How To Make Craftsman Style Mouldings
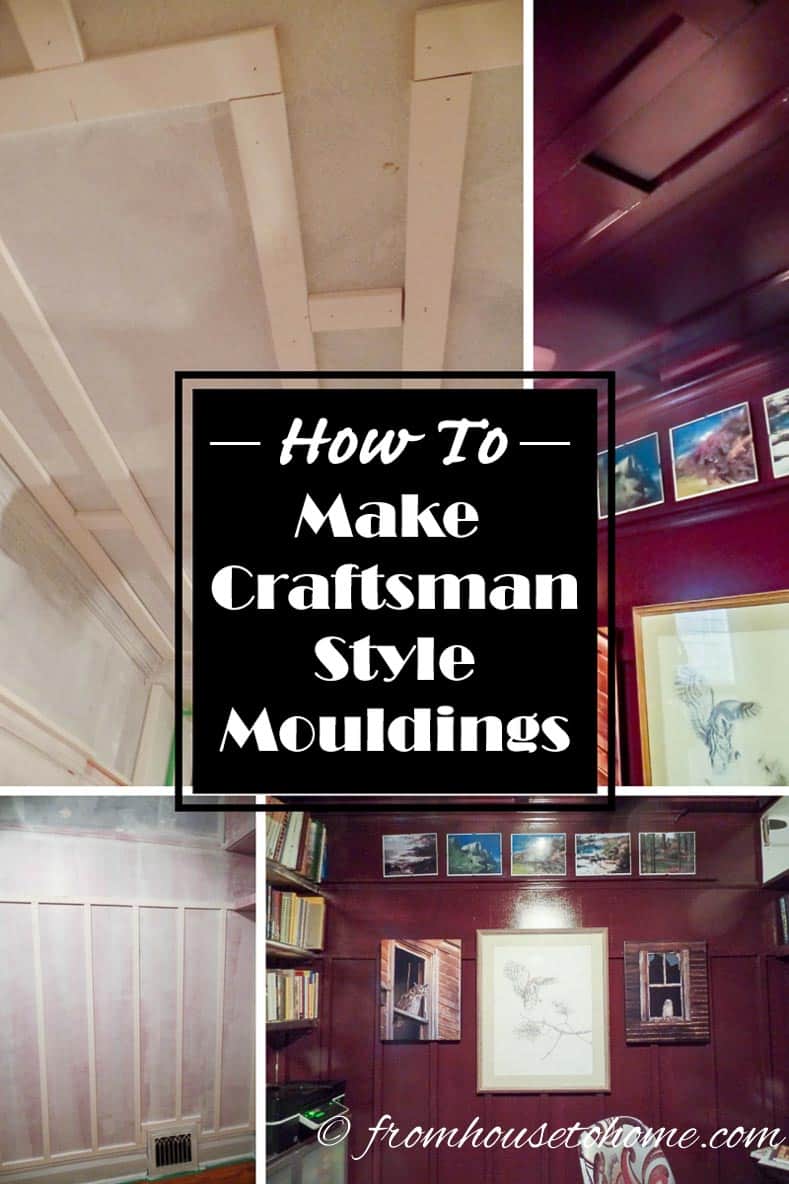
Like Wanda, I have also been working on updating my den / home office. Most people would say that there wasn’t anything wrong with this room to begin with. But I was a little tired of it and decided I wanted to add a more elegant look to the room.
When I came across Farrow and Ball’s “Brinjal”, I knew I had found my paint color! I also knew that I wanted to add some architectural interest to the room. So before I started painting, I thought long and hard on how to make that happen.
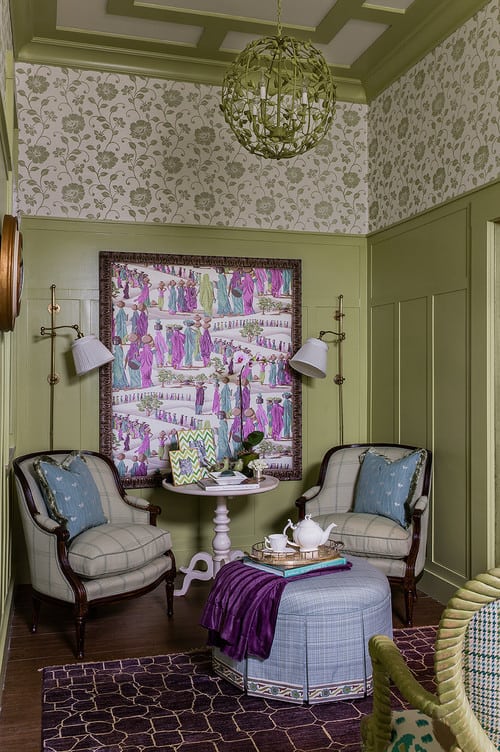
Traditional Spaces by Chestnut Hill Interior Designers & Decorators Elizabeth Home Decor & Design, Inc.
Then I saw this picture on Houzz.com, and I knew I had found the answer. Not only was it complimentary to the craftsmen style of the cupboard doors in the room, I loved the board and batten walls.
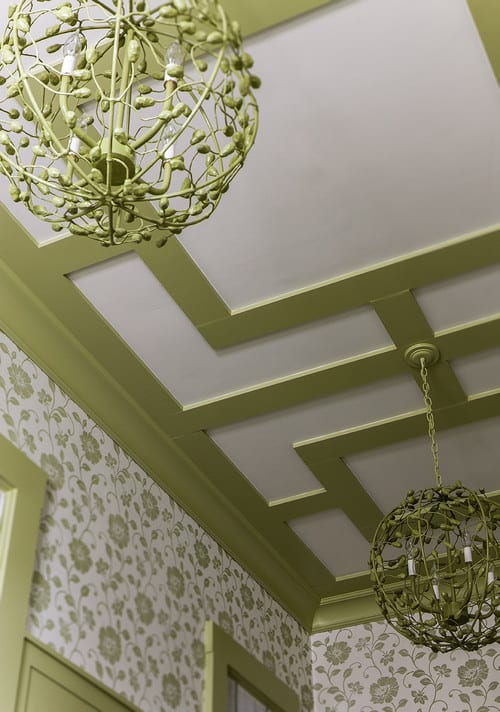
Traditional Spaces by Chestnut Hill Interior Designers & Decorators Elizabeth Home Decor & Design, Inc.
And the design on the ceiling fit right in with my theory that ceiling surfaces should not be ignored.
By adding moulding to the walls and the ceiling, I would definitely put some architectural interest into a very plain nondescript room. Thus my winter project was born and I could hardly wait to get started.
Keep reading to find out how to make Craftsman style mouldings.
What You Need
This post may contain affiliate links. We make a small commission if you buy the products from these links (at no extra cost to you). As an Amazon Associate, I earn from qualifying purchases. But we only recommend products we would use ourselves. For more information, click here to see our disclosures.
Materials
- Painter’s tape
- Primer
- 1” x 2” MDF primed boards for the wall (I needed 31, 8’ pieces)
- 1” x 3”MDF primed boards for the ceiling (I needed 13, 8’ pieces)
- Construction adhesive
- Caulk
Tools
- Paint tray with roller
- Paint brush
- Caulk gun
- Nail gun, or hammer and finish nails
- Tape measure
- Level
- Miter Saw
Get the Room Ready
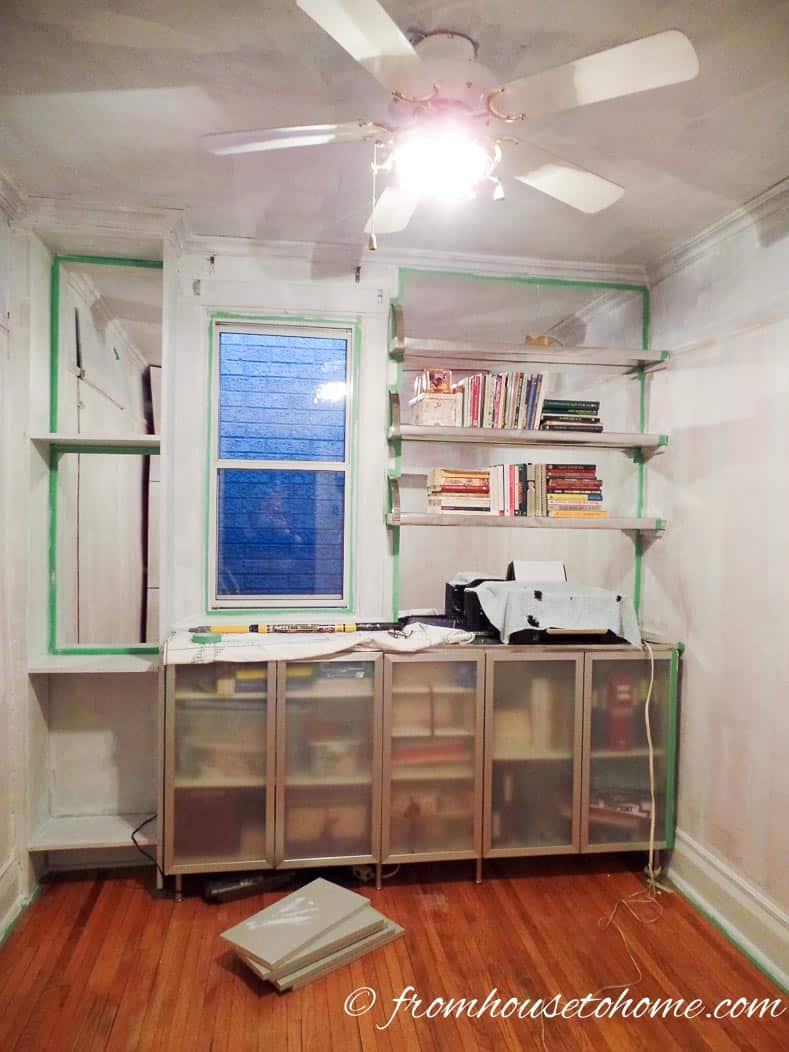
1. First, remove the electrical plates, and the blades from the ceiling fan.
2. Then apply painter’s tape around the window and other edges where you don’t want to get paint.
3. Prime walls, ceiling, and woodwork with a good quality primer. I used Kilz. Priming the surfaces before adding the moldings makes the job easier. It is much less work to paint plain walls without having to go around all of the molding boards. Plus, the moldings were already primed when purchased.
Install the Wall Mouldings
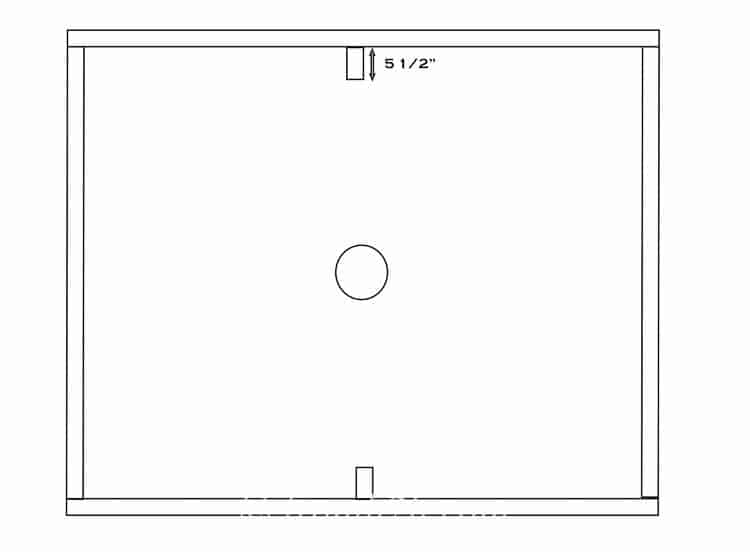
1. Draw a plan to scale on graph paper for the design on the walls.
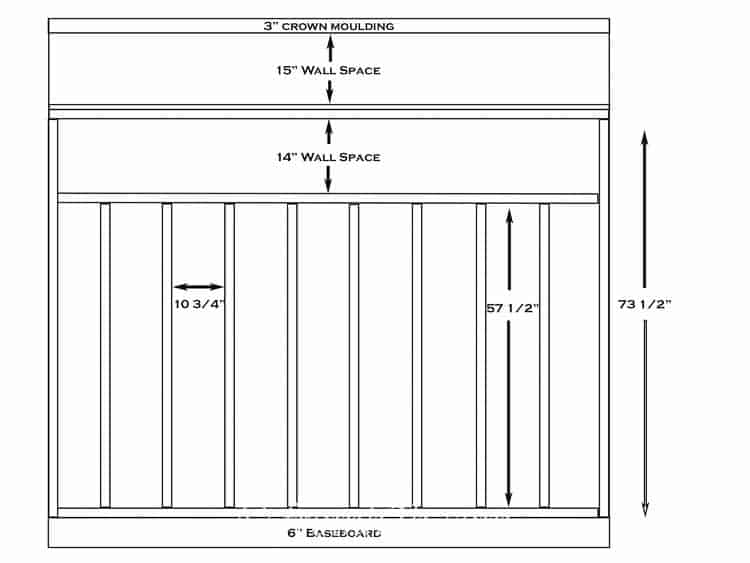
This will allow you to calculate how many boards you need. Since everyone’s room is a different size, your board lengths may be different than this, but you can take a look at my plan to get an idea of the sizes I used.
2. Working one wall at a time, attach 1″ x 2″ boards around the outer edges of each wall, and horizontally across the middle 57 ½” above the baseboard. I put a thin line of construction glue along each board and then nailed it in a few places. Note: the nails are to hold the boards close to the wall until the glue dries.
3. Cut and attach boards that fit vertically between the baseboard and the middle horizontal board. These measured 57 ½” and were spaced evenly at 10 ¾” on centre. I used a level to make sure they were straight up and down.
4. Divide the space between the crown molding and middle horizontal board in half by gluing and nailing a 1×2 horizontally. Use the level to make sure it is straight. I then attached another 1″ x 2″ lying on its side to the top to make a little shelf because I intend to hang a picture gallery up there.
Install the Ceiling Mouldings
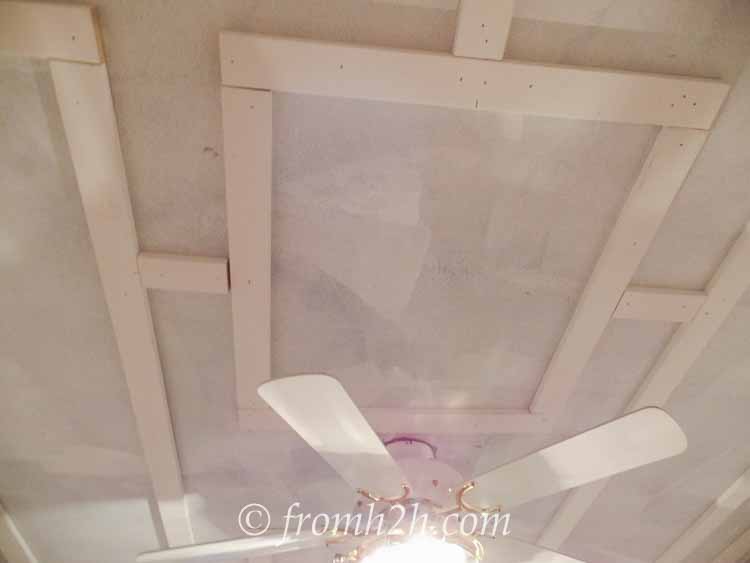
1. Similar to the walls, the first step to installing the ceiling mouldings is to create a plan.
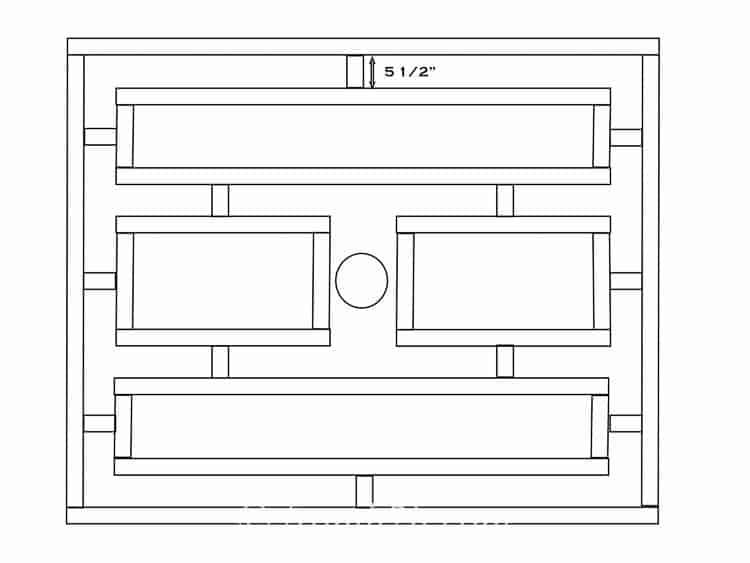
This will let you figure out exactly how long and how many boards you will need for your design. Here is the overall design for the ceiling mouldings.
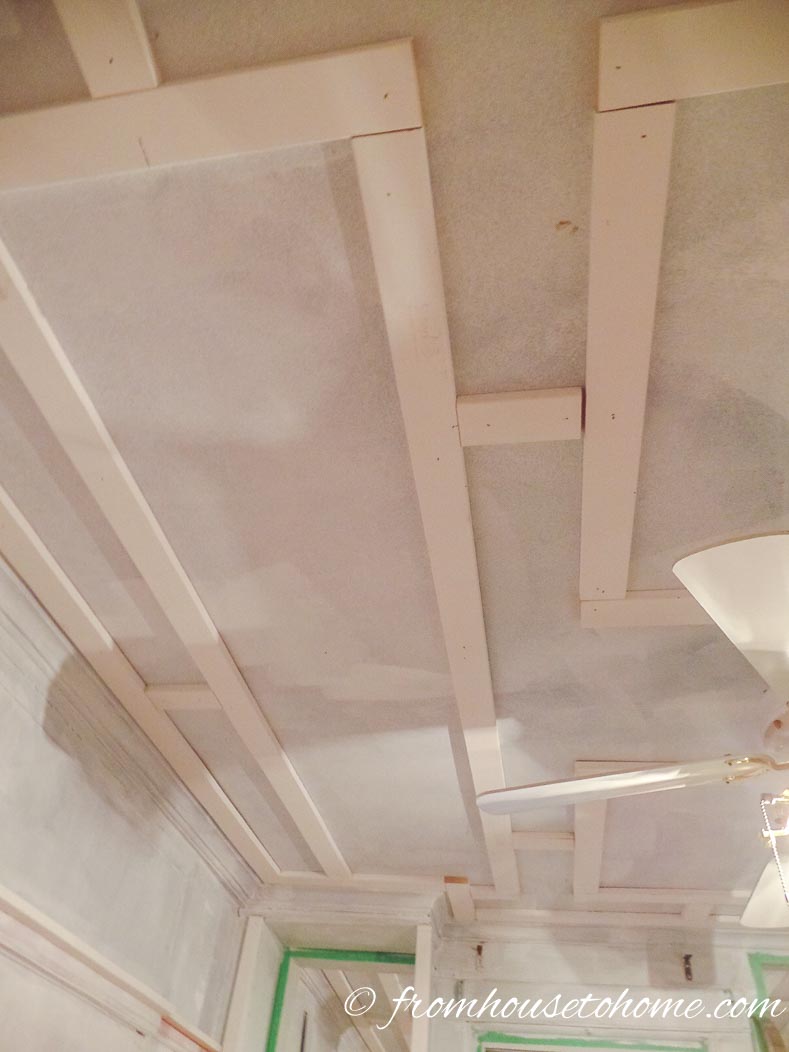
2. Cut and install 1″ x 3″ boards with glue and nails around the edges of the ceiling.
3. Cut and install the 5½” boards in the center of the long edge of the ceiling.
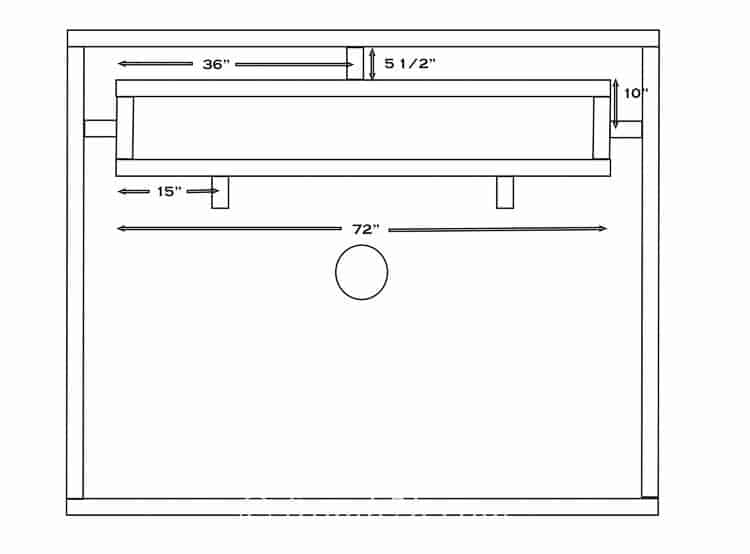
3. Working one section at a time, cut 1″ x 3″ boards and put them up based on the design planned in your drawing. For the side sections, here are the boards you will need to cut:
a. 4 – 1” X 3” boards for the long sides of the boxes (2 for each one). These will be the width of the ceiling between the periphery boards minus 11”, which worked out to 72″ in my case.
b. 4 – 1″ x 3″ boards for the short sides o the boxes (2 for each one), 15″ long in my case.
c. 8 – 5½” boards to join the sections together
4. Mark the center of one of the long edge (72”) boards and match it to the center of the 5½” one that you installed in step 3 above.
5. Glue and nail the end (15″) pieces on to the box by butting them onto the side of this board at the ends.
6. The next 72” board should fit squarely against these ends. Finish the side panel by adding a 5 ½” piece at each end, 10” on center from the outer edge of the panel.
7. Attached 2 5 ½´boards on the inner (i.e. facing the center of the room) sides 15” from each end. These will help with the placement of the center panels.
8. Make another panel exactly the same for the other side of the ceiling.

9. Next, tackle the 2 center sections. If you have a light fixture in the middle of the ceiling (like I do), leave about a 1’ blank space in the middle of the room where it is installed. You will need to cut the following boards:
a. 4 – 1” x 3” boards to form the long sides of the center boxes. These will be the length of the end box side pieces minus 12″ divided by 2. In my case, this was (72″ – 12″) / 2 = 30” long
b. 4 – 1″ x 3″ boards for the short sides of the center boxes. To figure out how long these will be, measure the distance between the two side boxes. Then subtract 17″ from that distance, in my case it came out to 21″ long.
c. 2 – 5½” boards
10. Attach the long side (30″) boards so that they are centered on the 5½” board that you installed in step 7 above.
11. Fit the short side (21″) boards between these outer sections.
12. Add another 5½” piece between the center box and the ceiling edge moulding so that it is centered on the short side of the center box frame, 13” on center in my case.
13. Repeat these steps for the center box on the other side of the light fixture.
14. Caulk both sides of all the boards where they meet the walls or ceiling and all joins to hide any gaps. Hint: make a small diagonal cut on the end of the tube of caulking so that only a thin line of product comes out. Keep a glass of water handy and smooth the caulk into the joints by running a wet finger along the edges.
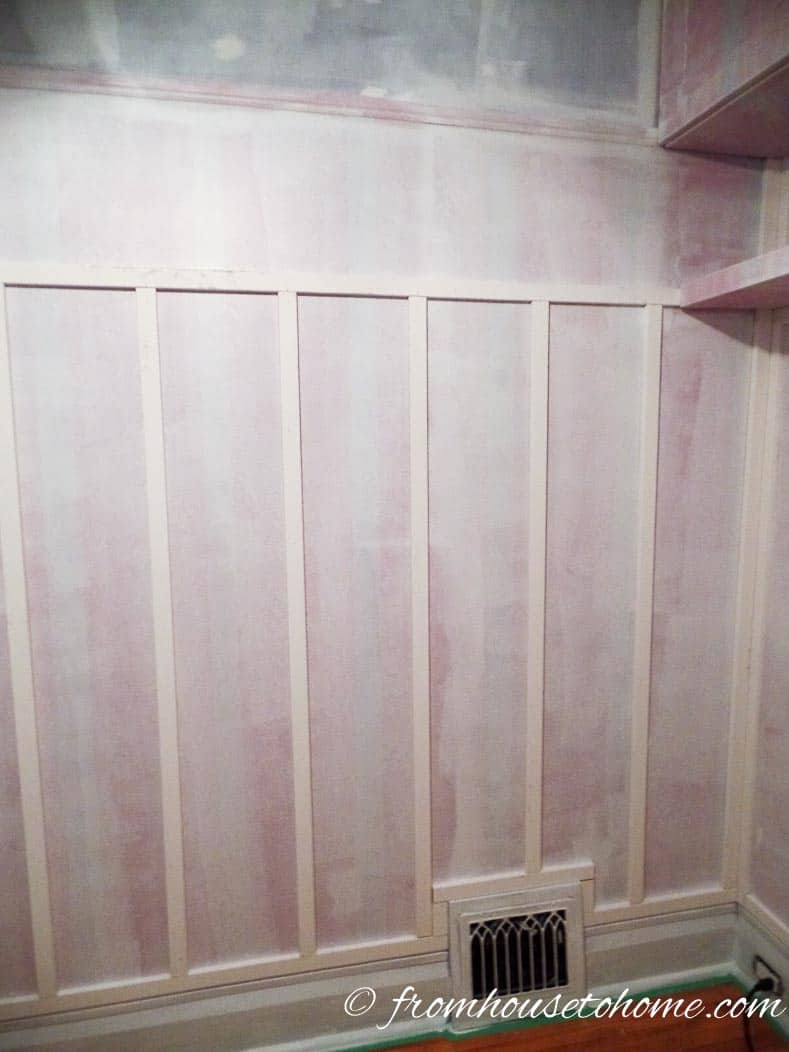
The Finished Craftsman Style Mouldings
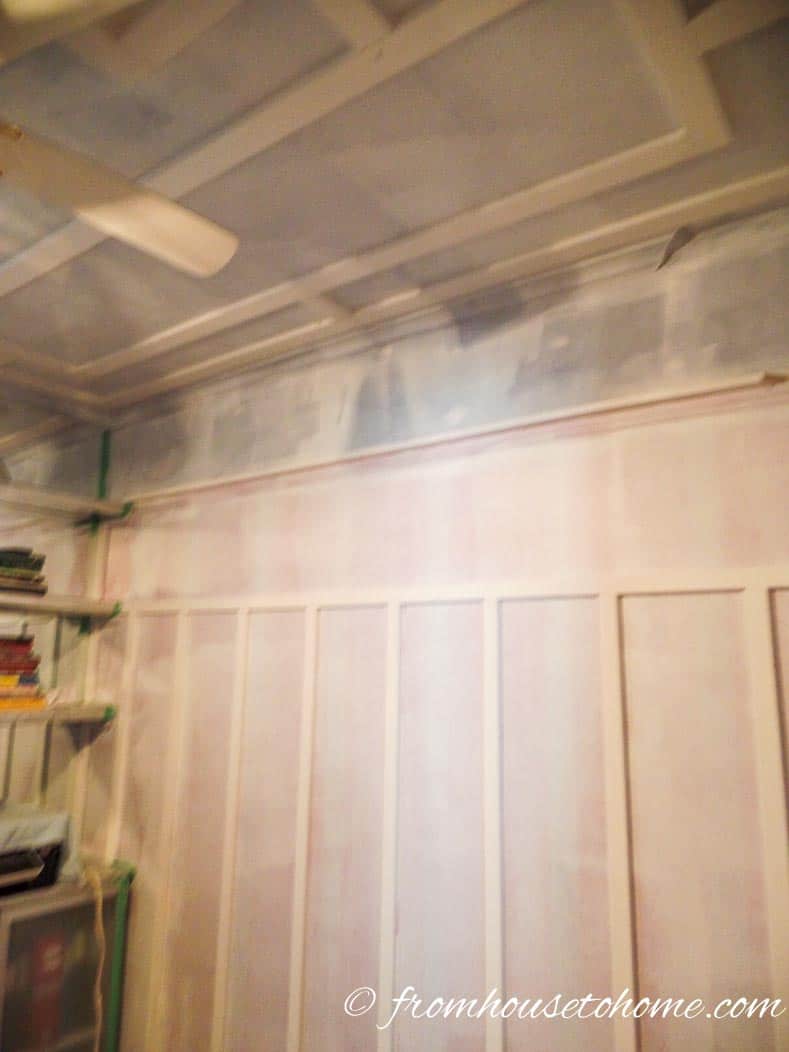
The room definitely has architectural interest now!
I love the ceiling detail! The room is now ready to be painted.
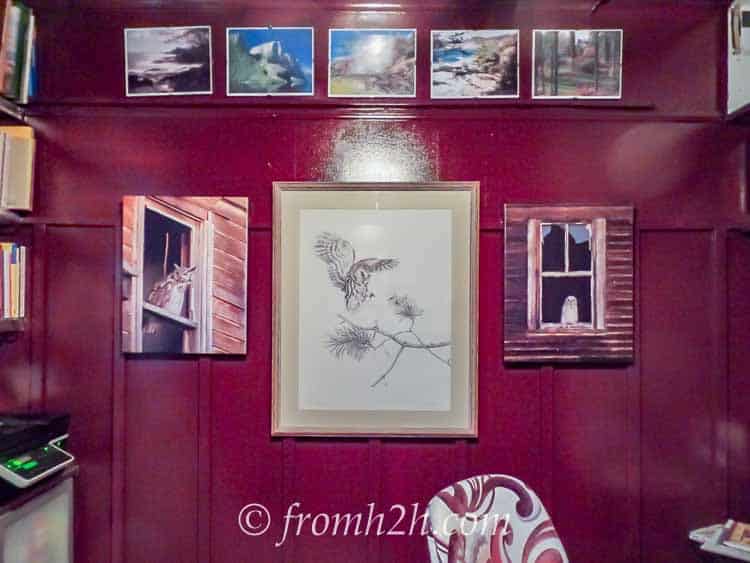
Here’s a sneak preview of the walls after painting…be sure to check back later to see the post of the completed project!
Have comments or questions on how to make Craftsman style mouldings? Tell us in the section below.
This post was originally published on February 3, 2016 but was updated with new content on July 7, 2023.
Hello, where would I get some ceiling moulds to decorate my ceiling not a rose though more of a pattern to go around the light???
Many Thanks
Helen
Hello Helen, There is a gold medallion on sale at https://www.horchow.com/Scrolled-Ceiling-Medallion-Chandeliers/ or we describe how to make your own in a tutorial .