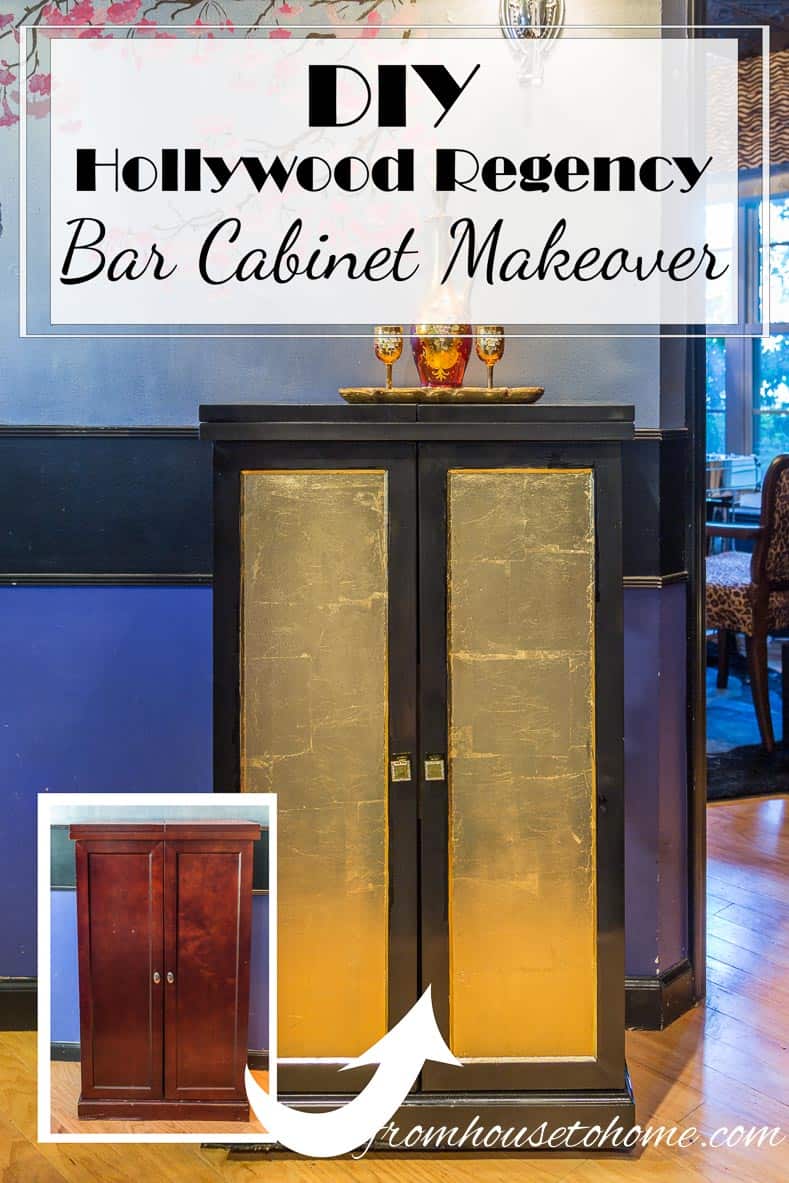
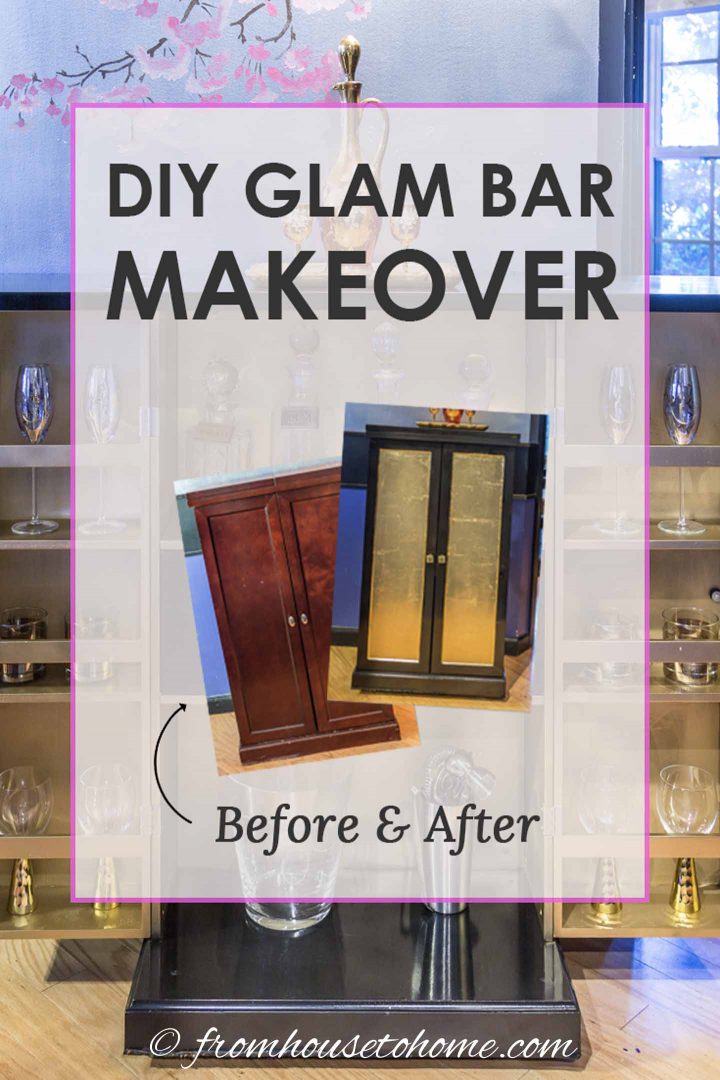
DIY Black And Gold Hollywood Regency Bar Cabinet Makeover
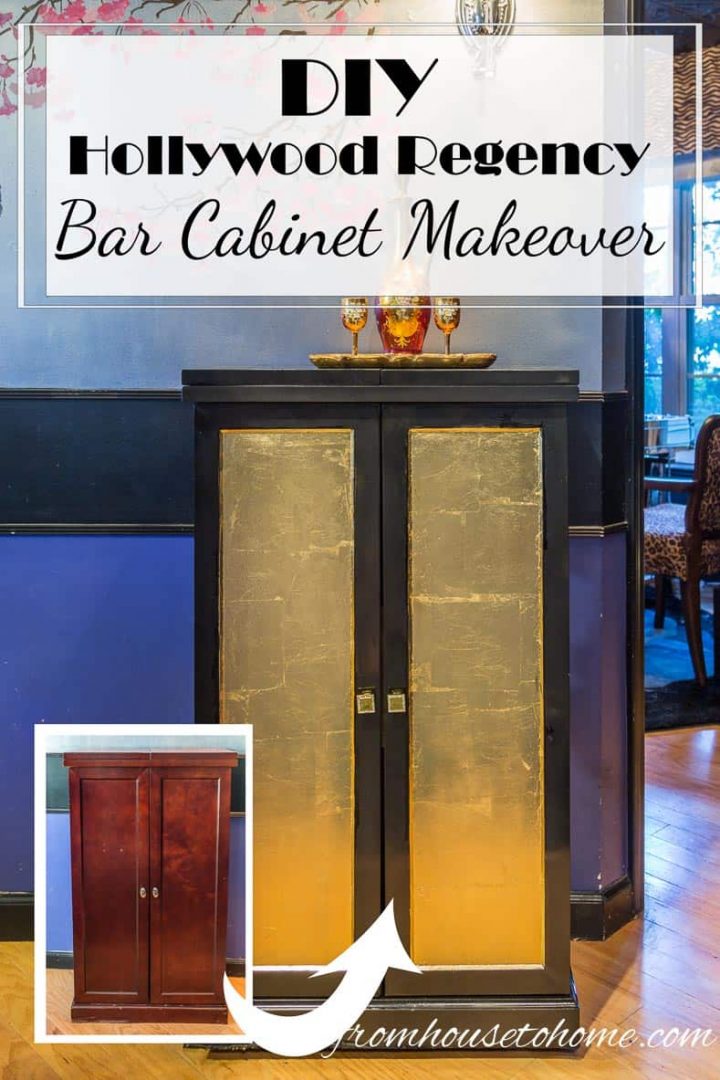

Looking for a way to update a boring piece of furniture? Try this DIY Hollywood Regency bar cabinet makeover to add some glam to your room.
If you have been reading my recent posts, you know that I recently threw a Mad Hatter anniversary party for some friends of mine…and these kinds of parties aren’t all that unusual at my house.
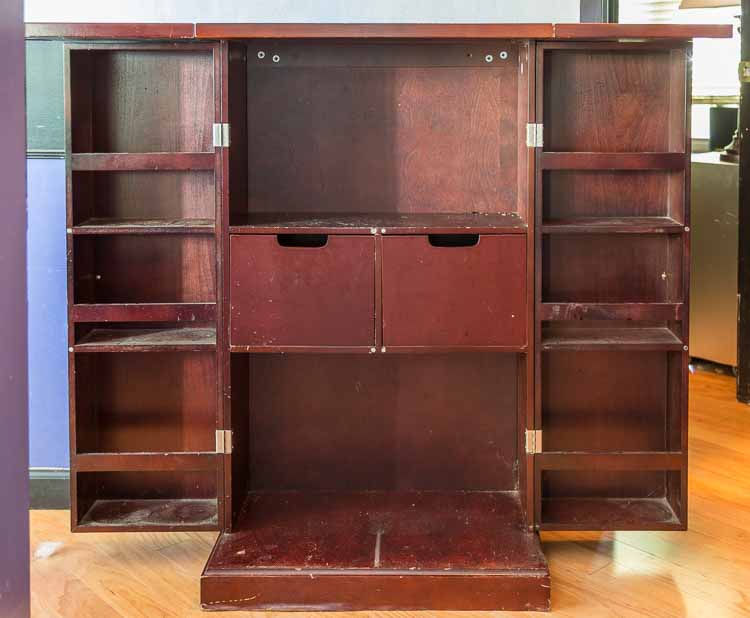
Which is why when I first moved into my house, I bought a fold-out bar*.
It wasn’t very expensive (made of particleboard) and isn’t very stylish but is really functional! It has lots of space for storing bottles, glasses and an ice bucket.
And it provides a large serving area when it is open.
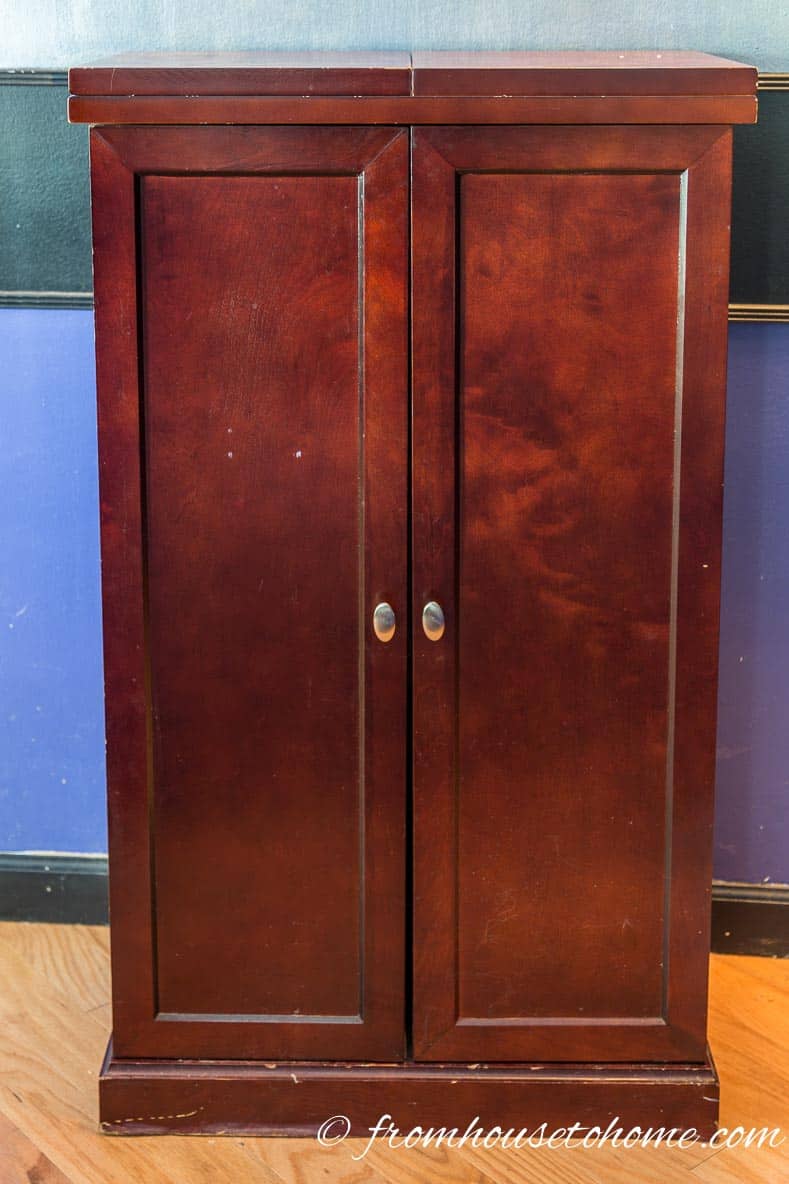
When it’s not in use, it folds up into a fairly small space so it doesn’t take up much room.
As you can see, it has been a well-used piece of furniture…so I finally decided to give it a face lift.
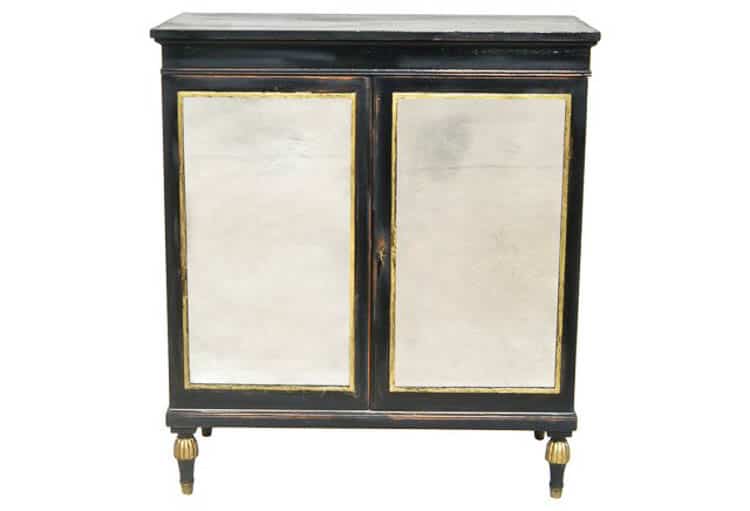
I have always wanted a Hollywood Regency style bar but didn’t want to spend this much money…and I already had a functional bar cabinet.
So I decided to do a DIY version with black lacquer and gold leaf (my first time ever doing gold leaf!), and it turned out to be much easier than I thought!
Read on to see my DIY Hollywood Regency Bar Cabinet Makeover.
Supplies
This post may contain affiliate links. We make a small commission if you buy the products from these links (at no extra cost to you). As an Amazon Associate, I earn from qualifying purchases. But we only recommend products we would use ourselves. For more information, click here to see our disclosures.
Materials
- Black lacquer spray paint*
- Gold spray paint*
- Scrap piece of wood
- 2″ swivel casters*
- 1″ screws
- Gold leaf* – I used faux gold since it’s a lot less expensive than the real thing and looks pretty much the same.
- Gold leaf adhesive*
- Gold knobs
Tools
- Screw driver
- Spray paint grip* – While this isn’t absolutely necessary, it will save your spray paint finger from getting tired.
- Saw
- Spray paint tent* – This is another optional item, but it keeps the spray paint from going everywhere. Which is very helpful if you are spray painting inside.
Step 1: Remove Doors and Knobs
To make painting easier, the first step is to remove the doors, the drawers and the fold out bar tops.
Wash all of the surfaces to make sure they are free from dust. This is really important if you want to have a smooth, shiny lacquer surface.
Step 2: Add Wheels
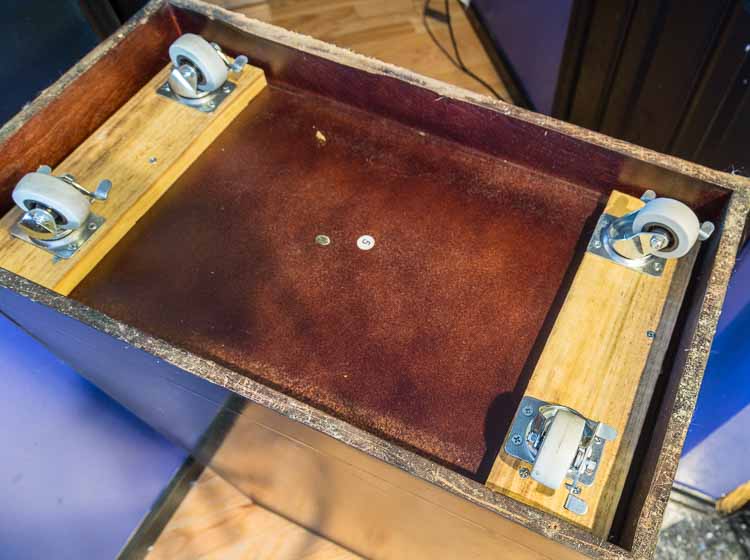
This step is not absolutely necessary, but having wheels on a piece of furniture that gets moved around a lot makes life a lot easier.
Not to mention that while moving it around, I have dropped this bar on my toes more than once!
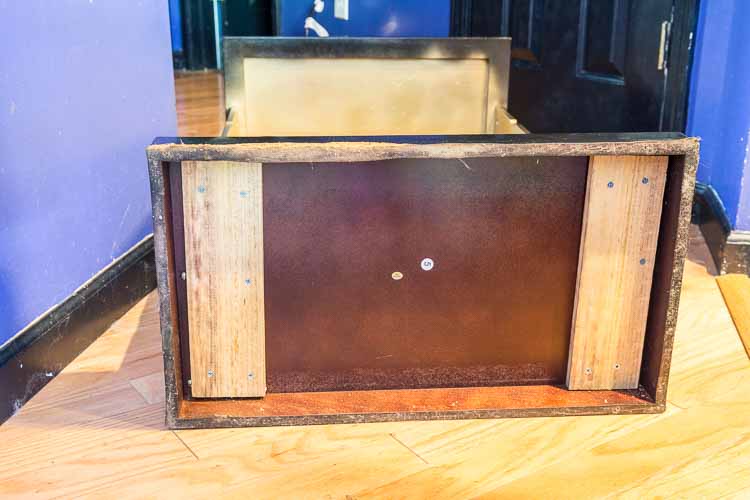
If the bottom board of the unit isn’t very thick (mine is only 1/2″ wide), add some extra boards to make the wheels more stable.
Since these boards are real wood, they also hold screws better than the particleboard that the bar is made out of (I wanted to make sure the wheels wouldn’t fall off).
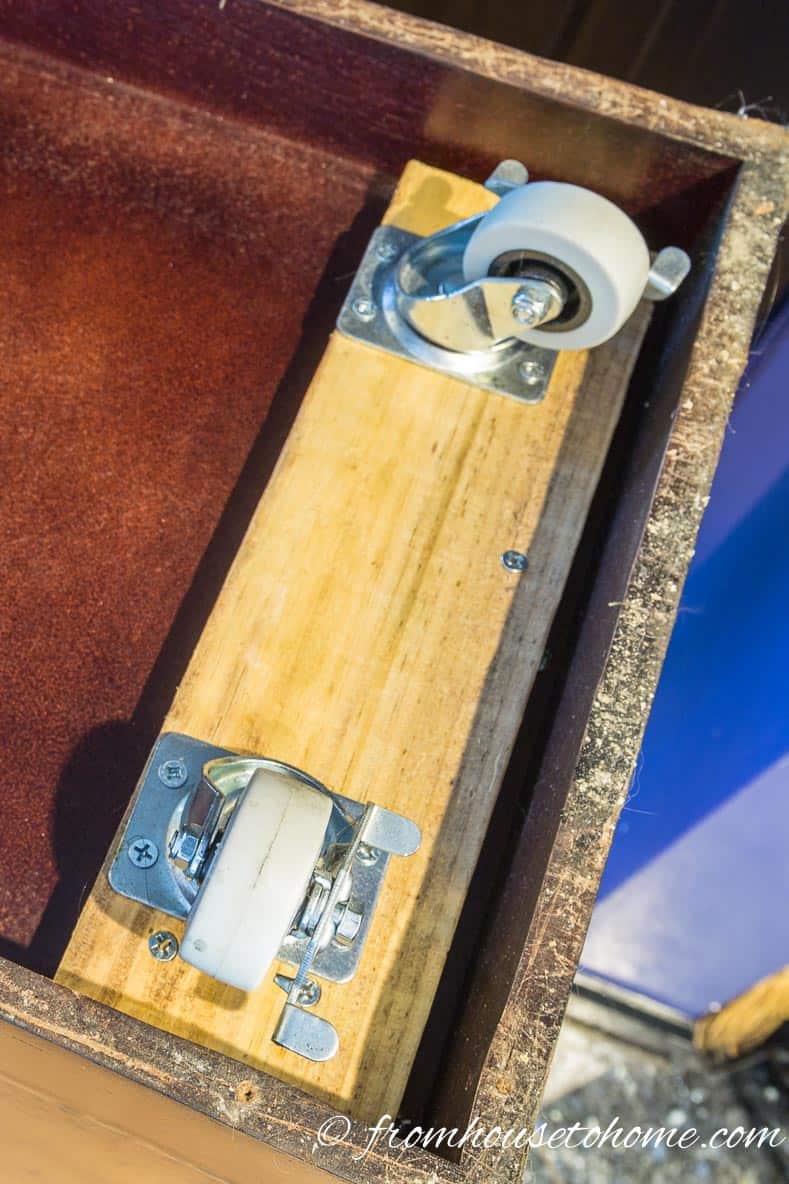
When attaching the wheels, make sure that they can rotate all the way around without hitting the side boards.
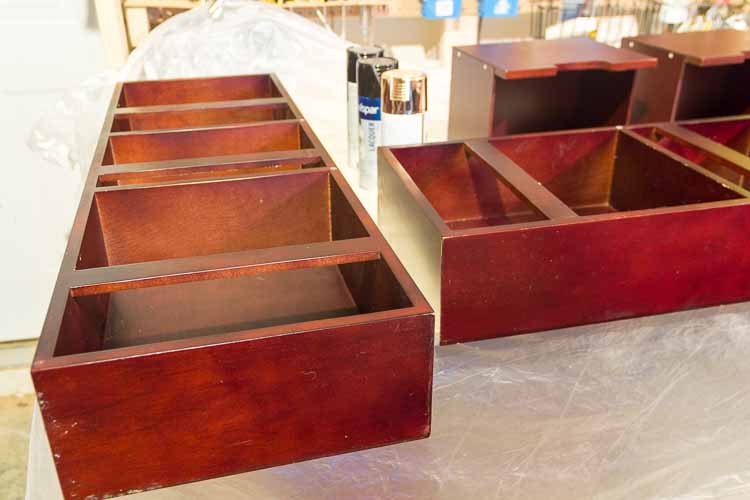
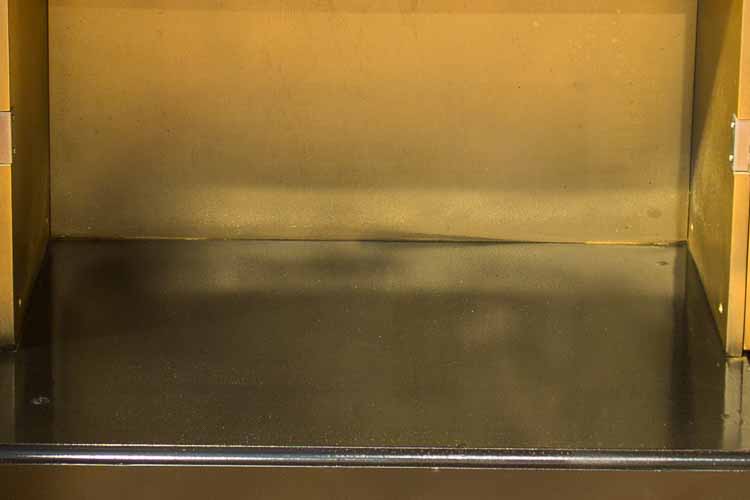
Step 3: Paint The Inside Of The Bar
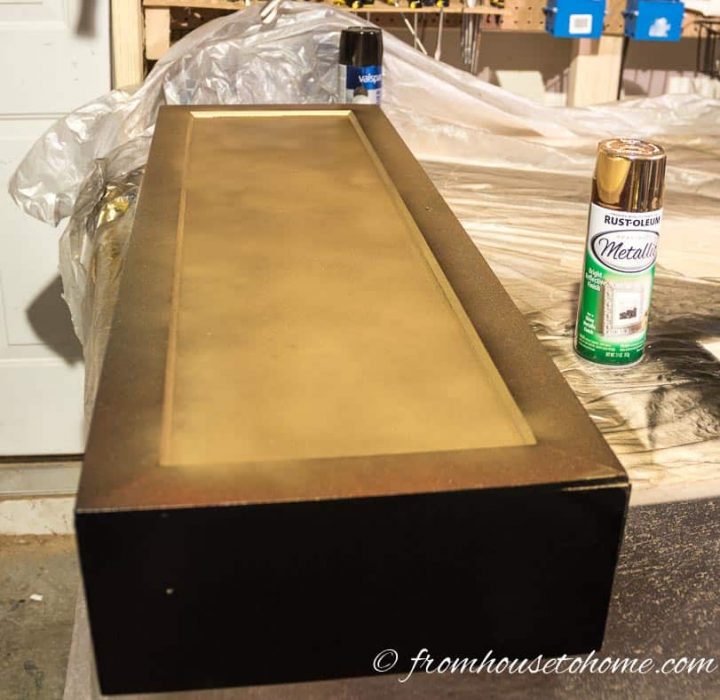
Start by painting the inside of the bar with the gold spray paint*.
Laying the bar down will make it easier to spray paint the back without getting paint runs.
For more tips, read Tips For Successful Spray Painting.
Paint the inside of the doors with the same gold.

I also painted the insets in the door gold. Since I was planning on putting gold foil in this space, this wasn’t absolutely necessary.
But I figured that would seal the wood and help prevent the dark wood from showing through the gold foil.
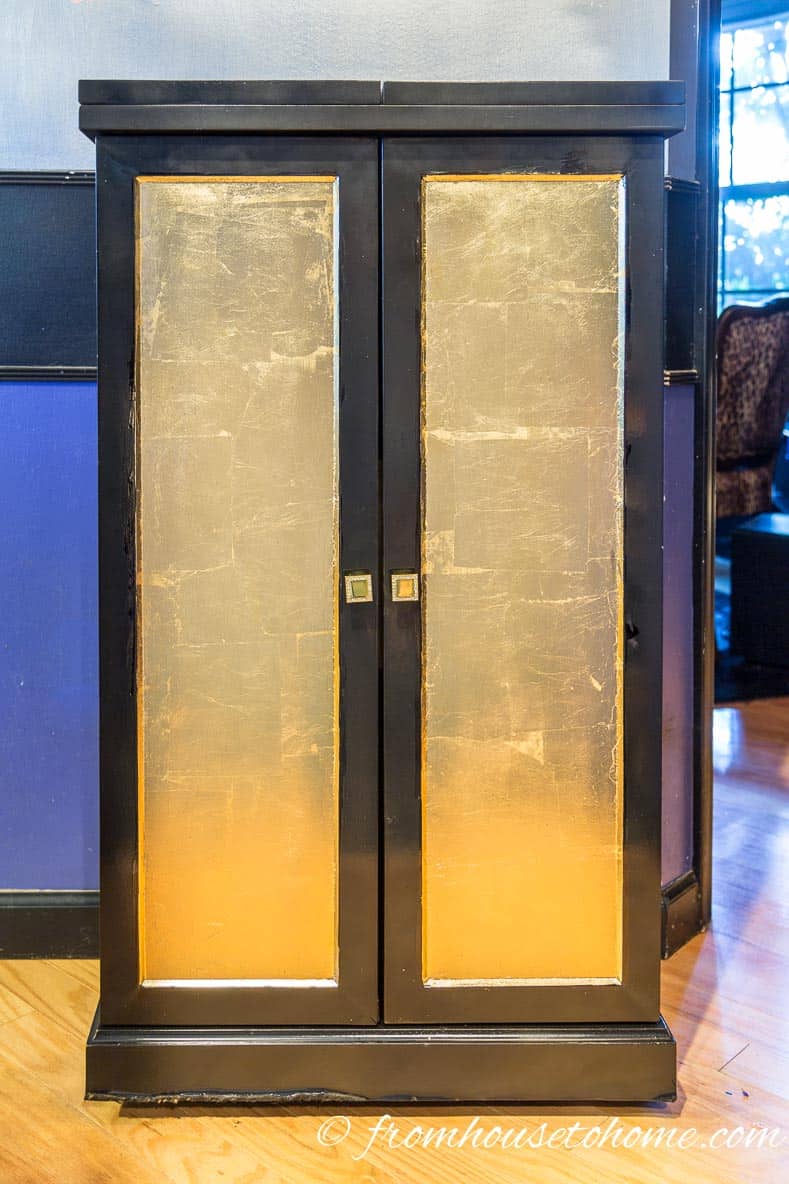
Step 4: Paint The Outside of the Bar
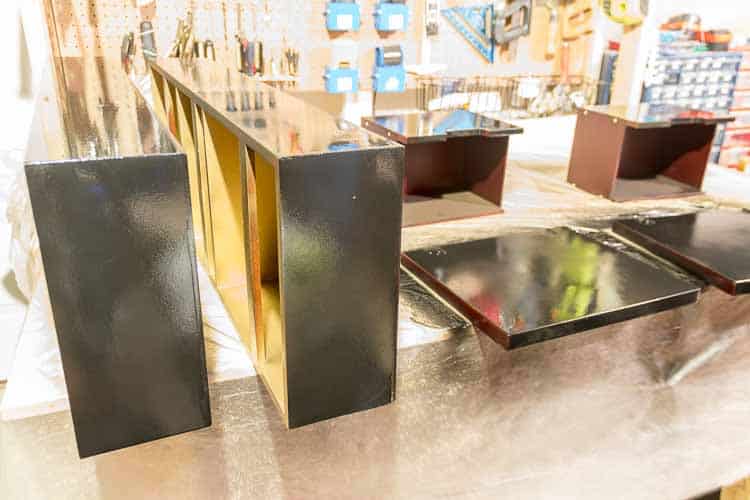
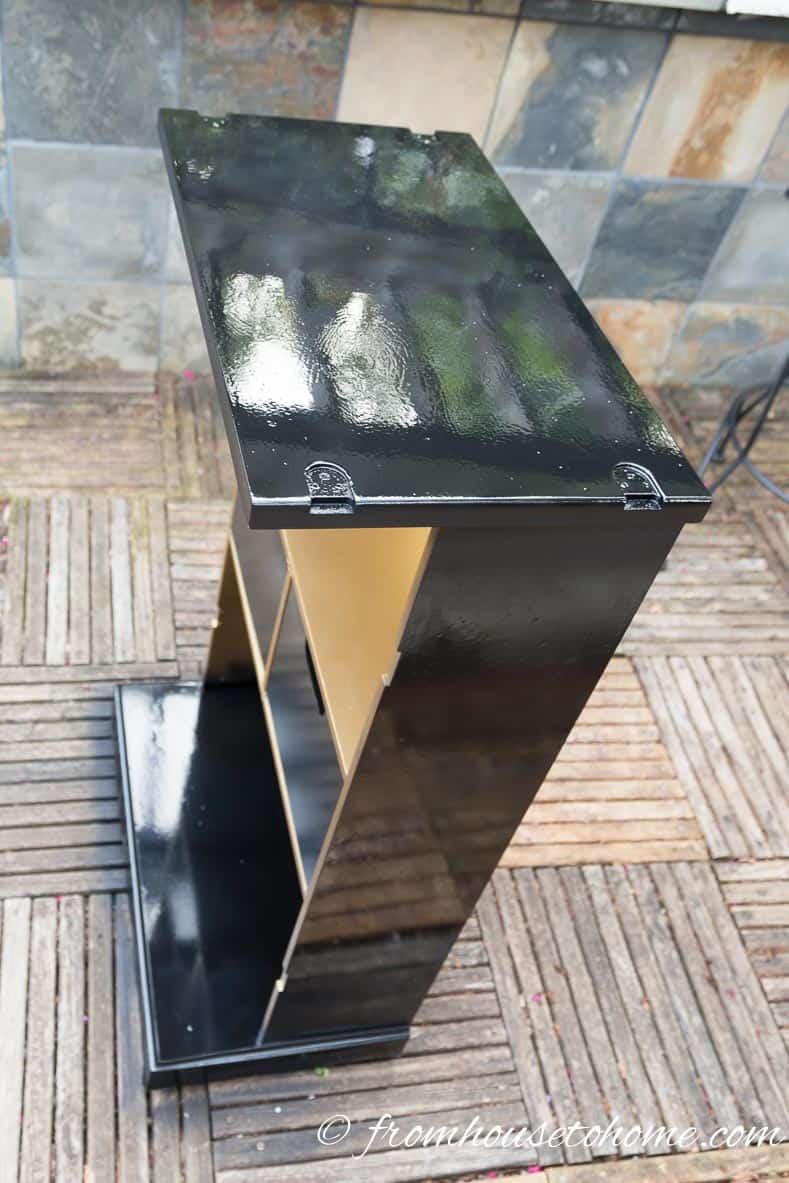
Once the gold paint has dried, spray the black lacquer spray paint onto the outside of the bar.
As I mentioned in my spray painting tips post, I always lay things down so I can spray a horizontal surface.
I find it gives the most even finish (which you definitely want when you are using lacquer).
It takes a little longer since you need to wait until that side is dry before you can flip the furniture over to paint the other side. But I think the finish is worth it.
A few tips with the black lacquer spray paint:

- Try to paint outside if possible (the fumes are really strong!), but make sure it isn’t too hot and that you have a spot in the shade.
- Using a paint tent* is a great way to keep the spray paint from going everywhere, and helps to keep the wet surface clean.
- Watch the finish as you spray. If it doesn’t look smooth and shiny as you are spraying it, it won’t look smooth and shiny when you’re finished.
- Always cover the whole surface at one time. It’s very hard to spot paint lacquer and have it end up with a smooth finish.
- The more coats of paint you put on, the more like lacquer it will look.
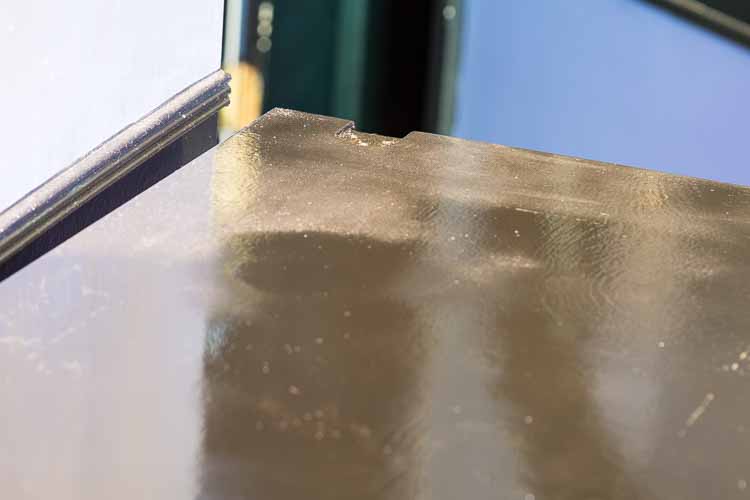
Step 5: Touch Up the Edges
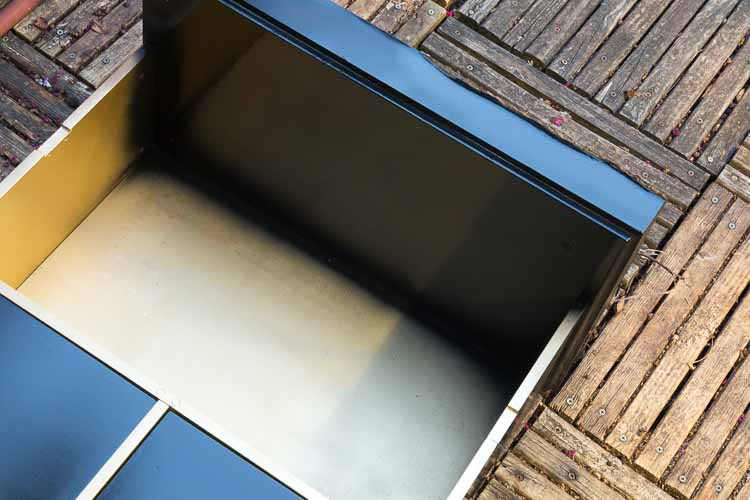
If you have any places where the two paint colors meet (like where the bottom shelf meets the back of my bar), you will need to touch up and edges where there is over spray.
You don’t want to do the touch ups on the lacquer paint if you can help it (that’s why we did the inside paint first).
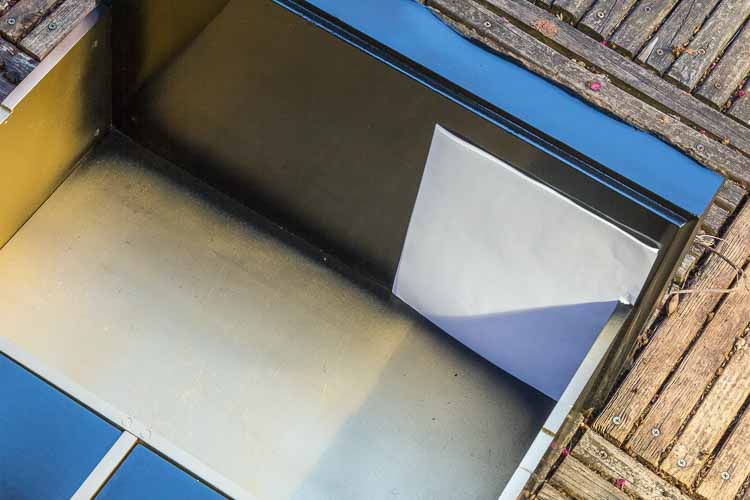
Cut some pieces of paper to cover the lacquer and meet up with the corner.
Use the gold spray paint to fix the black over spray.
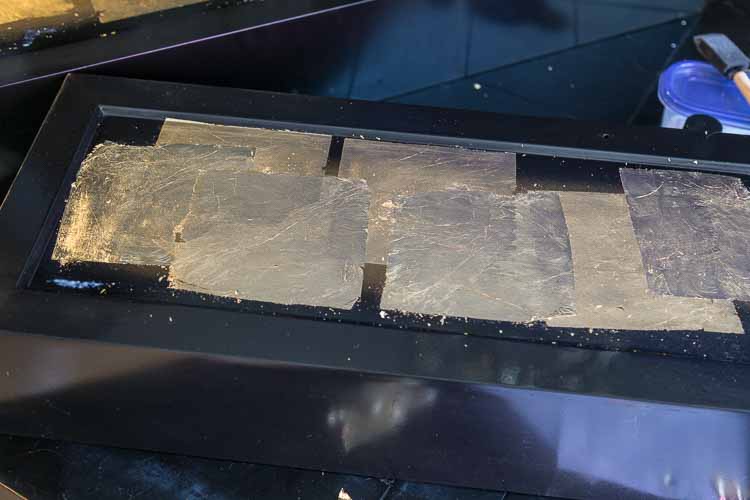
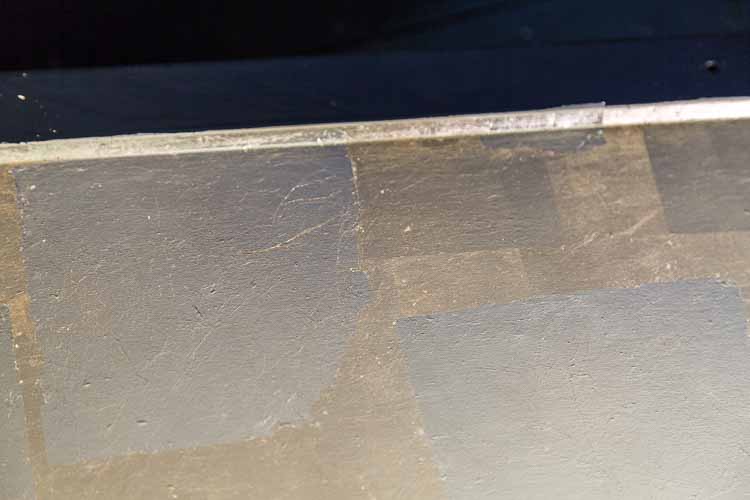
Step 6: Apply Gold Leaf
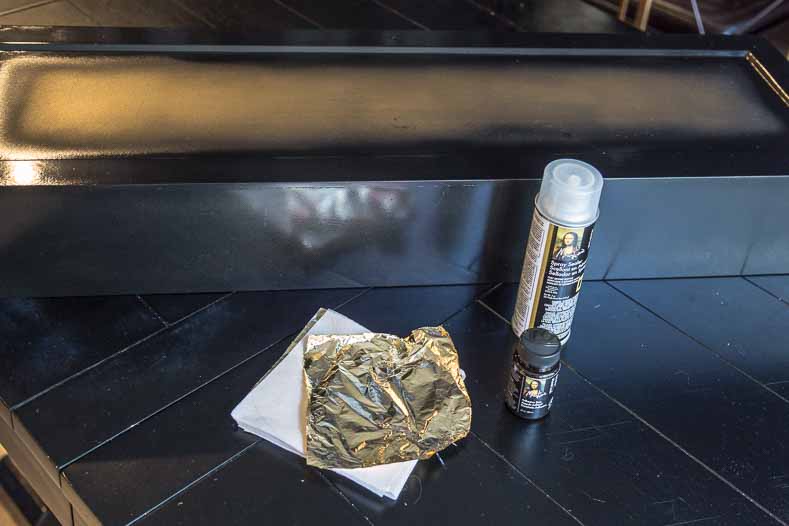
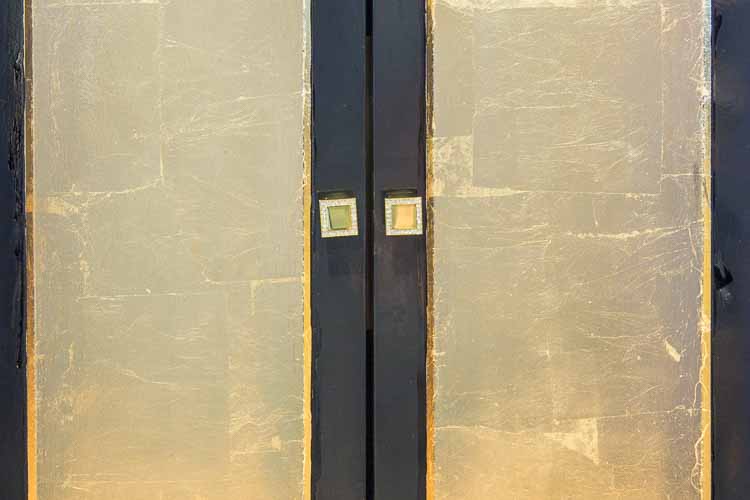
For my bar, I used gold leaf to line the insets on the front of the bar.
I think the layers of foil add a little more depth than gold spray paint would.
If you don’t have insets, you can create the same effect by adding thin moldings to create a frame. Then apply the gold leaf in the center.
To apply it, paint the inset area with the gold leaf adhesive.
Let it sit until it dries, at least 15 minutes. You don’t want to skip this step or the gold leaf will not go on smoothly.
Stick on the sheets of gold leaf.
Buff with a soft cloth to remove any extra bits.
If there are spots that are not completely covered, you can add more adhesive, wait for it to dry and then add another layer of gold leaf.
For detailed instructions, read how to apply the gold leaf.
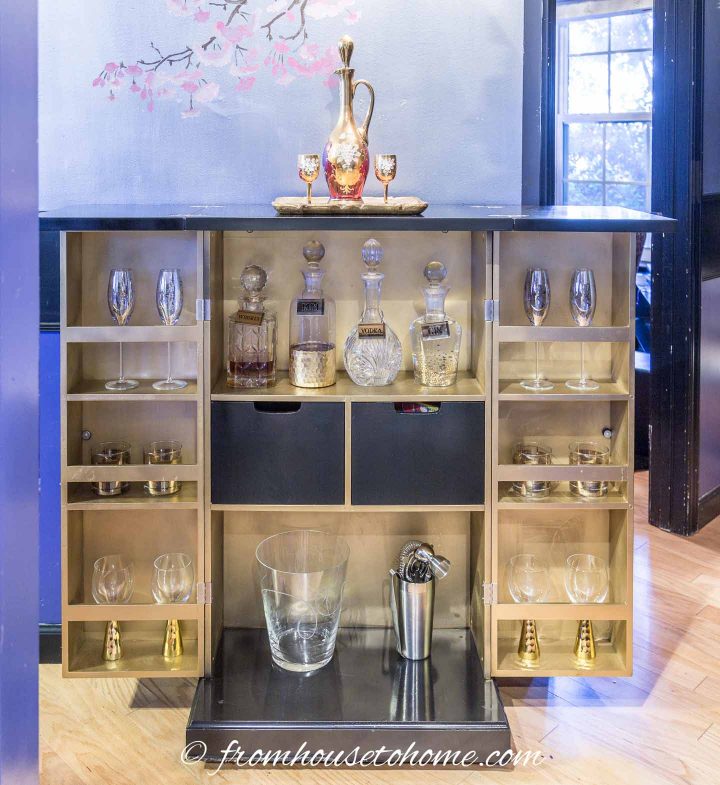
Step 7: Re-stock the Bar
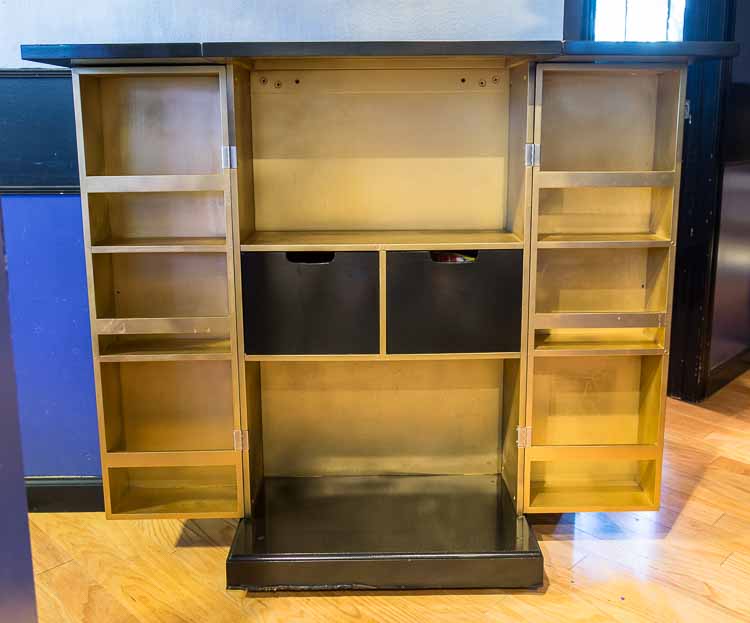
Re-install the doors and drawers.
Add some new knobs.
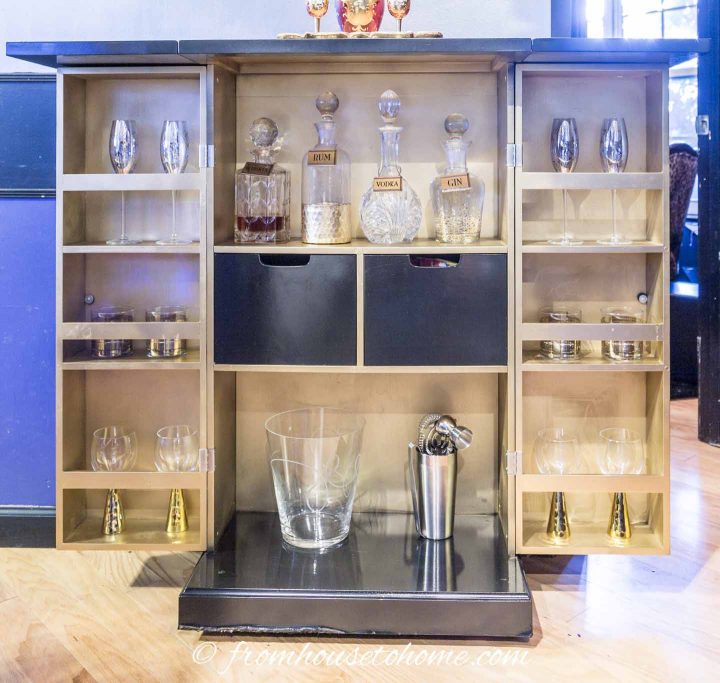
Then re-stock the bar.
It’s amazing how much better those bottles look with a gold background.
I’m so happy with how this bar cabinet turned out that I just have to share some more of the finished pictures.
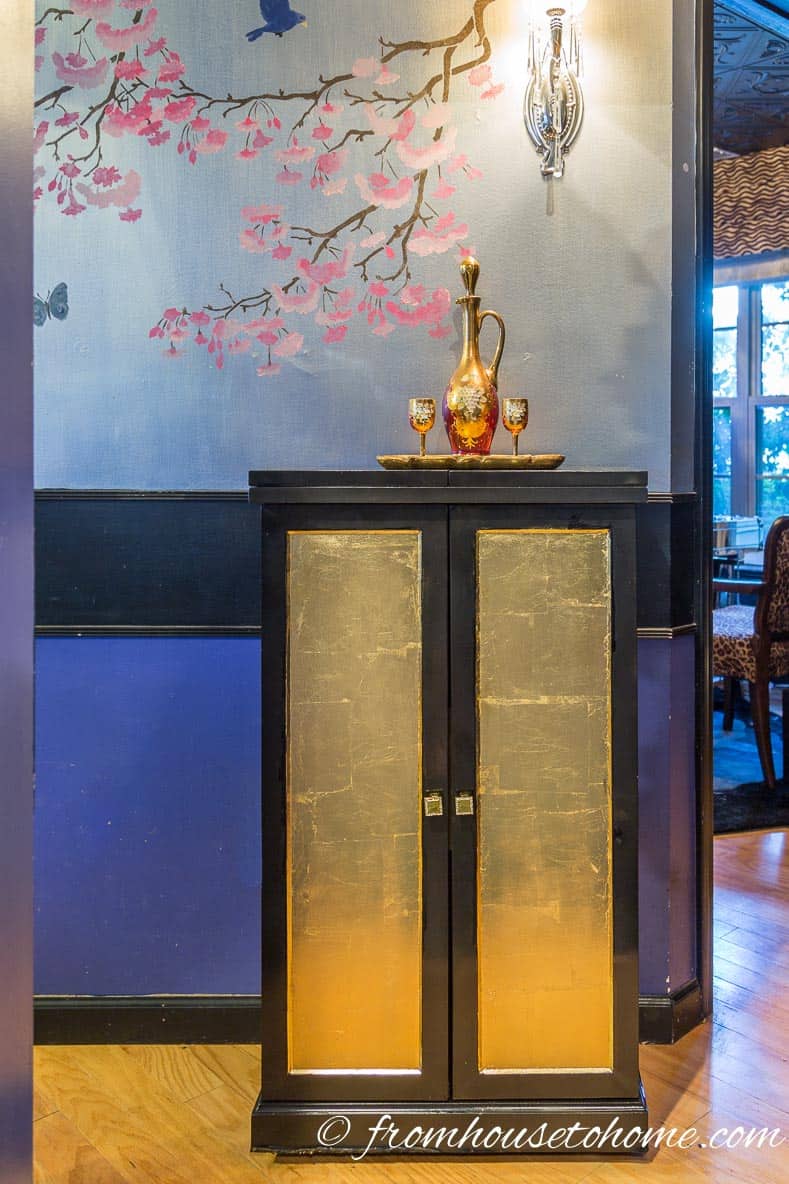
When it’s closed, the bar adds a lot of personality to my hallway.
It looks so much better than it did…it’s hard to believe it’s the same piece of furniture!
Have comments or questions on DIY Hollywood Regency Bar Cabinet Makeover? Tell us in the section below.
Pin It So You Don't Forget It!
This post was originally published on August 29, 2016 but was updated with new content on April 13, 2024.
Great job Wanda. Very effective. Amazing what a bit of paint can do!! Thanks for sending the project to me.
Your Aussie friend Pauline
Thanks, Pauline! I think this is my all-time favorite furniture makeover. It didn’t cost much to do and looks so much better now 🙂