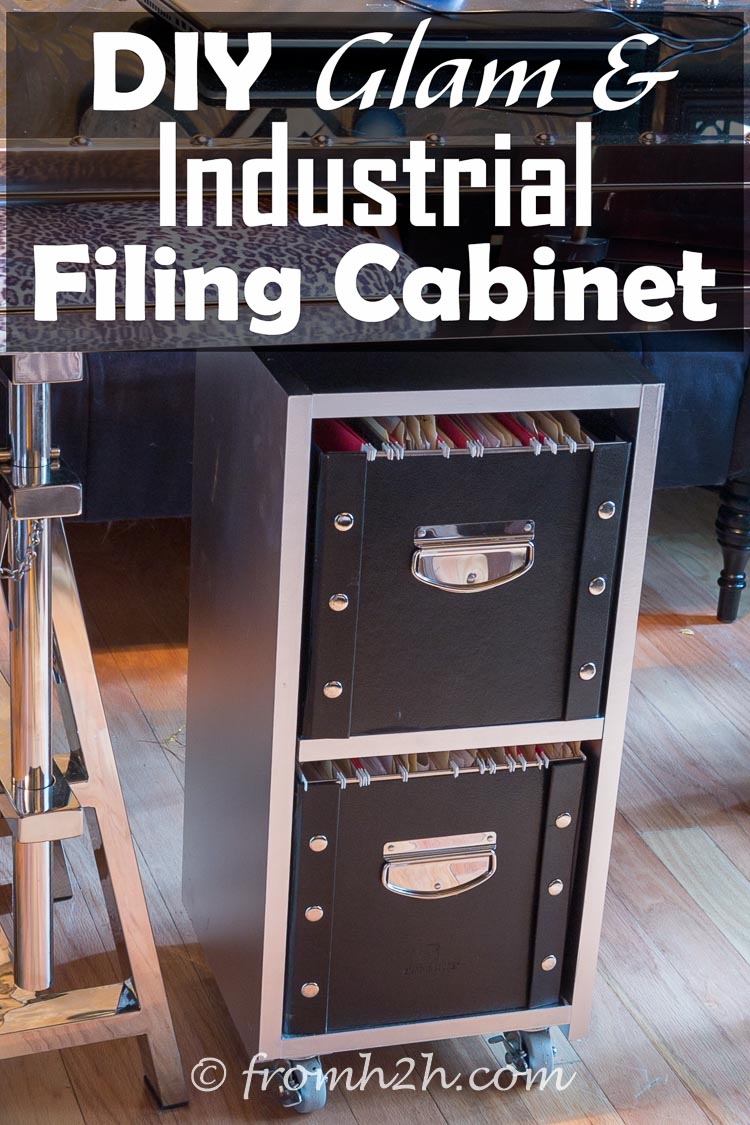
How To Make A Glam Industrial DIY Filing Cabinet
This chic upcycle project transforms an ordinary organizer shelf into a glam industrial DIY filing cabinet. Through simple steps and creative flair, the makeover breathes new life into a functional piece, blending style and utility.
Lately, I’ve been working on turning the third bedroom in my house into a home office / library.
It’s a very small room (10′ x 10′) and it already has a wall of books that helps with the library theme.
But it’s a little short on office storage.
And I wanted somewhere to store my papers. On wheels so I can easily move it if I need to (small room problems!)
However, I couldn’t find any filing cabinets that would match my glam office decor.
So I decided to make my own. Which ended up being a lot easier than I thought it would be!
Supplies
This post may contain affiliate links. We make a small commission if you buy the products from these links (at no extra cost to you). As an Amazon Associate, I earn from qualifying purchases. But we only recommend products we would use ourselves. For more information, click here to see our disclosures.
- 12″ wide x 12″ deep x 24″ tall shelving unit. Your shelf needs to be at least 12″ wide and 12″ deep since that is the size that the filing box will fit into. It can be taller than 24″ if you’re willing to cut it down to size. Which is what I did with an old closet organizer shelf I already had. It’s very similar to this ClosetMaid 3-Shelf Organizer*
- Mirror effect spray paint* – It is intended to be used on glass, so this isn’t a conventional use for this paint. But I find that it goes on with a much smoother finish and really adheres well to the surface (an important point when you are going to be sliding filing boxes back and forth on it).
- 2 inch swivel casters*
- 2 letter-sized file boxes – I used this black and silver one* but you can use anyone that matches your decor.
Equipment
- Painter’s pyramid stands* – These are optional but make painting furniture much easier.
How to make a DIY filing cabinet
1 | Cut the shelf to the right height
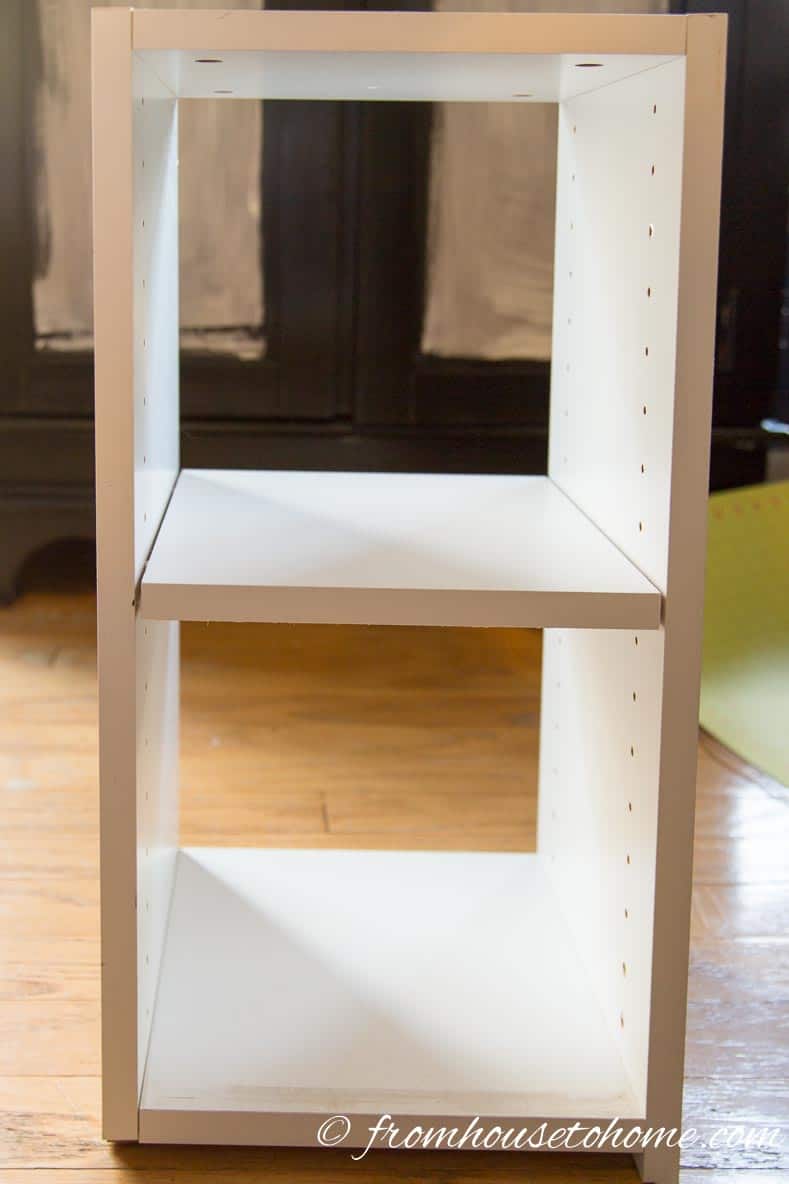
If your shelf is taller than 24″ high (like mine was), you’ll want to cut it down to that height. This is about the tallest it can be and still be steady on the wheels.
I also removed the back so I can access the filing boxes from both sides. If you don’t need to do that, you could leave the back on.
Just make sure your shelving unit has a fixed shelf on the top and the bottom. The middle one can be adjustable (although it’s easier to pull the file box out if it’s also fixed).
2 | Spray paint

The next step to creating a glam industrial file cabinet is to spray paint the shelving unit with silver spray paint*
Take the shelves apart (if you can). This makes them much easier to paint.
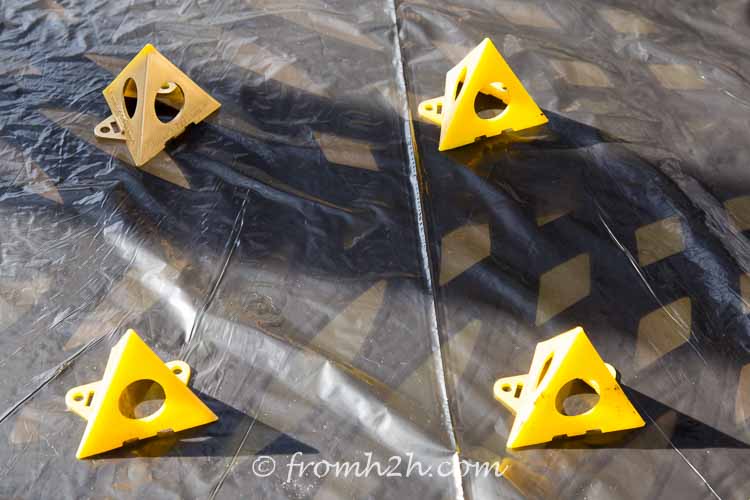
Arrange the paint pyramids* so that your boards will be able to sit on them.
Obviously this is an optional step. But they do keep the boards from sticking to the surface of the table.
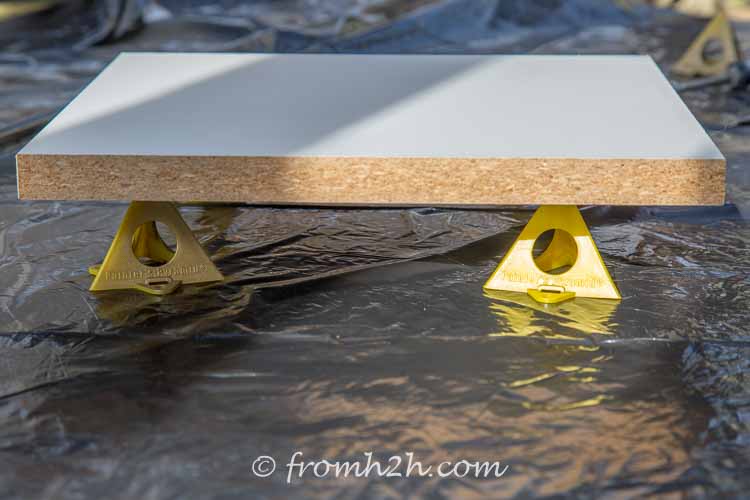
Lay out your boards. I usually try to start with the undersides of the shelves (the parts you won’t see too much). My first few paint sprays always seem to be a little heavy.
Apply the spray paint in thin layers. It took about 4 layers for me.
Thankfully, this paint dries very quickly so by the time you are finished the last board, you can usually start over with the first one.
Wait for a few minutes after the last coat, then flip the boards over and repeat for the other side.
To get a smooth finish, read out spray painting tips.
The one thing I have noticed is that the mirror effect paint seems to pick up finger prints really easily (just like stainless steel!). I may end up putting a clear coat on it so that I don’t have to keep wiping them off all the time.
3 | Attach casters
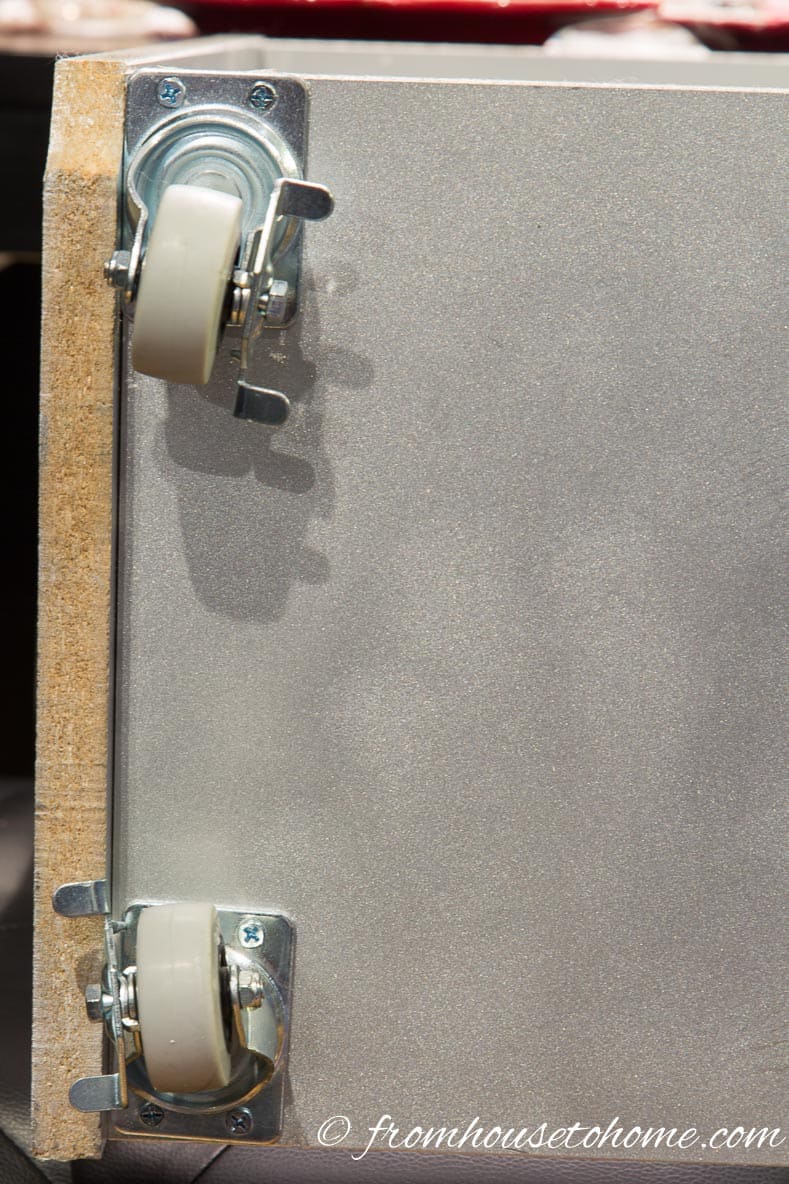
If you took your shelves apart to paint them, put them back together before attaching the casters. Make sure that you have the finished edges facing in the right direction when you do this.
Then turn the shelf unit upside down making sure that you don’t scratch the top (this is easiest if you can put down a towel or do this on a rug).
Attach the casters* in each of the corners using the screws that came with casters.
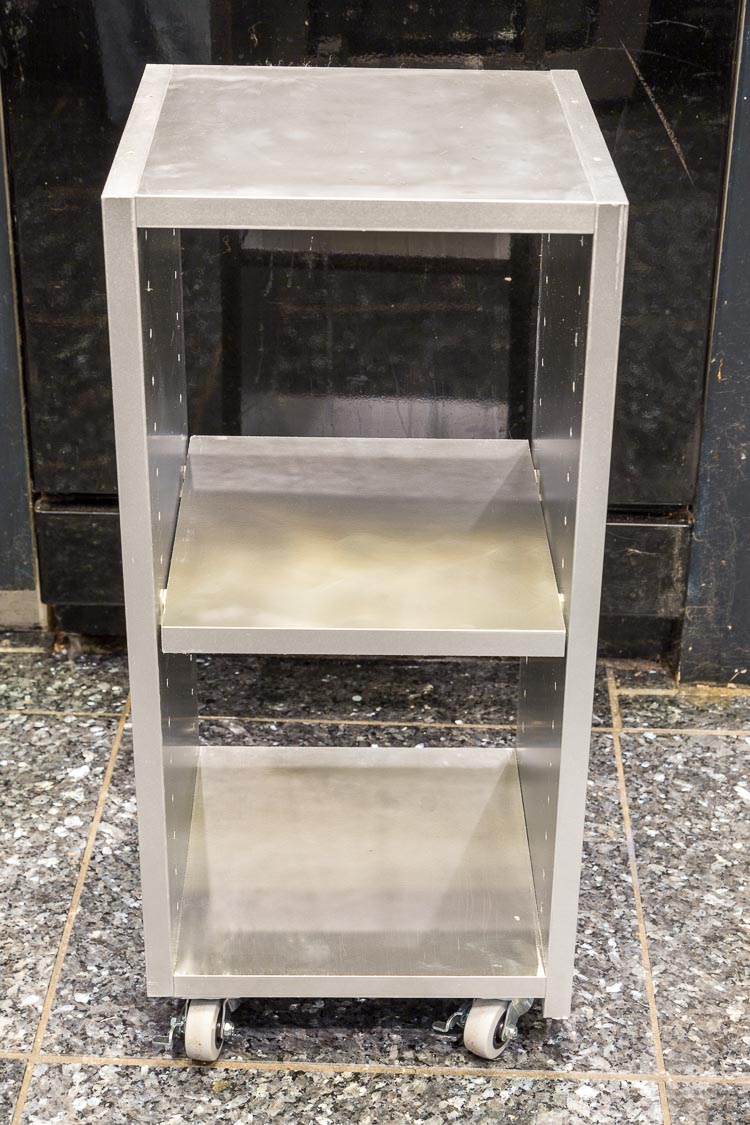
Turn the shelves right side up and the DIY part is done.
4 | Add the file boxes
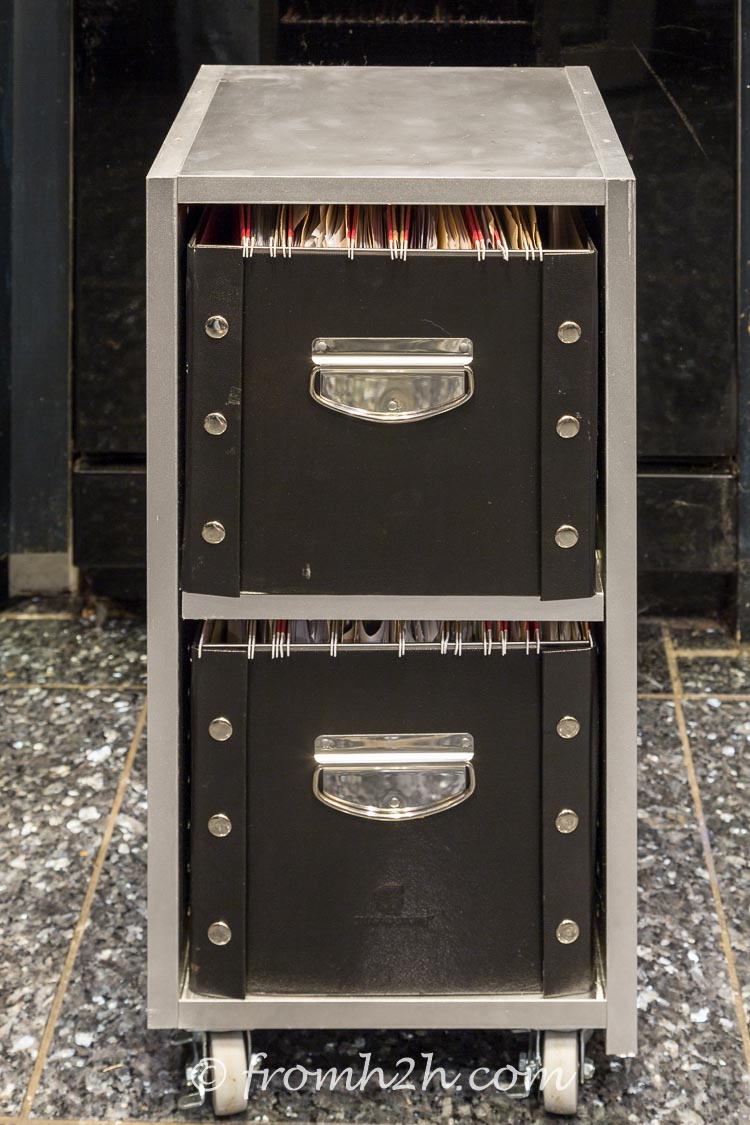
Put the file boxes* together (if necessary)
Load up your hanging files.
And then put the file boxes in your shelving unit and you’re done.
Note: These file boxes come with a lid but it doesn’t really work since it fits on top of the file tabs, and it makes the box wider than my shelf. So I just don’t use the lids.
The finished filing cabinet

Now, you can wheel the filing cabinet where you want it.
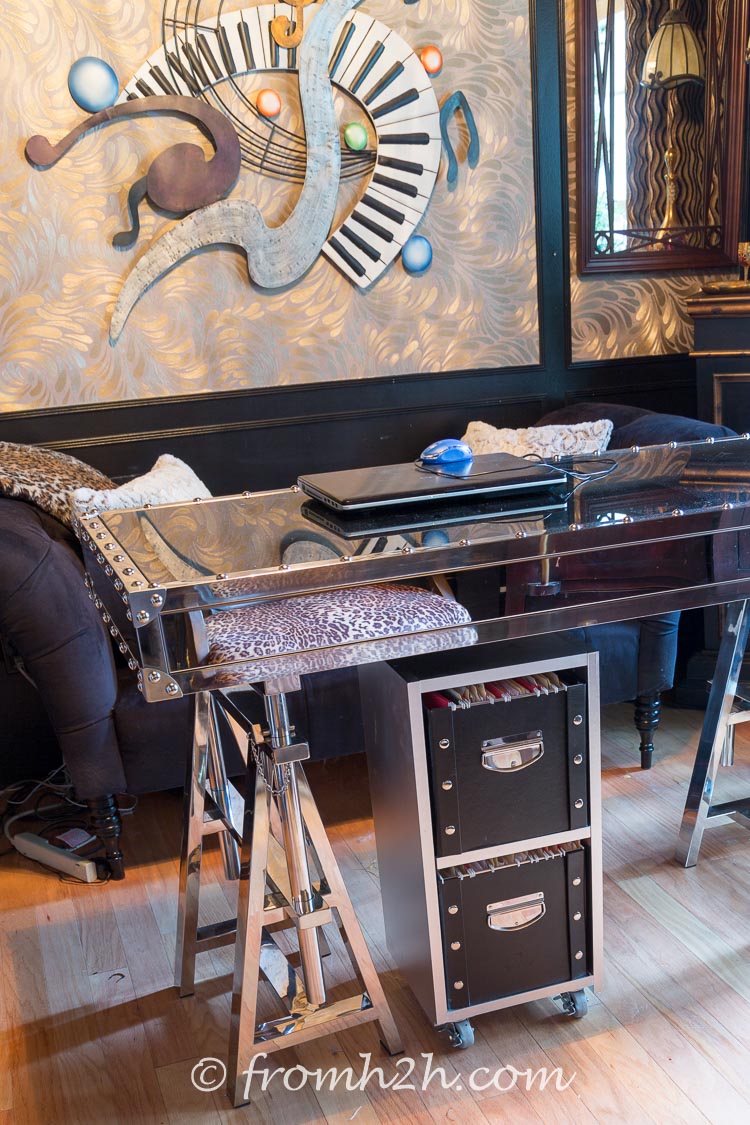
In my case, it’s going under my desk so that it’s out of the way.
But the wheels make it easy to pull out when needed.
And the fact that it’s fairly small means it doesn’t take up much space. A perfect solution for my small room.
Have comments or questions about our glam industrial DIY filing cabinet? Tell us in the section below.
This post was originally published on December 14, 2015 but was updated with new content on April 13, 2024.
Very nice, I’m glad I found your blog
Thanks, Barbara! I’m glad you like it…thanks for stopping by!