How To Make Inexpensive DIY Outdoor Curtains That Look Custom
These DIY outdoor curtains are a cheaper alternative to drop cloth curtains and look like they are custom made. With an inexpensive outdoor curtain rod, they’re a great way to add privacy and shade to a deck makeover, gazebo or porch.

DIY Outdoor Curtains
This post may contain affiliate links. We make a small commission if you buy the products from these links (at no extra cost to you). As an Amazon Associate, I earn from qualifying purchases. But we only recommend products we would use ourselves. For more information, click here to see our disclosures.
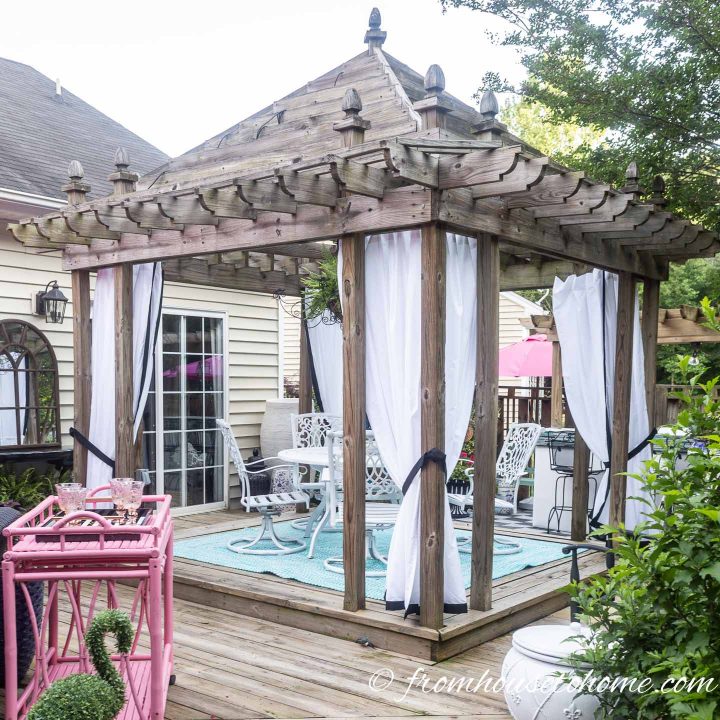
As part of the new design for her deck makeover, Wanda wanted curtain panels for the corners of her gazebo.
The problem is that to cover all four sides, you need eight curtain panels. To buy them would cost hundreds of dollars.
Since fabric (even outdoor fabric) starts to fade pretty quickly when it is exposed to the sun on a regular basis, that’s more money than she wanted to pay.
So we decided to make them ourselves. And the question came down to…
What’s The Best (Cheap) Fabric For Outdoor Curtains?
Option #1: Outdoor Canvas Curtains
Initially, we thought we would make our DIY curtains from outdoor canvas*.
It’s made to be outdoors and relatively inexpensive, compared to other outdoor fabrics.
But even on sale, it was $7 a yard. Since we needed close to 24 yards for our 8 curtain panels, the cost still ended up being too high.
And the canvas fabric is pretty stiff, so we weren’t sure how easy it would be to tie back.
Option #2: Drop Cloth Outdoor Curtains
Do a search on DIY outdoor curtains and you’ll find drop cloth curtains galore.
So that was the next option we considered.
But drop cloths must have gone up in price since everyone has started using them for DIY projects. We couldn’t find any of the $5 per panel options that everyone talks about.
And they have a couple of other strikes against them:
- Drop cloths are intended to soak up stains (to prevent whatever they’re covering from getting dirty). I read that they tend to stain easily and show every mark.
- They are usually made of cotton, which is fairly susceptible to mold and mildew (not ideal for outdoor use).
Option #3: DIY Walmart Outdoor Curtains
So that’s how we settled on option #3.
Which is to make the absolute cheapest curtains we can. And then hang them in a way that makes them easy to take down so we can bring them in when the weather gets bad.
That’s great, you may be asking…but what does that have to do with Walmart?
Well, the cheapest fabric we could find was Walmart brand twin flat sheets* – $4.97 per panel.
Basically, you want to buy the cheapest sheets you can find. The more polyester in them, the better (As we mentioned above, cotton doesn’t stand up to the elements as well as man-made materials).
We could have stopped there, but one of the benefits of making the curtains yourself is you have control over what they look like.
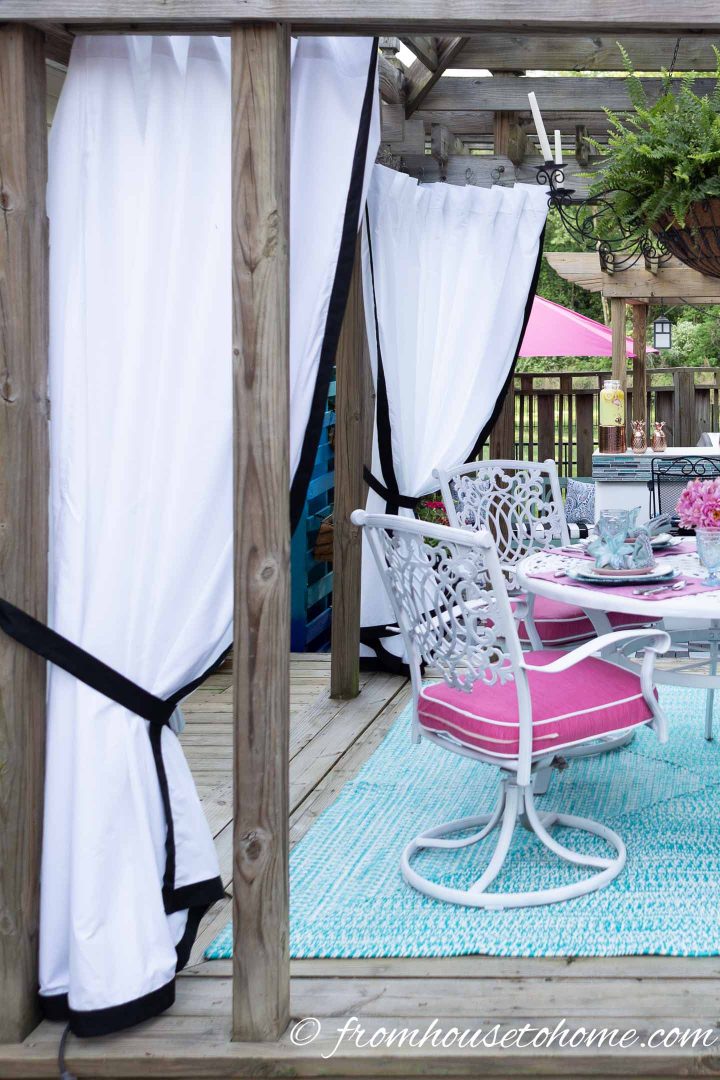
So we decided to upgrade them a little by adding a black band around the edge. For this we purchased some of that black outdoor canvas* mentioned above.
You could use a black sheet for the banding, too (which would cut down on the cost even more). But black fades REALLY quickly in the sun, so we thought the outdoor canvas would keep the curtains looking better longer.
In the end, the canvas band also had an unintended benefit. It added some weight to the curtains which helps to keep them from blowing around in the wind.
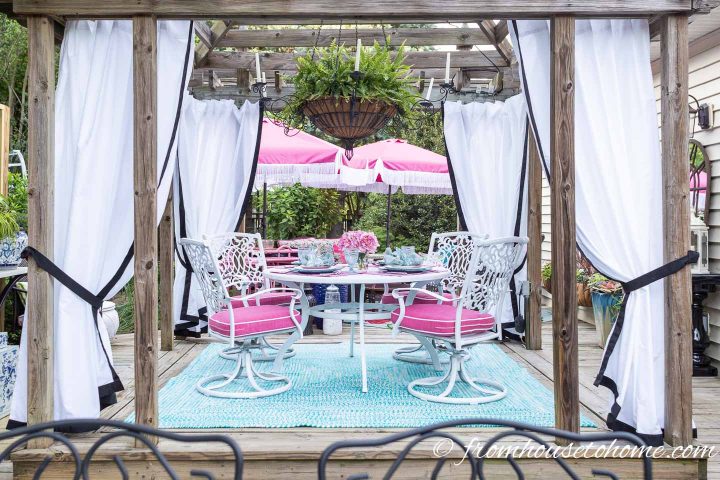
With black tie backs, the effect is stunning.
Although there is some straight sewing involved, which takes some time, the process is not difficult.
Supplies
Materials (per panel)
- 1 twin size flat sheet. Standard twin size sheets are 66 inches wide and 96 inches long. If you need a curtain panel that is larger than this, you can use a larger sheet size.
- black outdoor fabric for the banding and tiebacks. Of course, you can use any color you want.
- thread
- clip on curtain rings*
- waterproofing spray* (optional)
Tools
- sewing machine
- straight pins
- scissors
- iron
How To Make DIY Outdoor Curtains
1 | Measure
The first step to making your outdoor curtains is to measure the height and width of the space where the curtain will go.
Use the width to determine how many panels you need. A twin size sheet is usually 66 inches wide. (If you want a wider curtain panel, you can always get a larger sheet size.)
If you are planning on closing your curtains, you probably don’t want them to be stretched tight. So make make sure that the total width of your panels is wider than your opening.
For the height, if you’re lucky, it will be about 98 inches and you won’t have to cut the sheet 🙂
2 | Cut The Fabric For The Band
We purchased enough black outdoor fabric so that the side band could be cut in one long piece without joins. It should be the length of your curtain plus 3″ (for the overlap with the bottom band and the seam).
For each panel:
- Cut 1 long strip of black outdoor fabric that is 5 inches wide with a length that is equal to the desired height of your curtain plus 3 inches
- Cut 1 strip of black outdoor fabric that is 5 inches wide with a length that is equal to the width of your curtain plus 1 inch
Since our curtains were meeting at the corner, we only put a band on the outside edge and the bottom. If you want the band to go all the way around your curtain, you will need to cut one more long piece.
3 | Cut The Sheet
If you do need to cut your sheet, figure out how long it needs to be using this formula:
Desired curtain height minus 2 inches for the band plus 1/2 inch for the seam (e.g. 80 inches long – 2 inch band + 1/2 inch seam= 78 1/2 inch cut length)
I used the top of the sheet as the heading for the panel and cut off the bottom edge.
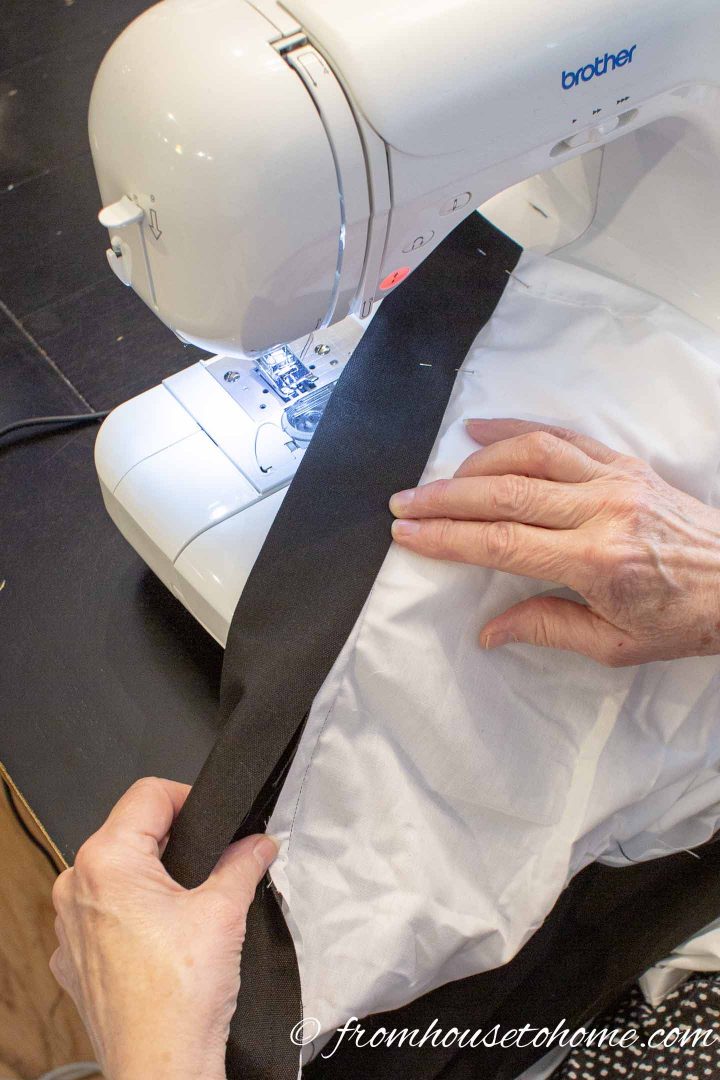
4 | Sew The Bottom Band On The Curtain
First you will sew the shorter band to the bottom of the sheet.
Sew one long edge of the band to the bottom of the sheet
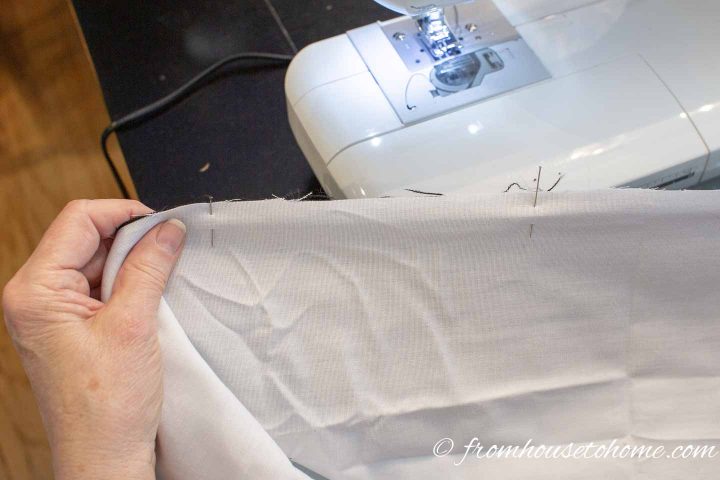
With the right side of the band fabric facing toward the curtain, position the long side of the band so that it lines up with the bottom of the sheet and is sticking out by 1/2 inch on either end. Pin the band to the sheet.
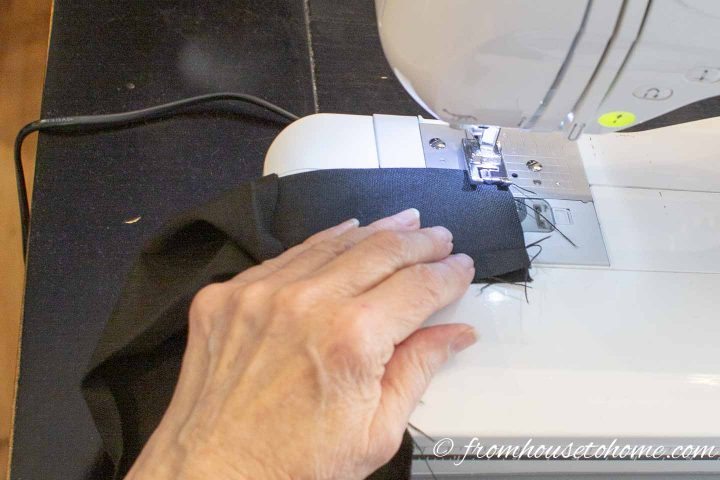
Straight sew all the way across the bottom of the curtain with a 1/2 inch seam allowance.
Use the iron to press the loose edges of the seam towards the band.
Create a finished edge on the other long side of the band
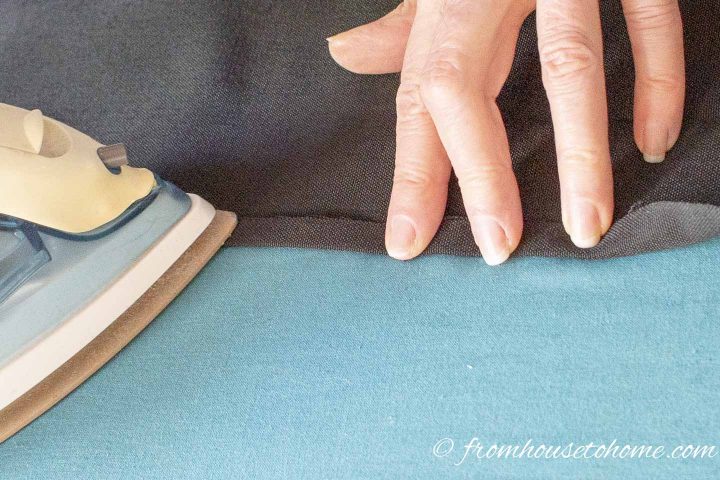
Make a 1/2 inch fold along the other long edge of the band towards the seam you just sewed.
Press it in place with the iron.
Close one end of the band
Note: These steps are not necessary if you are adding a band all the way around your curtains.
Fold the band in half lengthwise so that the right sides of the fabric are facing each other. The 1/2 inch fold you just made should match up with the previous seam.
Then sew one of the short ends of the band together at the edge of the curtain. This seam should be in line with the edge of the sheet. (Leave the other edge open).
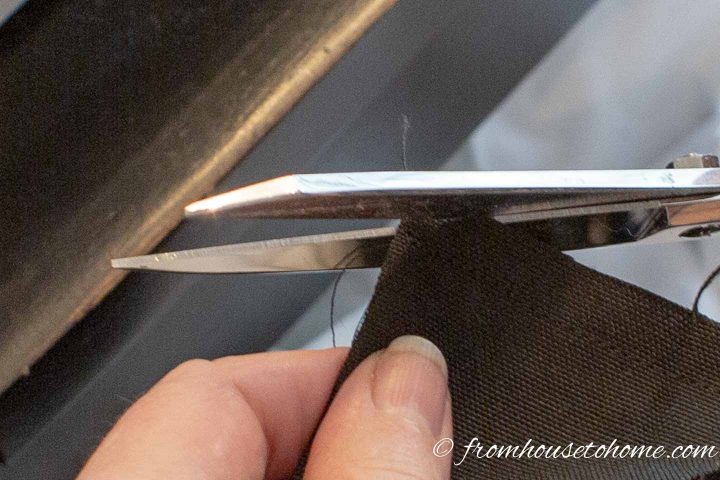
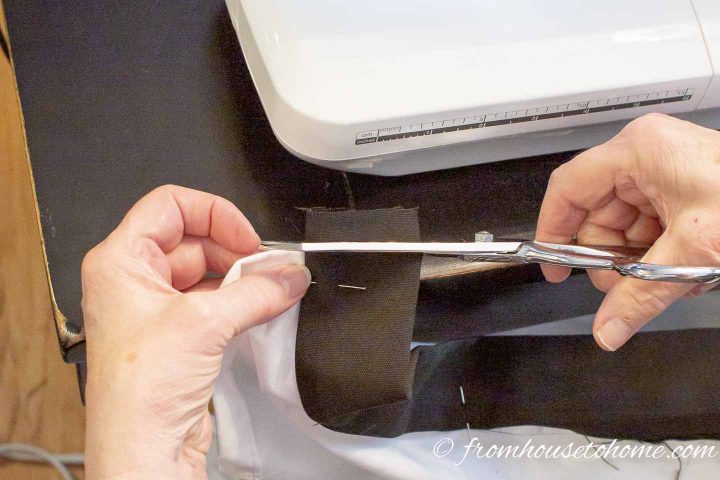
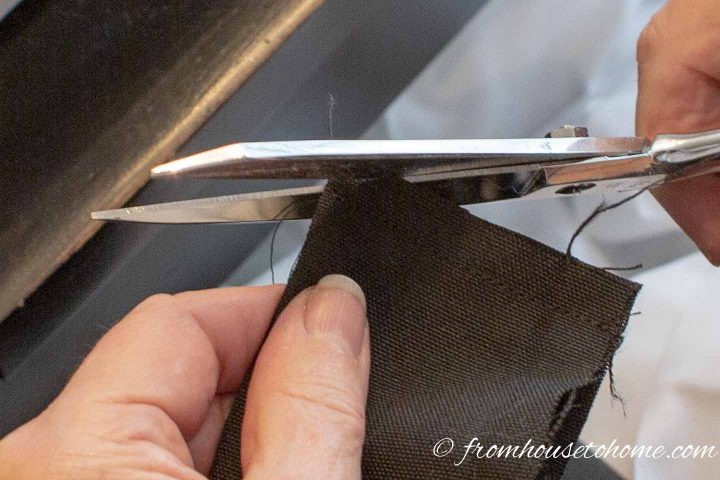
Trim the excess seam and clip off the corners. This helps to make the corners lay flat when you turn it inside out.
Turn the band fabric so it is right side out.
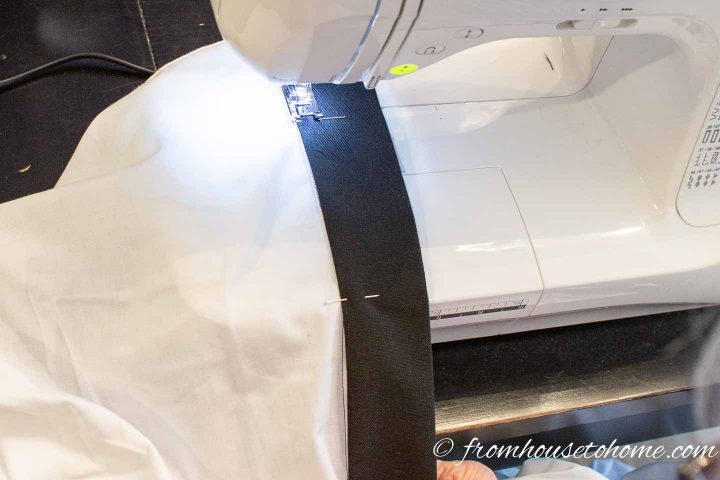
Sew the other long edge of the band to the sheet
Fold the band lengthwise down the middle (right sides should be out), then use the iron to press it in half.
Pin the pressed edge of the band over the previous seam and straight sew through all thicknesses.
Trim the other end of the band
Cut off the front edge of the band (the one that you did not sew together above) so that it is even with the edge of the sheet. (If you are putting a band on both sides of your curtain, cut both edges of the bottom band even with the sides of the curtain.)
5 | Sew The Side Band On The Curtain
Next we will sew the longer band onto the side edge of the sheet using a very similar process.
Sew one long edge of the band to the long edge of the curtain
For this section, you will need to work on the side of the sheet where you just trimmed the bottom band (ie. not the side where the bottom band edges are sewn together).
With the right side of the band fabric facing toward the curtain, position the long side of the band so that it lines up with the edge of the sheet and is sticking out by 1/2 inch on either end. Pin the band to the sheet.
Straight sew all the way across the bottom of the curtain with a 1/2 inch seam allowance.
Use the iron to press the seam toward the band.
Create a finished edge on the other long side of the band
Make a 1/2 inch fold along the other long edge of the band folding towards the previous seam, and press it in place with the iron.
Close both ends of the band
With right sides together, sew the top ends of the band together using a 1/2 inch seam. It should line up with the top of the sheet.
Then do the same for the edges at the bottom of the band.
Turn the band to right side out.
Sew the other long edge of the band to the curtain
Fold the band in the middle lengthwise, and use the iron to press it in half.
Pin the pressed edge of the tape over the previous seam and straight sew through all thicknesses.
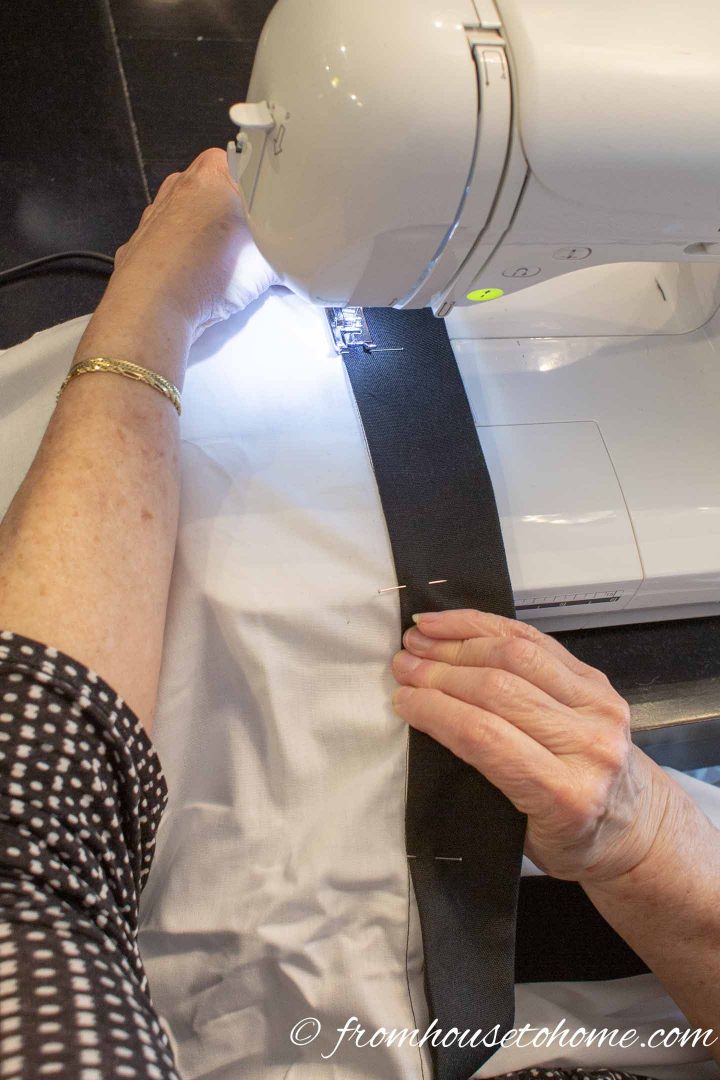
Hint: When sewing in a straight line, joining two pieces of fabric, keep the tension by stretching the fabric slightly before and after the sewing machine foot as it feeds through the foot. This will keep the top and bottom pieces of fabric sewing evenly.
6 | Make the Tie Backs
For the tie backs, the first step is to decide how long you want them.
The finished length on ours was 24 inches because they needed to loop around 2 posts on at the corner of the gazebo. So yours may be shorter.
Make the tie back by cutting a piece of the tie back fabric 5 inches wide and the desired length plus 5 inches long.
Fold the tie back in half lengthwise with the right sides of the fabric together.
Sew along the long side where the edges of the fabric meet and across one end using a 1/2 inch seam.
Trim the seam allowance and clip the corners to make it easier to turn right side out.
Turn the tie back to the right side by inserting a thin rod into the sleeve from the joined end. (I used a ruler).
Press the tie back flat.
Then fold the loose ends in and sew the end closed. Sewing it manually with a needle and thread results in a neater finish, but you can use the sewing machine if you prefer to get it done quickly.
Make a loop at each end to slip over a hook for tying back, by turning under 2 inch of the band and sewing with a zigzag stitch.
Alternatively, you could sew rings to both ends of the tie back that will slip over a hook.
7 | Hang Your DIY Outdoor Curtains
To make hanging your DIY outdoor curtains easy, attach drapery rings to the top of each panel at regular intervals.
We used 7 per panel.
These will then slip on to a rod mounted inside the gazebo. Stay tuned for an upcoming post on our cheap and easy way to hang outdoor curtains.
Note: If you really want to make sure your DIY outdoor curtains are waterproof, you can spray them with this waterproofing spray*.
Other Sewing Projects You Might Like
- How to make DIY fabric roller shades
- How to sew roman shades
- DIY box cushion covers
- How to sew envelope cushion covers
Have comments or questions on our DIY outdoor curtains? Tell us in the section below.
This post was originally published on May 23, 2019 but was updated with new content on February 12, 2024.
I’m thinking on doing some outdoor curtains for my patio. Wondering if shower curtains can work. They are made to resist water and some even mildew. Can be combined if need to add for height. Just an idea. Now can find so many styles and colors.
Hi Pam, Although I have never used shower curtains for this purpose, I think they would work well. There would be little or no sewing involved so it would be an easy install.
Suggest Lightweight thin chain in the bottom hem to keep the curtains hanging straight. Available at hardware stores.
Good idea Karen. Make sure the chain will not rust and cause staining.
Thanks for sharing your good idea Karen. Make sure the chain is made from a non rusting metal so that is does not cause staining of the material.
Hi, I’ve been pondering outdoor curtain option so, I’m glad to find your tutorial. Did you wash any of your fabrics (for shrinkage and fading) before sewing them? Have you your curtains since making them? I’m concerned about shrinkage and fading after the 2 types of fabrics are sewn together.
P.S. There is a product by Shout called Color Catcher that will catch any running before it sets into anything else in your washer. It’s great!!!
Hope to hear from you! Happy summer!
Hello Kathy, We did not wash the fabrics prior to sewing and I don’t think they have been washed since. Wanda puts them up only when she is entertaining. Polyester sheets do not shrink. I suppose the canvas band could. You could pre wash if you are concerned about the colors bleeding. Because the curtains are hanging outdoors, the colors will definitely fade from the sun.
Great idea, especially using the binding for weight. Thank you for the information about cotton vs polyester and the sun’s effect on it all. May have to try this!
Hello Gloria. I appreciate your comments. We are happy with how they look.