
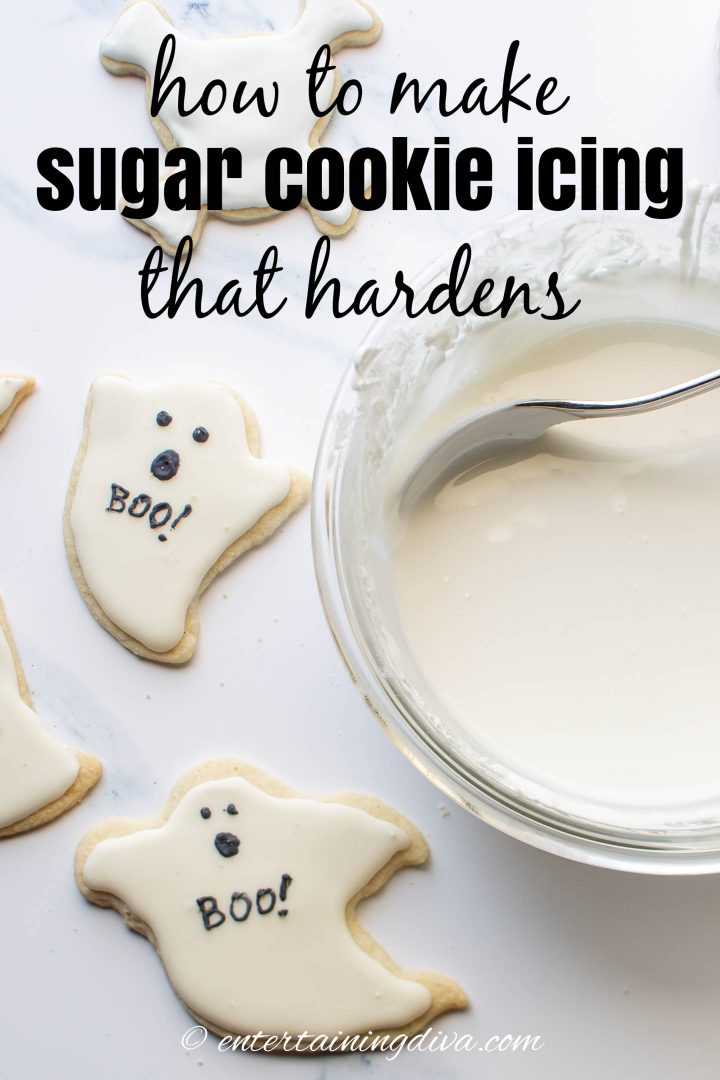
Royal Icing: Sugar Cookie Icing That Hardens
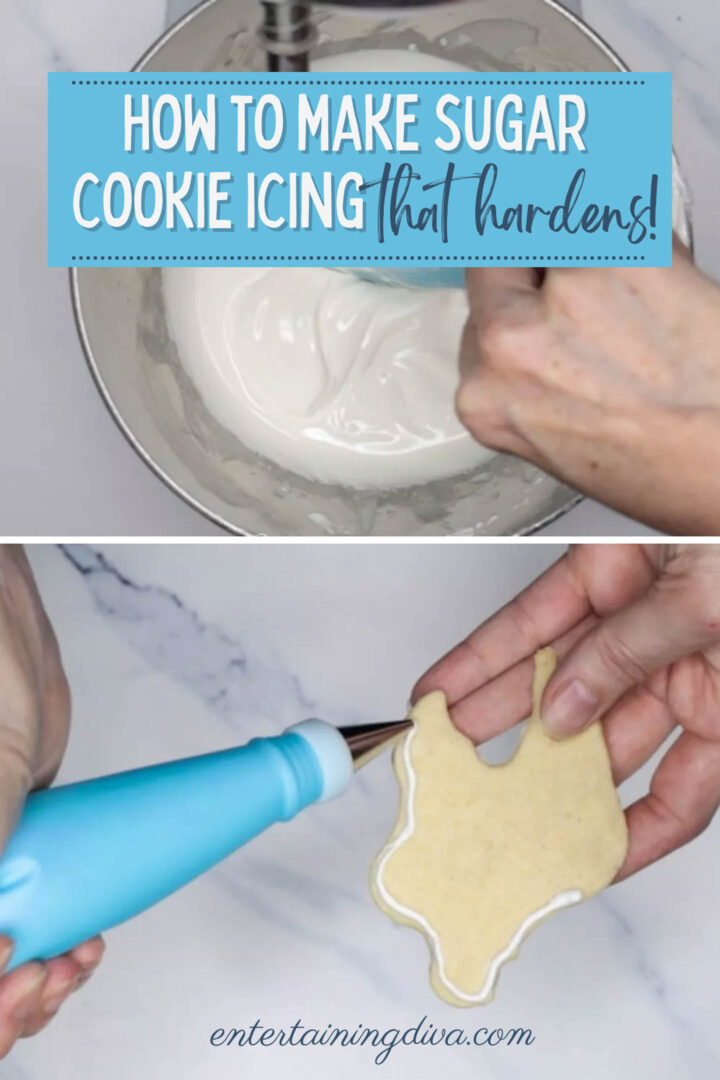


This royal icing recipe is what you need if you’re looking for sugar cookie icing that hardens. It’s really easy to make (and use) once you know the secret of getting it to the right consistency.
For a long time, I have loved the look of those sugar cut out cookies, decorated with the pretty colorful icing designs (that I have since found out are made with Royal Icing).
But I have always been afraid to try making them myself.
I’m not much of a baker.
And they just seemed so complicated!
Well, after spending the last couple of weeks decorating all kinds of Halloween cookies with sugar cookie icing that hardens, I’m here to tell you that it’s not as hard as it looks!
Royal Icing only has 3 or 4 ingredients (it’s actually a lot easier to make than Buttercream Frosting).
The main trick is to get the right consistency. Which isn’t that hard once you know the trick of how to test it.
Even better? Royal icing is both dairy free and gluten free, so it’s fine for anyone who is sensitive to these ingredients.
What Is Royal Icing Used For?
This post may contain affiliate links. We make a small commission if you buy the products from these links (at no extra cost to you). As an Amazon Associate, I earn from qualifying purchases. But we only recommend products we would use ourselves. For more information, click here to see our disclosures
In case you’re not sure what Royal Icing is (I wasn’t!)
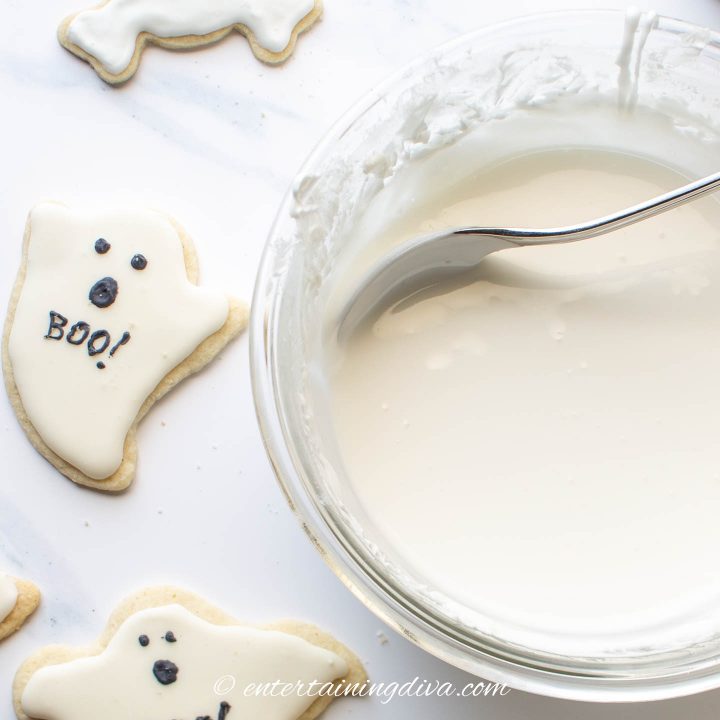
It’s a smooth frosting that hardens as it dries and is usually used for decorating cookies or creating hard decorations for cakes.
You can alter its texture so that it can be used for many different types of designs:
- A stiff version is perfect for creating icing flowers or other hard sugar decorations that are often used on cakes.
- Piping consistency is good for drawing designs or writing on cookies.
- A more liquid consistency will cover the tops of cookies, also known as “flooding”.
Ingredients
Here’s what you’ll need to make Royal Icing:
- 4 cups icing sugar (approximately 1 pound) – also known as confectioner’s sugar or powdered sugar
- 3 Tablespoons meringue powder
- 1/2 cup WARM water
- flavoring (optional) – 1 teaspoon vanilla extract or other extract
Supplies
- stand mixer with the whisk attachment and mixing bowl
- spatula
How To Make Sugar Cookie Icing That Hardens
To start, you want to make sure there aren’t any lumps in your sugar.
You can do this by sifting it.

Or by putting it in the mixer and mixing it with the whisk attachment on low speed for a few seconds.
Then add the rest of the ingredients to the mixer.
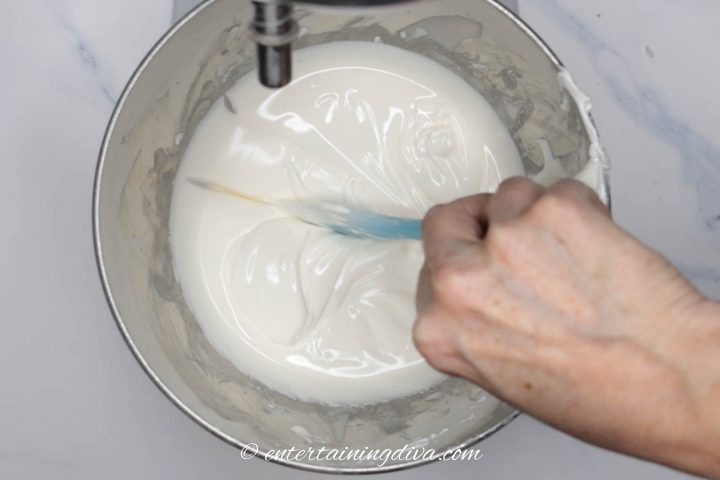
The trick is to mix the icing to the right consistency without getting air bubbles in it.
And the easiest way to do that? Mix at a lower speed for a longer period of time.
Start at the lowest speed until the ingredients are combined. This will prevent the icing sugar from going everywhere.
Then increase the speed to medium.
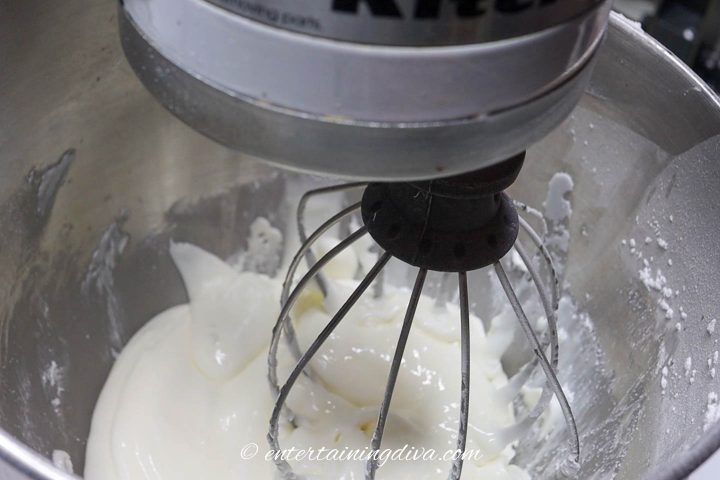
Continue to beat the icing for 5 to 8 minutes or until the icing has soft peaks.
Adjust The Consistency
Now you have a decision to make.
Are you going to be using the icing to make hard decorations (like sugar flowers)?
Or are you only using it to decorate the tops of cookies?
What you are using it for determines the consistency that the icing needs to have.
If you are going to be using it for more than one type of decorating, choose the one that requires the stiffest icing and make your whole batch that way.
Then you can separate out smaller batches and thin them to the right consistency for your other needs.
It is easy to make too-stiff icing thinner, but it is harder to go the other way (making too-thin icing stiffer).
Royal Icing For Hard Decorations
If you are going to be using royal icing for creating hard decorations like flowers, you’ll want to beat it some more until it has stiff peaks.
That way it will hold the shapes that you put it in without moving.
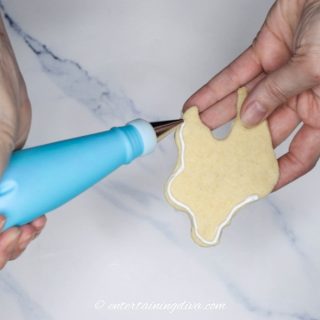
Piping Consistency Royal Icing – For Outlining or Writing

For outlining cookies, writing on them or creating designs like eyes and a mouth, you’ll want an icing that goes on smoothly but doesn’t run too much.
Something like “15 second” or “20 second” icing.
Don’t worry, I’ll explain what that is below, and how to make it.
But the short version is, you’ll probably need to add a little water to your icing to get it to this consistency.
Flooding Consistency – For Filling In
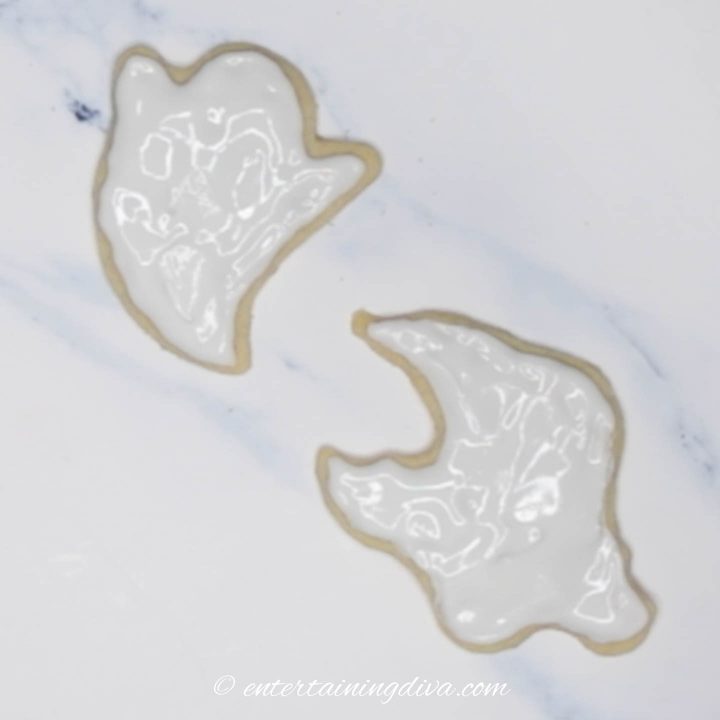
For royal icing that truly floods the cookie (evens itself out without much help from you), you’ll want to make “10 second” icing.
To use this thinner icing for flooding, you will also need to make some piping consistency icing which you’ll use to outline the cookie. (This prevents the flooding icing from running off the sides.)
Which is why I just make one batch of 15 to 20 second icing and use it for both. I think it’s the perfect royal icing consistency for both outlining and flooding.
You have to do a little extra work to get the icing to spread out but that’s easier than having to make and pipe two different versions of icing.
What is 15 Second Icing?
Or 10 second icing? Or 20 second icing?
If you run a knife through the icing, that’s the length of time it takes for the icing to close the gap.
Chances are your soft peak icing will take longer than 15 or 20 seconds to close.
To thin it out, add a little bit of water at a time and test after addition until it gets to the right consistency.
And when I say a little bit of water, I mean a few drops at one time. It doesn’t take much to make the icing get thinner.
Add Color

To make colored icing, use gel-based food coloring (the liquid kind has an effect on the consistency) and a glass or metal bowl (the food coloring will stain plastic).
Put some of your icing into a smaller bowl and add the food color in a little bit at a time.
Since you can always make the icing darker but it’s really hard to make it lighter, make sure you only add in a tiny bit and then mix before deciding if you need more.
Food coloring has a bitter taste so only use as much as you need to get the color you want. Otherwise your icing will end up tasting bitter.
Also, the color will dry darker than it looks when you first make it so keep that in mind as you are adding it.
To get a better idea of what the final color will be, mix it and then cover the bowl with plastic wrap so that it is touching the surface of the icing. Let it sit for a few hours. That color will be pretty close to the final dry color.
If you are using two different consistencies of the same color (like outlining and flooding), mix the color first. Then create the separate batches for the right consistency. Otherwise, it’s almost impossible to get the colors to match.
How Many Cookies Will This Cover?
This question is a little hard to answer since how much icing you will need depends on the number of cookies, how thick the icing is on your cookies and what kind of designs you use.
But generally, this should be enough to flood 24 2-inch cookies.
How Long for Royal Icing to Harden?
Royal icing will dry in 4 to 6 hours depending on how thick it is, how much water is in it and the humidity in the air.
Having said that, I like to leave my decorated cookies to harden over night just to make sure the frosting is set.
Other Royal Icing FAQ’s
Here are some other questions I had about royal icing (and you may be wondering, too).
What Does Royal Icing Taste Like?
Royal icing is basically sugar and water so it tastes a lot like sugar.
If you want it to have more flavoring, you can add a teaspoon of vanilla extract or another extract.
Can Royal Icing Be Refrigerated Or Go In The Freezer?
If you don’t want to use your icing right away, royal icing can be stored for up to 3 days at room temperature, up to a week in the refrigerator or up to 3 months in the freezer.
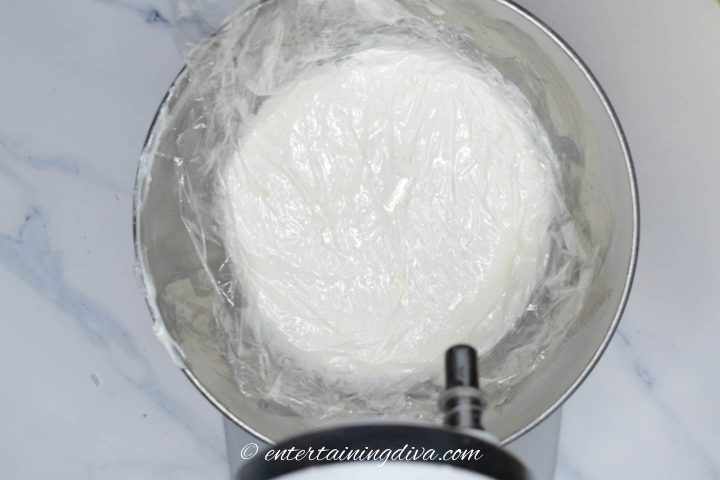
To store it at room temperature or in the refrigerator, put a layer of plastic wrap over the icing in the bowl so that the plastic is in direct contact with the top of the icing. Then push out all of the air pockets.
To store it in the freezer, put the icing in Ziploc bags and push all the air out so you know it’s air tight.
Bring it back to room temperature before starting to use it.
After sitting for a couple of days, Royal Icing may separate. Just mix it for a few seconds to bring it back to its normal consistency.
Why Won’t My Royal Icing Harden?
The main reason that royal icing doesn’t harden is too much water.
Using 10 second (or longer) icing consistency will help to make sure it is thick enough.
How To Fix Royal Icing That’s Too Thick?
Royal Icing that is too thick is easy to correct by adding a little water.
Mix in a few drops at a time until you reach the right consistency.
It doesn’t take much water to change the consistency so don’t add too much at once.
How To Fix Royal Icing That’s Too Runny?
If your icing is too runny, you can try:
- adding a little more icing sugar, or
- mixing in some thicker icing.
The second method generally works better but the best “fix” for this is not to let it happen in the first place. It’s much easier to thin too-thick icing than it is to make runny icing thicker.
Is Royal Icing Safe?
One other question that comes up from time to time is whether or not royal icing is safe.
Royal icing can be made one of three ways – with egg whites, dried egg whites or meringue powder.
The only version that may not be safe is the recipe that uses egg whites. Since they aren’t cooked, the egg whites can contain salmonella bacteria which causes food poisoning.
Icing made with egg whites also needs to be refrigerated. Which means the icing (and the cookies) cannot be left out at room temperature for long.
Because of these reasons, I like to use meringue powder for my royal icing.
Other Cookie Decorating Recipes You Might Like
- Black royal icing recipe
- Cut out sugar cookies that hold their shape
- How to make pink royal icing
- Really red royal icing recipe
- Ghost sugar cookies
Royal Icing: Sugar Cookie Icing That Hardens
Ingredients
- 4 cups icing sugar (also known as confectioner's sugar or powdered sugar) approximately 1 pound
- 3 Tablespoons meringue powder
- ½ cup WARM water
- 1 teaspoon vanilla extract or other flavoring optional
- gel food coloring optional
Equipment
- measuring cups
- Stand mixer with a whisk attachment and mixing bowl
- Spatula
Instructions
- Add 4 cups of icing sugar to the mixer and mix for a few seconds to eliminate any clumps. Or you can sift it ahead of time.
- Add 3 Tablespoons meringue powder, 1/2 cup of warm water and 1 teaspoon vanilla extract.
- Mix on low speed until combined.
- Increase the speed to medium and continue to beat the icing until it holds soft peaks, about 5 to 8 minutes
Adjust The Consistency
- For hard decorations, beat until the icing forms hard peaks.
- For outlining and writing, add a few drops of water at a time (mixing well between each addition) until the icing closes a gap cut with a knife in 15 seconds.
- For flooding, add a few drops of water at a time (mixing well between each addition) until the icing closes a gap cut with a knife in 10 seconds.
- To add color, put some of the icing into a glass or metal bowl and add gel food color in a little bit at a time, mixing well in between each addition until the desired color is obtained.
- Let the icing dry for 4 to 6 hours.
Notes
- Use as little food coloring as possible to prevent the icing from having a bitter taste
- Color will darken as it dries
- To ensure the icing has completely dried, leave it overnight before stacking cookies or adding more icing colors
- If icing is too thick, add a few drops of water at a time, mixing well between additions, until the desired consistency is obtained.
- If icing is too runny, mix in some thick icing or icing sugar until it becomes thicker
How To Store Royal Icing
- Royal icing can be stored for up to 3 days at room temperature, up to a week in the refrigerator or up to 3 months in the freezer.
- To store it at room temperature or in the refrigerator, put a layer of plastic wrap over the icing in the bowl so that the plastic is in direct contact with the top of the icing. Then push out all of the air pockets.
- To store it in the freezer, put the icing in Ziploc bags and push all the air out so you know it’s air tight.
- Bring it back to room temperature before starting to use it.
- After sitting for a couple of days, Royal Icing may separate. Just mix it for a few seconds to bring it back to its normal consistency.
Nutrition values are estimates only, using online calculators. Please verify using your own data.
Have comments or questions about our recipe for sugar cookie icing that hardens? Tell us in the section below.
This post was originally published on October 7, 2020 but was updated with new content on March 19, 2024.
I want to glaze my biscotti tops with melted chocolate that hardens and stays glossy, do you have a recipe for this situation, I may even dip them in the chocolate?
Hi Nina…I don’t have a recipe on the site for this. I have dipped cookies in melted chocolate mixed with a little coconut oil or corn syrup. It hardens, but I’m not sure how glossy it is.
NEED YOUR ADVICE –
I used this recipe and it went on like a dream, looks smooth and glossy. Loved the result and was so excited after 2 hours of piping…but then…
MY CHALLENGE
it doesn’t totally harden. it has a nice crust and looks like it’s hard, but it will still dent with pressure or fingernails – so I can’t bag and stack or transport – they will get dinged up.
I dried them in front of a table fan for 2 hours, then left them out overnight with a ceiling fan on. I let them sit for 12 hours so far, still fingernail marks or can get depressed with finger.
Then I tried one test cookie in the oven with the light on, no heat; and one test cookie in the tiny toaster oven/air fryer on “warm” lowest setting for 10 mins (that actually made it SOFTER).
Nothing seems to make these harden totally.
I did use 10 T of water instead of 8T (half a cup)
and I do live in a coastal town on the water, so I am guessing the humidity is high (even though I’m in side with AC and fans on).
Any thoughts or help or hacks if it’s not totally hardening?
more meringue powder?
Hi Ryan…Sorry you’re having trouble. Royal icing can be a little finicky. I suspect the extra water is the issue (and the humidity probably doesn’t help). I would try making the icing consistency stiffer (less water or more icing sugar). Maybe do a few test cookies with different consistencies (eg. a few with 25 second icing, 20 second icing, 15 second icing, and 10 second icing). Then see which ones harden for you. If the stiffer icing doesn’t spread out evenly on the cookies, I use a toothpick to push it around so it fills in any gaps, then lift the cookies up about half an inch and gently drop them onto the counter two or three times…that usually settles any bumps. Also, make sure you are using warm water (I don’t know why but it seems to make a big difference in how well the icing hardens). I hope that helps.
Icing sugar? You mean confectionery sugar
Hi Doreen…Yes, it’s the same thing 🙂
Wow, thank you! As someone new to cookie decorating and as a 76 year old, I need all the help I can get. Your message was sooooo helpful. Thank you, and God bless.
I’m glad you found it helpful, Charlie. Have fun decorating!
I made this along with your sugar cookie recipe and it was a big hit! Thank you!
Thanks, Priscilla! I’m glad you liked them 🙂