DIY Leaf Rain Chain
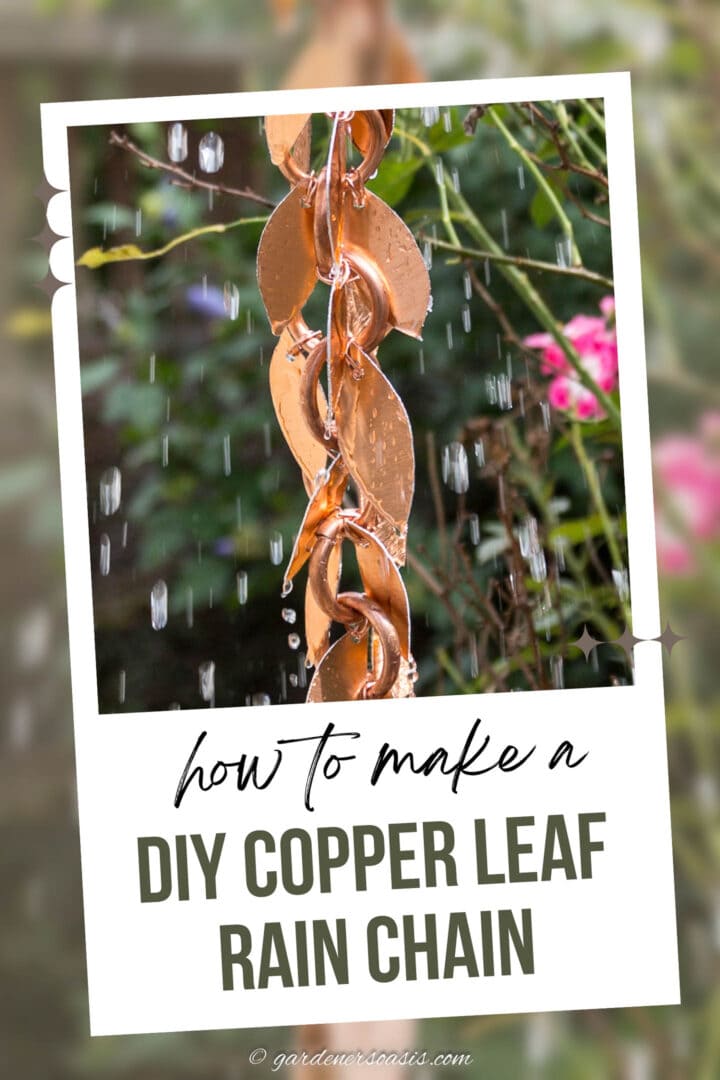

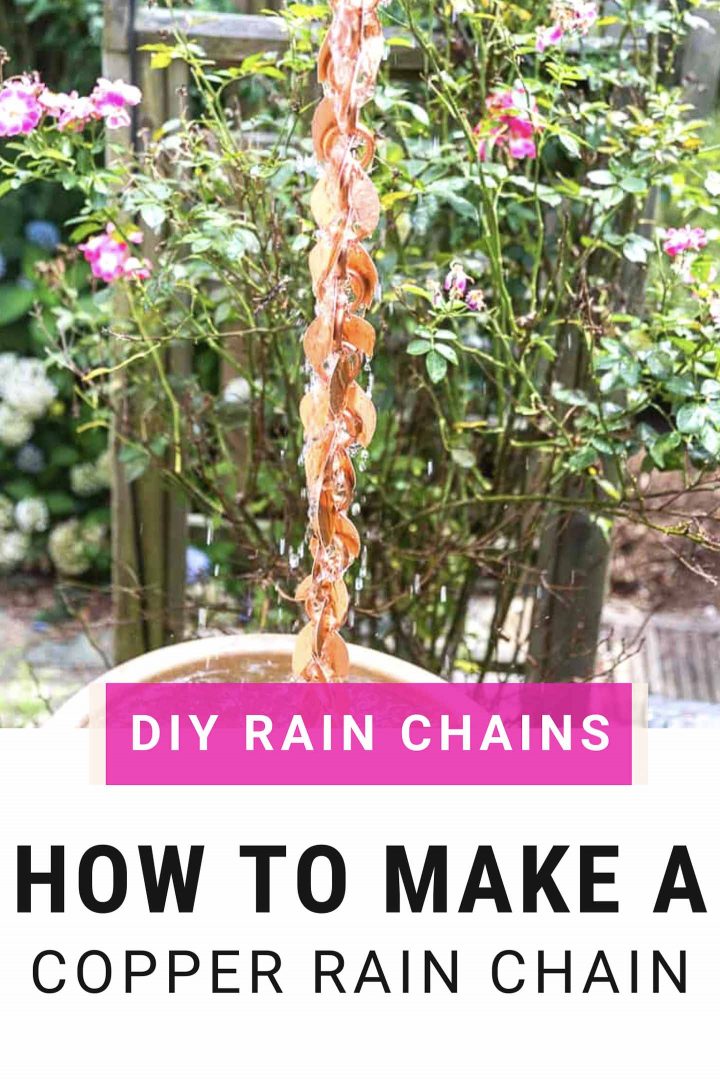

This beautiful DIY leaf rain chain transforms an ugly downspout into an elegant cascade of water. With a design inspired by serene Japanese gardens, this tutorial will guide you through creating a functional piece of art for your outdoor sanctuary.

As you may remember from the post I did on rain chains a while back, I am a little obsessed with them.
My goal is to eventually replace most (if not all) of the downspouts on my house.
So I’m always looking for different rain chain designs that will add interest to my garden.
I saw this one (which you can buy HERE on Amazon*) and really liked the idea of having the leaves hanging from the chain.
But I didn’t want to spend as much money as they are charging.
And since I’m going to be hanging it over a rain barrel, I didn’t need it to be that long.
So I decided to make my own, and I’m really happy with the way it turned out!
Read on to get the step-by-step instructions for making a DIY leaf rain chain.
Supplies
Here’s what you will need to make this project.
Materials
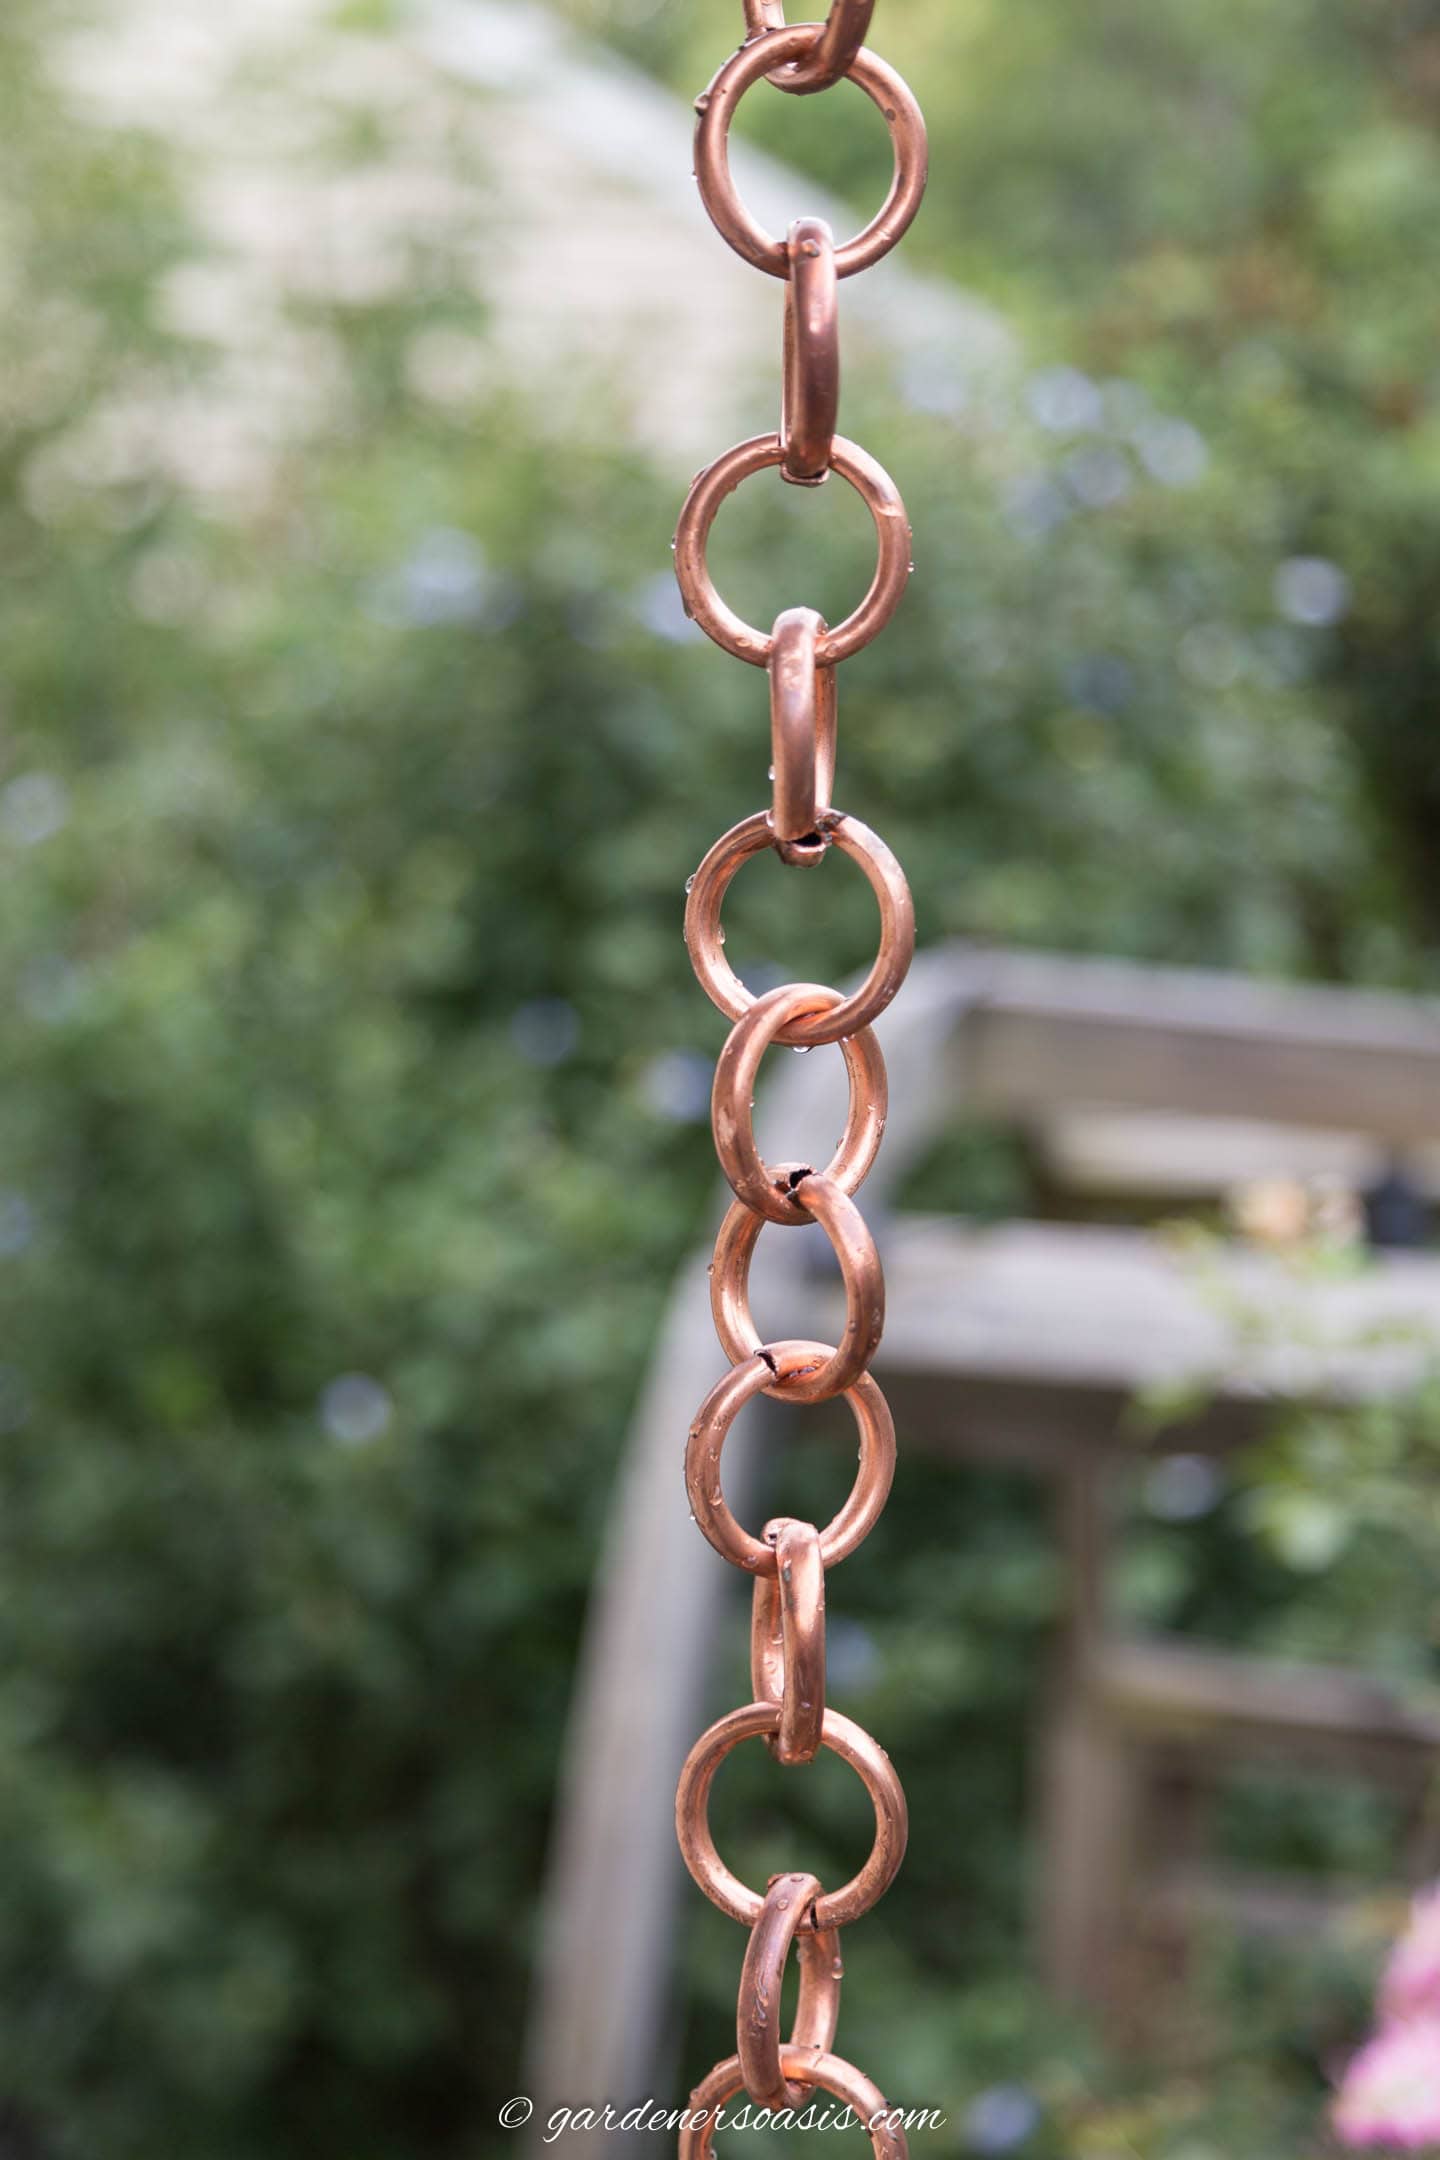
- Copper rain chain – You have a few options for this:
- Buy regular copper chain* – This is the least expensive option, but the chain isn’t as big as a normal rain chain so it won’t make as much of a statement.
- Make a DIY copper link rain chain (like the one in the picture). This is a little more expensive than the first option but has more substantial loops. Get the tutorial HERE.
- Buy a copper rain chain (like this one*) – This is the most expensive option however it’s a lot less work than making your own.
- Copper sheet metal* – This is what we’ll make the leaves out of.
- Copper hobby wire* – Used to tie the leaves onto the rain chain.
- Rain chain installation kit* – This may not be necessary if you bought a copper rain chain since they often come with a gutter attachment.
Tools
- Wire cutter
- Jig saw
- 24 TPI Thin Metal Jig Saw Blade*
- Cordless drill
- 1/8″ drill bit for drilling metal*
- 120 grit sand paper
How to make a rain chain with leaves
1 | Cut the copper leaves
If your copper sheet comes with a layer of plastic, leave it on while you are cutting.
It will protect the copper from getting scratched.
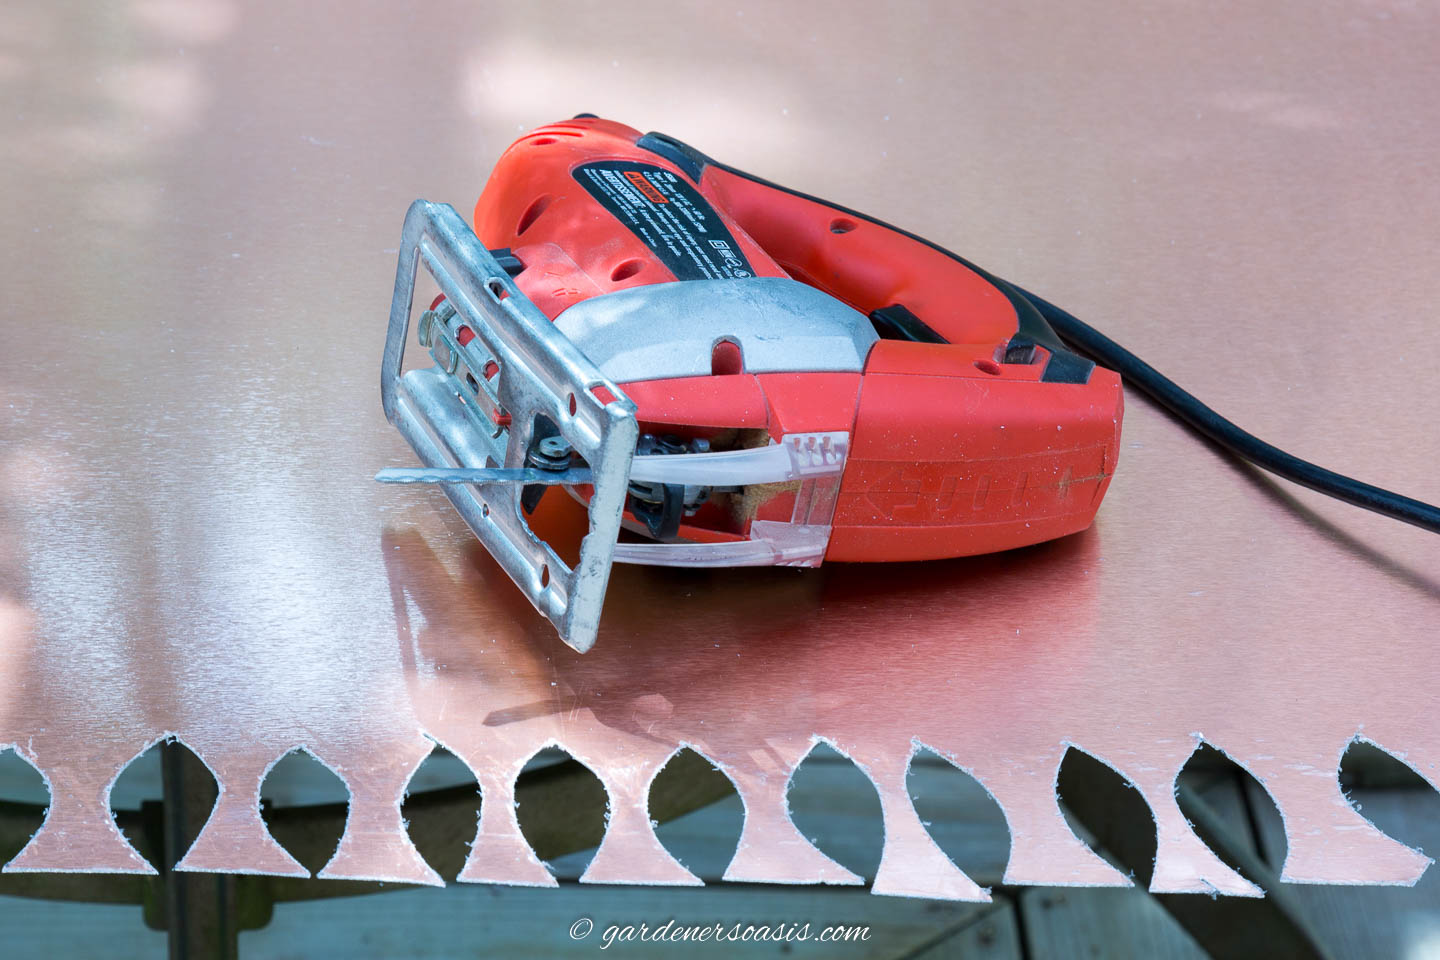
To cut the leaves from the copper sheet metal, use a jig saw with a blade meant for thin metal.
Since the leaves are really just 2 arcs that join at the top and the bottom, I didn’t bother to draw them. I just cut them freestyle.
However if you would like all of your leaves to be the same size and shape, you might want to cut the shape out of a piece of cardboard and draw it on to the metal.
I made 2 leaves for each link in the chain. Which is a lot of leaves, and a lot of cutting!
You can adjust the number you make depending on how you want your rain chain to look.
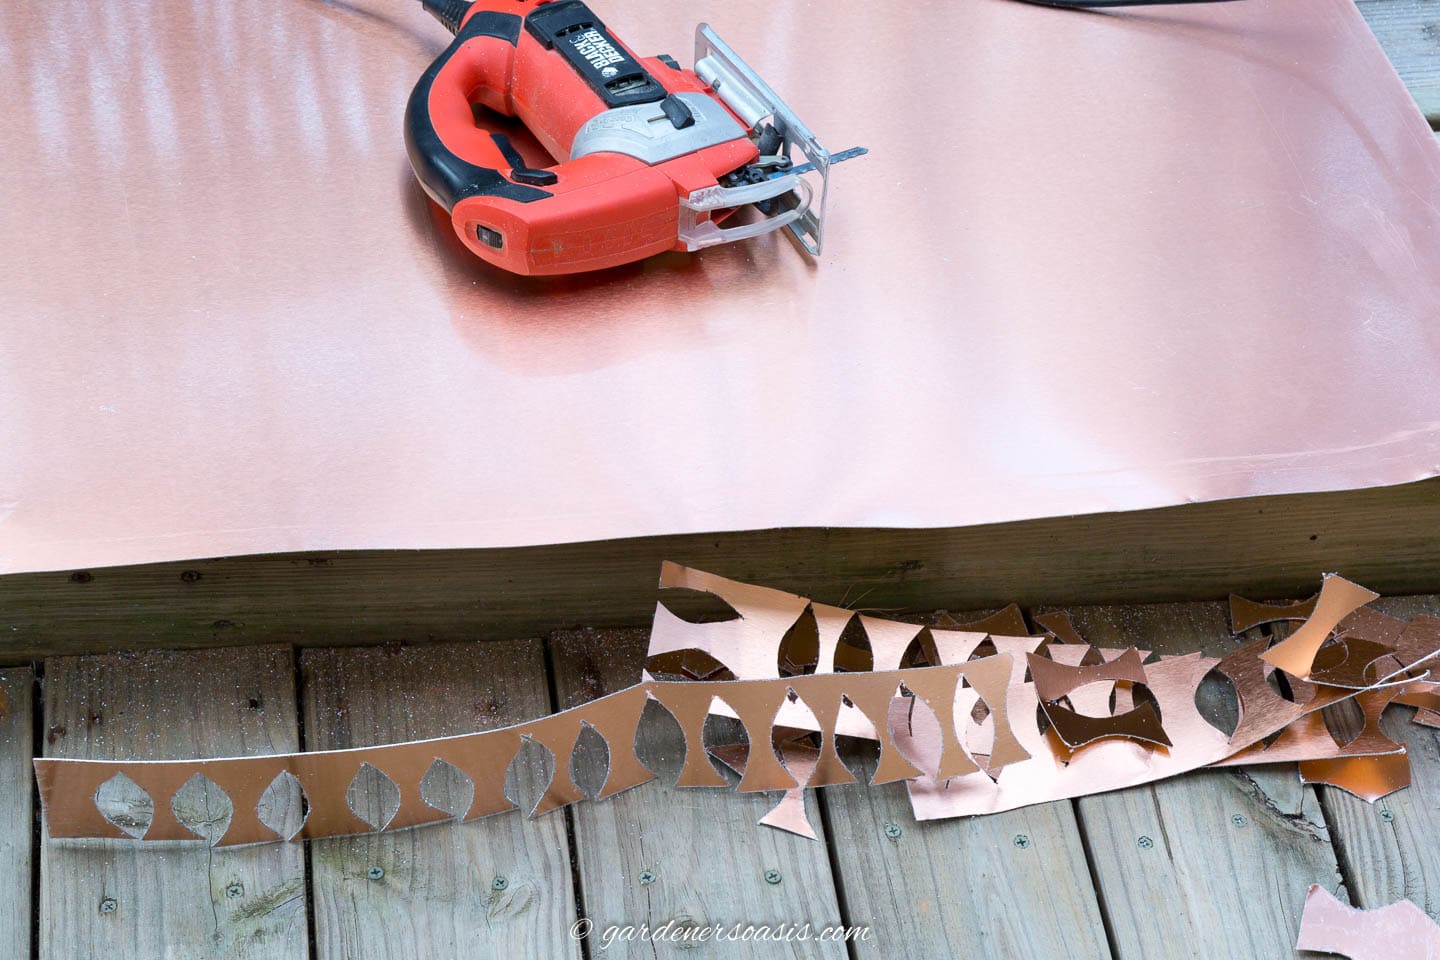
When you have cut a row of leaves, cutting off the used portion makes the metal easier to work with.
Sand the edges of your leaves with 120 grit sandpaper to remove any sharp edges.
2 | Get the leaves ready to attach
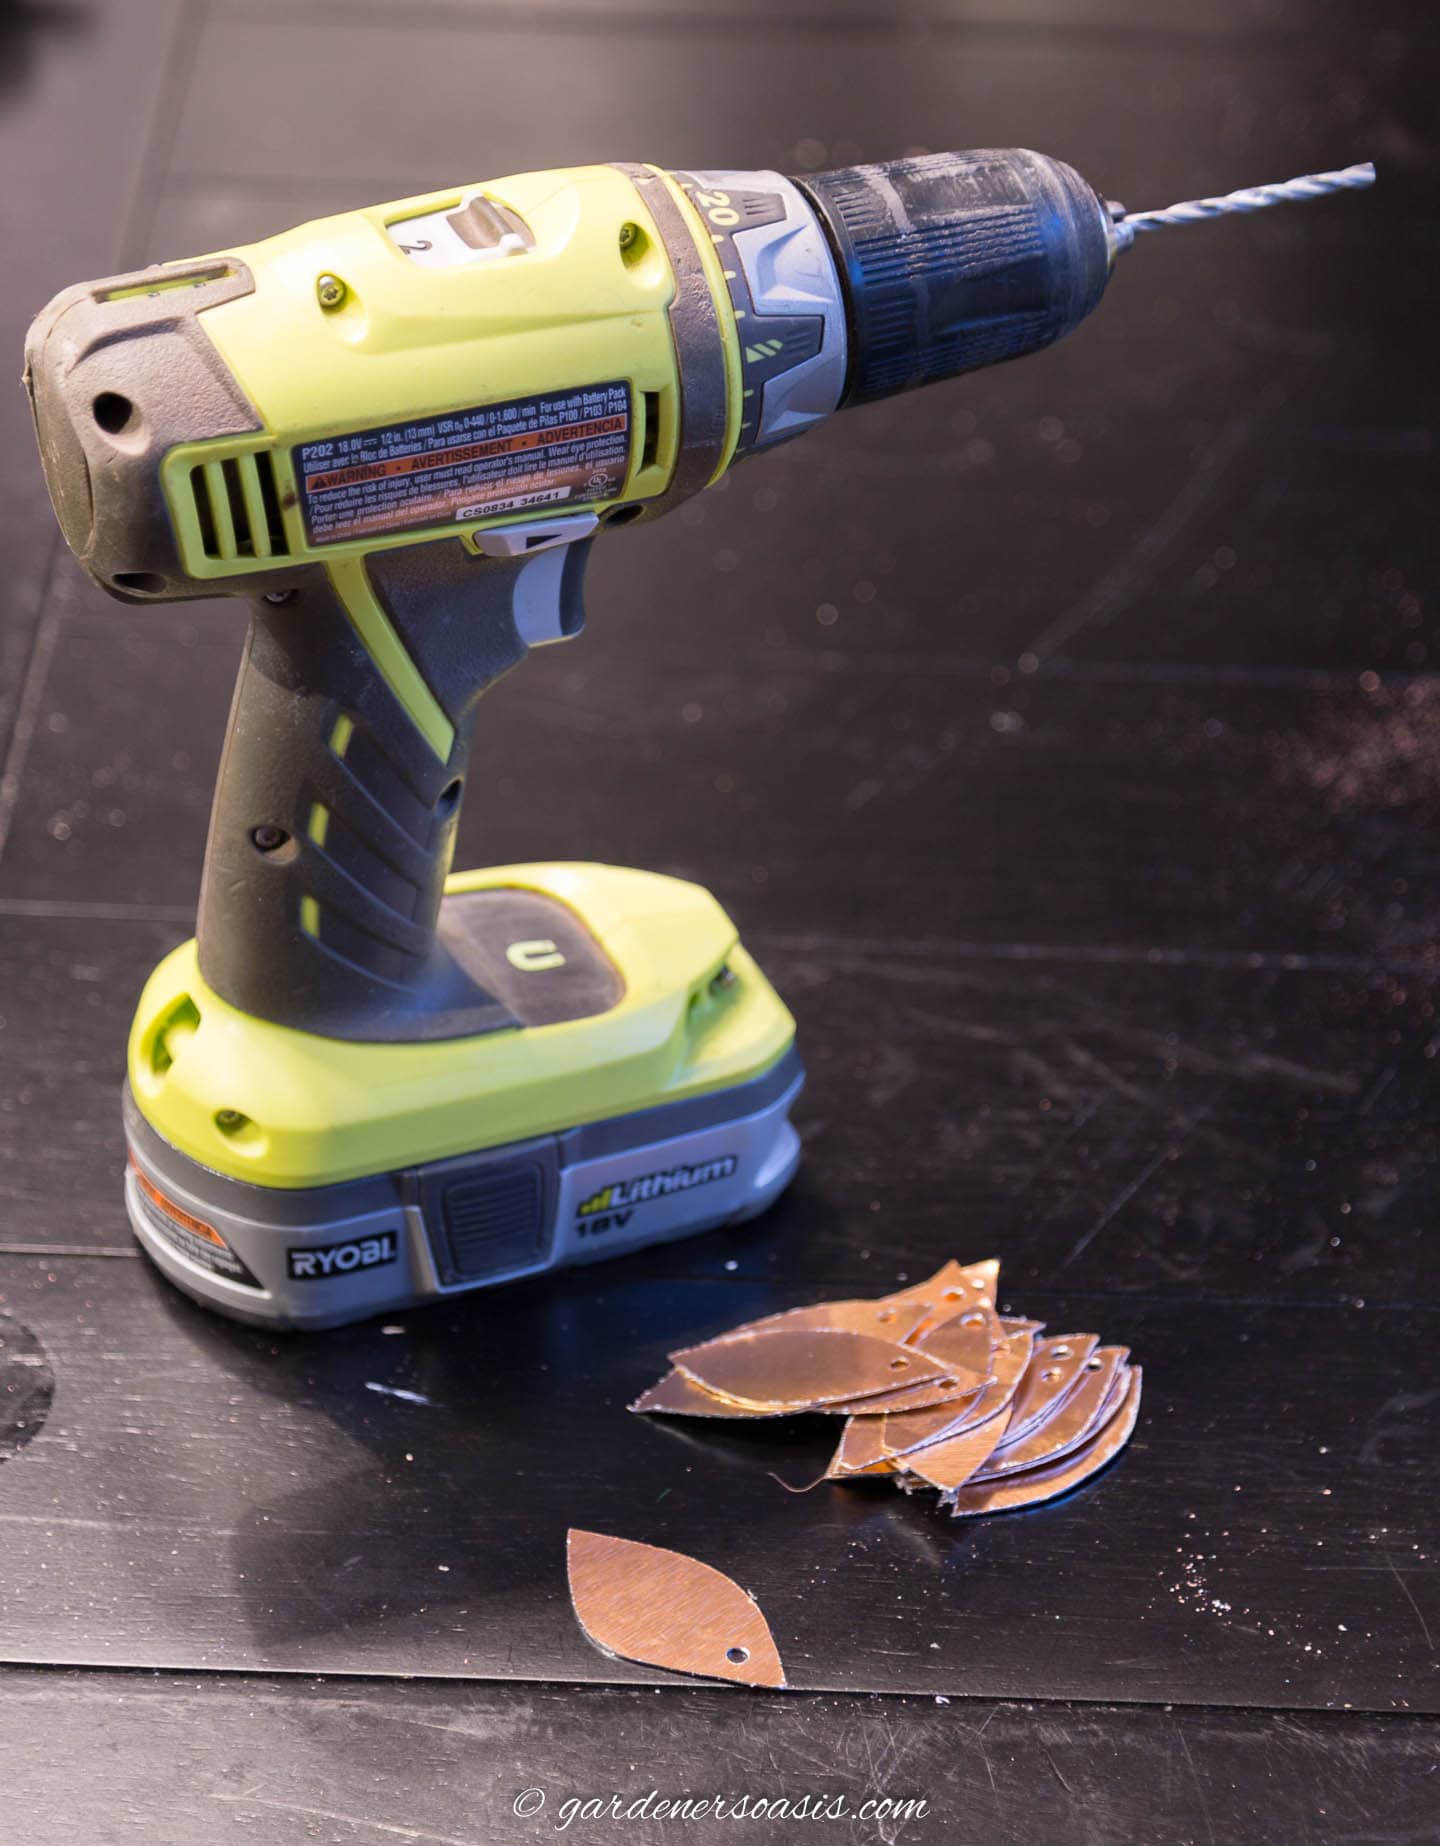
Use a 1/8″ drill bit that is meant for drilling metal to create a hole at the end of each leaf.
If your copper sheeting has a plastic coating, you can remove it from the leaves now.
Cut a 2″ to 3″ long piece of copper wire.
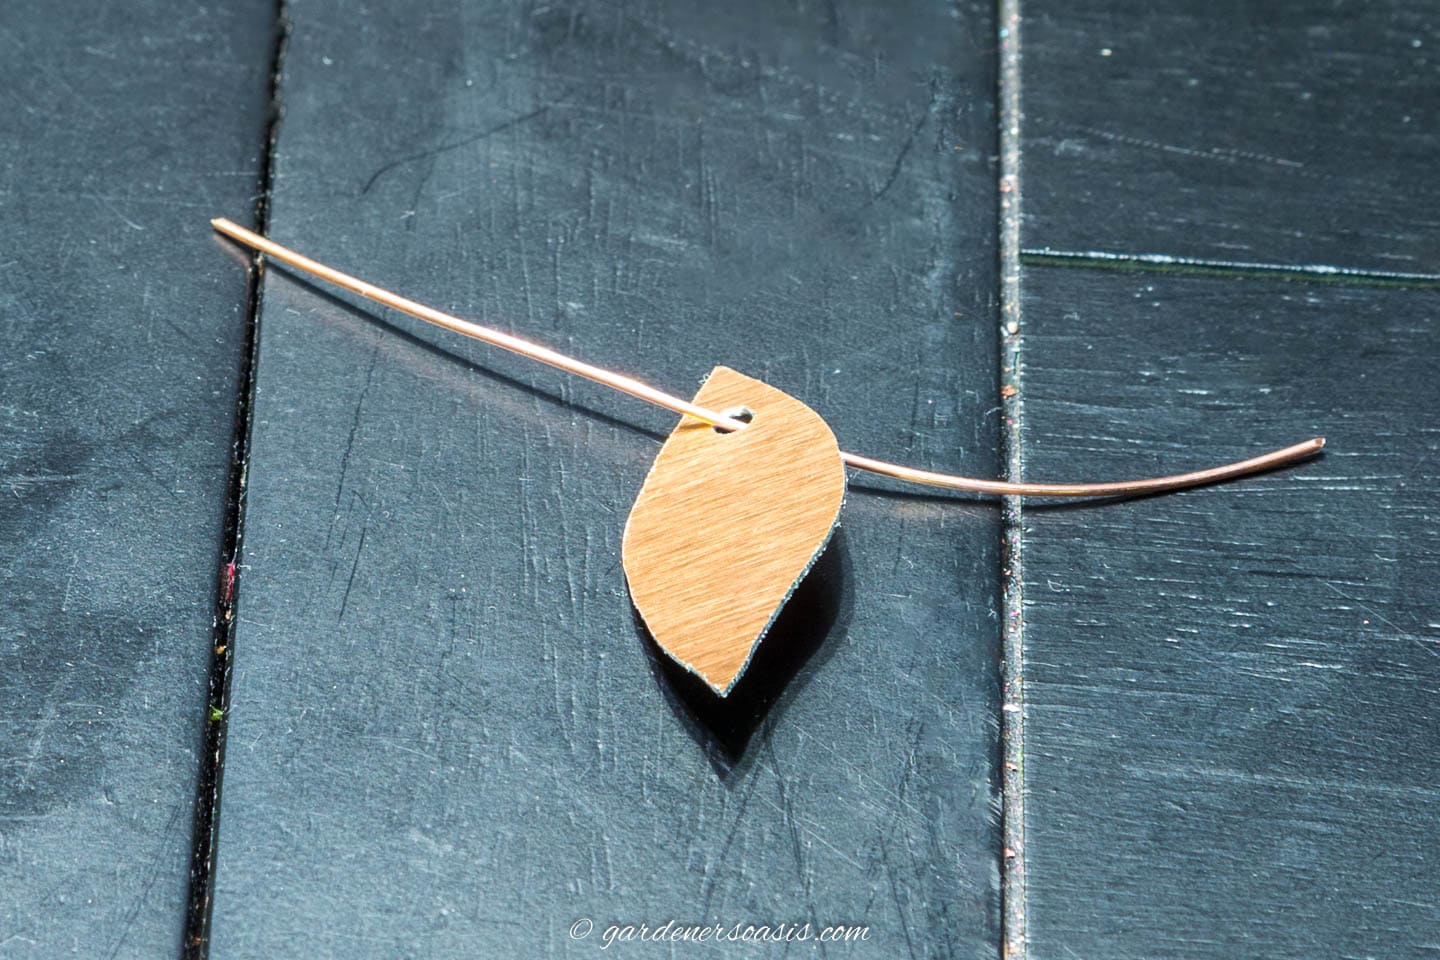
Stick the copper wire through the hole in the leaf.
3 | Assemble the rain chain
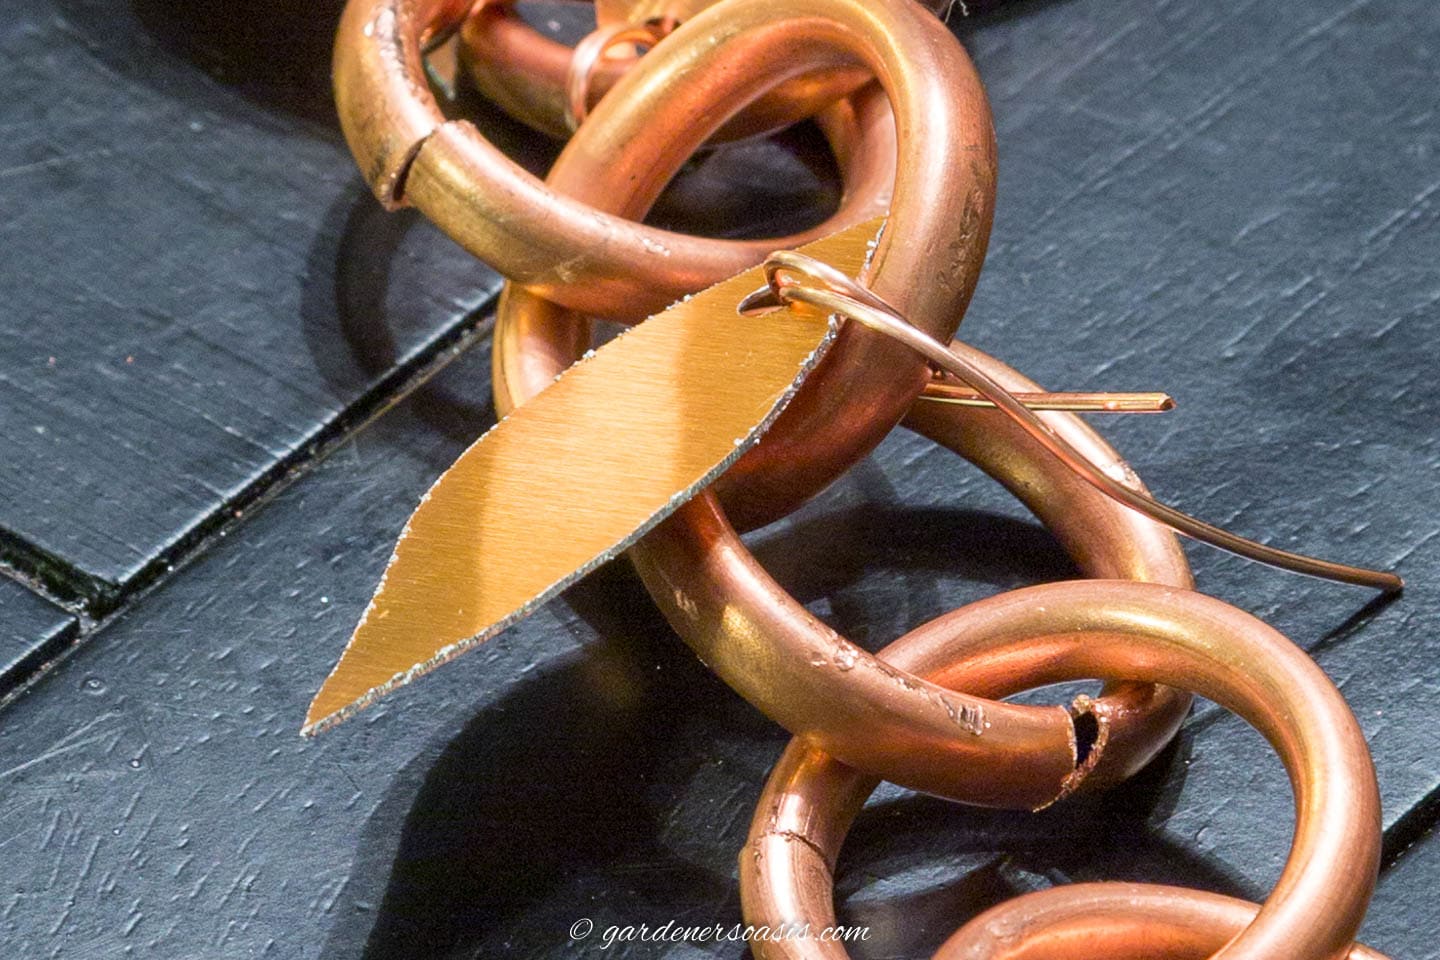
Wrap the wire around the chain link twice going back through the hole in the leaf.
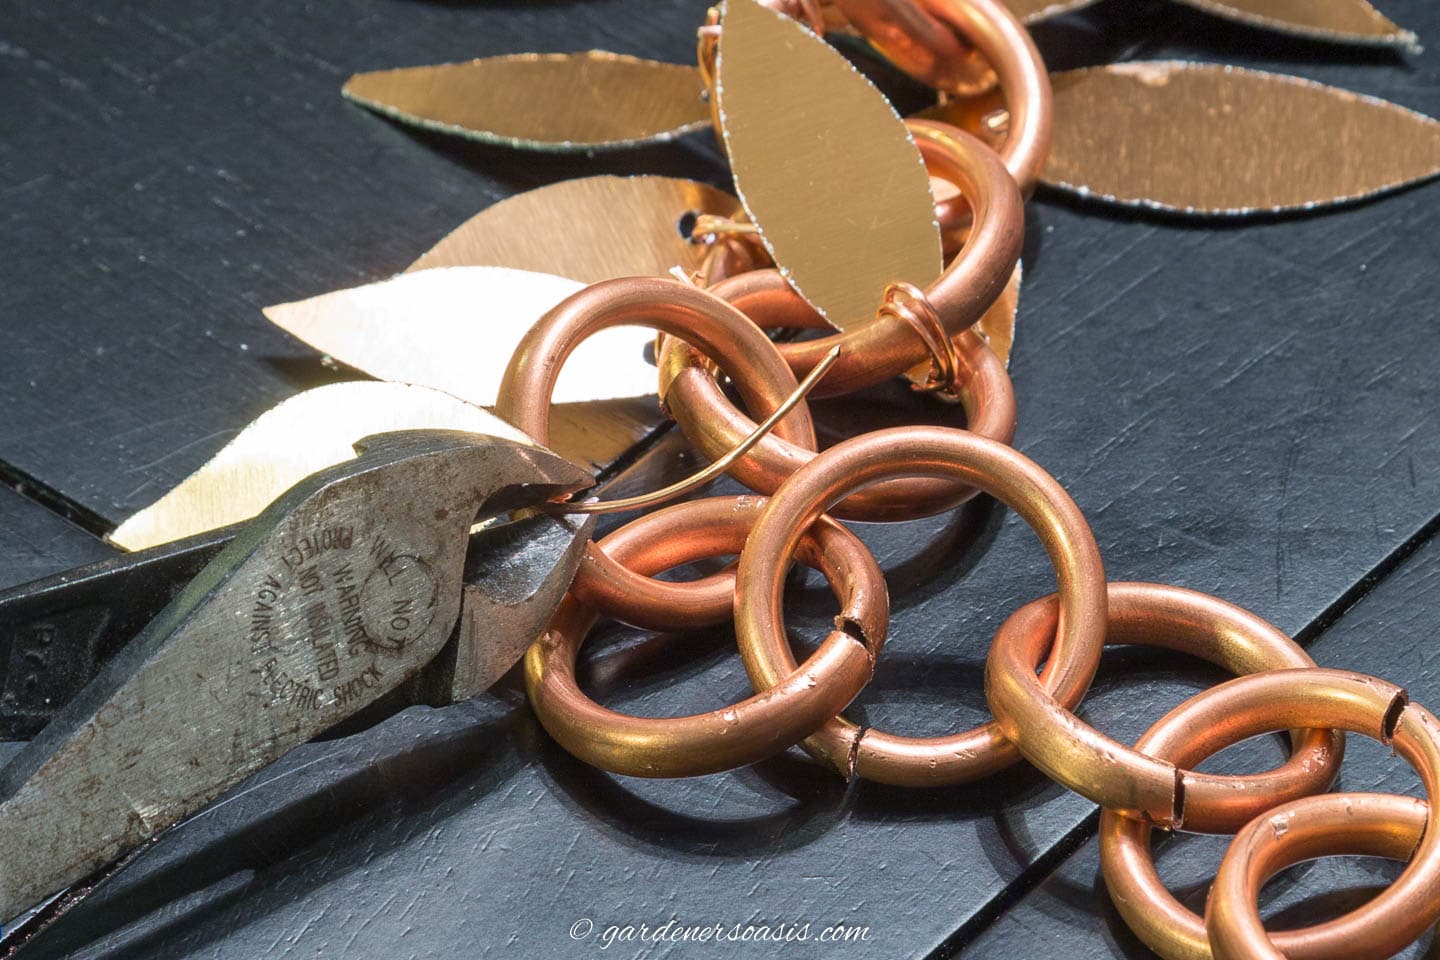
Use a wire cutter to cut off any ends that are sticking out.
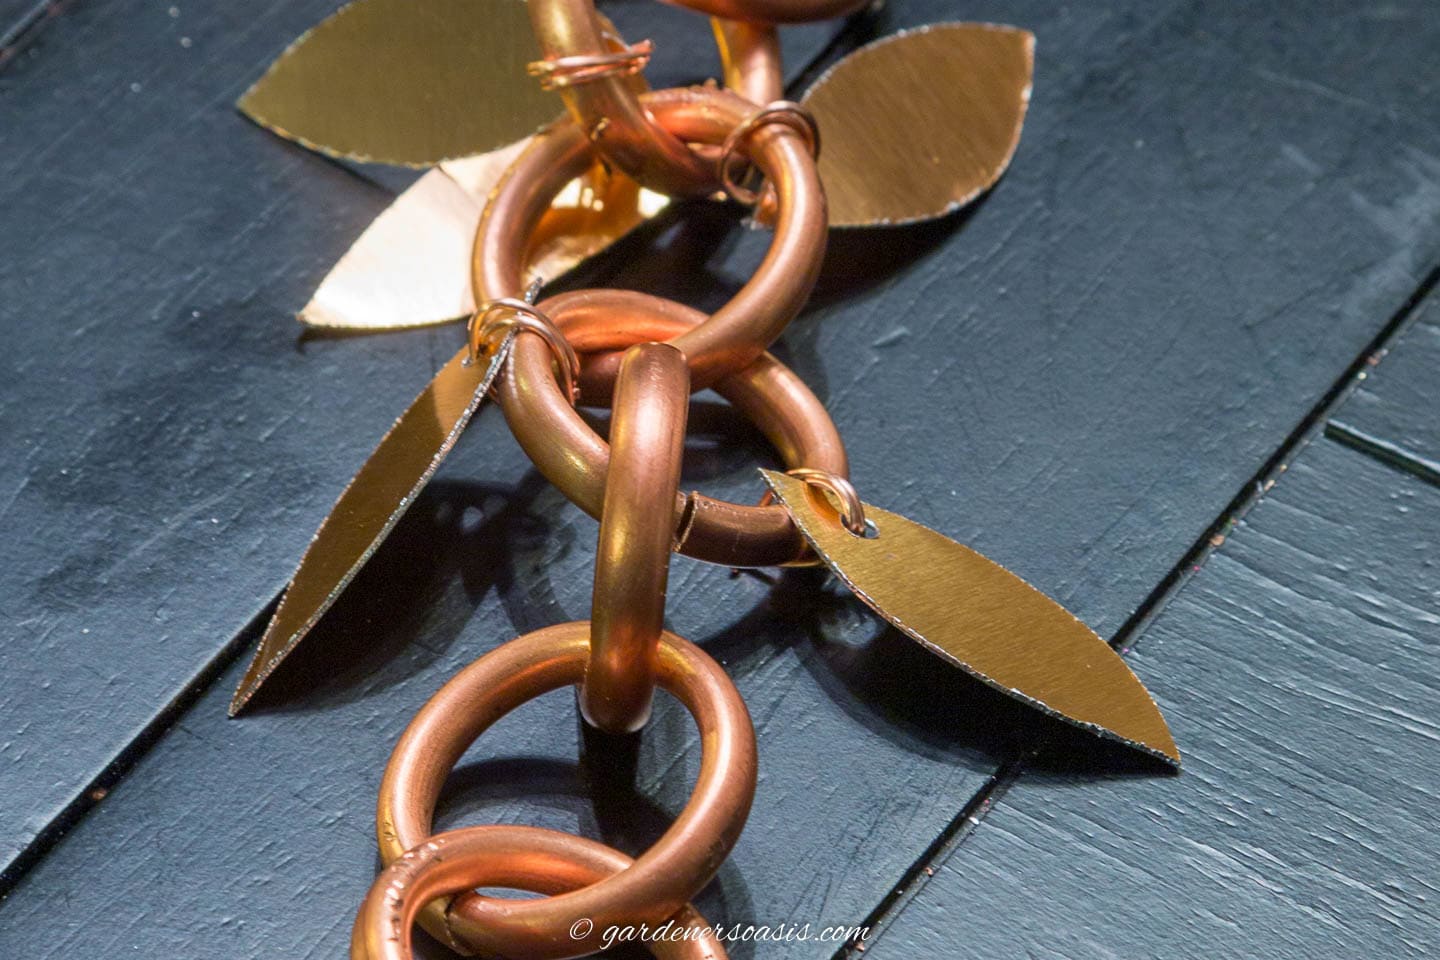
If you are using 2 leaves per link like I did, attach the second leaf on the other side of the chain.
Repeat until you have added leaves to all of the links.
Hang The Rain Chain
Now, it’s time to hang up your rain chain.
You’ll need to either remove the downspout or drill a 2¼” hole in the bottom of your gutter where you want the rain chain to go.
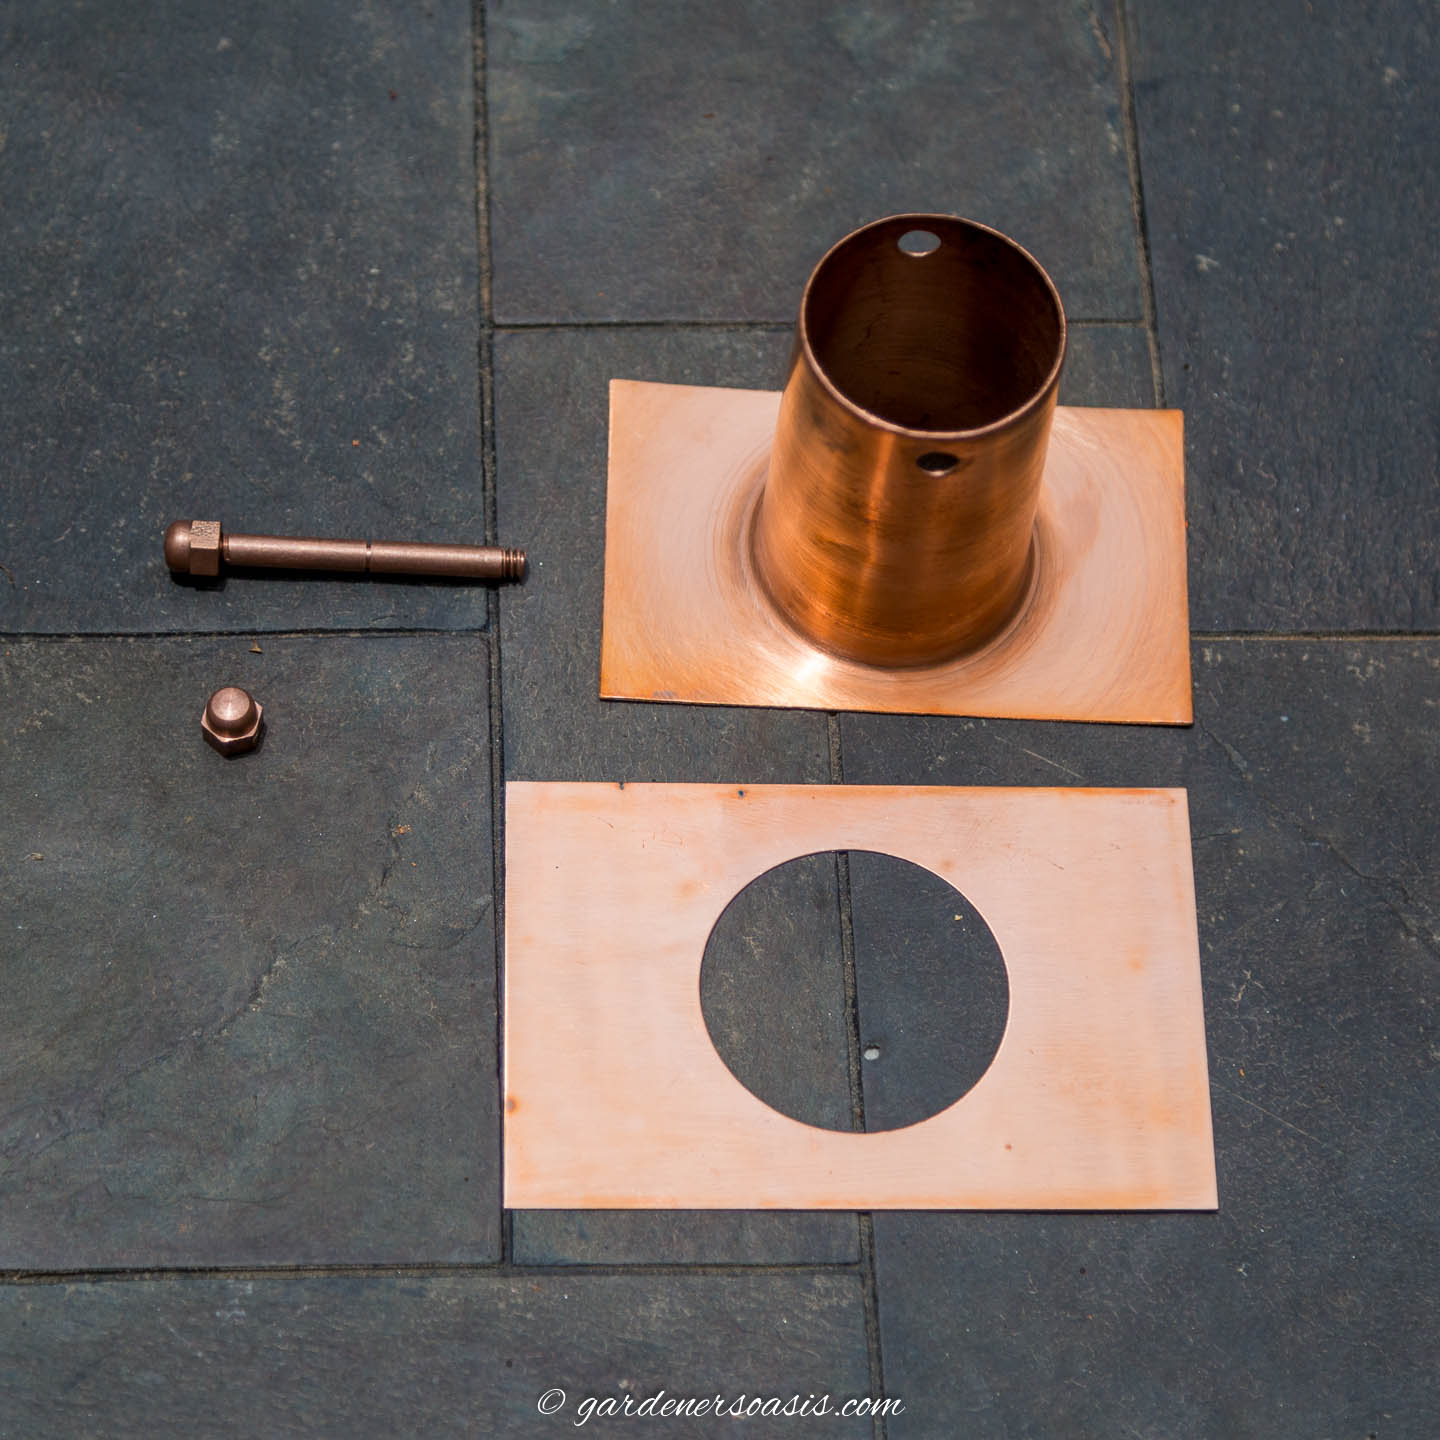
Remove the bolt and pin from the bottom of the gutter adapter.
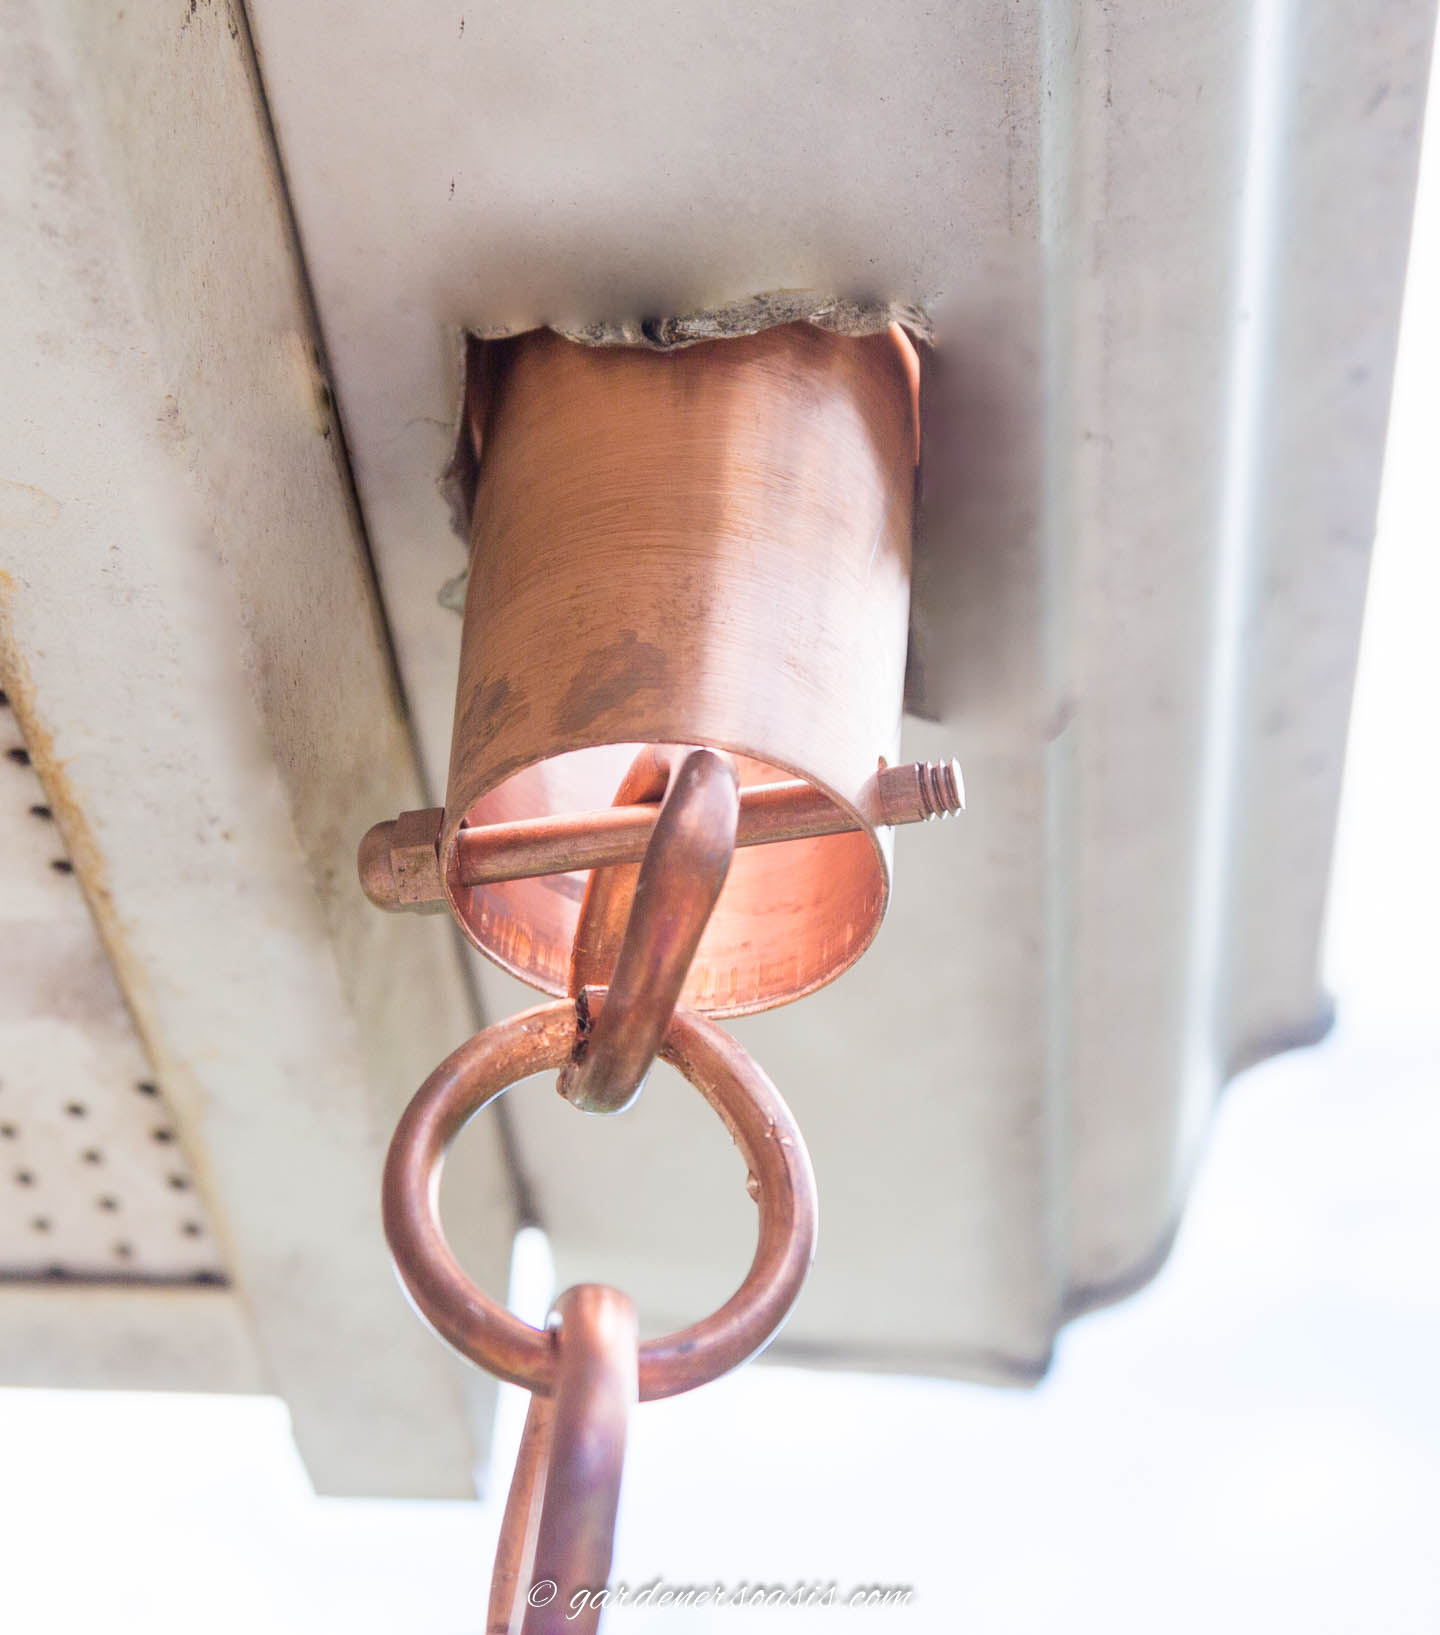
Put the gutter adapter into the gutter so the end of it comes all the way through the hole.
Then attach the top of your rain chain to the pin and put the bolt back on.
For more details on this or on how to hang the rain chain with the V-hook adapter that comes with most rain chains, read our guide on how to install a rain chain.
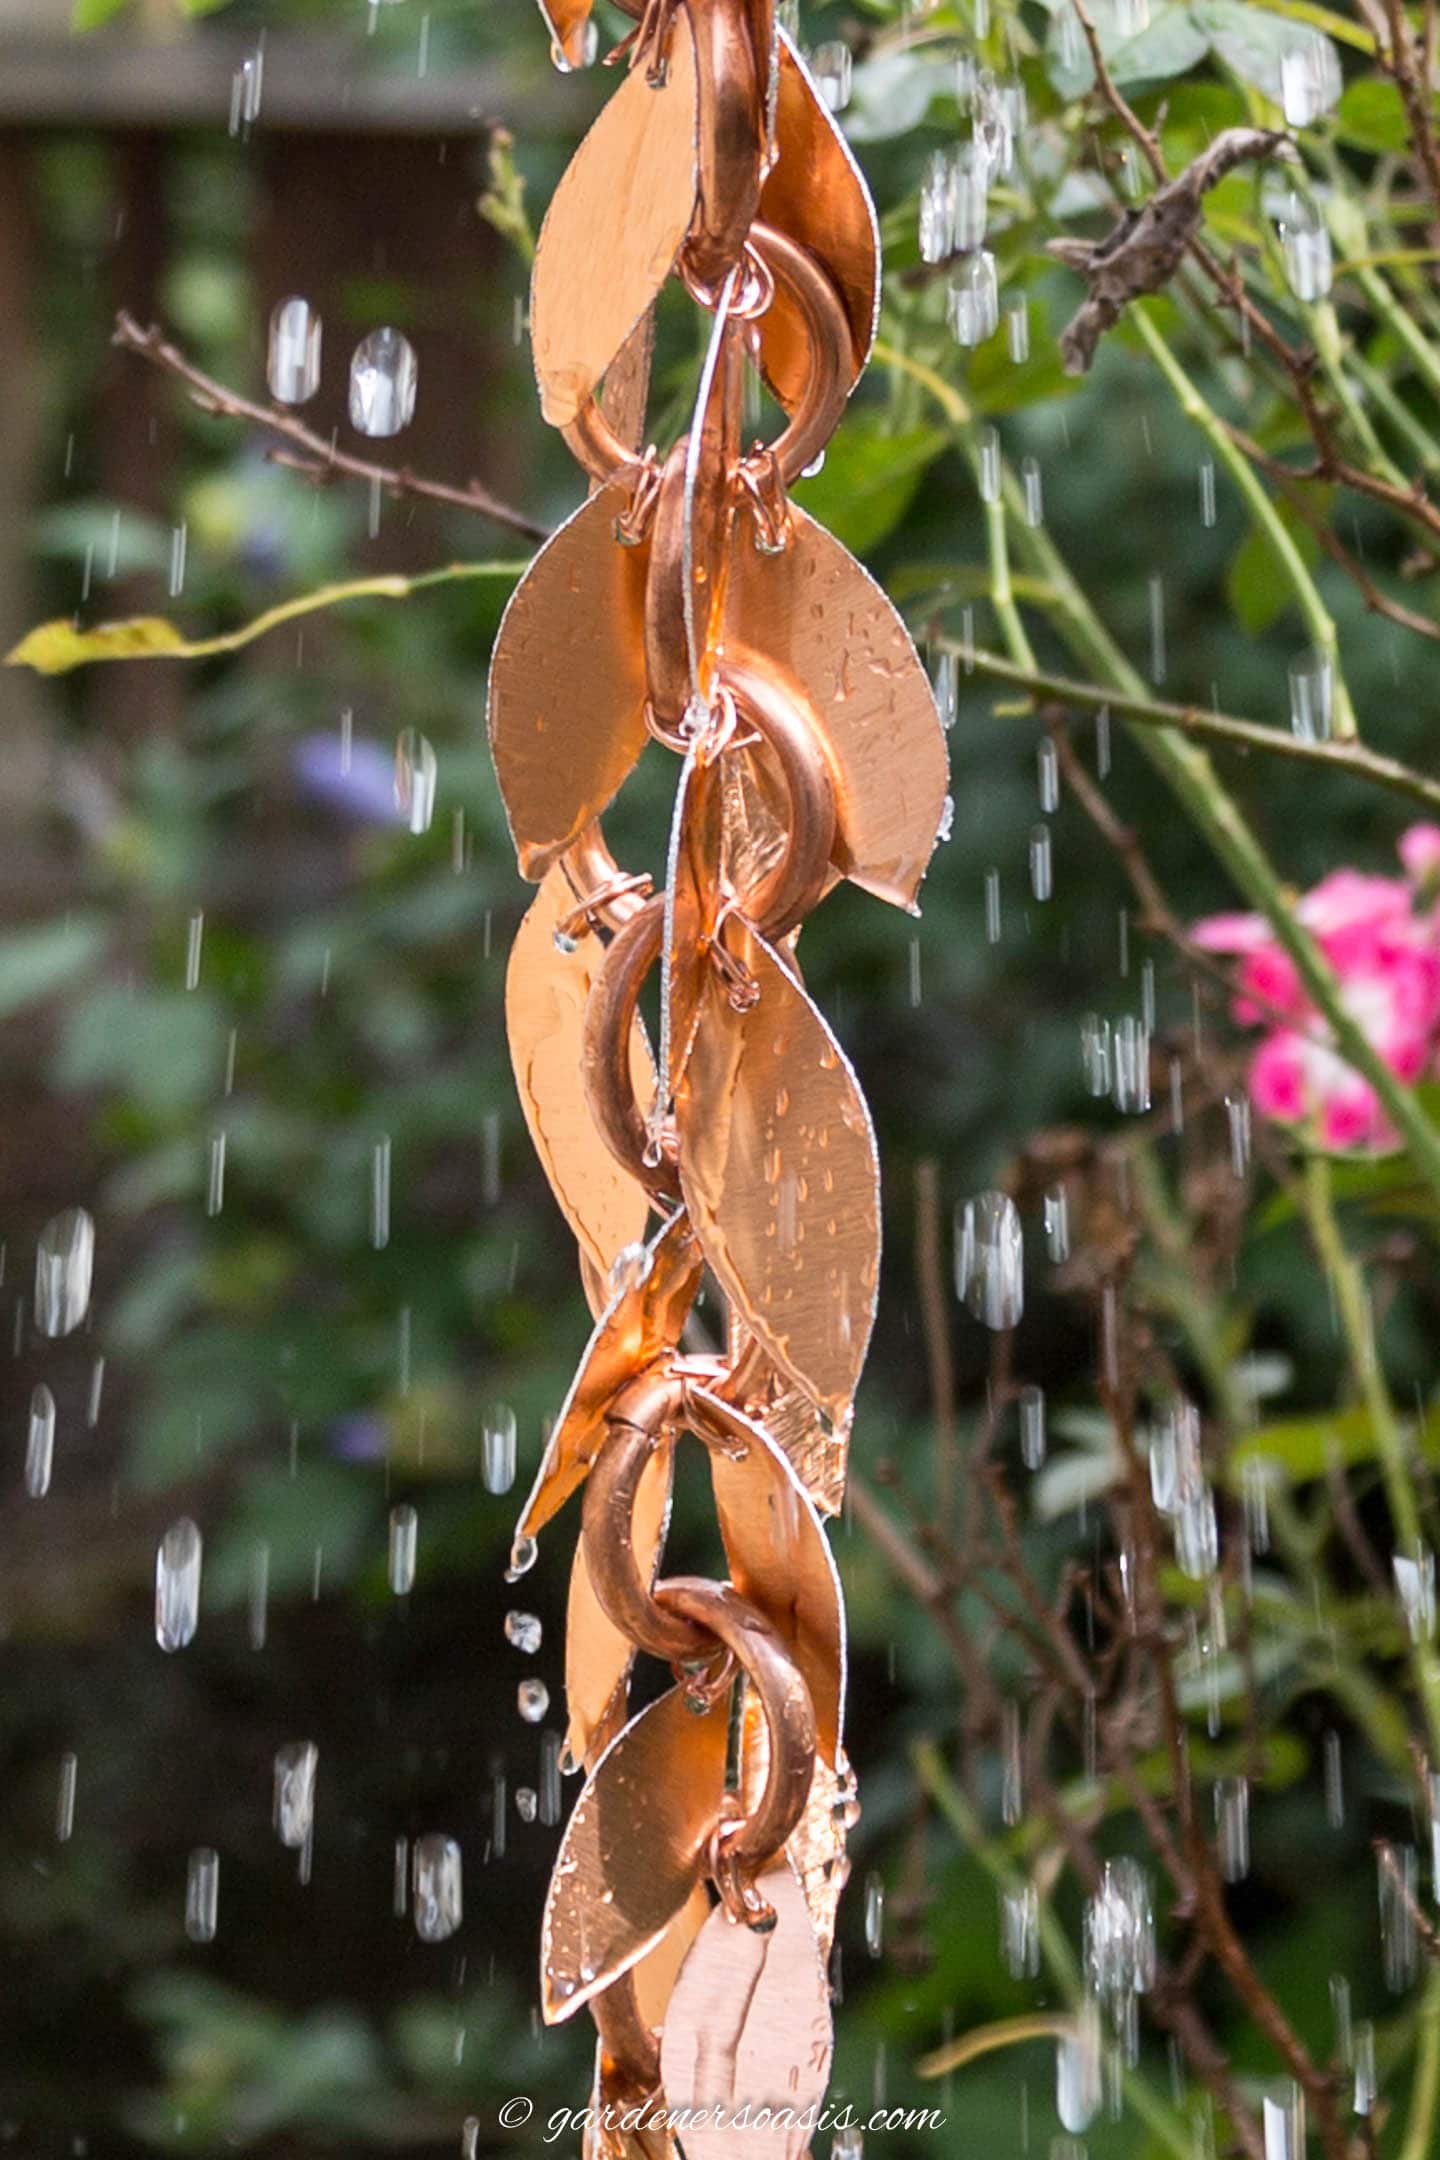
Test with water
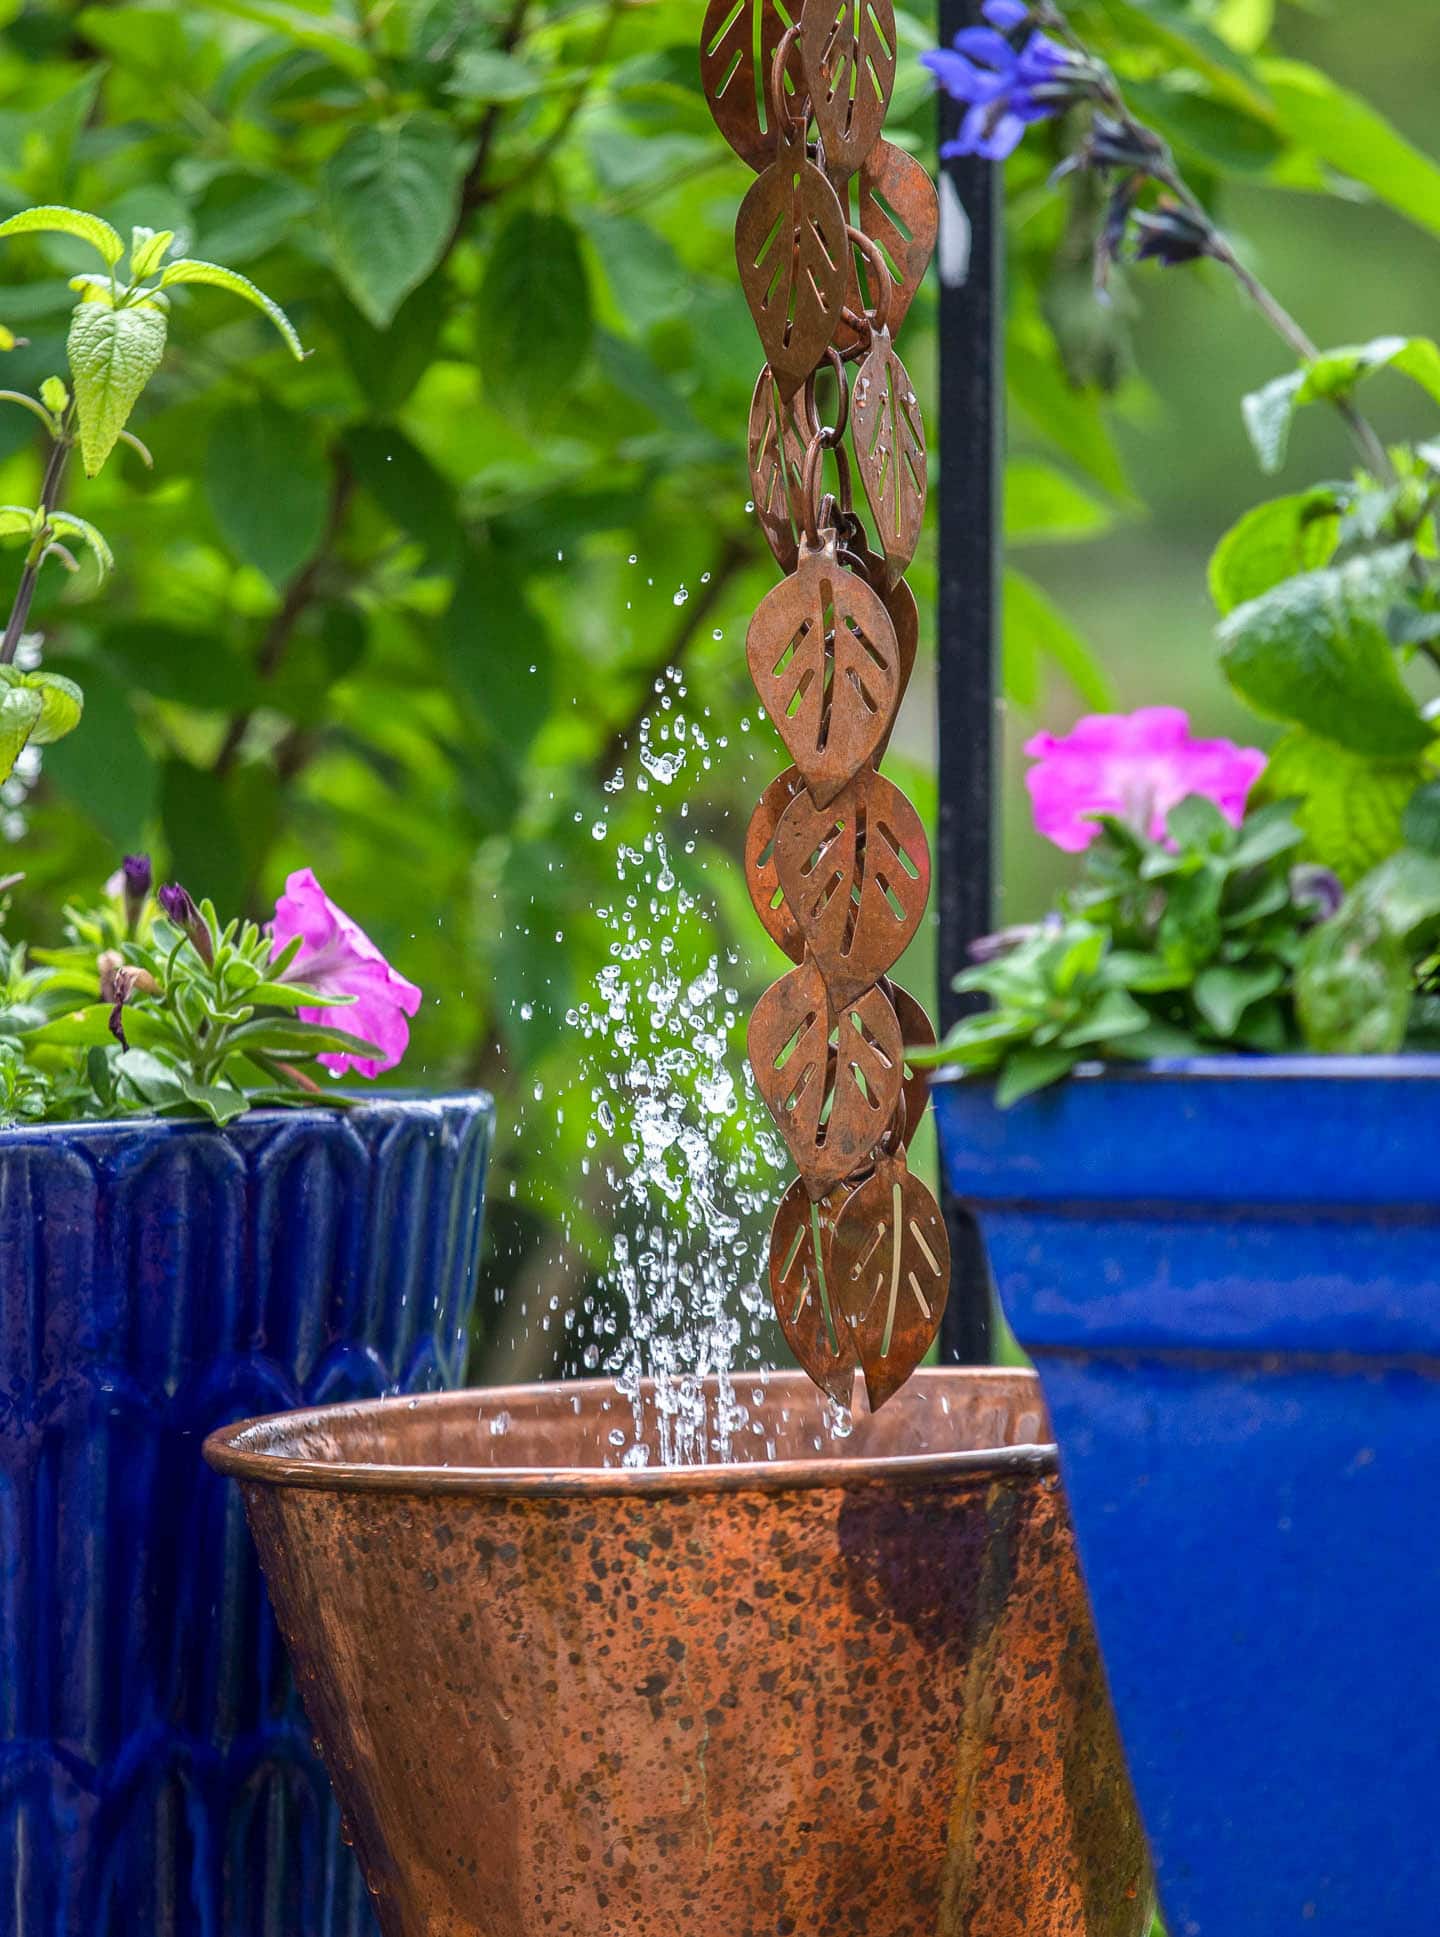
You can test your rain chain by putting a hose in the gutter and letting the water run down over your rain chain.

If you see the water splashing out too far from the rain chain, you may need to re-position the leaves.
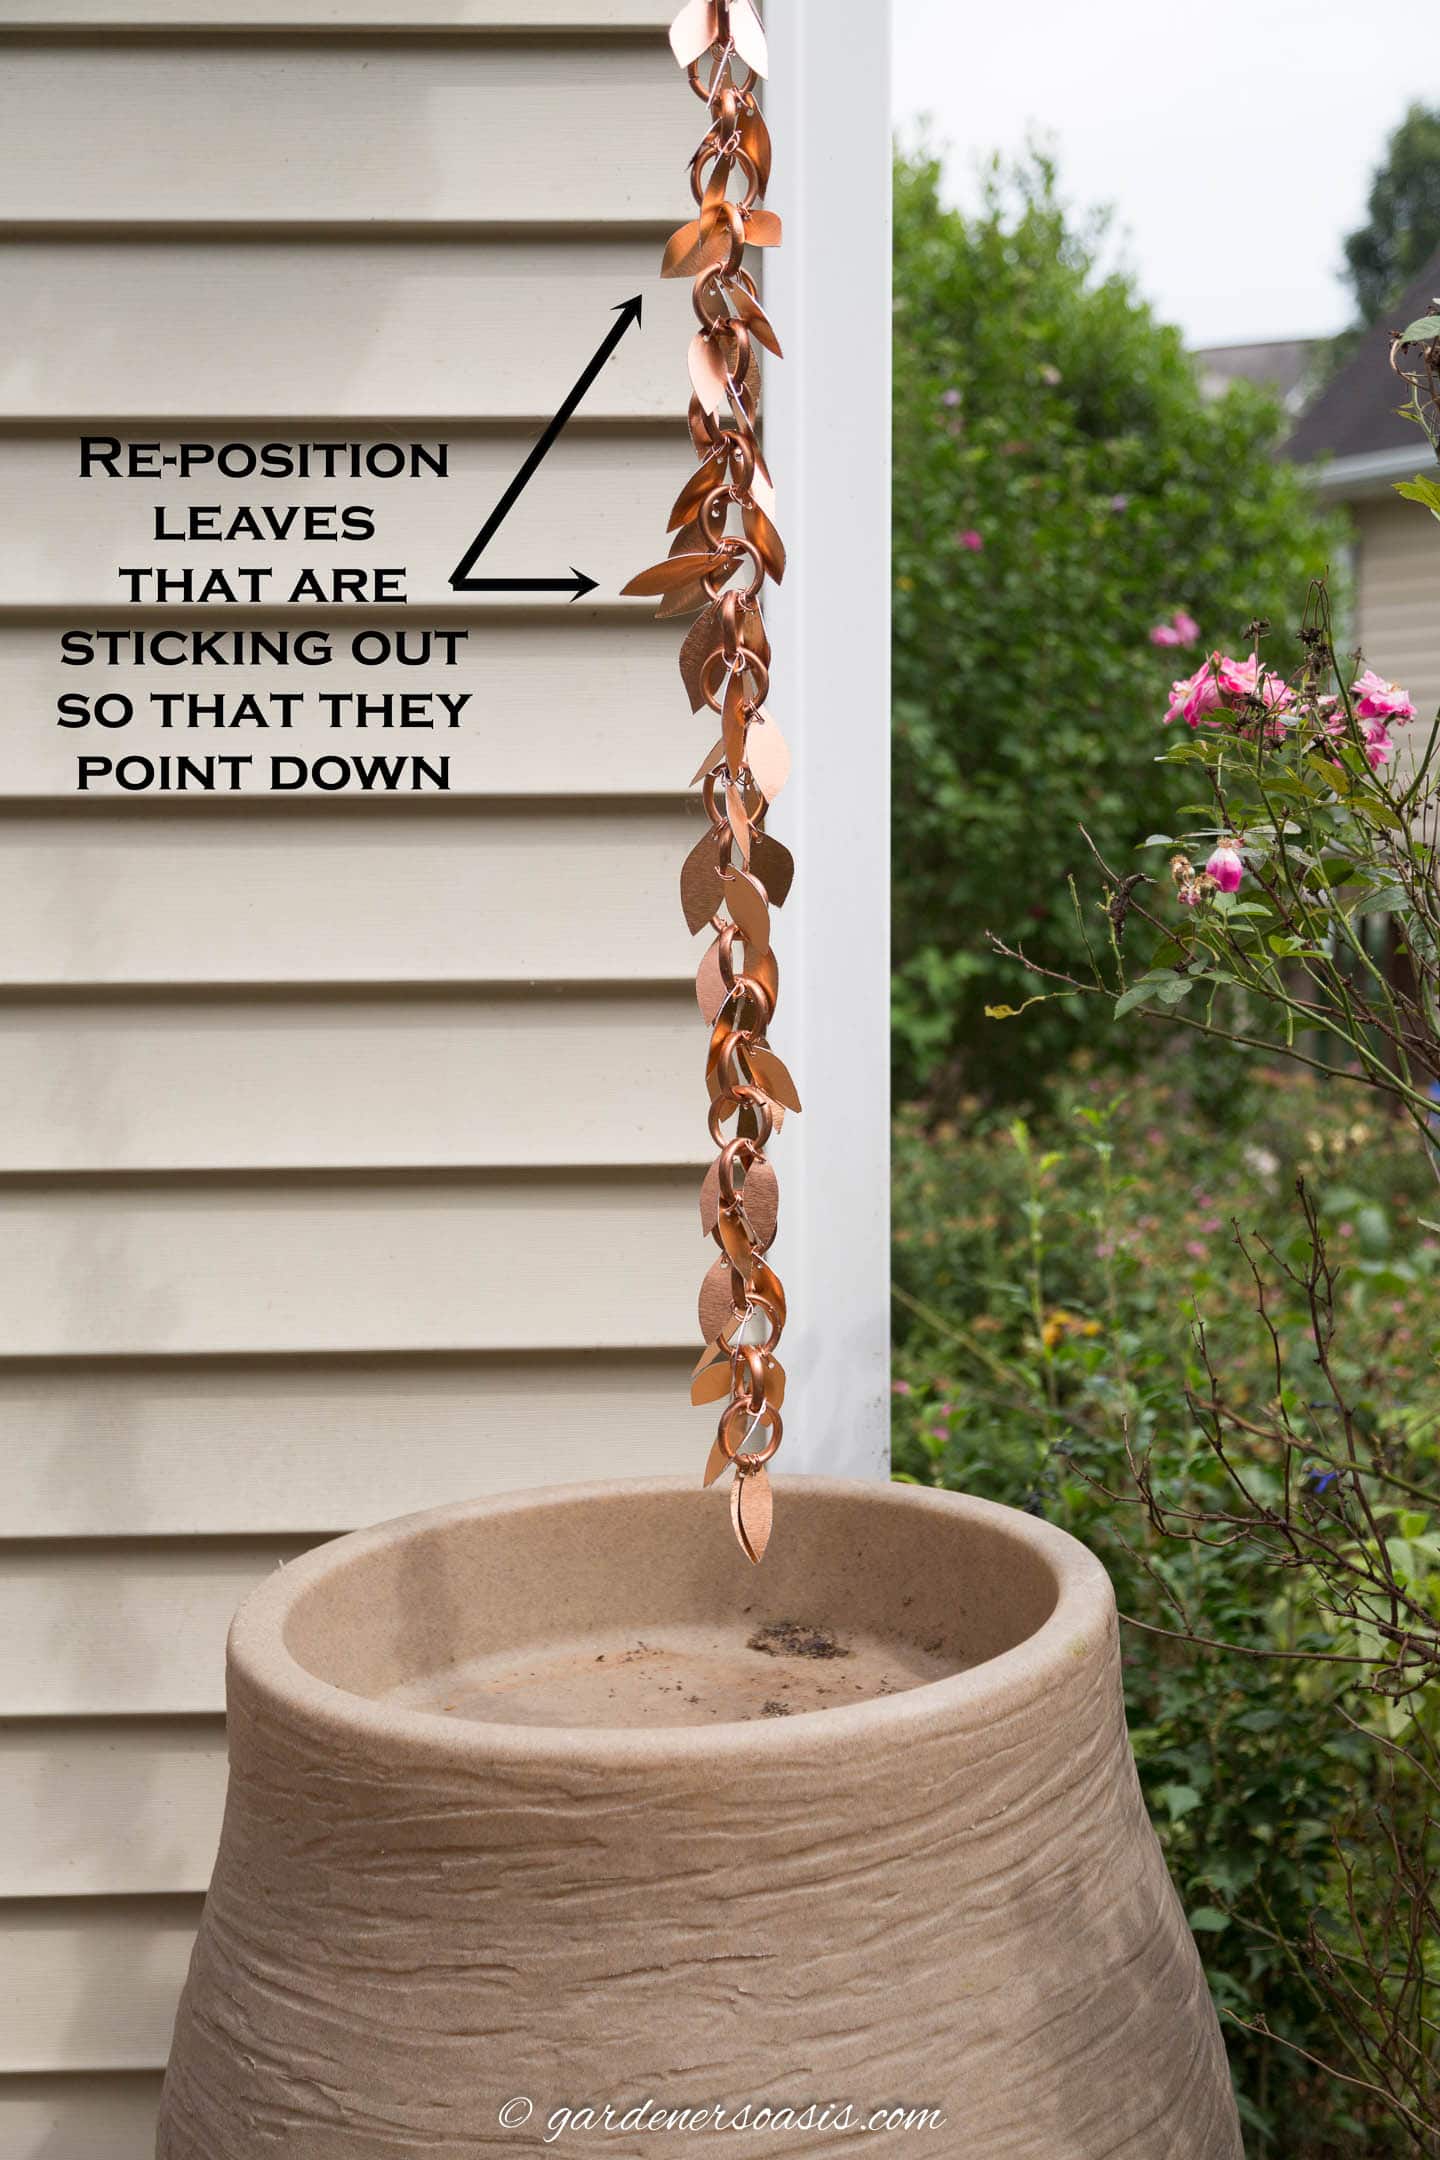
Look for any that are pointing out and move them around until they are pointing down.
In my experience, this is a one-time adjustment. I have had my leaf rain chain installed for quite a few years now and I have never had to do it again.
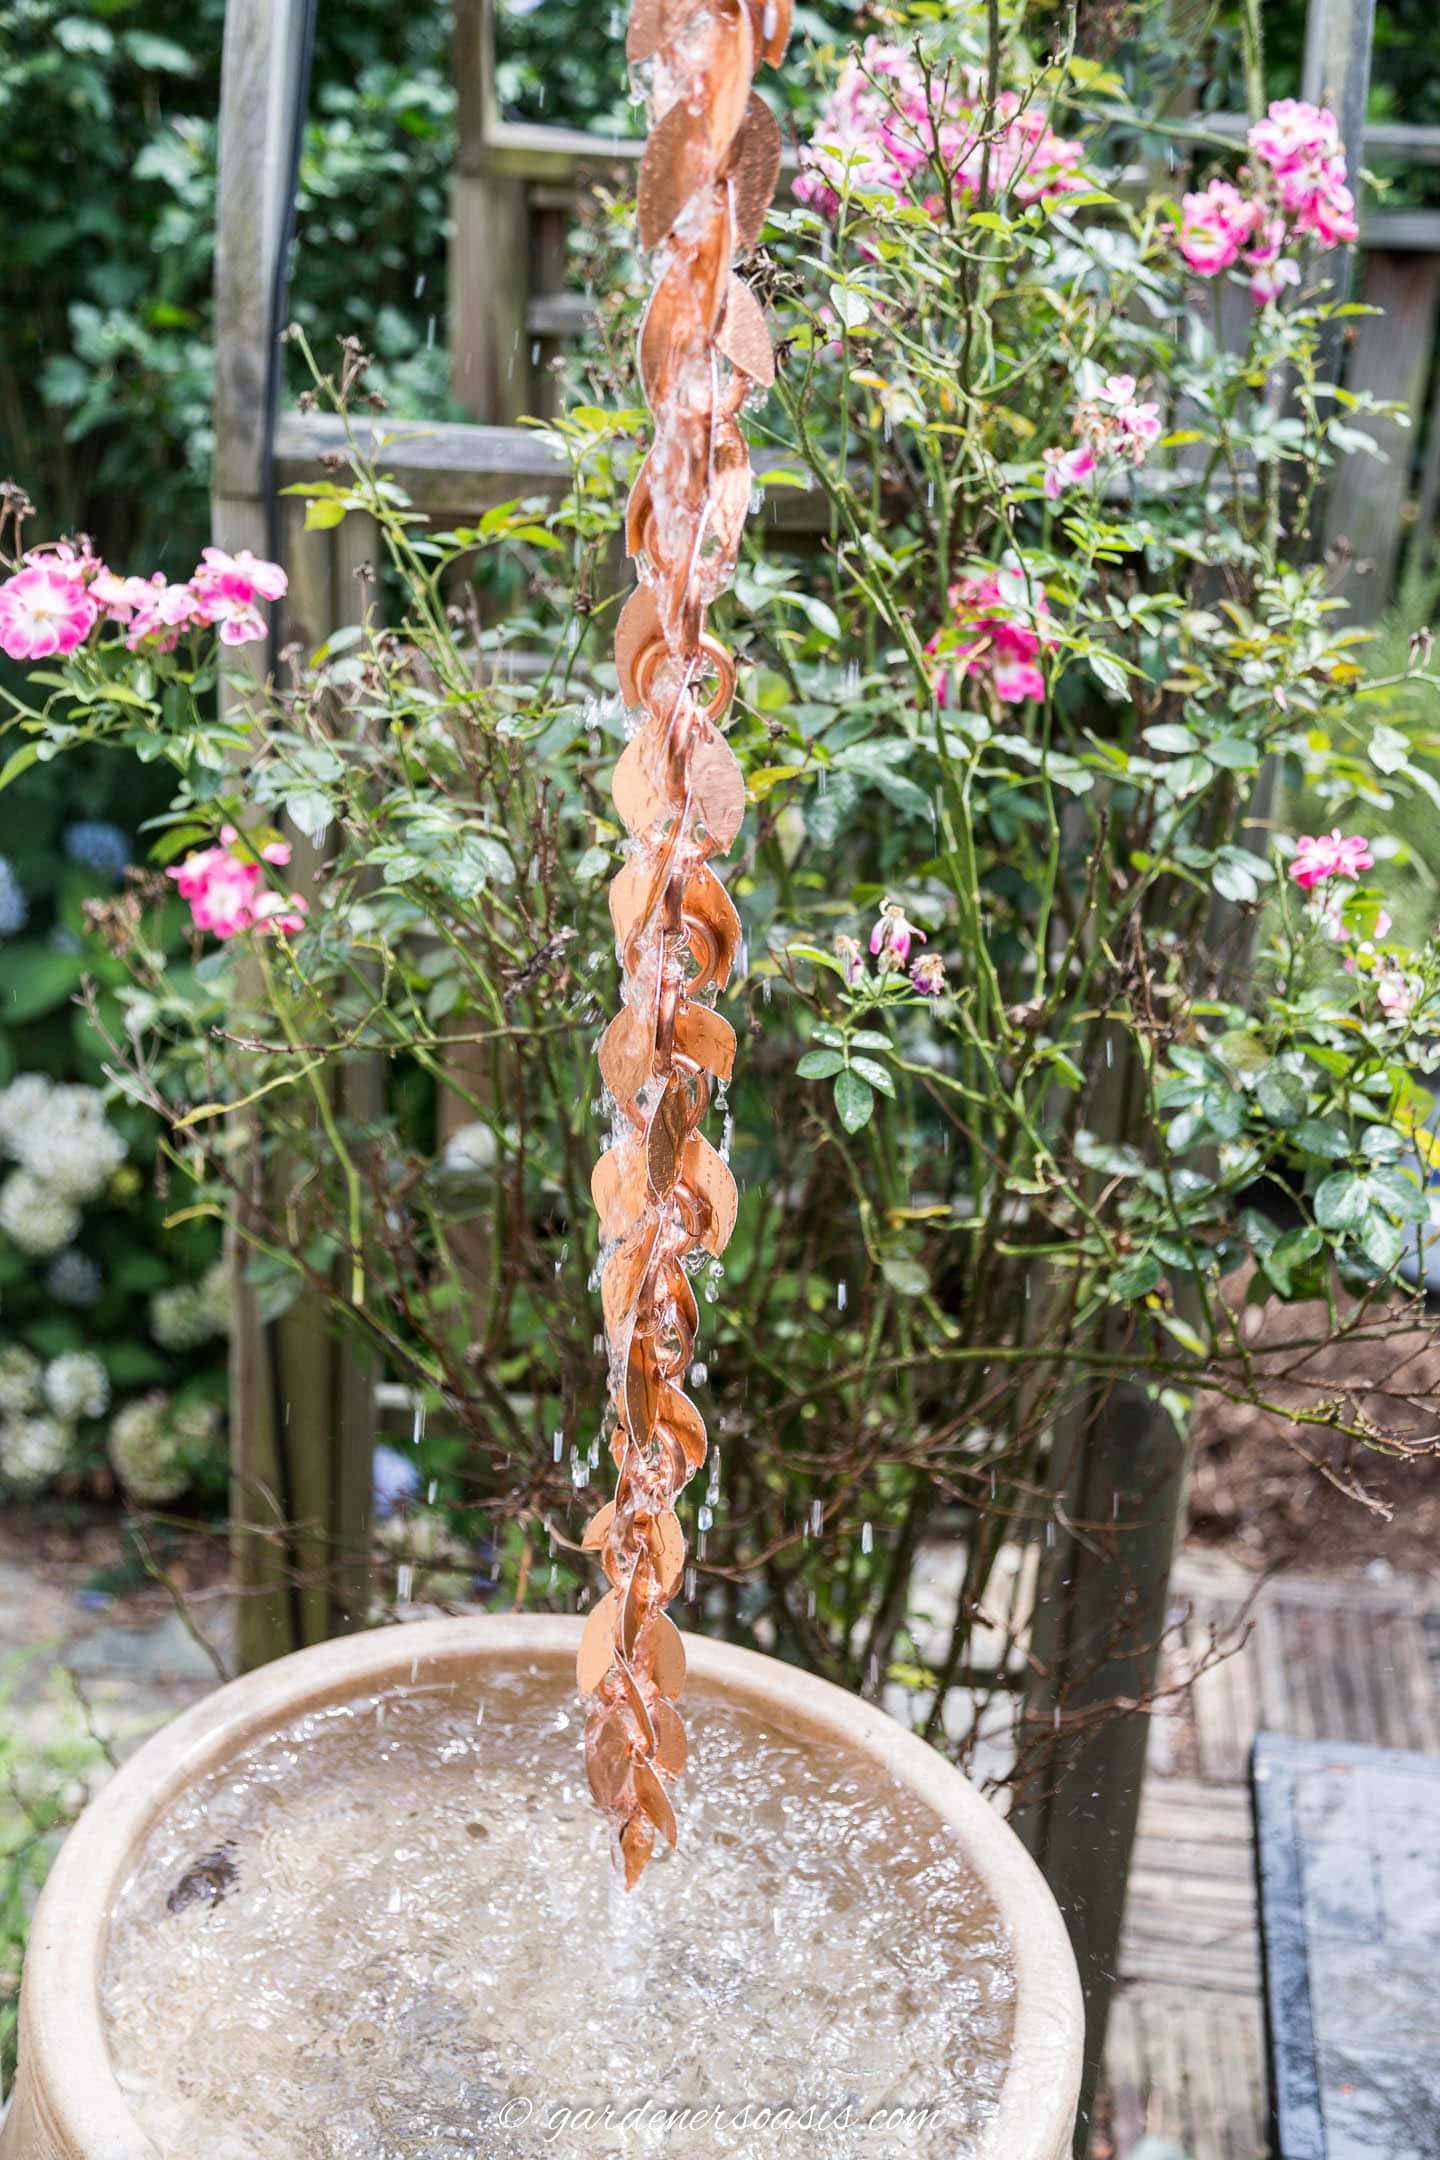
Test with the water again until you see it flowing smoothly down your rain chain.
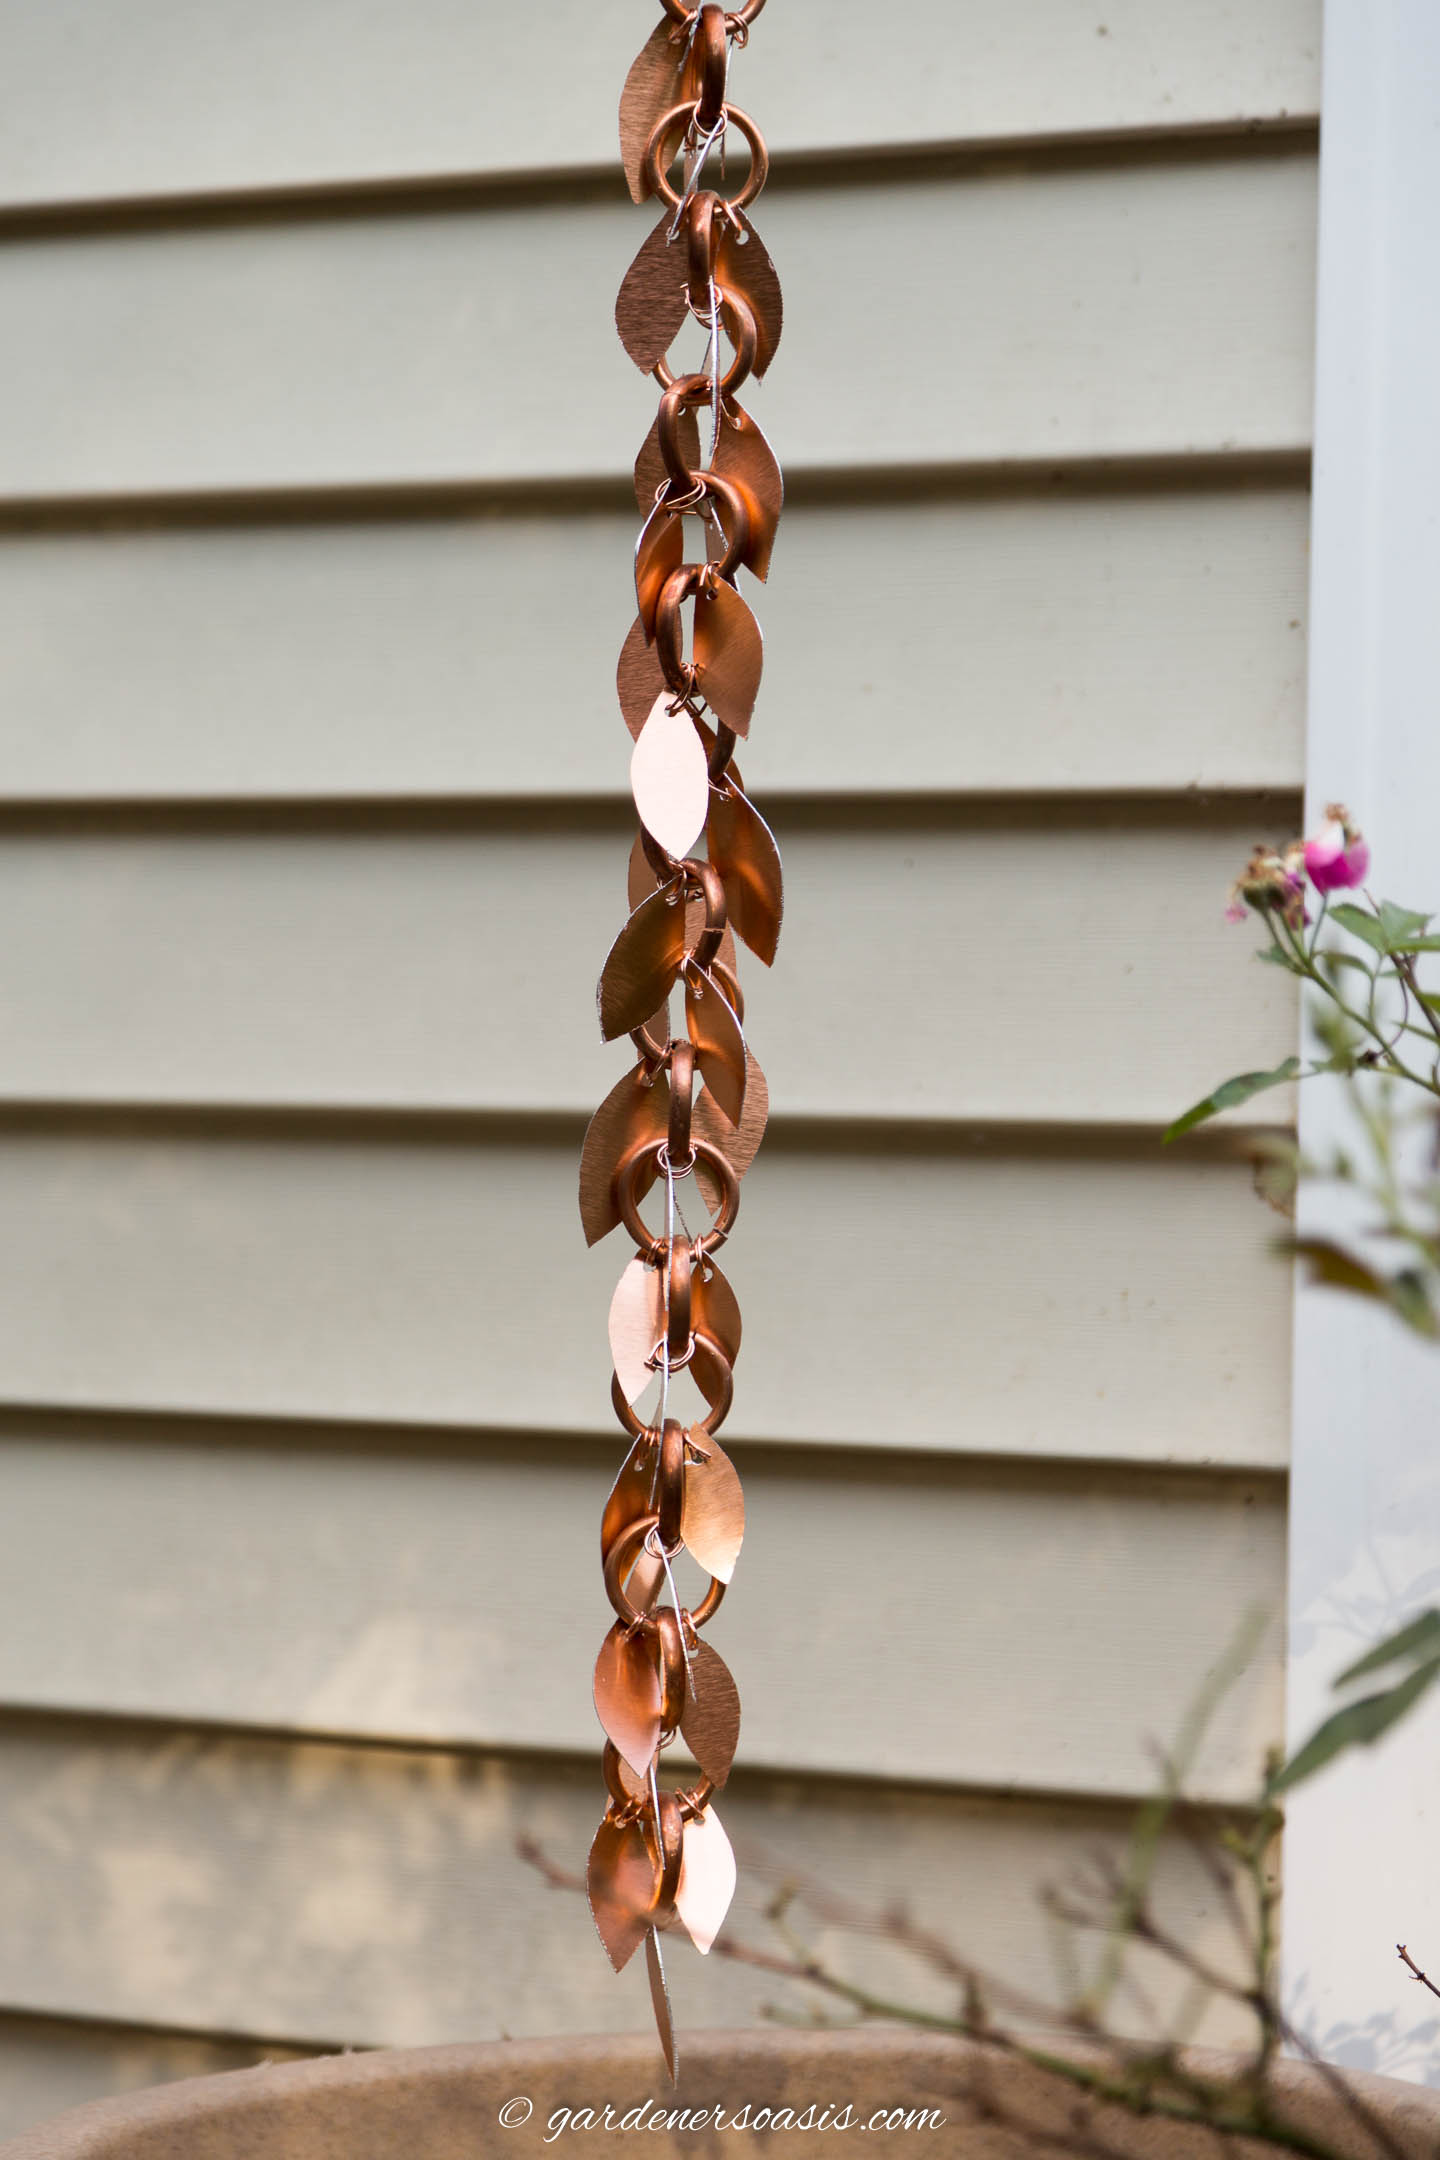
The finished leaf rain chain
After many years, I think this DIY leaf rain chain is still my favorite.
It looks so pretty with water running down it.
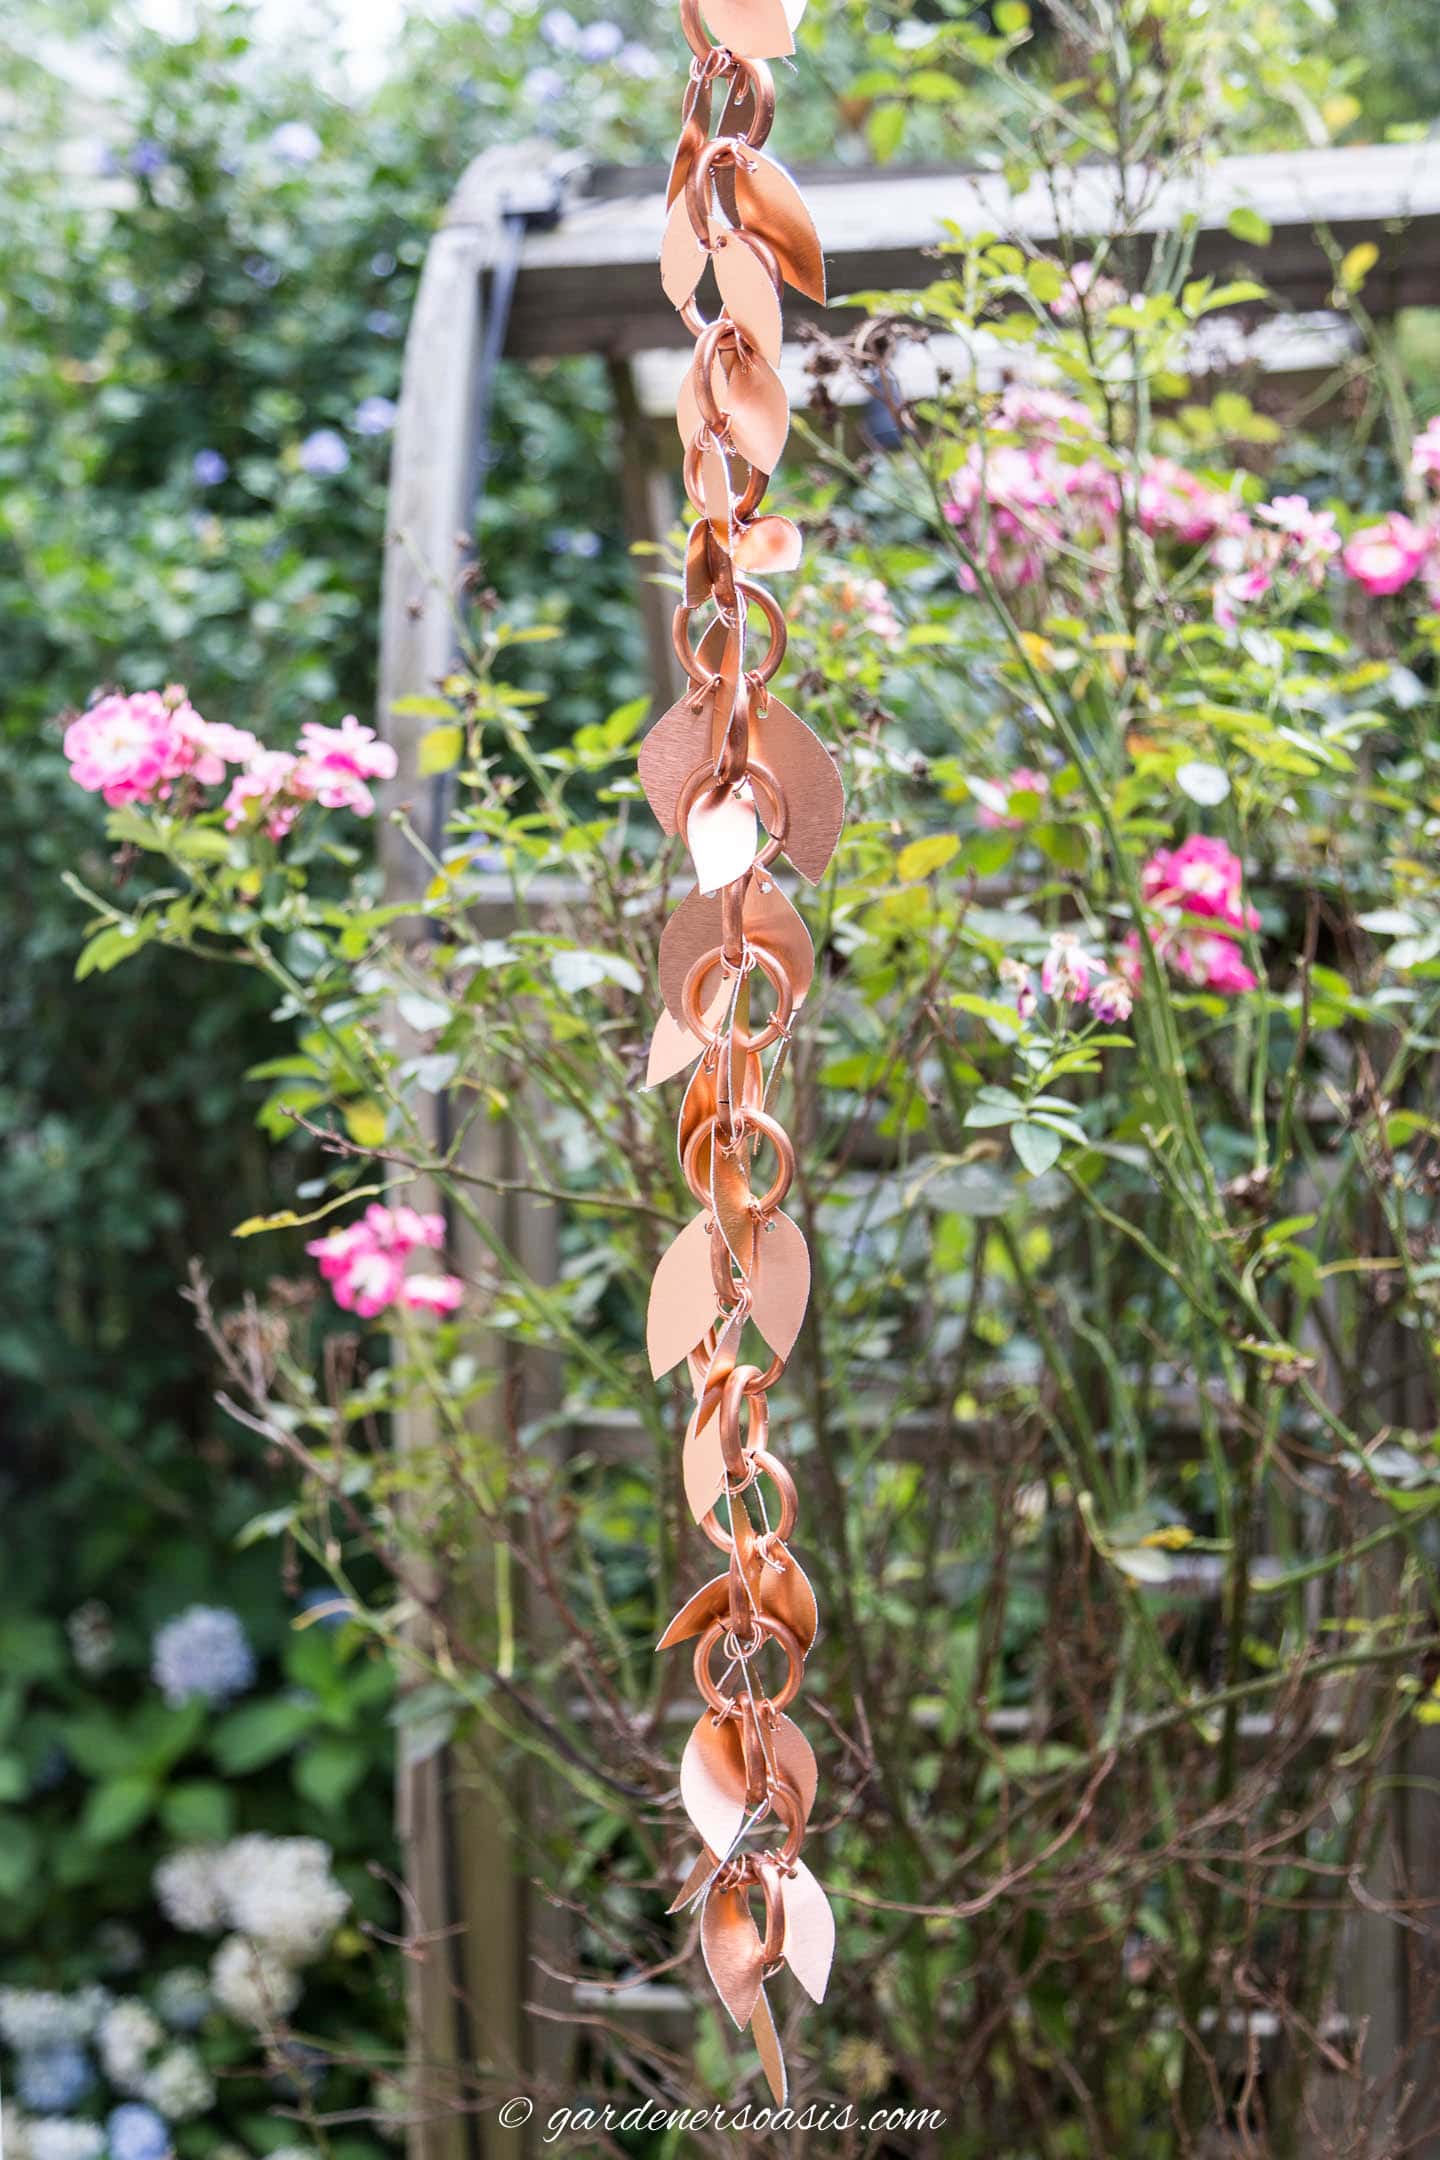
And even when it’s not raining, I love the way it looks in the garden.
Other rain chain ideas you might like
- Everything you’ve ever wanted to know about rain chains
- How to make a copper ring rain chain
- How to install a rain chain