
A Step-By-Step Foundation Planting Guide For Better Curb Appeal
If you’re ready to upgrade the boring, builder-grade front yard your house came with, this step-by-step foundation planting guide will show you go from scratch to professional, organic curves. I’m walking you through the entire process so you can finally give your home the curb appeal it deserves.

We’ve all seen it: the classic builder-grade front yard.
It usually consists of a perfectly straight, narrow mulch bed hugging the foundation, a couple of lonely evergreens, and a vast sea of grass that looks generic and uninspired.
And its exactly what my house looked like when I moved in.
I knew immediately that the landscaping had to go.
But even when you’re motivated, staring at a blank slate of grass and siding is intimidating. Where do you actually start?
That’s where this foundation planting guide comes in handy.
In this tutorial, we’re moving beyond just “buying pretty plants” and looking at how to actually design foundation planting that will improve your home’s curb appeal.
We’ll talk about how to use a garden hose to map out organic curves, how to layer heights to add interest, and how to choose a focal point plant that gives your home a custom, finished look.
Whether you’re ready to start digging today or you’re just starting to map things out, this step-by-step guide will help you create a front garden that actually feels like home.
Looking for more front yard garden ideas? You'll love these Front Yard Landscaping Ideas.
1 | Break the Box (Bed Shape & Size)
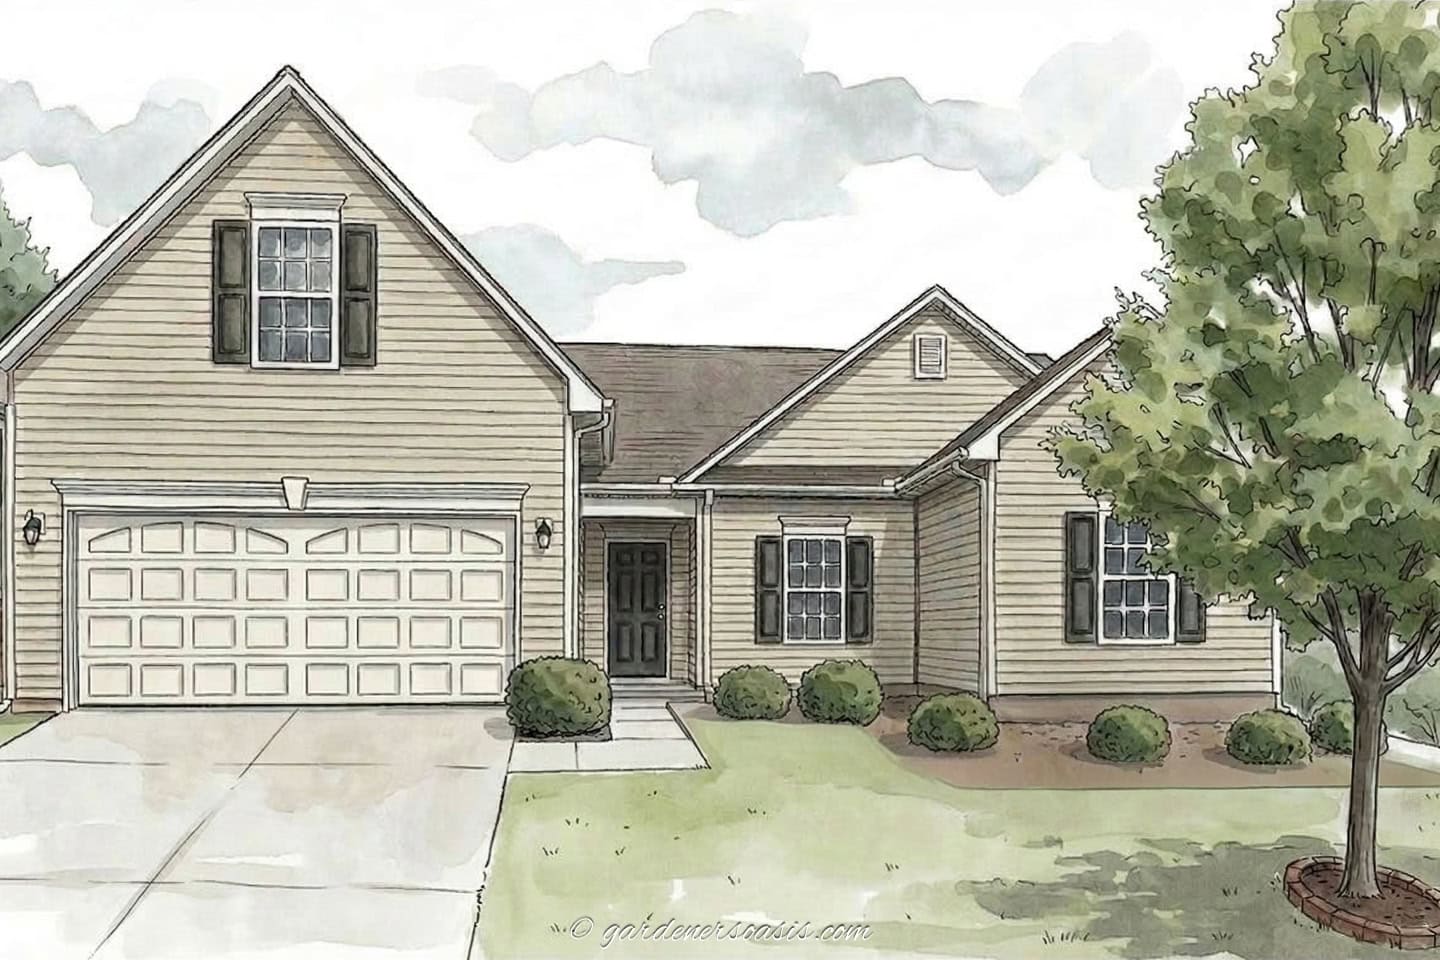
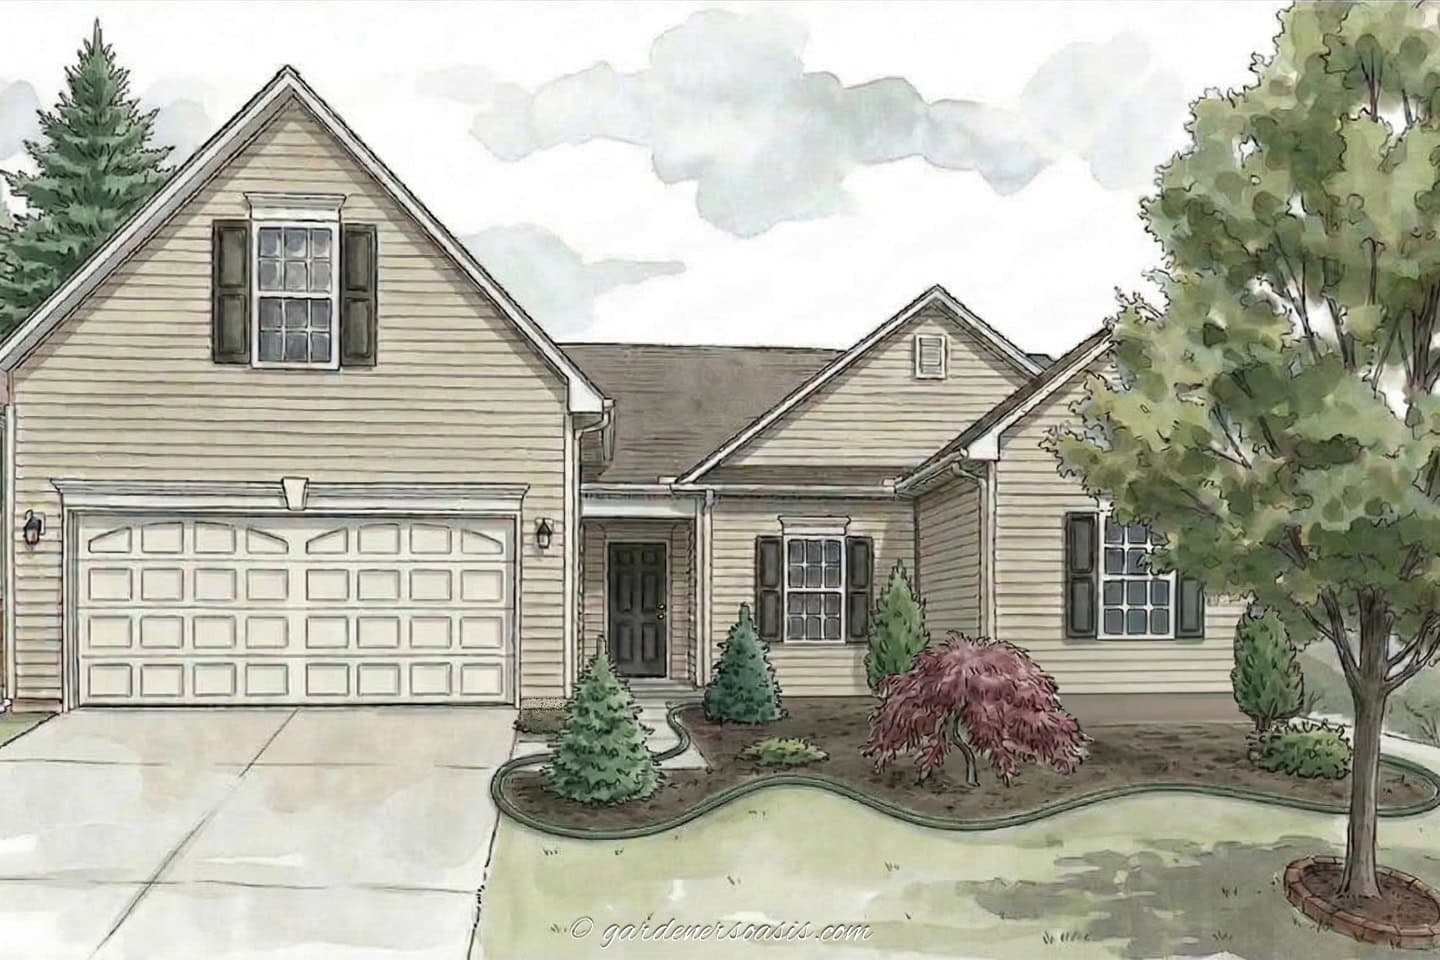
If you look at most builder-grade landscaping, it follows a very predictable, uninspiring pattern: a narrow, straight line of mulch exactly three feet wide, hugging the foundation like it’s afraid to let go.
Within that strip, you’ll usually find the ‘contractor special’: A handful of the cheapest shrubs available, plopped in a single-file row.
Because they were chosen for their price tag rather than their beauty, these plants end up looking incredibly boring and repetitive. (Everyone else on the block has the same ones!)
Instead of softening the house or adding interest, this rigid, budget-driven lineup actually emphasizes the ‘boxiness’ of the architecture, making the whole yard feel like a series of right angles rather than a living garden.
To get that lush, custom-landscaped look, the first thing we have to do is break the box.
And before you ever break ground, you need a plan.
The Garden Hose Trick
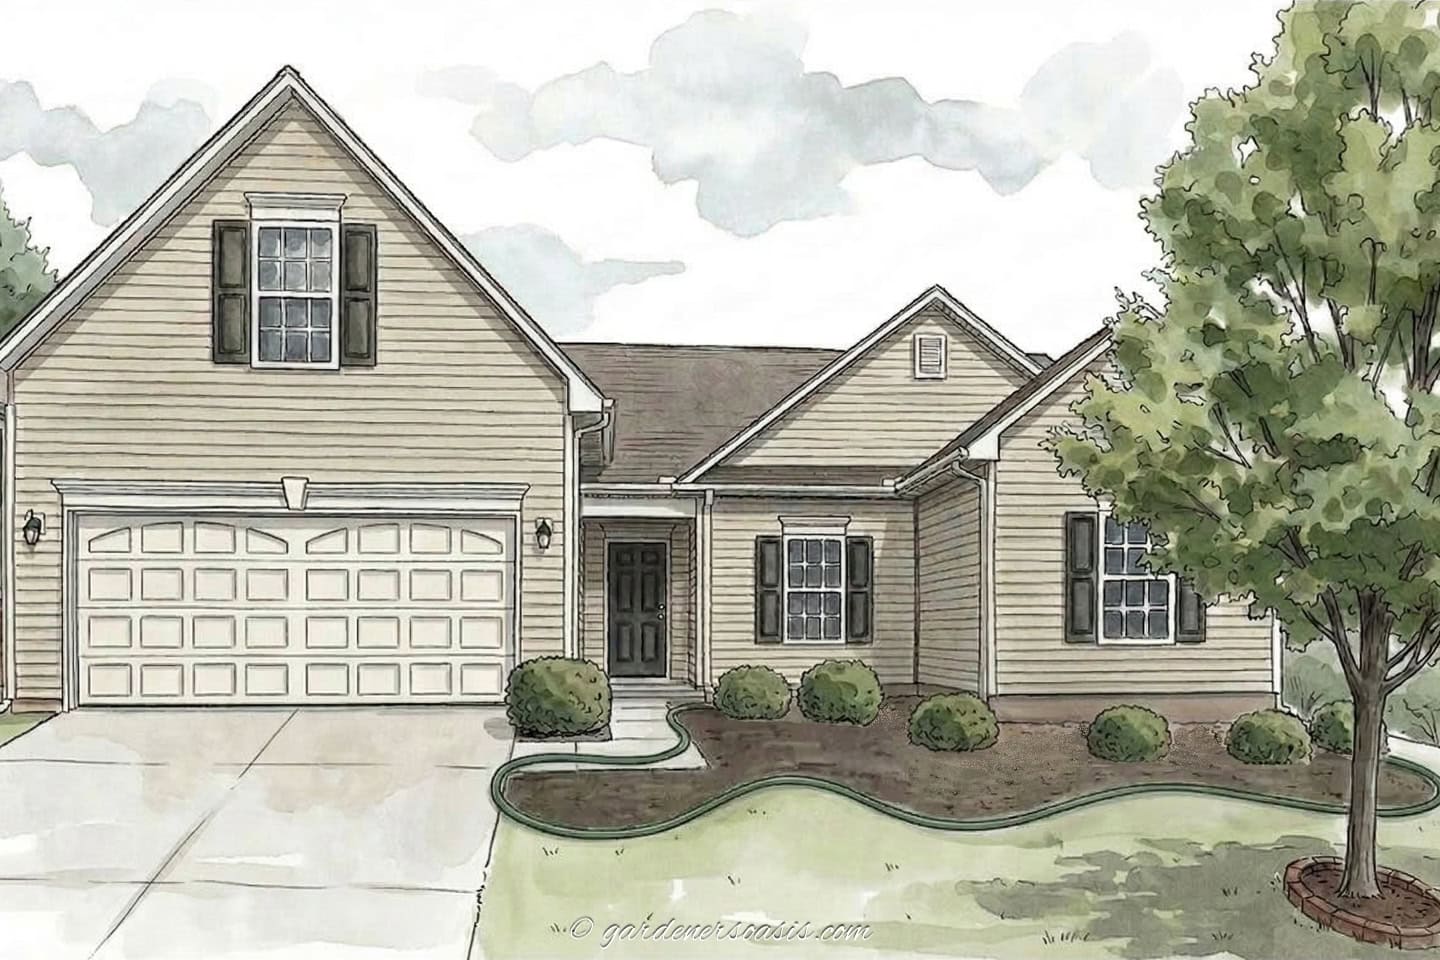
Straight lines are for house walls; curves are for gardens.
To create a professional-looking shape without the stress of geometry, grab your garden hose.
Lay it out on the grass to “draw” a new, sweeping edge for your flower bed.
- Aim for organic curves: Think “S” shapes rather than jagged zig-zags.
- Soft corners: Use the hose to round off those sharp 90-degree corners where the mulch meets the driveway.
- The “Walk-By” test: Step back to the street. Does the curve draw your eye toward the front door? If it feels fluid and natural, you’ve nailed it.
Push the Boundaries
As you map out your new layout, aim for at least 5 to 6 feet of depth.
I know it can feel like a lot of grass to lose, but that extra breathing room is the secret to a high-end look.
It allows you to plant in “drifts” (clusters of plants) rather than a boring, single-file row.
Do The Digging
Once you’ve landed on a shape you love, you’re ready to grab your shovel and make those lines permanent.
Dig up all of the grass between your existing bed and the hose line.
Then use a sharp spade to cut a clean, 3-to-4-inch deep trench at a 90-degree angle between your grass and your new garden bed.
It creates a crisp “shadow line” that makes your DIY project look like a professional landscape job instantly.
2 | Audit The Plants (Keep, Move, or Toss?)
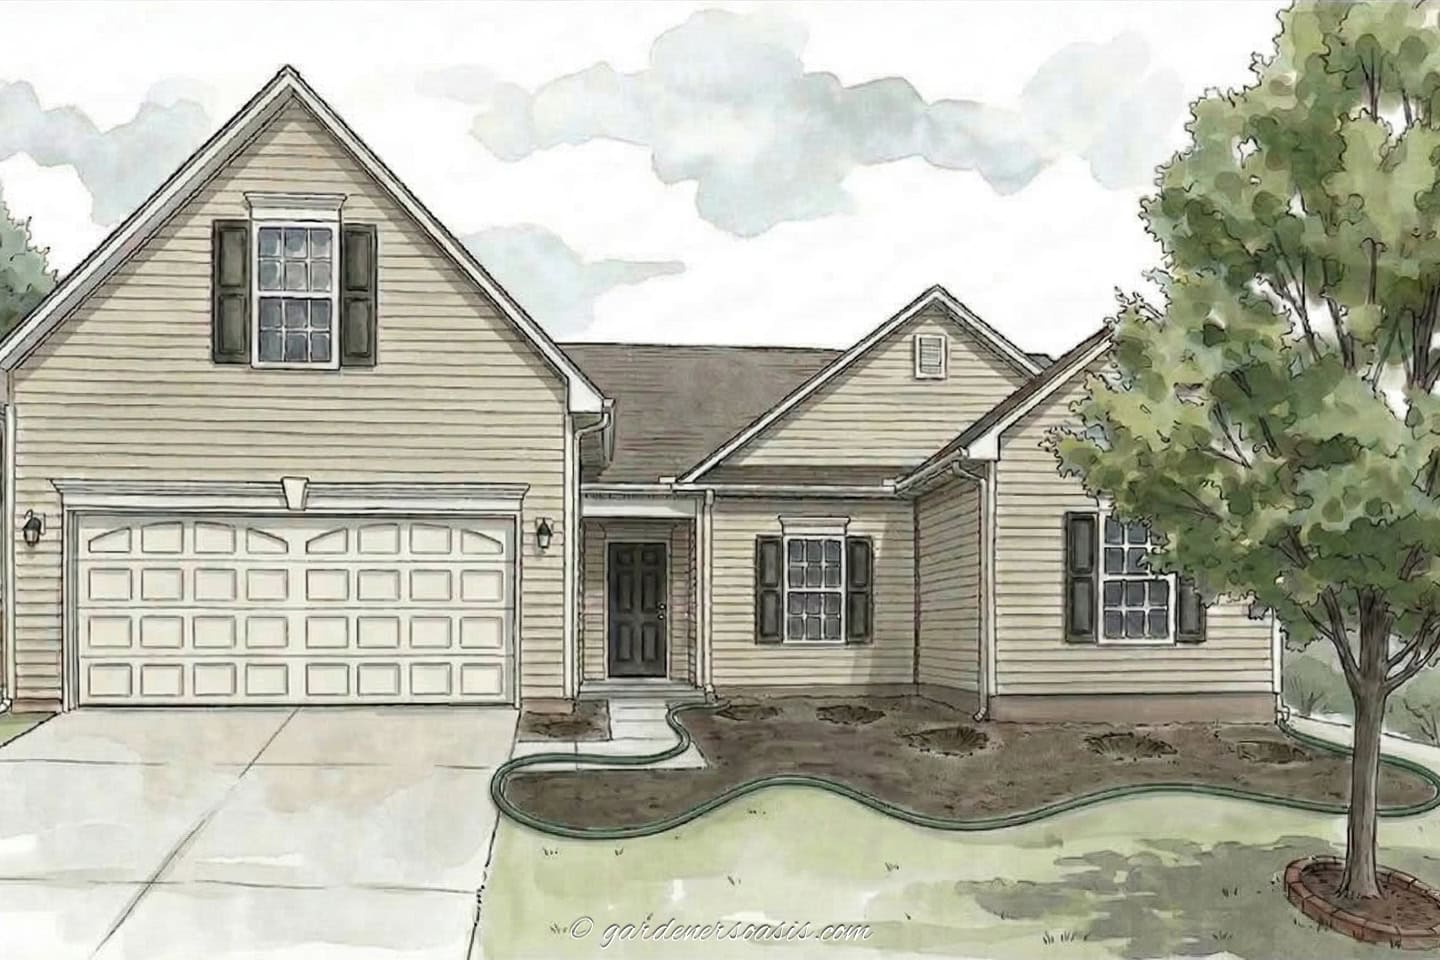
Before you buy a single new plant, you need to look at your current “boring” lineup with a critical eye.
Just because a builder put it there doesn’t mean it has to stay there.
But it also doesn’t mean it’s trash.
Evaluate the Health and Habit
Take a close look at each shrub. Is it healthy, or is it struggling with disease and “leggy” growth?
If it’s an older plant that has grown too large for the space, or if it’s become ‘leggy’ (with all the new growth at the tips and a bare, woody center) it might be time to let it go.
However, if you have a healthy, slow-growing evergreen that has just been planted in the wrong spot, it’s a candidate for a “promotion.”
Consider a “Promotion”
Sometimes a plant looks boring simply because it’s lonely.
That single Boxwood or Holly currently sitting against the siding might look incredible if it were moved to the corner of a new, deeper bed to act as an Anchor.
Ask yourself:
- Does this plant provide good winter structure?
- Can it be pruned into a more natural, attractive shape?
- Would it look better in a cluster of three rather than standing alone?
Or if you don’t mind the plant, but it isn’t what you want for your foundation, you can always move it to another part of your yard.
Clear the Canvas
If a plant is truly an eyesore, or if it’s an invasive species often used in cheap landscaping packages, don’t feel guilty about removing it.
Digging up a few $15 shrubs now is much easier than trying to design a beautiful garden around a plant you actually hate.
3 | Pick The “Anchor” Plants (Creating Structure)
Now that you’ve reclaimed some space from the lawn and carved out those beautiful curves, it’s time to talk about The Anchors.
Think of these as the “furniture” of your garden room.
If perennials and annual flowers are the colorful throw pillows and decor, the anchors are the sofa and the bookshelf.
Without them, your garden feels like a collection of pretty things floating in space.
The Power of Evergreen “Weight”
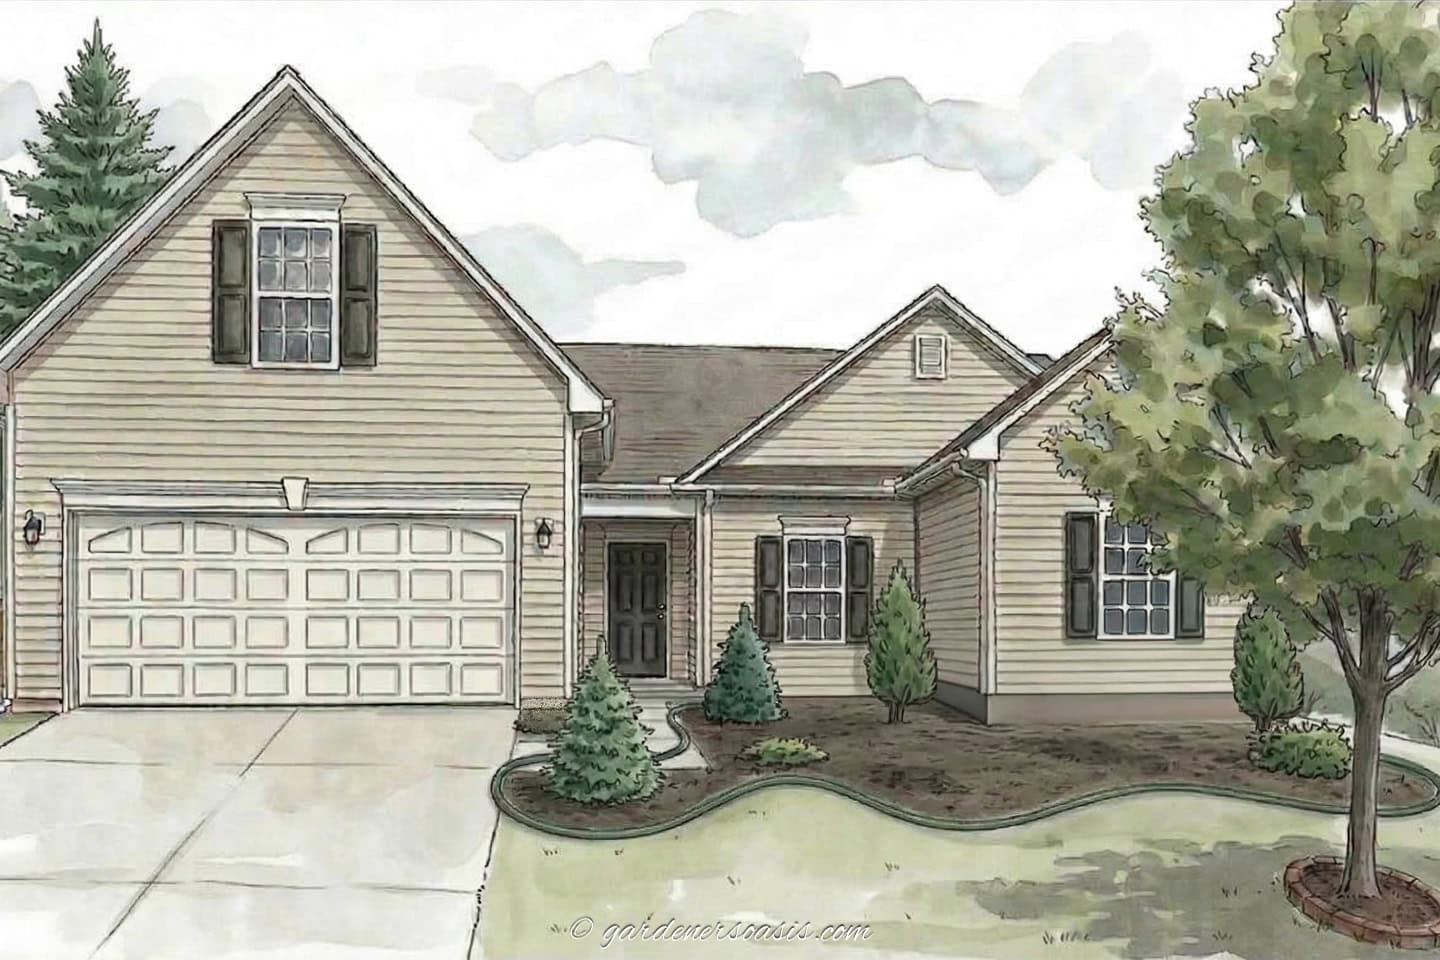
In the spring, we’re all tempted to buy whatever is blooming the brightest at the garden center.
But if you only plant flowers, your yard will look like a ghost town come November.
To create a professional-looking, year-round structure, you want to use evergreens as ‘anchors’ throughout your design. Staggering them at varying depths within your beds keeps the design feeling balanced in every season.
- Boxwoods: The classic choice for a reason. They provide a tidy, deep green backdrop that makes the colors of your spring tulips pop.
- Dwarf Conifers: Look for varieties like ‘Blue Star’ Juniper or Bird’s Nest Spruce. They add different textures and silvery-blue hues that break up the “sea of green.”
- Holly: Perfect for adding height and a bit of winter interest with those iconic red berries.
Choosing Your Focal Point
Every great foundation bed needs a focal point.
And small specimen trees that draw the eye are a great way to do that.
Look for varieties that stay under 15 feet, so they enhance the architecture of your home rather than hiding it:
- Japanese Maples: Their delicate foliage and sculptural branches provide an upscale, custom-build feel.
- Kousa Dogwood: Stunning white or pink “blooms” (actually bracts) in late spring, followed by unique red fruit.
- Weeping Redbud: Stays very small and has a dramatic “dripping” effect that looks like a living sculpture.
- Standard Hydrangea: This isn’t actually a tree, but a Hydrangea paniculata that has been grafted onto a trunk to create a tree form.
4 | Layer Like a Pro
If you’ve ever looked at a professional landscape and wondered why it looks so “full” compared to yours, the answer is almost always layering.
By widening your beds and planting the anchors, you’ve created the “stage” for a three-act play.
Now, we just need to cast the actors.
The Three-Tier Rule
Think of your garden bed like a class photo: the tall kids in the back, the medium kids in the middle, and the short kids in the front.
This layering is what hides the foundation and creates that lush, full look.
1. The Back Row (The “Wall”): This is where bigger shrubs and taller perennials live. You want plants that reach 3–5 feet high to mask the foundation of the house.
- Try: Tall Ornamental Grasses, Hydrangeas, or Rose of Sharon.
2. The Middle Row (The “Show”): This is where the color and texture happen. These plants should be 1–2 feet tall. This is the heart of your garden where the eye naturally rests.
- Try: Coneflowers (Echinacea), Black-eyed Susans, roses or classic Lavender.
3. The Front Row (The “Edge”): These are your “ground-huggers.” Their job is to spill over the edge of your new curves and hide the bare stems of the plants behind them.
- Try: Creeping Phlox, Lemon Coral Sedum, or Coral Bells (Heuchera) for incredible leaf color.
To keep your garden in color all season, try to buy plants that bloom for a long time and at different times throughout the year so your foundation planting always has some color.
Whatever you do, don’t plant these tiers in straight lines. If you just create three parallel rows of plants, you’ll end up with a “triple-decker” version of the builder-grade problem! It looks like a staircase rather than a garden..
Instead, let your layers weave and overlap. Bring a cluster of medium-height perennials forward into the front row, or let of them “leak” back between two taller shrubs. This staggering creates depth and makes your foundation bed look like a natural, living landscape.
The Rule of Three (and Five)
Here’s a designer secret: Stop buying one of everything.
One of the biggest mistakes we make at the garden center is the “Drifts-of-One Syndrome.” We see a pretty plant, grab one, and move to the next.
But in a wide garden bed, a single small plant looks like a mistake or a weed.
When you’re picking out your plants, buy them in odd numbers of three or five.
Grouping three identical plants together creates a “mass” that has enough visual power to balance out the height of your house.
It tells the eye, “This garden was planned, not just gathered.”
This rule is for your smaller “filler” and “layering” plants. You generally only need one statement tree (like a Japanese Maple or Serviceberry) to act as your primary focal point and you don’t have to buy multiples of large bushes. They are big enough that they make a statement on their own.
The Power of Repetition
To take that one step further and really get that high-end, designer look, repeat your patterns.
If you have a cluster of purple Catmint on the left side of your porch, tuck another cluster (or two) on the right.
Repetition creates a “rhythm” that leads the eye across the front of your home, making the whole landscape feel intentional and cohesive.
Don’t Fear the “Negative Space”
While we want a full look, remember that plants grow!
When you’re first starting out, your new layers might look a little sparse.
Resist the urge to jam them together. Follow the spacing instructions on the plant tag (measured from the center of one plant to the center of the next.)
Otherwise, you’ll end up having to move a bunch of plants around in a couple of years. And create unnecessary work for future you.
While you wait for your perennials to fill in their layers over the next two or three seasons, fill in the gaps with cheap, colorful annuals like Petunias, Marigolds or Impatiens. They give you instant gratification while the “bones” of your garden do their slow and steady work.
5 | Add the “Pretty” Details
You’ve widened the beds, added your anchor plants, and layered your heights.
Now comes the part we all wait for: the personality.
In a neighborhood where every house might have the same siding color, these details are your signature.
Vertical Interest
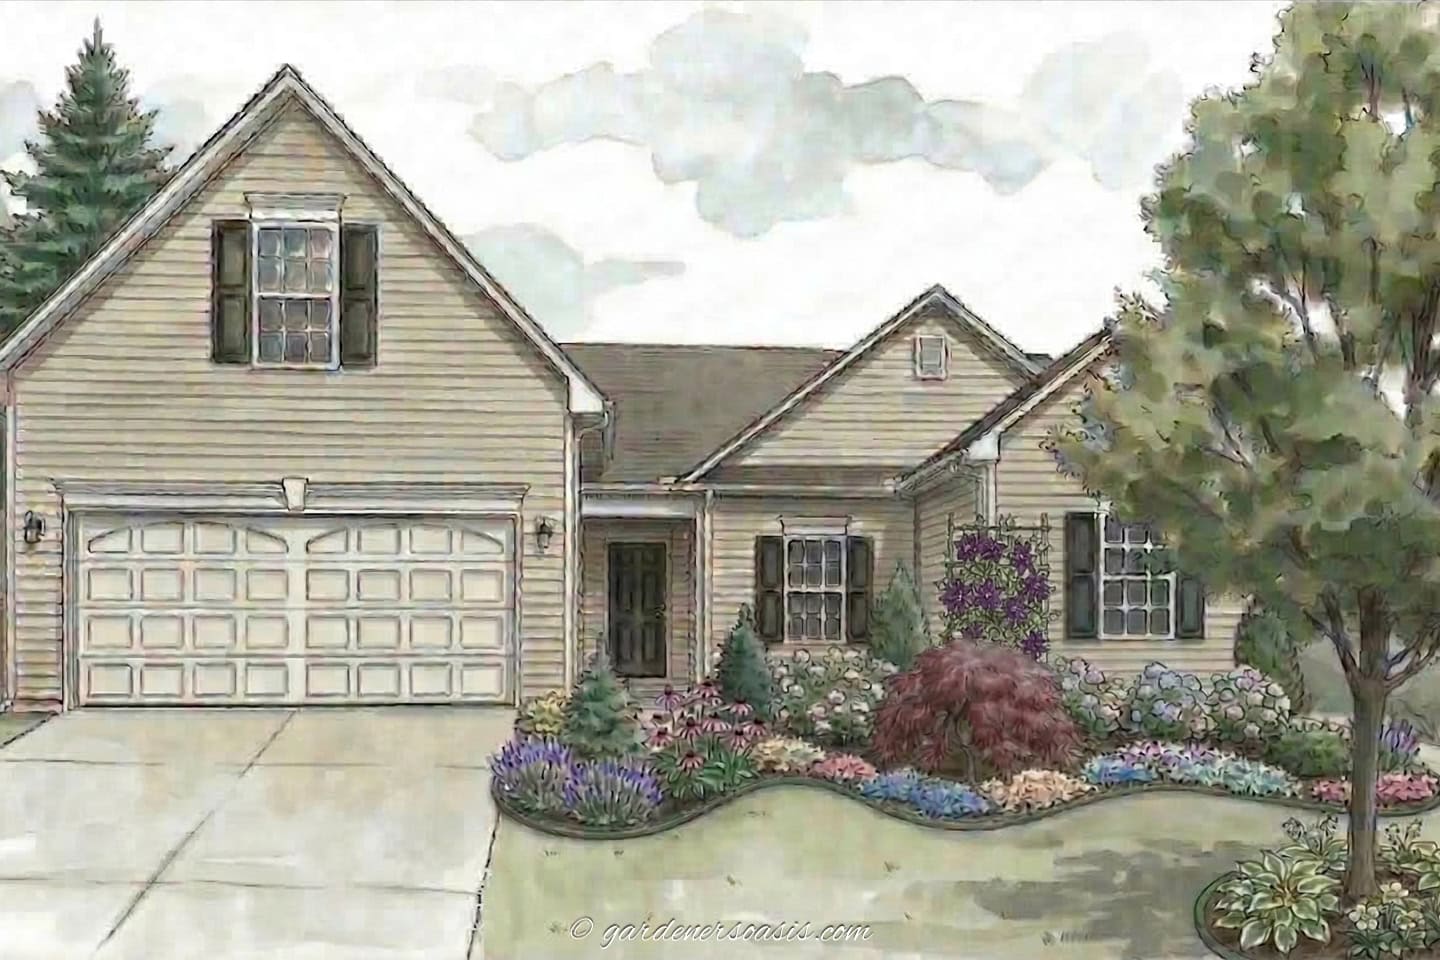
A garden shouldn’t just sit on the ground; it should reach up to meet the house.
Adding vertical elements is the fastest way to soften a wide expanse of siding or brick and add a layer of romance to the home.
You can place a cedar or wrought-iron trellis against a blank wall to support a climbing Clematis for show-stopping blooms.
Or simply allow Star Jasmine to wrap around a porch pillar for an incredible scent that greets you at the door.
By using these structures to guide your greenery upward, you ensure the landscape feels like an intentional, living part of the architecture.
A Layer Of Mulch
Add a fresh layer of mulch to act as the canvas for your plants.
Beyond just suppressing weeds and retaining moisture, mulch provides a high-contrast background that makes your green foliage and vibrant blooms truly pop.
For a professional look, avoid the “playground” feel of chunky bark or bright red dyed mulches.
Instead, opt for a fine-textured, dark brown or black mulch that mimics the look of rich, organic soil (such as double-ground bark).
Apply a consistent two-to-three-inch layer across the entire bed, but be careful not to “volcano” mulch against the trunks of your new trees or the crowns of your plants, which can cause rot.
Garden Accents
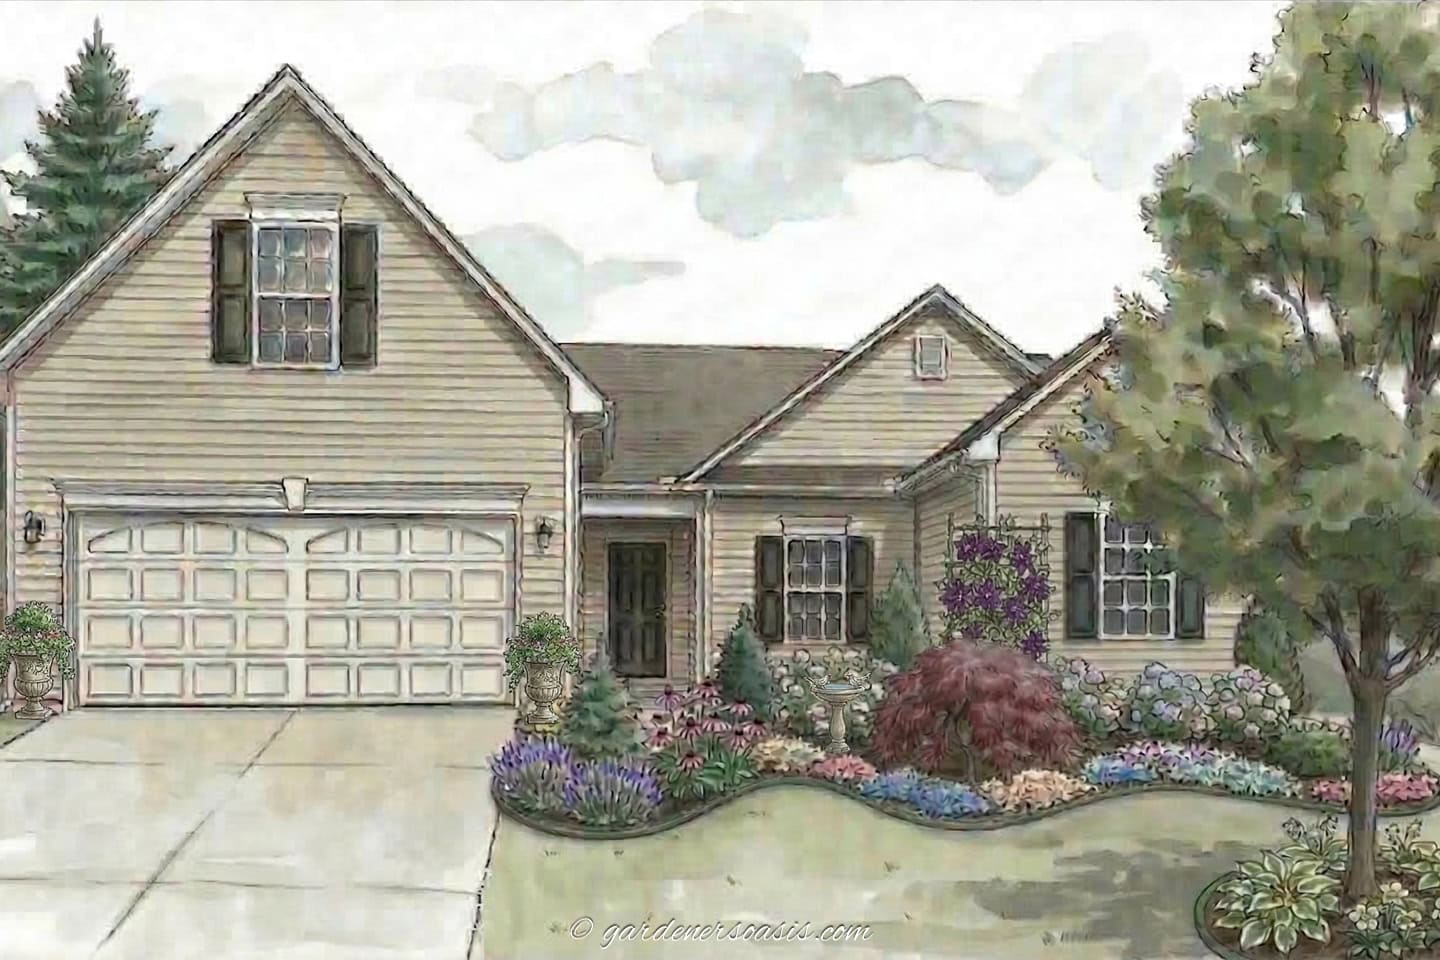
Adding non-plant elements like a birdbath or a large urn gives the eye a place to rest and makes the garden feel “furnished” year-round.
These pieces act as anchors for your smaller perennials and ground covers, providing a sense of permanence even in the winter months.
For the best look, choose high-quality materials like cast stone, wrought iron, or durable frost-resistant resin that can withstand the elements in any climate.
You can nestle a birdbath about two-thirds of the way into a curve or tuck it into a drift of plants to create a beautiful sense of discovery as you walk toward the house.
In cold climates, I prefer not to use ceramic planters because they often crack when it freezes. So you have to take them in for the winter and put them back out in the spring. Which is more work than I want to do.
Quality Lighting
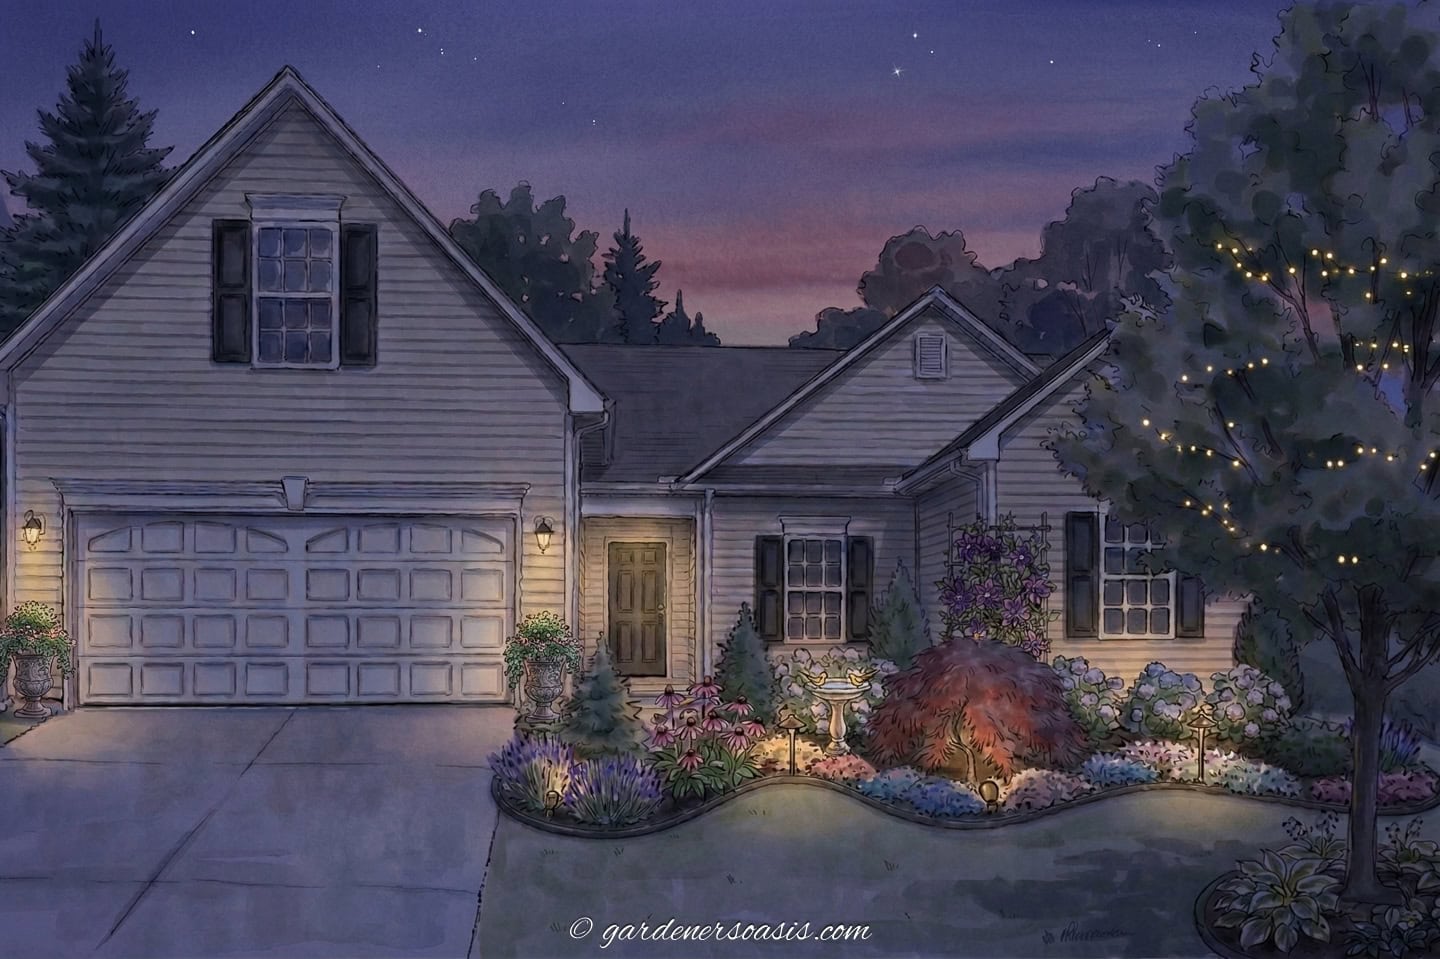
Lighting is the difference between a garden that disappears at 8:00 PM and one that looks like a luxury resort at night.
To create a sense of drama, place a low-voltage LED spotlight at the base of your statement tree to wash light up into the branches.
Then add more lights where they highlight your garden accents and other plants.
When adding path lights, avoid the temptation to line them up along the grass. Instead, stagger them inside the garden bed so the foliage glows from within, creating depth and shadows rather than a lit-up runway.
The English Edge
To wrap it all up, give your beds a professional finish with a clean “English Edge.”
Use a sharp spade to cut a clean, 4-inch deep “V” trench along the entire perimeter where the mulch meets the grass.
This creates a crisp shadow line that defines your new curves and prevents the lawn from creeping into your beds.
It’s the final detail that makes the whole project look like it was handled by a pro.
Final Results: Small Changes, Big Impact
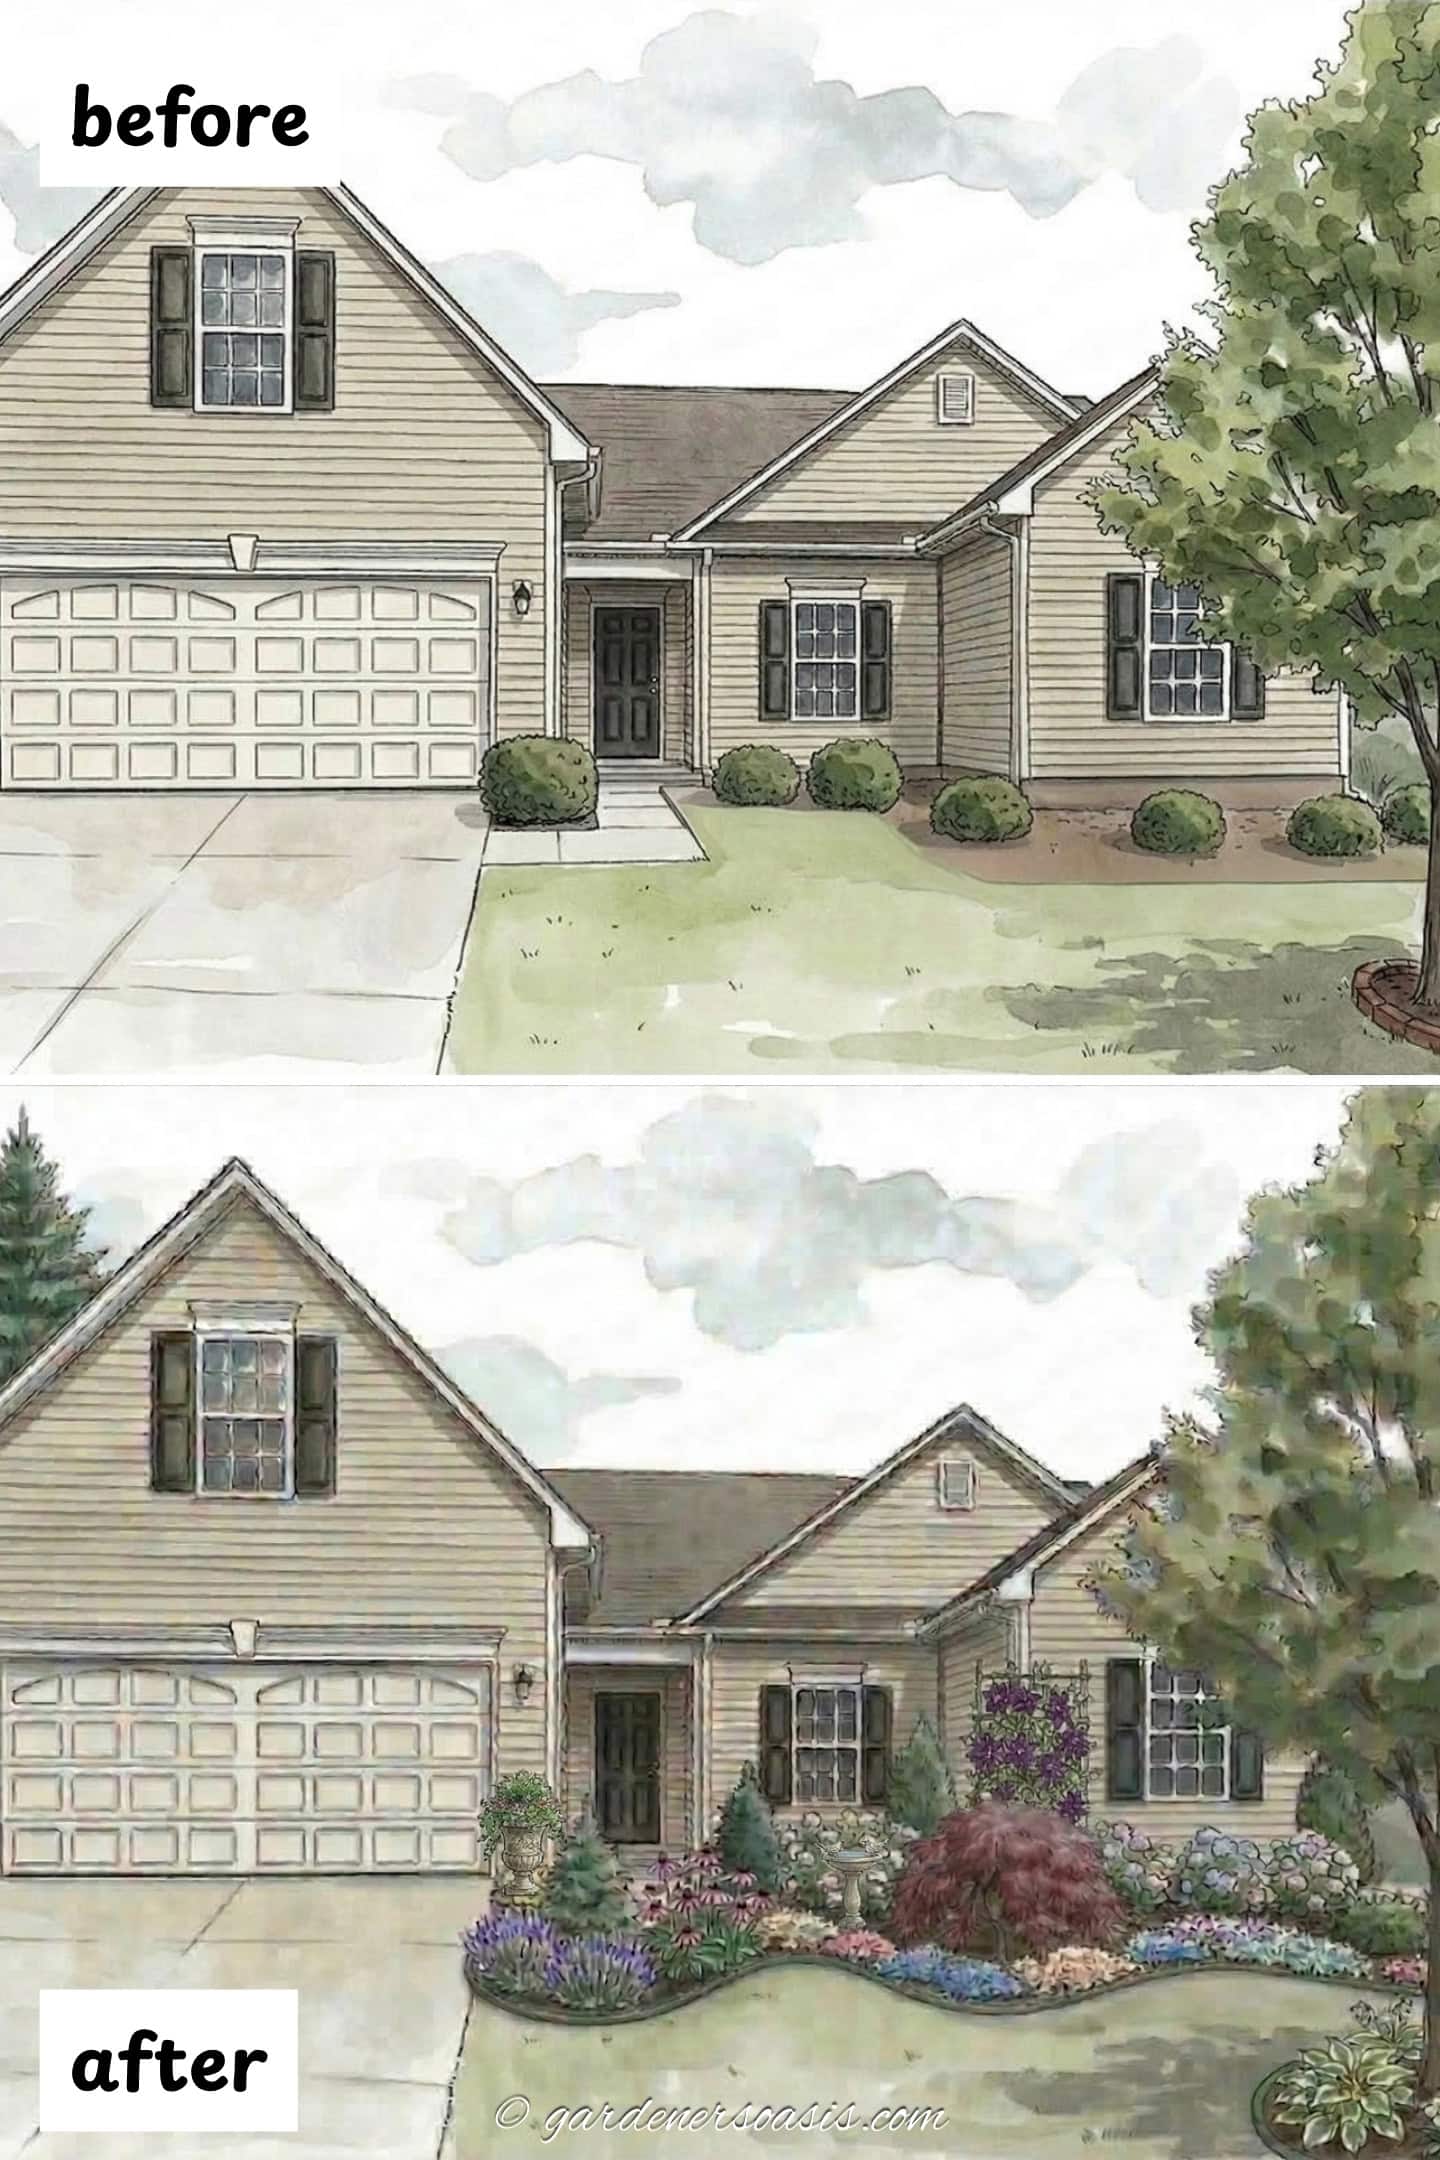
By simply deepening the garden bed and replacing a rigid, linear layout with organic, sweeping curves, the home’s entrance feels more balanced and inviting.
It’s a perfect example of how a simple garden hose, a little vision, and a little elbow grease can completely redefine your home’s curb appeal!
Have comments or questions about how to design your foundation planting? Tell us in the section below.