
How To Paint A Plaid Ceiling
Plaid isn’t just for fabric. Bringing this classic pattern to the ceiling adds unexpected color, personality and a designer touch to any room. I’ll show you how to paint a plaid ceiling so you can create this custom look without spending a fortune.

In my house, the living and dining room ceilings are stucco over lath and plaster construction.
The surface is in good condition, but it is very wavy. Which is very apparent when it is painted a plain color.
So I decided to disguise the waviness by painting the ceiling plaid.
I chose colors based on the fabric and paint colors already in the rooms. (In fact, for the main color, I just added glaze to leftover wall paint.)
This is a bit of a time-consuming project that is well worth the effort in dramatic results!
Although I painted this on the ceiling, you can use the same steps to paint a plaid wall.
More ceiling paint ideas

What You Need
Materials
- Latex paint in satin or flat finish (see below for the colors and amounts)
- Latex glaze*
Tools
- Measuring tape
- Chalk line*
- Ladder
- Paint tray
- Paint roller
- Extension pole
- 2 inch foam paint brush*
- 4 inch roller*
- Straight edge*
- Damp rag or sponge
1 | Prep work
The first step is to determine the type of plaid pattern and colors you would like to use on your ceiling.
Decide on a pattern
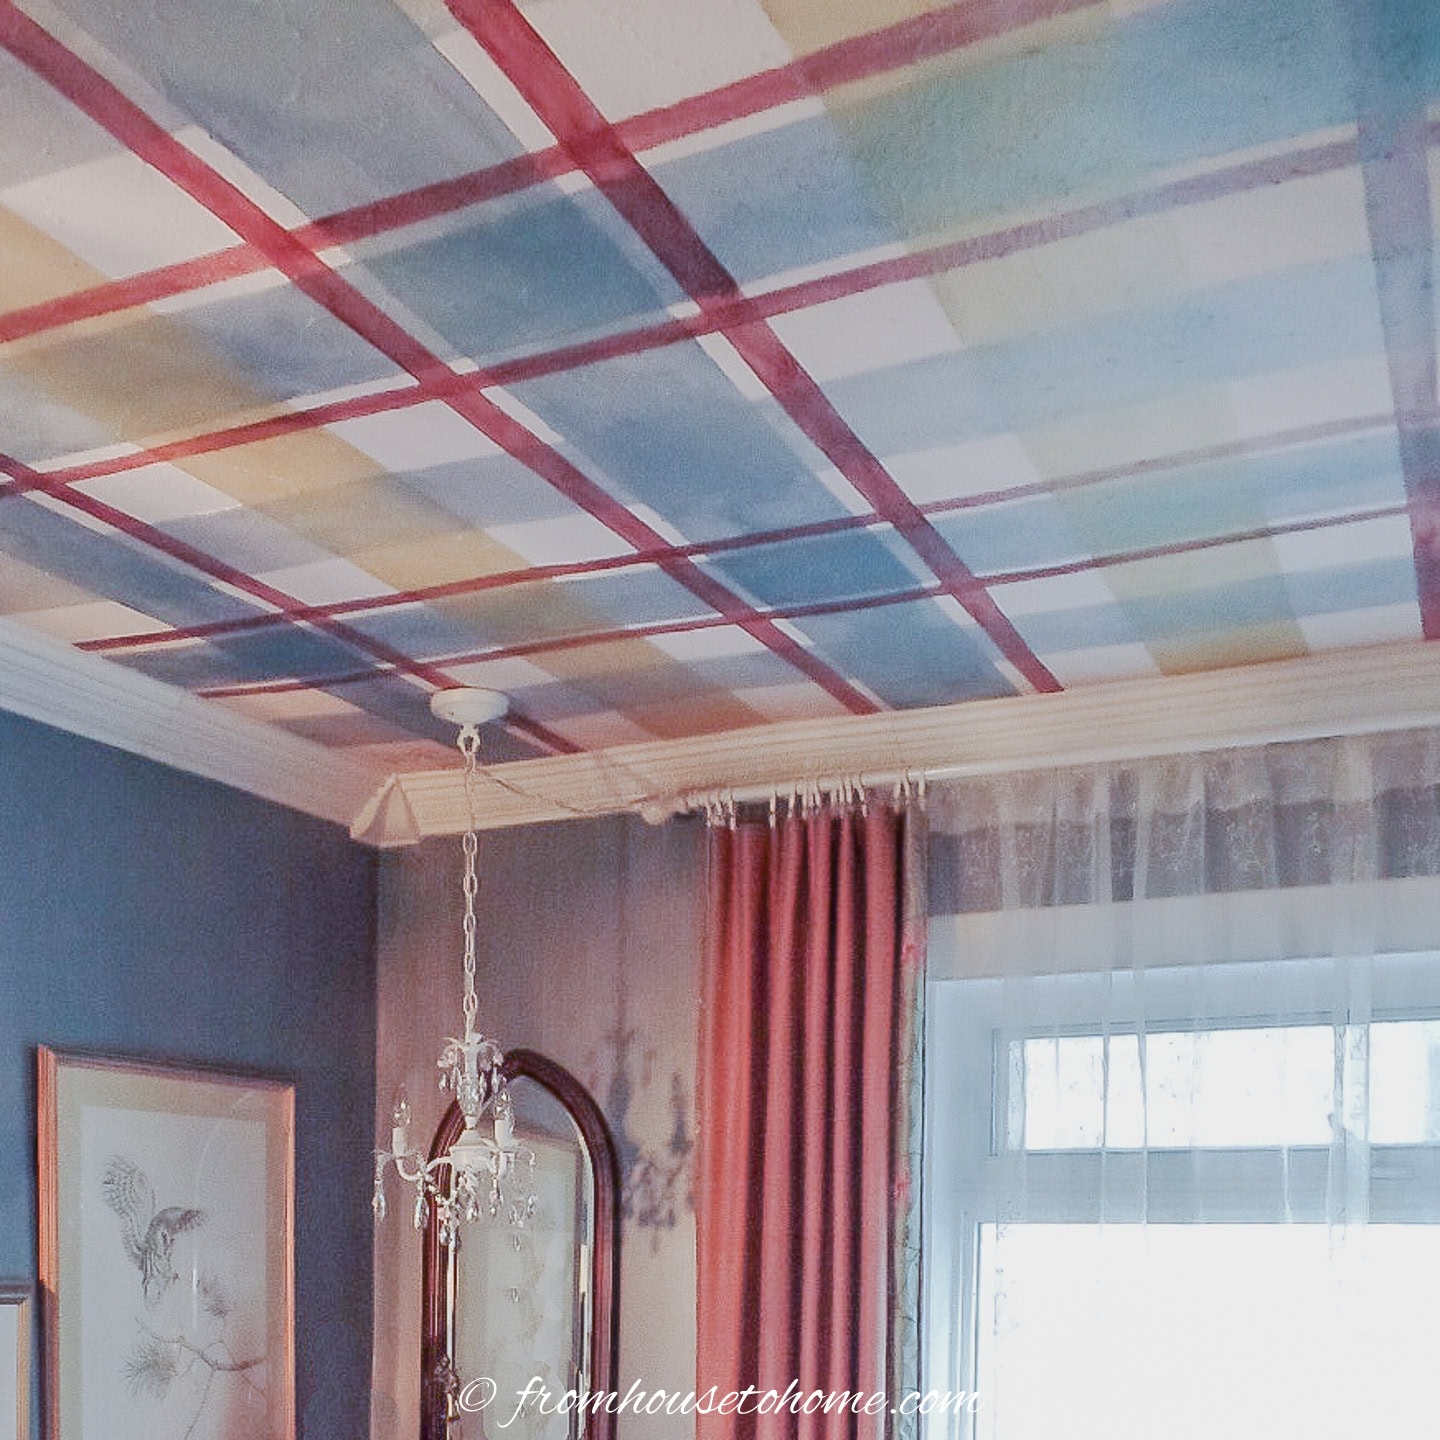
My pattern contained wide stripes in 2 colors (the blue and gold) and smaller lines of another color (the red) on an ivory background.
If you are having trouble deciding, find a sample piece of fabric or picture that looks like what you want and use it as a template.
Figure out the stripe sizes
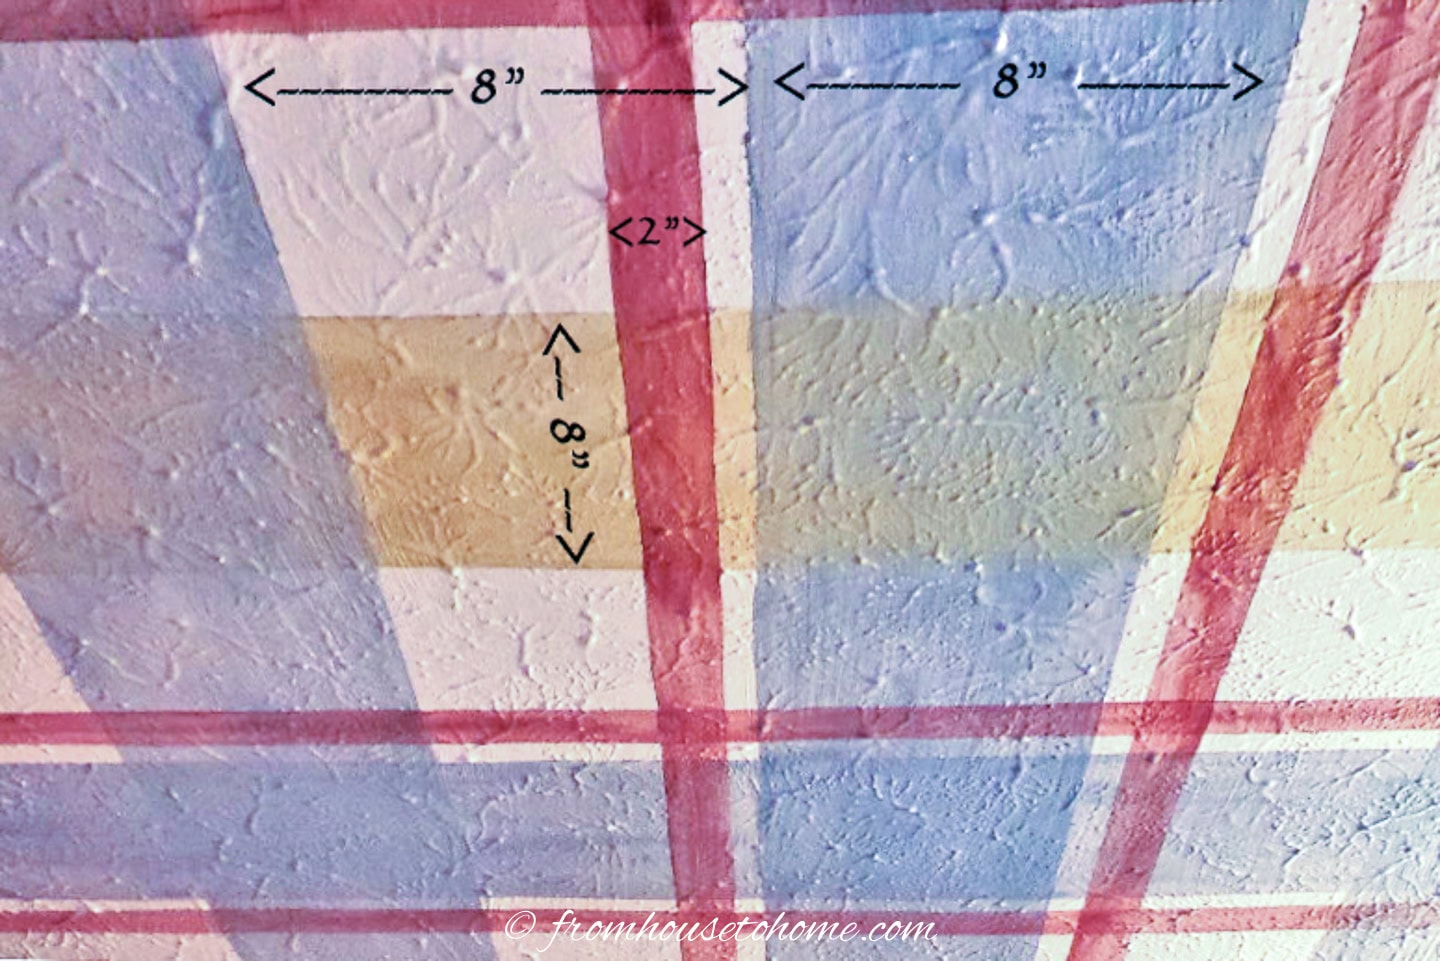
Once you know what the pattern should look like, you will need to determine how large to make each of the stripes.
The actual size of each one is not terribly important (other than it needs to be big enough to see it and the smaller the stripes, the more work it will be), but the proportions are.
Generally, plaid will have wide stripes that are all the same size (but may be different colors) and some smaller lines running through it.
For ceilings, using 6″ or 8″ wide stripes with 1″ or 2″ wide lines usually works pretty well.
Pick the colors
Next you will need to pick your paint colors.
If you are using a fabric sample that you like, you can take it to the local paint store and have them match the colors for you.
You will need one color for the background, and at least 2 colors for the stripes (one for wide stripes and one for lines).
I used three stripe colors: Two different ones for wide stripes and one for the lines.
You might want to draw a sample of the plaid on a piece of paper using the measurements and colors that you have come up with to make sure you like it. It’s much easier to re-draw it now than having to re-paint on the ceiling!
Determine how much paint you will need
To figure out how much paint you need, measure the length and the width of the ceiling.
You will need enough of the background color to paint this entire space.
For the stripes, a pint of each color is generally enough (unless you have a really large space or are doing very large stripes).
A gallon of glaze should cover most spaces.
2 | Paint the background color
The first step is to paint the whole ceiling your background color.
It will likely need 2 coats.
And you’ll need to wait for it to dry completely before continuing.
3 | Draw the wide lines
To make sure you get the pattern right, you’ll want to draw the lines on the ceiling first and then paint them.
Determine the ceiling center point
Measure the length of the ceiling and divide the number in half to determine where the half-way point is. Your first stripe will be centered on this measurement. For example, if your ceiling is 10′ long, the half way point would be at the 5′ mark. The reason for starting in the center is to have your pattern equally spaced on the ceiling at all edges.
Use chalk or a pencil to mark this point on both of the end walls.
Center the main plaid stripe
Divide the width of the main stripe in your plaid pattern by 2 to determine where the center of the stripe is.
This will determine how much of the stripe will fall on each side of the center line. For example, if the stripe is 8” wide, the sides of the stripe will be 4’’ on each side of the center mark.
Use chalk or a pencil to mark where the two edges of the stripe will be, one on either side of the ceiling center point.
Then repeat the same marks on the opposite end of the ceiling.
Use the chalk line to mark the two sides of the stripe all the way across the ceiling.
It is easier to do this if you have a second person. Each of you can hold an end of the chalk line at either side of the ceiling and snap it to mark one side of the stripe, then do the other side. However, to do it solo, you just need to tack the end of the chalk line at one end of the ceiling and pull it across to the other side.
If you have a flat ceiling without popcorn or stucco, you could also use painter’s tape to mark the edges of each stripe. In this case, I do still like to use the chalk line to make the initial lines because it marks a straight line. Then you can match the edge of the tape to the chalk line.
Mark the rest of the plaid lines
Continue to mark the edges of the wide stripes in your pattern so that they cover the full length of the ceiling. In our example, these marks would fall every 8″ from the edge of the center stripe.
Repeat for the other direction
Repeat the whole line-drawing process going across the width of the ceiling (marking the stripes for the other direction).
4 | Paint the wide lines

Mix the paint and glaze in the proportions of 1 part paint to 4 parts glaze for your first color.
Apply the glaze mix to the main stripe in a smooth flowing motion with an EZ painter or brush, paying attention to following the chalk lines as straight as possible.
I used the straight edge and damp sponge to correct any errors (holding the straight edge with one edge along the line prevents the sponge from wiping away paint that you want to leave there).
Paint all of the stripes using the same color in both directions on the ceiling first. Don’t be too worried if the color does not go on evenly. With glaze, variations in color are unavoidable and are part of the artistic effect.
Glaze dries quickly, so complete each stripe before starting the next, to avoid darker over lapping lines.

If you are alternating colors like I did, make sure to skip alternate stripes so that you can go back later with the second color. Then repeat the same steps to fill in the alternate wide stripes that you skipped in the first pass.
I only did the alternating colors in one direction, but you could do it both ways if that’s what you prefer.
5 | Add the small lines

Repeat the same line-drawing process as before to create the chalk lines for the narrow stripe.
In my pattern, the narrow lines were 2″ wide and were placed 1″ away from either side of the main blue stripe.
Paint them using a 2” nylon or foam brush in the third color.
The finished ceiling

Then sit back and admire!

Your plaid ceiling will add interest and drama to any room, even if it’s a small builder-grade house like mine!



Have comments or questions about how to paint a plaid ceiling? Tell us in the section below.
Pin It So You Don't Forget It!
This post was originally published on January 28, 2015 but was updated with new content on June 23, 2026.
Is the glaze what give the see through look to the stripes? The stripes are not solid in that you can see the underlying color.
Yes, Darlene, the glaze makes the paint opaque. If you do not want to see the underlying color, just use undiluted paint in your choice of colors.