
How To Decorate a Christmas Tree With Ribbons
This blue, white, and gold Christmas tree is layered with plenty of ribbon, soft textures, and subtle sparkle to create a full, elegant look that feels warm and inviting. Our step-by-step tutorial walks you through exactly how to decorate a Christmas tree with ribbon so you can recreate the same layered, designer-style effect at home.

This year I decided to do something a little different than usual with my Christmas tree. And make the ribbons on my tree the star of the show.
Rather than a background decor element like it usually is.
The problem is that it can be hard to make ribbon look good on a tree.
So I set out to find the best way to put it on so it looks natural and like it belongs.
After a lot of research and a little trial and error, I think I’ve got it!
So keep reading to find out how to decorate a Christmas tree with ribbons.
Get a FREE Room Makeover Workbook by signing up for our newsletter
You’ll also get access to our members-only resource library with all of our other printables.
We won’t send you spam. Unsubscribe at any time.
Supplies
Below are the colors and sizes of ribbon that I used. Of course, you can choose whatever colors match your holiday decor.
- 6′ narrow white Christmas tree
- 9 off-white and gold faux flower picks (from HomeGoods)
- 9 gold large fern picks (from HomeGoods)
- several navy poinsettias and large velvet flower clips
- 3 rolls of 2½-inch wired ribbon in blue and gold (which I bought at Costco and Michael’s)
- 3 rolls of gold and white 2½-inch wired ribbon for the tree topper plus 1 roll of 1½-inch gold
- 4″ balls in white, navy and gold.
- 4″ fancy decorated blue and white balls
- 2½” navy balls many with white decorations on
- navy finial ornaments
- about three dozen mini ceramic ginger jar ornaments*
- 30 LED battery operated candles with remote timer
- cable ties
- green florists’ wire
- Bowdabra bow maker*
1 | Fluff the tree
The first thing to do is determine the location of the tree and assemble it.
Then straighten and fluff the branches and stems so there are no gaps and the tree is symmetrical all around.
This always takes more time than I expect but is definitely worth the extra effort.
2 | Add picks
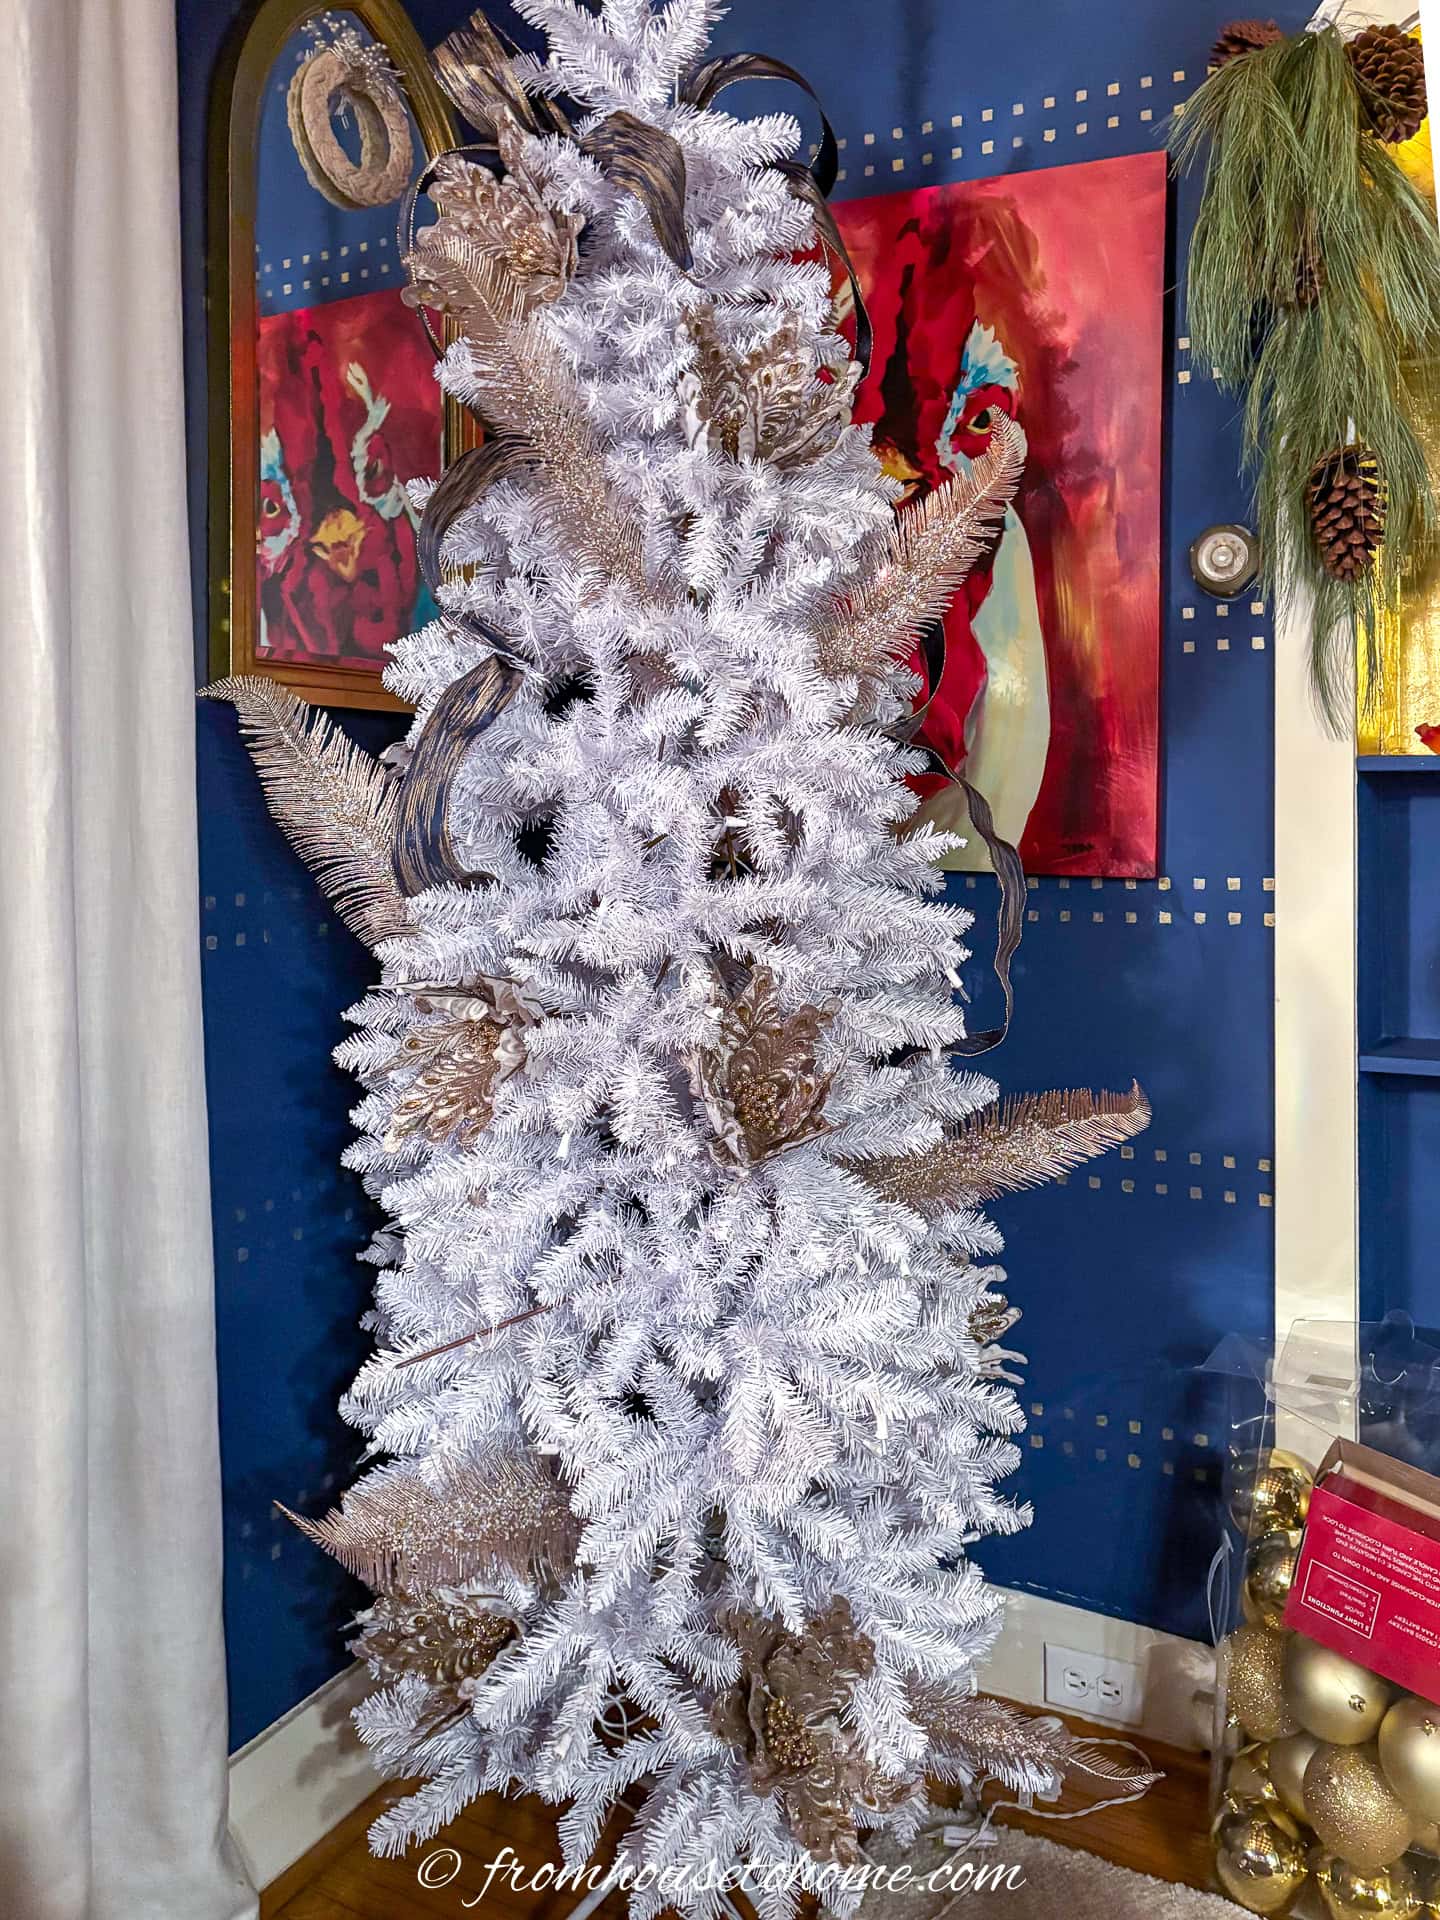
Add artificial botanical picks at pleasing angles and evenly distributed for balance around the tree.
I used sparkling gold trimmed off-white fabric flowers and large gold fern stems embellished with gold sequins.
These add some contrast and texture to the softness of the ribbon.
3 | Run ribbons down the tree
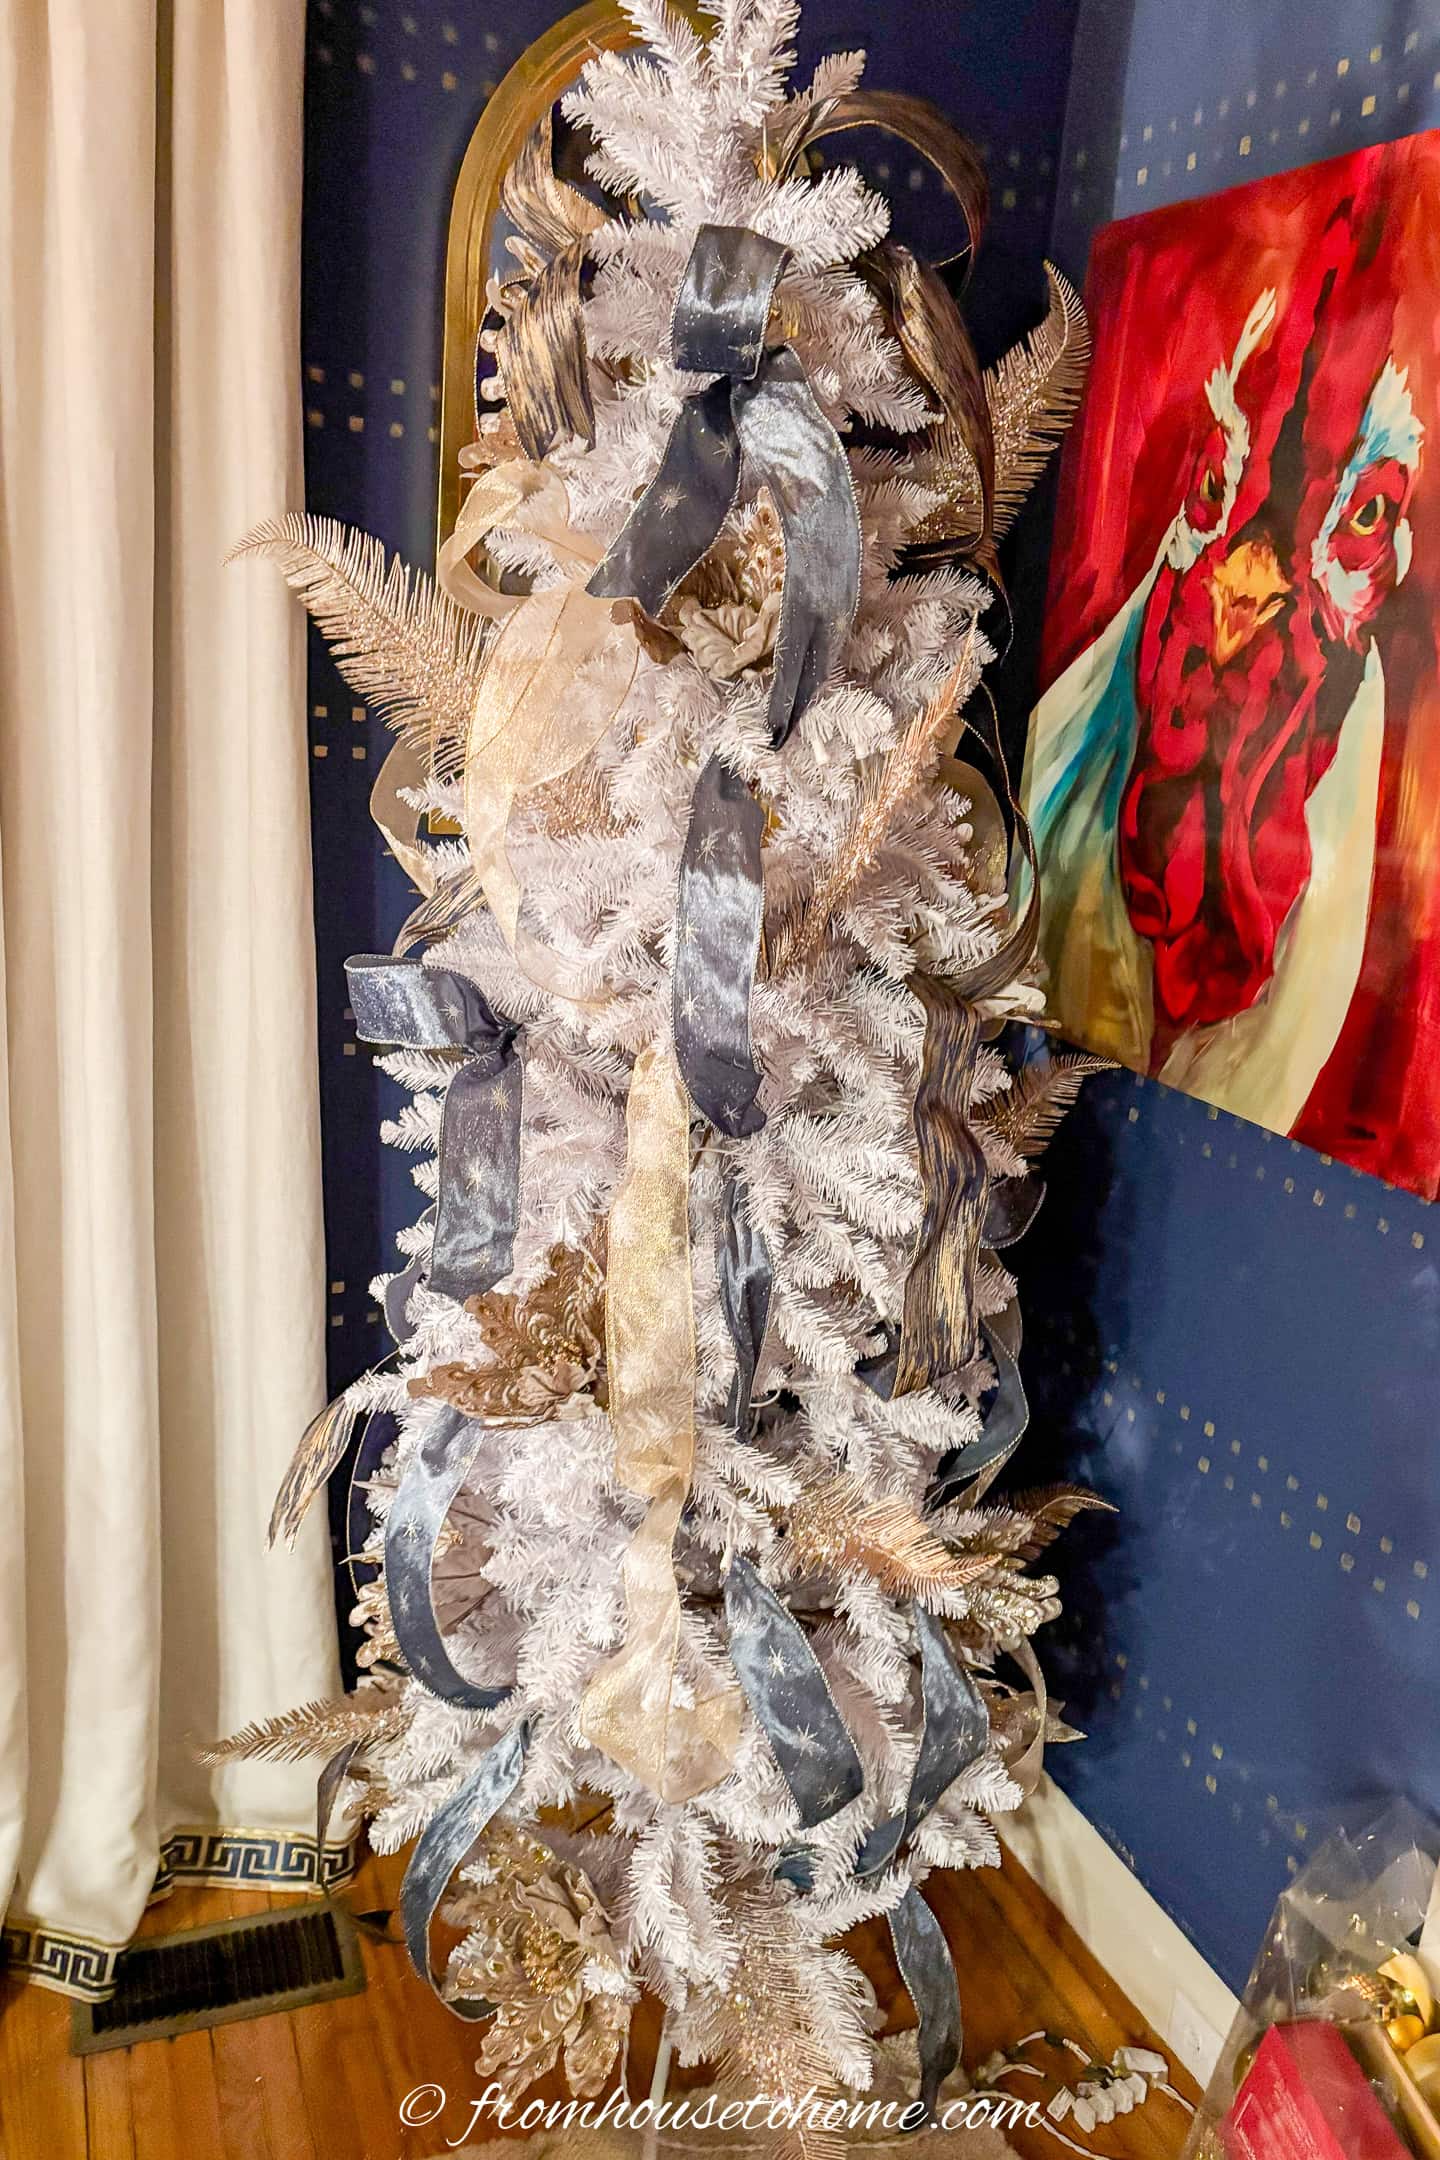
Step three is devoted to ribbons. Make sure to get wired ribbons. They are easy to place and will hold the shape you want.
I ran ribbons in three coordinating colors (one was a blue and gold mix, the second was sheer gold and the third was blue with stars) down the length of the tree.
1 | Dovetail the end of the ribbon
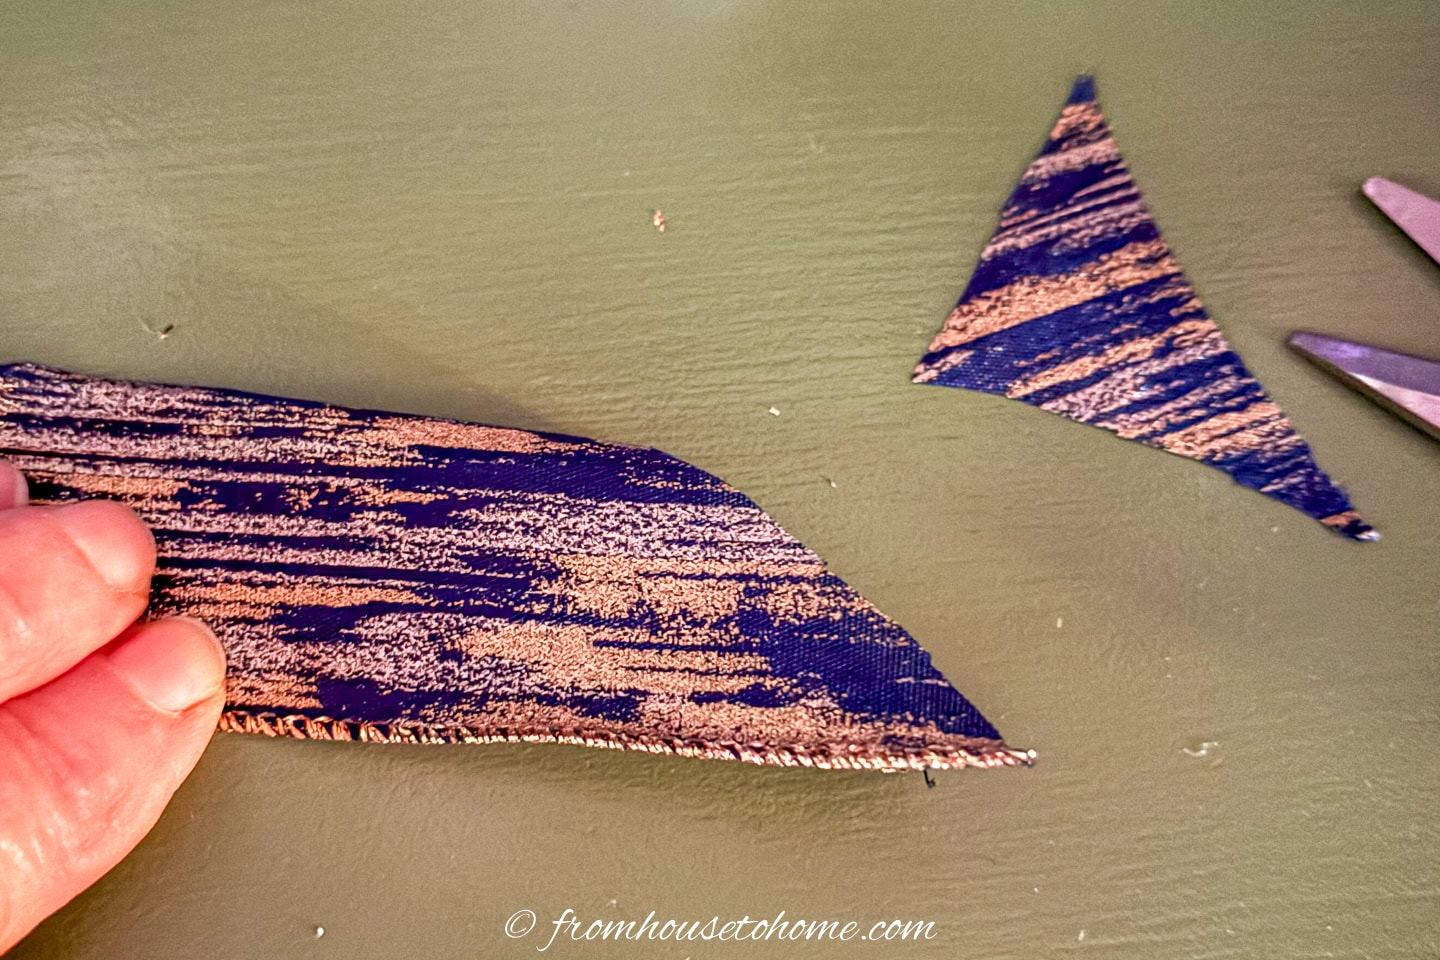
For a finished look, dovetail the end of all of the ribbons. To do this fold the end of the ribbon in half lengthwise and cut a 45 degree angle from the outer edges to the fold.
2 | Make the top loop
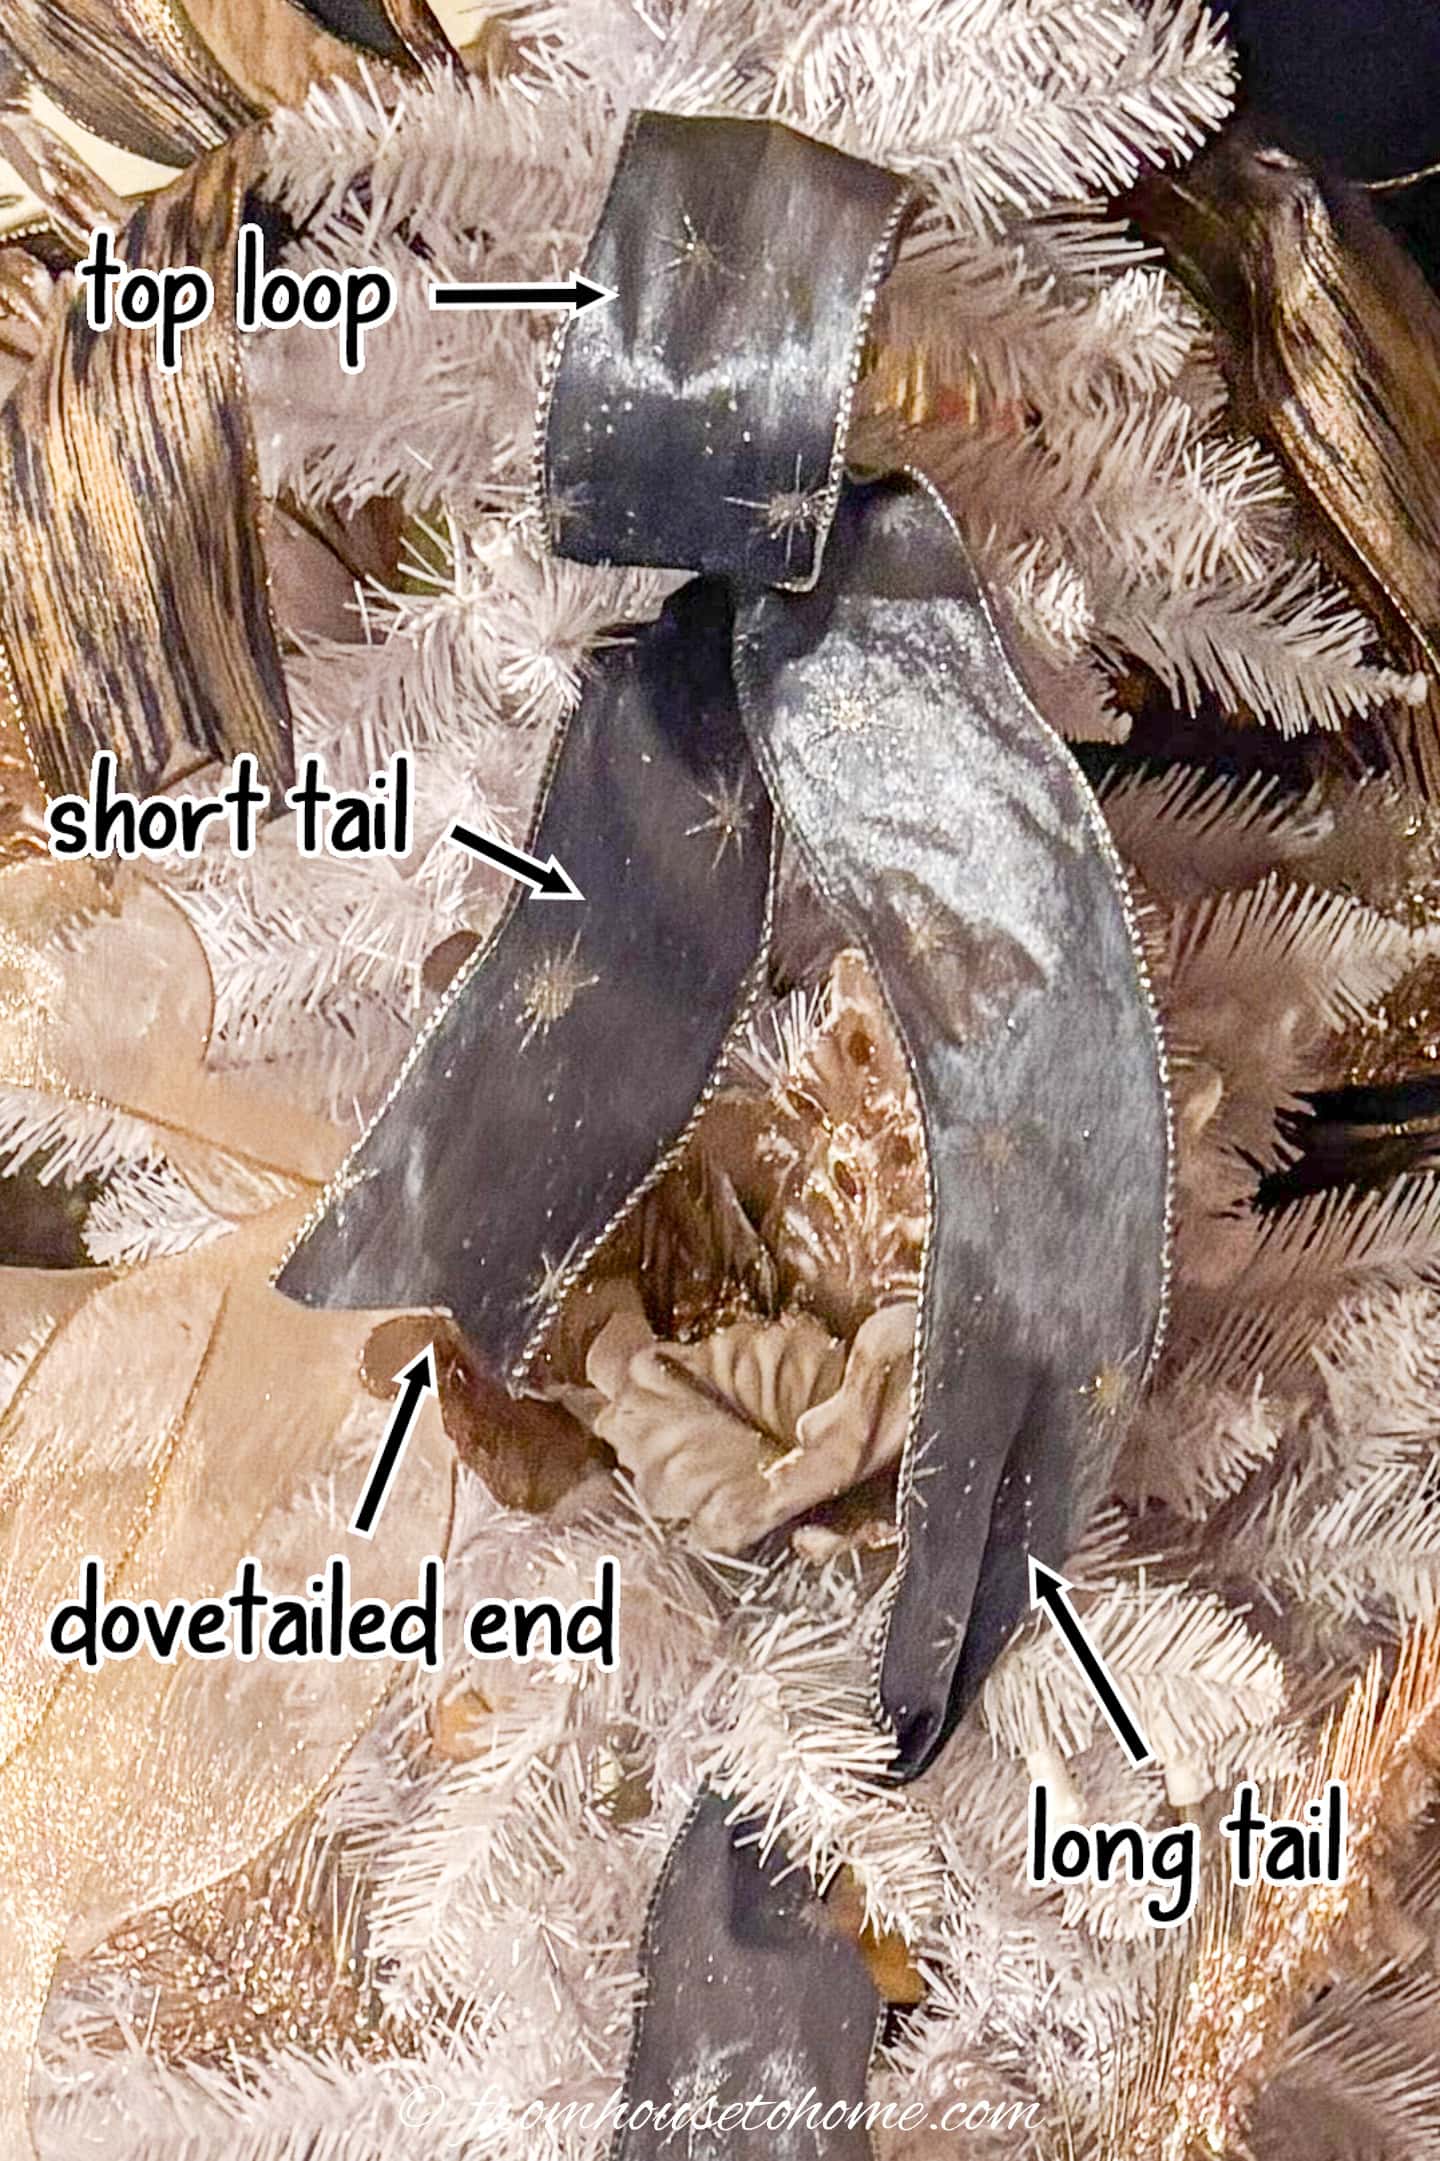
To make the top loop, fold the ribbon over to create a single 6″ loop with about an 8″ tail and pinch it between your fingers to keep it together.
Do not cut the other end of the ribbon since you won’t know yet exactly how long it needs to be.
3 | Secure to the tree
Then insert the pinched section well into the tree branches close to the top of the tree on one side.
Tie it into location by wrapping a tree branch around it.
4 | Cascade the ribbon down the tree
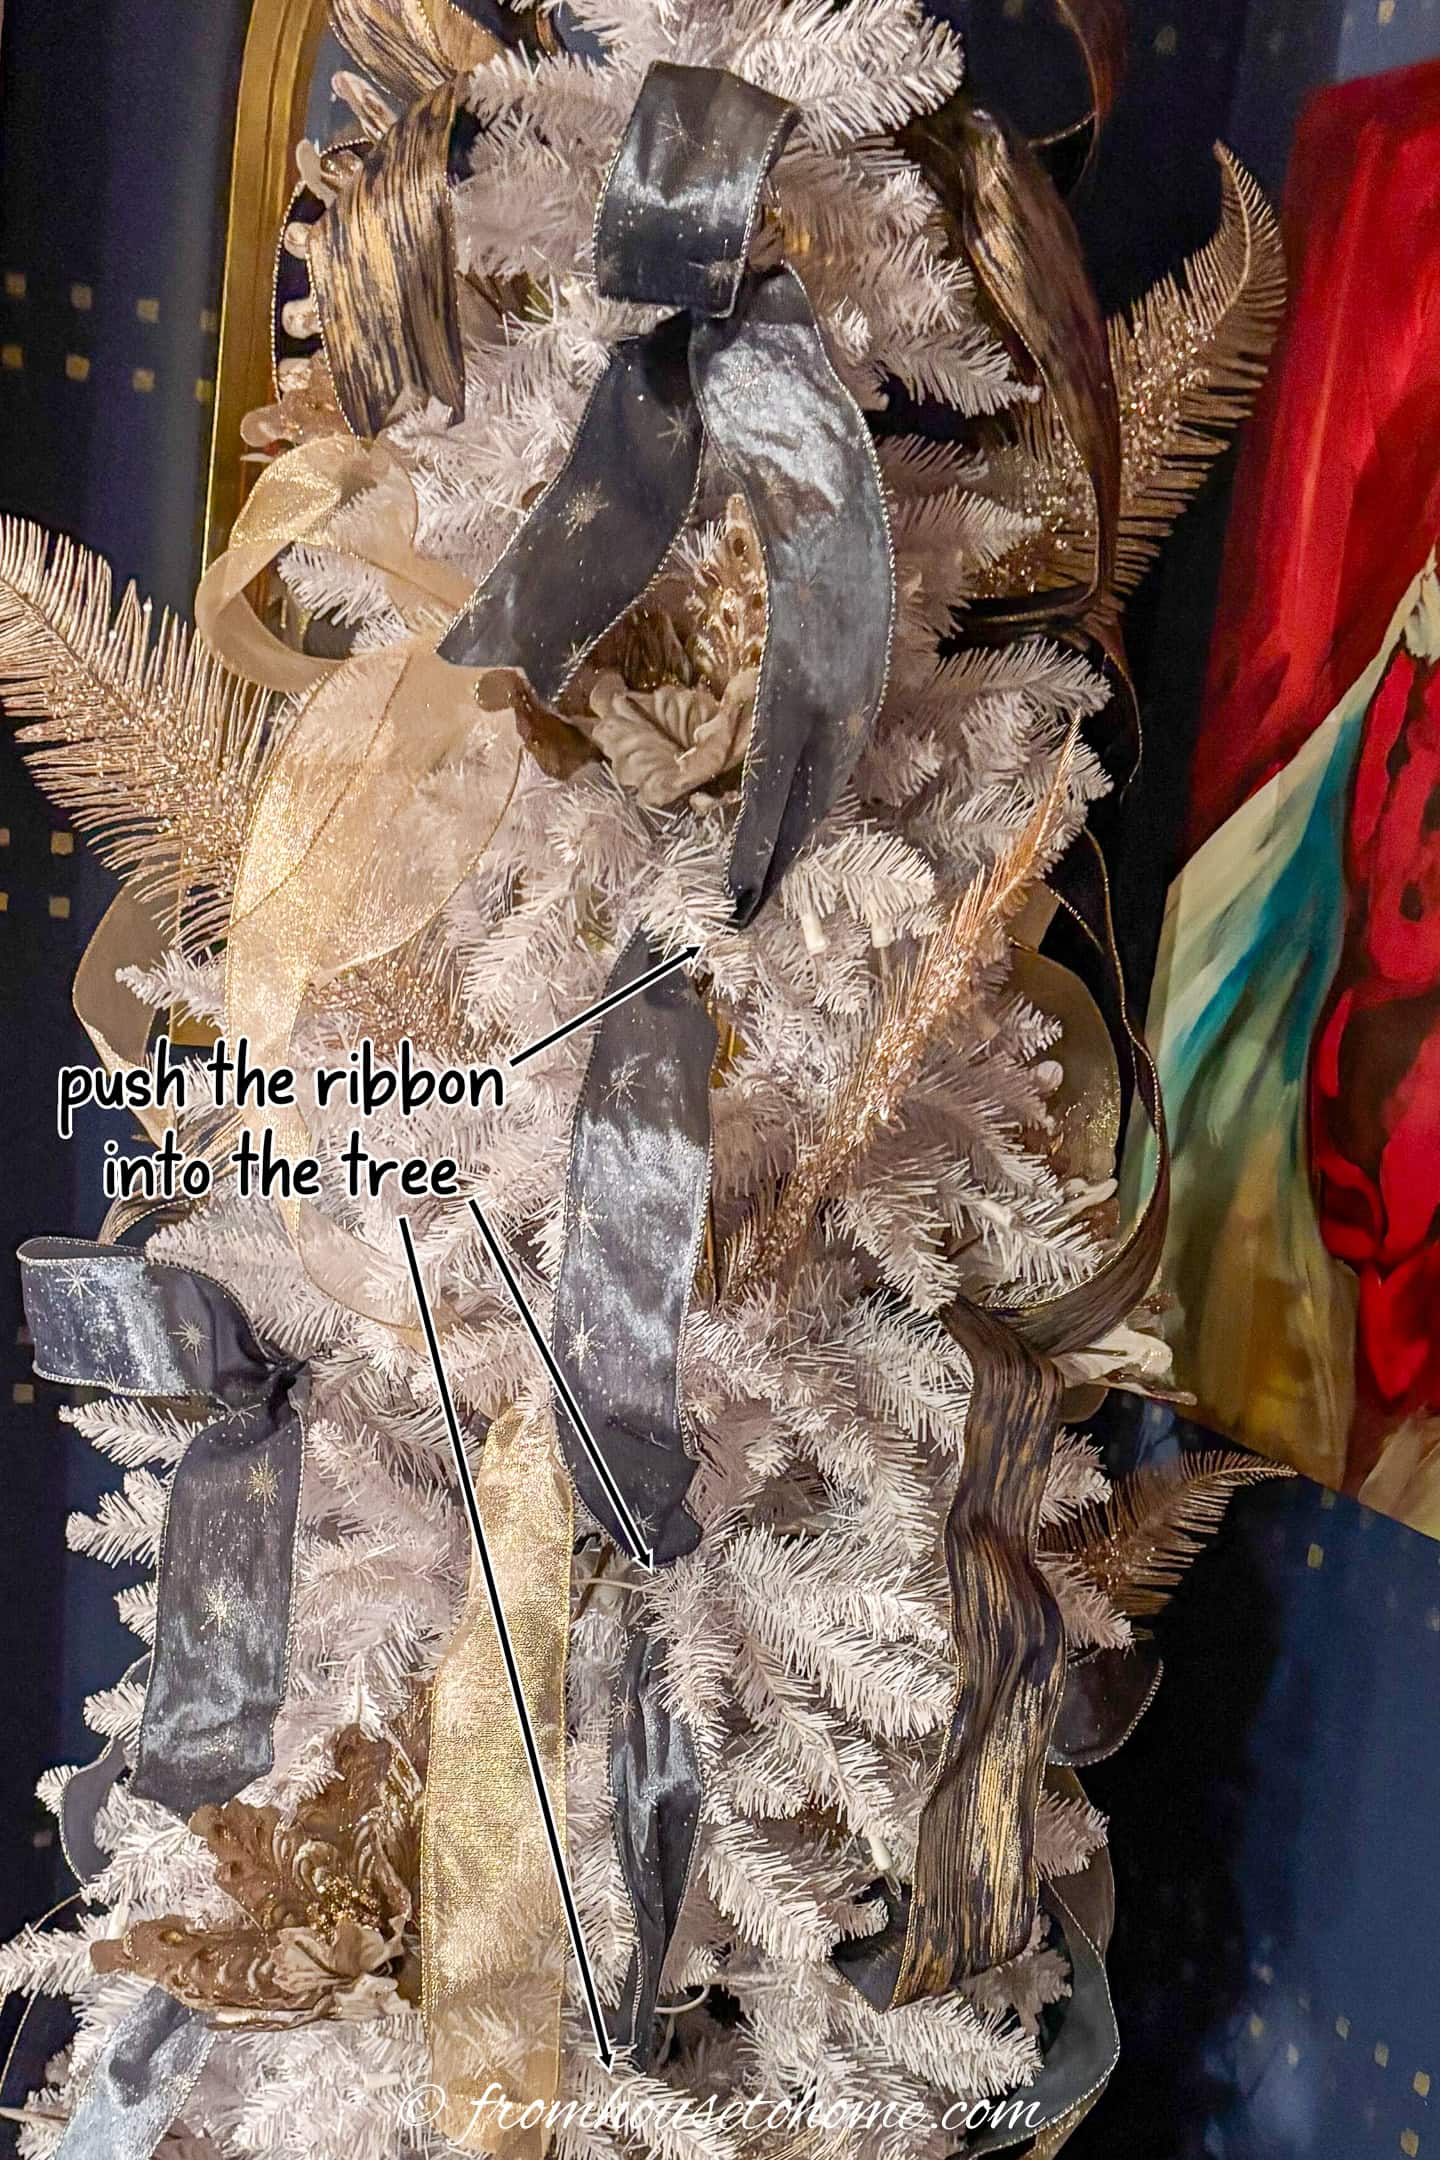
With the long tail of the ribbon, create loops down the side of the tree by pushing it into the tree at 12″ to 18″ intervals. The last indent should be at about two-thirds of the way down.
Make each loop a little bigger than you think it should be and secure each section well back into the tree by tying the ribbon in with the tree branches.
5 | Cut the end of the ribbon
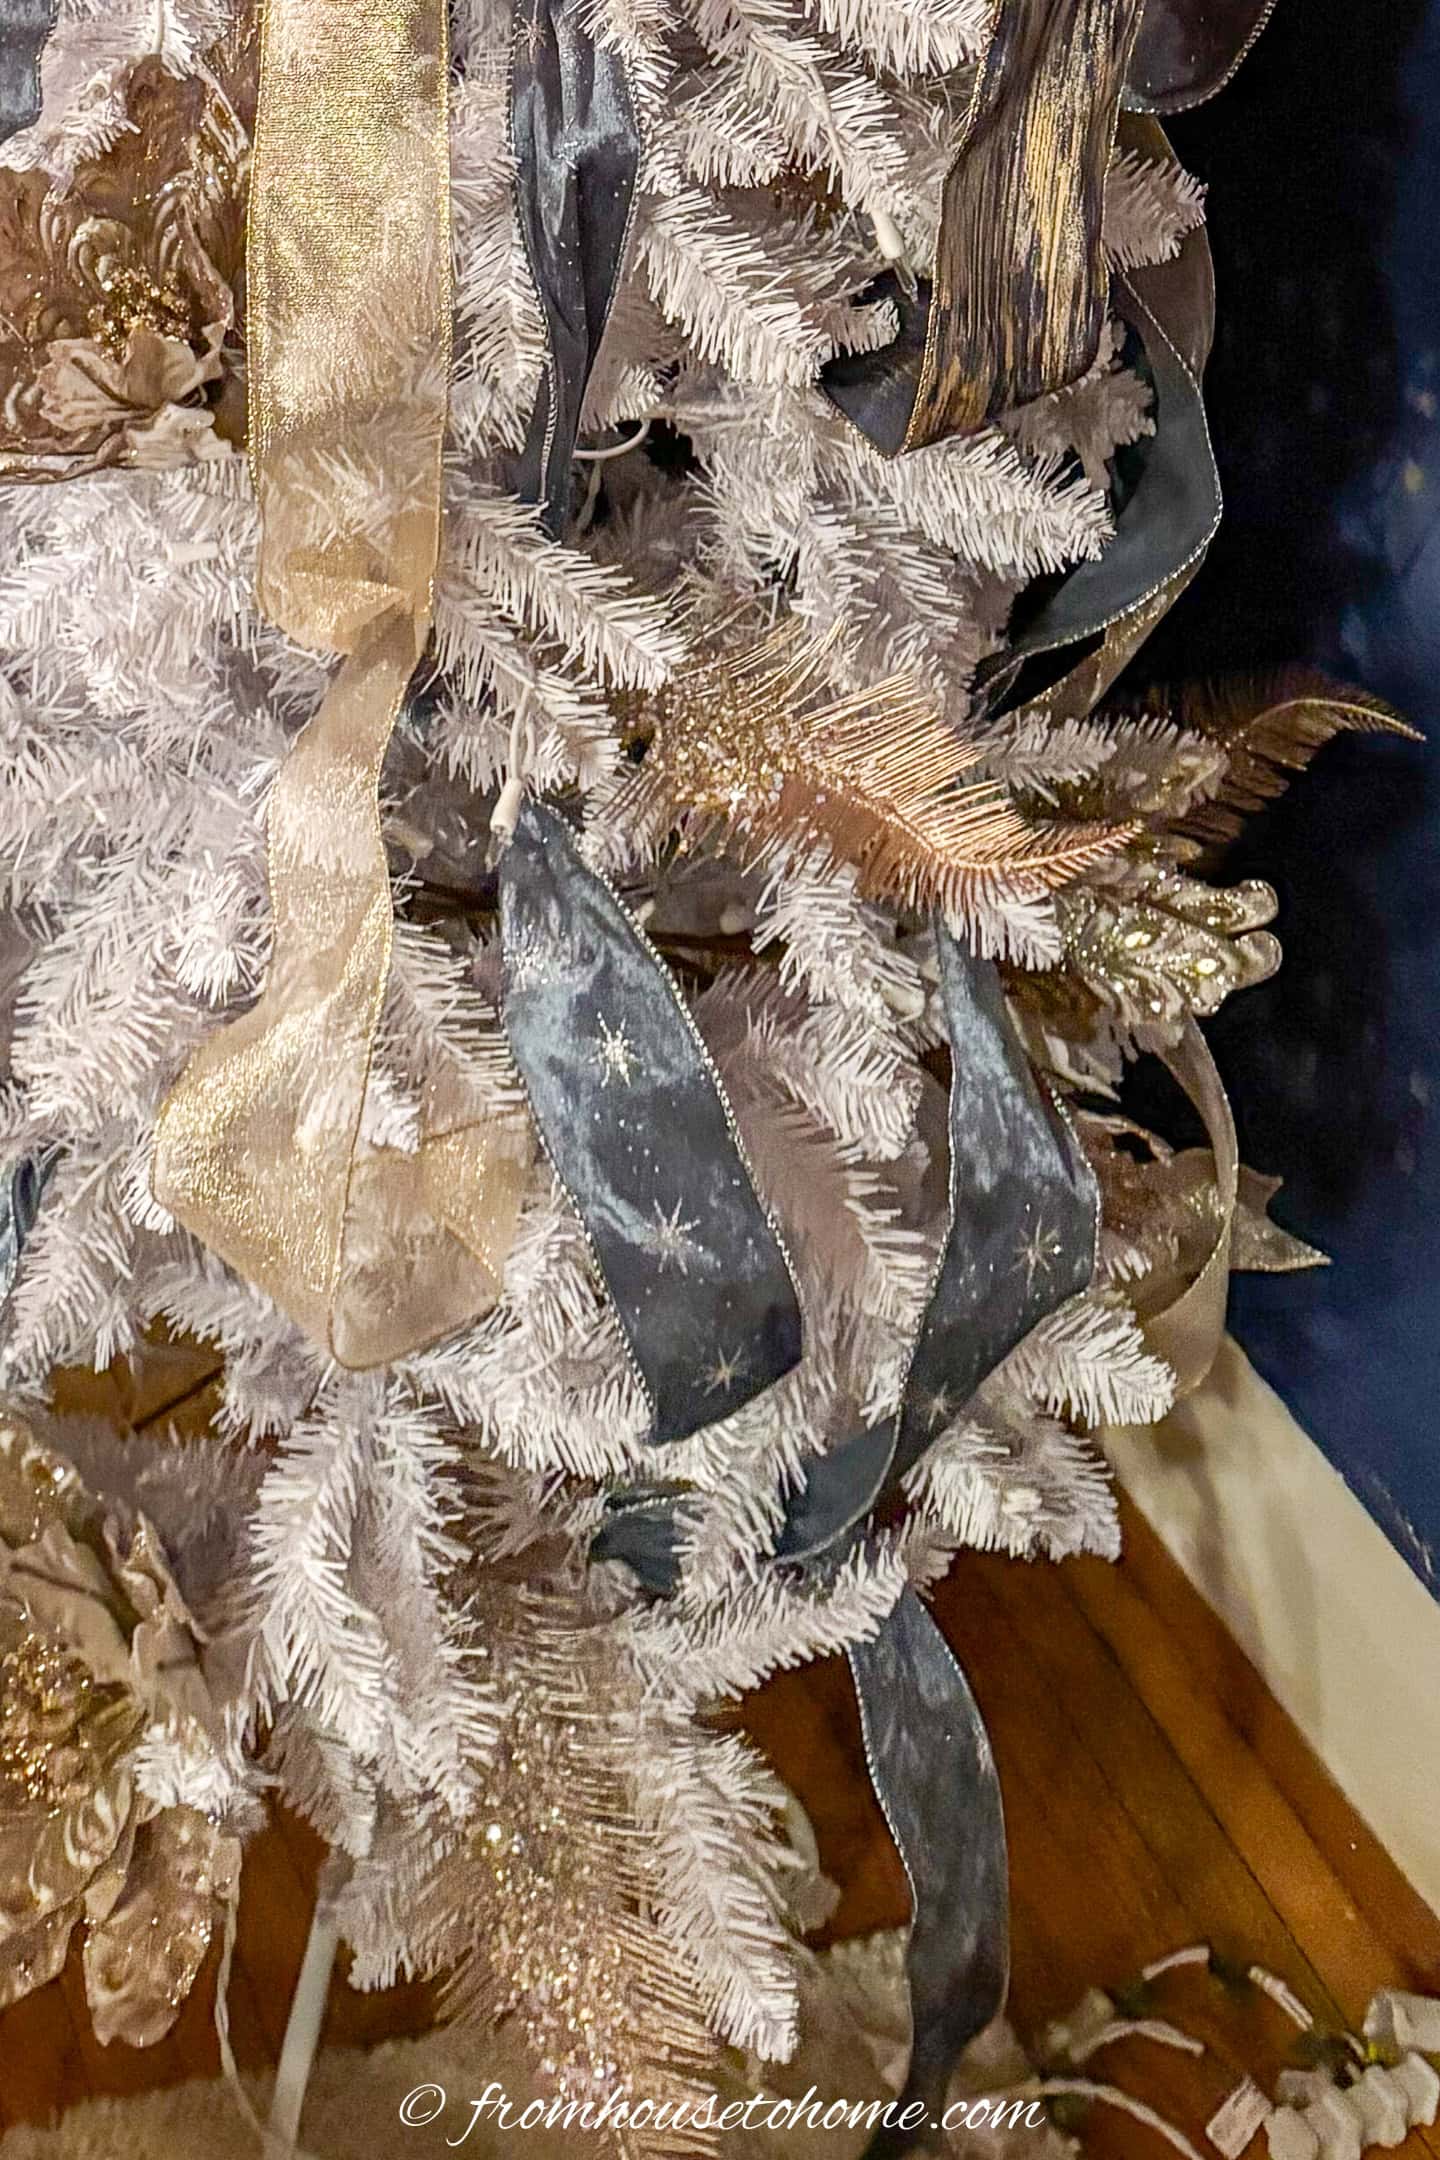
Cut the end of the ribbon about 12″ to 18″ below the last indent.
Dovetail the end like you did at the beginning.
6 | Repeat the process
Make a similar cascade using the same ribbon color on the opposite side of the tree.
Repeat again using the second ribbon color down the middle of the tree, but start a little lower down.
Create 3 more vertical cascading ribbons:
- Make one with the second ribbon color and two using the third color.
- Use the same process as above but with shorter lengths (not all the way from the top to the bottom of the tree).
- These should fill in the spaces between the ribbons you have already put up and start at different heights (mostly lower down on the tree since that’s where you will have more empty space to fill.)
4 | Make bows
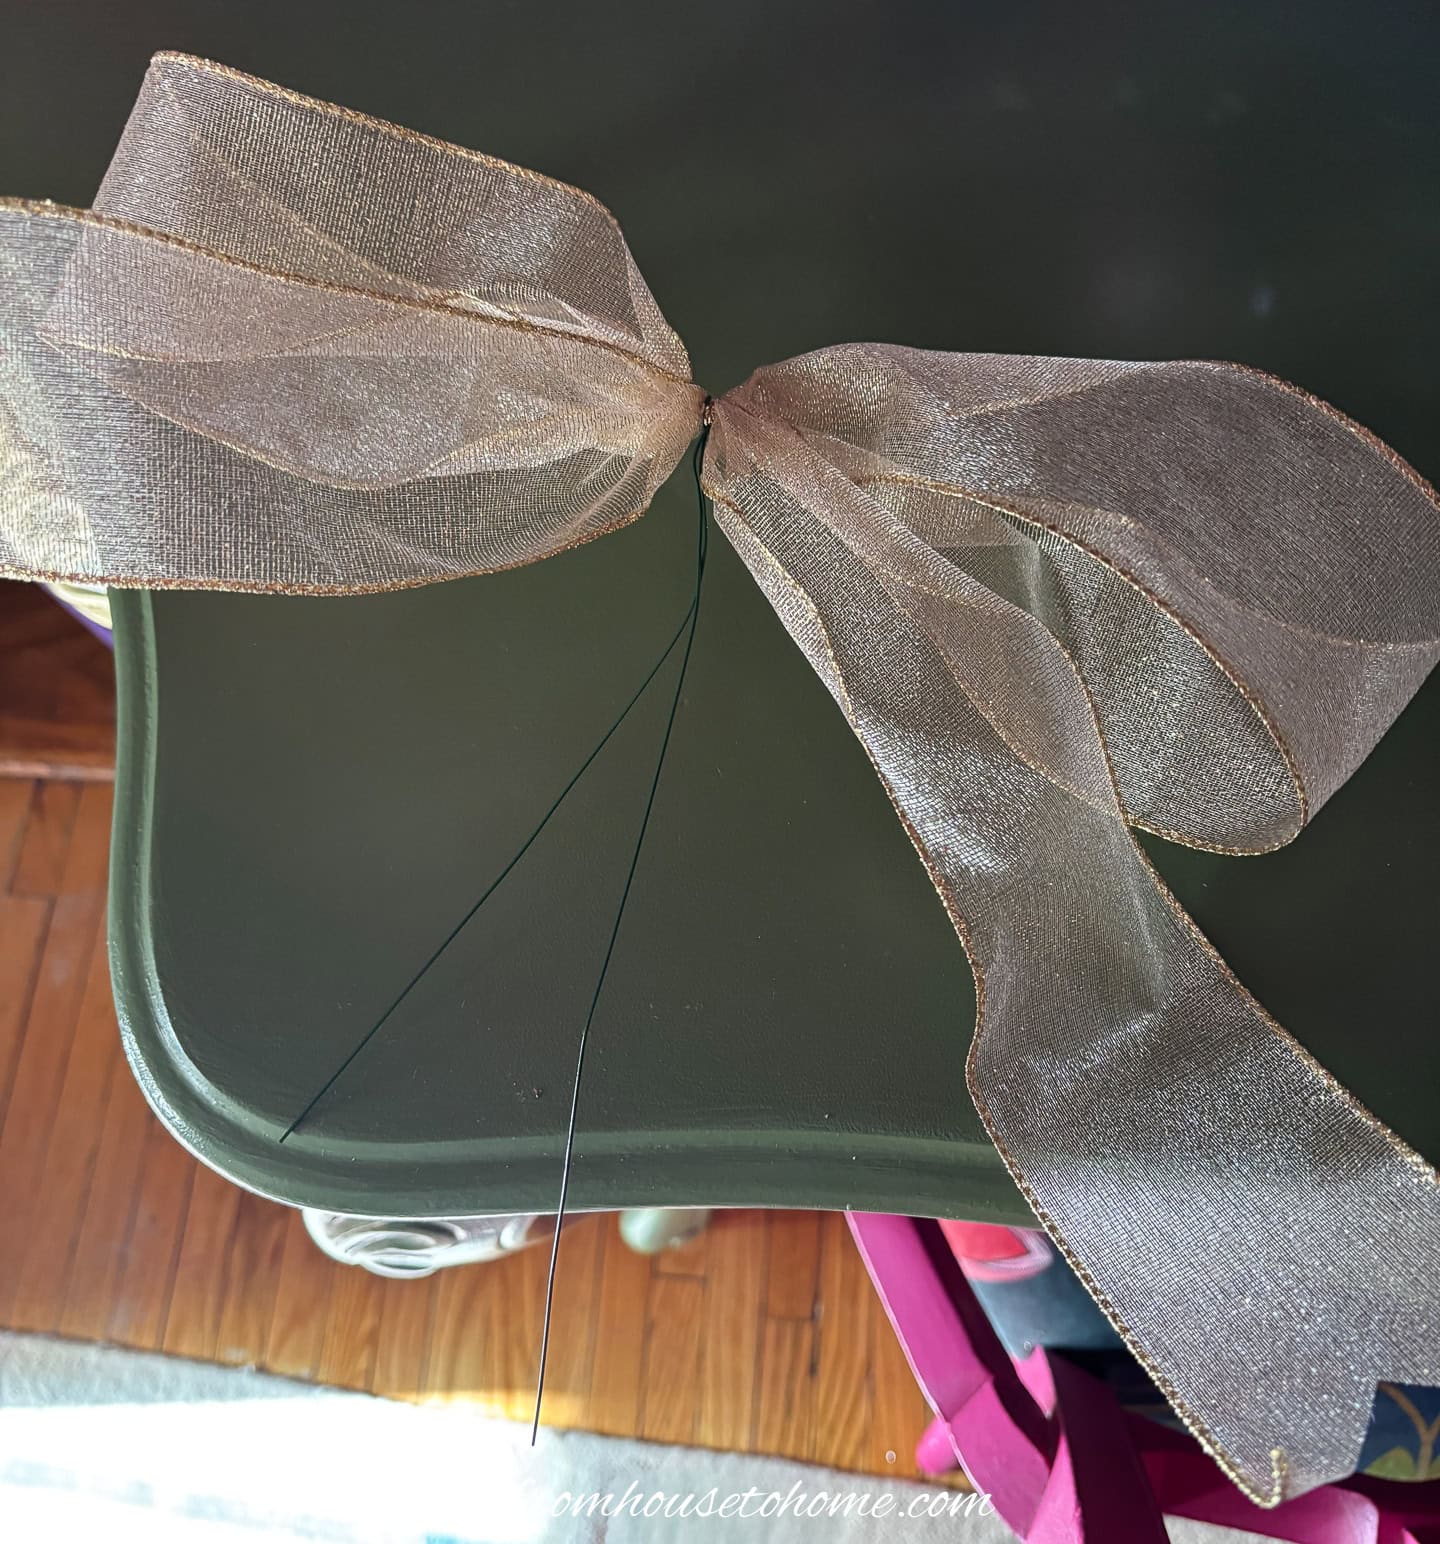
Use the same ribbon colors to make a 2-loop bow for each of the ribbon indents on the tree. (You will probably need 6 to 10 bows for each of the 3 colors, depending on how many indents you made).
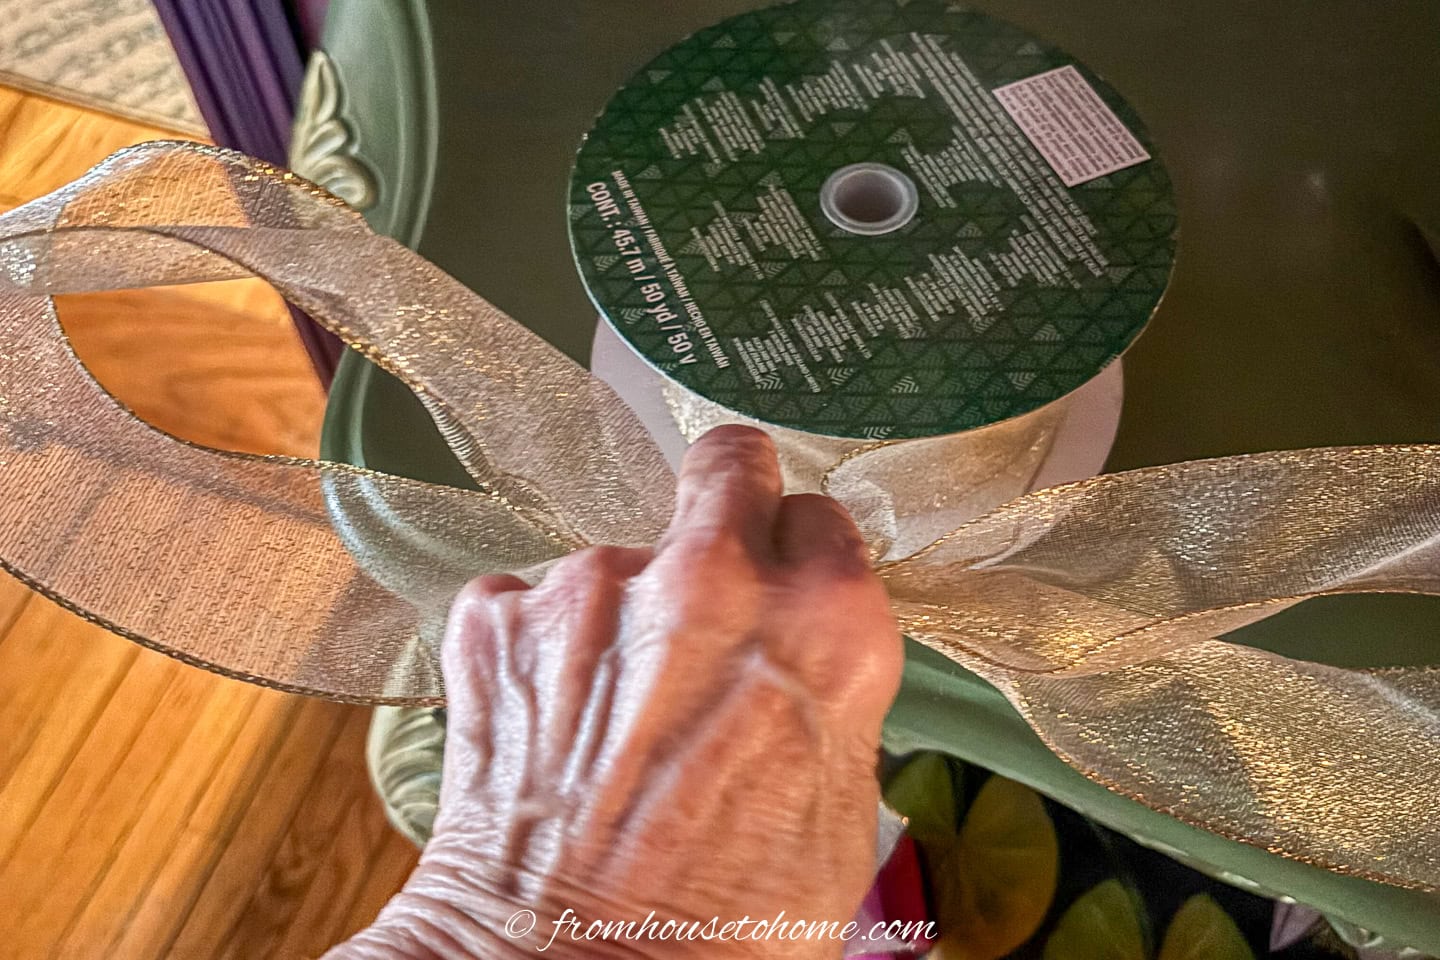
To make a 2-loop bow:
- Pinch at about 8 inches in on the ribbon, make a 6″ loop and pinch again holding the ribbon between your thumb and pointer finger.
- Twist the ribbon at your finger so that the right side of the ribbon is facing out.
- Make another 6″ loop by pinching it into your holding finger and thumb.
- Cut the ribbon off about 8 inches from where you have it pinched. (You should have 2 tails that are each about 8 inches long).
- Wrap the pinched area with a green florists’ wire and pull the wire tight and twist to keep it closed.
5 | Attach the bows to the tree
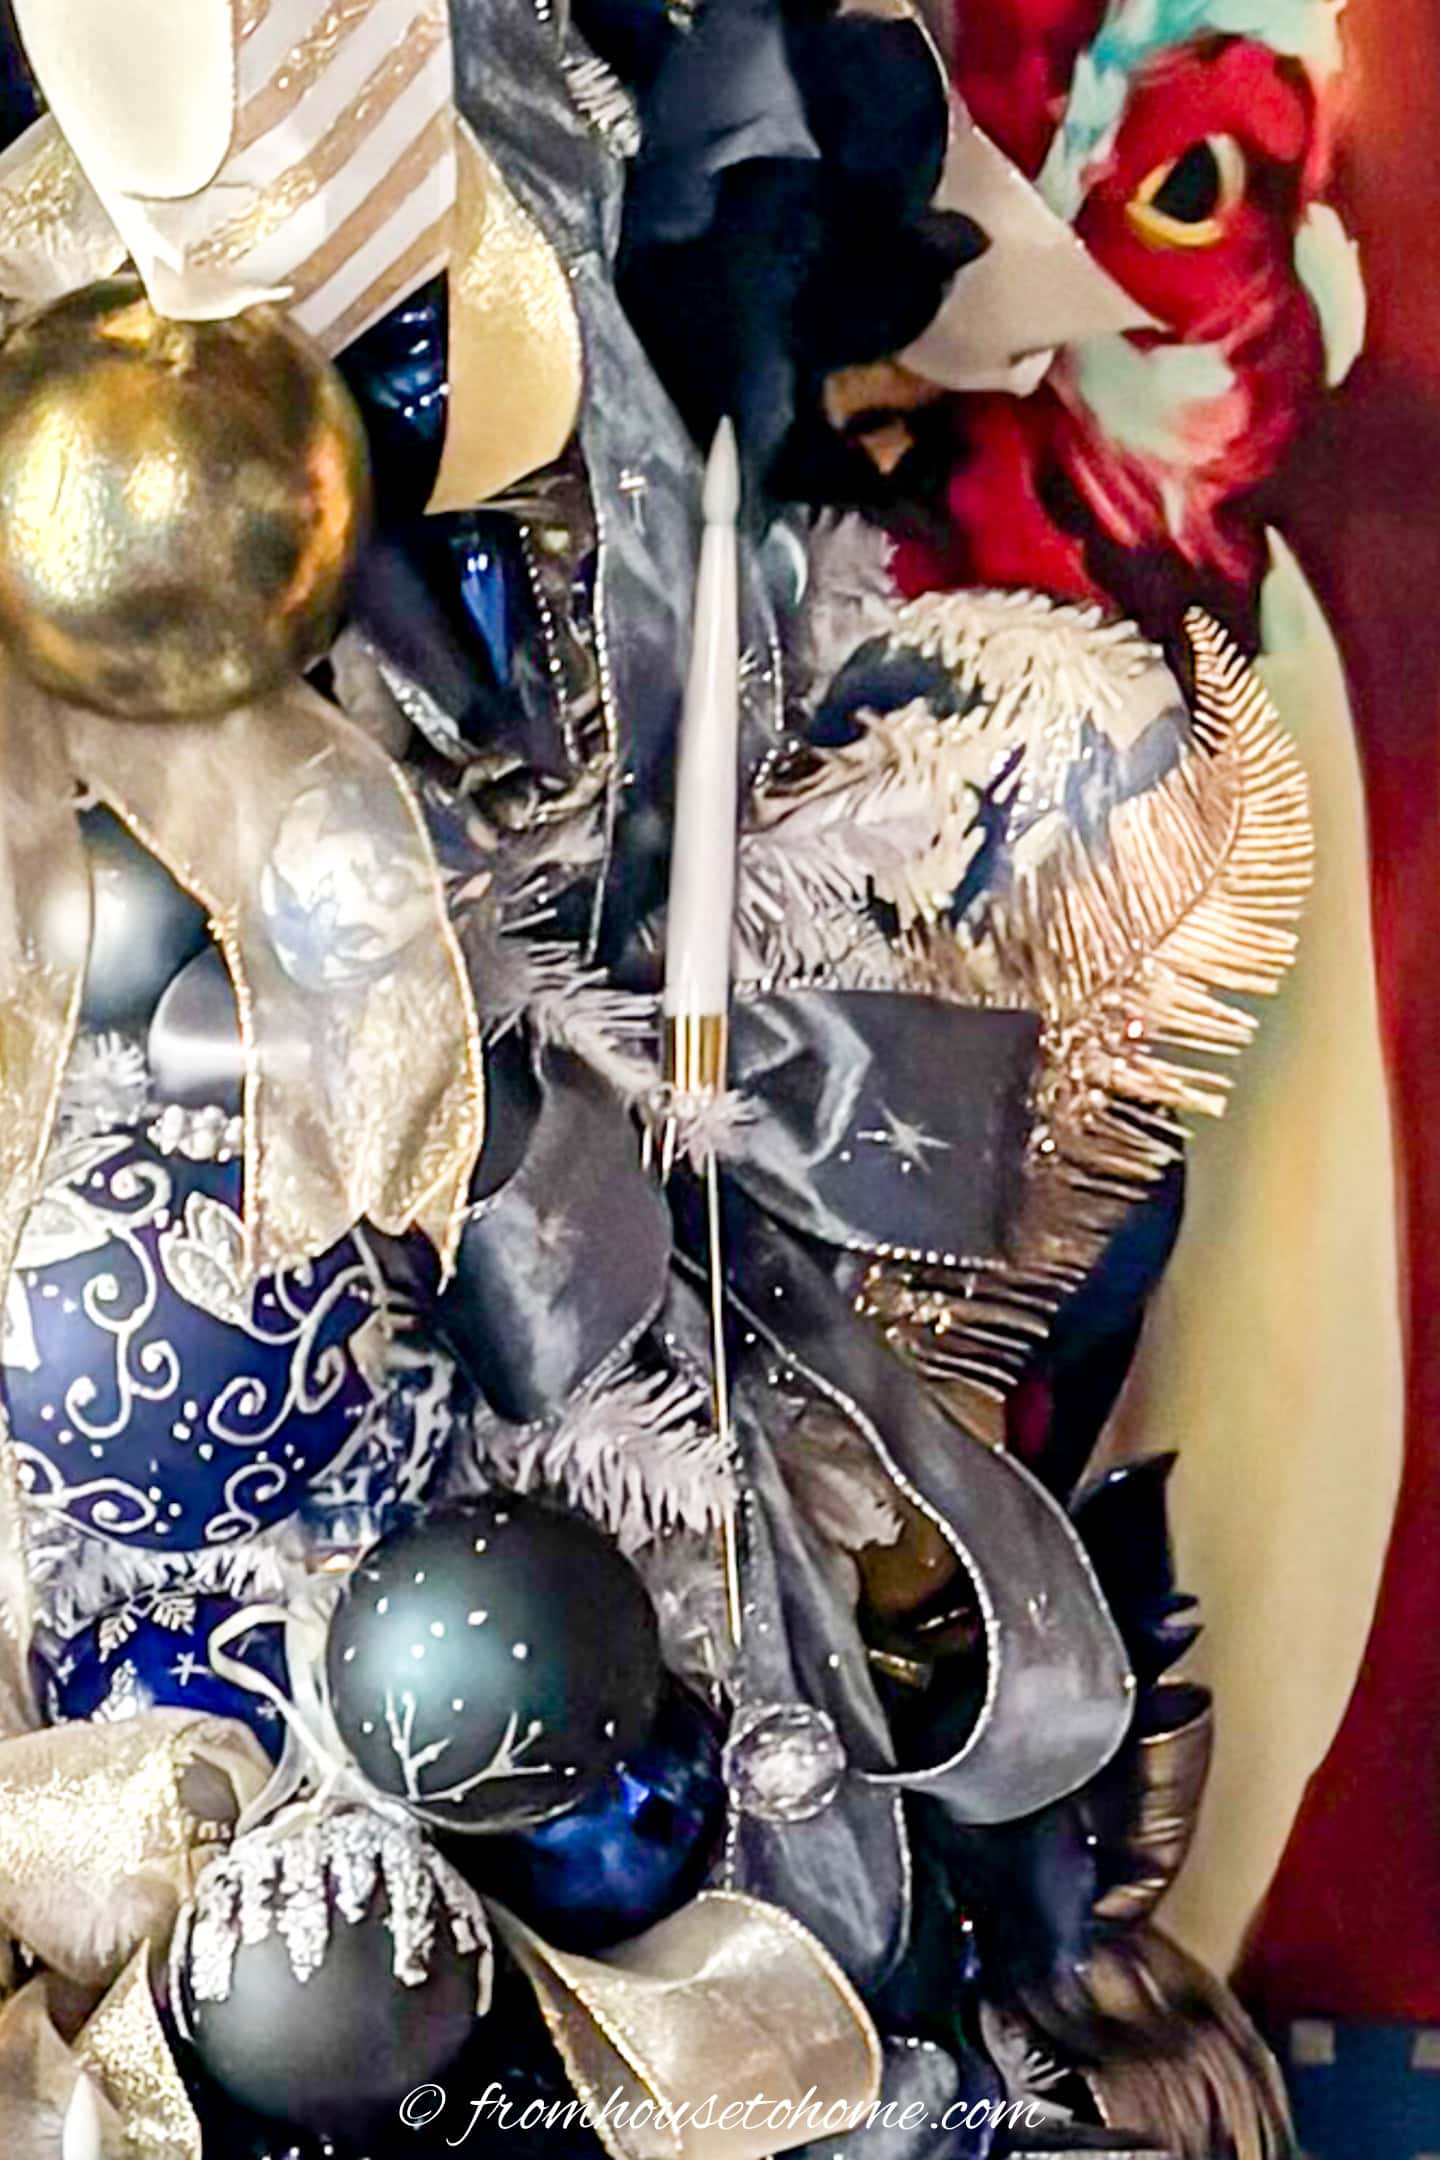
Use the florist wire to attach a bow to each of the ribbon indents on the tree.
Do not make the mistake of attaching the bows to the ends of the branches. They look much better if pushed into the stems so that they can be secured by their wire to the tree branch behind the front stems.
Be sure to fluff and position each bow as you go.
6 | Make the bow tree topper
I used a Bowdabra* to make two large-looped bows for the top of the tree.
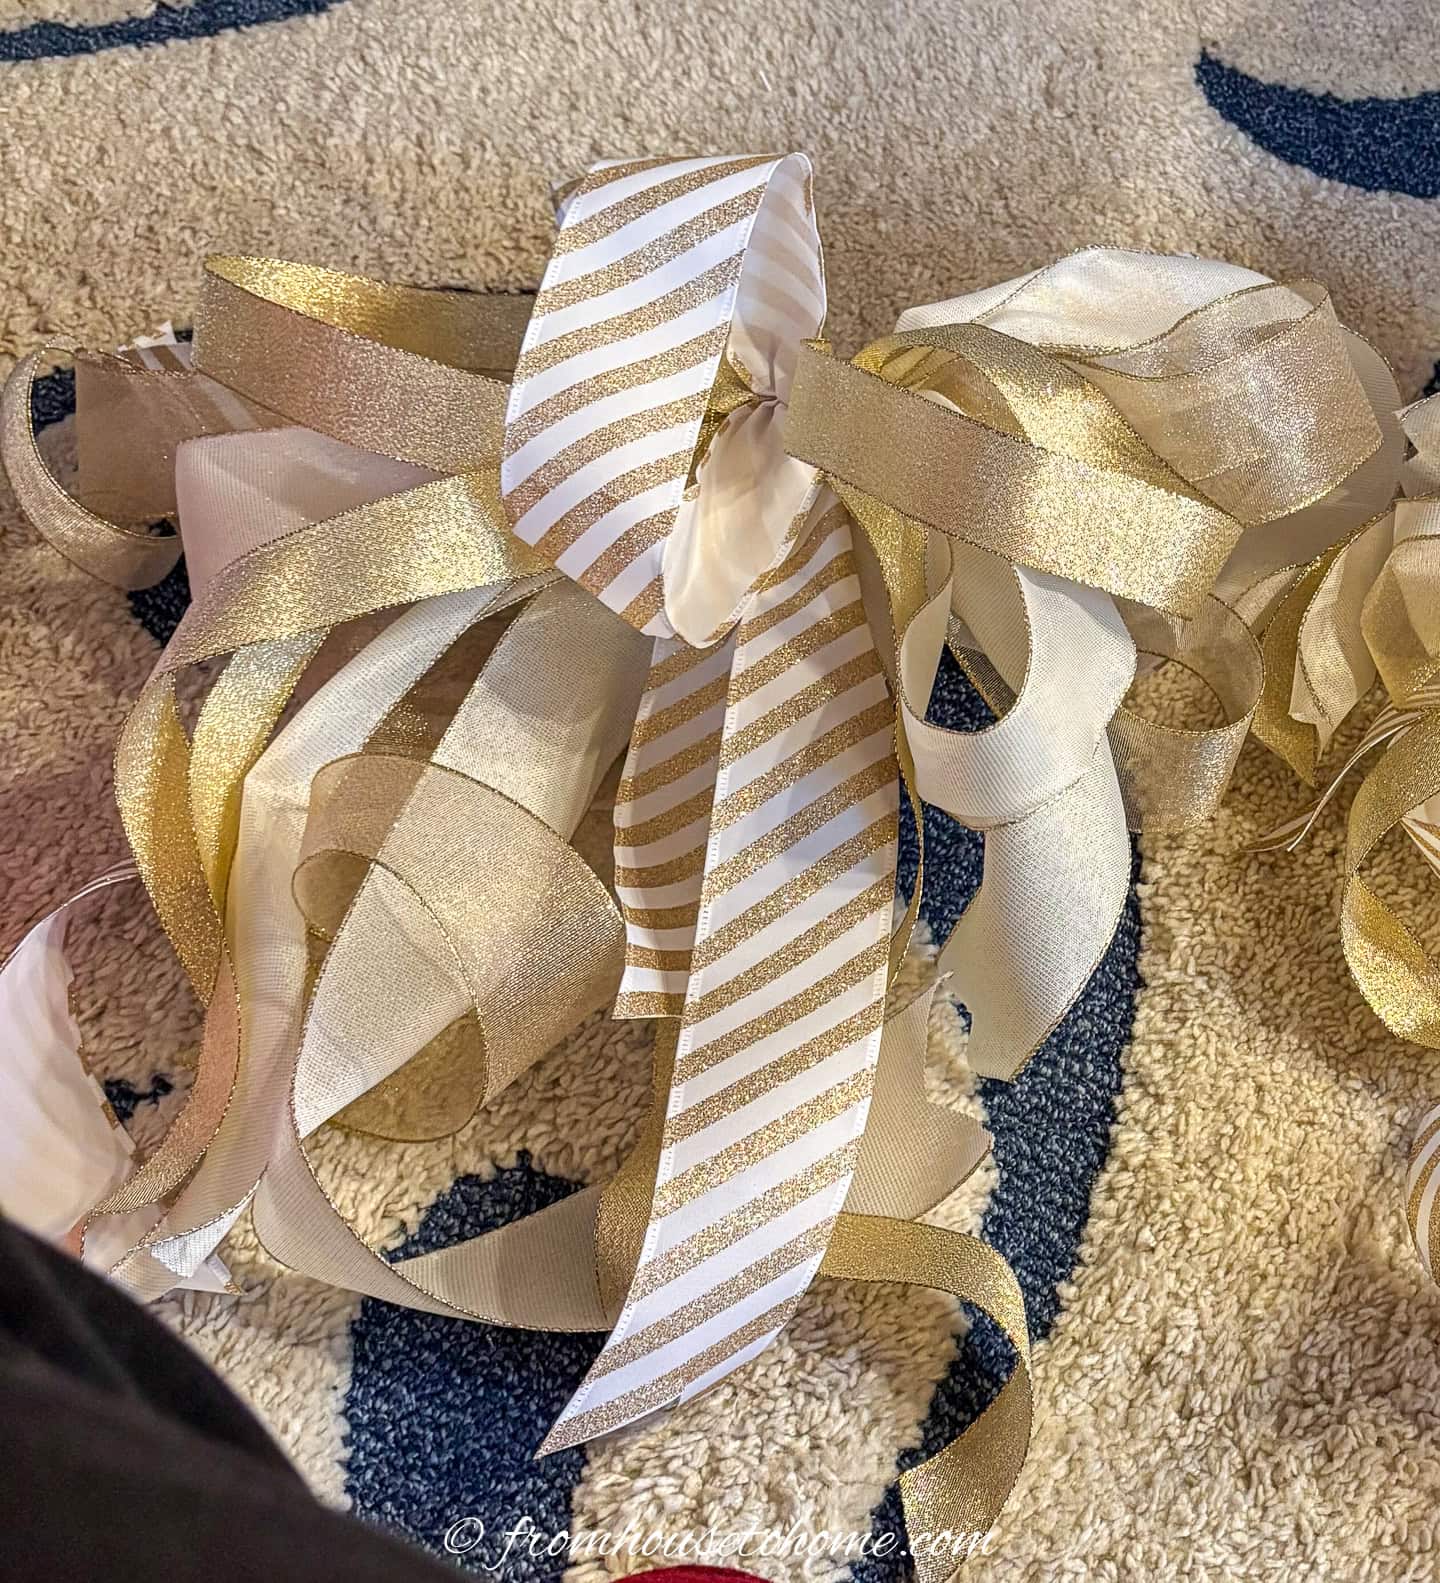
To make the first bow:
- Use 3 2½” ribbons and a 1½” ribbon. In my case, I used a 2½” striped white and gold ribbon, a 2½” gold ribbon, a 2½” gold-edged white ribbon, and a 1½” gold ribbon.
- For each of the ribbons, stack 2 8″ loops with 2 12+ inch tails plus an 18″ piece (inserted in the middle for extra tails).
- End with one loop and 2 tails in the first ribbon color.
- Tie to secure the center.
To make the second slightly smaller bow:
- use the same ribbon colors that you used on the tree.
- follow the same directions as above but use 6″ loops instead of 8″ ones.
Tie the smaller (second) bow to the front of the larger (first) bow.
7 | Put up the tree topper
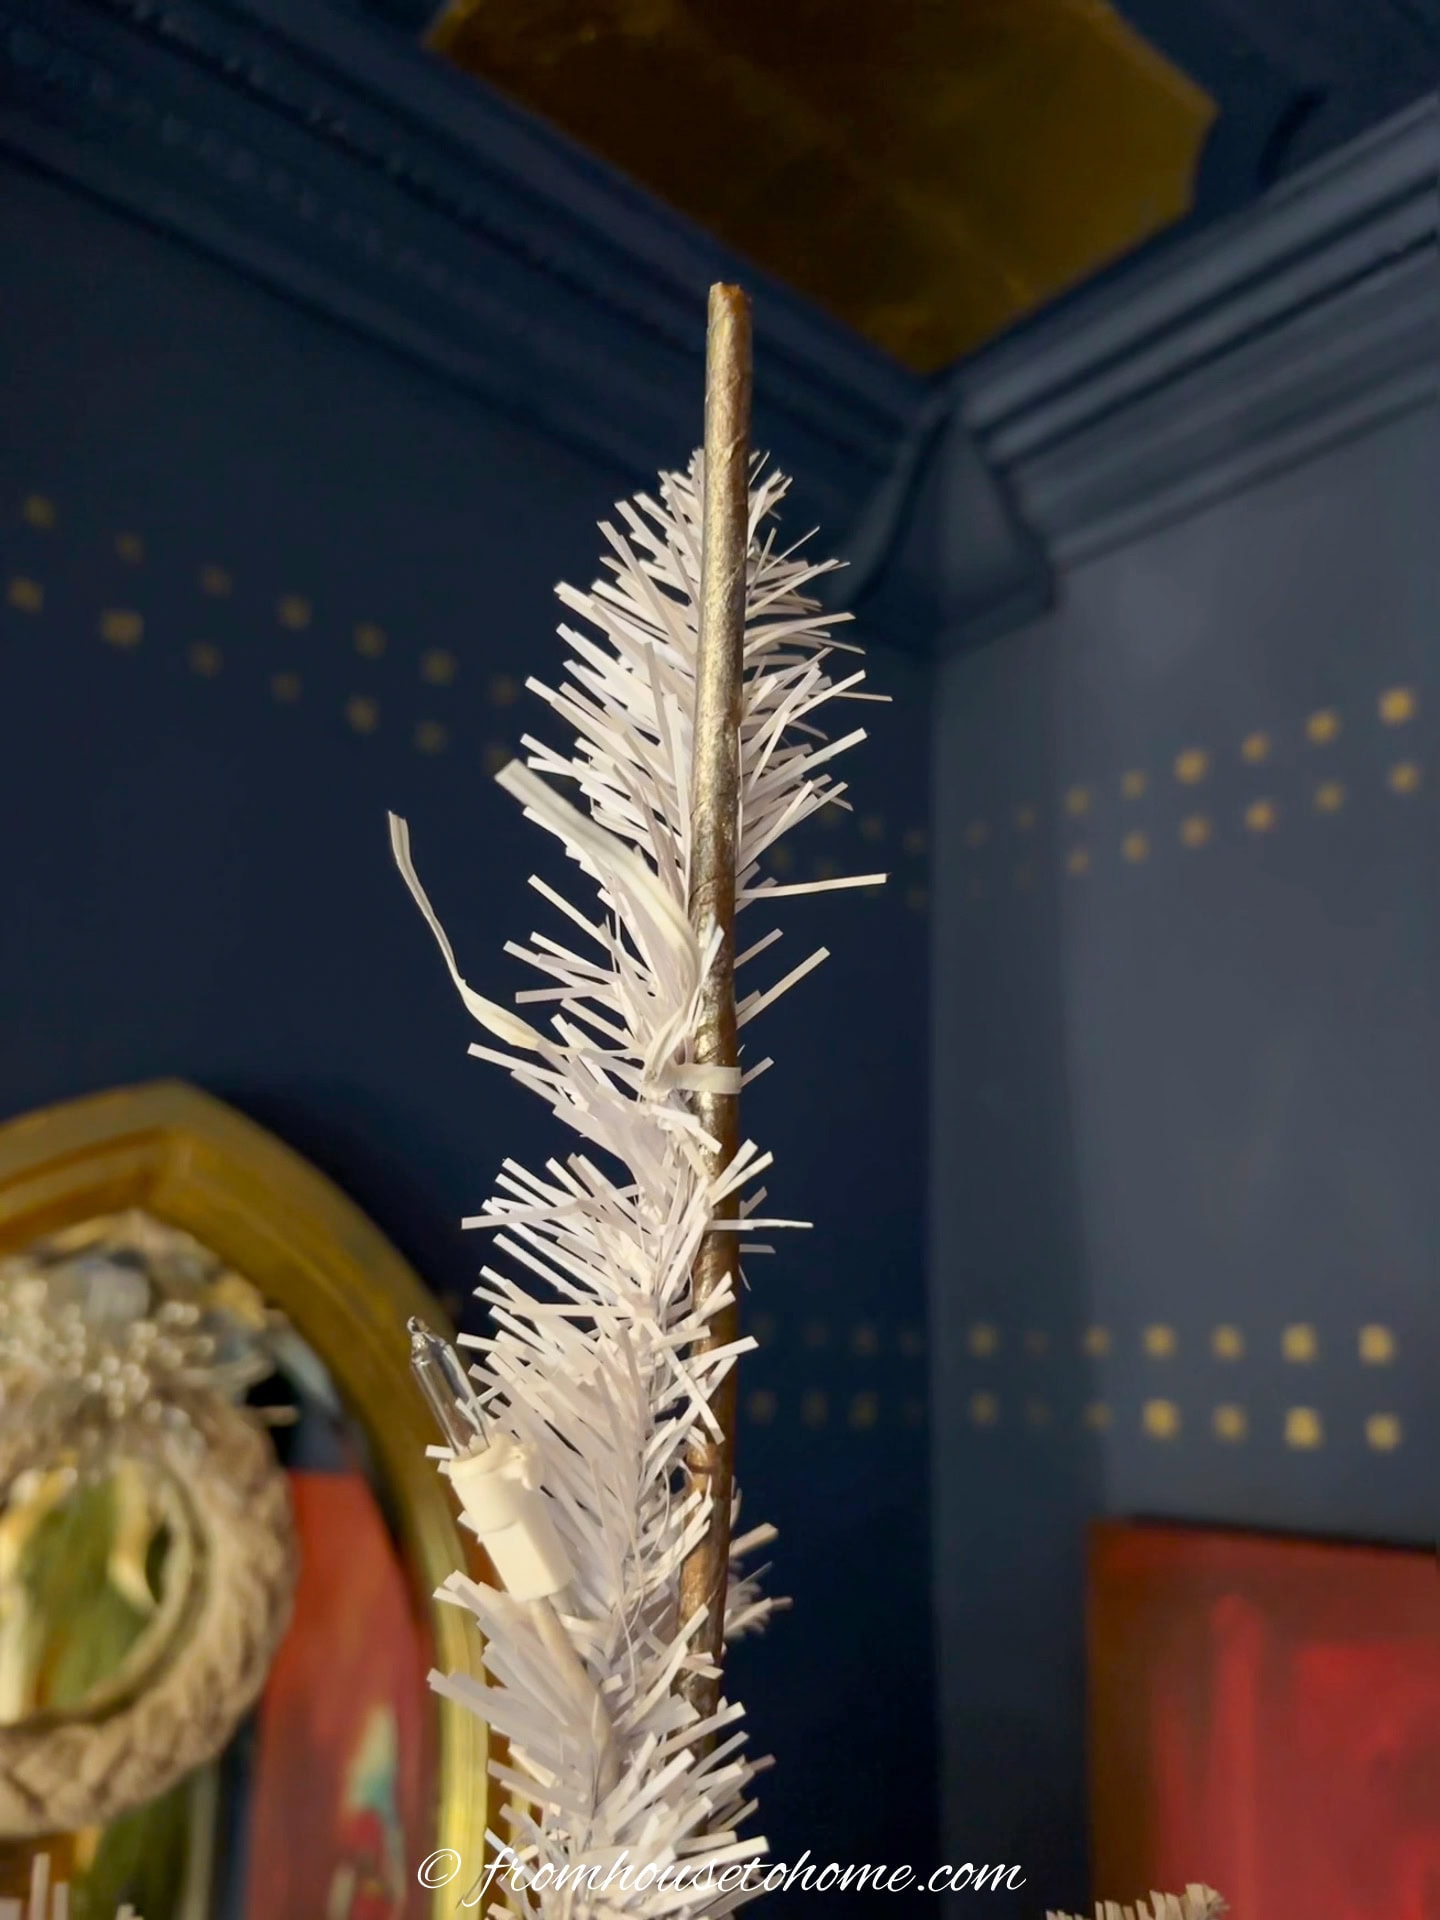
Because the bow is pretty big and heavy, the top of your tree may not be strong enough to hold it upright (mine wasn’t).
To fix this, I wired a supporting thin stake to the stem of the tree securing it well down the center trunk of the tree with tight cable ties.
I used a plumbing pipe, but a 2- or 3-foot garden stake would also work well.

Then you can tie your bow to that center stake and it won’t flop over.
8 | Create ornament clusters
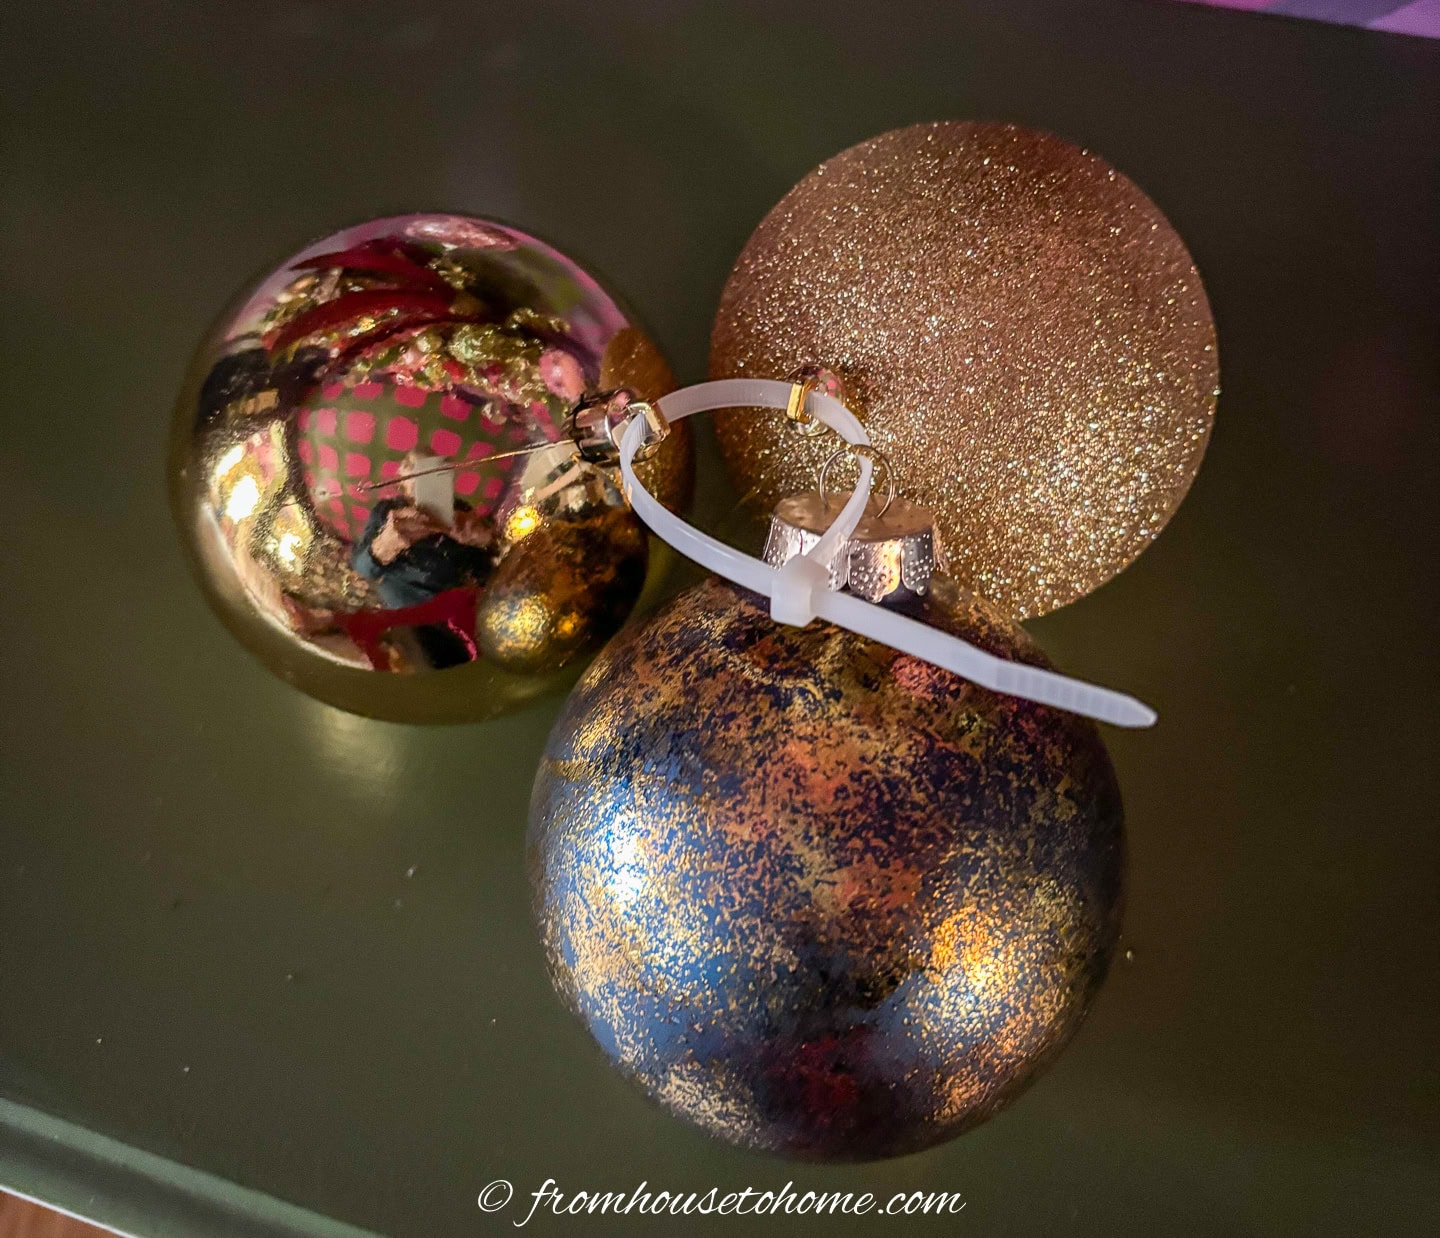
This year, instead of using single balls, I created clusters of ornaments.
To do this, string the ornaments onto a 6″ zip tie. Then close the tie part way to leave a loop which can be slipped over a tree stem.
I combined a variety of 2½” and 3½” navy, white, and gold balls, including these DIY chinoiserie ornaments I made a few years ago.
If the ornaments keep detaching from their tops, you can use a little hot glue to hold them.
9 | Hang ornaments and clips

In addition to the ornament clusters, I also hung individual fancy 3½” blue and white toile balls, navy 4″ finials, and a whole bunch of blue and white, miniature ginger jars. They speak to the large ginger jars throughout the room.
I found some navy velvet poinsettias and peony clip-ons in my stash that I had forgotten about so I filled in gaps with those.
10 | Clip on flame-less candles
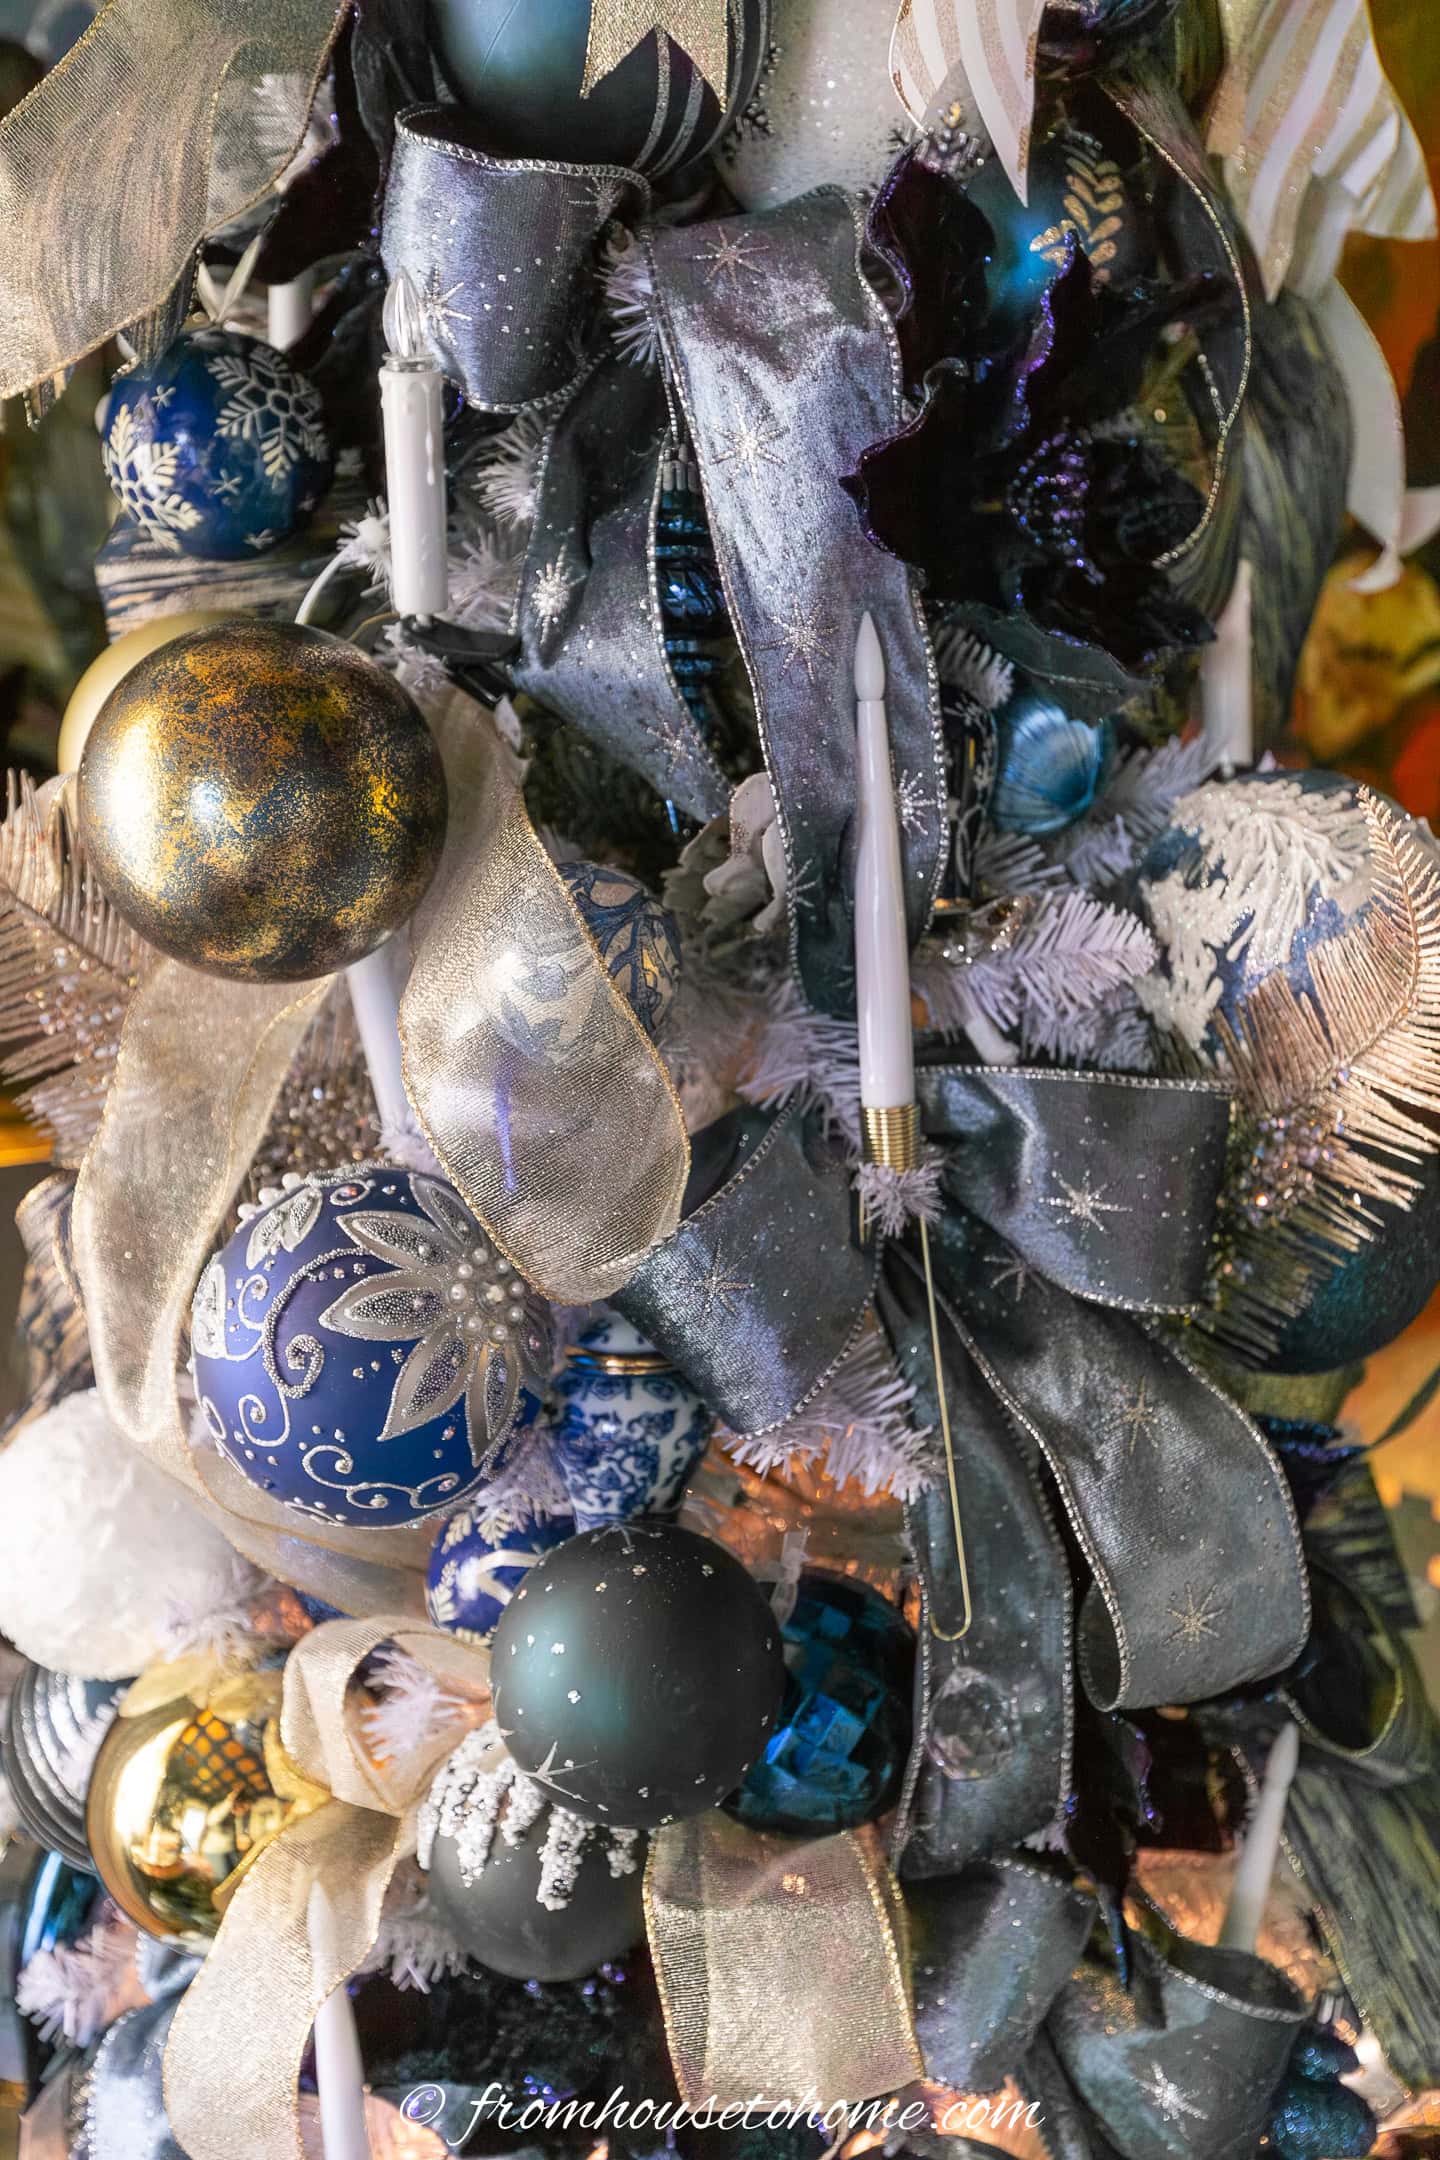
Lastly, I attached LED battery-operated candles to the ends of branches. They come with remote timers which is convenient.
Where possible, I positioned them in front of one of the bows.
As a finishing touch, I very gently adjusted any crushed or crooked ribbons and bows by pulling them straight, or out from under ornaments.
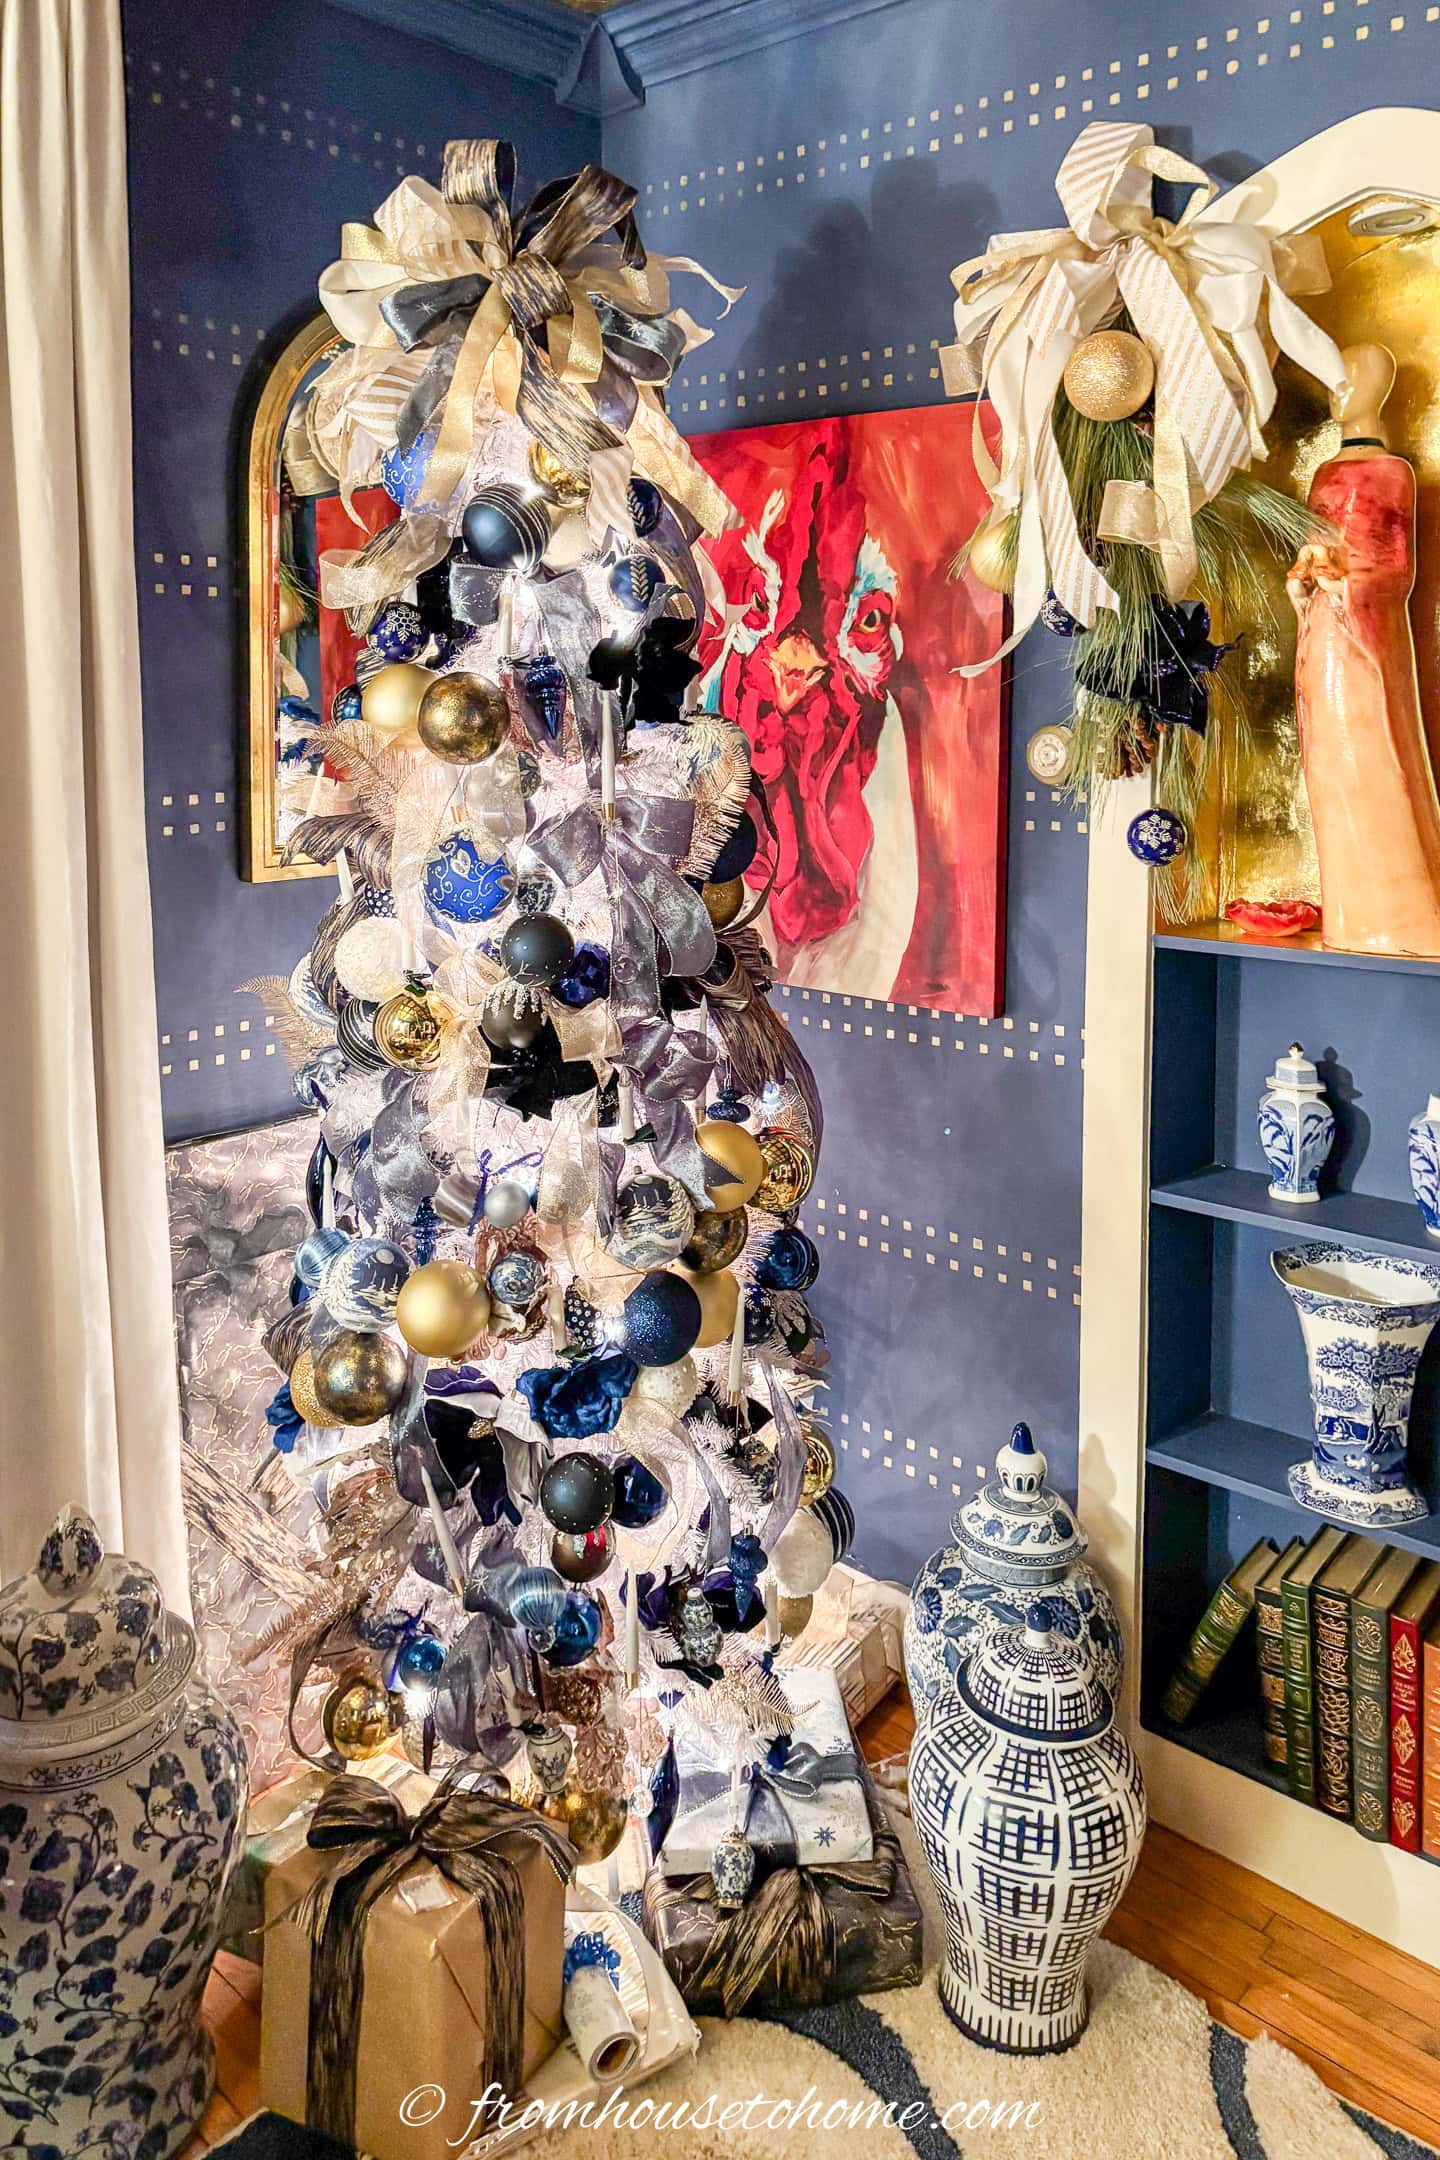
I love the end result with the ribbons adding softness while the ornaments add sparkle.
And the color scheme definitely goes with the room!