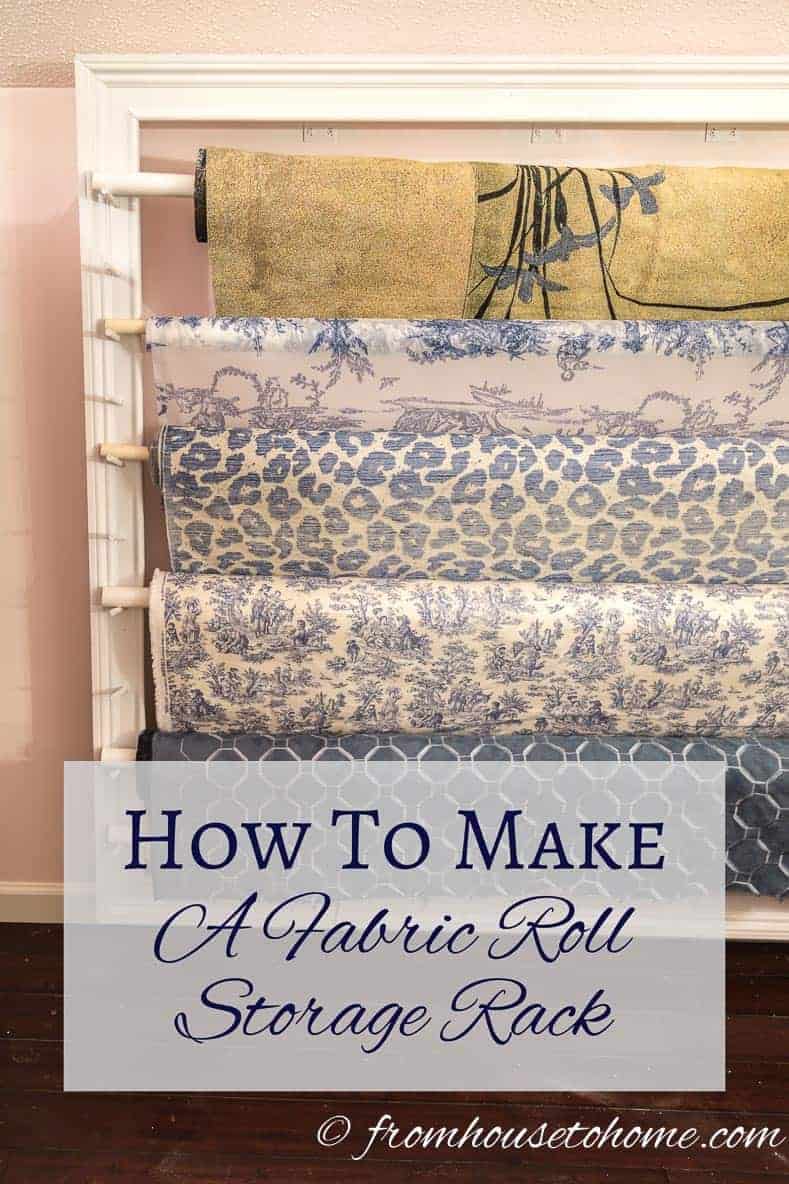
How To Make a Fabric Roll Storage Rack
Okay…I know there probably aren’t that many people who have multiple rolls of fabric hanging around the house…but I have a bad habit of buying fabric, and then not getting around to doing the project.
So I needed some way to store them that is easy to get at and doesn’t take up a lot of room. So I immediately thought of the racks of fabric that they have at the fabric store. Since I’m not sure where you actually get the racks that they keep fabric on at the store, and I didn’t really want something that big…a DIY project was in order!
What I came up with is basically a large frame with some dowels installed at an angle and PVC Pipe as the poles (although you could really use any kind of a pole…closet rods, copper pipe or curtain rods would also work fine).
Add the fabric and you have made your fabric roll storage rack.
What You Need
Materials
- 4 – 2″ x 4″ x 8′ boards
- Primer
- Paint
- 2″ Screws
- 4 – 2 1/2″ to 3″ wide x 8′ moulding (such as baseboard or chair rail moulding)
- Finishing Nails
- Caulk
- 2 – 2″ x “2 x 18” boards
- 4 – 4″ Angle Brackets
- 3 – 2″ Angle Brackets
- 1″ Screws
- 3/8″ dowels*
- 9 – 6′ lengths of 3/4″ to 1 1/4″ PVC Pipe – Curtain rods, closet rods or copper pipe would also work
Tools
- Miter saw
- Random orbit sander and sandpaper
- Cordless Drill
- Construction Square
- Mini Pocket Hole Jig with 3/8″ drill bit*
- Hammer
Measure and Cut The Frame
1. Measure the length of the longest fabric roll. Add 5″ to this measurement to come up with the width of the frame. For me, the longest roll was 60″, so I used 65″ as my width measurement.
2. Figure out how tall you want the frame to be…just make sure you can reach the rolls at the top. Since my fabric rack is going in the bonus room, I could only make it 56″ high.
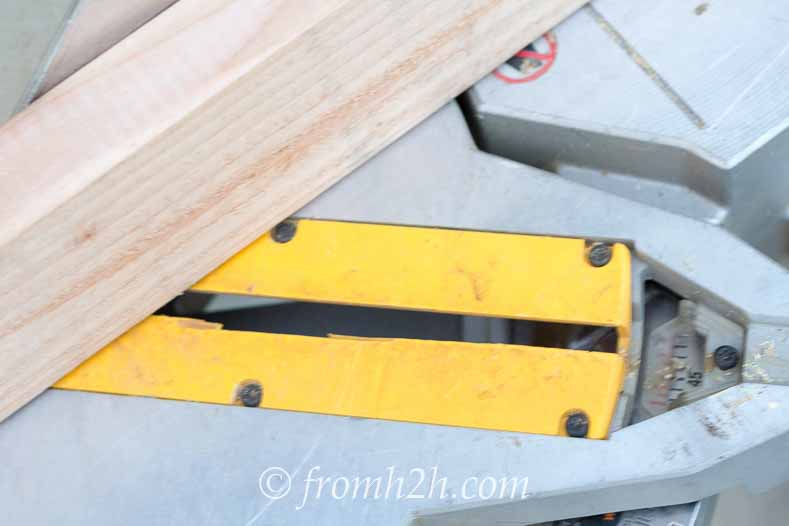
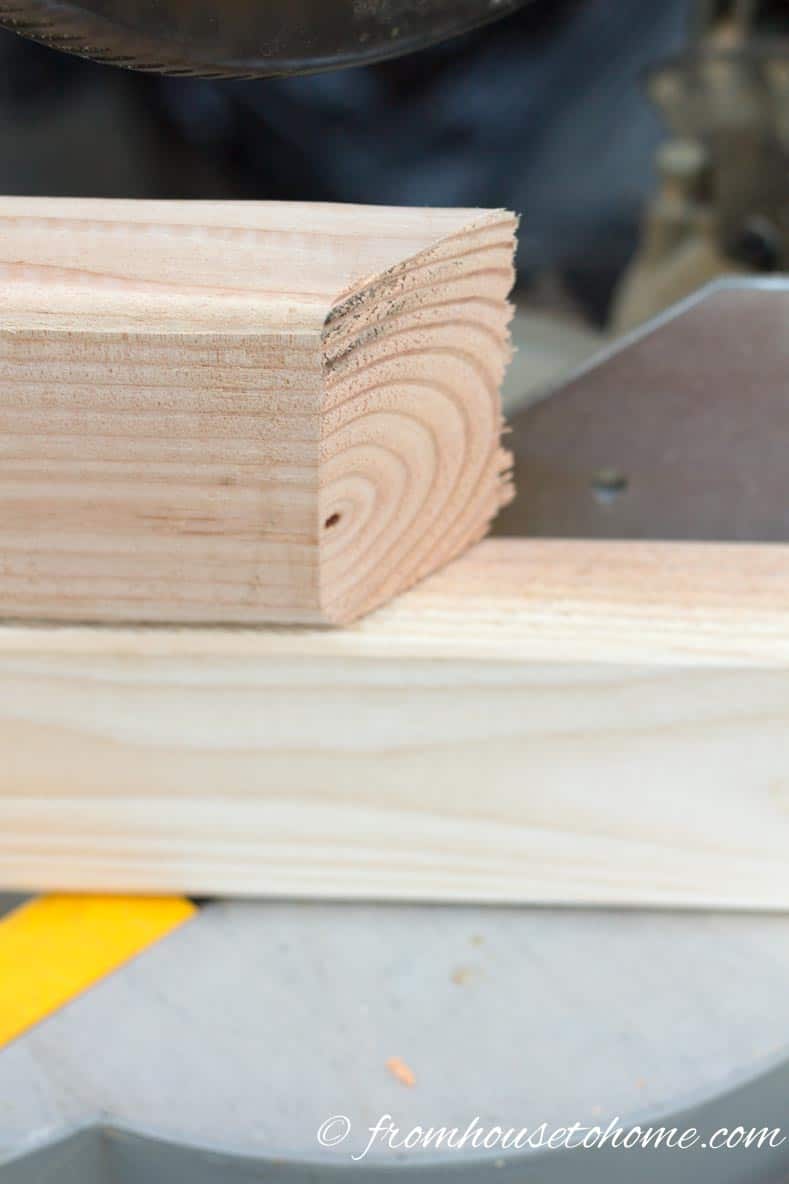
3. Cut one of the 2″ x 4″ boards:
a. Mark one of the 2″ x 4″ boards with the width measurement from step 1.
b. Stand the board on its edge on the miter saw
c. Then cut one end with a 45º angle.
d. Cut the other end so that the angle is going in the opposite direction of the first one and your measurement is on the long side of the board.
e. You should end up with one side of the board being shorter than the other. The long side of the board should equal the length you measured in step 1.
4. Cut the next 2″ x 4″ board to the same length:
a. Position the board that you just cut on top of one of the other 2″ x 4″ boards.
b. Mark the angle at both ends of the board
c. Use the miter saw to cut along the outside edge of your pencil mark.
5. Repeat steps 3 and 4 for the second measurement that you took.
Sand and Paint

1. Since 2″ x 4″ boards are usually a little rough, use a rotary sander to smooth them out.
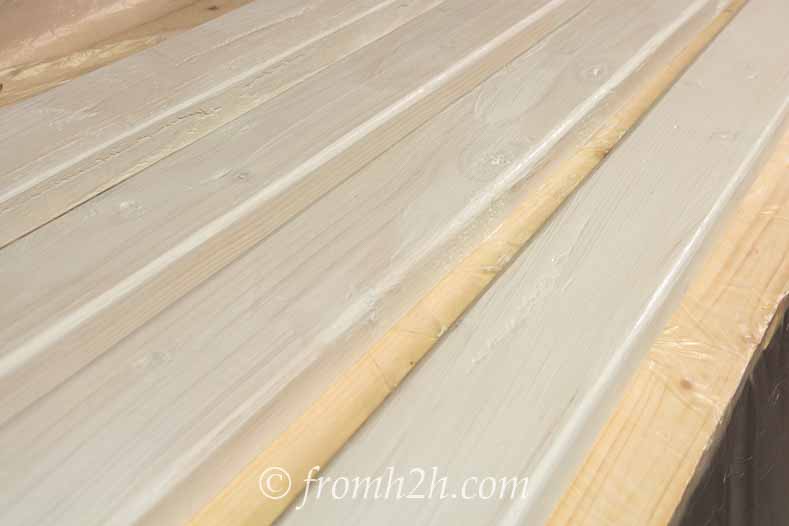
2. Prime the boards. It’s easier to do this now before they have been put together.
3. You can also add the first coat of paint if you want to.
Assemble The Frame
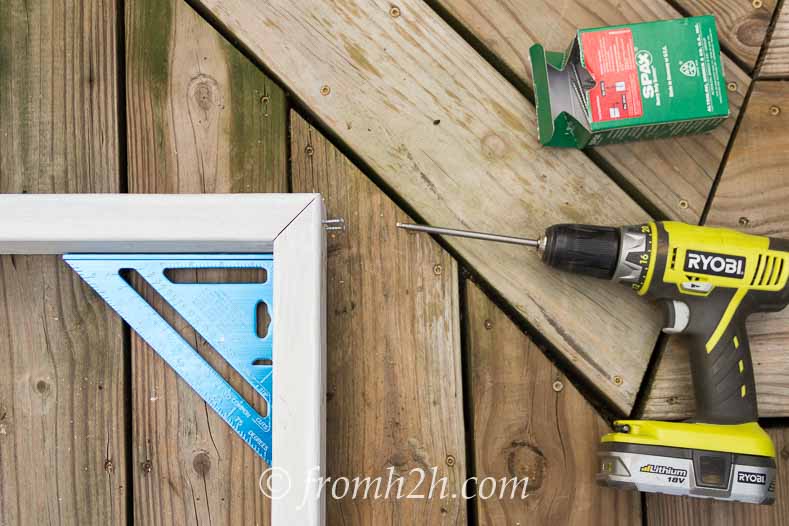
1. Use screws to drill through the ends of the corners.
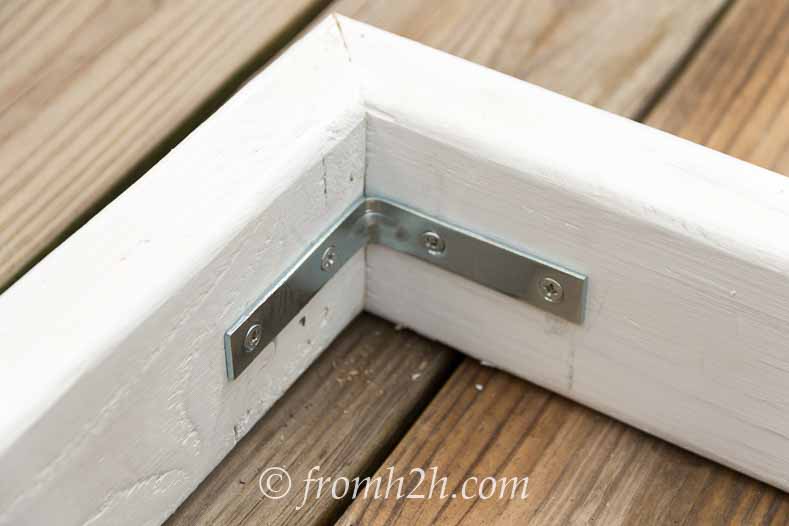
2. For extra strength, attach angle brackets to the inside of the frame.

3. Cut moulding to fit along the top of the frame, using a similar process to the original boards. The only difference is these boards will be lying flat when they are cut.

4. Use finish nails to attach the mouldings to the front of the frame.
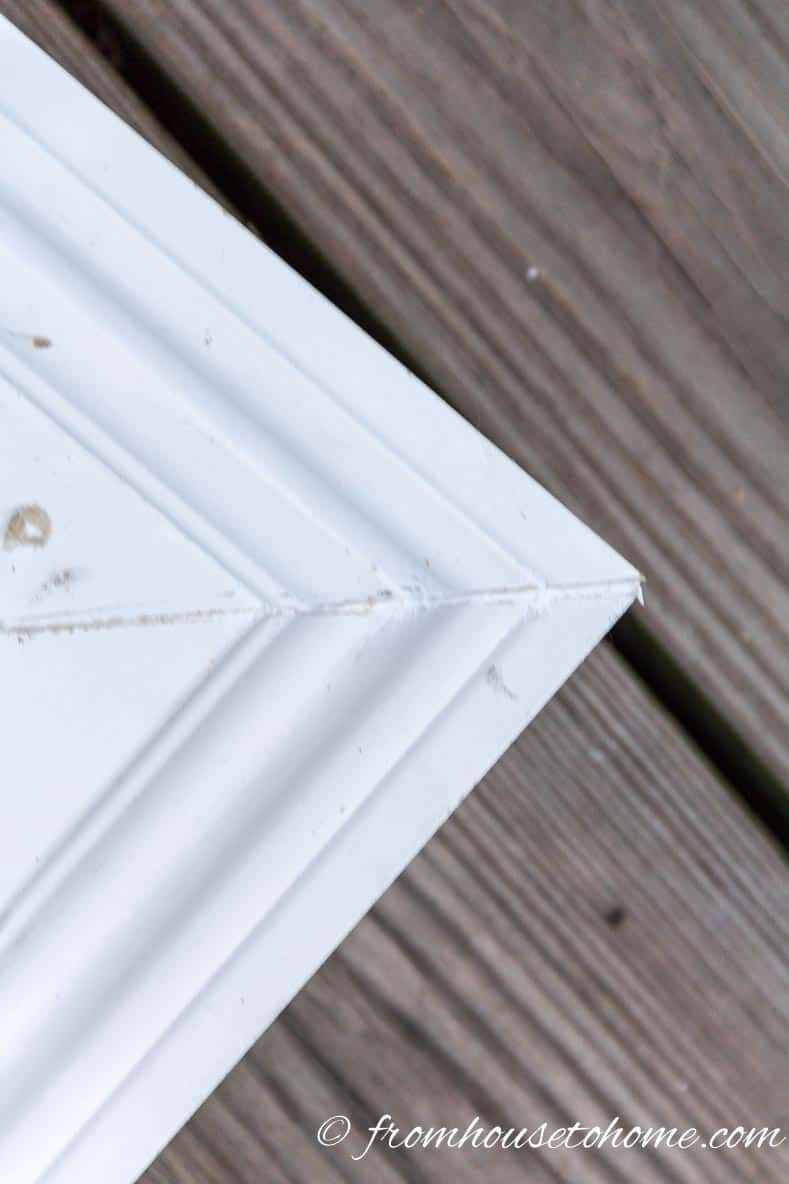
5. Caulk the corners to fill any gaps.
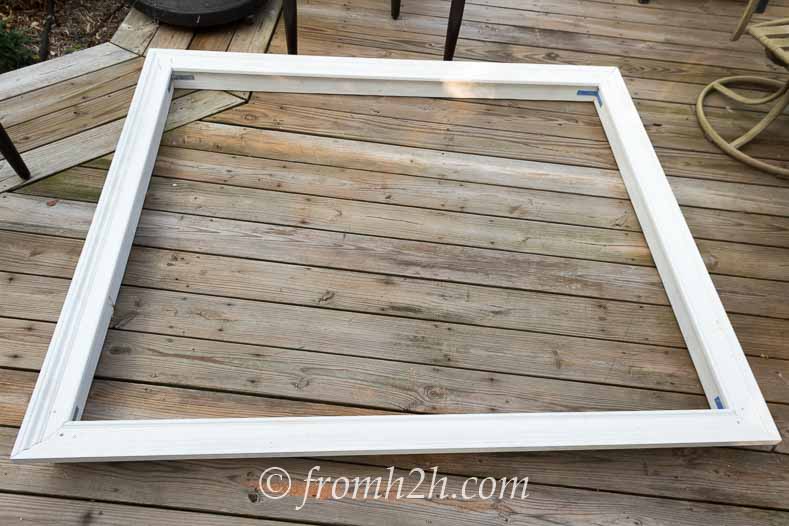
6. You should now have a finished frame.
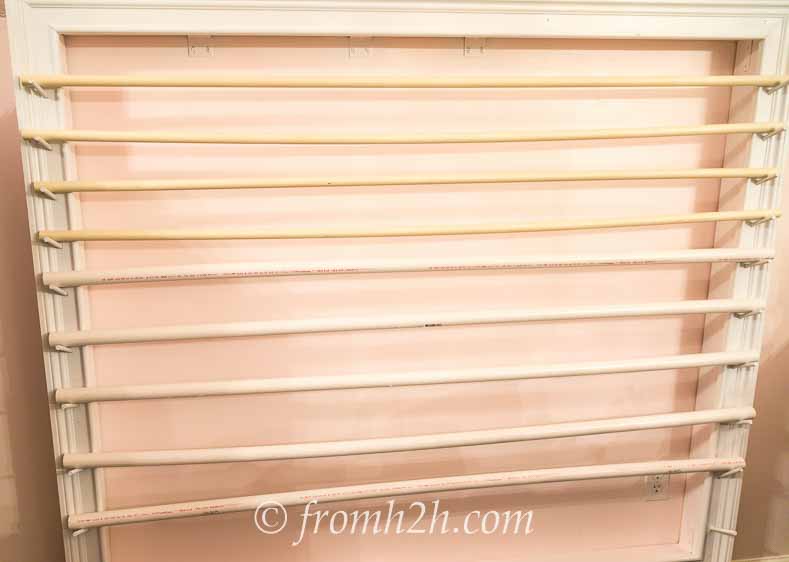
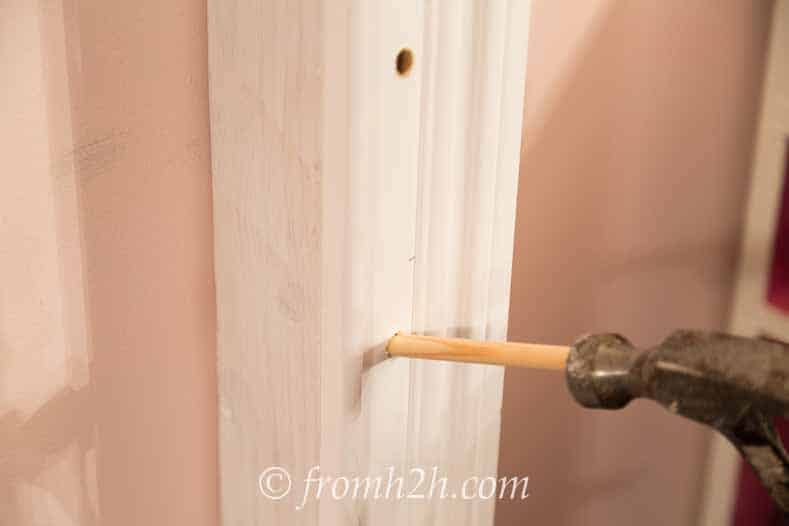
Make the Dowel Holes

The next step will be to add the holes for the dowel brackets that will hold up the rolls of fabric.
1. Use a measuring tape to measure up from the bottom of the frame on one side. Mark approximately where the dowels should go. To accommodate different sizes of rolls, I used 6″ gaps at the bottom of the frame, 5″ gaps in the middle of the frame, and 4″ gaps at the top of the frame.
2. Repeat the same measurements on the other side of the frame.
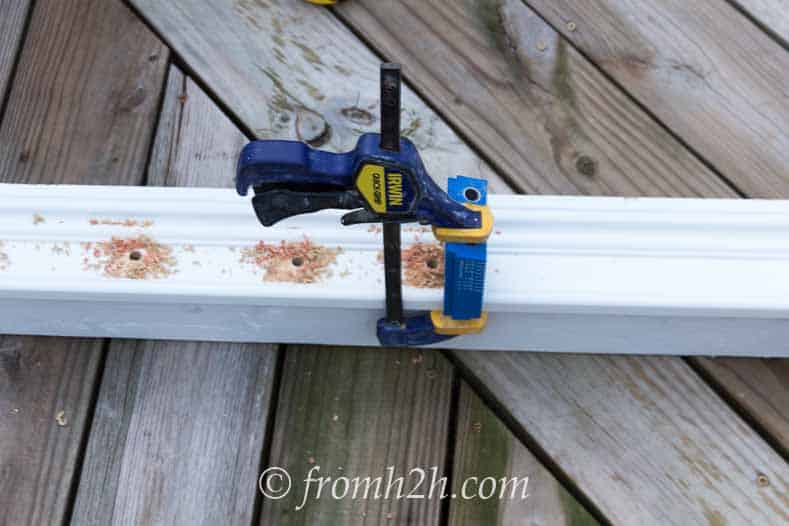
3. Clamp a mini Pocket Hole jig so that the top of aligns with the first marking. Make sure that the hole is angled up
4. Use a drill bit to make the holes through the jig.
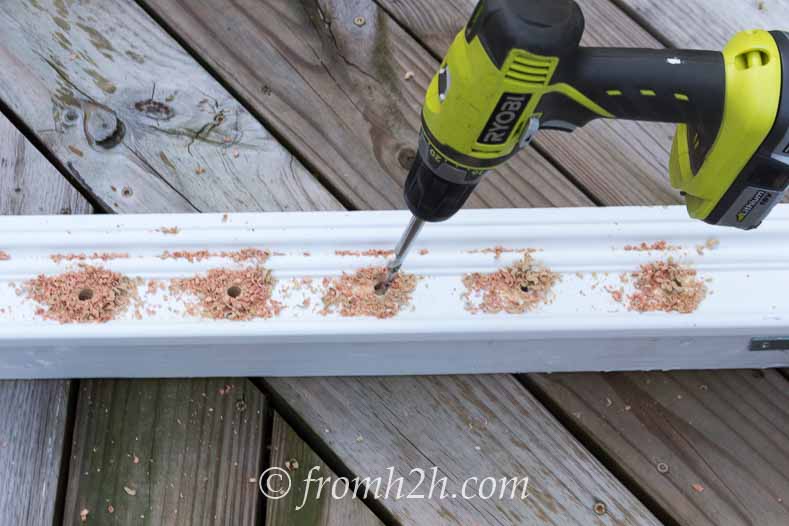
5. Once you have made the initial holes, use the drill without the jig to make the holes a little deeper.
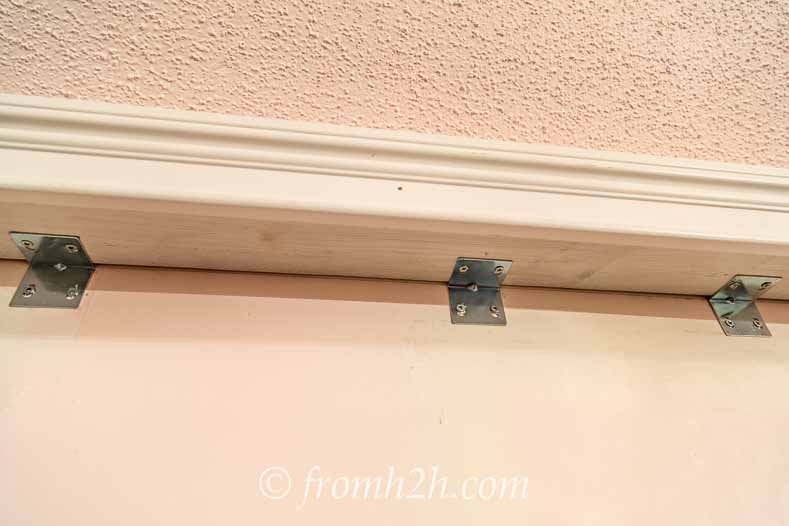
Hang The Frame
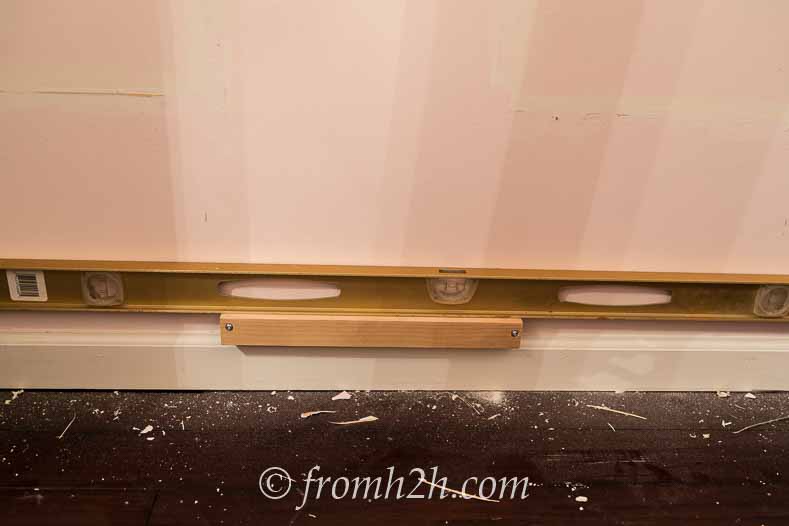
1. Since there will be a number of fairly heavy rolls of fabric hanging from the frame, you will want to make sure it isn’t going to fall off the wall. To do this, install cleats at the bottom. These are boards that the bottom of the frame will rest on. To do this:
a. Find the studs in the wall. It will be much more sturdy if you screw the cleats into the studs.
b. Making sure that the cleat is level, screw through the wood into the studs.
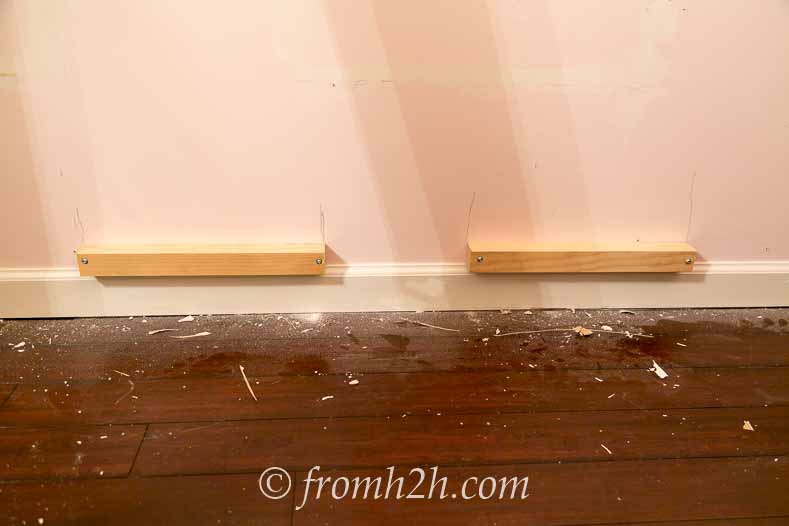
c. Repeat with a second cleat.
d. Use a pencil to mark both ends of the cleats on the wall. This will make it easier to install the frame later.
2. We will use angle irons installed under the top of the frame to hold it in place.
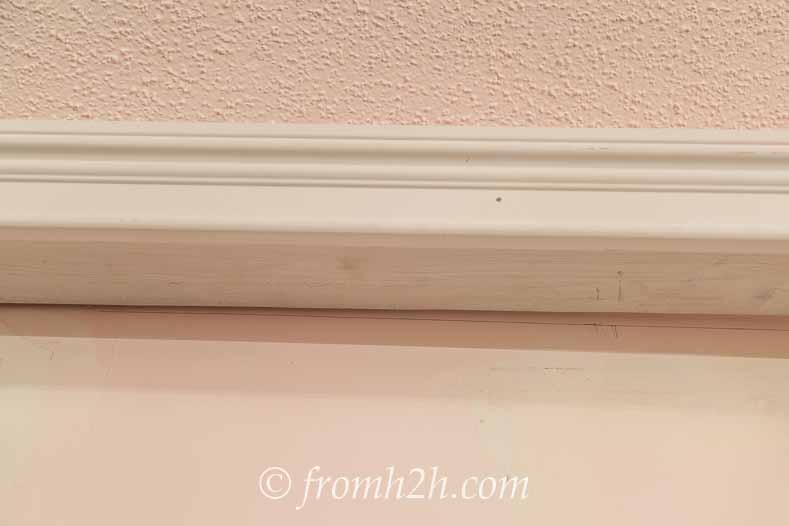
a. Rest the frame on the cleats and use a pencil to draw a line under the top of the frame.

b. Move the frame out of the way and install the angle brackets so they line up with pencil mark. Try to attach to the studs where possible.
3. Put the frame up on the wall so that it is resting on the bottom cleats and the top angle irons. Make sure that you have it right side up (the angle on the holes should be going up).
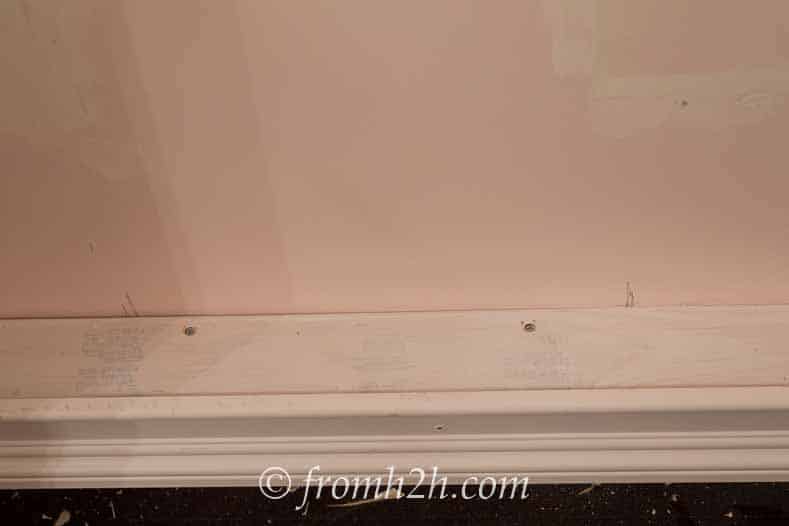
4. Use screws to attach the bottom of the frame to the cleats. You will know where they are by the pencil marks you drew on the wall earlier.
5. Use screws to attach the angle brackets to the top board of the frame.
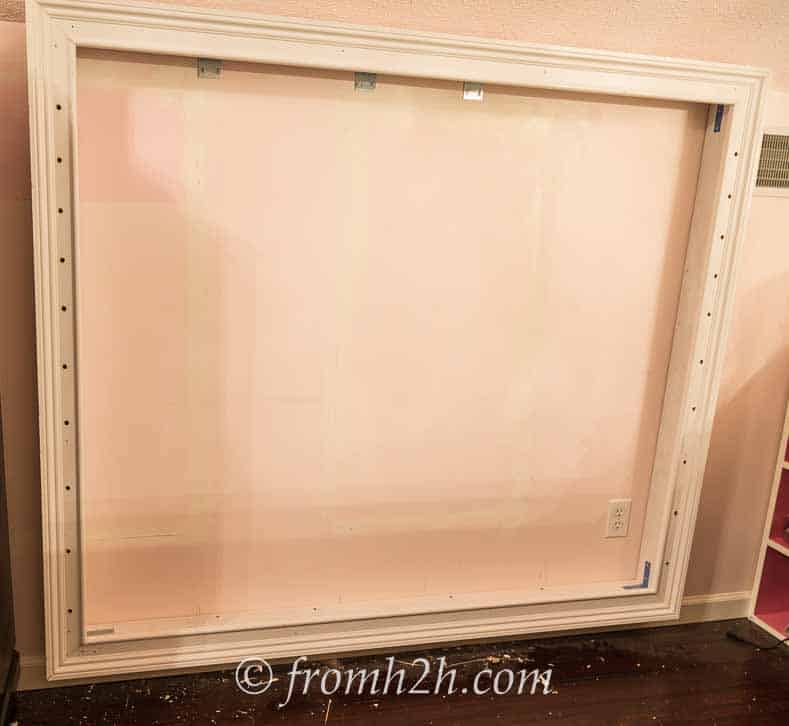
6. Your frame should now be securely attached to the wall.
Attach The Dowels and Paint

1. Cut the dowels to about 4″ in length.
2. Fit the dowels into the holes. You might need a hammer to get them to go in far enough to be sturdy.
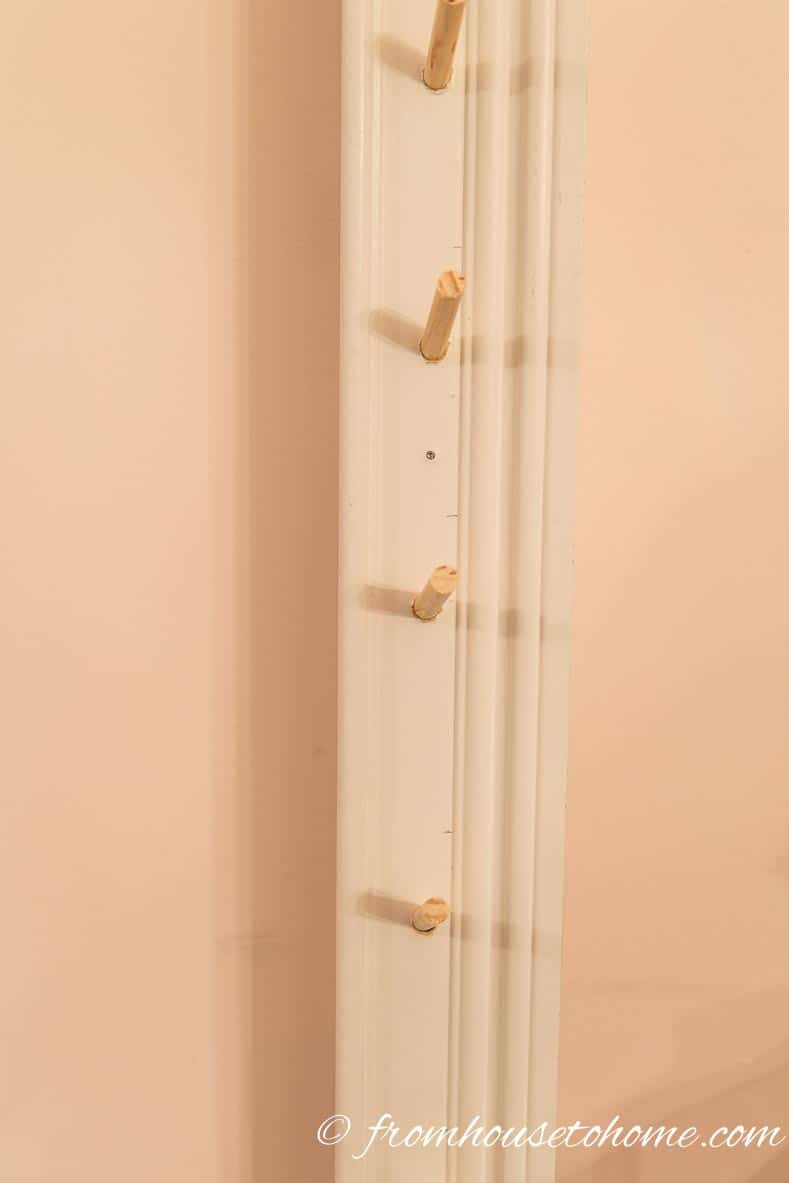
It should be a tight fit (you don’t want them coming lose and dumping rolls of fabric all over the floor).

3. Paint the frame, dowels and background (if necessary…at the very least you might want to paint the angle brackets the same color as the wall). I also painted the inside of the frame the same color as the wall…I think it makes it blend in better.
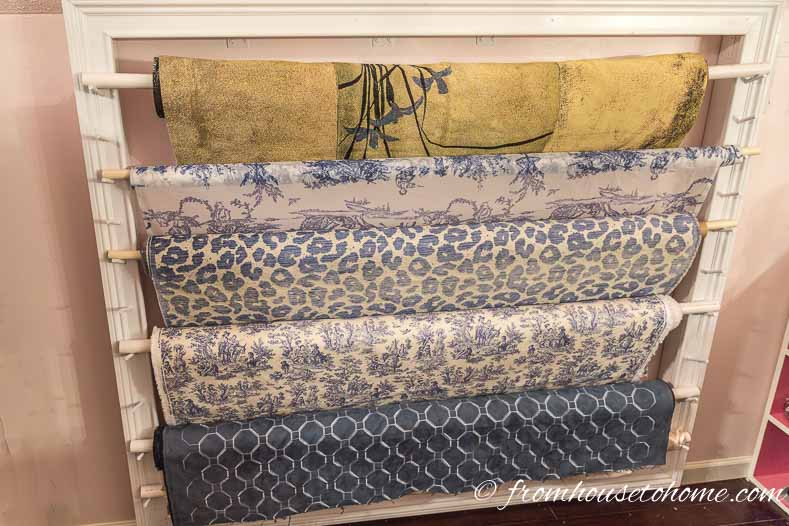
Put Up The Fabric Rolls
We are finally ready for the final step…adding the fabric rolls!
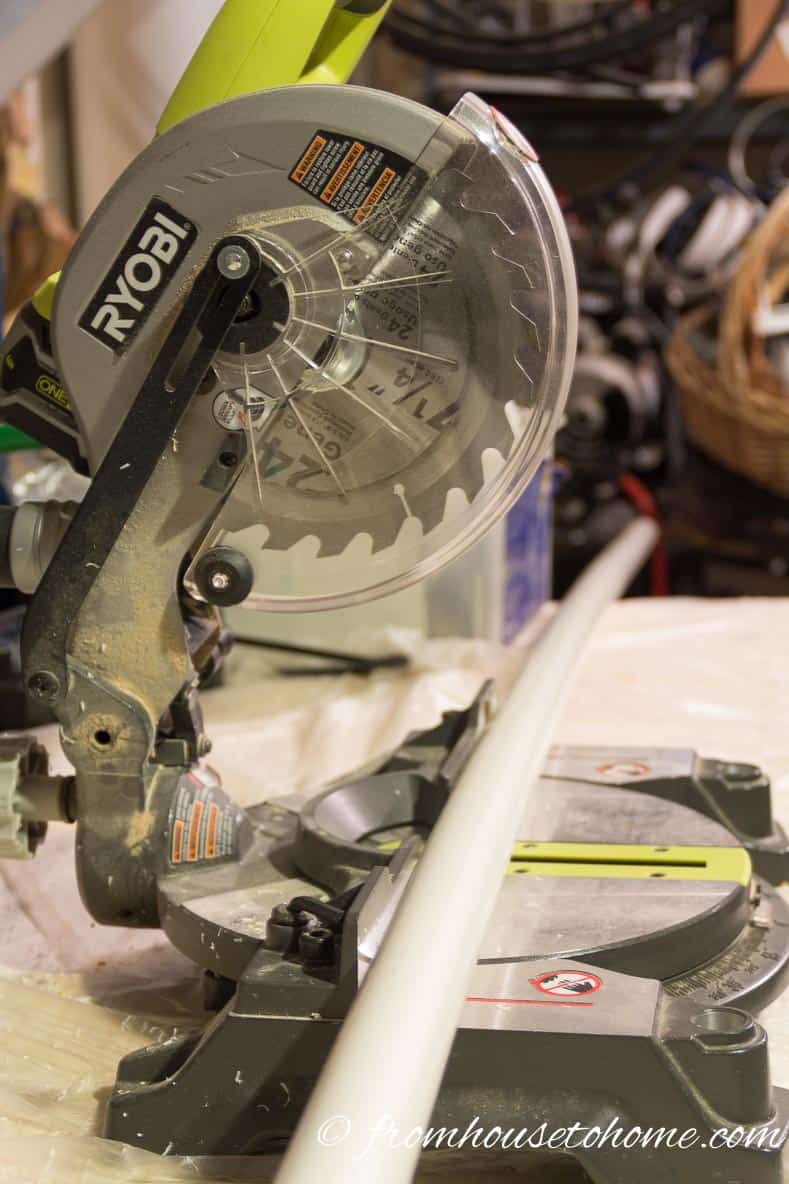
1. Cut the PVC Pipe so that it is a couple of inches shorter than the outside width of the frame. In my case they were 66″ wide.
2. Make sure they all fit by trying them out on the frame.
3. Add the fabric and your fabric roll rack is complete!
The Finished Fabric Rack
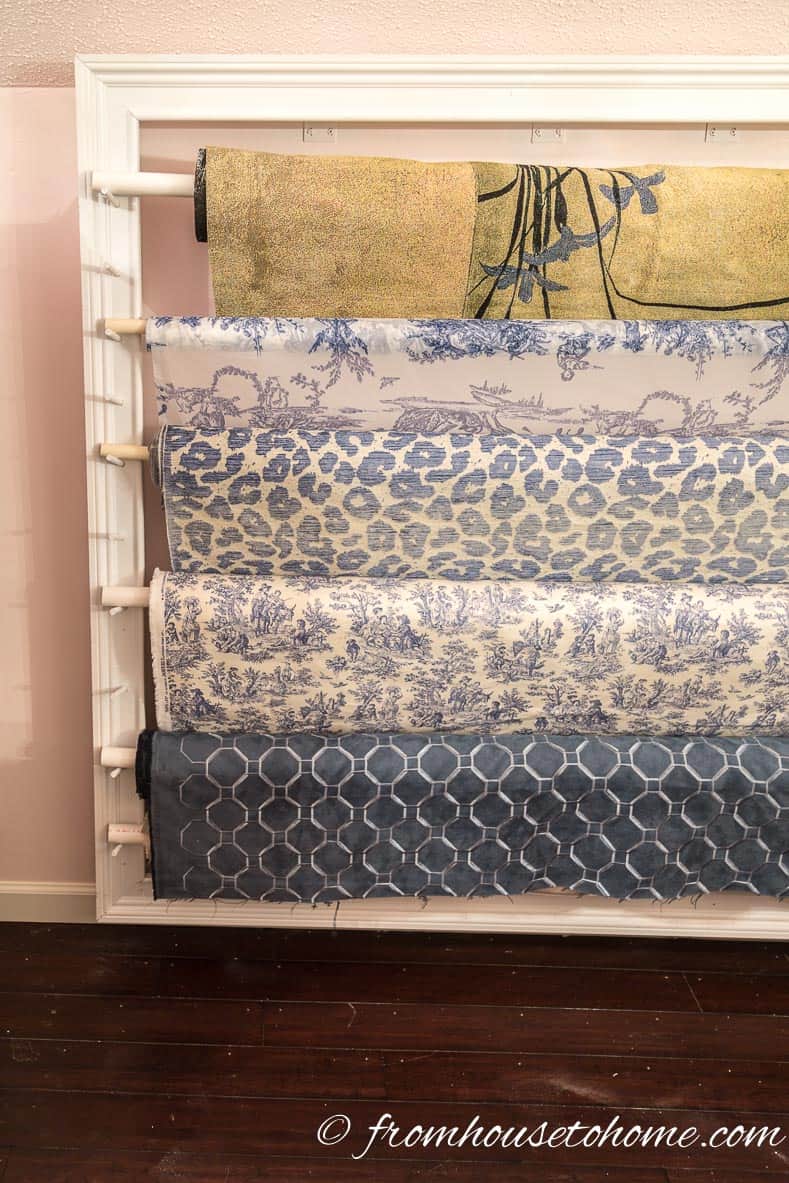
The finished fabric rack is functional but also looks good…and since I didn’t use up all of the dowel brackets, I even have some room for expansion!
You can keep each of the rolls rolled up like I did. Or if you really like a particular fabric, put it at the top of the rack and pull it down like a framed piece of art.
Then enjoy being able to find your fabric when you need it!
Comments or questions about How to Make a Fabric Roll Storage Rack? Tell us in the section below.
This post was originally published on September 26, 2016 but was updated with new content on July 7, 2023.
This would also work very well for a wrapping paper station in your craft room!! Instead of fabric rolls… gift wrap rolls.
Hi Kim…I agree it would work well for gift wrap, too! I’ll be doing that!
How about splitting enough paper towel cores to cover the rods and then covering them with duct/duck tape to keep the tablecloths from sliding off.
Hi Lanell…I’ll have to try that and see if it does the trick 🙂 Thanks for the suggestion!
Now why didn’t I think of that in my sewing days. I had mine on rolls standing in a basket. This is much more finished. I’m thinking of doing something like this with my table clothes that I have hanging in my cabinet. Do you have any ideas on how to roll the cloth so it stays really smooth.
Hi Aunt Elaine…I had not thought of using something similar for table clothes, but that’s a good idea. No brainwaves yet on how to get them to go on smoothly (I could have used it for a couple of the fabrics that I had to re-roll). I’ll have to think about it for a little while and see what I can come up with. If you beat me to it, I would love to hear your solution 🙂