DIY Custom Fence (How To Build A Wooden Fence That Doesn’t Look Like Everyone Else’s)

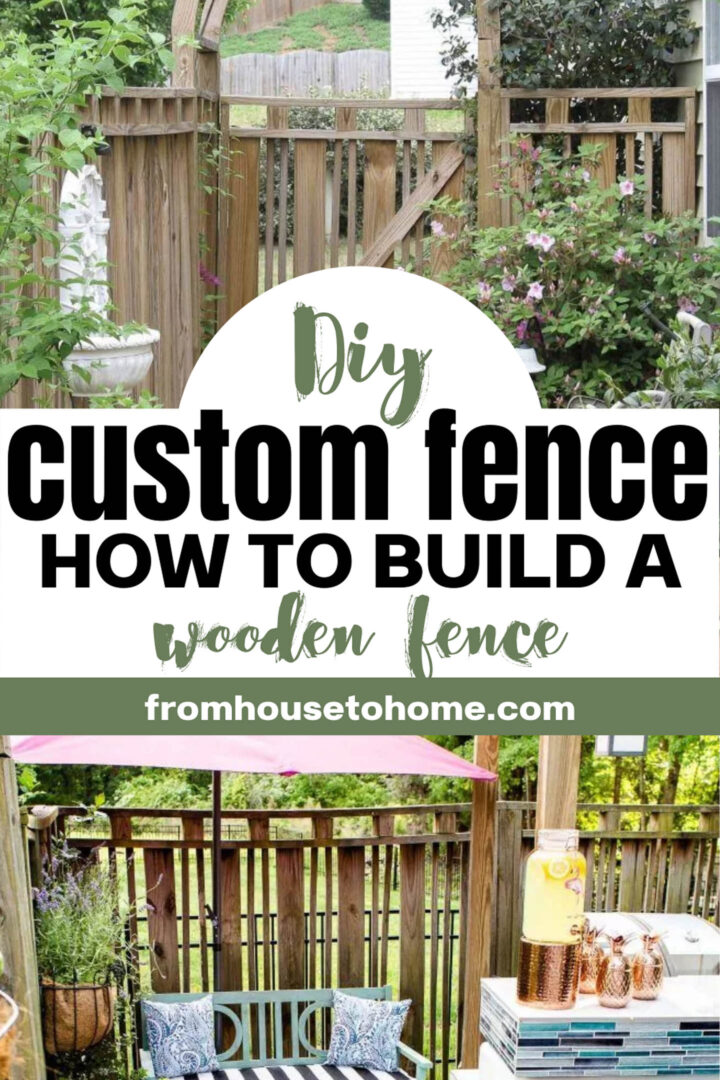
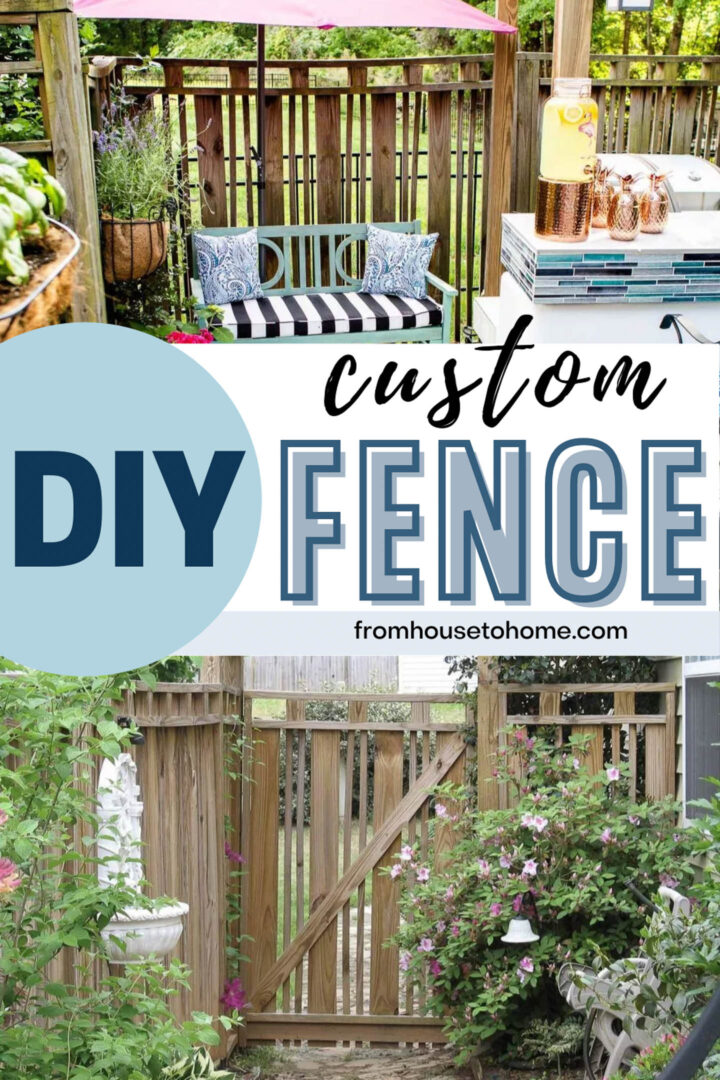
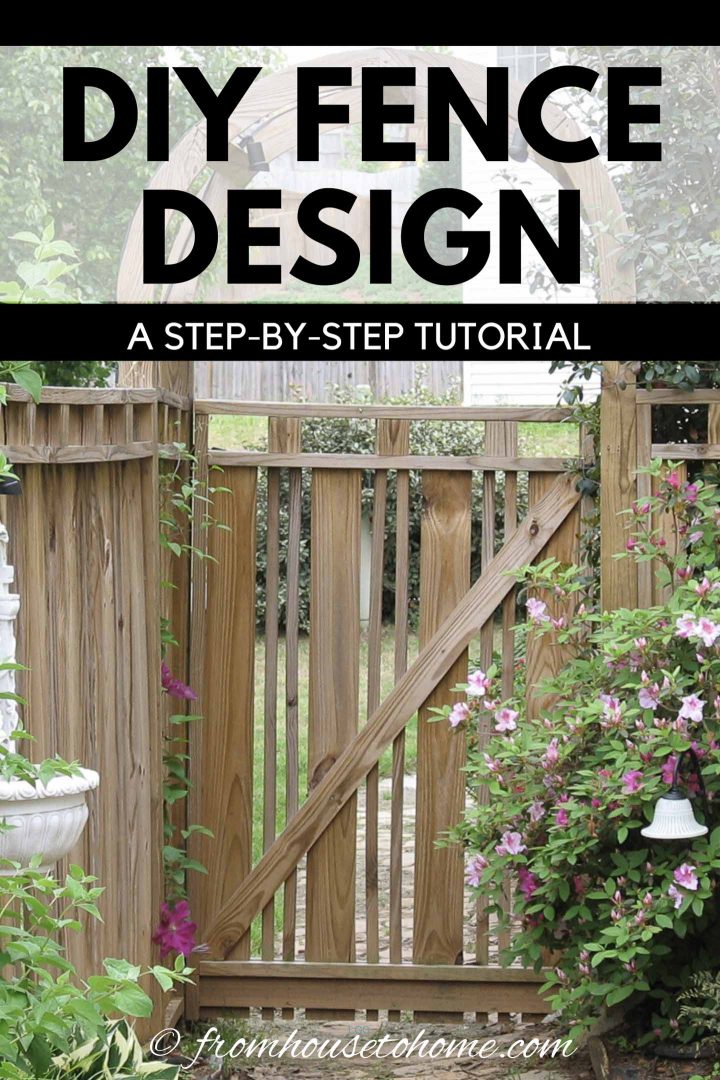
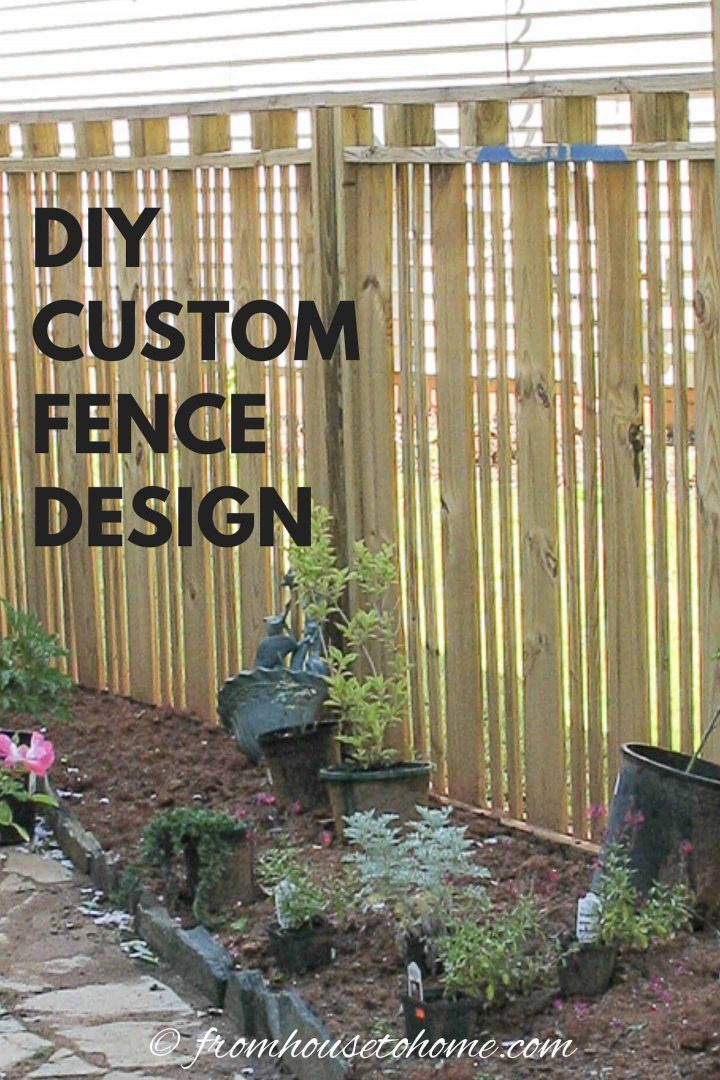


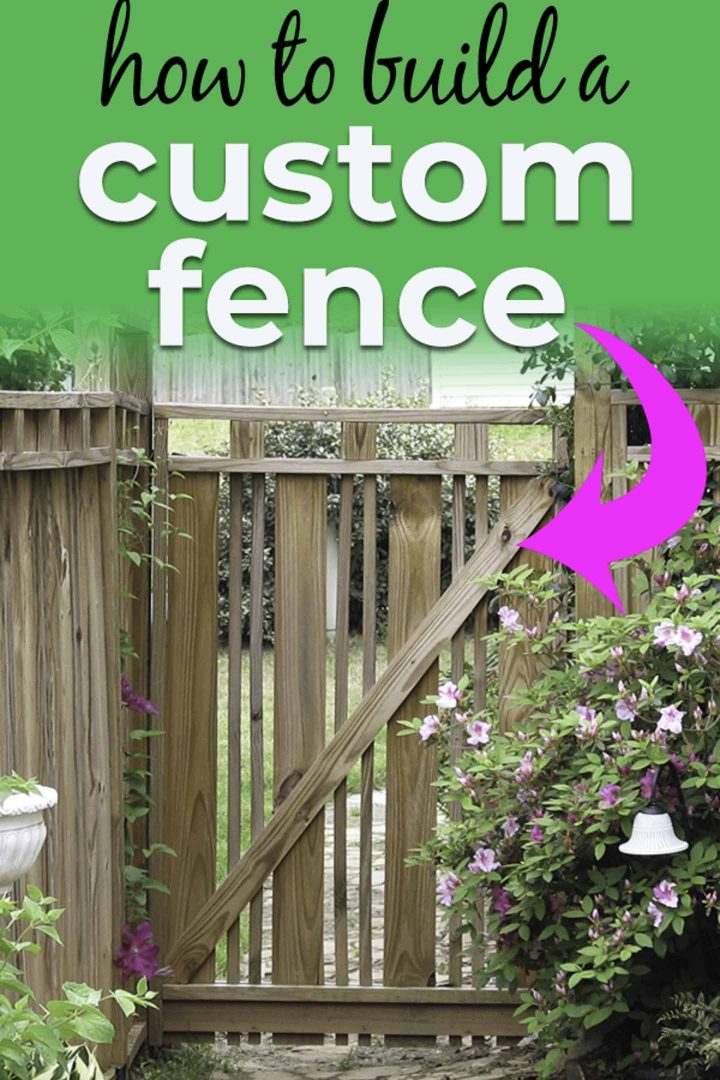
If you’re looking for something other than your standard board and rail fence, this DIY custom fence design may be just the thing. It looks good from both sides so you and your neighbors will be happy with it.
After a few requests, I’ve finally written down the build process for my DIY custom fence.
Now I should say right off the bat that I am in no way a professional fence builder. So this may not be the right way or the best way of constructing this fence, but it’s the way that worked for me.
As a bit of background, when I moved into my house it was a brand new builder-grade home. With a bare-bones yard that didn’t even have grass in the backyard. But did have a ravine behind it (one of the selling points for me).
And it stayed like that for a year or two while I was working on decorating and improving other parts of the house.
Then I got a dog.
And all of a sudden a fence jumped to the top of my priority list. (While I love the ravine, I didn’t really want the dog wandering around in the mud back there).
Because I live in a subdivision with a home owners association, any fence that you build has to look good from the outside. So if you put up a standard board and rail fence, the ugly rail side has to be facing into your yard.
Since I didn’t want that, I set out to design a fence that looked just as good from the inside as it did from the outside.
And I figure…if you’re going to design and build your own fence, it might as well look a little custom 🙂
So that’s where this DIY custom fence design came from.
Supplies
These are the supplies to make one section of the fence.
You will need to multiply them out for however many fence sections you are making.
Materials
- 5 – 8′ x 2″ x 4″ boards – I used pressure treated wood for all of the wood, but you could go with cedar or another rot-resistant type as well.
- 14 – 8′ x 1″ x 2″ boards
- 7 – 8′ x 1″ x 6″ boards
- 1 – 2′ x 4″ x 4″ – This is just the amount of 4″ x 4″ required to build the fence panel. You’ll also need to buy the materials for the posts. Read the section on preparing to build your fence for more information about that.
- 2 1/2″ deck screws
- 2″ deck screws
Tools
- Cordless screw driver – you will need to use low speeds to install the panels so the variable speed option is important
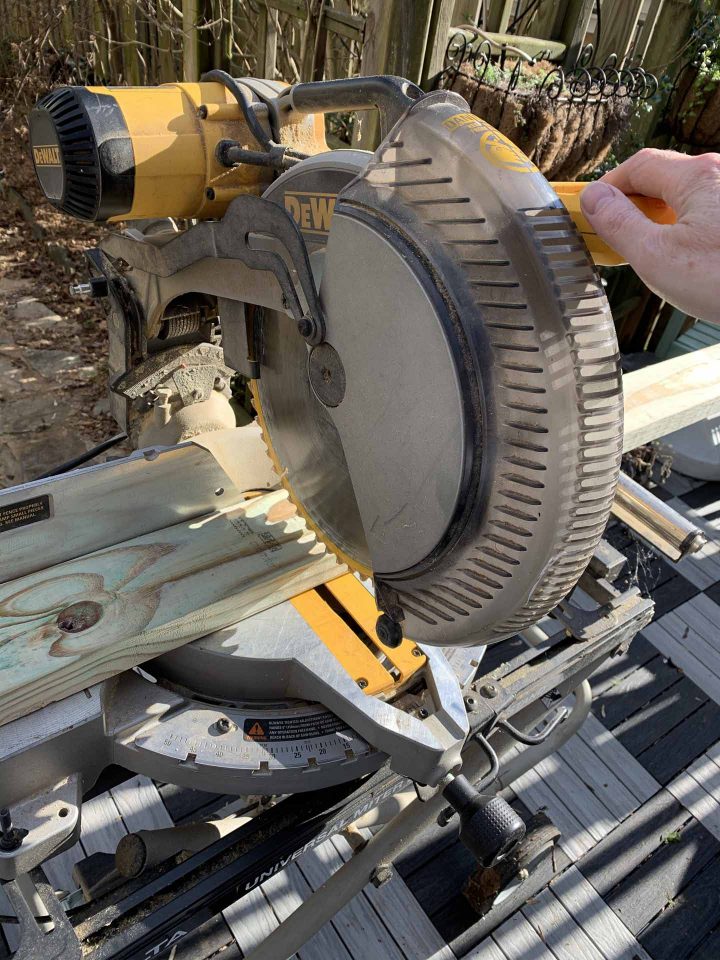
- Saw – I used a miter saw, but any kind of saw that will cut through a
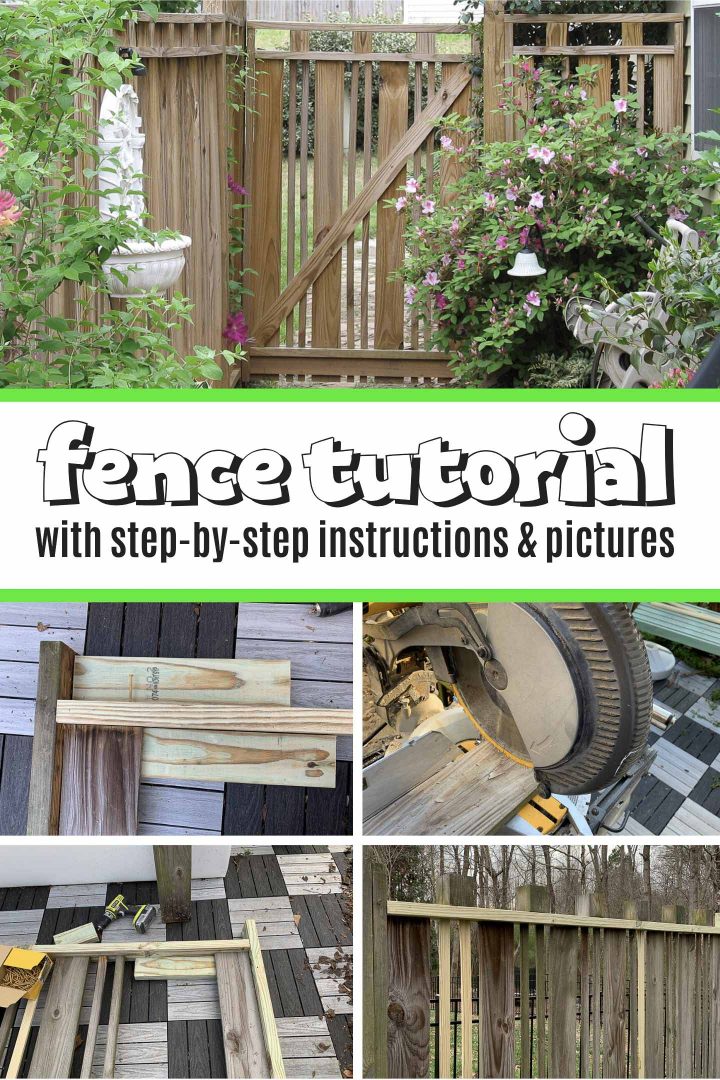
Before we begin…
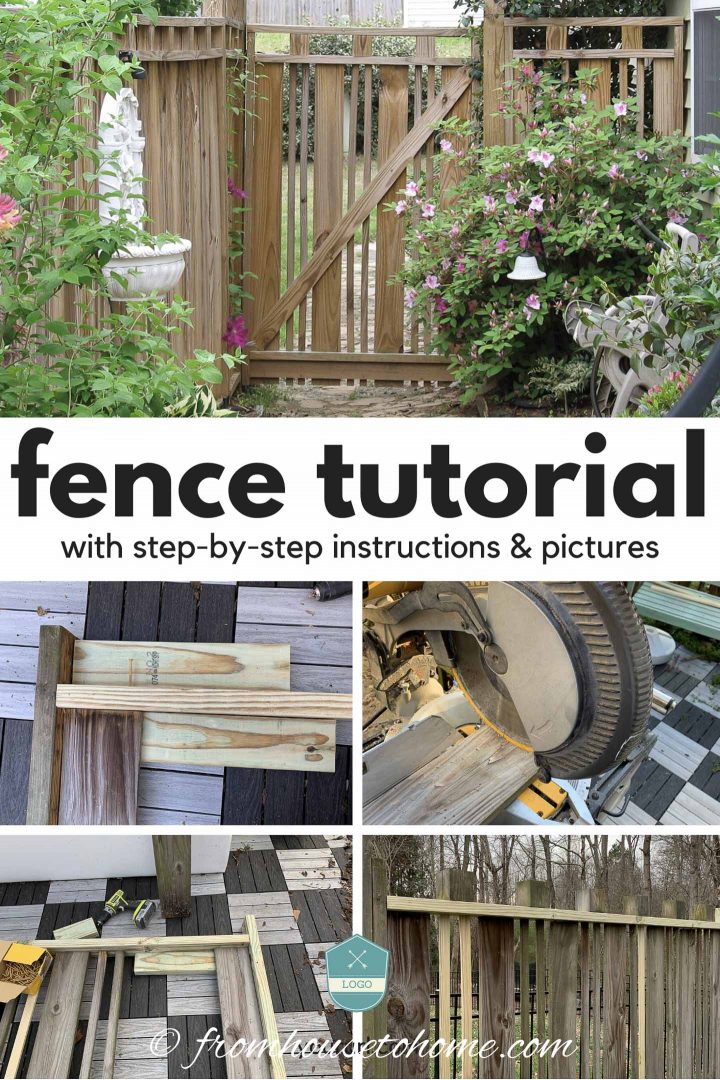
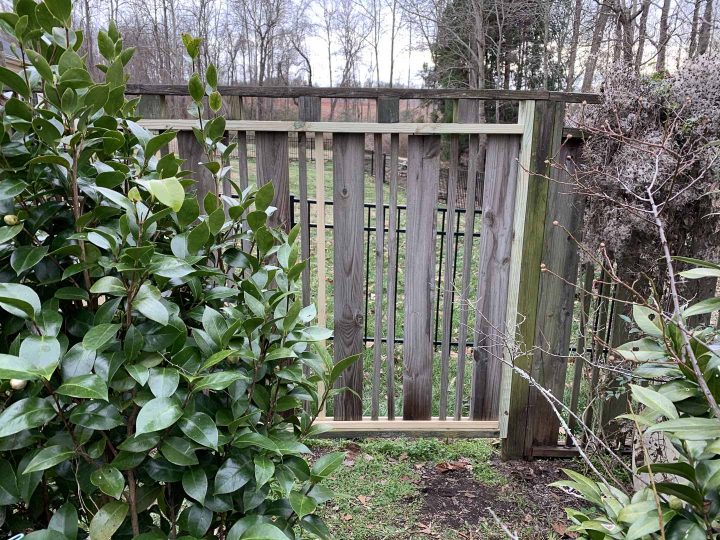
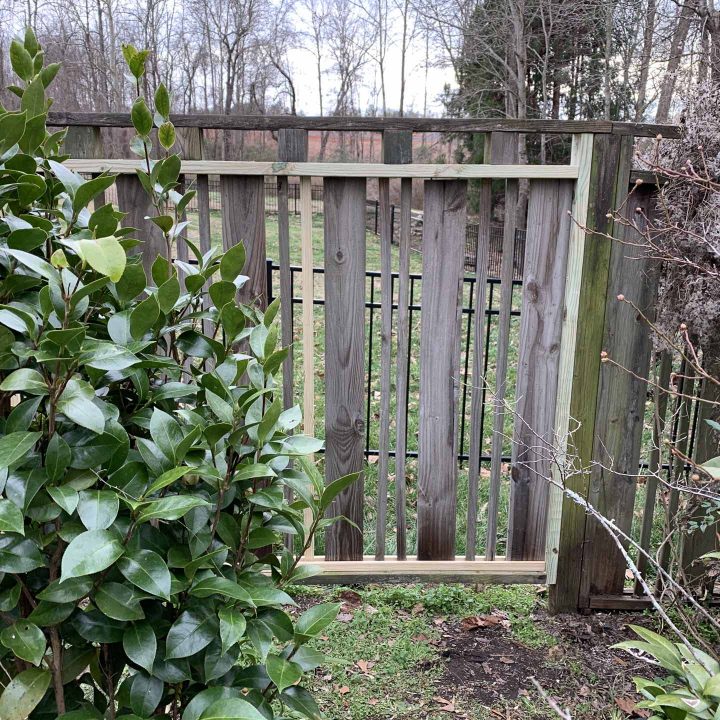
I’d like to apologize for the pictures.
I took the pictures in this post when I was fixing one of my fence panels that had rotted at the bottom. (It was touching the ground in a wet area of my yard…learn from my mistake and keep the bottom rail of the fence off the ground).
I was able to reuse most of the boards that were already there (I hate to waste good wood!).
But since my fence is almost 15 years old, you can really see the difference between the new boards and the old ones.
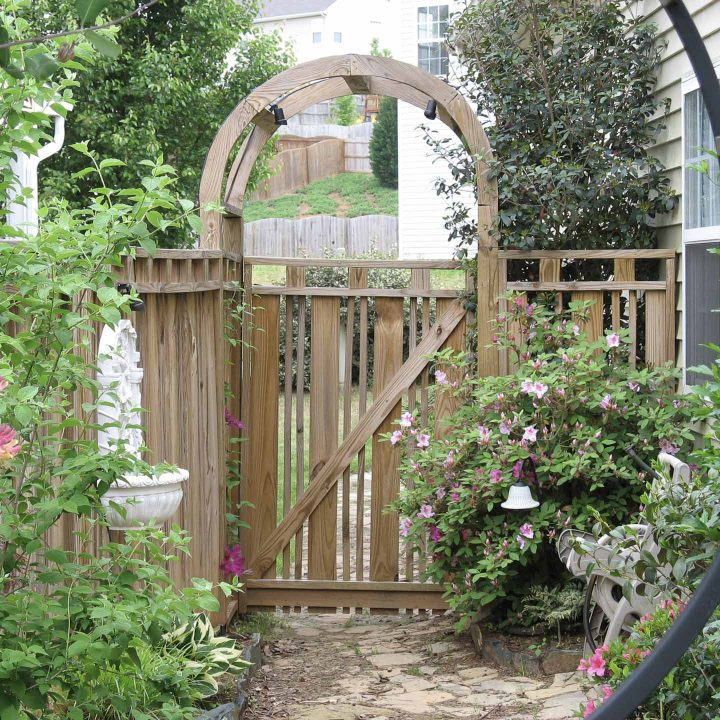
When I was originally building the fence, I didn’t take any pictures. (That was before I had a blog.)

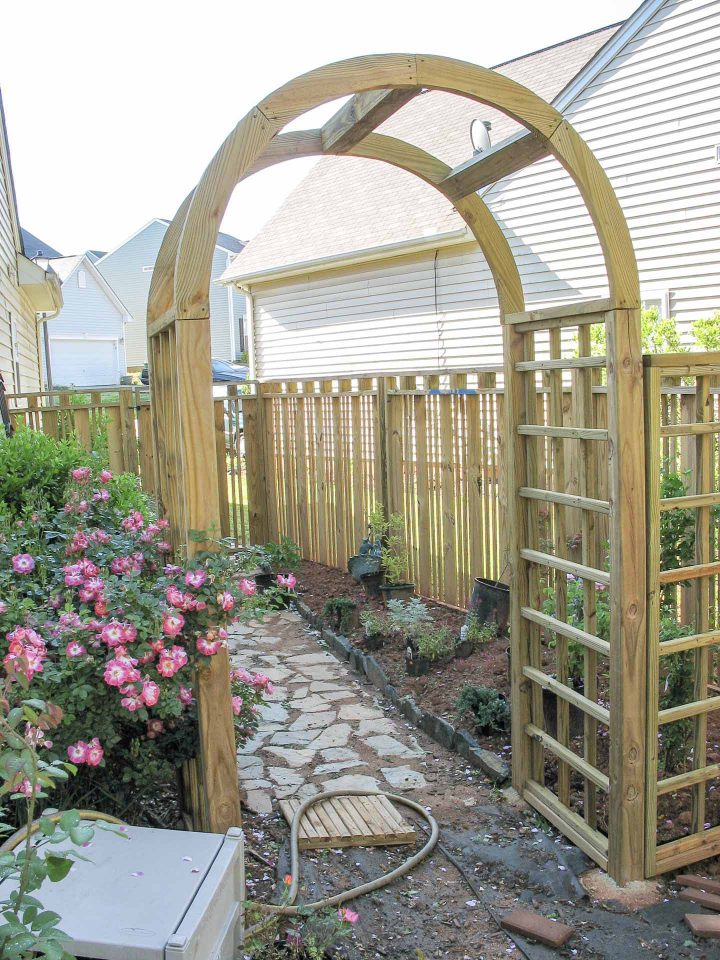
I could only find this one that was taken fairly soon after the fence was completed.
And this one was really more of the arbor than the fence. (As you can see the rest of the garden was still a work in progress.)
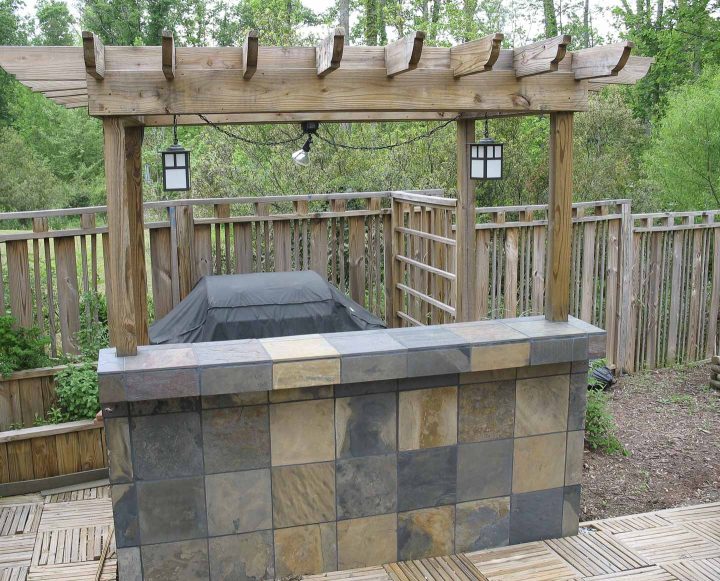
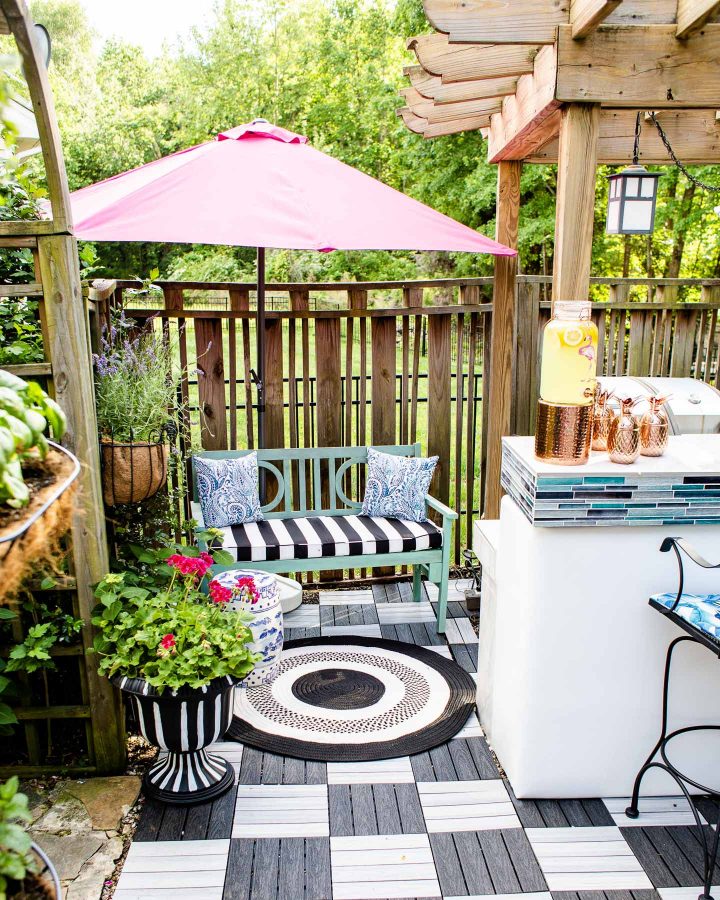
Then there’s this one that I took of the original outdoor kitchen area a couple of years later. But you can see the fence design pretty well in the backyard.
But that’s about it. So you’re stuck with ugly photos.
On the positive side, at least you know my DIY custom fence has passed the test of time since it is still going strong after all these years 🙂
Prepare to build your fence
Before you build your fence, you’ll need to plan out how high you want it to be and where it will go.
The first question you will want to answer is how tall do you want your fence to be?
I wanted mine to be 66″ (5 1/2′) tall including a 2 1/2″ clearance at the bottom. So the fence panel was 63 1/2″ tall. But you can go taller or shorter than that (adjust the measurements below accordingly).
Then you’ll need to determine how long your fence line will be and how many posts you need.
Because this fence design has a regular pattern to it, you may need to adjust the starting and ending points for your fence to keep that pattern going evenly around your yard.
These fence panels are 86 1/2″ wide. So that should be the distance between each of your fence posts.
If you need to make a panel that’s less than 86 1/2″ wide, you’ll want to decrease the length in 13″ increments since that’s the width of the repeating pattern.
I wouldn’t make the panels any bigger than 86 1/2″ wide because the fence will probably start to sag in the middle over time.
For more information on laying out your fence and installing the fence posts, watch this video from the Home Depot.
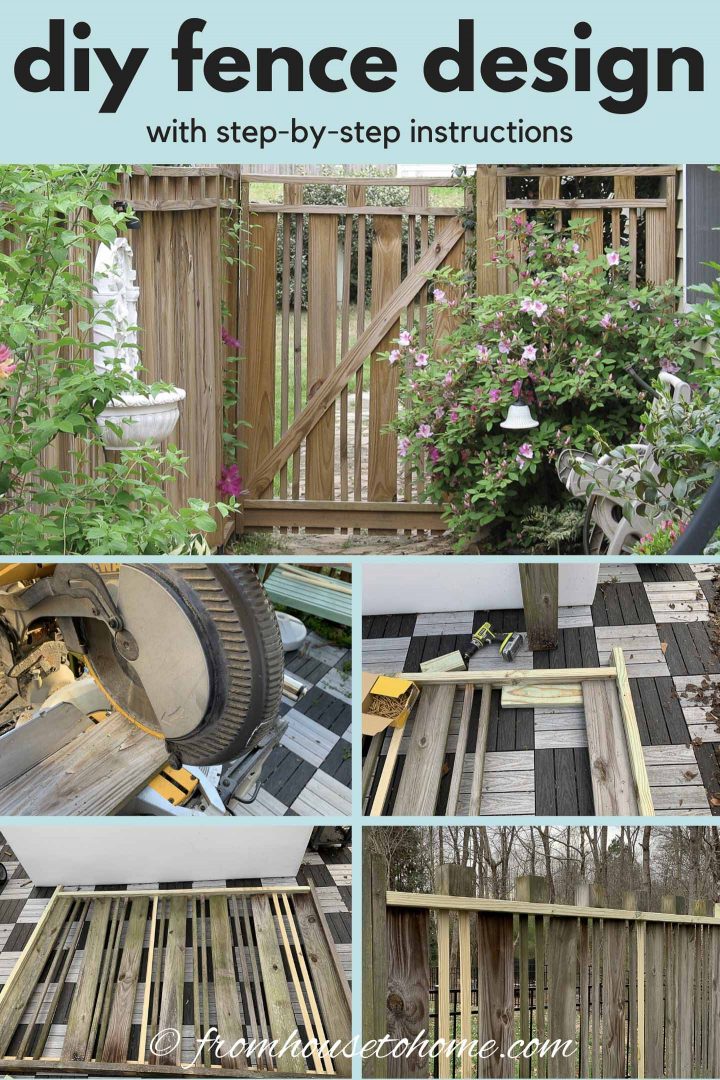
Cut the boards
The first step to making the fence panel is to measure the distance between the posts that you’ve installed. (You’ll need to do this for each panel that you’re making since the measurements may vary slightly from panel to panel).
I know it’s supposed to be 86 1/2″ wide, but most of them won’t be exactly that.
And since we’re building a panel that needs to fit exactly between the posts, you really need to know the exact measurement.
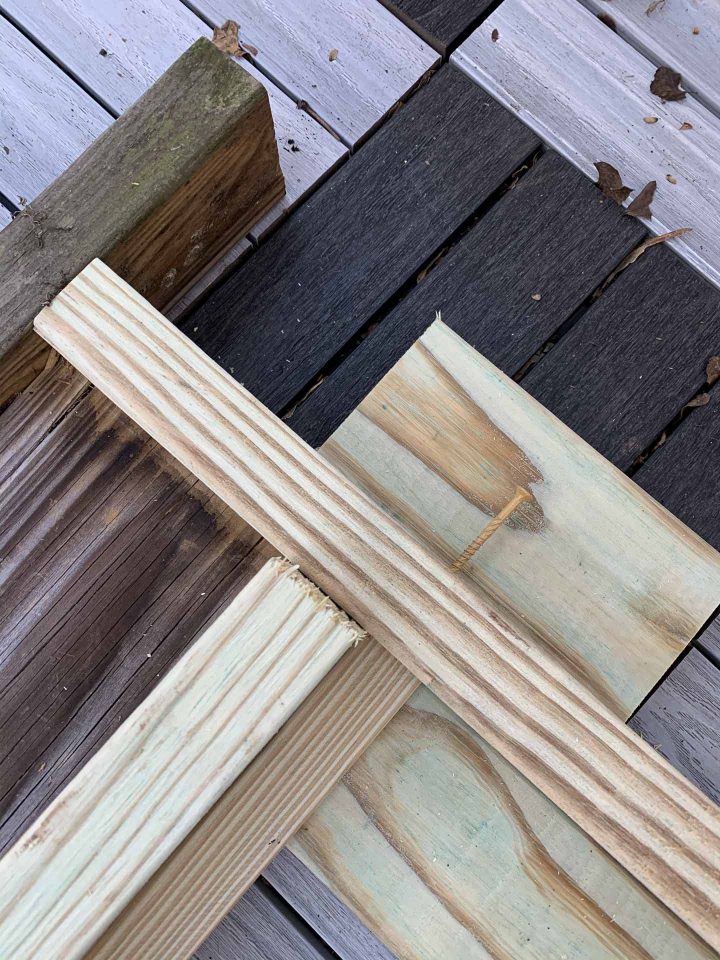
a. Cut 2 2″ x 4″ boards that are 3 inches shorter than the distance you measured between your fence posts (in step a), which should work out to about 83 1/2″. These will be the top and bottom rail of your fence panel.
b. Cut 2 1″ x 2″ boards the same length. These will be used to secure the bottom of the fence boards to the bottom rail.
c. Cut 2 2″ x 4″ boards that are 1 1/2″ inches shorter than your fence panel height. In my case, that worked out to 62″ tall. These will be the upright boards for your frame.
d. Cut the remaining 12 1″ x 2″ boards and all 7 of the 1″ x 6″ boards to 7″ shorter than your uprights (in step d). In my case, that worked out to 55″ tall. These will be the fence boards.
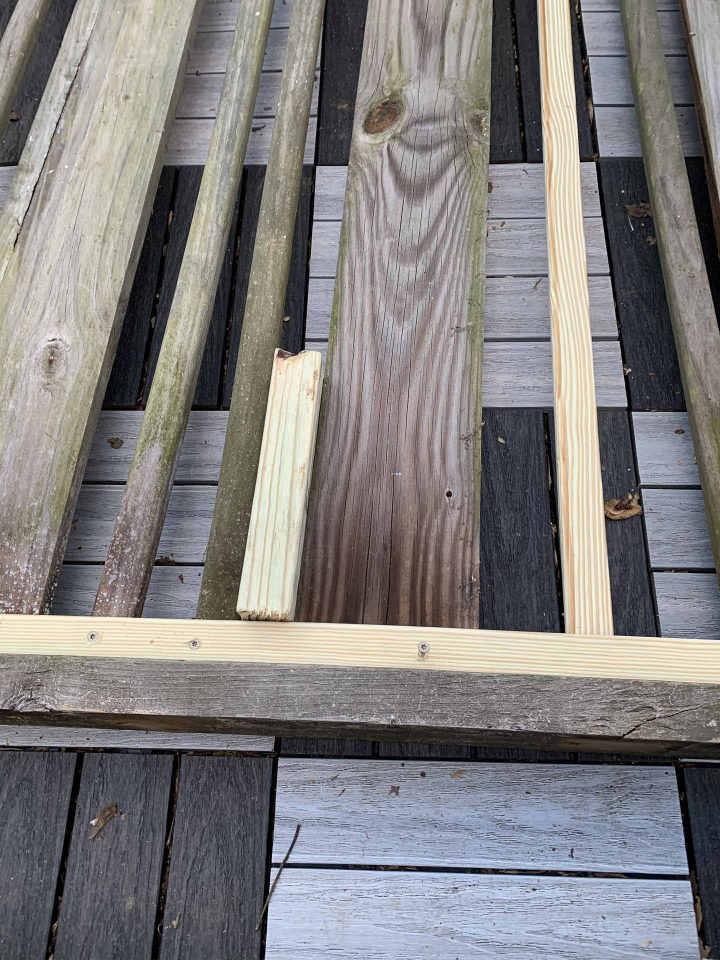
e. Cut the 4″ x 4″ into 6 pieces that are each 4″ tall.
There should be 1 2″ x 4″ board left over which will cover the top of the fence. We’ll cut this one at the end to make sure we get it the correct length.
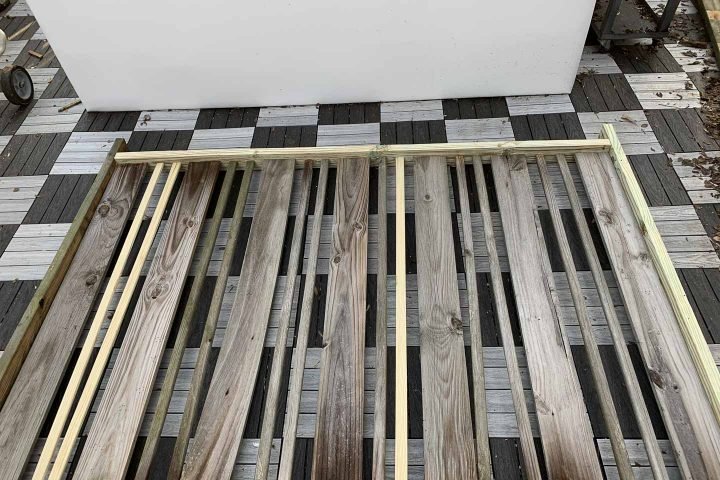
How to make the wooden fence panels
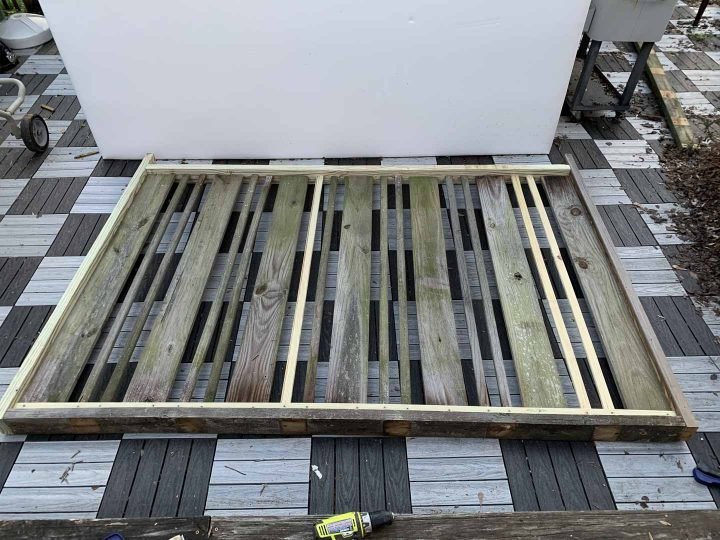
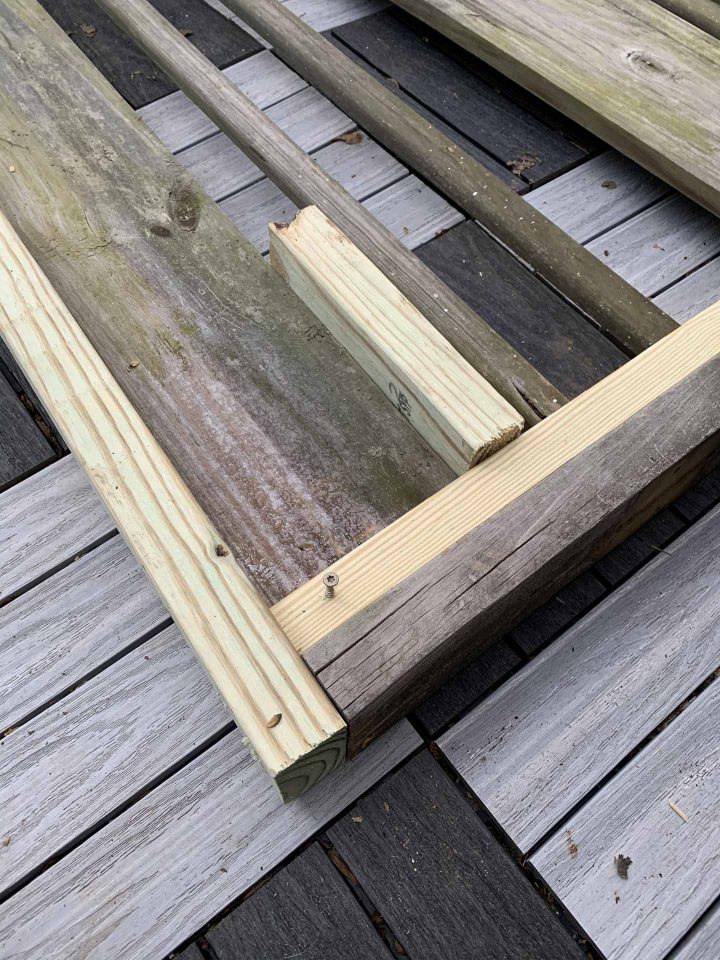
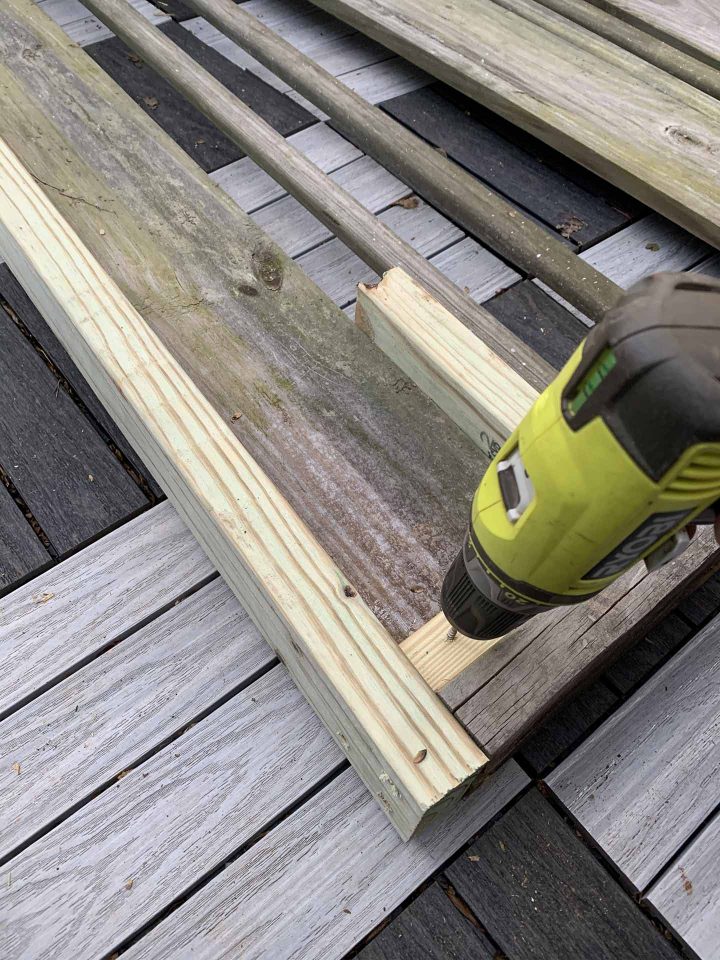
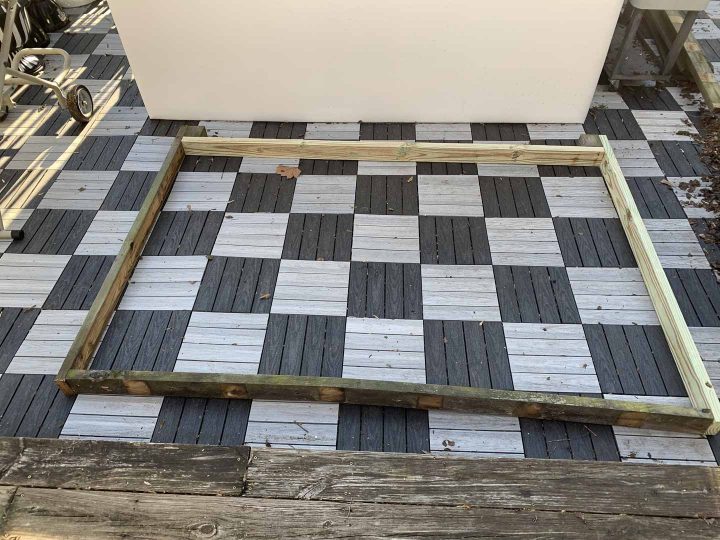
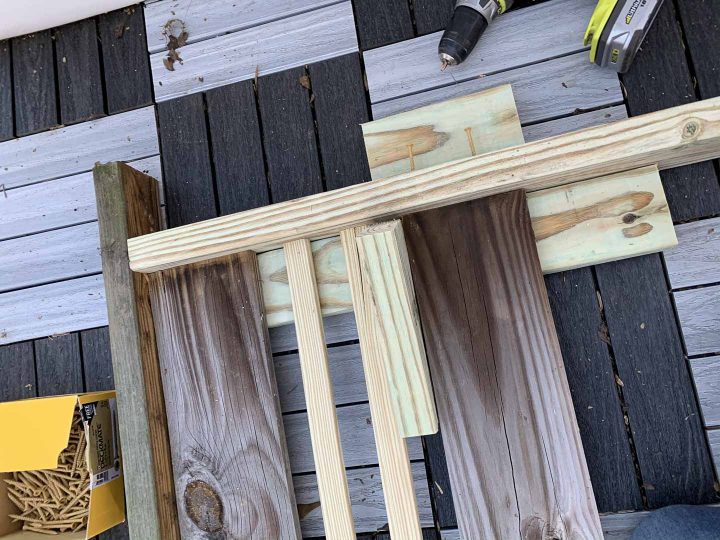
1 | Build the frame

Now we’re going to build the frame for the fence panel.
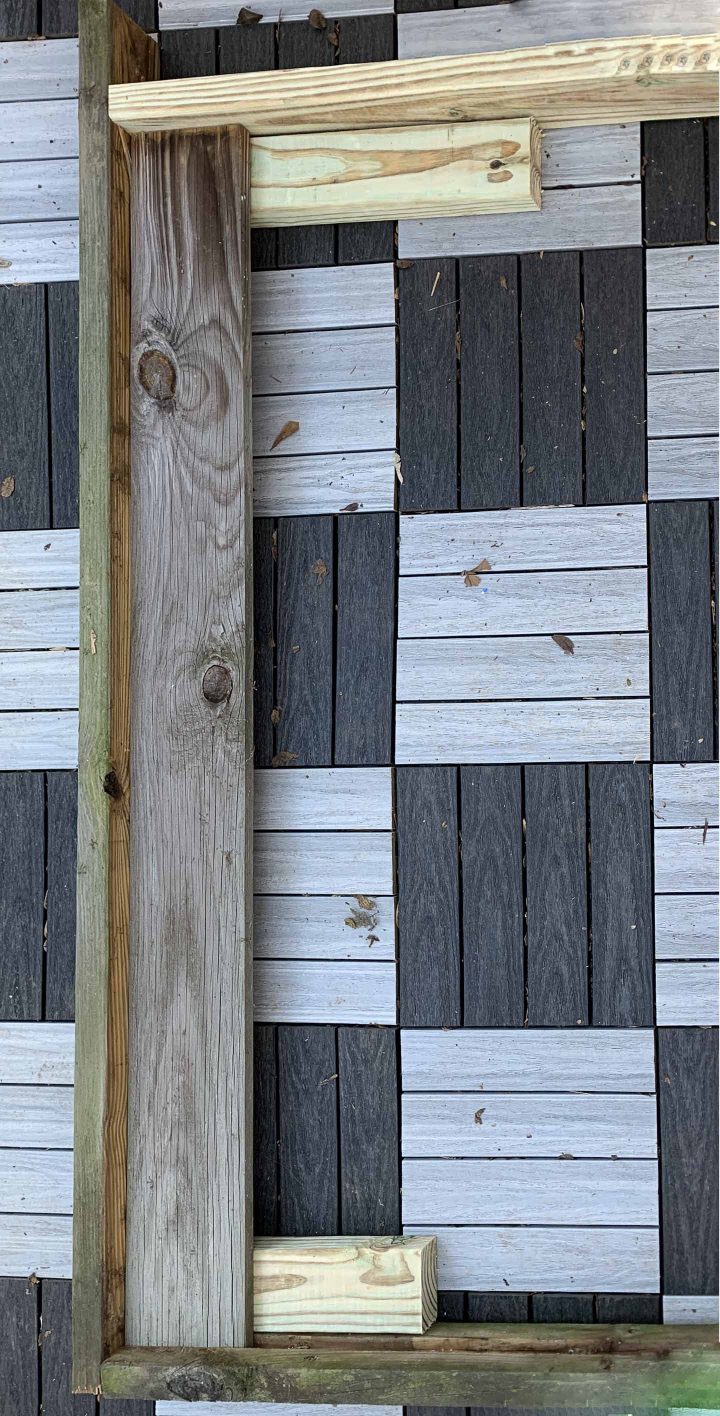
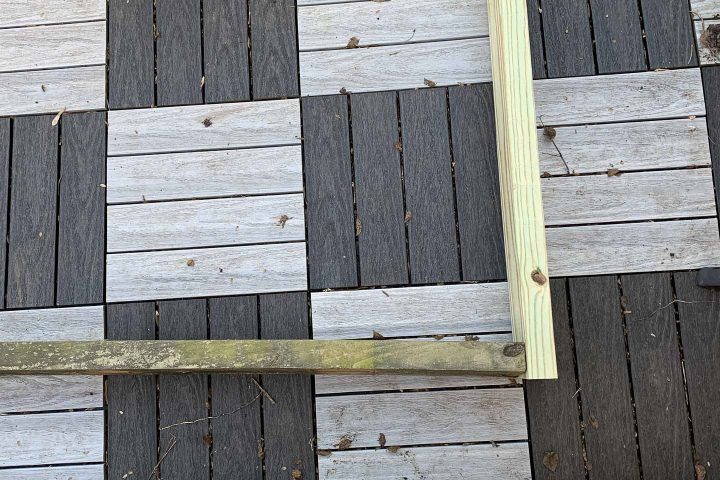
Position the two longer boards between the two shorter boards.

Line up one of the longer boards with the bottom of the shorter boards (making sure it is on the inside edge).

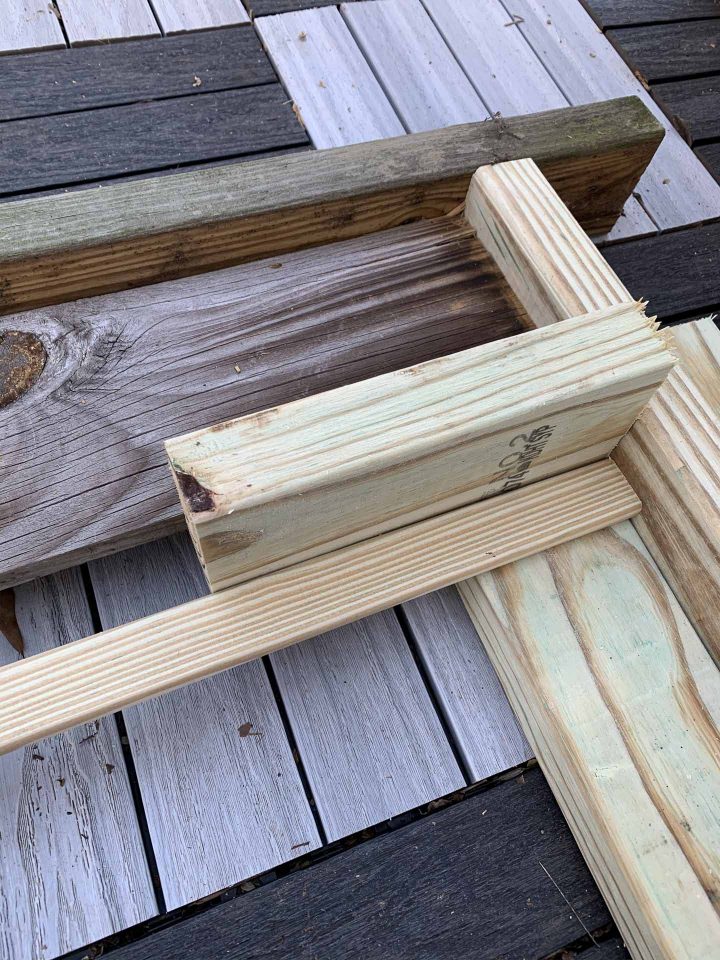
Line up the the other long board 4″ from the top.
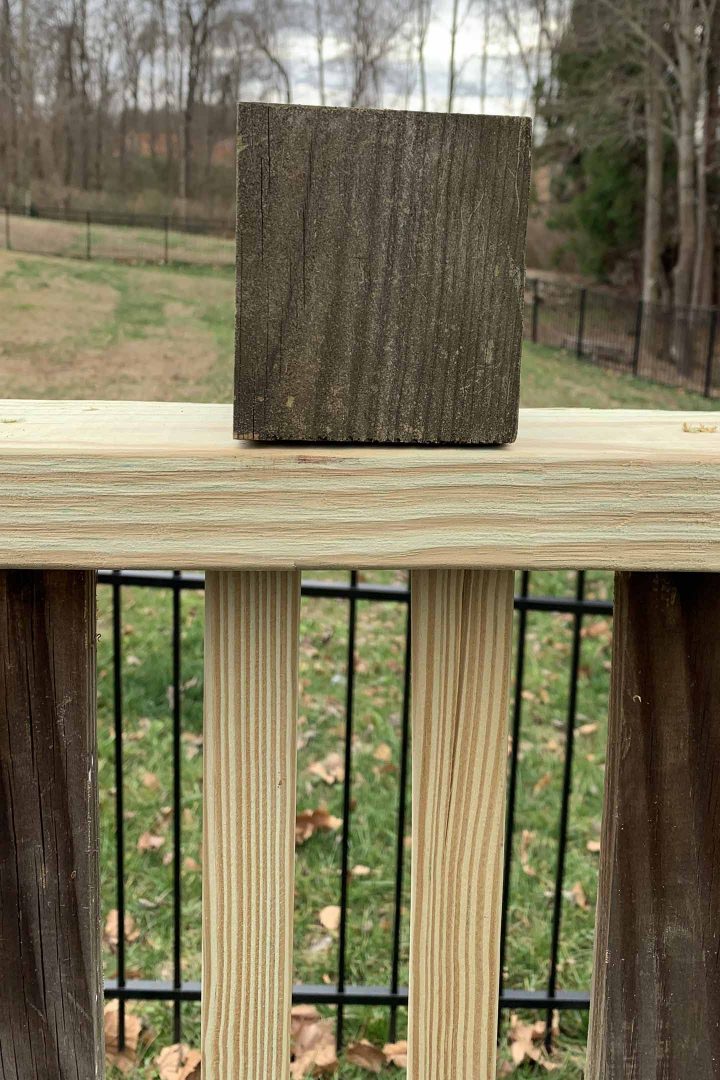
I used one of the 4″ x 4″ blocks as a spacer to make sure this board was in the right place. If you’re doing this, too, make sure the cut side of the 4″ x 4″ is facing down towards the top rail (not sideways).

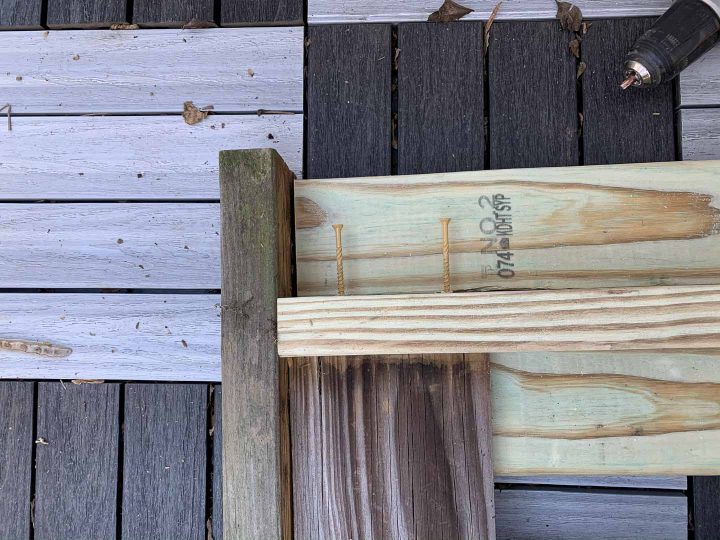
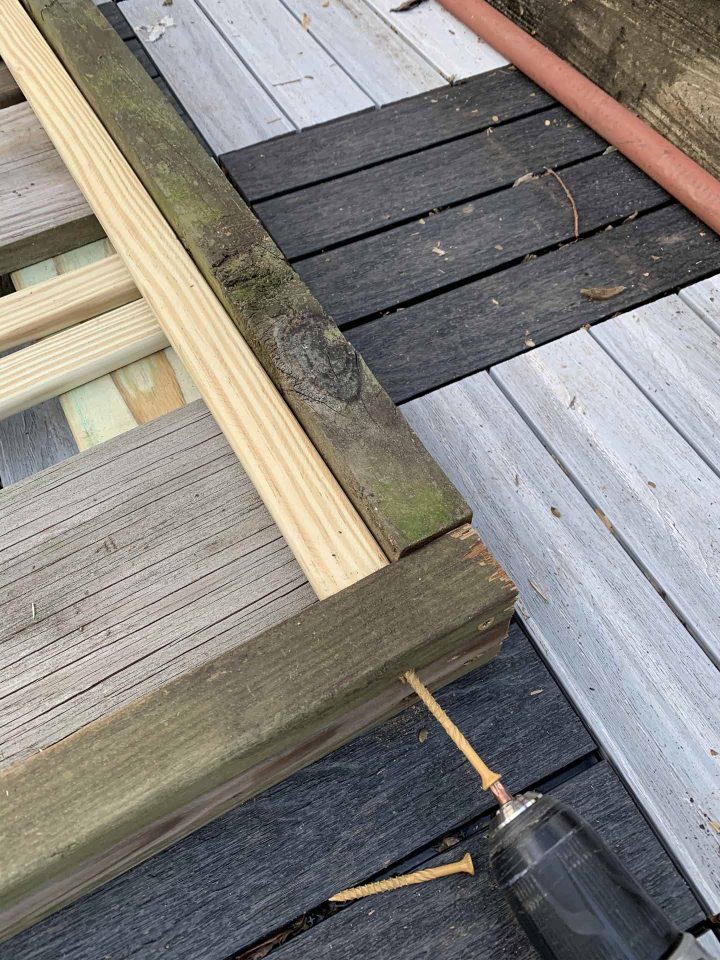
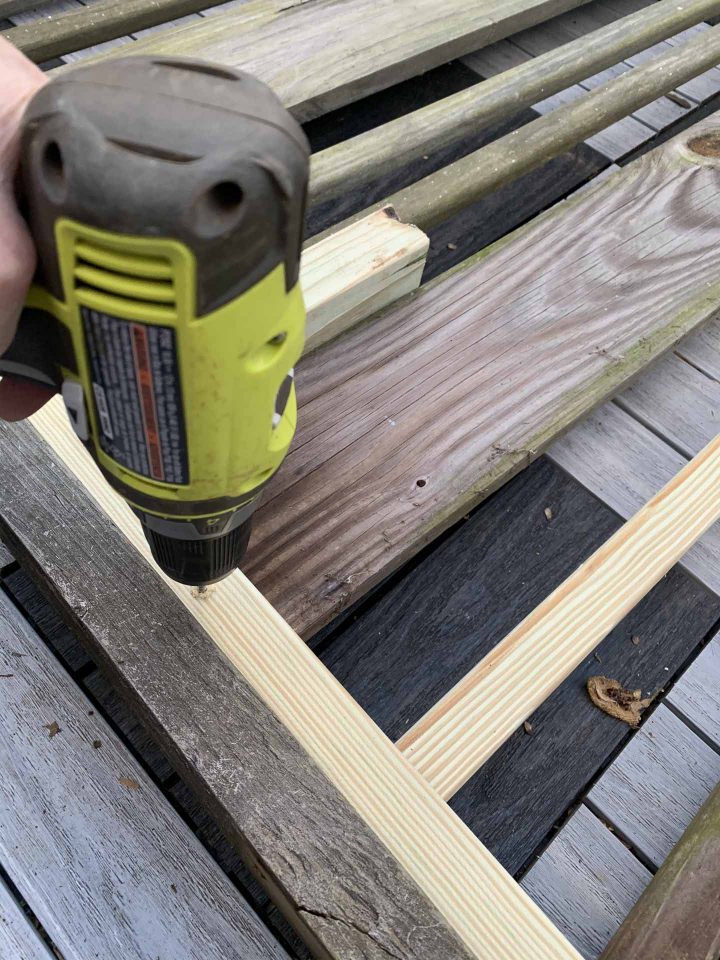
Then use 2 1/2″ screws to attach the upright boards to the top and bottom rail boards where they meet.
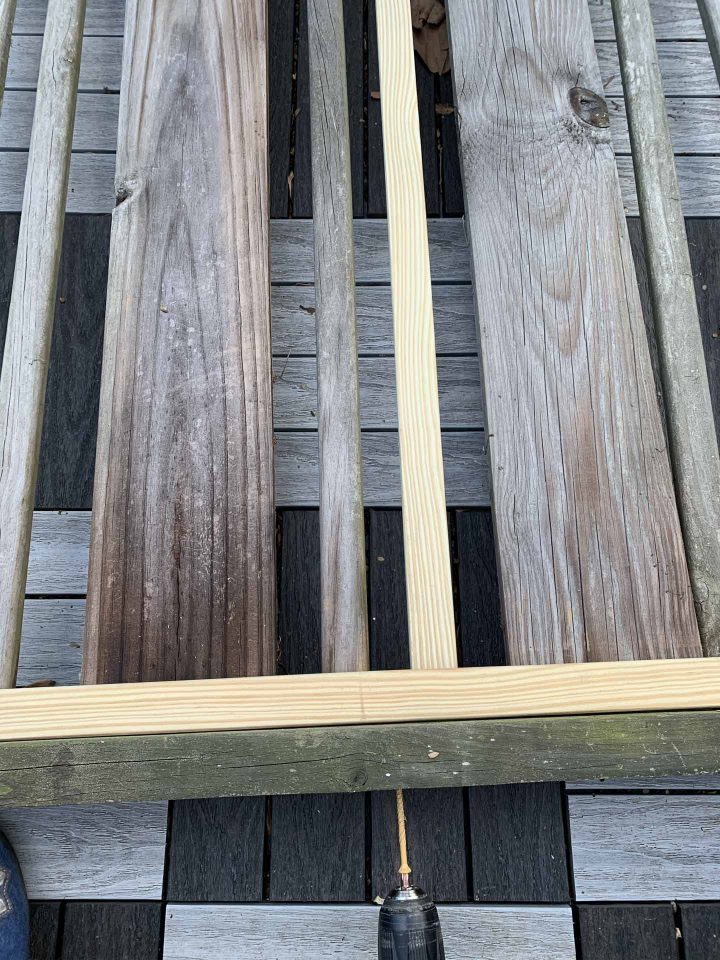
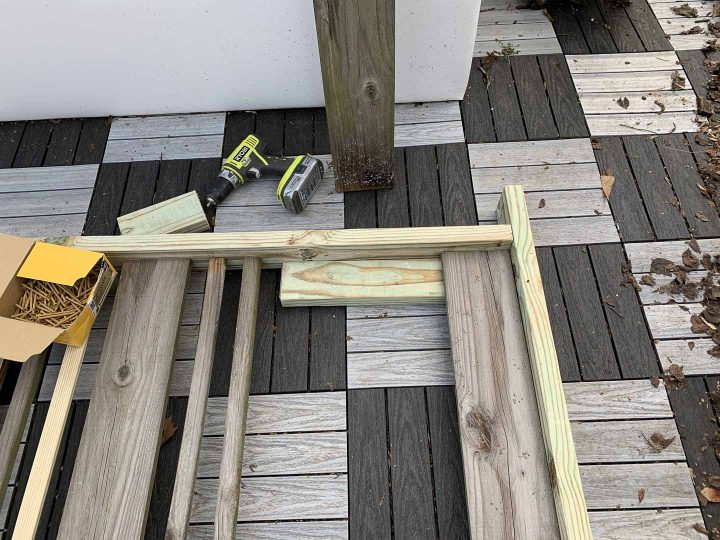
2 | Attach the fence boards to the top rail
Next we’re going to attach the fence boards to the top rail. This is the one that has the 4″ space at the top.
We’ll attach all of the boards to the top fence rail before we move on to doing any of them on the bottom. (You’ll see why later)
To do this, you’ll want to gather some of the scrap pieces of 2″ x 4″ boards that you have left over. We’re going to use them as spacers.
a. Install the 1″ x 6″ fence board

Place 2″ x 4″ spacers inside the top and bottom rails at one end of your fence panel. They should be lying flat on the ground so that the top edge is almost half way up the frame board.
The spacer beneath the top rail can be moved along as we attach the boards. But you’ll need enough spacers on the bottom rail to go all the way across to the other side of the fence.
Then lay a 1″ x 6″ board over the top of the spacers and push it all the way up against one of the upright frame boards.
Lay another spacer board on the outside edge of the top rail. It will help you determine where the screws should go in.
Start 2 screws just above this outside spacer board so that they will go into the top of the 1″ x 6″ fence board. I used 2 1/2″ screws for this, but the 2″ ones should also work fine.
Note: If your fence boards are dry, you may want to pre-drill these holes first to prevent the boards from splitting.
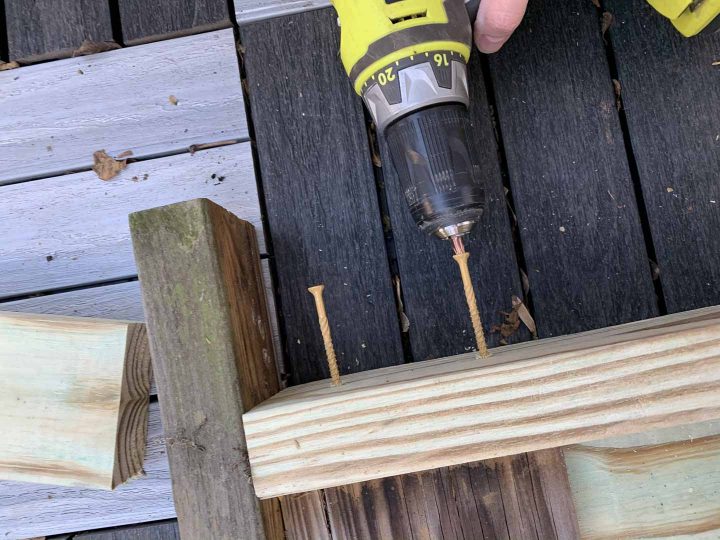
Move the spacer board that is under the screws out of the way.
Then finish screwing them in all the way.
For this first board, put a couple more screws through the upright frame into the side of it to hold it tightly in position.
b. Install a 1″ x 2″ fence board

Now we’re going to install a 1″ x 2″ board 1 1/2 inches over from the 1″ x 6″ board.
Rather than measuring, I used another 2″ x 4″ spacer board stood up on end to determine how far over the 1″ x 2″ board should go.
You’ll only need one screw to hold the 1″ x 2″ board in place.
Use the same steps as you did for the 1″ x 6″ to install the screw in the right location.
c. Install a second 1″ x 2″ fence board
Repeat the process from step b above to install another 1″ x 2″ fence board.
d. Repeat the pattern
Continue attaching fence boards across the top rail using the same pattern: 1 1″ x 6″ board and then 2 1″ x 2″ boards, separated from each other by a 1 1/2″ gap.
When you get close to the other end of the fence, attach the last 1″ x 6″ to the top rail so that it meets the upright frame board.
Make sure you have a spacer under the bottom of this last board. Then add a couple more screws through the side of the frame to hold it tightly in place.
Then go back and attach the remaining 1″ x 6″ and 1″ x 2″ boards to the top rail.
This will allow you to adjust the spacing slightly if your fence panel wasn’t exactly 86 1/2″ wide. You may not be able to use the spacer board to position these last few fence boards. I usually lay them all out and eyeball the spacing to make them look even. As long as your panel width isn’t too far out, you won’t be able to tell the difference once the fence is installed.

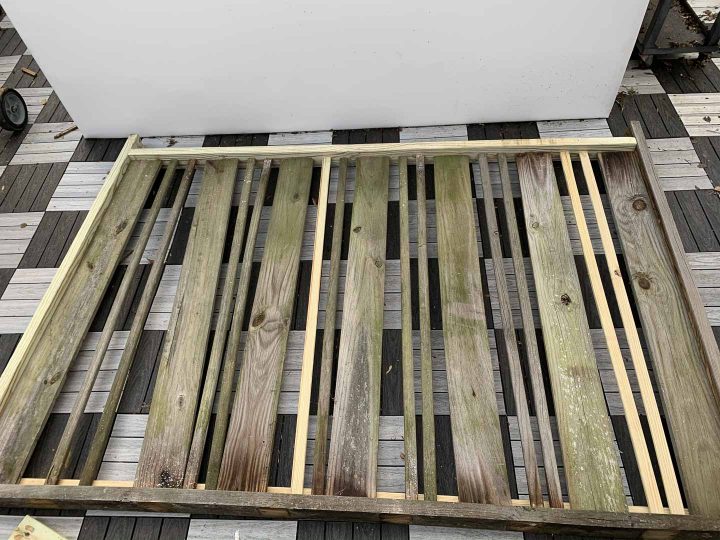
The top of your fence should look something like this.
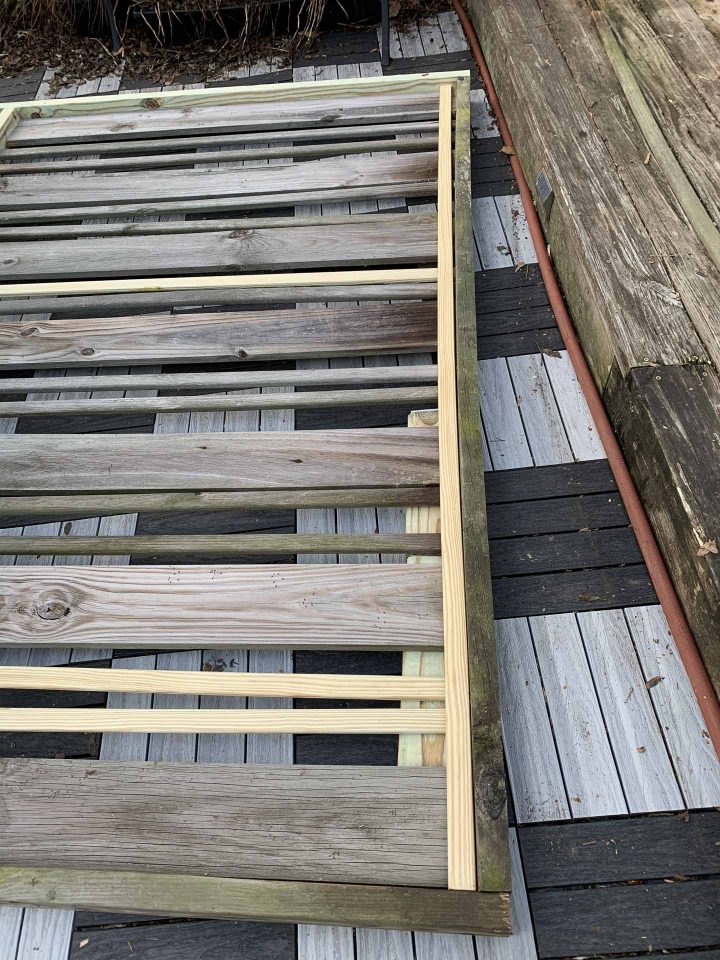
3 | Attach the fence boards to the bottom rail
Now we’re ready to attach the fence boards to the bottom rail.
Technically, you can do this the same way that you did on the top. The problem with this approach is if you need to change out one of the boards (ie. it gets cracked or broken), you’ll need to take the whole fence panel down to fix it.
So I used a different approach.

a. Lay one of the long 1″ x 2″ boards you cut at the beginning down along the bottom of the fence boards. It should reach all the way across to the other end of the fence.
The spacer boards should still be under your fence boards (which will make sure the band board is in the correct place).
But don’t worry if the fence boards are crooked, we’ll fix them in a little while.
b. Attach the 1″ x 2″ to the side of the frame, making sure that it is flush against the bottom board and the fence boards.

c. Then screw through the bottom rail into the 1″ x 2″ band that we just installed (not into the fence boards). The spacer trick doesn’t really work for this. You should just be able to position the screw about an inch down from the top of the rail board to get it to go into the right board.
Repeat this 4 or 5 times across the length of the fence panel.
d. When you get to the end, install a screw through the side panel into the end of the 1″ x 2″ board like we did on the other end.
e. Now you’re going to flip the fence over, so that the band we just installed is underneath the fence boards.

f. Lay the second long 1″ x 2″ board at the bottom of the fence boards so that it is over top of the first one.
Then attach it to the first and the last 1″ x 6″ boards using 2″ screws.
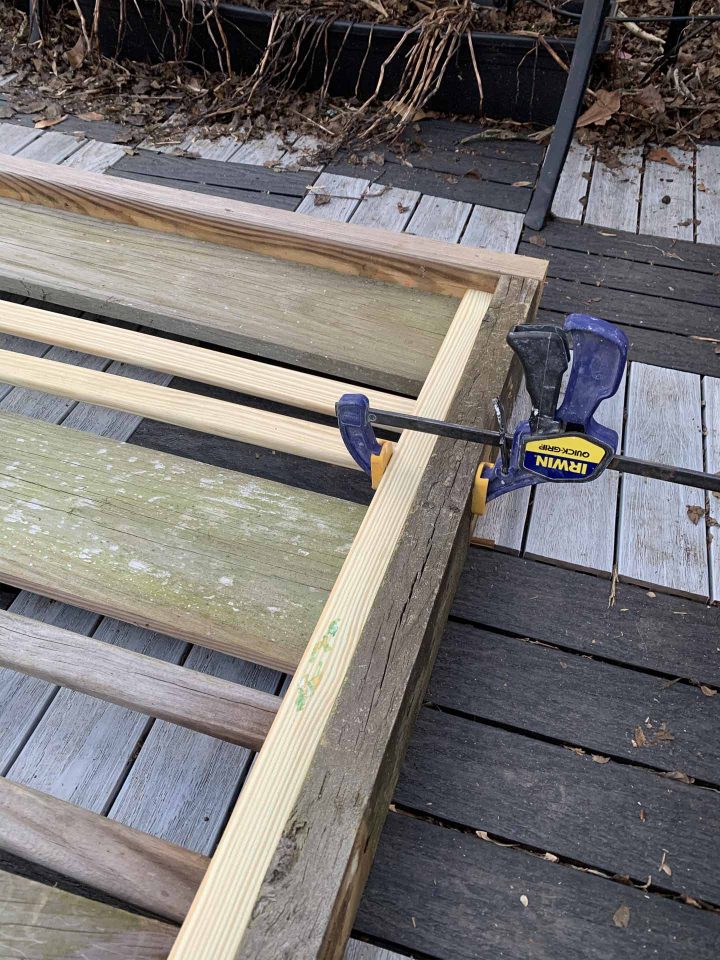
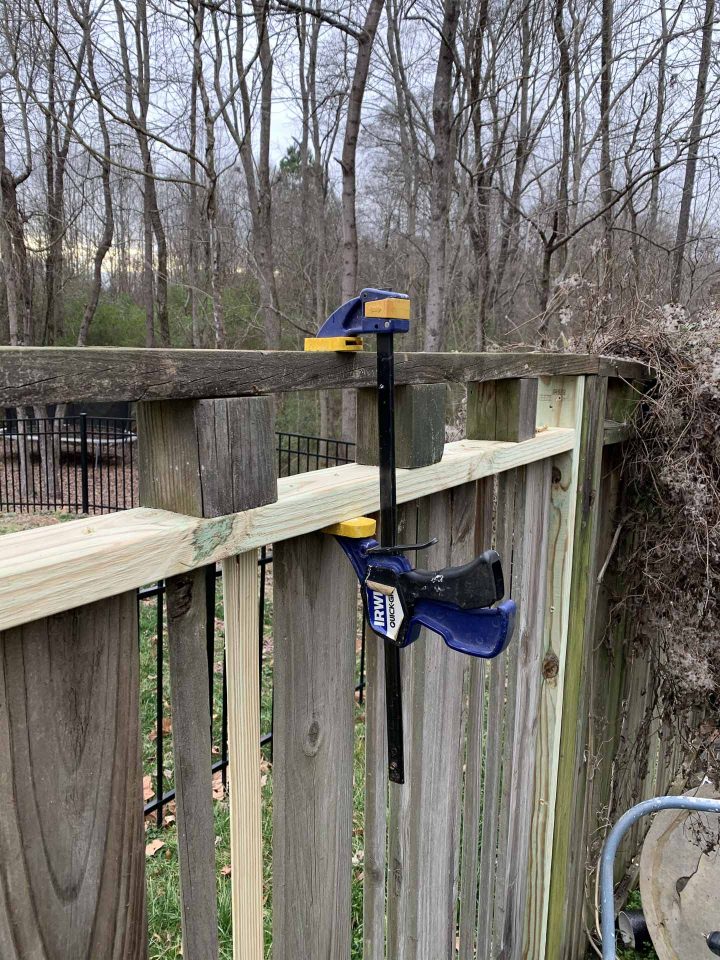
Make sure that it is flush against the fence boards and the bottom rail when you do this. If you have trouble getting it to stay in place, try using a couple of clamps to hold it.
DO NOT attach it to either the upright or bottom frame boards. We want to be able to remove this band easily if a fence board needs to be replaced.
g. Now we’re going to fix the spacing for the rest of the fence boards and attach them to this 1″ x 2″ band.
For this, you’ll need your upright 2″ x 4″ spacer again. Use it to position each of the fence boards.
Push the 2″ x 4″ against the board that you just attached. Then push the next board up against the 2″ x 4″. As long as you use the same spacer for the top boards, they will line up correctly.
Then keep the fence board in position by putting a 2″ screw through the 1″ x 2″ band to hold it in place.

You should now have a finished fence panel that looks something like this.
How to install the fence panel
4 | Put the fence panel up
Now it’s time to install the fence panel between the posts.
This is much easier to do with two people…but still possible for one person if you’re willing to work at it (which is what I did).
If you haven’t already, cut off your posts to the height that the top of the fence panel should reach. This should be 1 1/2″ lower than the actual fence height that you’re going for.
Put the fence panel between the posts and raise it up until the top of the upright meets the top of the post.
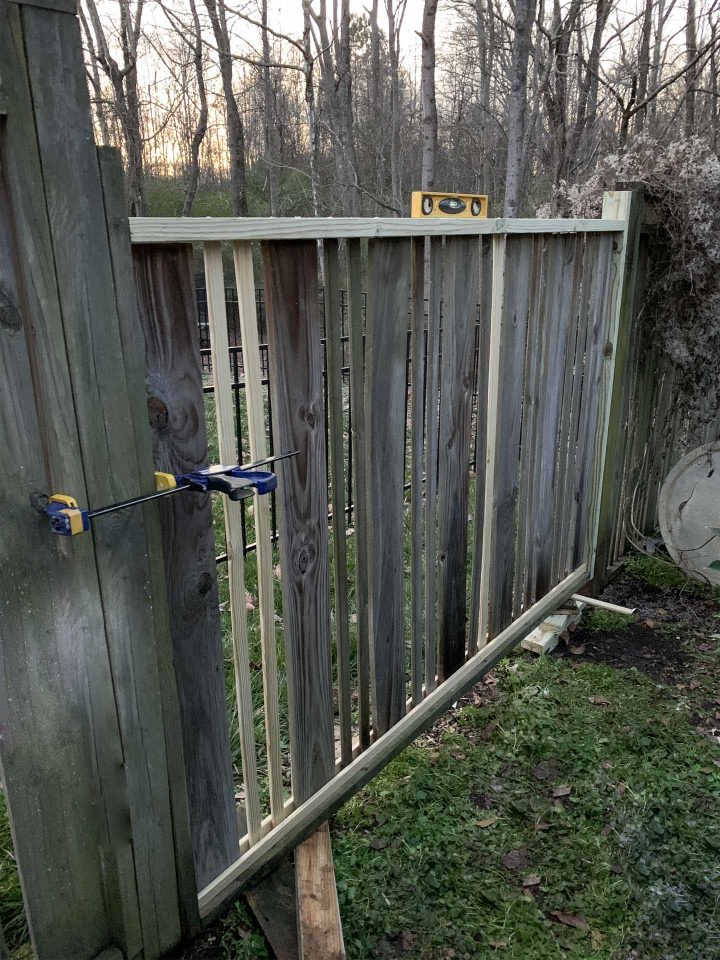
Since I was doing this by myself, I used very scientific ways of doing this like piles of wood under the fence and clamps to hold it onto the post.
Make sure that the fence is level.
Then use a few screws on each side to attach the frame to the fence posts. I put them on both sides of the fence.
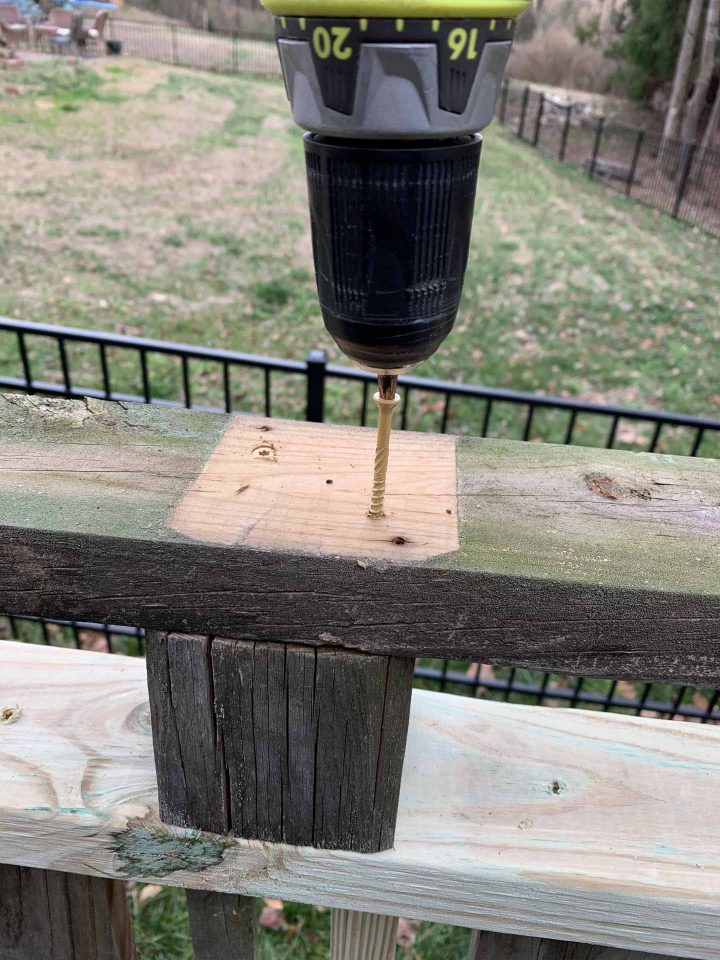
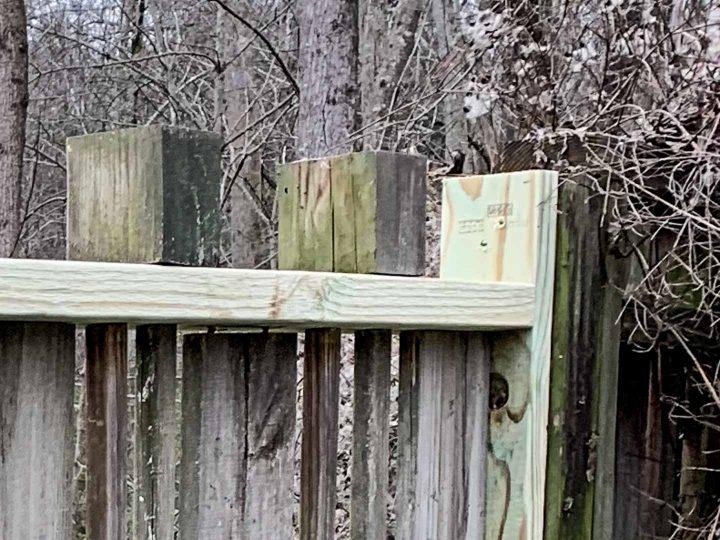
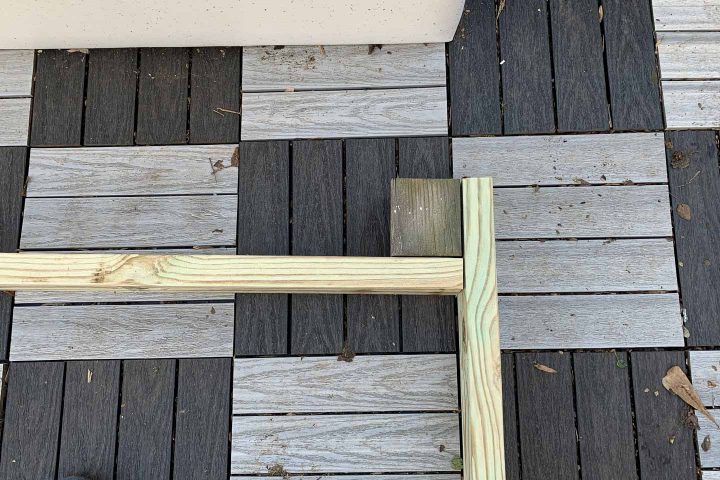
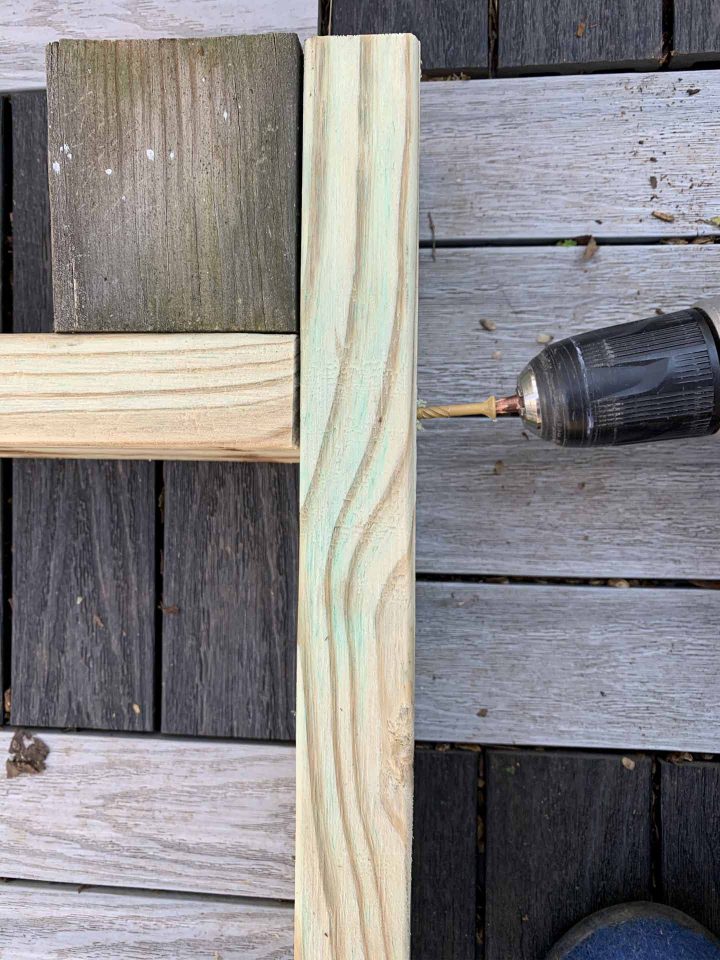
5 | Add the decorative blocks
Now we’re going to add the 4″ x 4″ blocks to the top of the fence.

Position the block so it is centered over a set of 2 1″ x 2″ fence boards. Make sure that the cut side of the block is facing down (not sideways).
Use 2 1/2″ screws to screw up through the fence rail to attach the blocks to the frame.

Repeat this step until there is a square block over every pair of 1″ x 2″ boards.
6 | Install the top railing
We’re finally on the last step!
Now we’re going to cut the last 2″ x 4″ board that will cover the tops of the frame, the blocks and the top of the post.
For most fence sections, this board will be 3 1/2″ longer than your fence panel.

This is so it can cover half of a post on either side of the panel.

However, if this board is at the end of the fence, it will be 5 1/4″ longer than your fence panel to cover the whole post at one end.
Or if you’re doing a stepped fence because of a slope in your backyard (like I did), then some sections will have a board that is only 1 3/4″ longer than the fence panel.
I found it was easiest to wait until I had the panel installed and then measure how long the board needed to be. That way I didn’t make any mistakes.
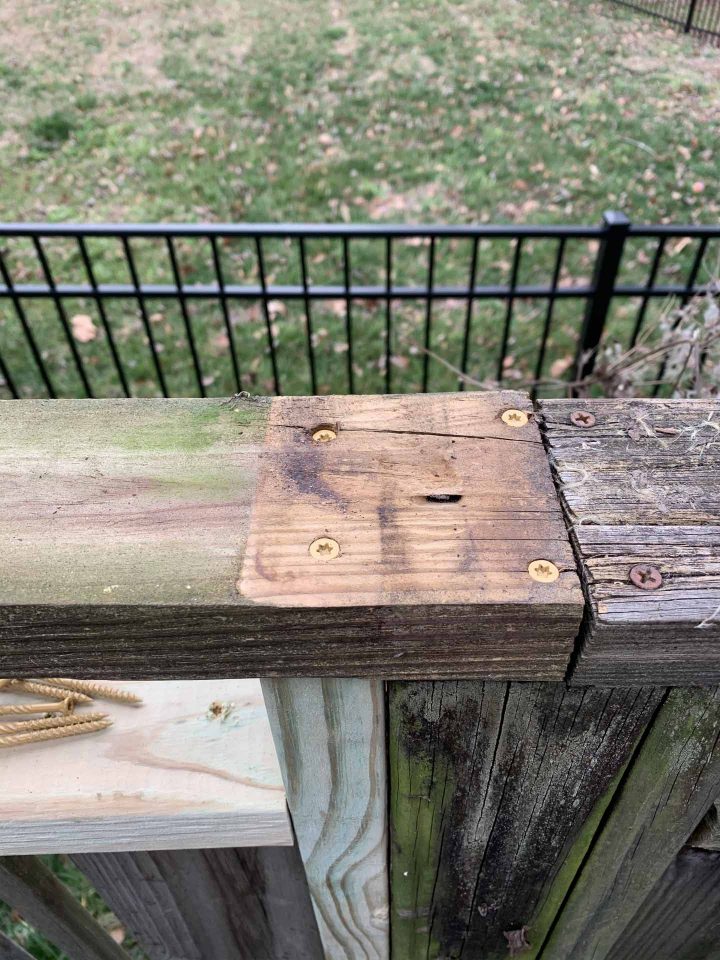
Once the board is cut, put it up on top of your fence and screw it into the fence post and the fence panel.

Then screw it down onto the 4″ x 4″ blocks…every other one should be good enough.

If you have trouble with warped boards, use clamps to hold them in place until they are attached.
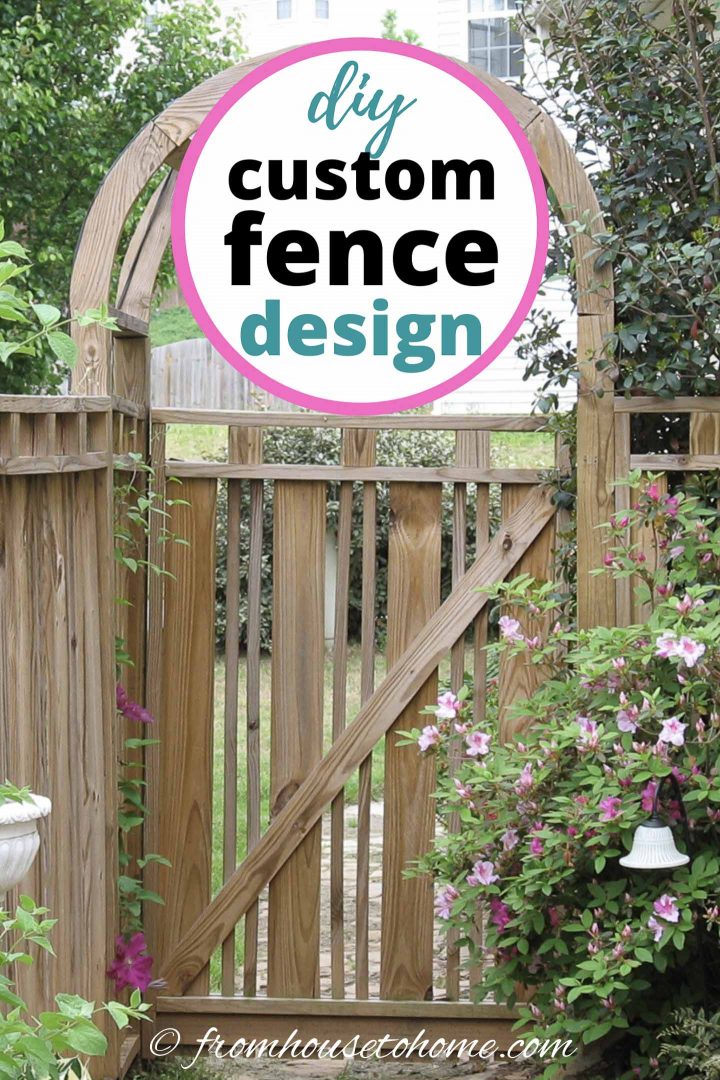
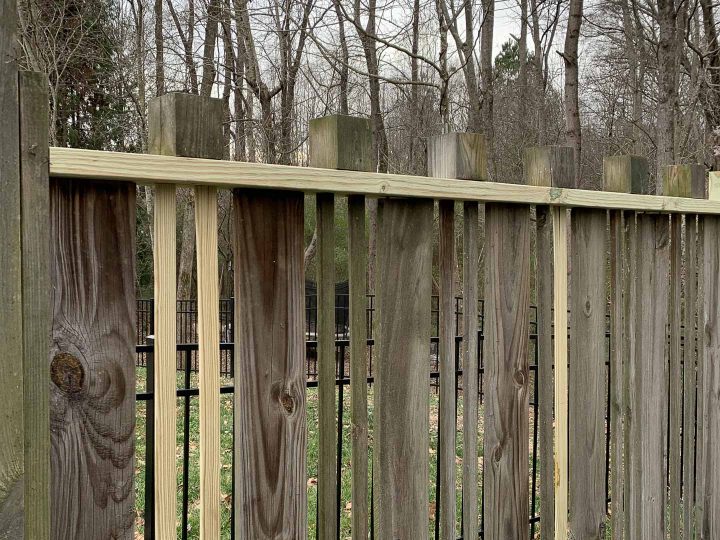
The finished fence
The fence section is done!
I used the exact same design (with fewer boards) to make gates as well.
The only addition is the cross board that helps to keep the gate square.

I still love how this fence looks, even after all these years.
How to replace a broken or cracked fence board
If the time comes where you need to fix a broken fence board, here are the steps you’ll need to do. There are a few of them, but it really doesn’t take more than a few minutes to complete the whole process.
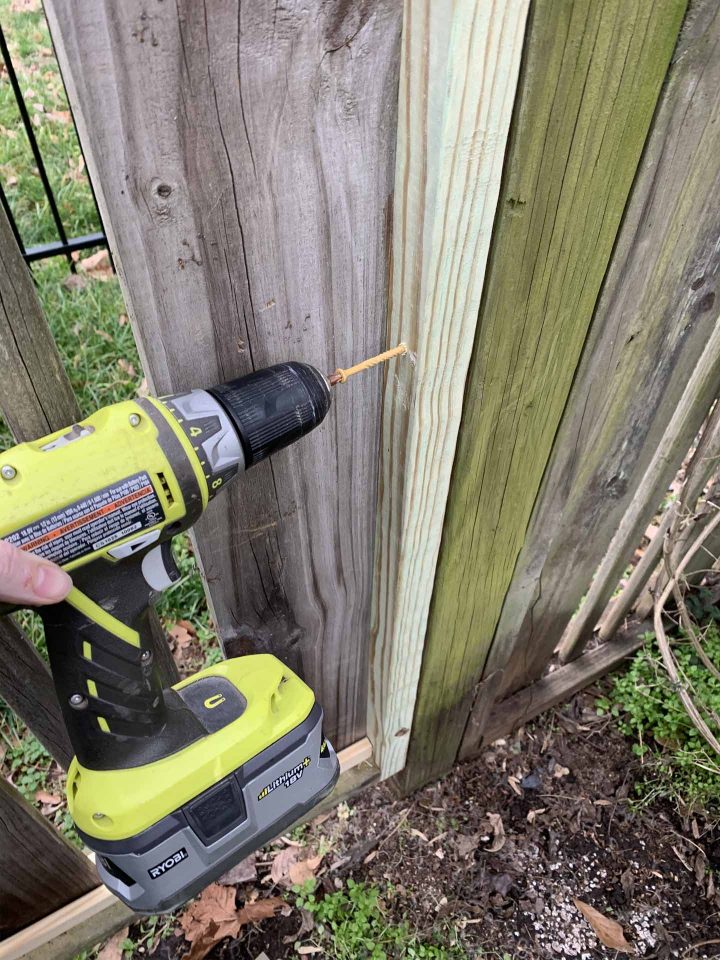
- Remove the top railing by undoing the screws across the top.
- If the broken board is 1″ x 2″ that is under one of the 4″ x 4″ blocks, remove the screws under the block so that it lifts off the rail.
- Undo the screw(s) at the top of the fence board.
- Go to the side of the fence that has the screws through the side of the bottom band.
- Undo the screw at the bottom of the board that needs to be replaced.
- Take out the broken pieces.
- Slide the new fence board in between the two bands on the bottom of the fence and stand it up straight under the top rail.
- Put the screws back in at the bottom and top of the fence board.
- Re-attach the 4″ x 4″ block.
- Add the board back onto the top of the fence.
Other DIY outdoor projects you might like
Have comments or questions about our DIY custom fence design? Tell us in the section below.
Pin It So You Don't Forget It!
This post was originally published on January 24, 2020 but was updated with new content on January 20, 2023.