How To Sew A Zipper In A Cushion Cover
I admit it. I have a pet peeve. Cushions that you can’t take the cover off of.
Whether it’s to wash the cover or just to easily change out the decor, cushion covers with zippers are where it’s at if you ask me.
Fortunately, it’s really not as hard as it seems to sew a zipper in a cushion cover.
Whether you’re sewing it into the end of a box cushion or the back of a pillow, the process is pretty much the same.
This method will make sure you have lots of room to get the cushion in and out of the cover (that’s pet peeve #2…cushions with zippers that are too short, making it almost impossible to get the cushion out).
And it will make sure that your zipper is straight. Which doesn’t really affect the functionality but it looks better. For those of you with a touch of OCD like me, a crooked zipper would drive you crazy!
Supplies
This post may contain affiliate links. We make a small commission if you buy the products from these links (at no extra cost to you). As an Amazon Associate, I earn from qualifying purchases. But we only recommend products we would use ourselves. For more information, click here to see our disclosures.
- Two pieces of fabric from the back of the cushion that will be joined by the zipper. Before you start, you will need to have cut your cushion cover fabric. If you’re not sure how to do this, you can see our instructions for sewing box cushions HERE and the tutorial for pillow covers HERE.
- Sewing machine
- Zipper foot*
- Zipper
- Thread – in a color that matches your fabric
A Couple of Tips
Tip #1: Make sure that your zipper is at least as long as the width of the cushion form. In this case, the cushion is 18″ wide, so the zipper is 18″ long. This way the zipper will stretch all the way across the back of the cushion, which makes it much easier to get the cushion form in and out. If your zipper is too long, you can cut it…use tip #2 to make sure the zipper pull doesn’t fall off the track.
Tip #2: Before you start, if there are no stops on the zipper (or if the zipper is longer than you need), cut the zipper a little longer than you need it to be. Then sew across each end a couple of times. This prevents it from accidentally sliding off the end of the zipper (and avoids the frustration of trying to get it back on!)
How To Sew In A Zipper
1. Install the zipper foot on your sewing machine (if you’re not sure how to do this, check your machine’s manual for the instructions).
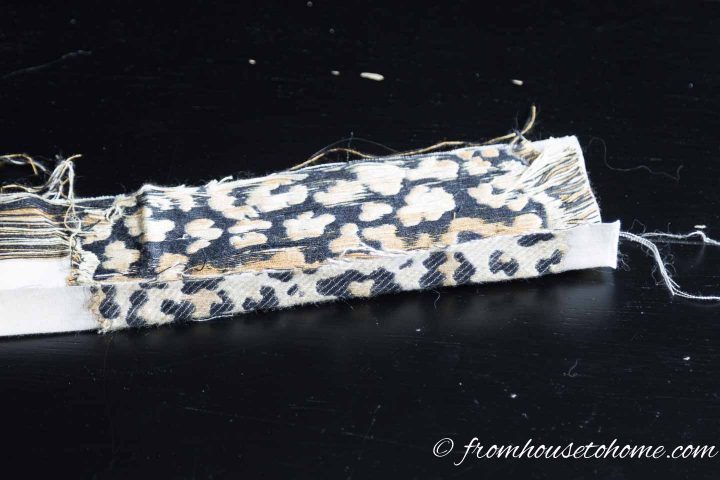
2. On one piece of fabric, fold one edge of the long side over ½” so that the wrong sides of the fabric are together. If your material has a pattern, you will want to make sure that you are folding the side that continues the pattern from the second piece of fabric. Press with an iron so that the fold stays in place.
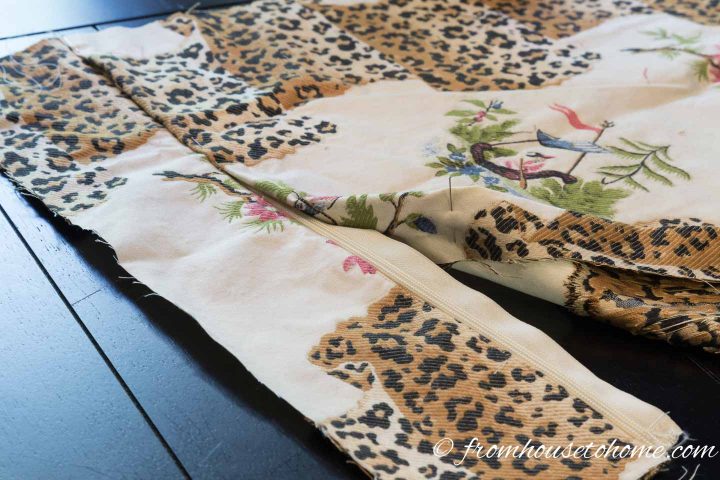
3. Lay the zipper down on the table with the zipper pull facing up.
4. Place the folded edge of the fabric along the edge of the zipper track. Make sure that the right side of the fabric is up and the right side of the zipper is up. The small folded edge of the fabric should be covering the edge of the zipper.
5. Pin the fabric to the zipper.
6. Start at one end of the zipper and sew it to the fabric as close to the zipper as you can. If you remove the pins just before you get to them, you will make sure not to break your needle.
7. Now get the other piece of fabric for the cushion.
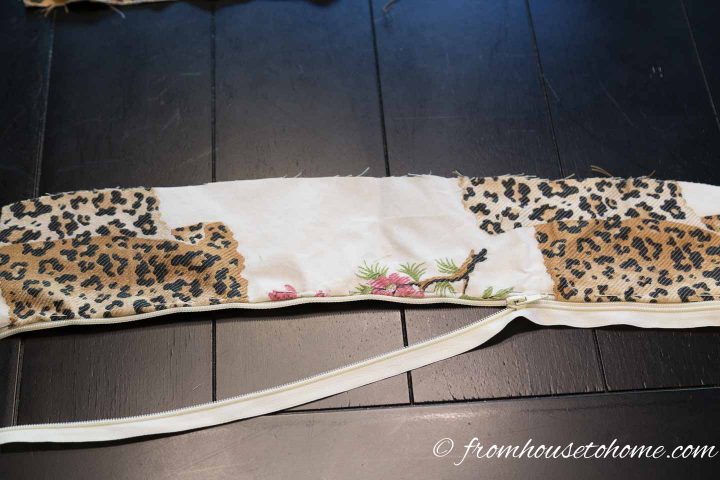
8. Fold the bottom edge of the fabric up 1″ so that the wrong sides are together. If your material has a pattern, make sure you have the bottom edge by checking that the pattern is matching up with the piece you just sewed to the zipper. It won’t match exactly (because of the fold on the other piece), but should be close. If the fold won’t stay very well, use a few pins to hold it in place.
9. Use the iron to press the seam so that it stays folded.
10. Close the zipper and make sure it is lying face up on the table.
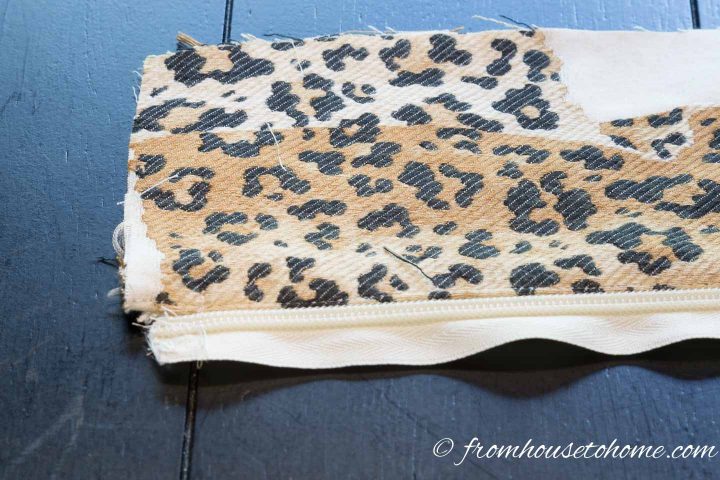
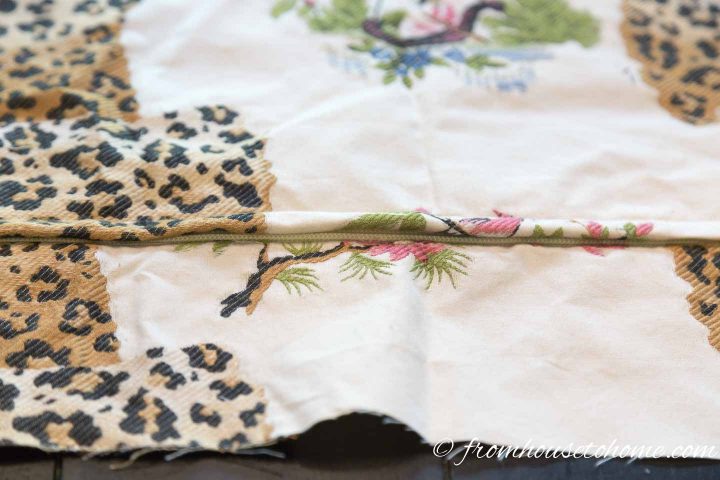
11. Position the fabric so that the folded edge completely covers the zipper track. This will make sure that the zipper track isn’t visible on the back of your cushion.
12. Pin the material onto the zipper.
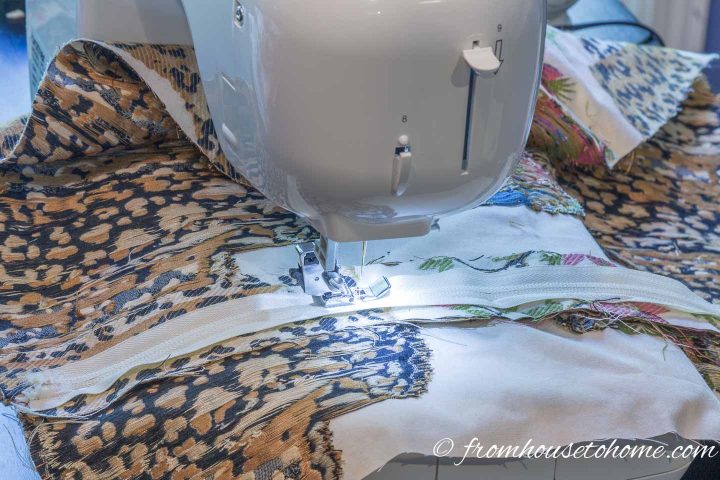
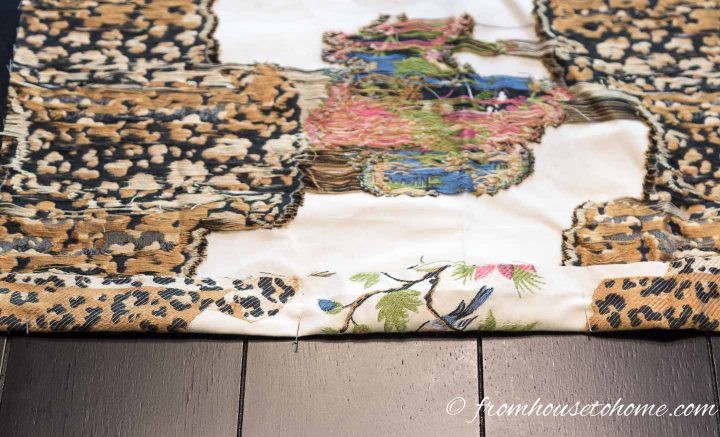
13. Turn the fabric over so that the wrong side is up. Sew the zipper to the fabric. In this case, you want to leave a ¼” gap between the zipper track and where you are sewing so that there will be enough room to easily open and close the zipper.
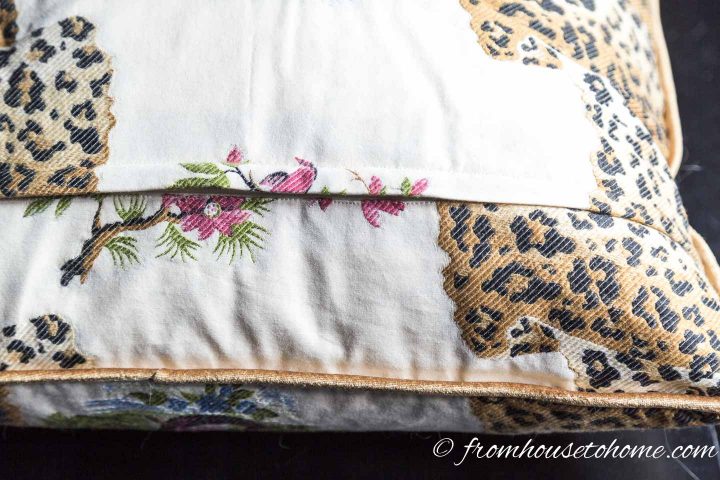
And that’s it! You’ve sewed in a zipper! (Told you it wasn’t that hard).
Now before you go finishing the rest of your cushion, you’ll want to make sure you open the zipper part way. Otherwise, you’ll have a hard time getting it open to turn the cushion cover right side out.
Have comments or questions on how to sew a zipper in a cushion cover? Tell us in the section below.
This post was originally published on May 25, 2019 but was updated with new content on January 14, 2021.