How To Sew Piping On A Pillow (Step By Step Tutorial)
Piping or trim isn’t absolutely necessary for a cushion, but it definitely makes your cushions look like a professional sewed them!
Piping (or welting as it is sometimes called) comes in many different colors and styles, so you can easily find something that goes with your cushion.
Supplies
This post may contain affiliate links. We make a small commission if you buy the products from these links (at no extra cost to you). As an Amazon Associate, I earn from qualifying purchases. But we only recommend products we would use ourselves. For more information, click here to see our disclosures.
- The fabric for your cushion. If you’re not sure how to cut out your cushion fabric, you can find our tutorial on sewing envelope cushions HERE and our step by step instructions for making box cushions HERE.
- Sewing machine
- Piping foot* or zipper foot*
- Piping
A Couple Of Tips
Tip #1: If you have a piping foot for your sewing machine, you will want to put that on now as it makes sewing piping much easier. If not, the zipper foot will also work.
Tip #2: You will need enough piping to go all the way around the outside of your cushion…so for an 18″ square pillow that would be 18″ x 4 sides plus a few extra inches for joining…or about 78″.
Pin The Piping To The Fabric
1. Lay the front piece of the cushion out on the table with the right side up. If you are making an envelope cushion, this is the fabric piece that does not have the zipper in it. For box cushions, you will need to repeat the same process for both the top and bottom pieces of fabric.
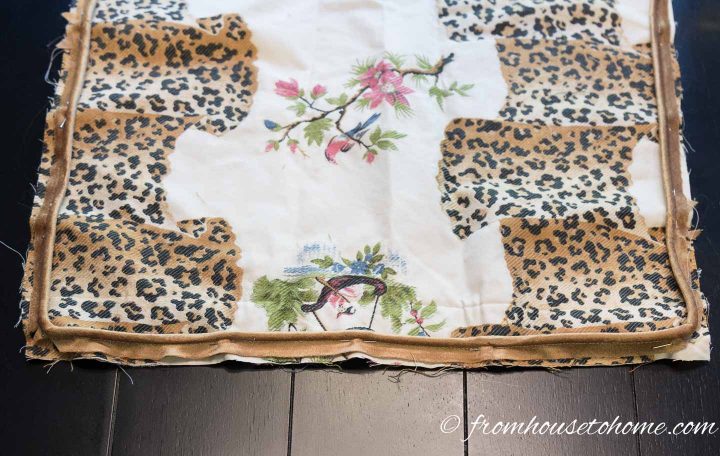
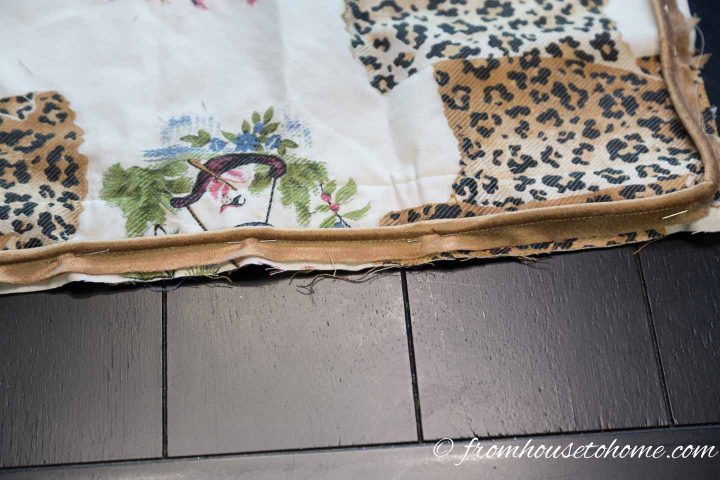
2. Pin piping around the edges of the fabric so that the raw edge of the piping meets the raw edge of the fabric. Start the piping in the middle of an edge (rather than at the corners).
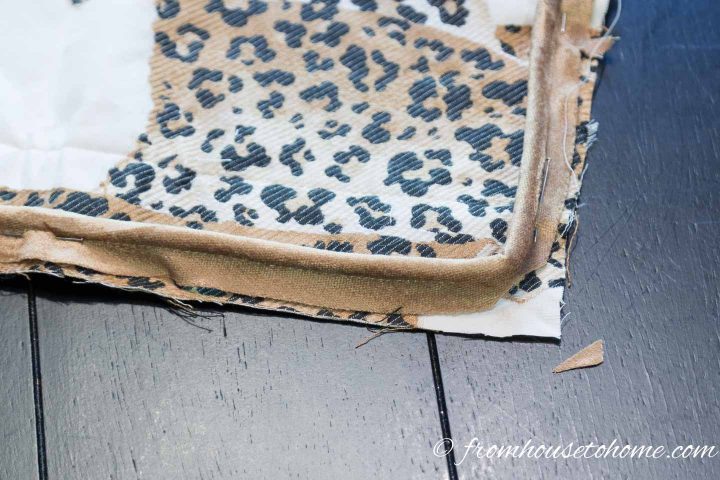
3. Cut the corners off of the piping to allow it to turn smoothly. Make sure not to cut through the thread on the piping when you do this.
Join The Piping Ends
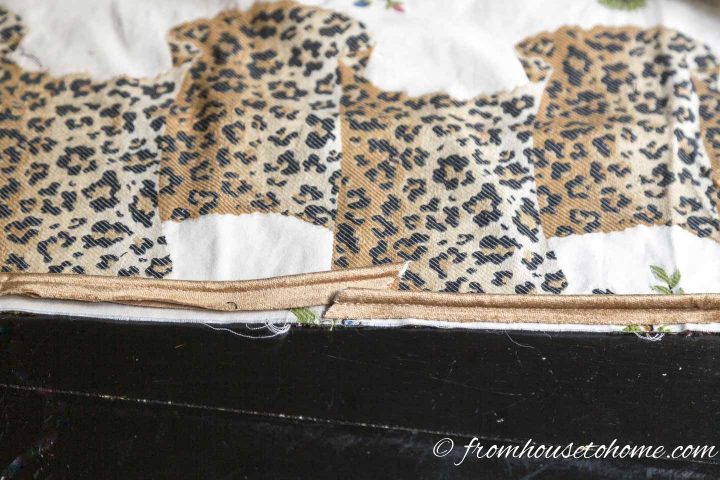
4. When you get back around to the start, cut off the piping so that there is some overlap (the end should extend past the start by at least 1″).
You can also do this if you don’t have long enough pieces of piping to go all the way around your cushion.
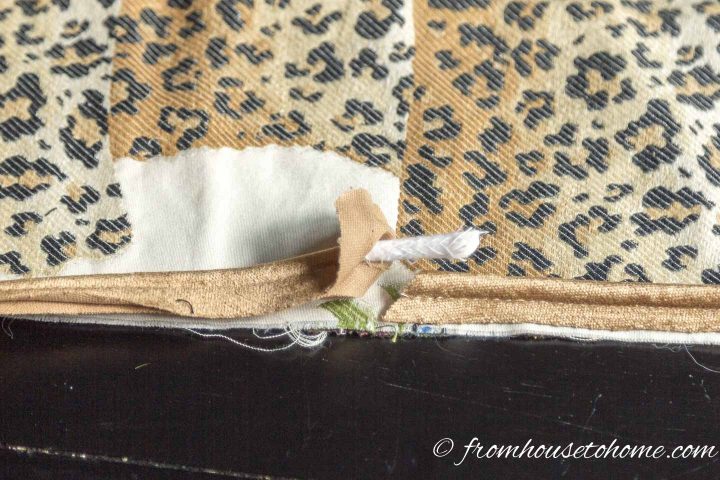
5. Remove the last few stitches from the end of the piping cover.
6. Fold the fabric back to expose the piping cord.
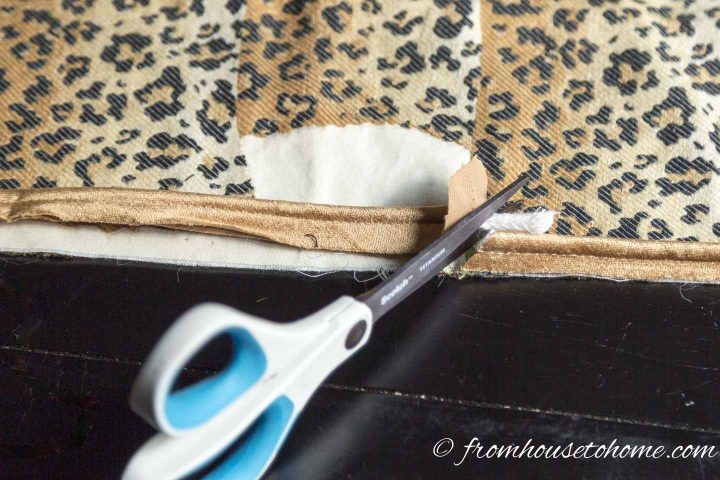
7. Cut the end of the cord so that it matches up to the start of the cord on the cushion.
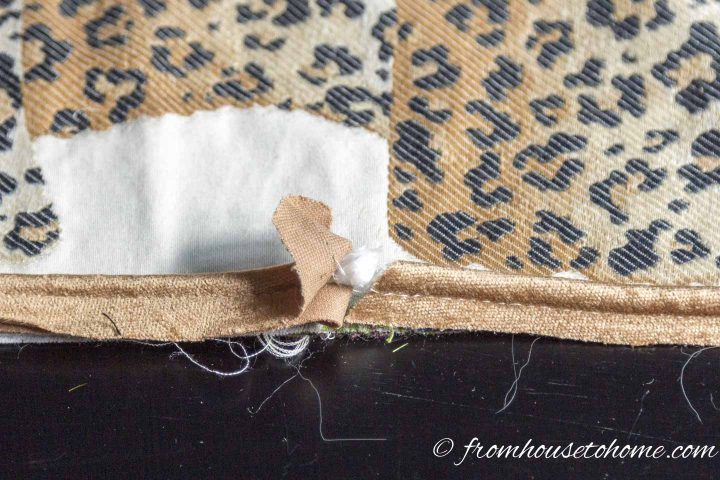
8. Make sure that the ends meet.
9. Fold the cut edge of the piping fabric under.
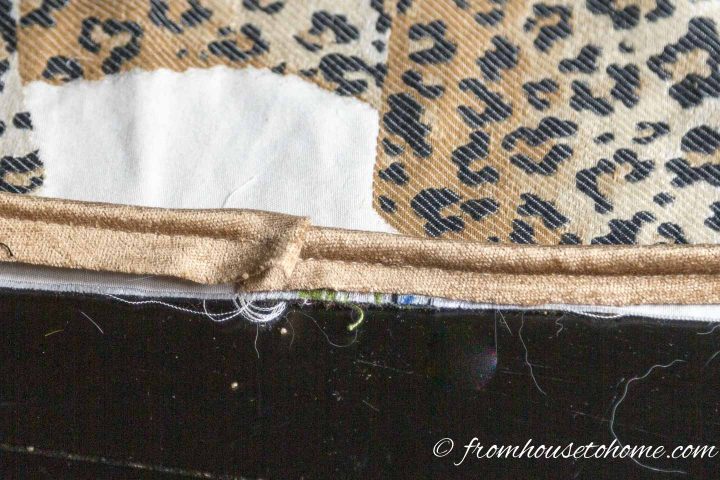
10. Wrap the extra piping fabric around the two cord ends so that they are covered.
Sew The Piping To The Fabric
11. Change the stitch length on your sewing machine to a basting stitch (probably the longest stitch length available).
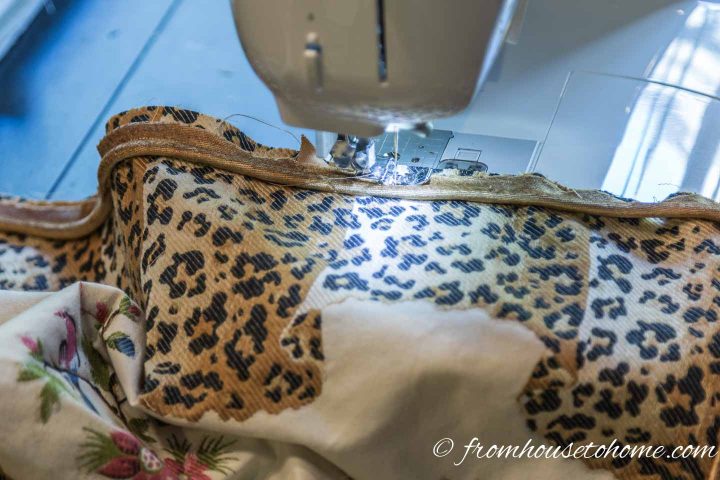
12. Baste the piping to the fabric, removing the pins as you go. Go slowly around the corners to make sure they hold their shape.
The piping will get sewn in again when you put the rest of your cushion together, so a basting stitch is all you need for now.
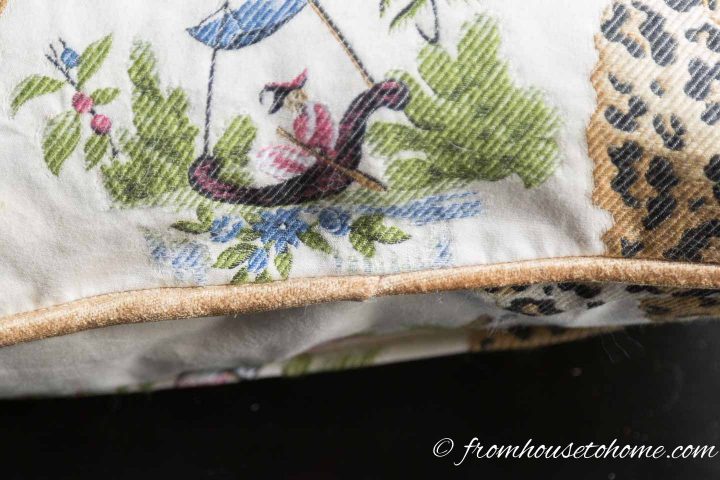
That’s all there is to it! The piping join is hardly visible when you’re done.
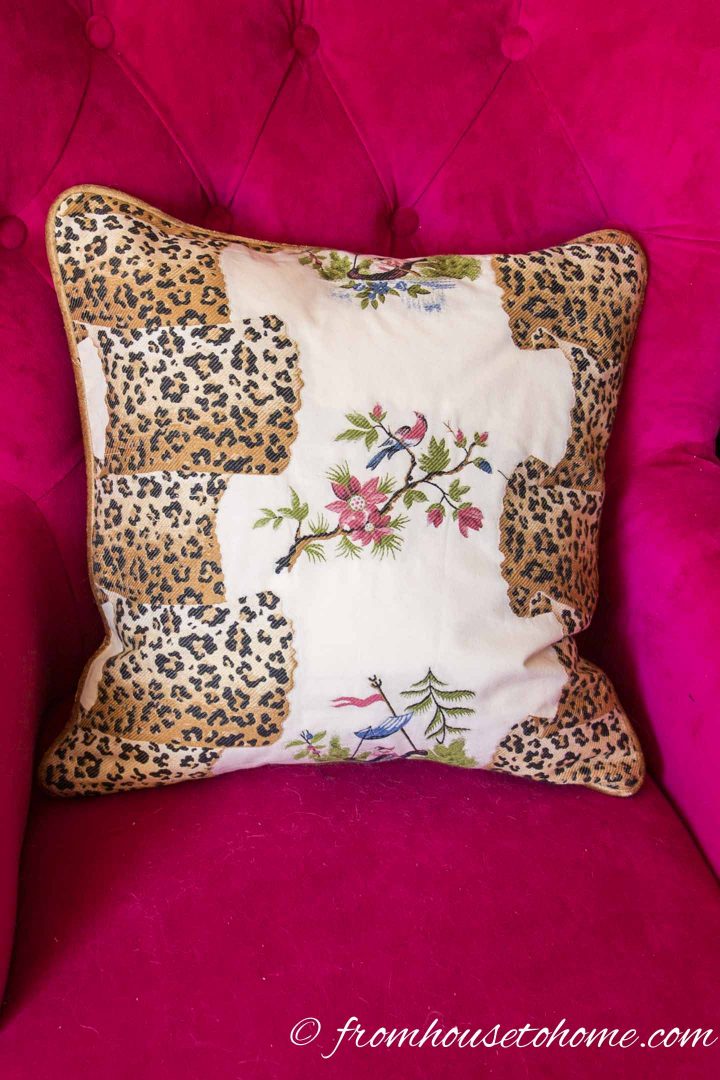
And the finished pillow looks very polished.
Other Sewing Projects You Might Like
- How to sew a zipper in a cushion
- How to sew cheap outdoor curtains
- Step by step tutorial: How to sew a pillow cover
Have comments or questions on how to sew piping on a pillow? Tell us in the section below.
This post was originally published on June 3, 2019 but was updated with new content on January 14, 2021.
Do you suggest a particular brand of the zipper by the yard? There are so many. I’m confused about cutting a metal zipper…
Jana, I just purchase the zipper that is closest in size for the purpose I want. There is no problem cutting the metal zipper between the teeth. Alternatively, if you do not need a long zipper you can use a dressmaker’s zipper that will come in the color and exact length you want.
Thank you so much for that speedy reply! When I realized the date of your original posting I doubted you would see this. I’m so grateful! Thanks again! Take care!
Hi thank you for posting these tutorials. I’m just about to start making a couple of box cushions for window seats. I’ve never done this, or put piping on anything. There are different sizes of piping I see…does it matter what size I choose? I can’t find a bernina piping foot to buy, but I do have a zipper foot. Thanks for your help!
Hello Nancy, The size of the piping for the box cushions is really personal preference. I would use from 1/4″ to 1/2″ welts. A zipper foot will work fine for sewing it on. You may want to baste the piping in place before stitching to give you more control and accuracy in the finished result.