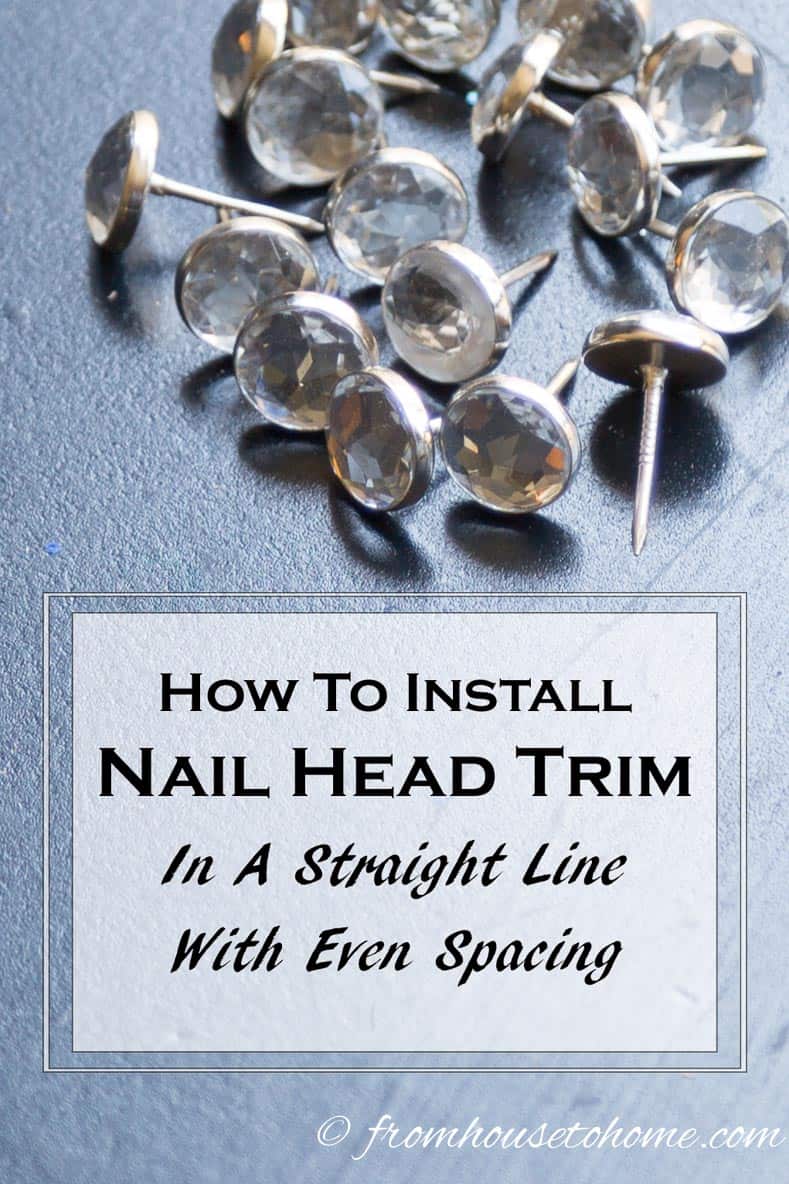
How To Install Nail Head Trim In a Straight Line With Even Spacing
If you have ever tried to install nail head trim on a piece of furniture manually, you know how hard it is to get them to go in evenly spaced and straight.

You could use the long strips that have real nails every 5 spots or so, but they never seem to look right to me.
You can see where they are attached to each other…and the one that you nail in always seems to look a little different than the others (a little rounder and a little shinier in this case).
Also you can’t use them in projects where you don’t want the nails to be right next to each other (like the project below).
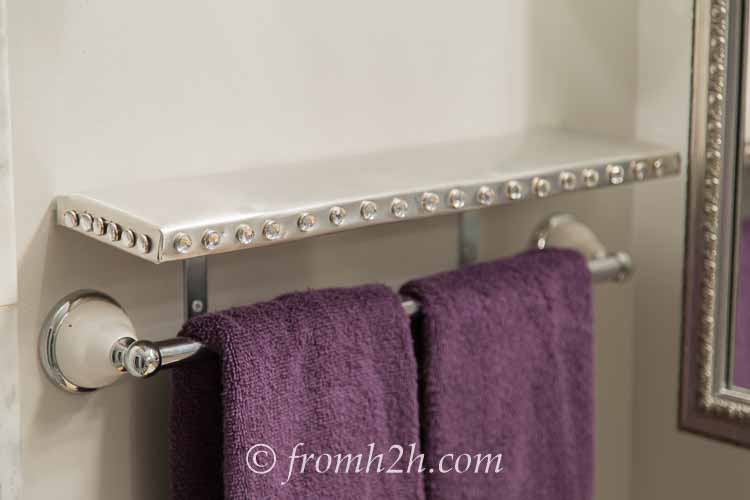
Now that I have added nail head trim to a few pieces of furniture (like this silver shelf I made for my bathroom where you can see that the nail heads are not particularly straight), I have finally figured out a way to get the individual nails to go in straight and evenly spaced. And since I’ll be using it again on some upcoming projects (it’s a great way to add some interest to a project that needs a little something extra), I figured I would share how to do it…once you have figured it out, it really isn’t that hard!
Continue reading to find out how to install nail head trim in a straight line with even spacing.
What You Need
This post may contain affiliate links. We make a small commission if you buy the products from these links (at no extra cost to you). As an Amazon Associate, I earn from qualifying purchases. But we only recommend products we would use ourselves. For more information, click here to see our disclosures.
- A piece of cardboard
- Measuring stick
- Pencil
- Scissors
- Cordless drill
- Upholstery nails – I used these crystal upholstery nails* for this project.
- Rubber mallet
Step 1: Make a Jig For Your Nails
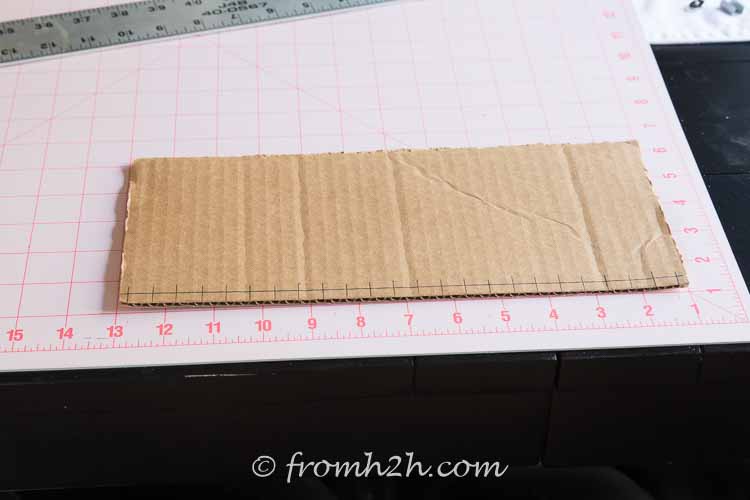
To keep the upholstery nails evenly spaced all the way around your panels, it helps to make a jig. For this you will need a piece of fairly sturdy cardboard.
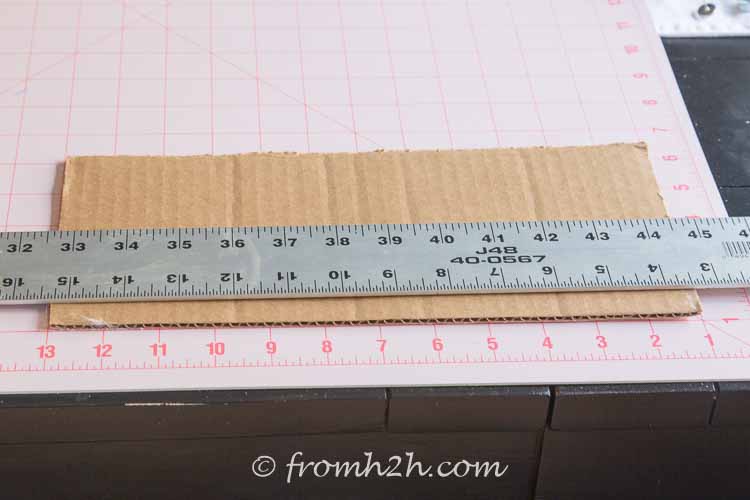
1. Start by drawing a line ¼” from the side of the jig. This is assuming that you are using upholstery nails with 7/16″ heads. If your nail heads are a different size, divide the width of the nail in half to figure out how far out the line should be drawn.
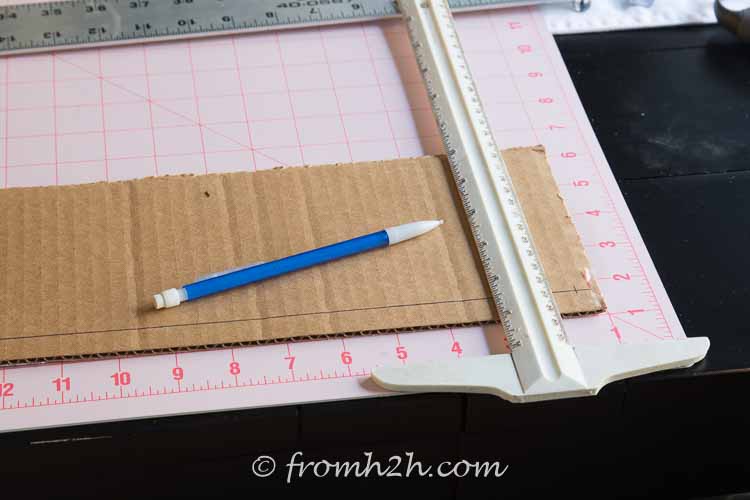
2. Next draw cross-lines that start ¼” from the side of the cardboard and repeated every ½”. Again this depends on the width of your upholstery nail heads…mine were 7/16″ so the first line is half the width of the nail head from the side, and the other lines are drawn a little more than the width of each nail head apart. If you want your nails to be spaced further apart, just increase this spacing to the desired distance.
You should end up with a pattern across one edge of the cardboard that looks like the picture at the top of this page.

3. Use scissors to cut along each of the short lines.
Step 2: Pre-Drill the Holes
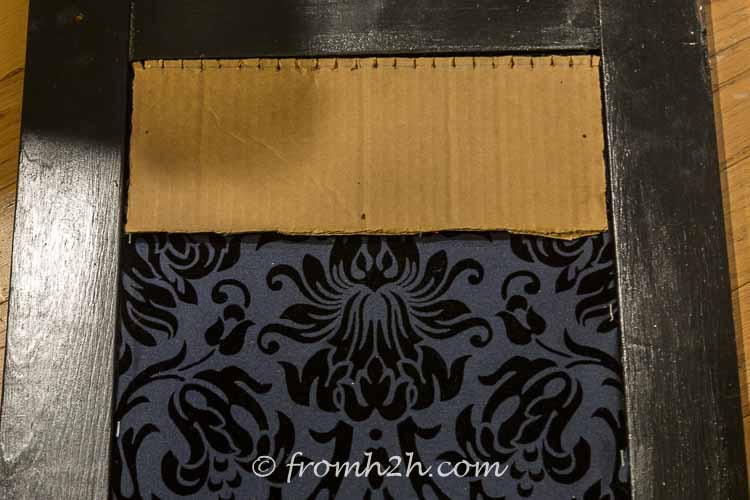
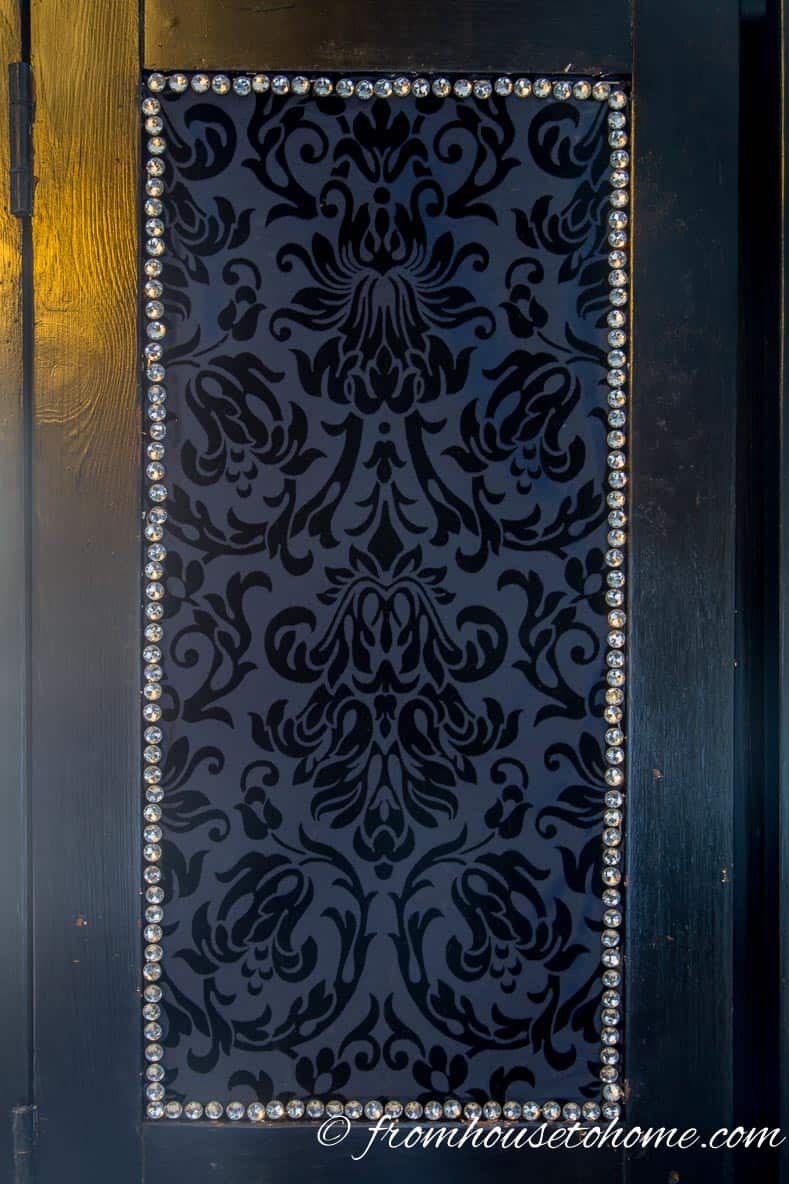
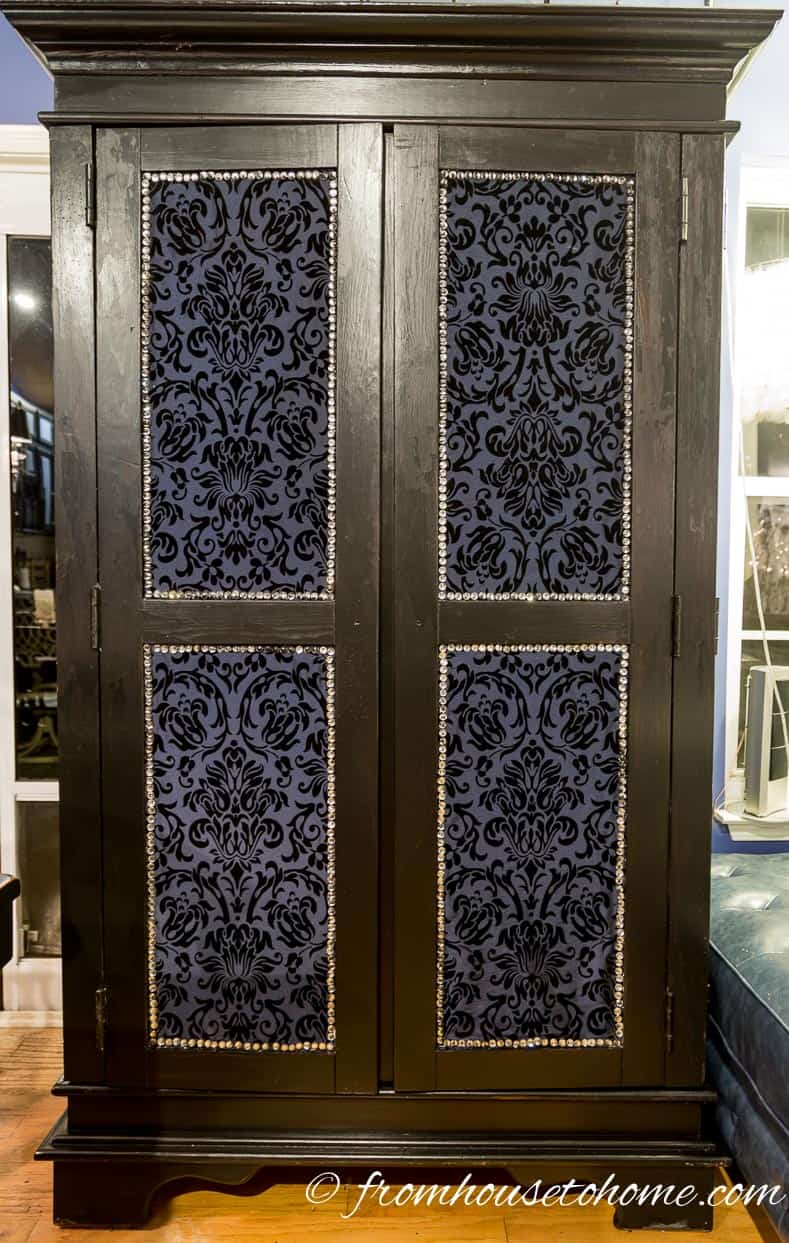
1. Line your jig up where you want to install the nails. If you can hold it in place by tacking it with a small nail…or if you are installing your trim on something that you can remove, like these armoire doors, it is much easier to install the nails if the piece is laying flat.
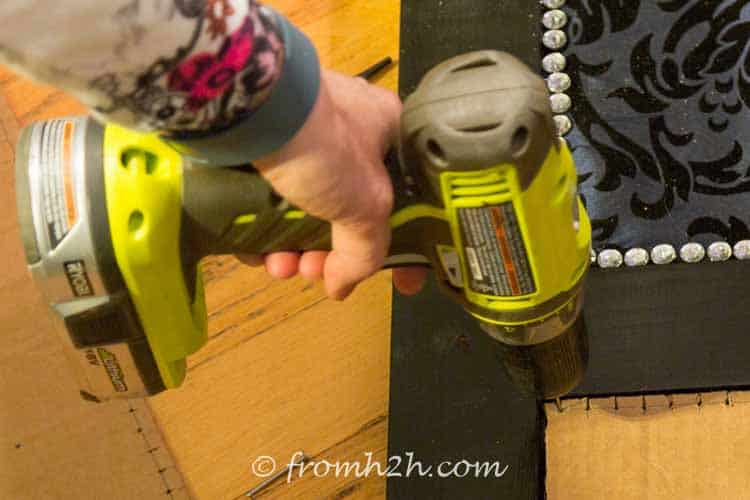
2. Drill a small pilot hole where each of the lines on your jig cross. Use a very small drill bit for this…1/16″ is probably the largest you can use. Be careful not to drill too far in…you may want to use a drill stop to make sure that all of the holes are the same depth.
Install the Nails
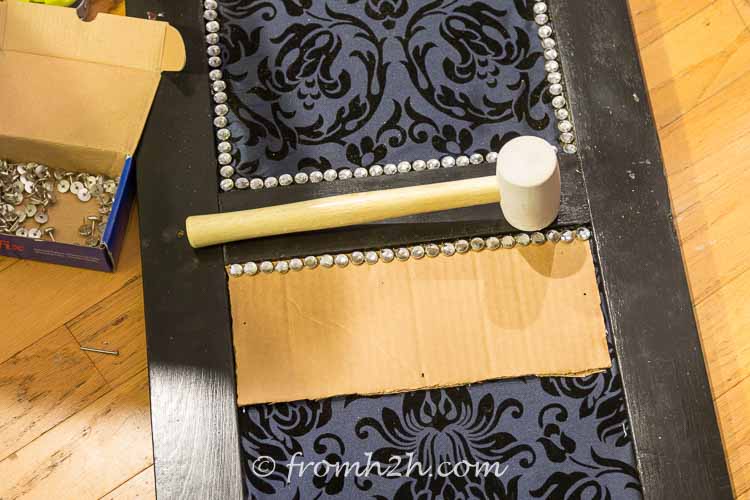
1. Insert the upholstery nails into each of the holes you have drilled
2. Use a rubber mallet to hammer the nails in until they are touching the jig.
3. Pull the jig out from under the nails.
4. Hammer the nails in the rest of the way.
Repeat Until You Are Done
1. Re-position the jig so that it covers the next section of the furniture.
2. Use the last nail head that you installed as the first one for the new position…that way you are sure that the next one will still be evenly spaced and straight.
3. Repeat the instructions for installing the nails…and keep going until you are finished. You’ll have your nail head trim installed in no time!
Click here if you want to see the rest of this upholstered armoire project.
Now you can use real upholstery nails and still get them installed in a straight line and even spacing!
Have comments or questions on How To Install Nail Head Trim in a Straight Line With Even Spacing? Tell us in the section below.
This post was originally published on April 4, 2016 but was updated with new content on April 13, 2024.