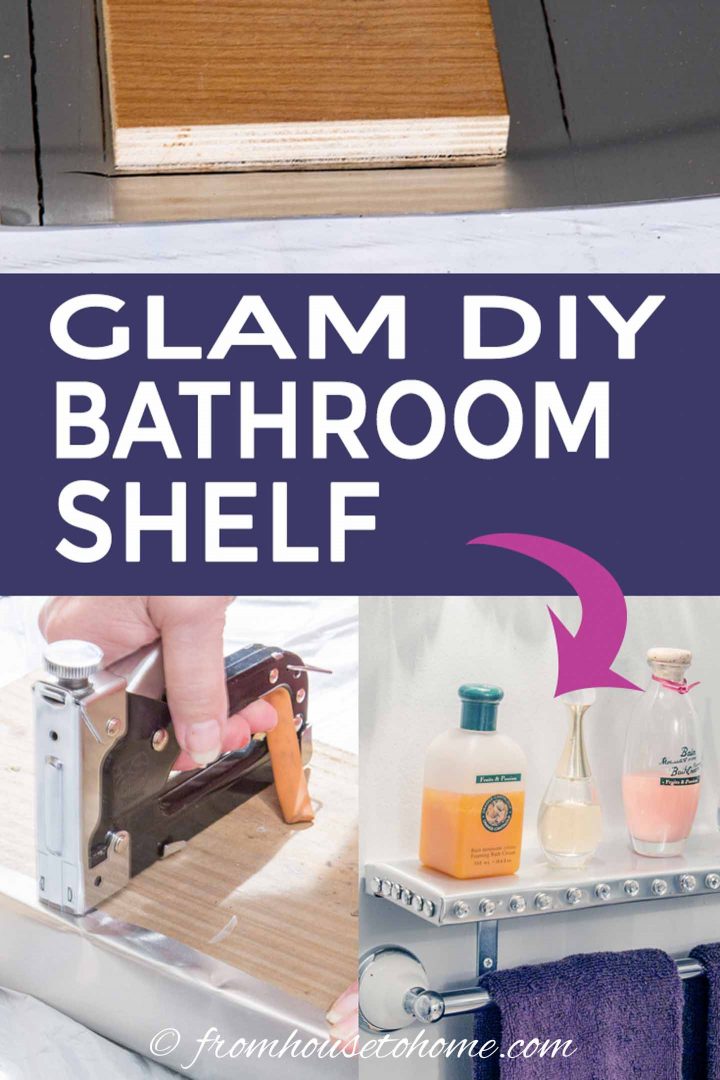
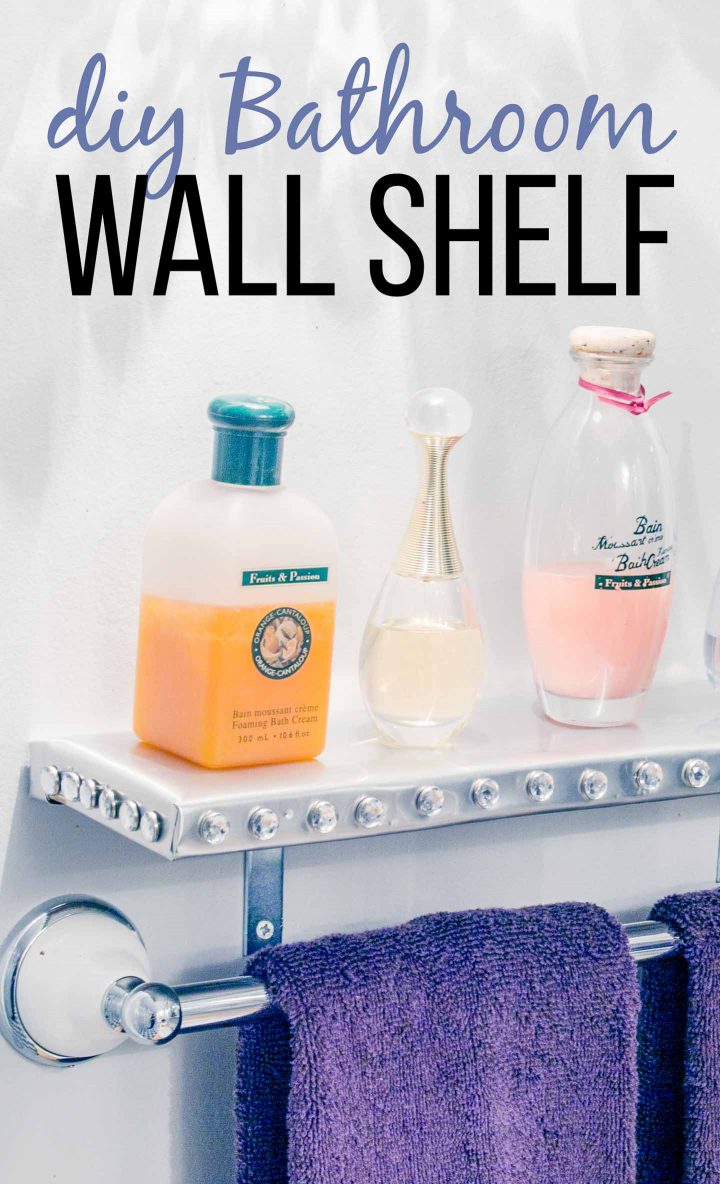
How To Make A Glam DIY Bathroom Wall Shelf


If you’re looking for a small bathroom shelf that’s waterproof and looks beautiful, this glam DIY bathroom wall shelf may be just what you need. Made with aluminum flashing and crystal upholstery tacks, it’s both functional and beautiful.
It doesn’t seem to matter how big your house is, or how much storage you already have, everyone always seems to need more places to put stuff.
And my house is no exception.
I wanted a little shelf in my bathroom where I could put toiletries beside the sink.
And it needed to look good since it’s the first thing you see when you walk in the bathroom. I always like a little glam 🙂
Oh, and it had to be small, 4″ wide x 16″ long in order to fit in the space. As usual, getting exactly what I wanted meant another DIY project.
To go with the mirrors and faucets I already have in the room, I decided that a silver shelf would be the way to go.
But I didn’t want to just paint something silver, because I wanted it to make sure it was water resistant.
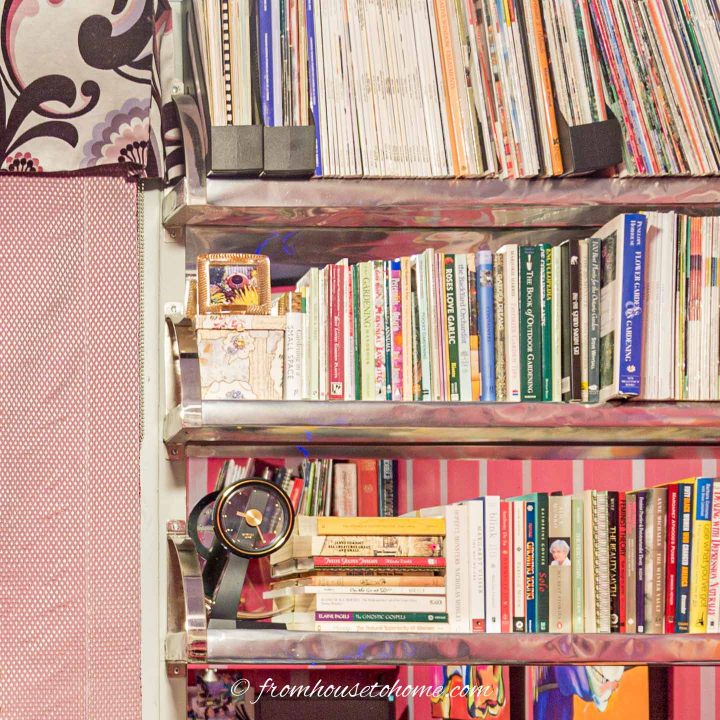
Then I remembered the metal wall shelves that my mother made for her glam wall unit. They’re inexpensive and definitely water-proof.
Find out how to make my mother’s glam wall unit.
Supplies
Materials
- Aluminum flashing* – See below to figure out the length and width of the flashing you will need
- Grease pencil* – This is the best way to write on the flashing.
- A wood, plywood or MDF board that is long enough to fit the space you are working with
- ¼” staples
- Crystal head upholstery tacks*
- 2 3-inch corner brackets – if your shelf is wider than 4 or 5″, you will probably want to use larger corner brackets to keep it stable.
Tools
- Measuring tape
- Tin snips*
- Staple gun with 1/4″ staples
- Hammer
- Utility knife
- Straight edge*
- Rubber mallet (optional)
How Much Wood and Aluminum Flashing Do You Need?
The 2 main components of this DIY bathroom wall shelf are wood, plywood or MDF boards and aluminum flashing.
1. First, measure how long and wide the shelf needs to be to fit your space as well as how thick the boards will be.
Most shelves are about 1″ thick.
But if you are planning on storing heavy items on them, or if they are longer than 36″ wide, you might want to consider going thicker than that.
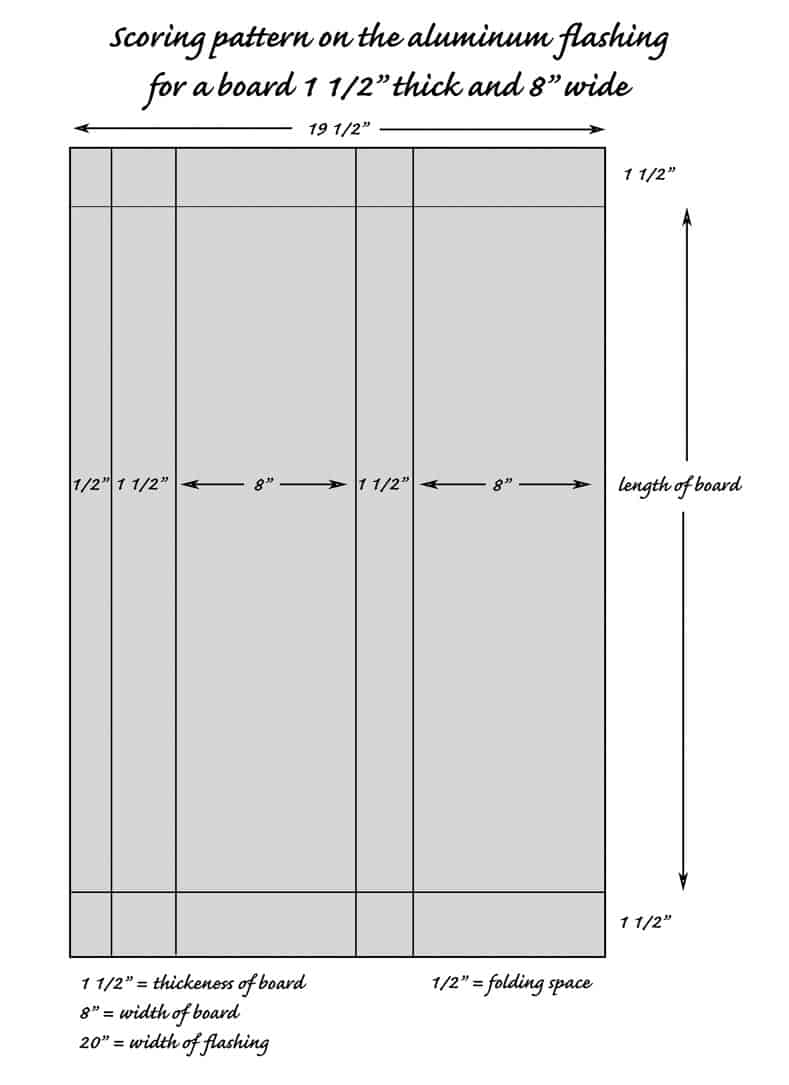
2. Next, figure out how wide the aluminum flashing needs to be.
To calculate the flashing width, add the width of the board to the thickness of the board and multiply by 2.
Then add an inch to come up with the total width.
For example, if you are using a board that is 1″ thick and 8″ wide, you’ll need flashing that is at least 19″ wide — (1″ + 8″) x 2 + 1″.
Make sure whatever flashing you buy is at least this wide or you’ll have a seam in your shelf. (And if you can find it exactly this width, you’ll save yourself some cutting time).
3. Finally, figure out the length of the flashing you need need.
Multiply the thickness of the board by 2. This will cover the ends of the board.
Then add the length of the board to that amount.
For example, if your board is 40″ long and 1½” thick, the flashing should be cut to a length of 43″ — (1½” x 2) + 40″.
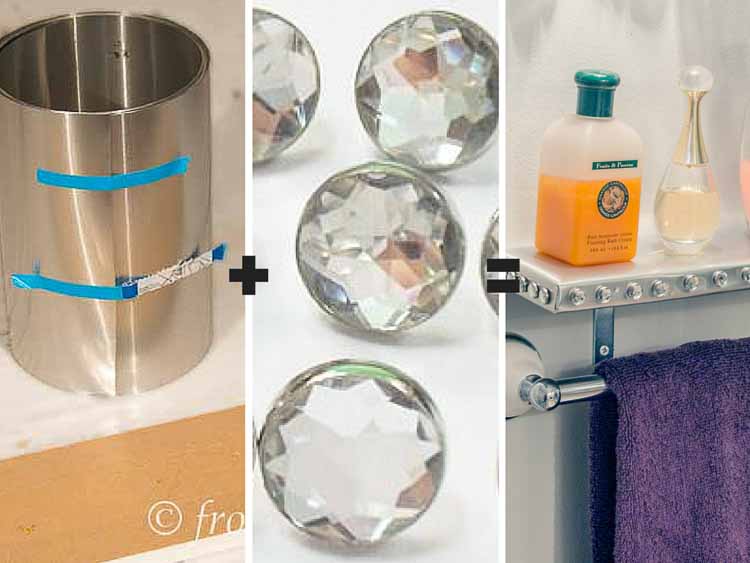
Prepare the Aluminum Flashing
1. Cut the board to the required length.
2. Cut the flashing to the that you calculated abaove. Tin snips work very well for doing this, but you can also use regular scissors or a utility knife.
Be careful with the edges of the aluminum flashing…they are sharp!
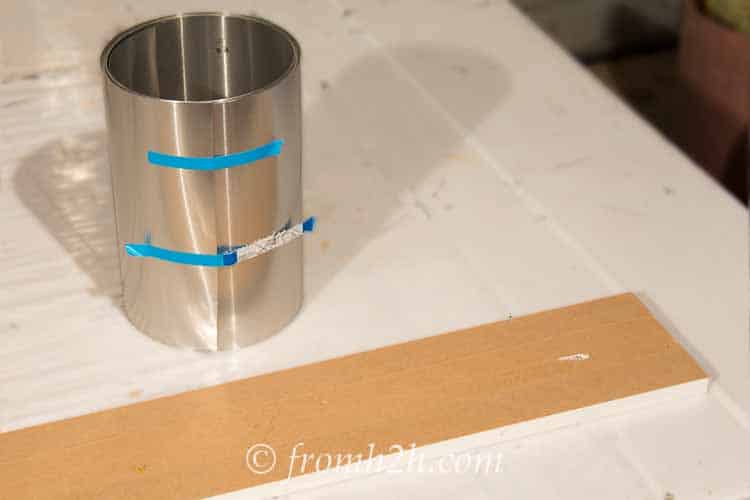
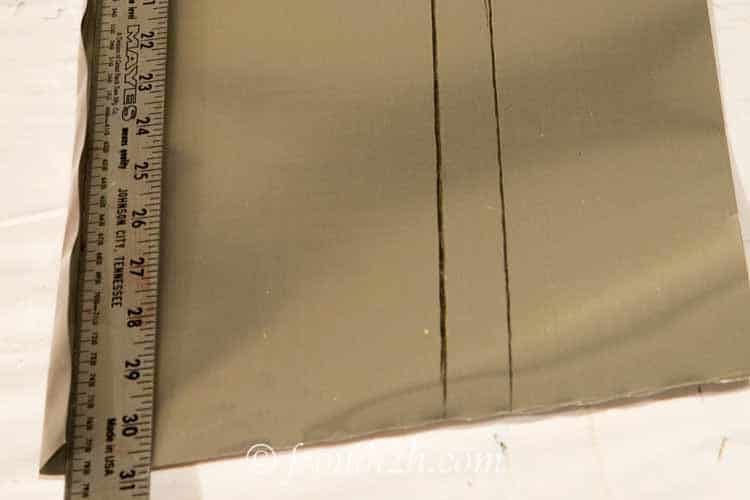
3. Measure ½” in from the side of the aluminum flashing and draw a line that continues along the length of it.
Regular pencils don’t work very well for this. I used this grease pencil* instead. They are something like crayons but wipe right off the aluminum…so if the board slips and your line isn’t straight, you can easily start over!

4. Stand the board on its edge with one side along the line you just drew.
Draw a second line down the length of the flashing using the other side of the board as a guide.

5. Lay the board down with one edge along the second line that you just drew.
Draw a third line down the length of the flashing using the other side of the board as a guide.
6. Stand the board on its edge again (similar to step 4), with one side along the third line that you just scored.
Draw a fourth line down the length of the flashing.

7. Make sure that your board is centered in the middle of the flashing lengthwise and draw lines at each end.
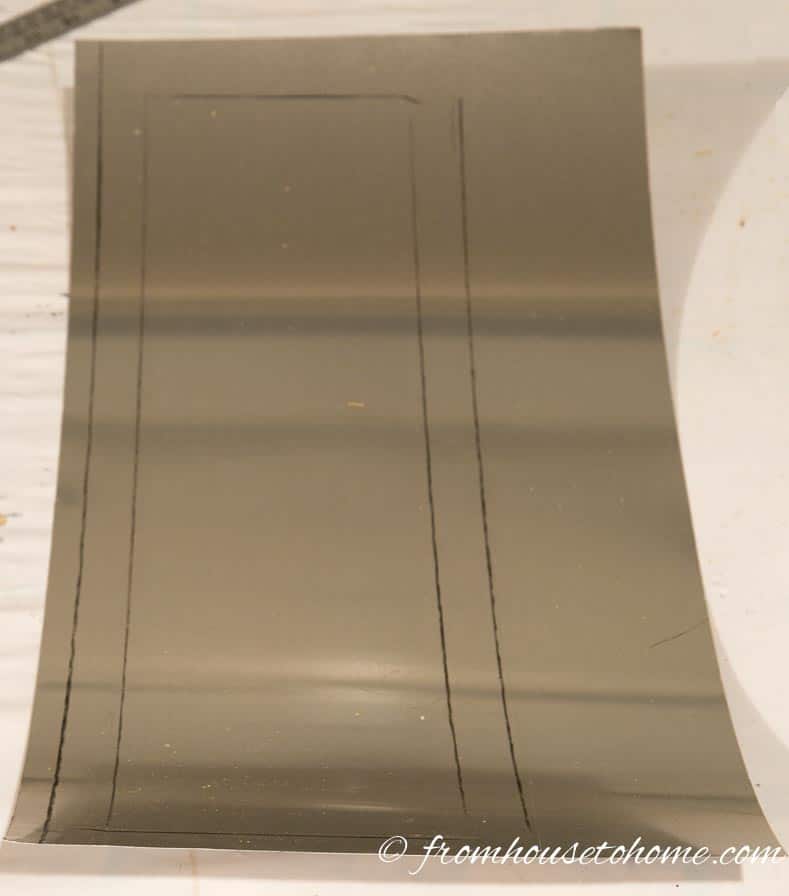
You should end up with marks that look something like this.
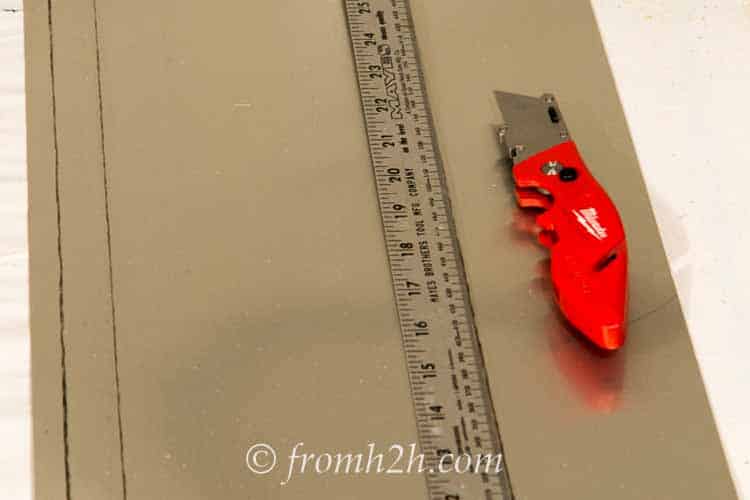
8. Use the straight edge and a utility knife to score the flashing along all of the lines that you have drawn.
The scoring should go from one end of the flashing to the other (not just across the part where the board was).
This works best if your straight edge reaches all the way down the length that you are scoring. Otherwise, the score lines may not meet up exactly and the line won’t be straight.
9. Fold the aluminum flashing up along the first line that you drew, with the scored line on the inside of the fold. The fold should make a corner (not be folded all the way over).
Once you have made the fold manually, put the straight edge along the fold and press along the outside of the fold. This will help to create a square corner.
10. Continue to do this with all of the lengthwise lines that you drew.
Do not fold the lines at the ends of the flashing yet. We will do these ones in a later step. This should end up looking like a covering for your board.
Cover the Board
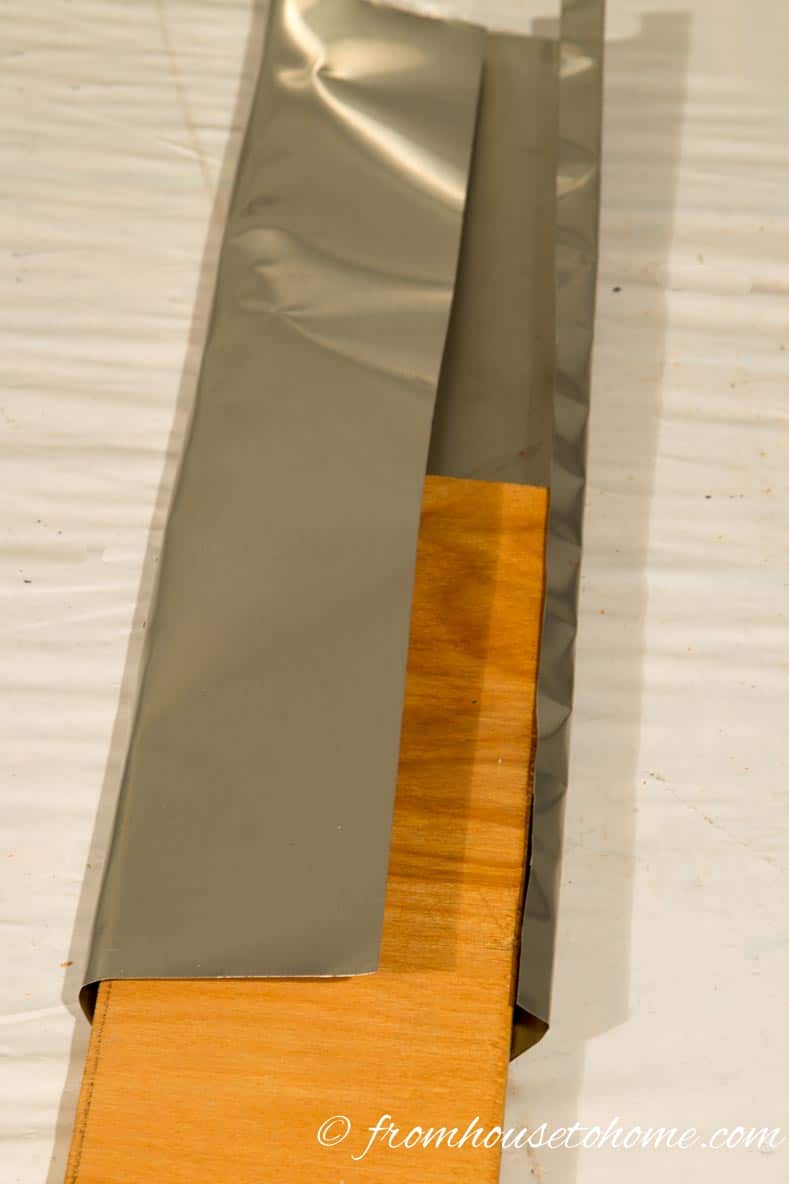
1. Fit your board into the aluminum flashing covering that you have made.
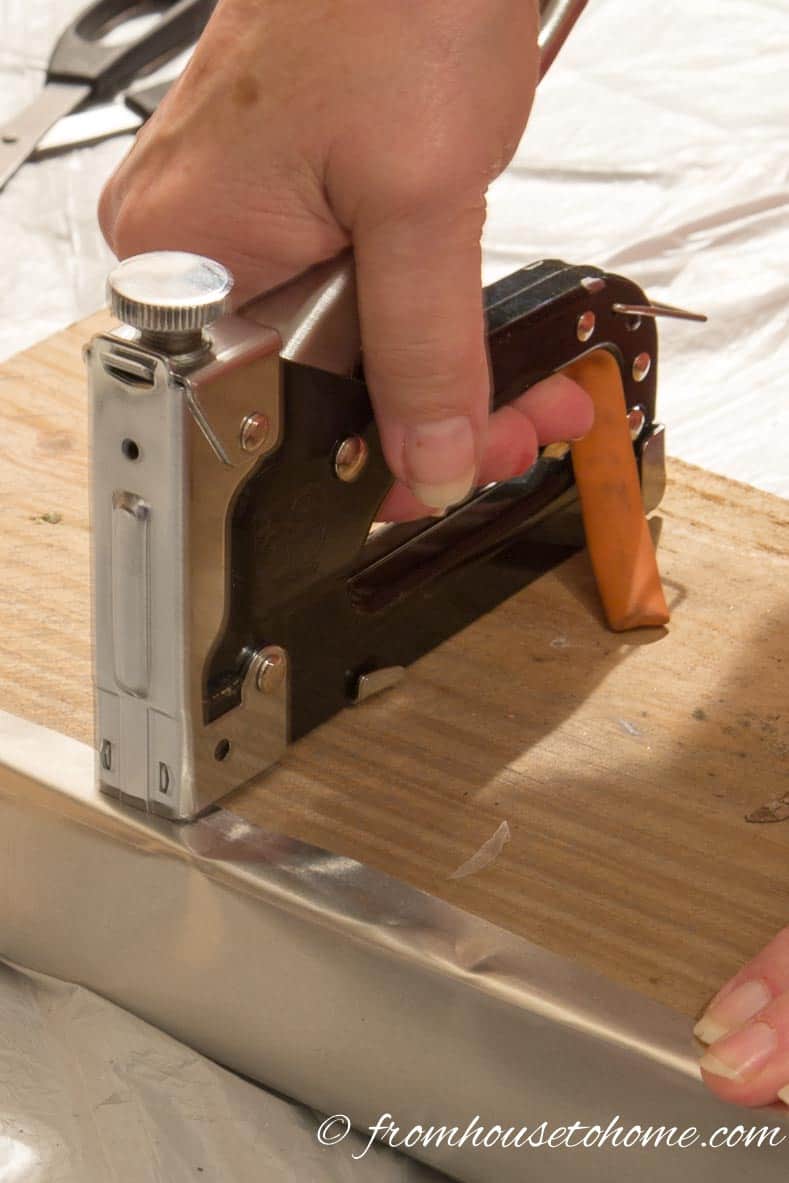
2. Use a staple gun with 1/4″ staples to staple the edges of the aluminum flashing to one side of the board.
If you are using a powered staple gun, make sure that the power is not set very high or the staples will go right through the aluminum flashing.
If you are using a manual stapler, don’t worry if the the staples don’t go all the way in.
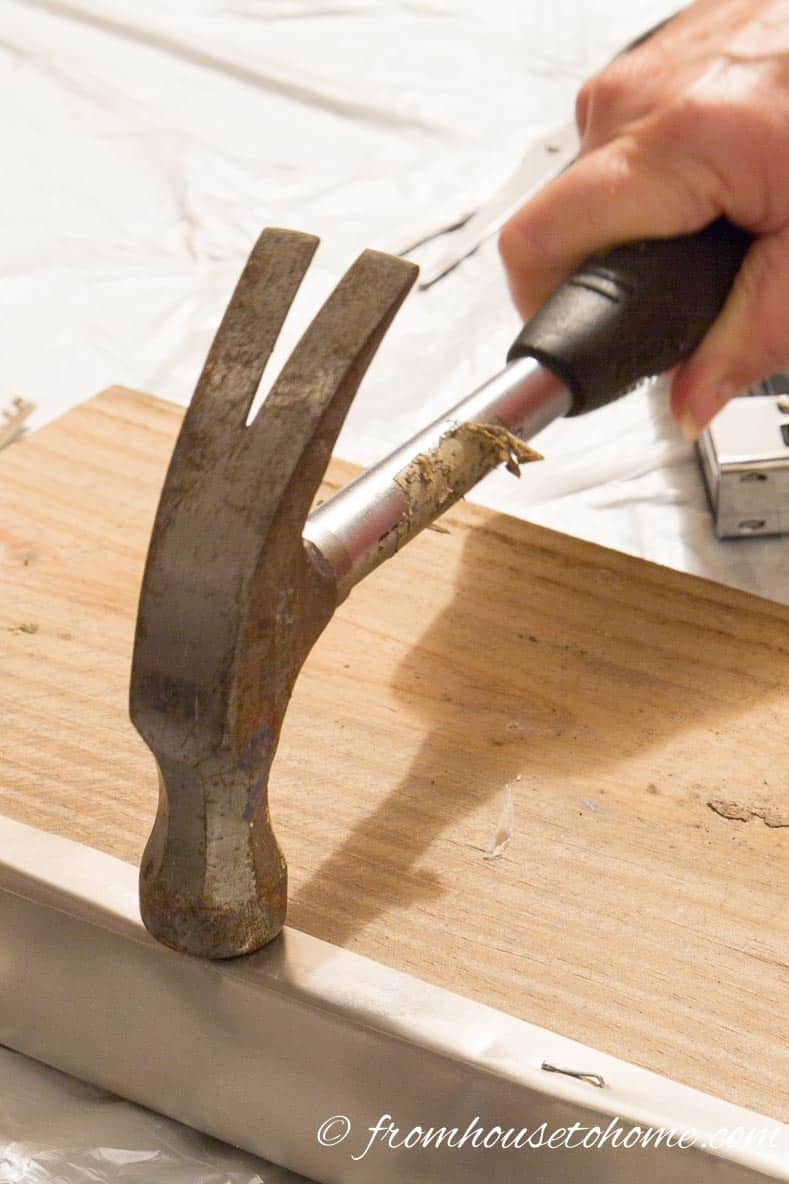
You can use a hammer to knock them in the rest of the way.
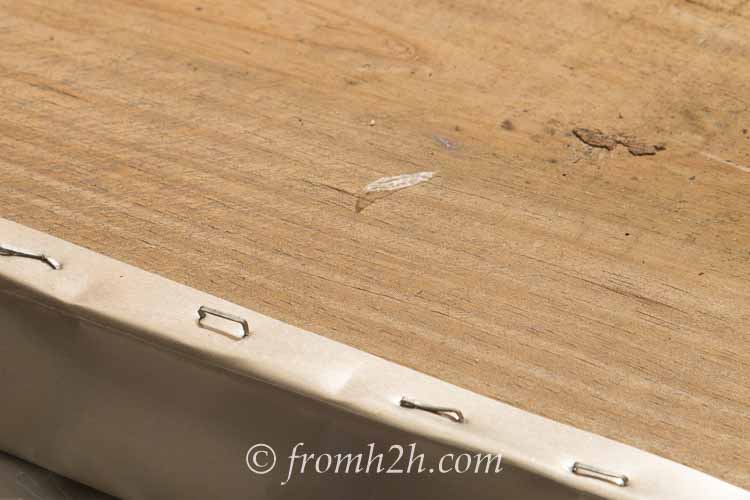
3. Wrap the aluminum flashing around the rest of the board and staple the other edge in the same way.
Ideally these staples should go on the side of the board that will be against the wall so that you won’t see them once the shelves are installed.
Finish the Ends
Finishing the ends of the shelves is something like wrapping a Christmas present.
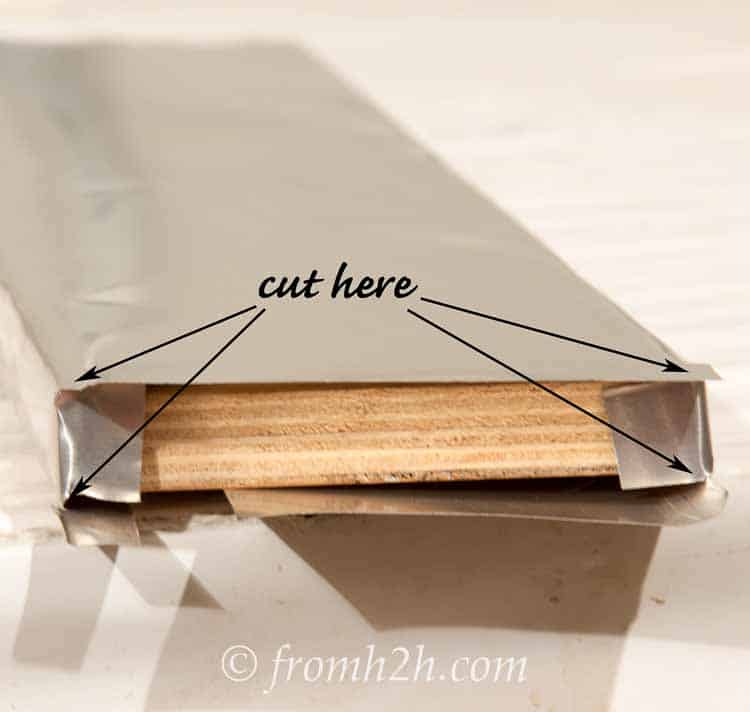
1. Cut each of the four corners at the end of the board all the way in to the board.
2. Fold the end pieces of flashing in.
Be very careful when you’re doing this…it is very easy to cut your self on the edge of the aluminum flashing while you are trying to fold the edges in.
3. Make sure that the bottom piece of flashing is shorter than the thickness of the board. If it isn’t cut off the extra.
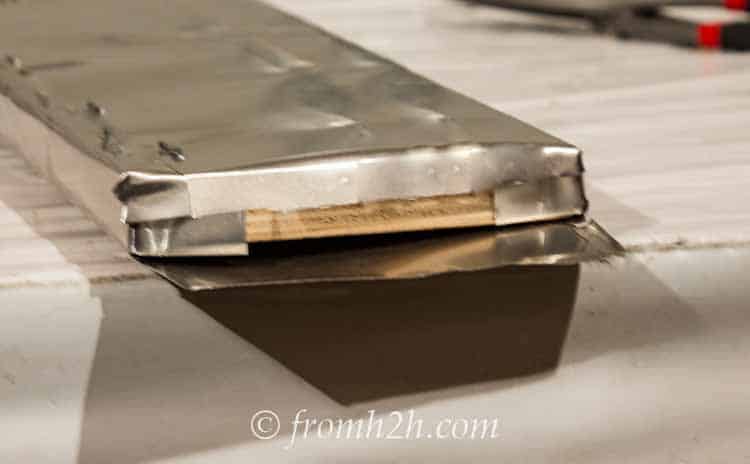
4. Fold the piece that will be on the bottom of the shelf over the end.
5. Make sure the top piece of flashing just reaches to the edge of the board. If it is longer, cut off the extra.
6. Fold the piece that will be on the top of the shelf over to finish the edge.
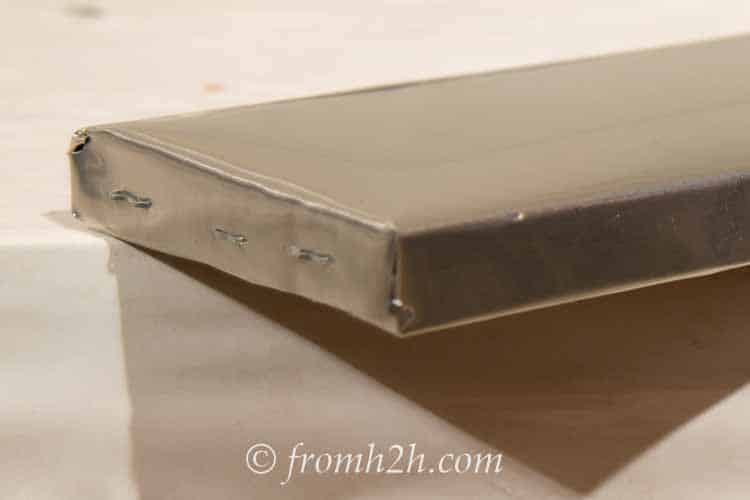
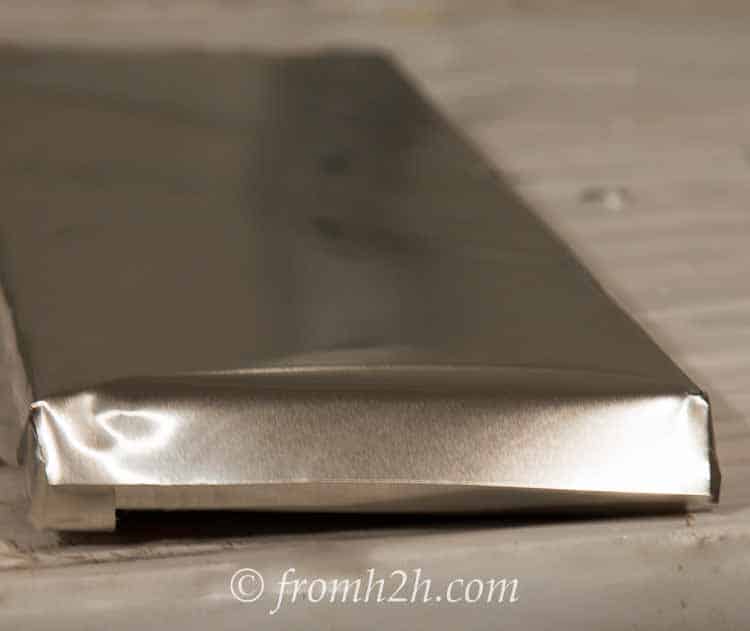
7. Staple along the edges to keep everything in place. You could also use little silver-head nails for this if you prefer the look.
8. Repeat for the other end.
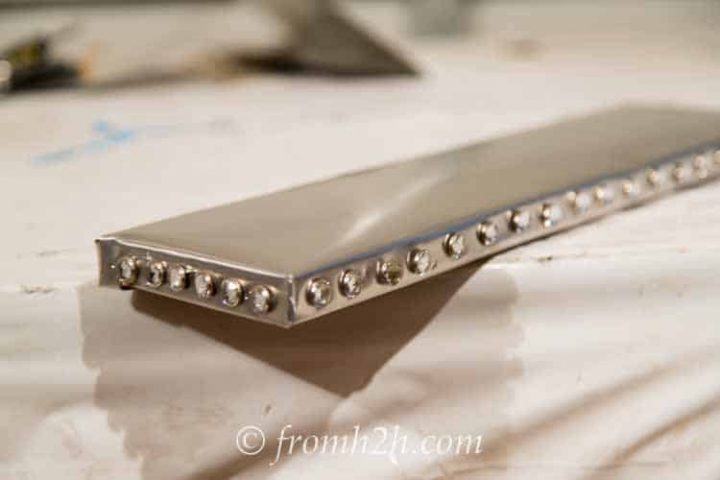
Add a Little Sparkle
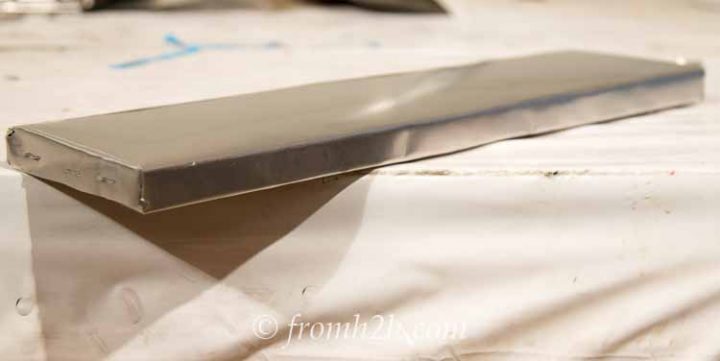
Now you have a finished stainless-steel look shelf that didn’t cost very much to make and is a custom size for your room.
If the shelf will be located somewhere that the edges are not obvious or your brackets will cover the ends of the shelf (or the staples don’t bother you), you are ready to put them up!
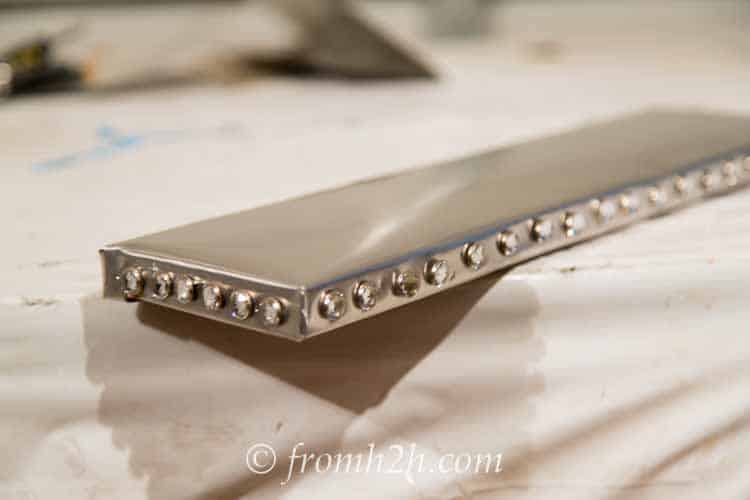
And now for the glitz!
If you want to cover up the staples, or just want to add some extra sparkle (like I did), try using upholstery tacks along the front and sides of the shelf. These crystal head upholstery tacks* are especially good for adding that extra sparkle.
Use a rubber mallet to hammer them in so that the front of the tacks doesn’t get damaged.
To make sure that the tacks are straight and even, you can make a template. For more details, find out how to make it.
I installed it with some 3″ corner brackets, mostly because those were the only things I could find that fit the size of my shelf.
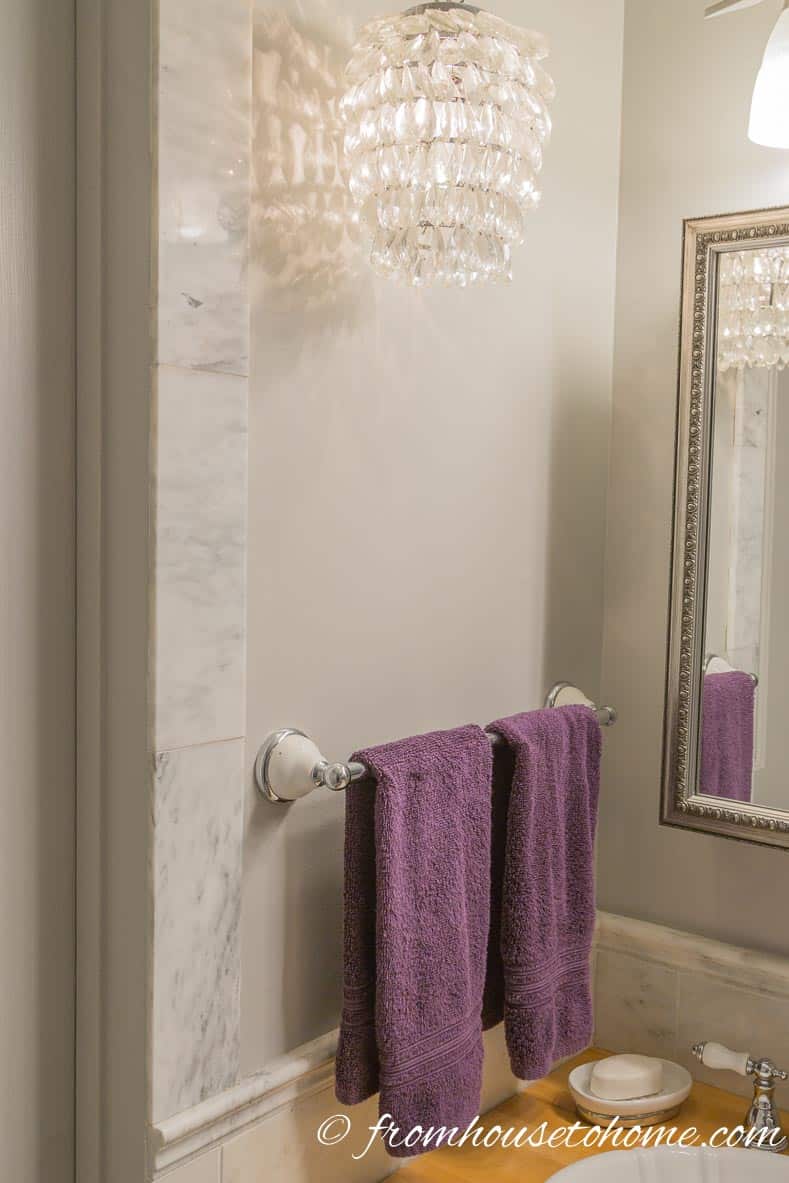
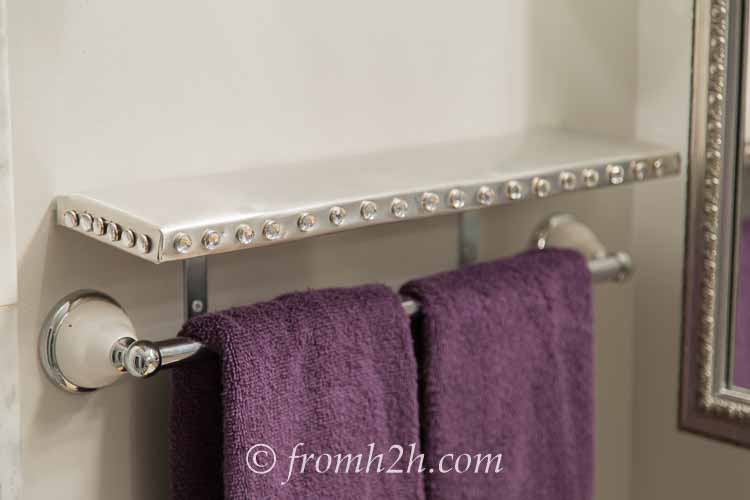
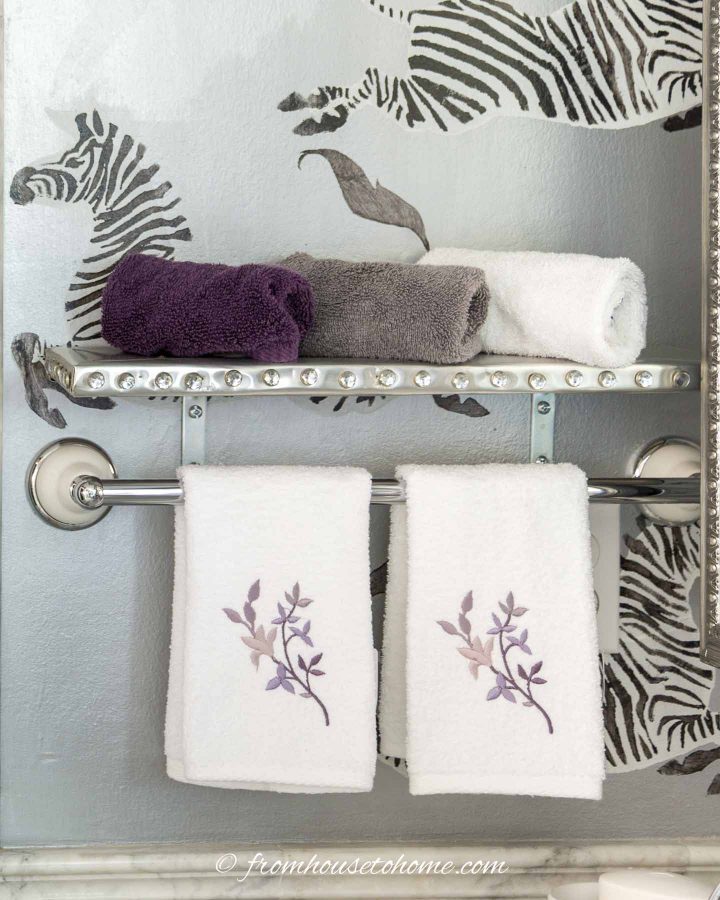
The Finished DIY Bathroom Wall Shelf
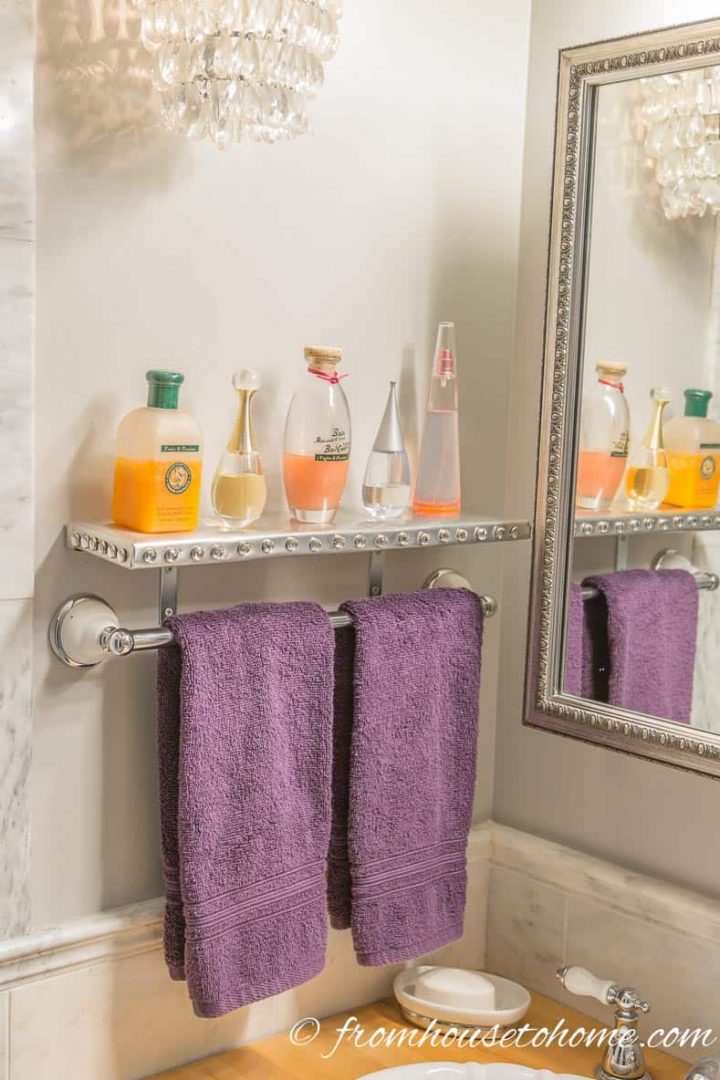
The finished shelf fits perfectly in my space and adds the little bit of glam that I was looking for.
It’s just the right size for holding bubble bath and perfume bottles, which is exactly what I wanted!
And when I did my bathroom makeover, the shelf really goes well with the silver paint on the walls.
So that’s how some aluminum flashing and a board and a little bit of sparkle turn into a glam DIY bathroom wall shelf.
Other bathroom ideas you might like
- Bathroom Organization Ideas: 11 Quick and Easy Ways to Clear Clutter
- Eclectic, Deco, Glam Master Bathroom Makeover
- How to Renovate a Small Bathroom on a Budget
Have comments or questions on how to make out glam DIY bathroom wall shelf? Tell us in the section below.
Pin It So You Don't Forget It!
This post was originally published on November 16, 2015 but was updated with new content on April 13, 2024.
What I want to know most about your beautiful shelf and bathroom is: Where did you get that stapler? It looks perfect for all I do. My electric has no power, can you share the brand?
Hi Marietta…I have had mine for a long time so I don’t remember where it came from. It’s a TUV GS stapler. I saw a couple of them listed on Ebay and Amazon but they seem to be a little hard to find so I’m not sure if they are still making them? I did run across another one on Amazon that looks similar, called the Könnig Heavy Duty Stapler so that might work, too. Hope that helps!
Wanda, the shelf looks amazing in your bathroom, right next to that lovely mirror! The upholstery tacks give it a special touch and make it very unique! great job! Thank you so much for sharing this at Sweet Inspiration #1 this week!!
Thanks, Katrin! Happy to post on your Link Party…thanks for hosting!