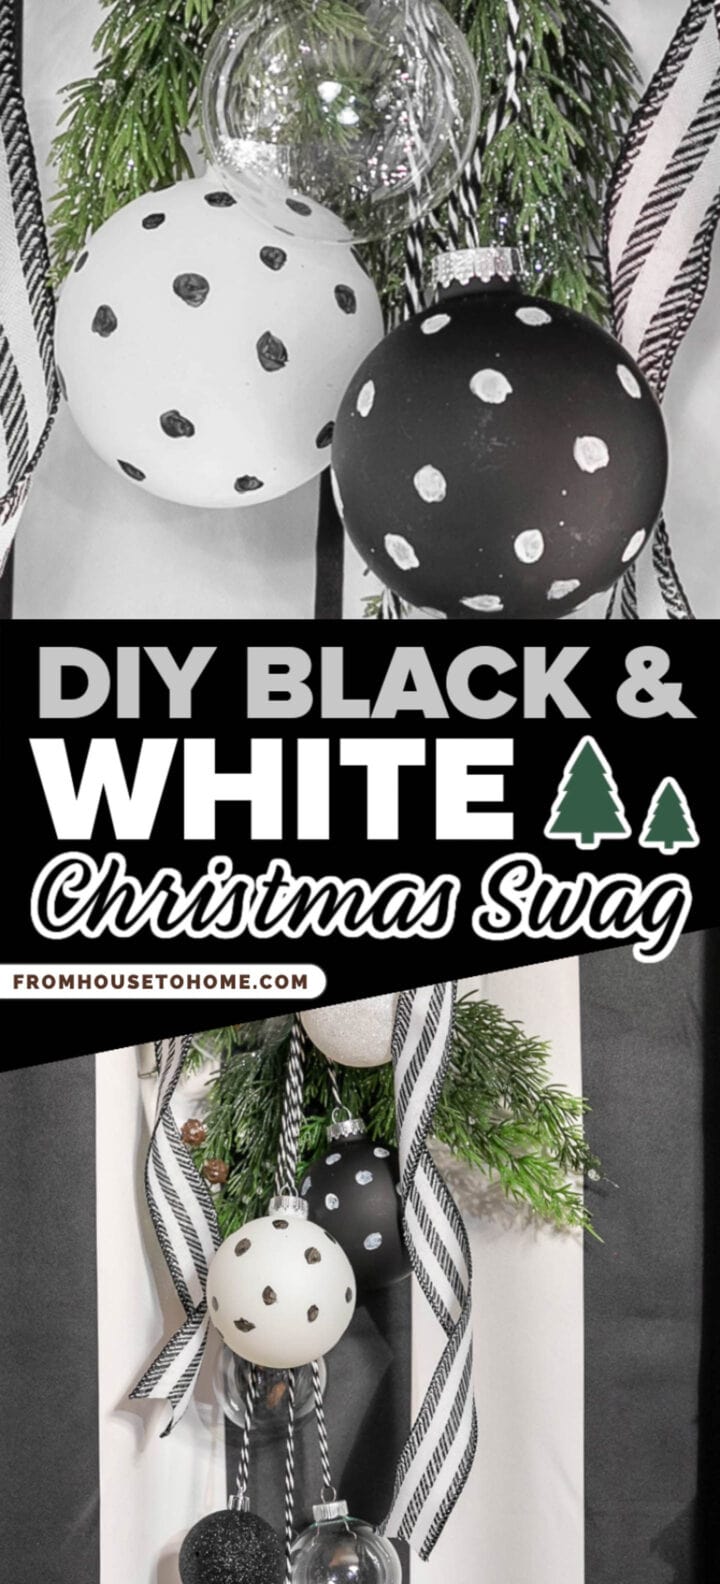
DIY Black And White Christmas Swag

If you have been seeking a unique holiday decoration that’s a little different than your standard wreath, you’ve come to the right place! With minimal materials, effort, and time, you can create this pretty DIY black and white Christmas swag that’s perfect for your front door.

When I was trying to figure out what to do for Christmas decorations this year, I decided I wanted to do something different than the wreaths I usually hang.
And saw this really pretty swag on Hometalk. But there weren’t any instructions on how to make it.
So I decided to do my own version.
And it turns out, it is super easy to make and looks really pretty with my DIY polka dot ornaments.
You can use these swags on your front door, in windows, on the backs of dining room chairs or on kitchen cabinet doors. Pretty much anywhere you might hang a wreath.
Supplies
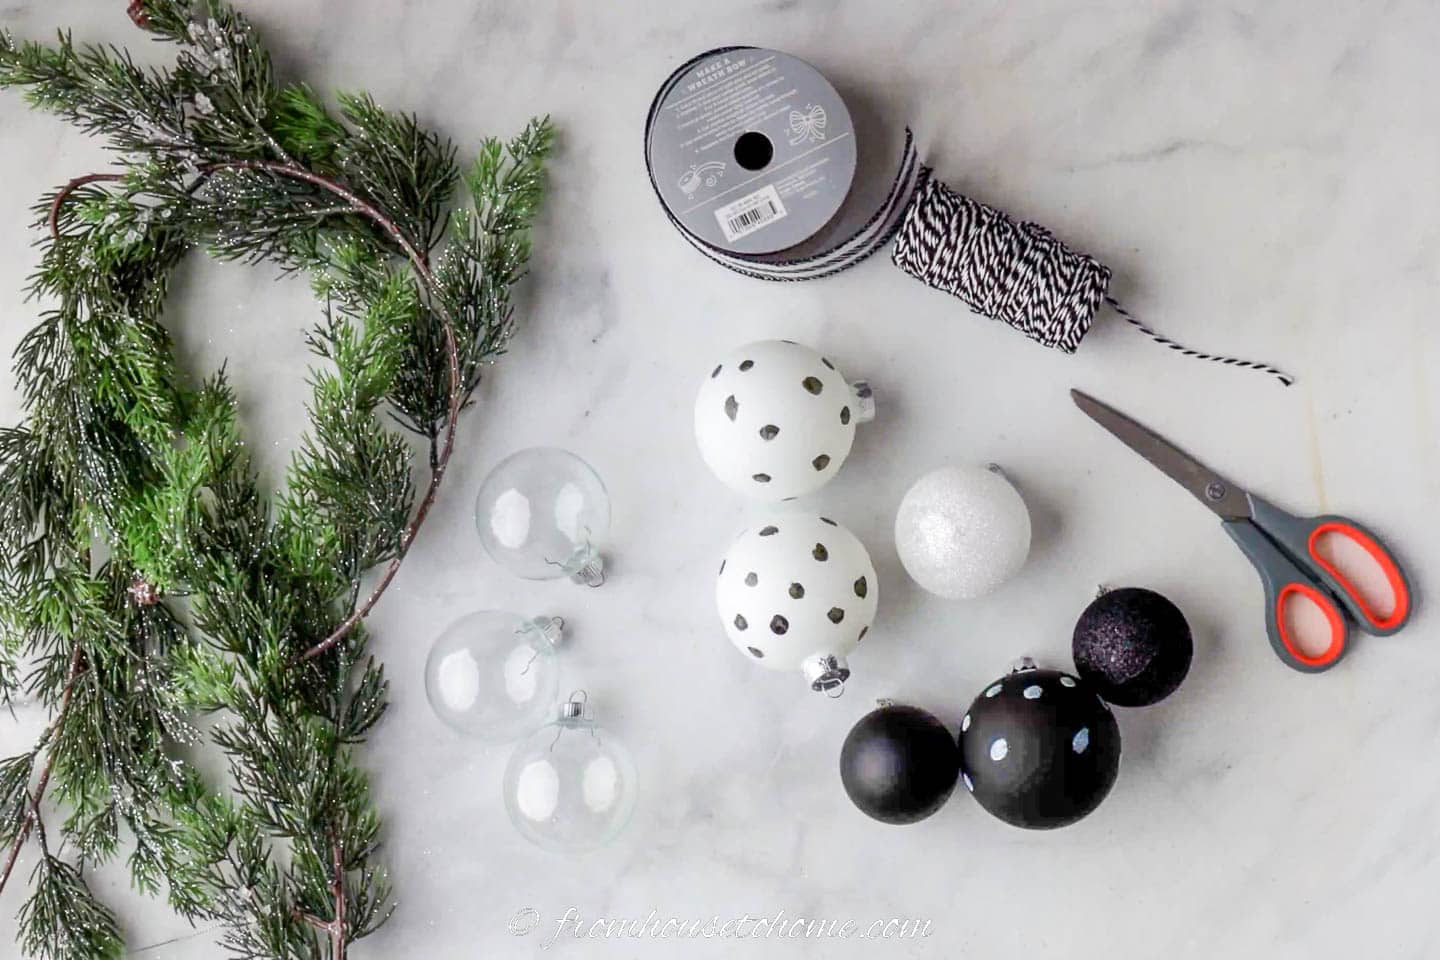
Materials
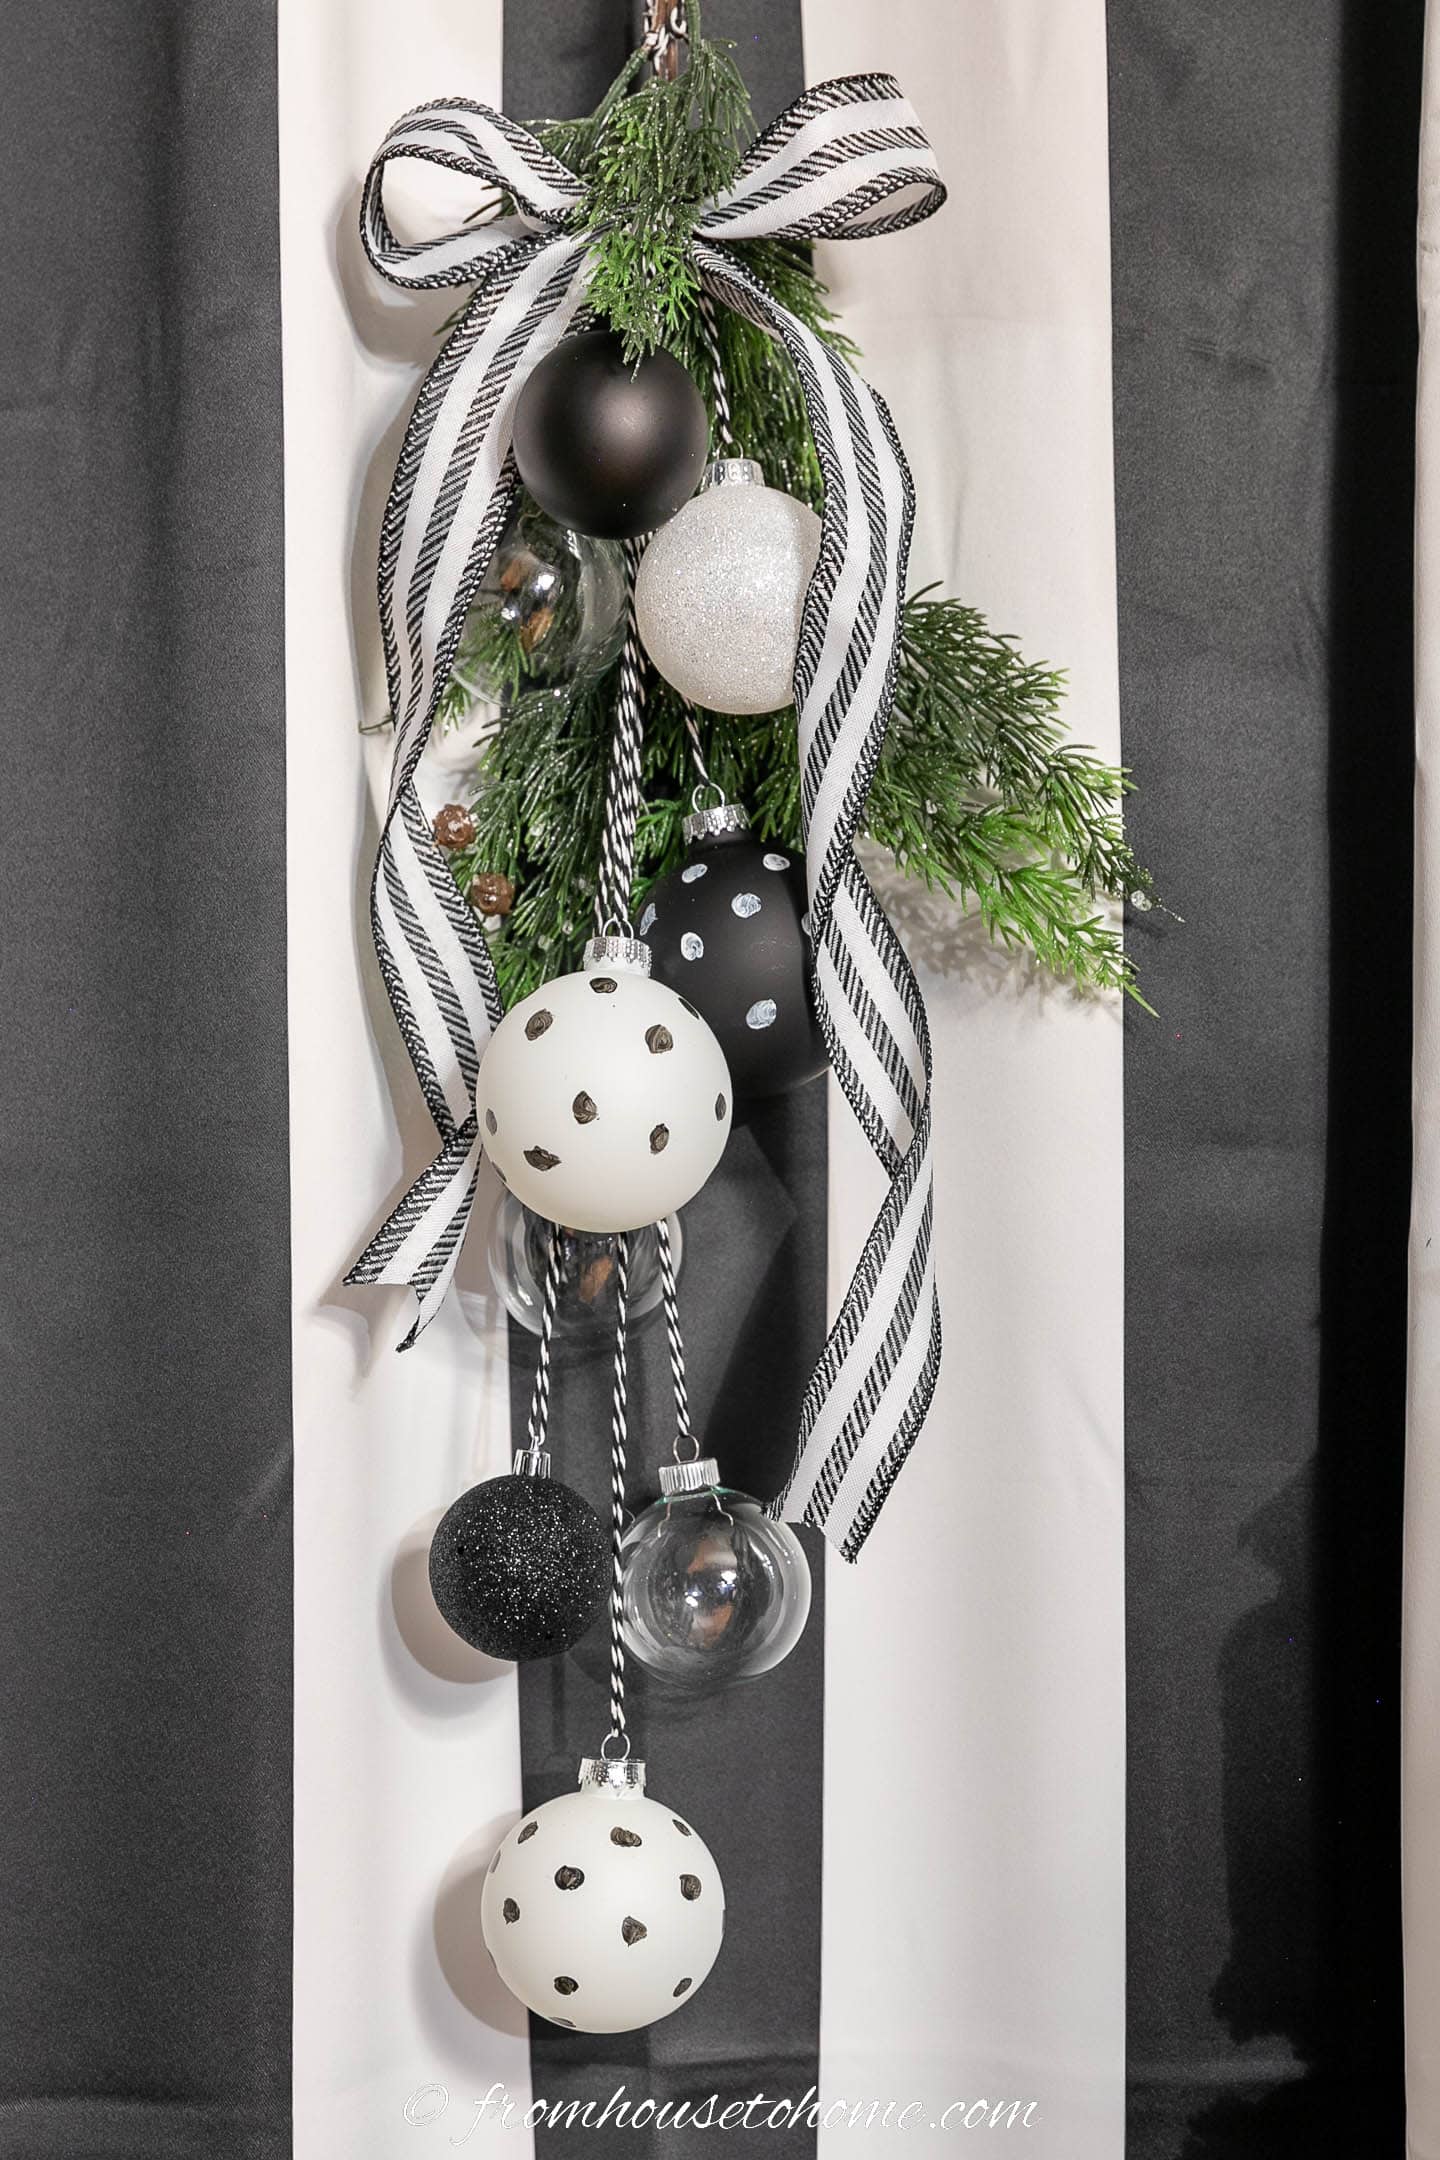
- 3 white ornaments with different textures or patterns – I used a 2” glitter ornament and 2 of my DIY polka dot ornaments
- 3 black ornaments with different textures or patterns – I used 1 glitter ornament, 1 matte ornament and DIY polka dot ornament
- 3 clear ornaments
- 1 evergreen garland – I like the ones with short needles best for this project, but you ca use whatever your favorite type is
- Black and white string
- 2.5” wired black and white ribbon – I used striped ribbon, but another pattern would work just as well.
Equipment
- Scissors
- Wire snips (optional) – These are the easiest away to cut faux evergreens. But you can use scissors, if you don’t have wire snips on hand.
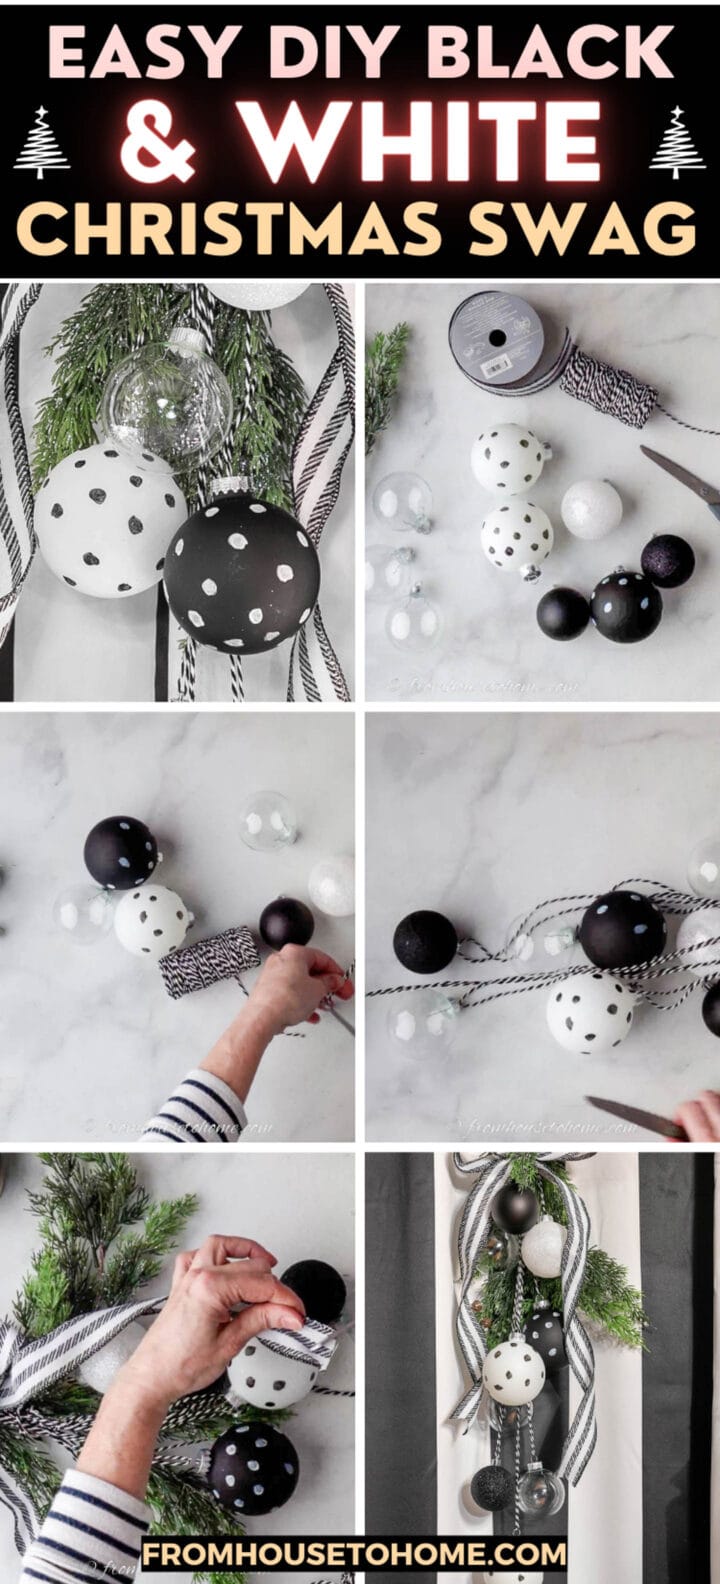
How to make a DIY black and white swag
1 | Arrange the ornaments
The first step is to lay the ornaments out in a pattern that you like.
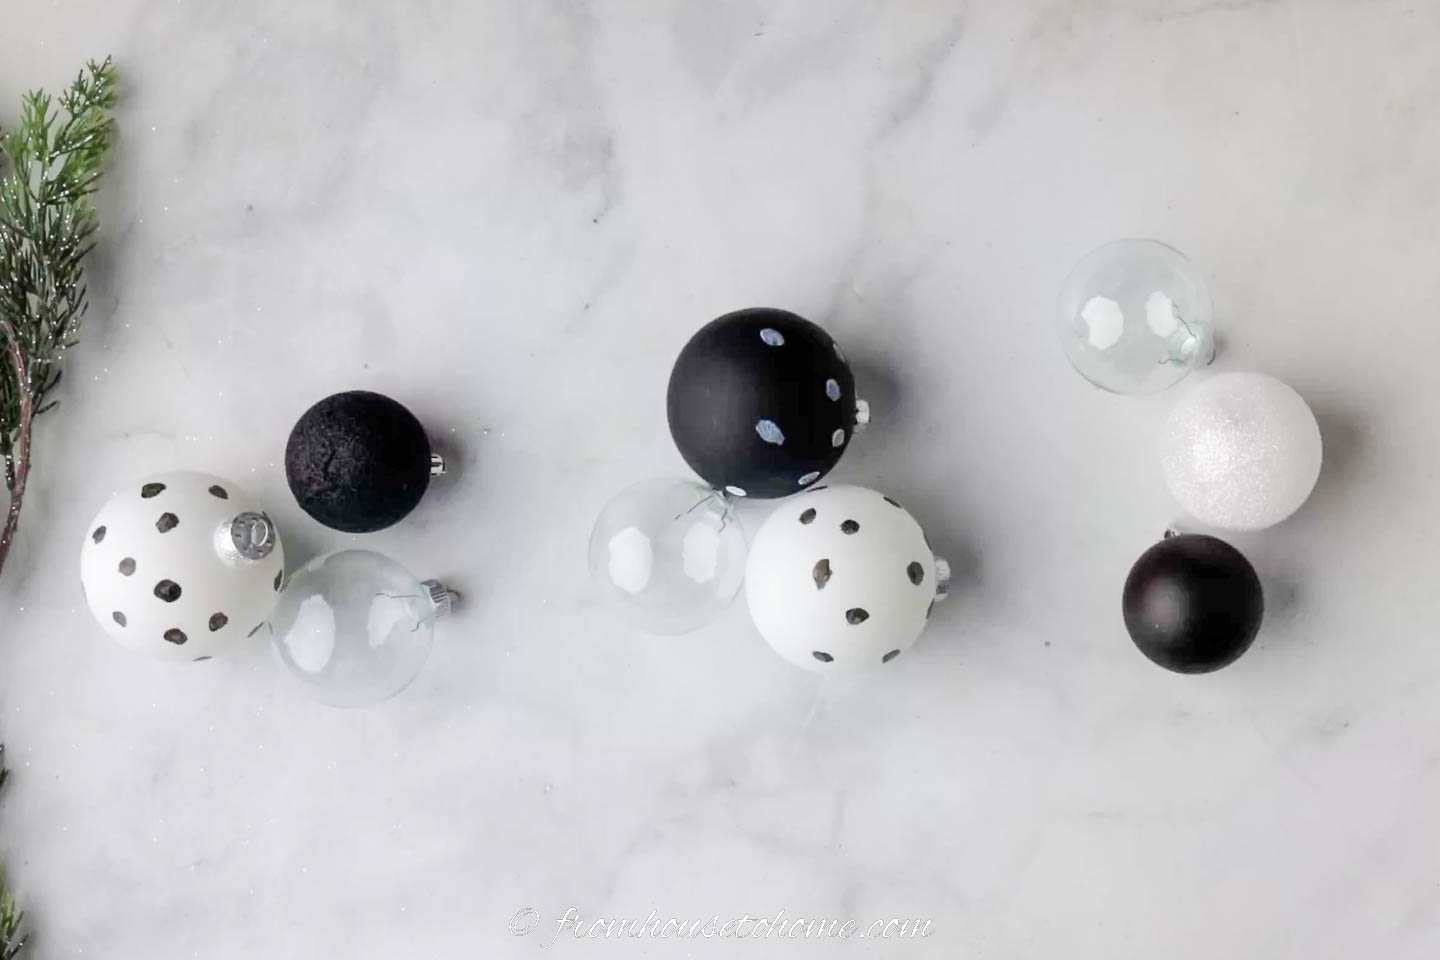
I did 3 layers of 3 ornaments each – 1 black, 1 white and 1 glass.
Try to vary the heights a little so the ornaments in one layer aren’t all at the exact same level.
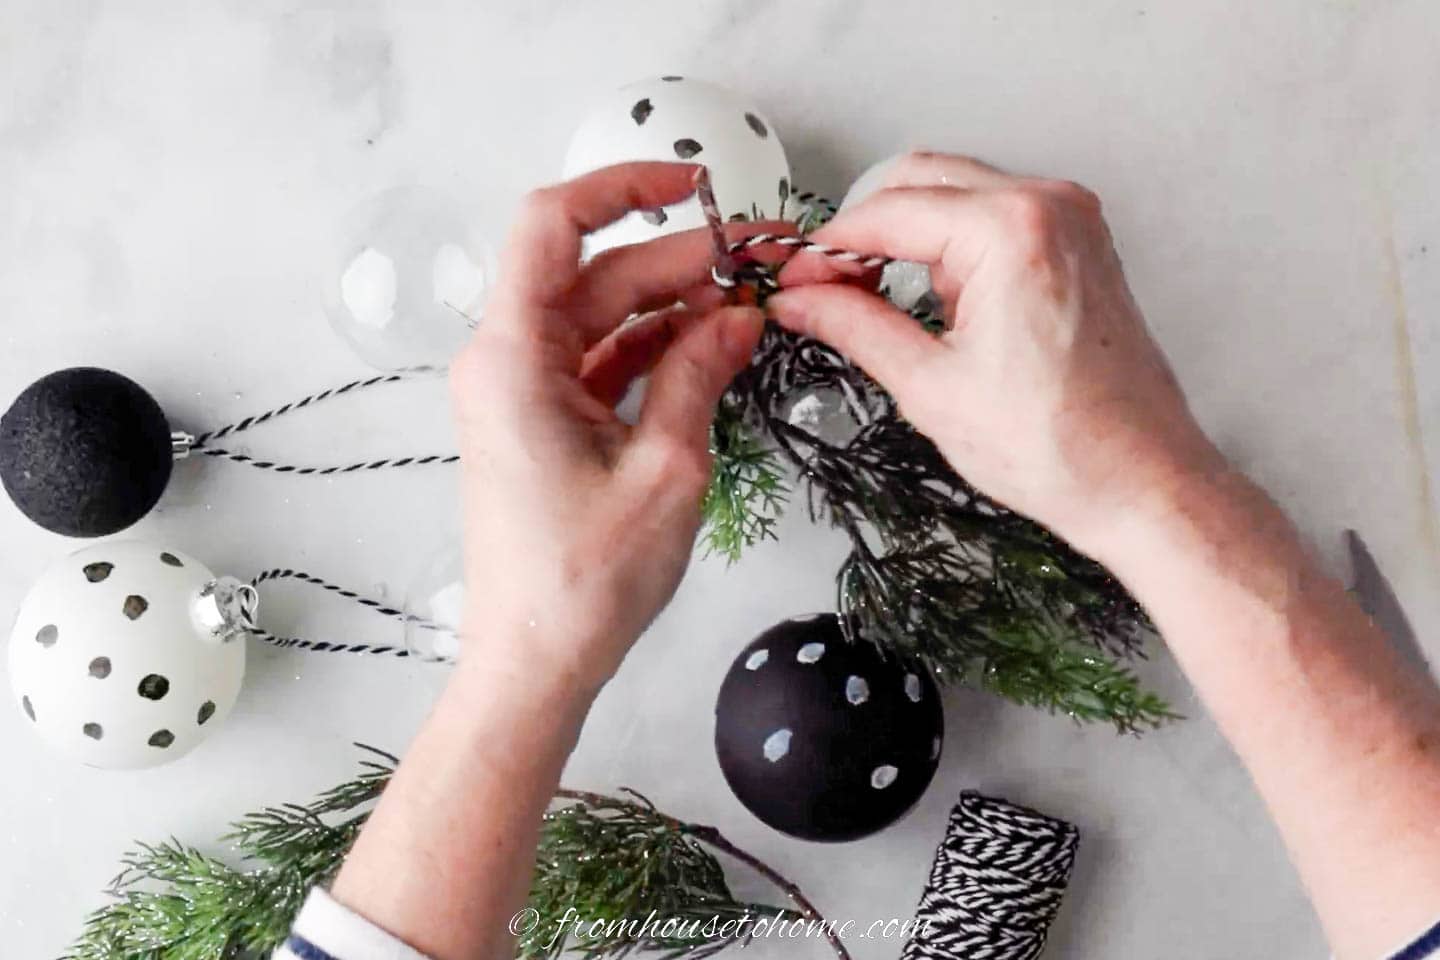
2 | Add string
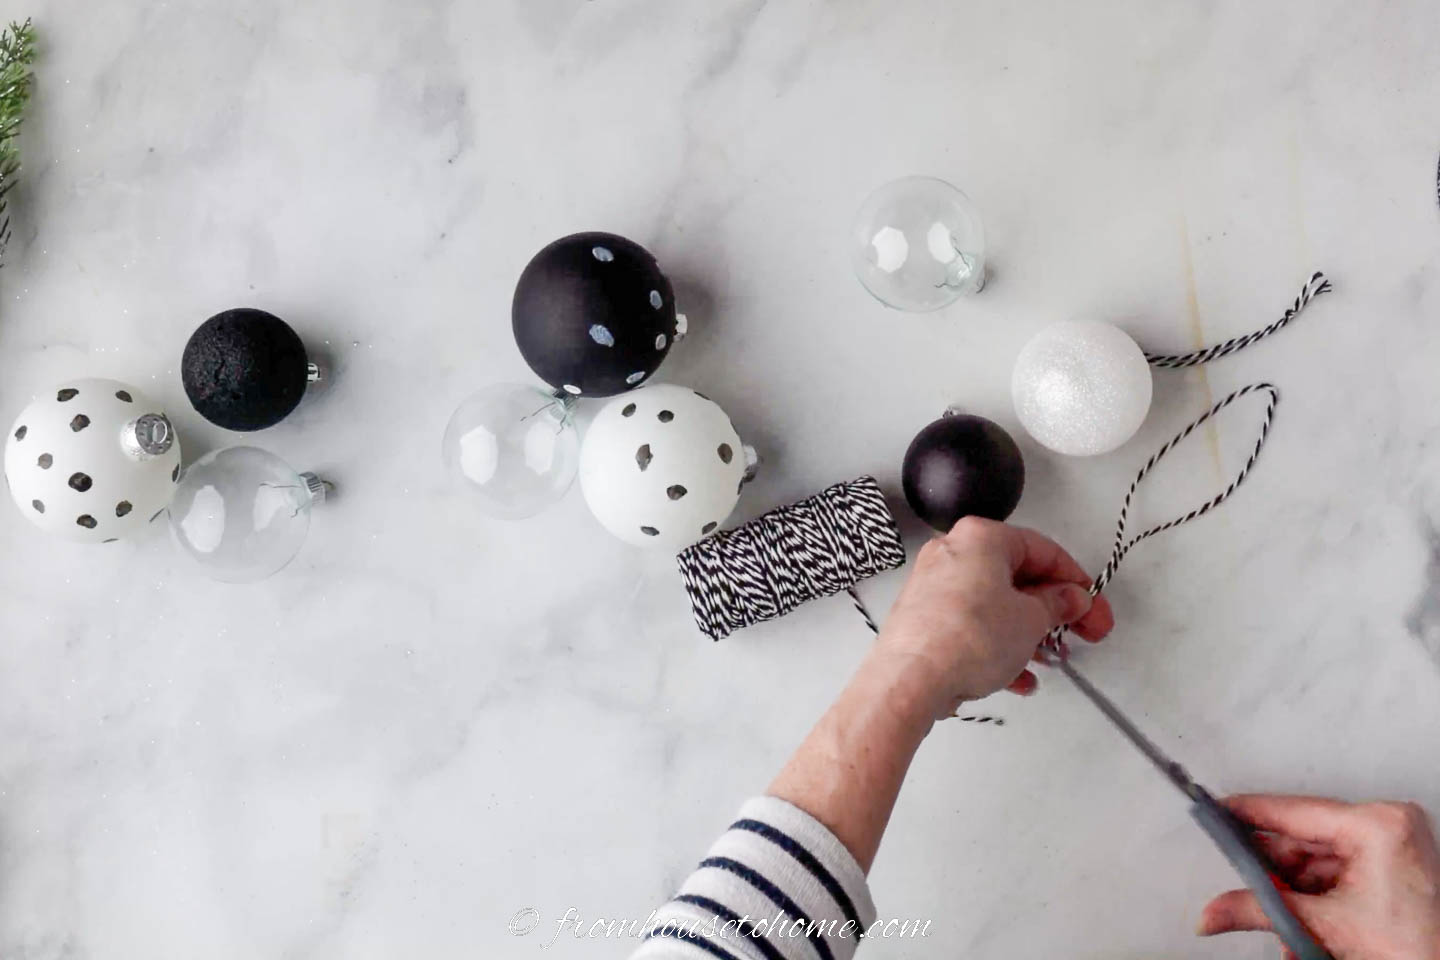
Starting 3 or 4 inches above your top layer, roll out enough string to create a loop for the first ornament.
Cut the string, then thread it through the top of the ornament and tie a knot to close the loop.
Repeat this process with each of the 9 ornaments so they all have loops of string attached to the right length.
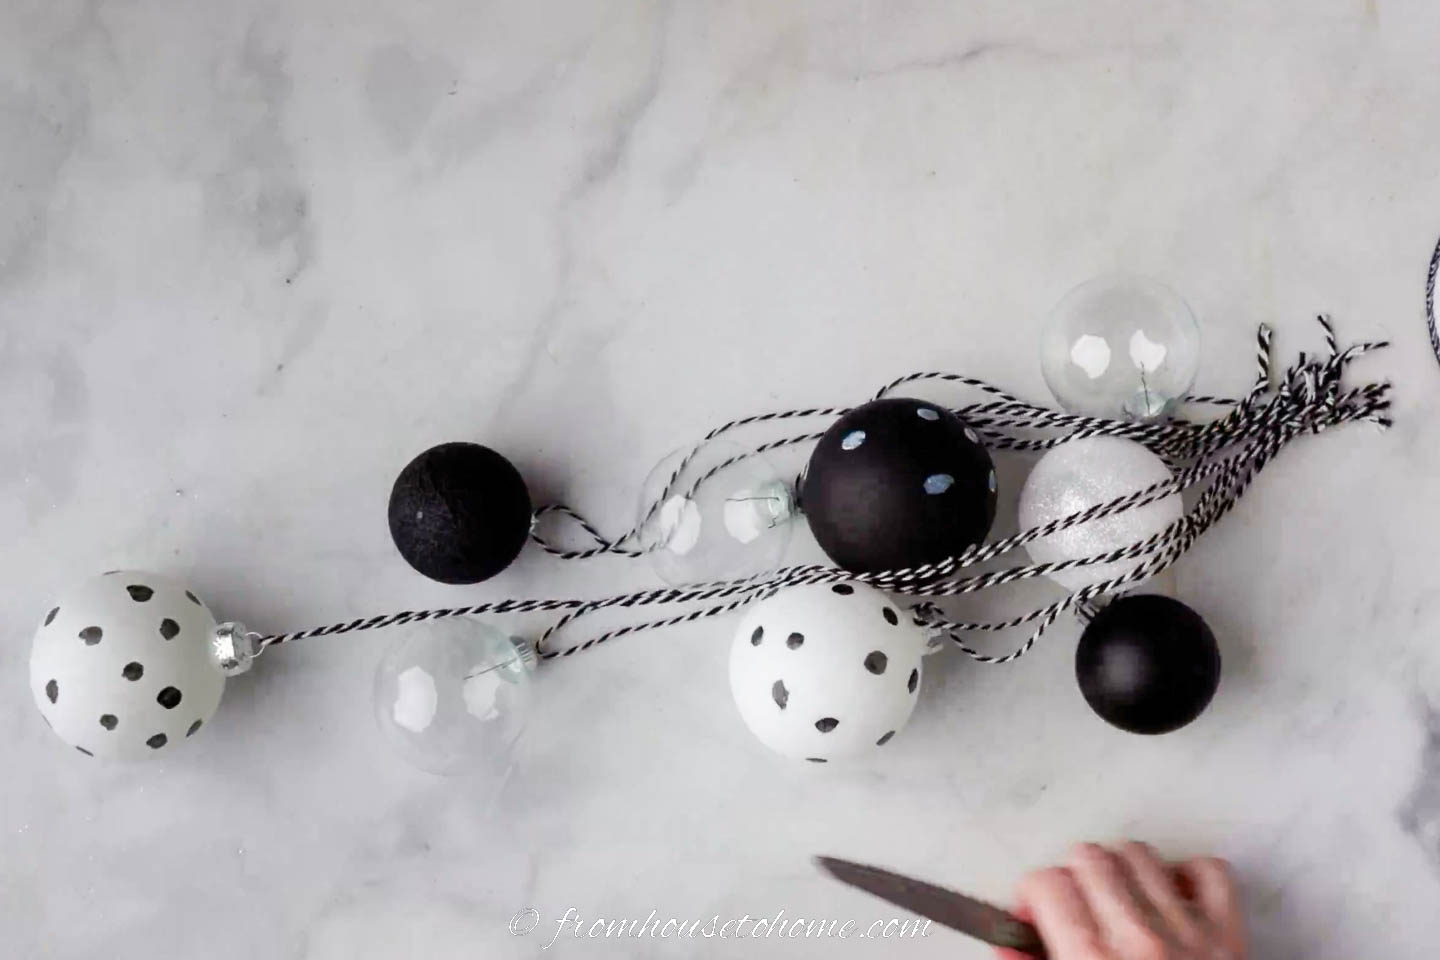
3 | Tie the ornaments together
Cut another piece of string that is about 12 inches long.

Thread this string through the loops of all the ornaments.
Then tie a knot in the string to keep them tightly grouped together.
This should be at one end of the string as we’ll be using the rest of it to tie on the evergreens.
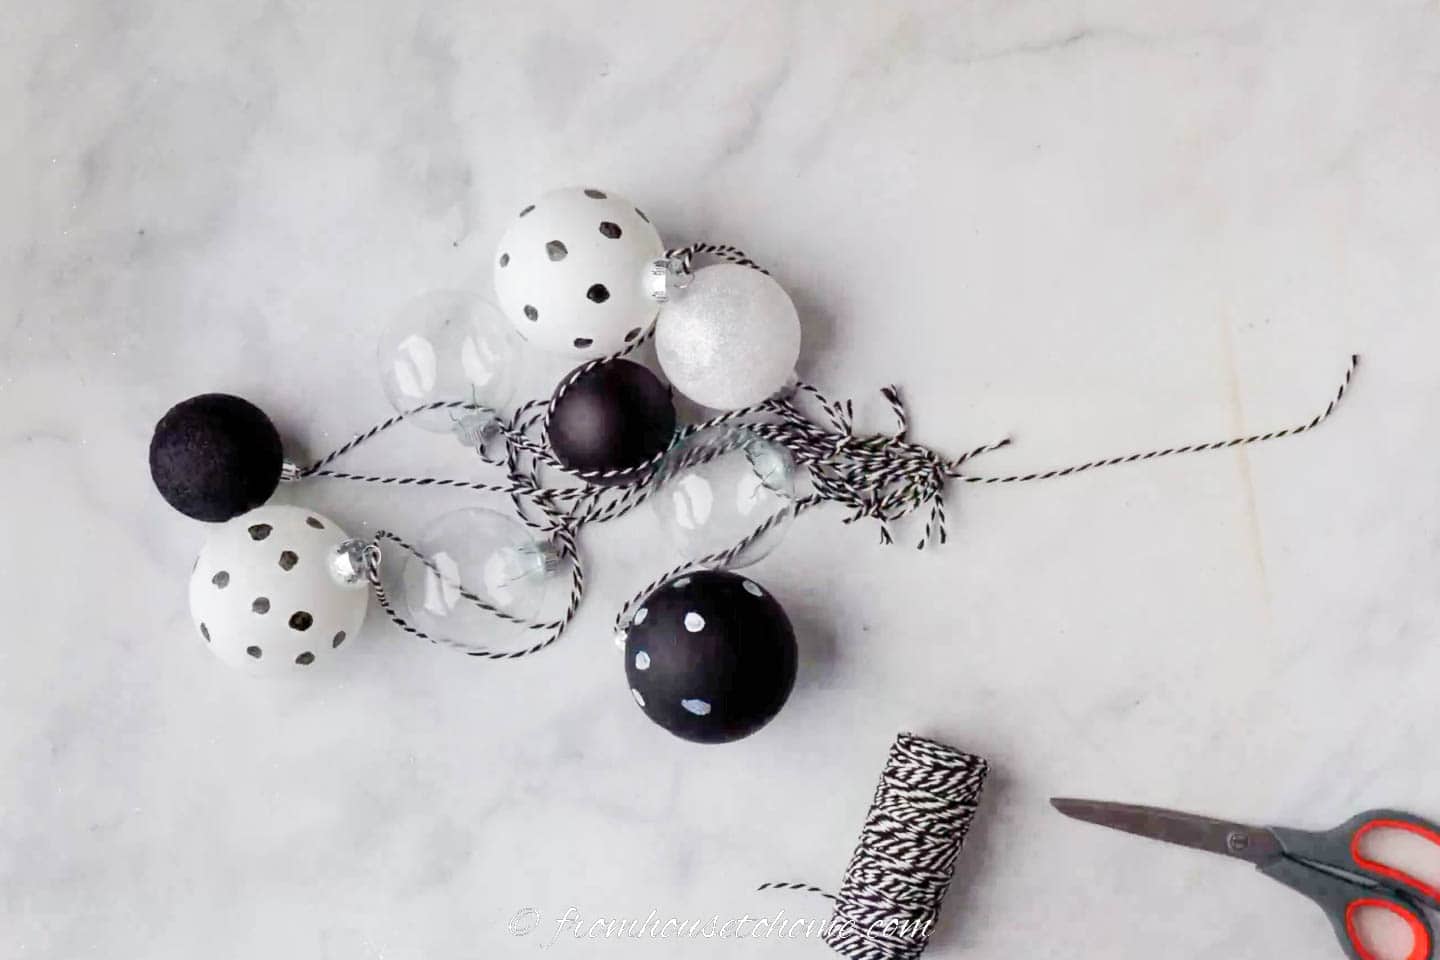
4 | Add the evergreens
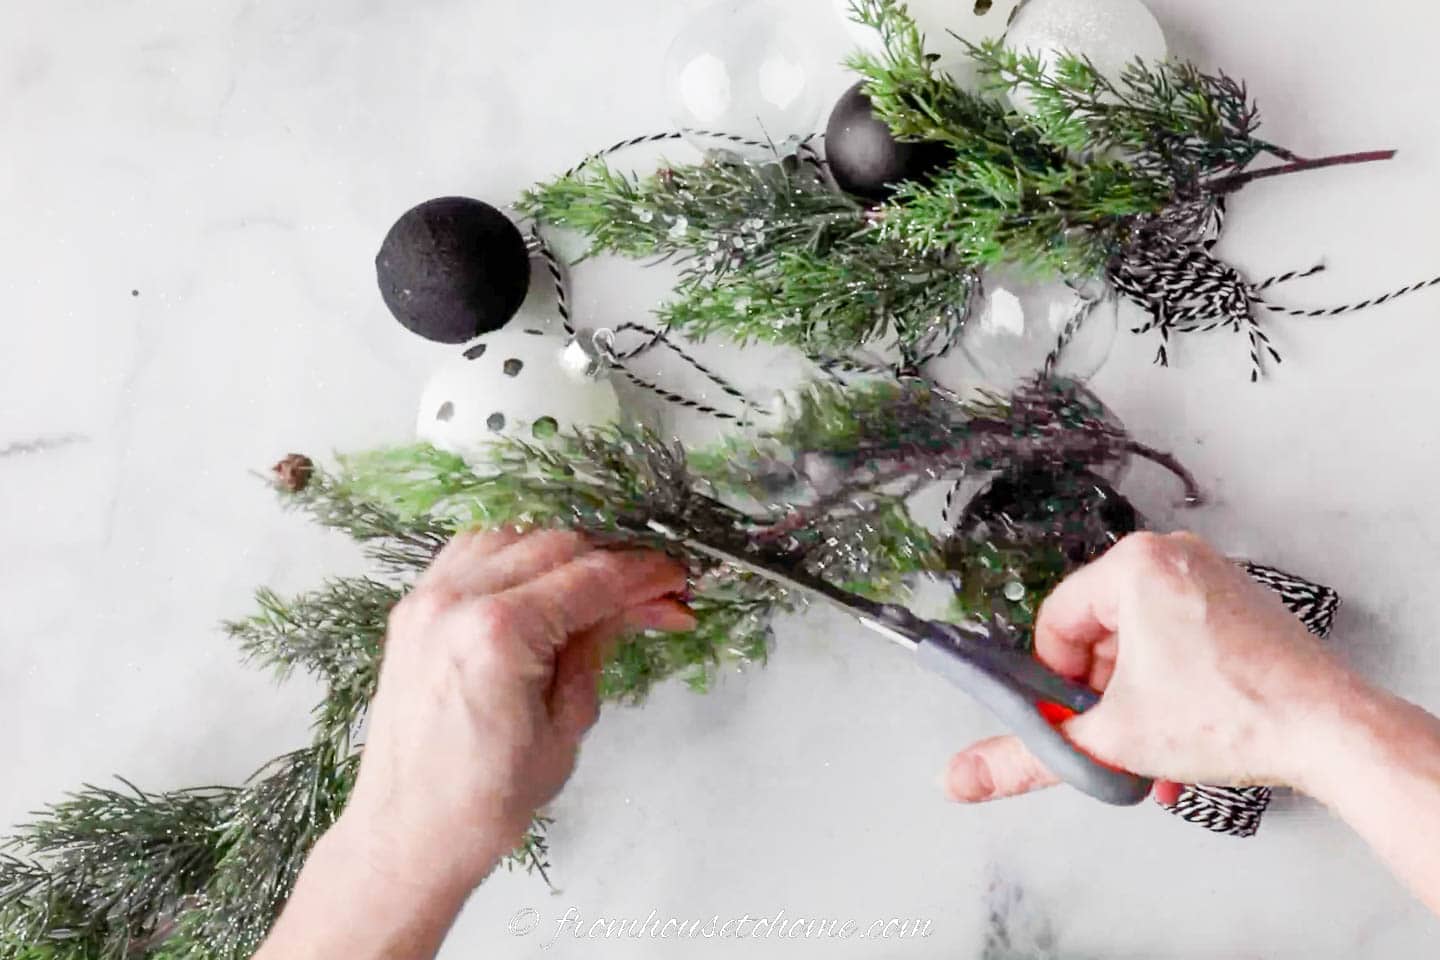
Cut 2 pieces of faux evergreen that extend a little more than half way down your ornament grouping (when they are hanging).
Place them behind your ornaments.
Attach the top of the evergreens to the top of the ornaments with the extra string left over from tying the ornaments together.
The easiest way to do this is to loop it under the first branch and around the stem before tying a couple of knots in it.
5 | Create a loop
Create a loop at the end of the string remaining after attaching the evergreens and tie a knot.
We’ll use this to hang the swag.
If you don’t have enough string left over to tie a knot, you can cut another small piece to loop under and around the top of the evergreen branches.
6 | Tie the bow
The last step is to add the bow.
Cut 2 to 3 feet of wired ribbon.
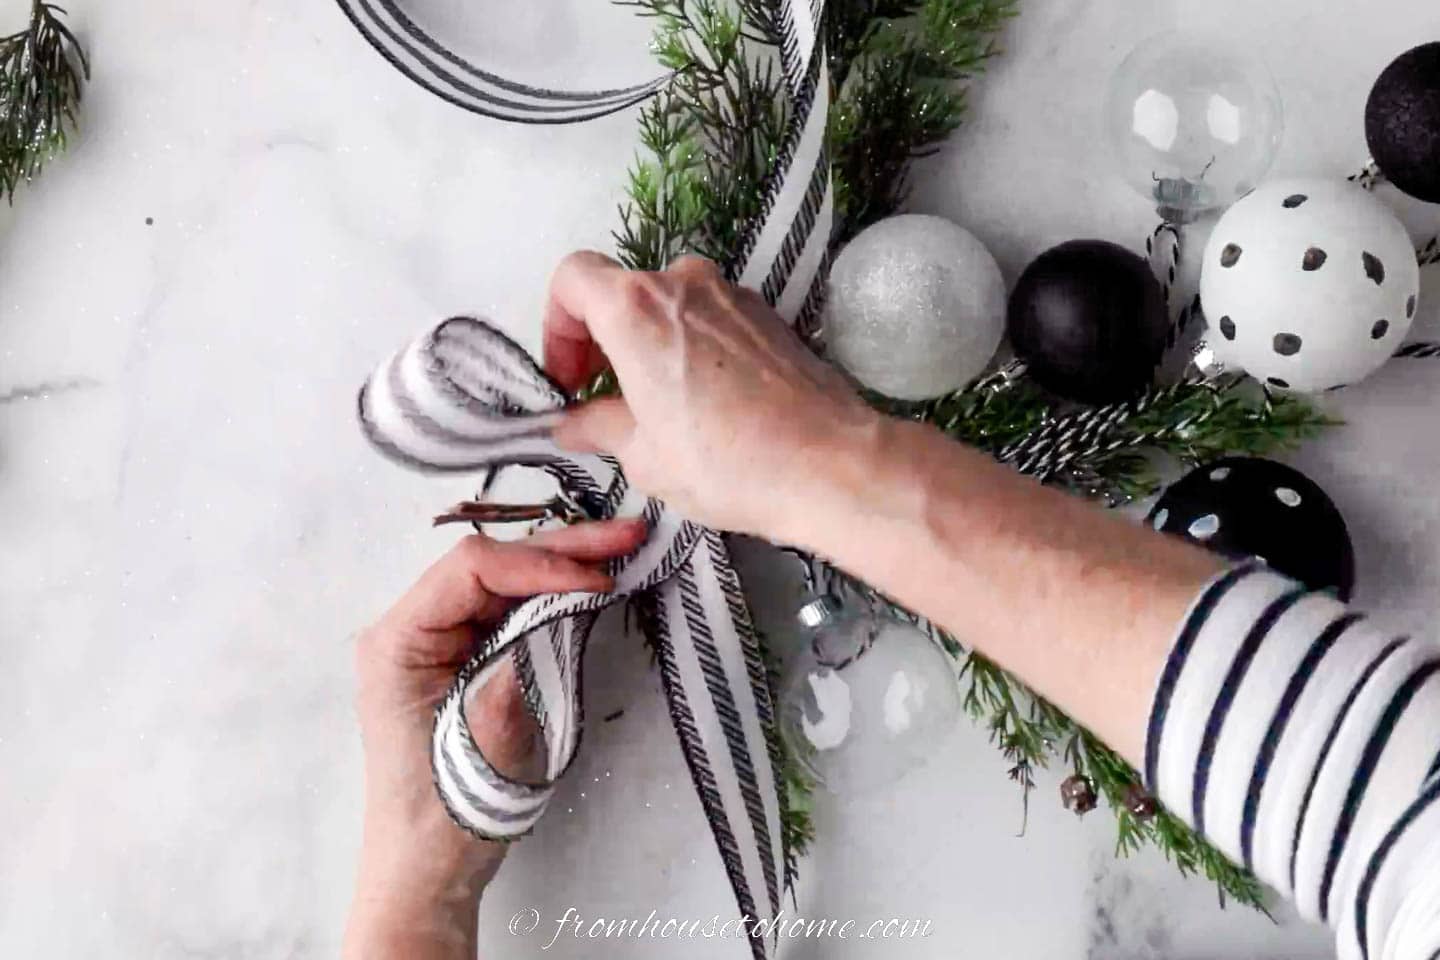
Wrap the ribbon around the top of the evergreens, tie a knot, and then add a bow.
I just used a simple single loop one, but you can get fancier than that if you prefer.
I think it looks best if the ribbon goes under the first evergreen branches, and covers the ends of all the ornament loops.
Shape the tails of the ribbon to create loose curls down the side of the ornaments.

Cut a triangle in the bottom of each ribbon and you’re done!
Hang the swag
Now it’s time to hang it.
Since these swags aren’t very heavy, command hooks are a great way to hang them. They can be removed without causing damage to most surfaces.
Or if you’re hanging them in front of a window where you often close the curtains, you can hang it from the curtain rod with a piece of string that hangs down to the right height.
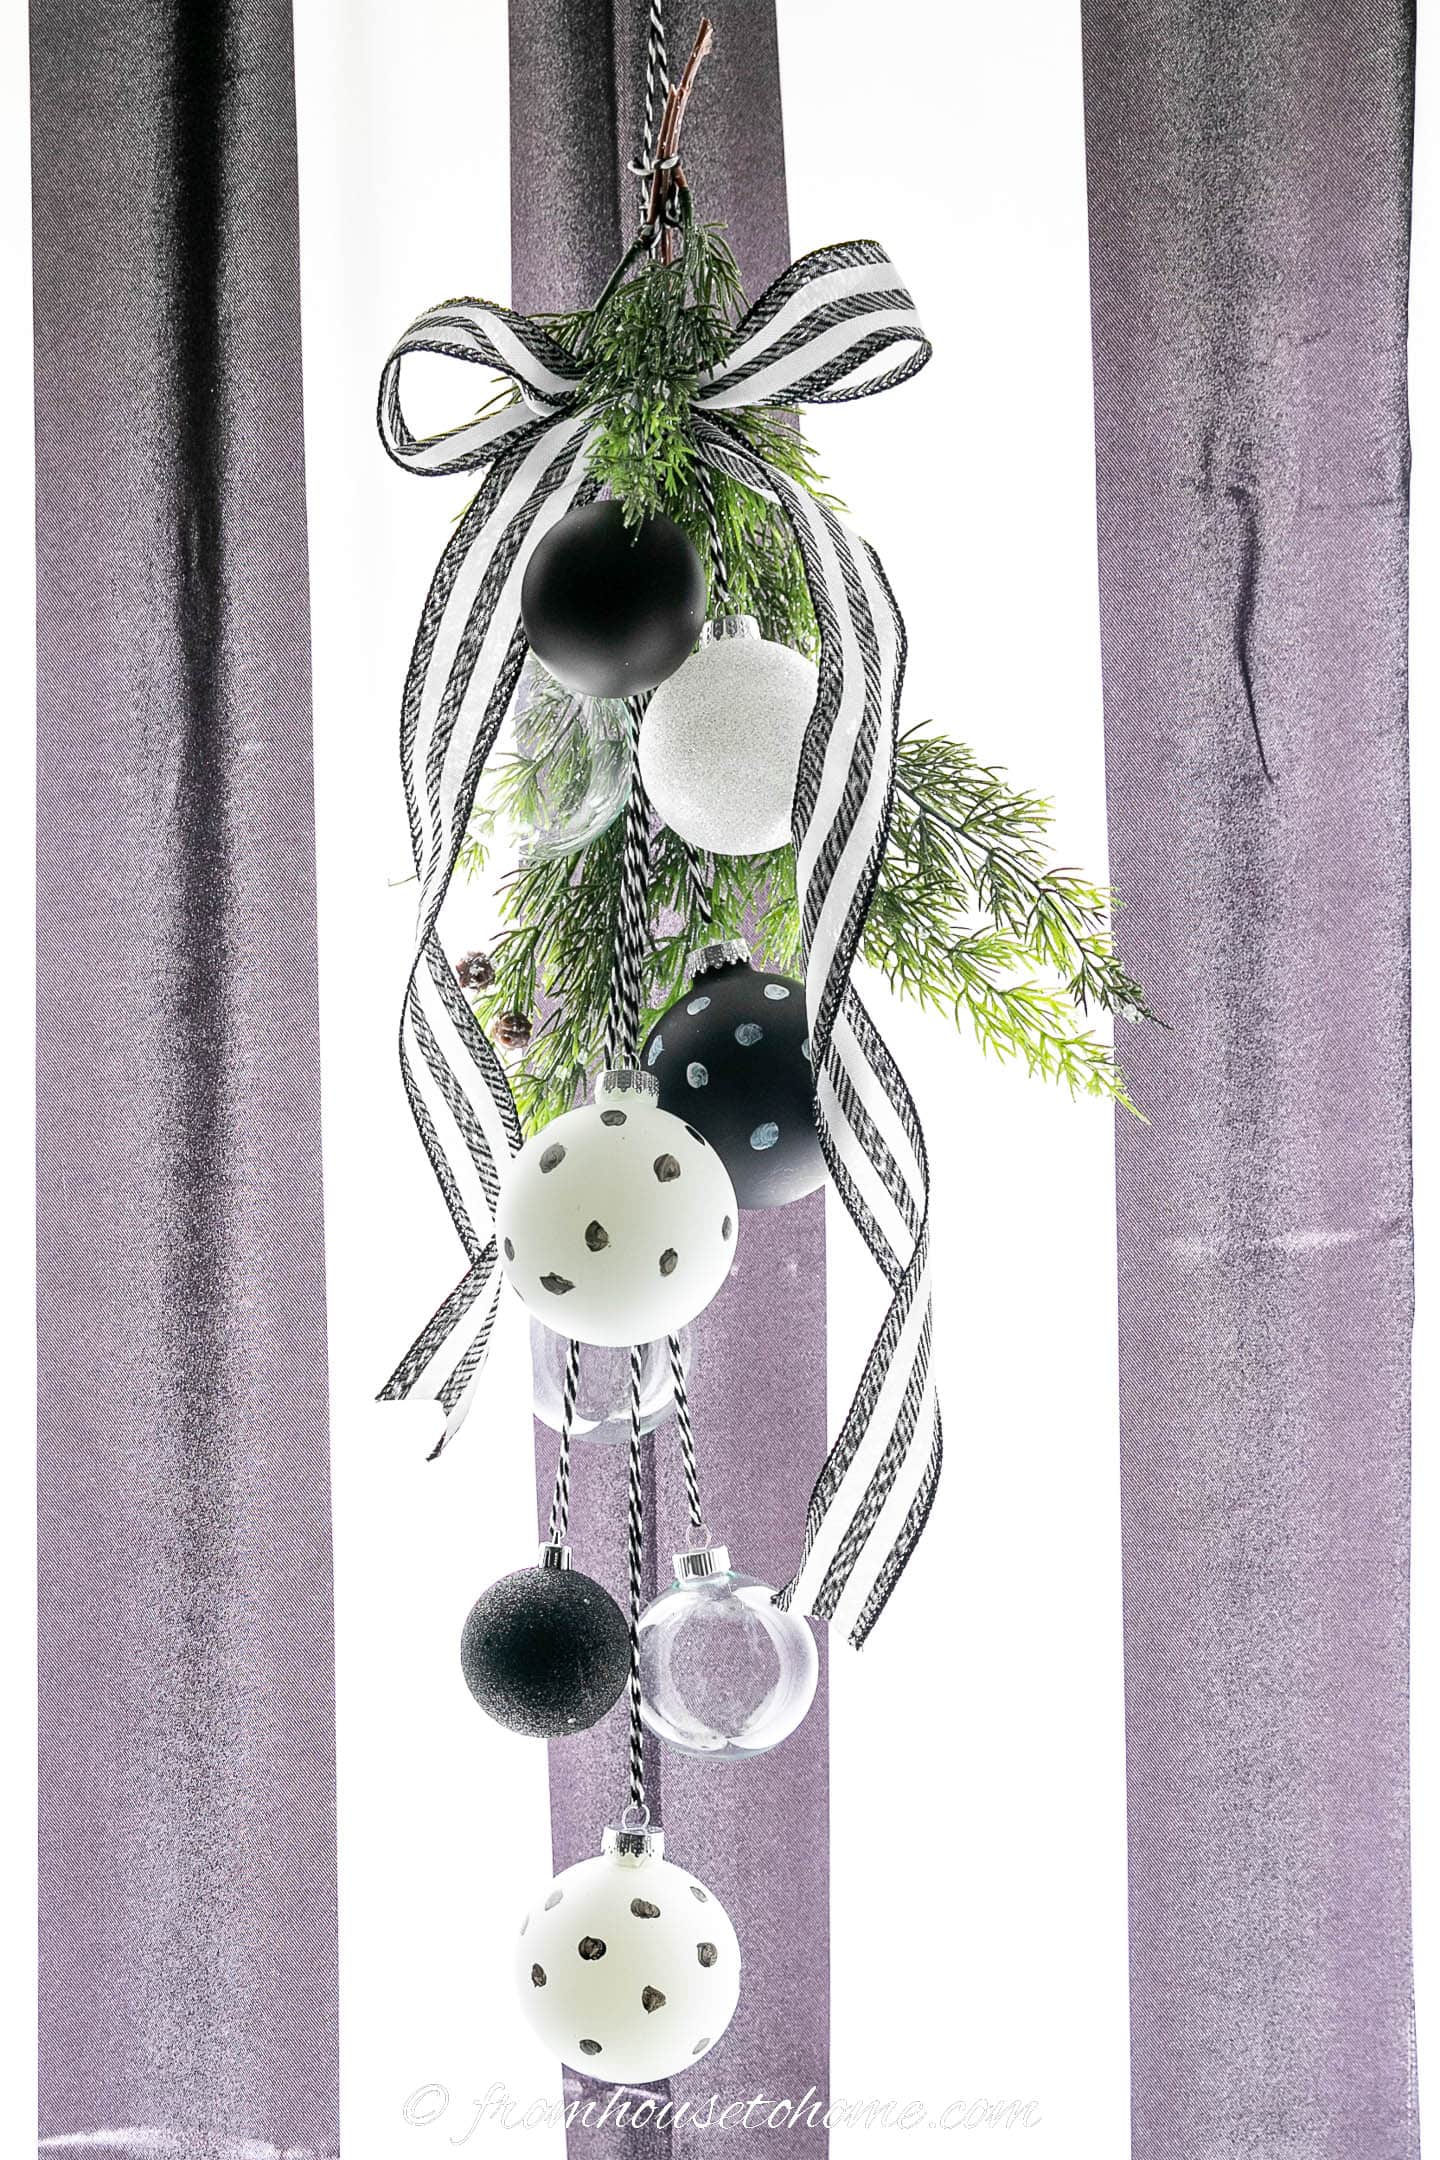
The finished swag
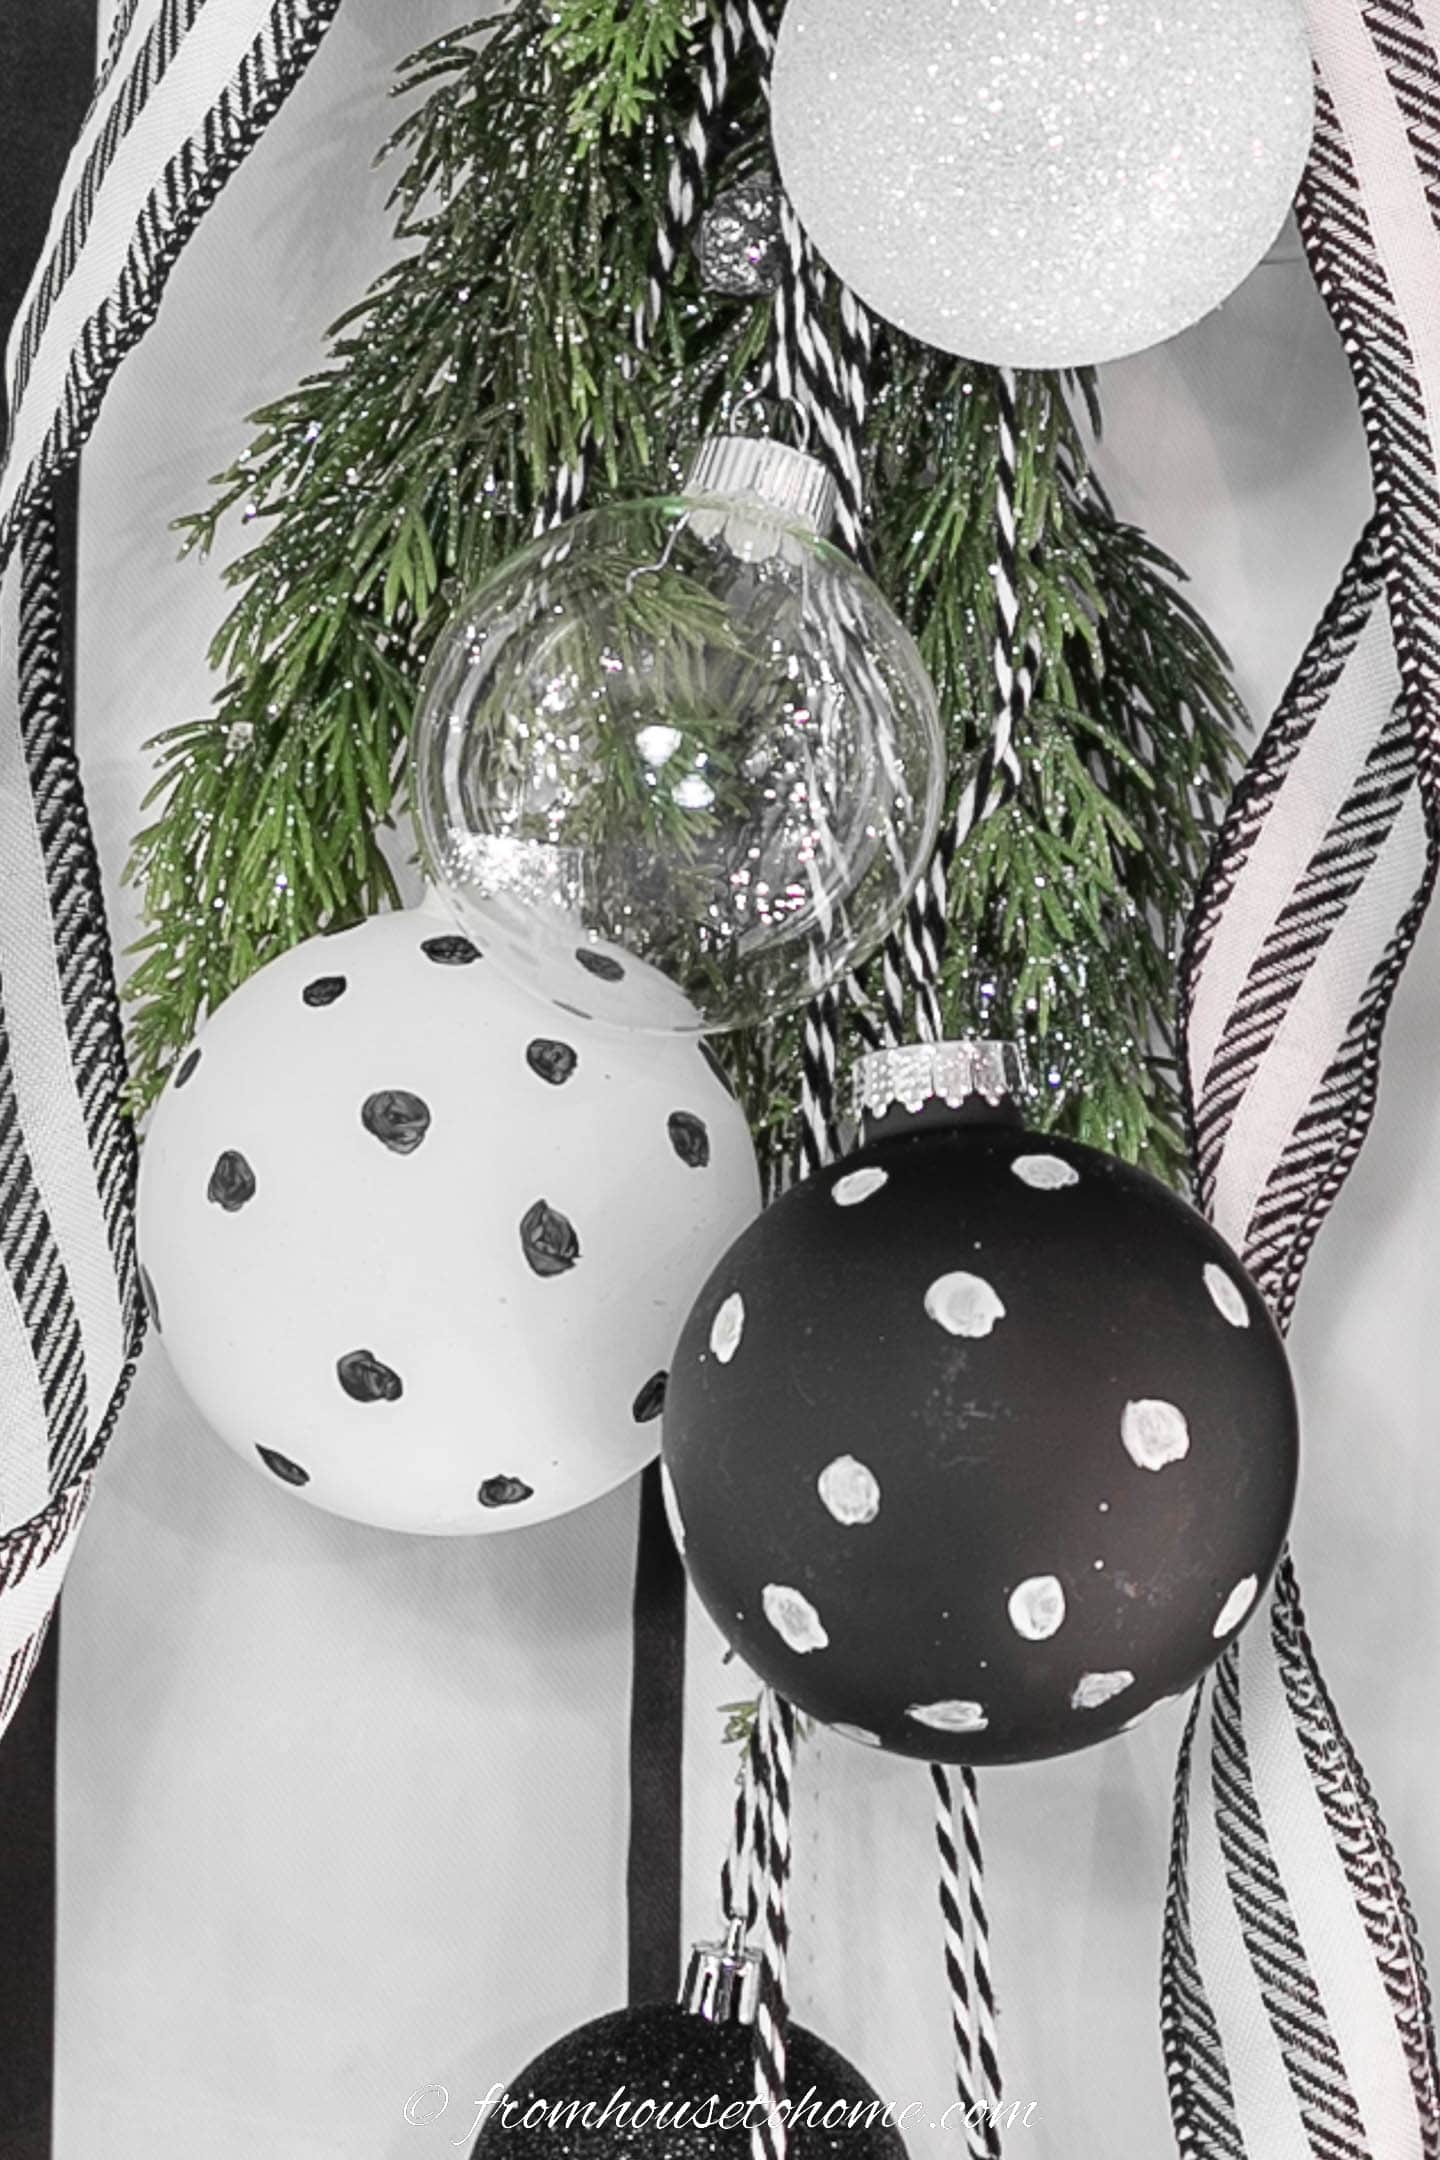
I love the contrast in texture between the the glass ornaments and the evergreens. And the contrast in pattern between the polka dots and stripes.
Now, all that’s left is to enjoy your new Christmas decoration.
Other black and white Christmas decorations you might like
- DIY black and white polka dot ornaments
- Black and white Christmas decor ideas
- Black and white plaid Christmas tree
DIY Black And White Christmas Swag
Equipment
- scissors
- wire snips (optional)
Materials
- 3 black ornaments of different sizes, textures and/or patterns
- 3 white ornaments of different sizes, textures and/or patterns
- 3 clear ornaments
- 1 roll black and white baker's string
- 1 garland faux evergreens
- 2 to 3 feet 2.5" wide black and white wired ribbon
Instructions
- Lay out the ornaments the way you want them to look when they are hanging. Creating 3 layers of 3 ornaments (one of each color) works well.
- Cut a loop of string for each ornament so that it will hang down the length required for your layout from above. The shortest ornament should have a loop that is about 3" to 4" long.
- Cut another piece of string that is about 12 inches long.
- Thread it through the top of the loops for all of the ornaments and tie it so they are grouped together. The knot should be as close to one end of the string as possible.
- Cut two pieces of the evergreen garland that are about half the length of your longest ornament string.
- Use the free end of the string to loop under the first branch and around the top of the stems of the evergreens. Then tie a knot.
- With the remaining string, create a loop that will be used to hang the swag. If you don't have enough string left to do this, cut another piece of string to use as the hanging loop.
- Tie a bow around the top of the ornaments and evergreens. This looks best if the ribbon goes under the first evergreen branches and covers the top of the ornament strings.
- Shape the ribbon into loose curls down the sides of the swag and cut a triangle in the ends.
- Hang on the front door, windows, or kitchen cabinets with command hooks
Have comments or questions about our DIY black and white Christmas swag? Tell us in the section below.
This post was originally published on December 16, 2022 but was updated with new content on December 9, 2023.