Easy DIY Heart Christmas Ornaments
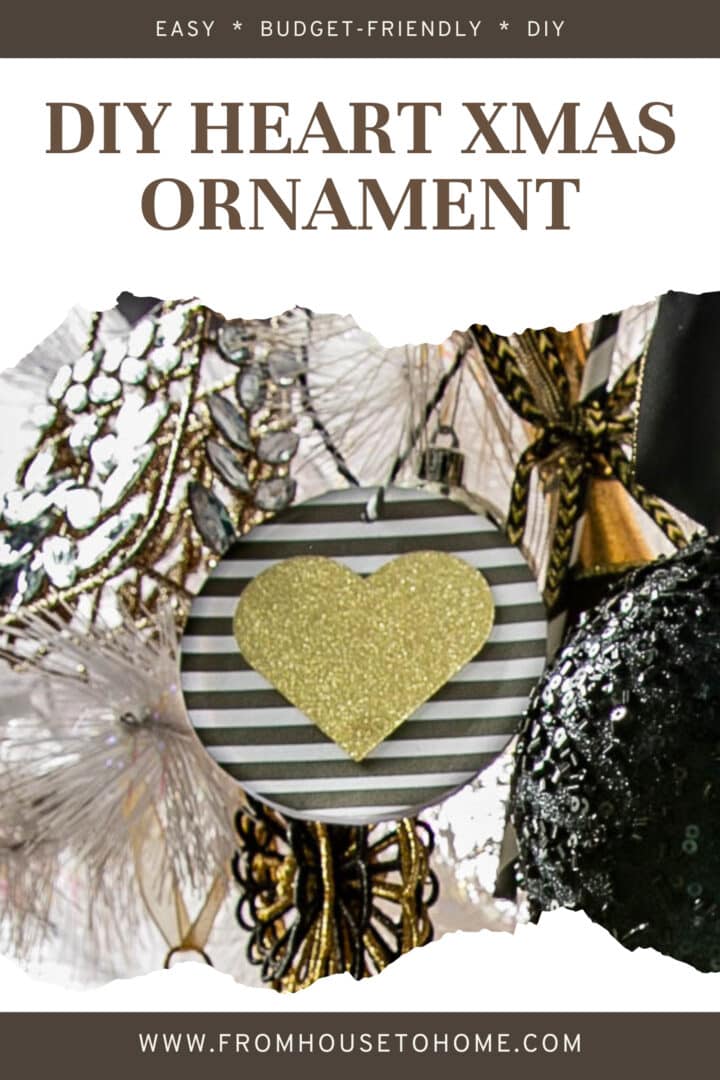

In this DIY heart Christmas ornaments tutorial, you’ll learn how to whip up budget-friendly black and white striped ornaments with a gold heart that will add a dash of homemade glamour to your Christmas tree.

If you’re looking for some simple DIY Christmas ornaments that will add a little glamour to your Christmas tree, you’ve come to the right place.
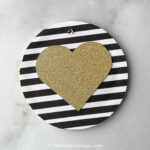
These printable black and white striped ornaments with a shimmering gold heart at the center are one of my favorite DIY Christmas projects.
They are not only quick and easy to create, but they’re also a cost-effective way to add a touch of elegance to your tree.
And I love the way they look on my tree.
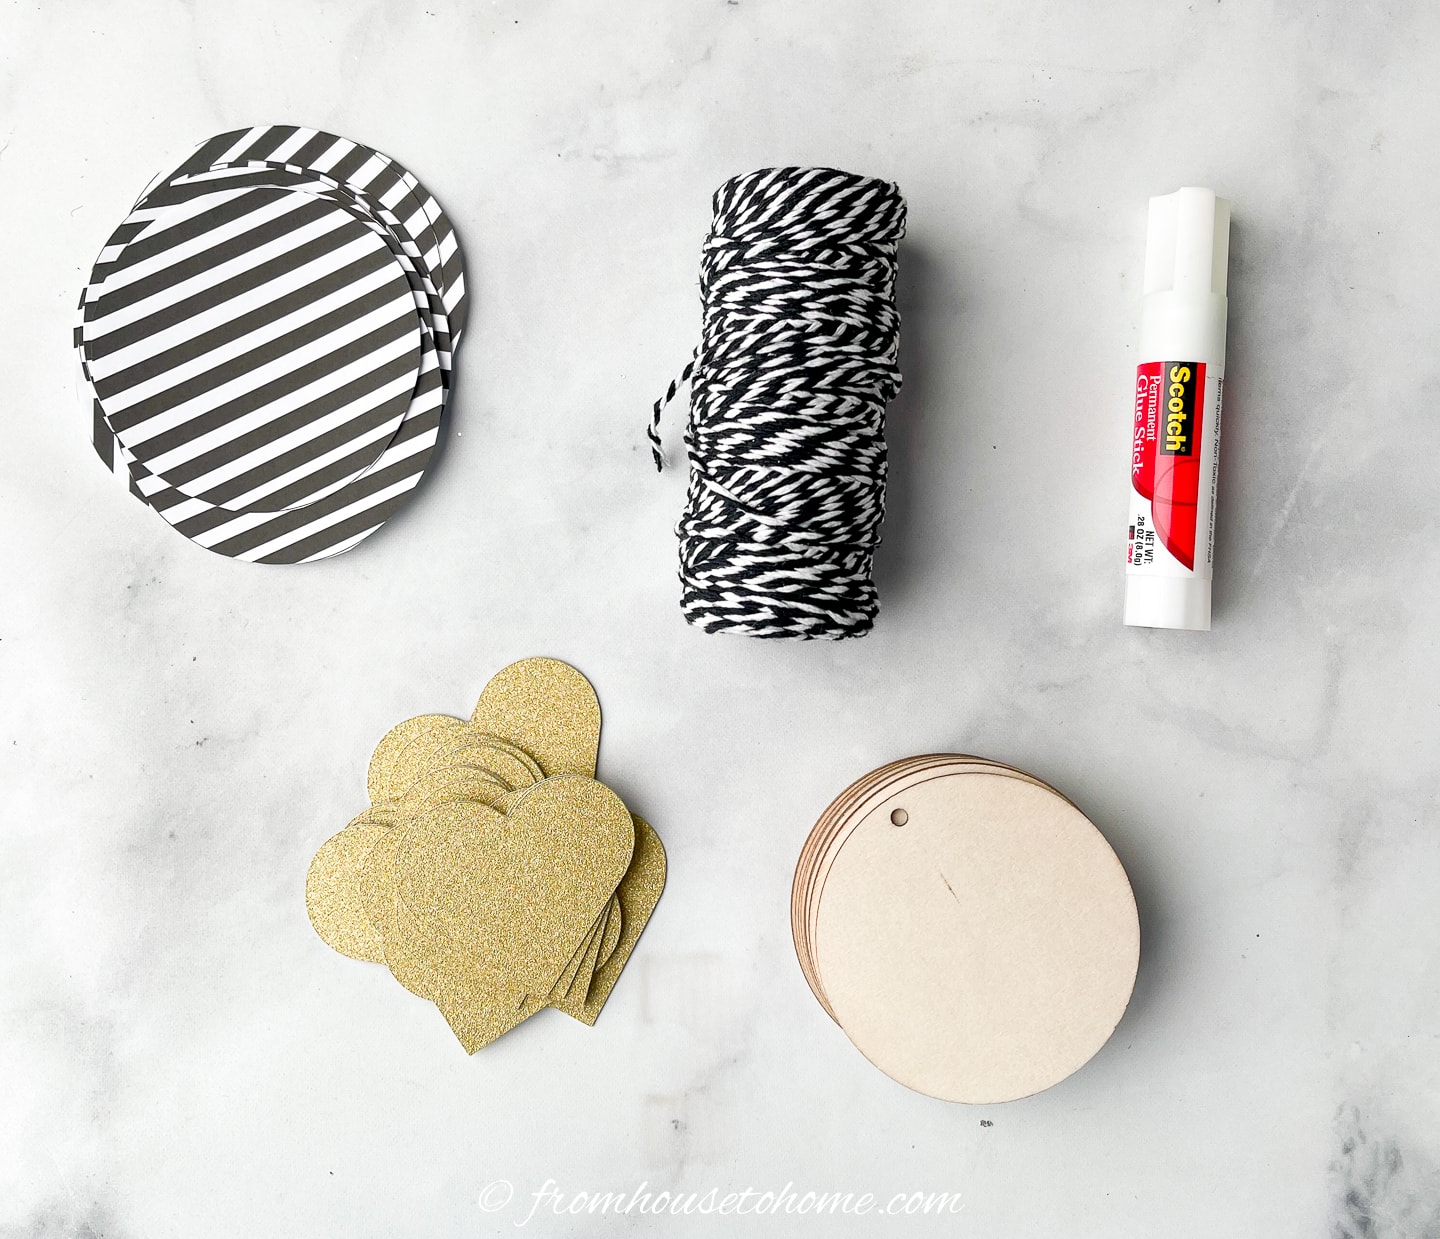
Supplies
This makes enough for 6 ornaments with hearts on both sides.
Materials
- 2 – 8½” x 11″ sheet of paper
- 1 sheet of gold glitter cardstock
- glue – I like to use a glue stick because it’s less messy than regular white glue. But any type of glue will work.
- 3-inch round wood discs* with a hole at the top
- black and white string* – for hanging. You can also use thread, fishing line or ornament hooks.
Tools
- printer
- Cricut (optional)
- scissors
- pointy object (like a pen or a screw)
How to make dIY heart Christmas ornaments
Step 1 | Download the designs
To start this DIY heart Christmas ornaments project, you’ll need to download the black and white striped circles and heart designs.
If you are already a newsletter subscriber, these are available for free from our members-only resource library.
If you’re not already a member, just sign up for our newsletter and we’ll send you the password.
Step 2 | Print
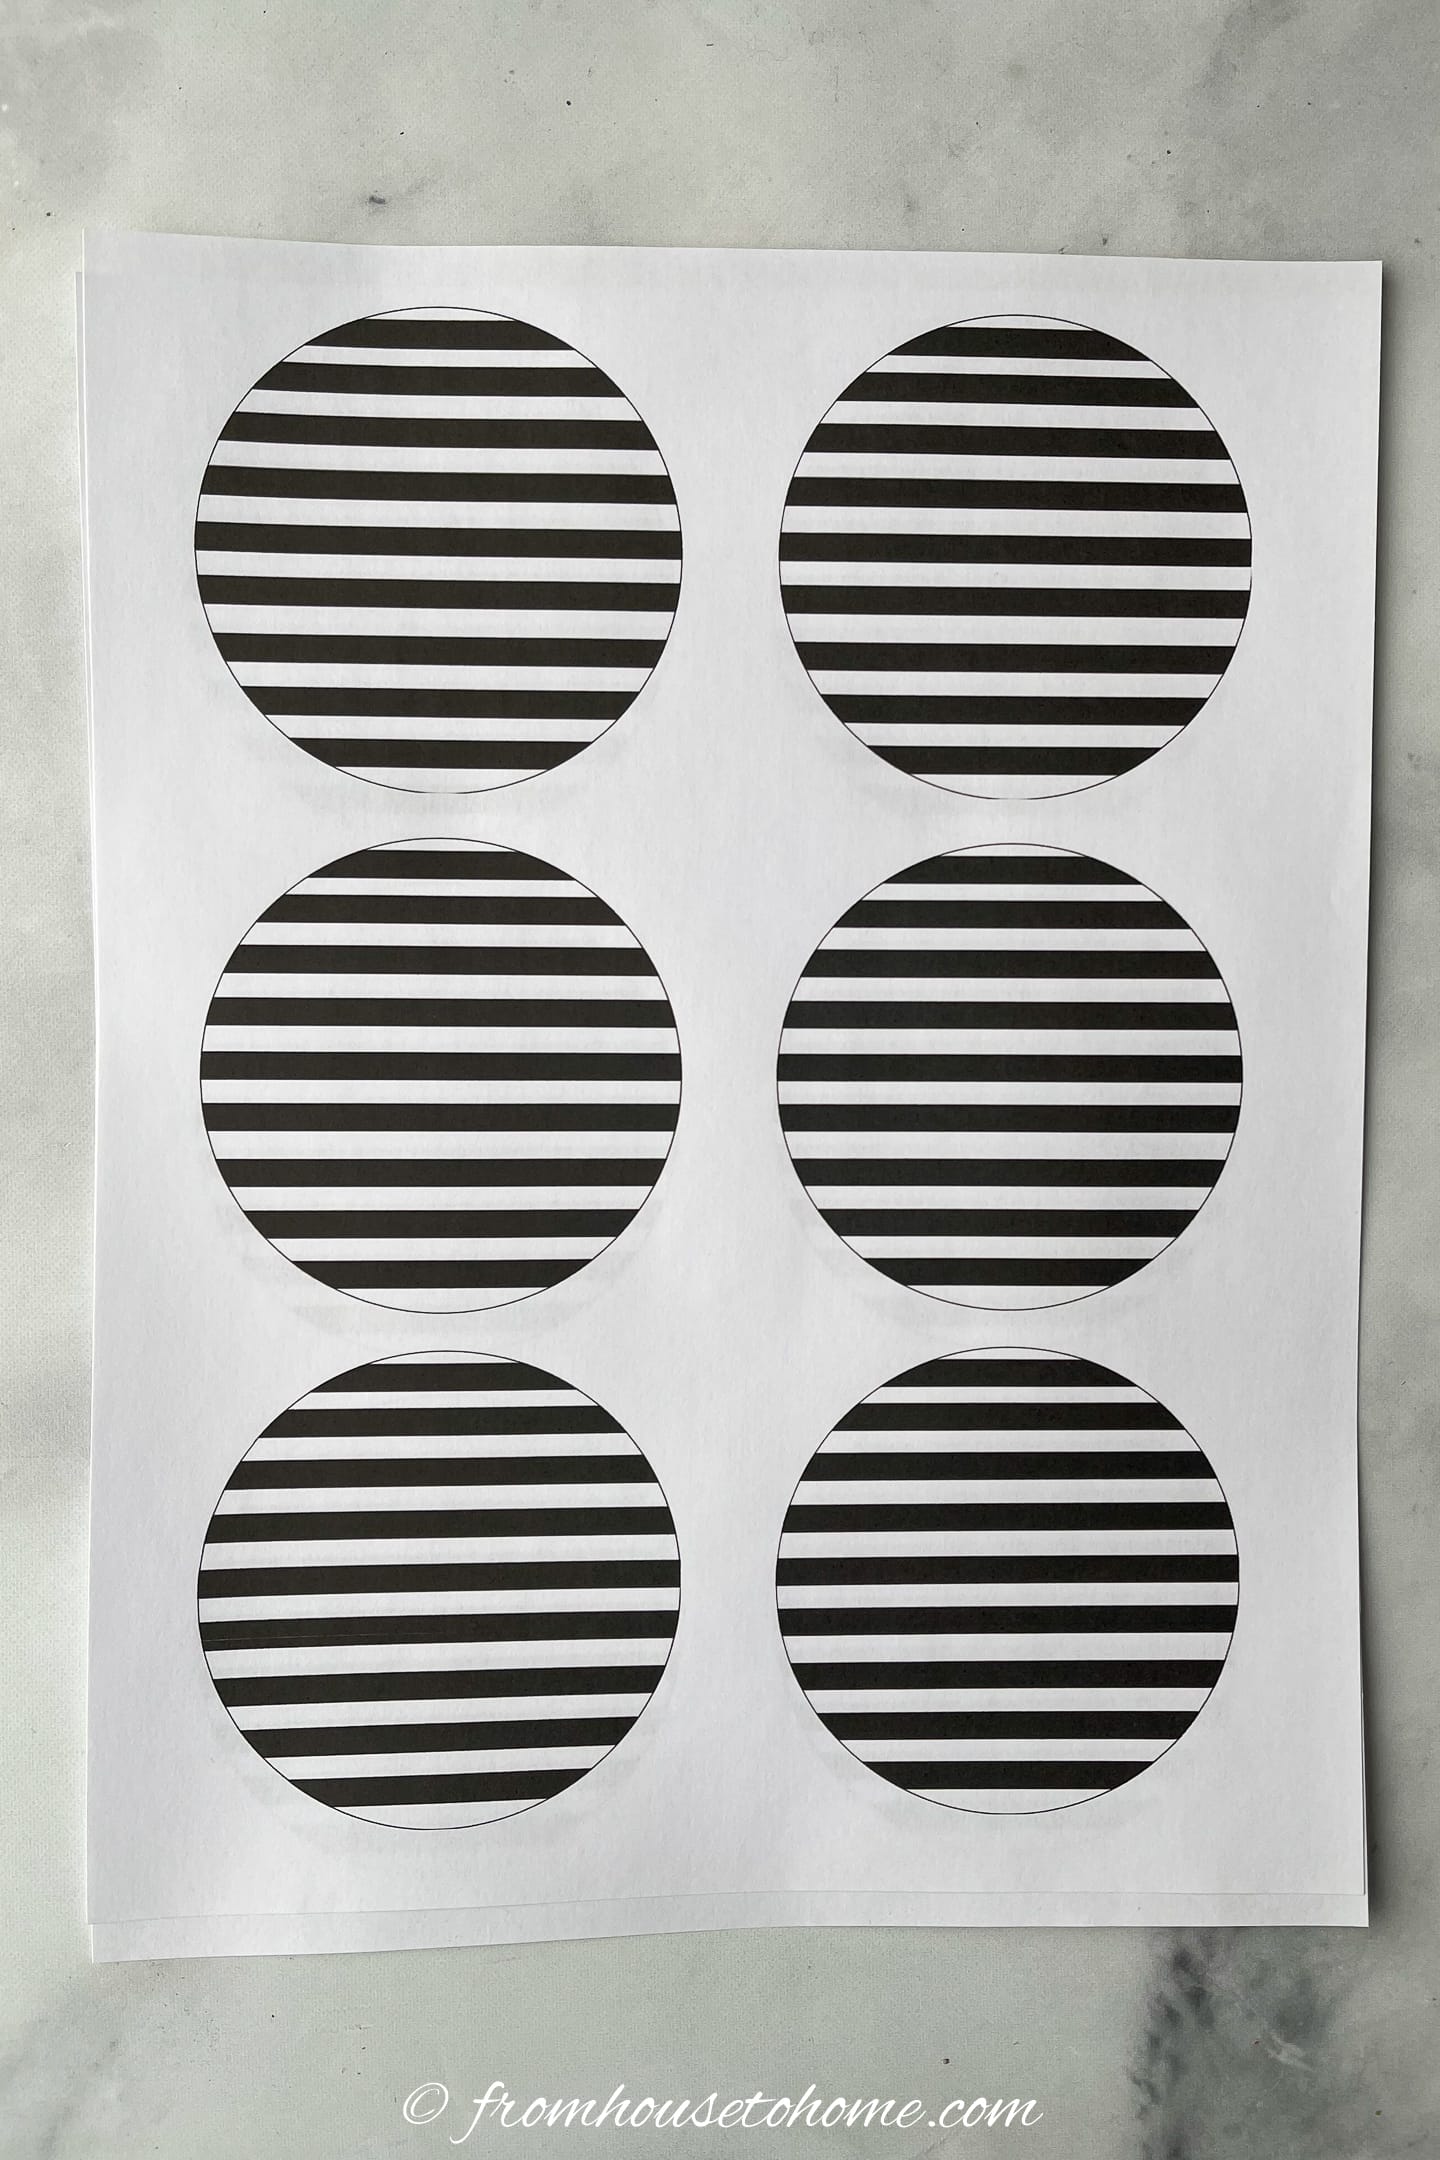
Next, print the black and white striped circle design on regular paper.
I like to cut out the hearts using my Cricut because it’s easier. However, if you want to cut them out by hand, print the heart design onto the gold glitter cardstock.
Step 3 | Cut out the shapes
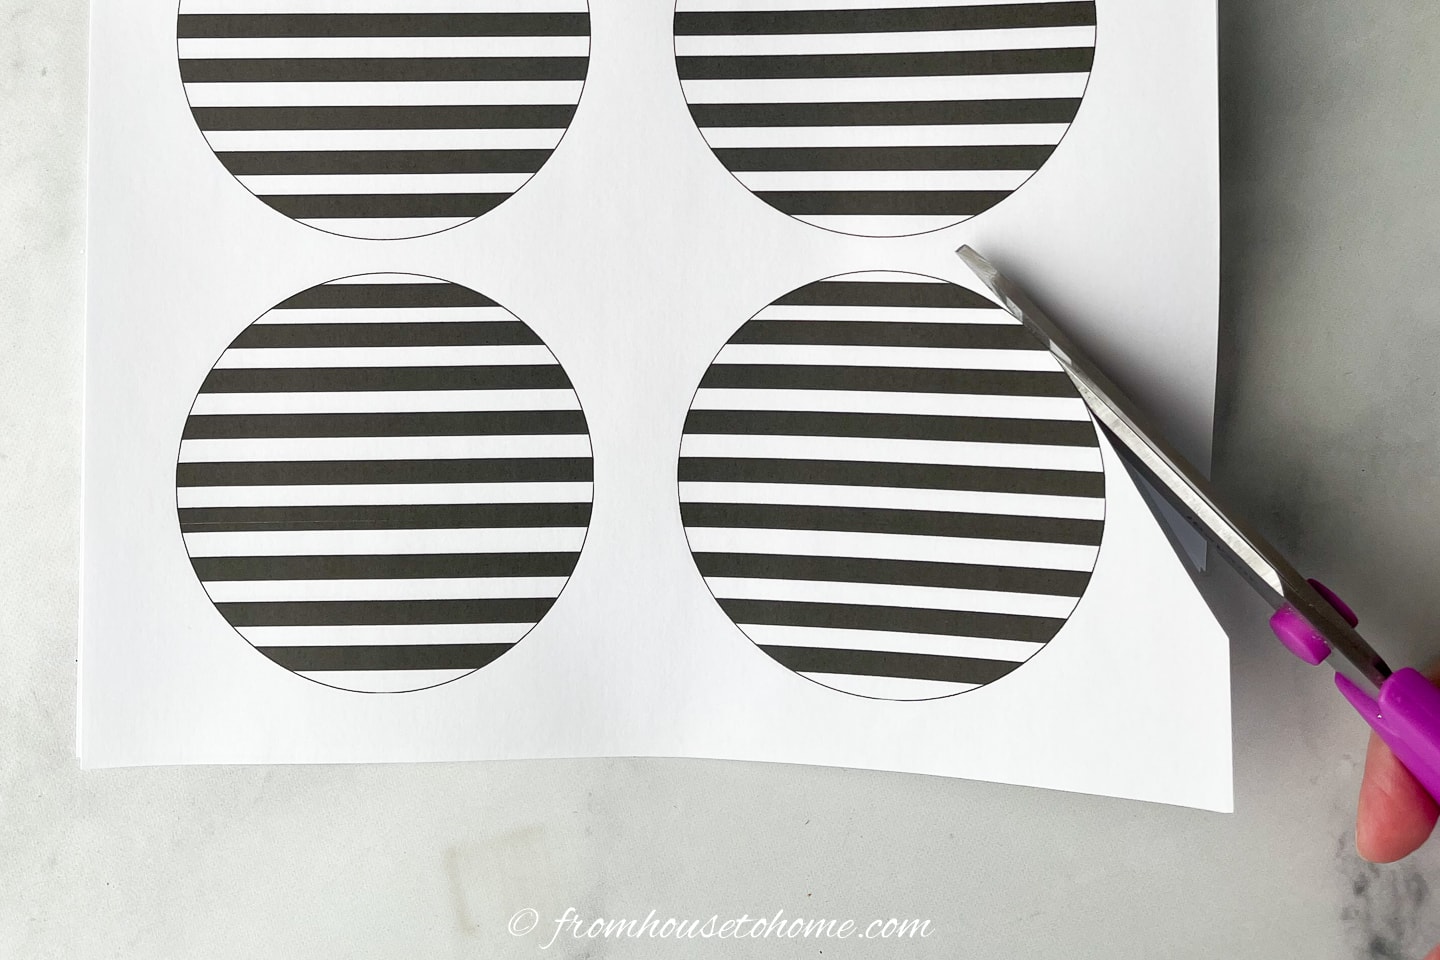
Carefully cut out the circles featuring black and white stripes with scissors.
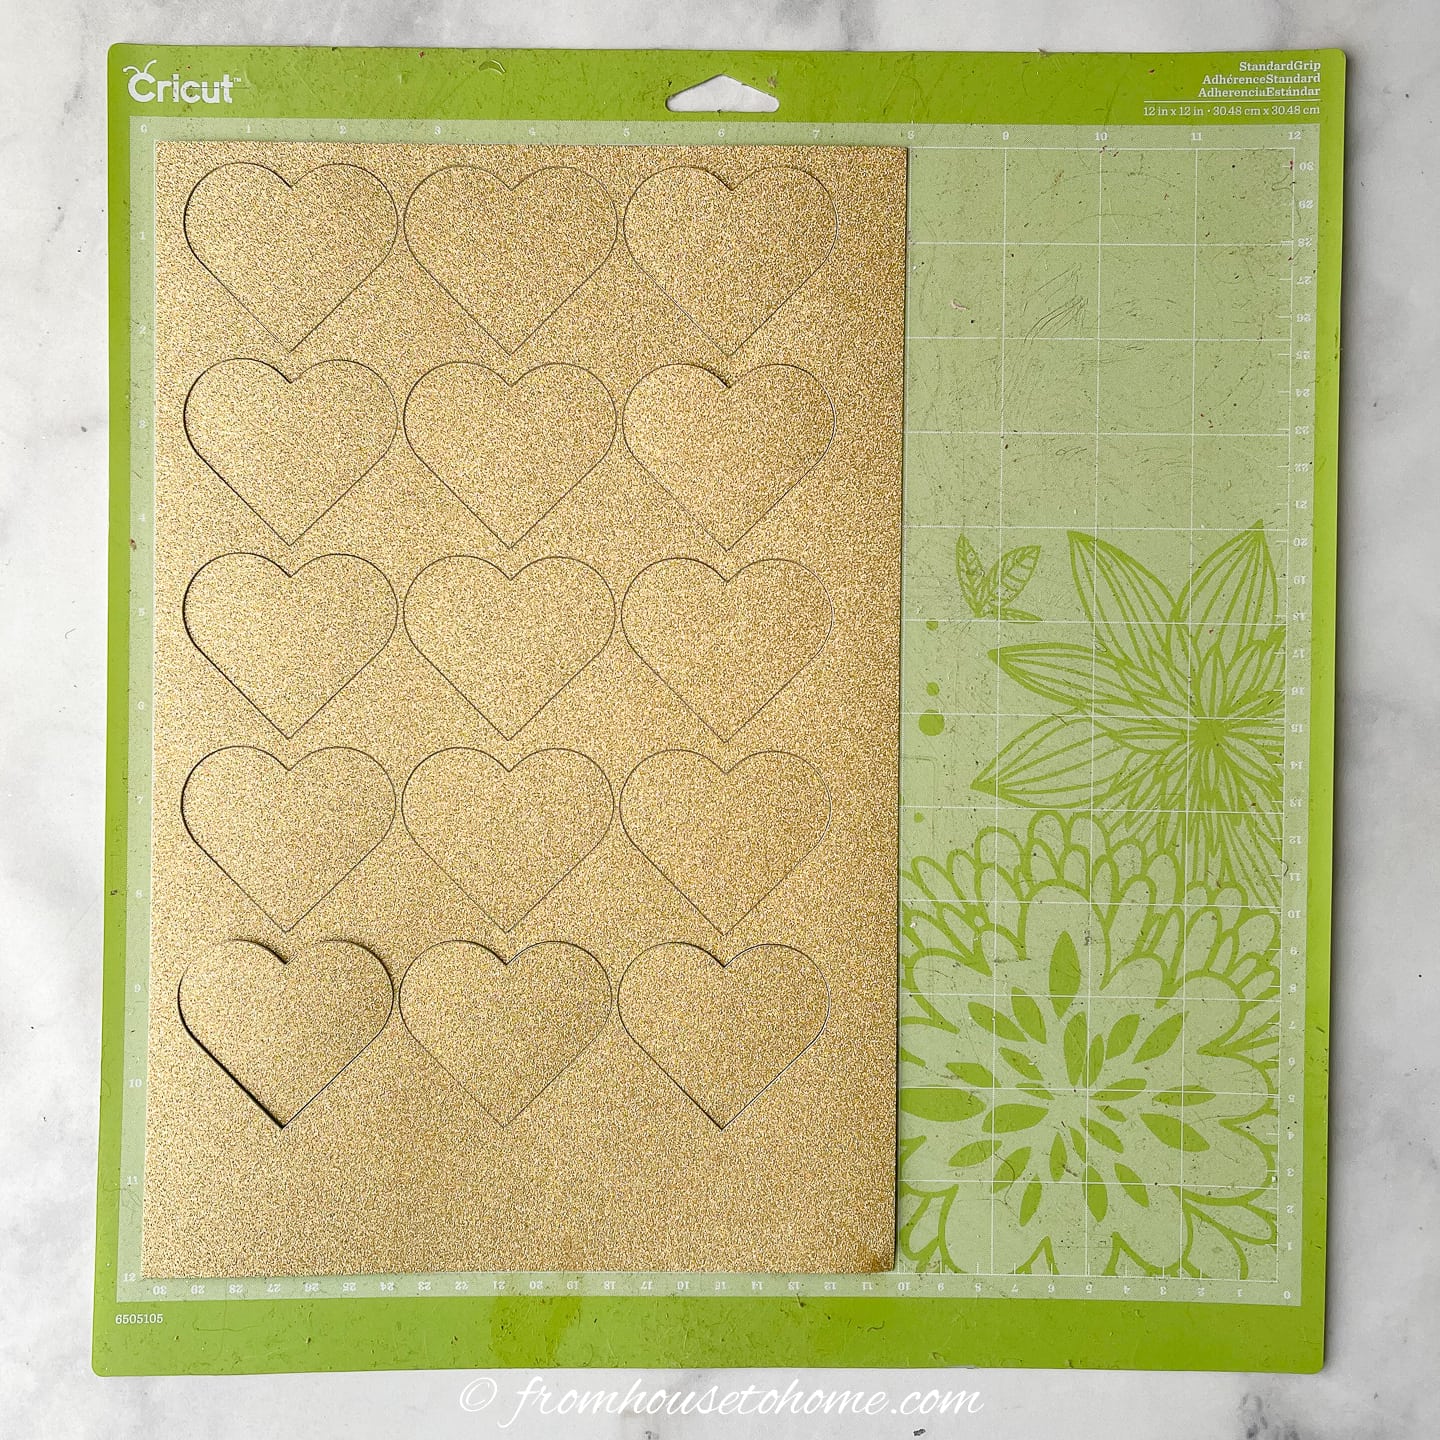
If you own a Cricut (or something similar), upload the heart design into Design Space and let it do the work of cutting out the hearts for you.
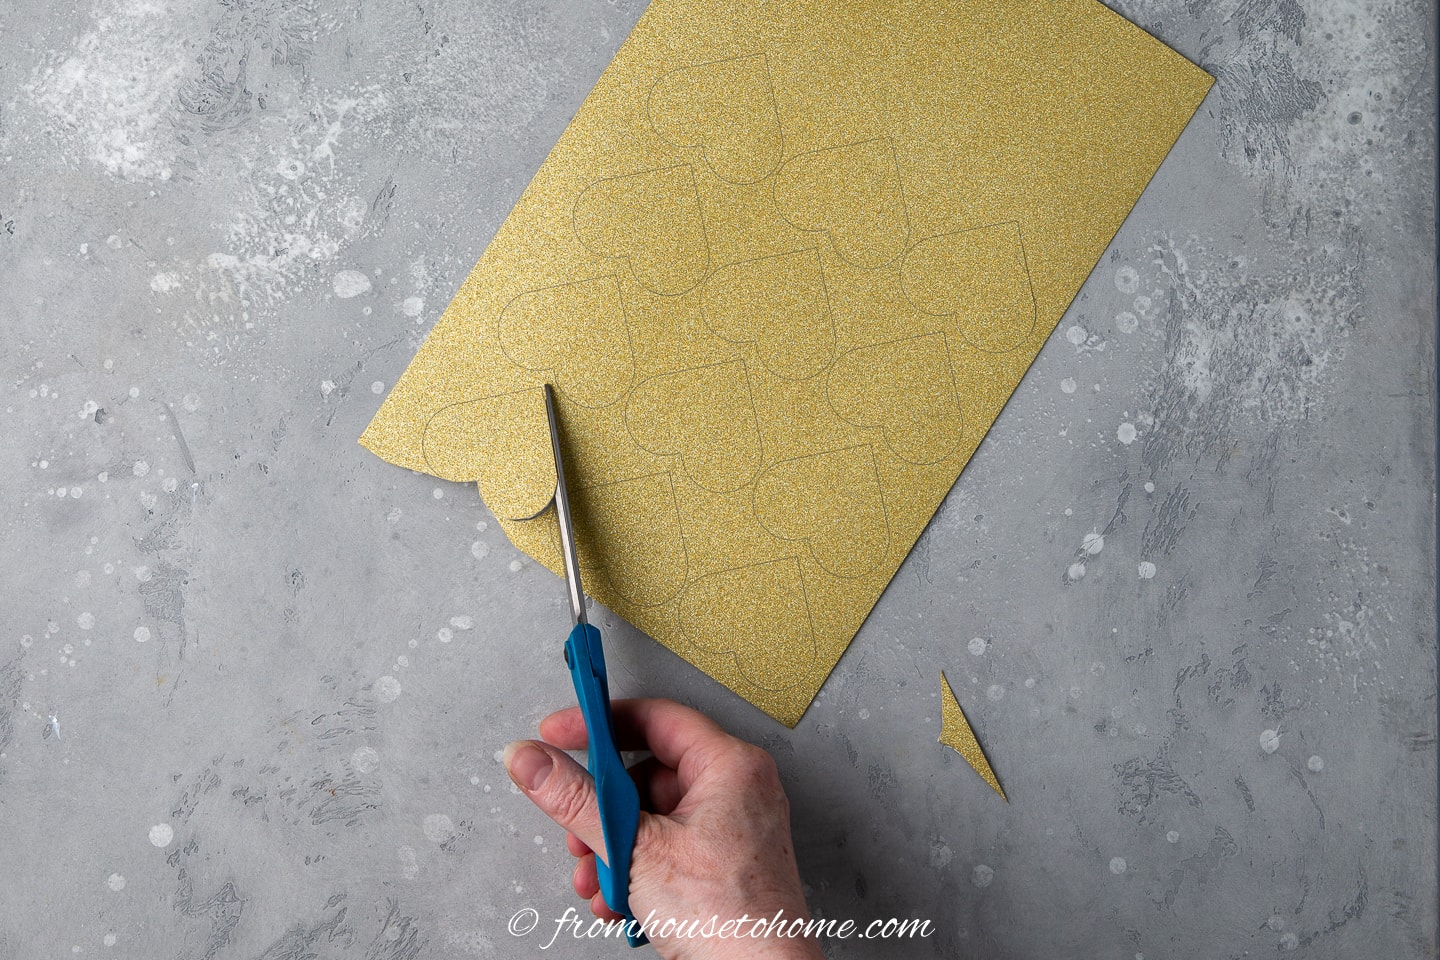
Or you can cut them yourself with scissors.
Step 4 | Glue the circles to the wood
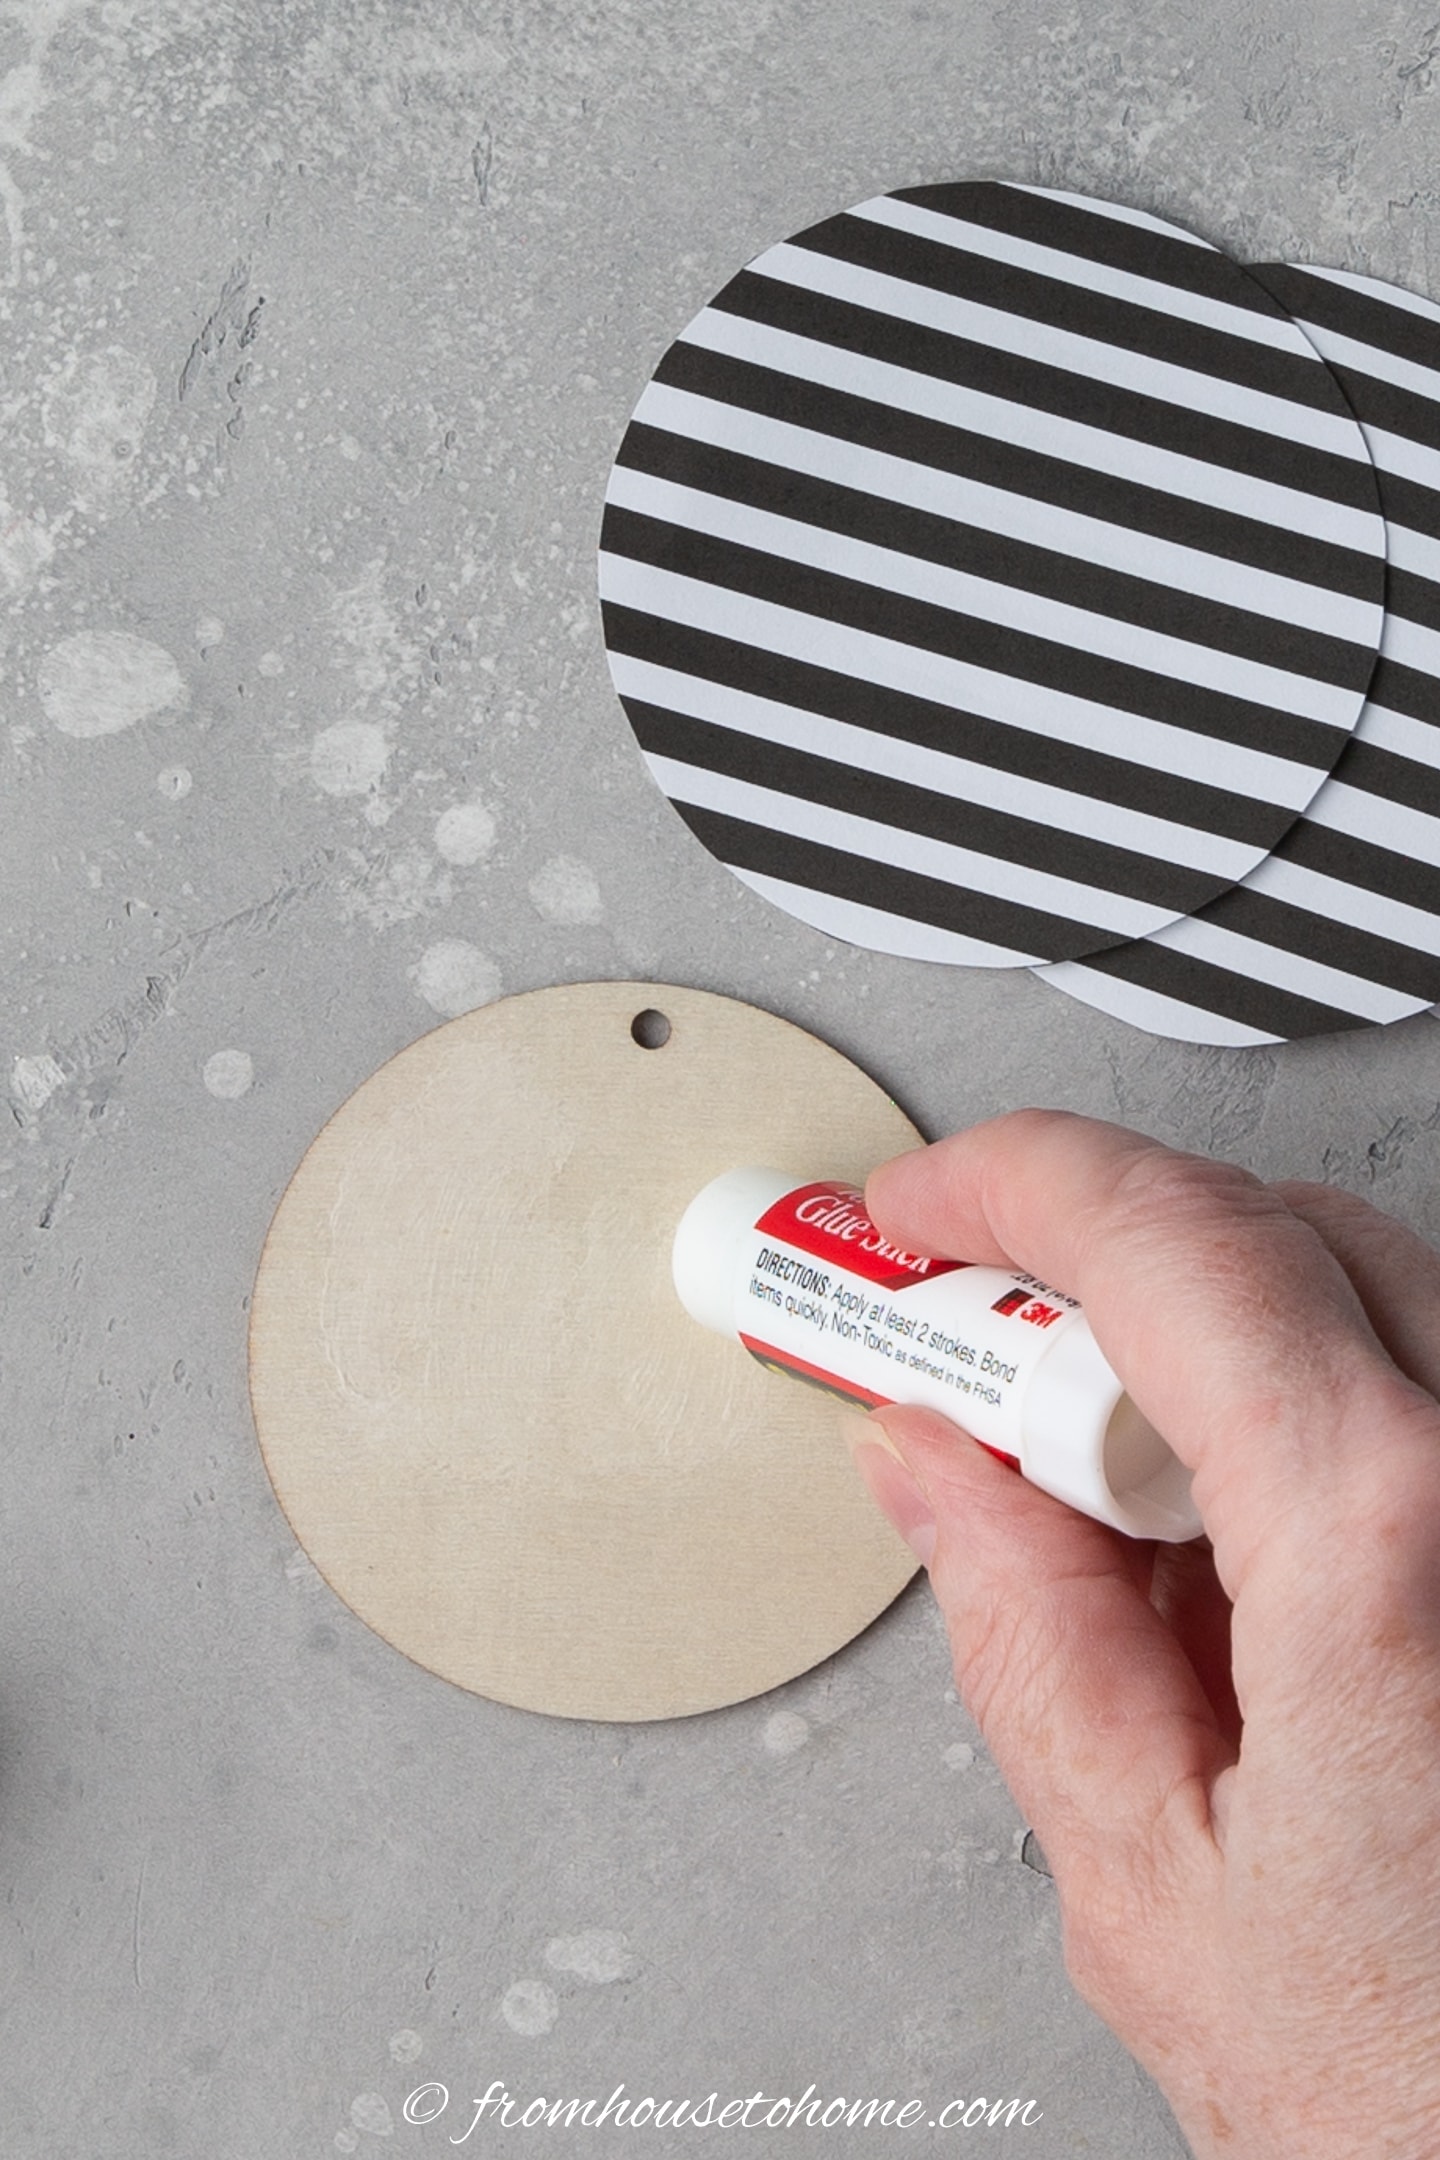
Apply adhesive to one side of the wooden disc.
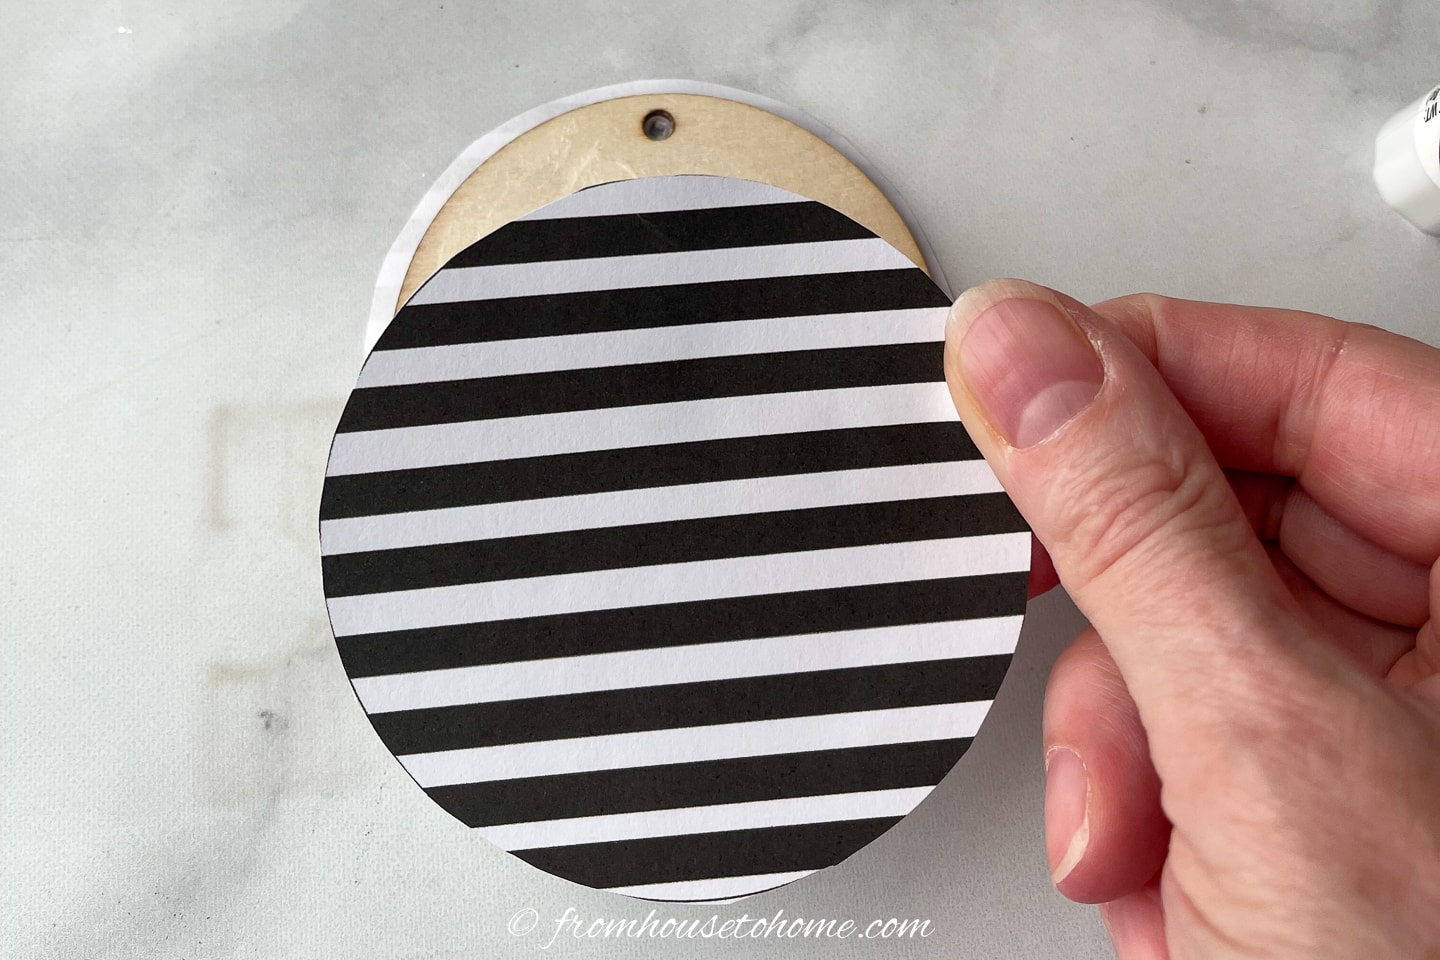
Attach a striped circle, ensuring the hole in the wood disc is at the top and the stripes are going horizontally.
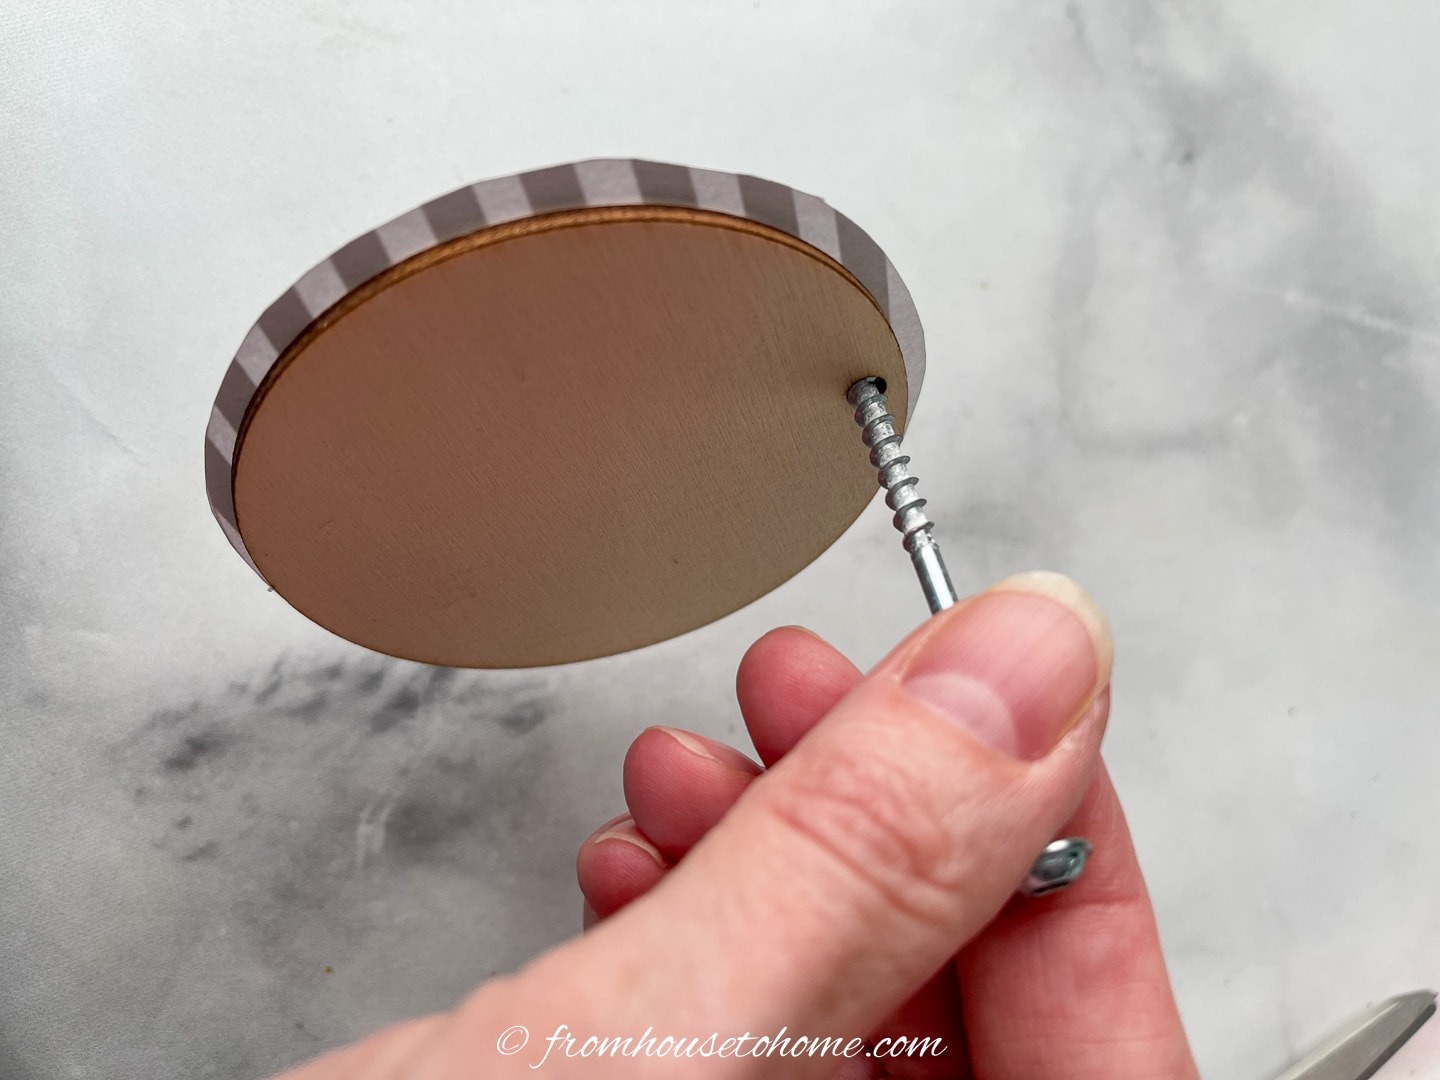
Use a pen or screw to puncture the paper at the same spot where the disc hole is.
Repeat the same steps on the other side of the disc, making sure to align the stripes in the same direction as the first circle.
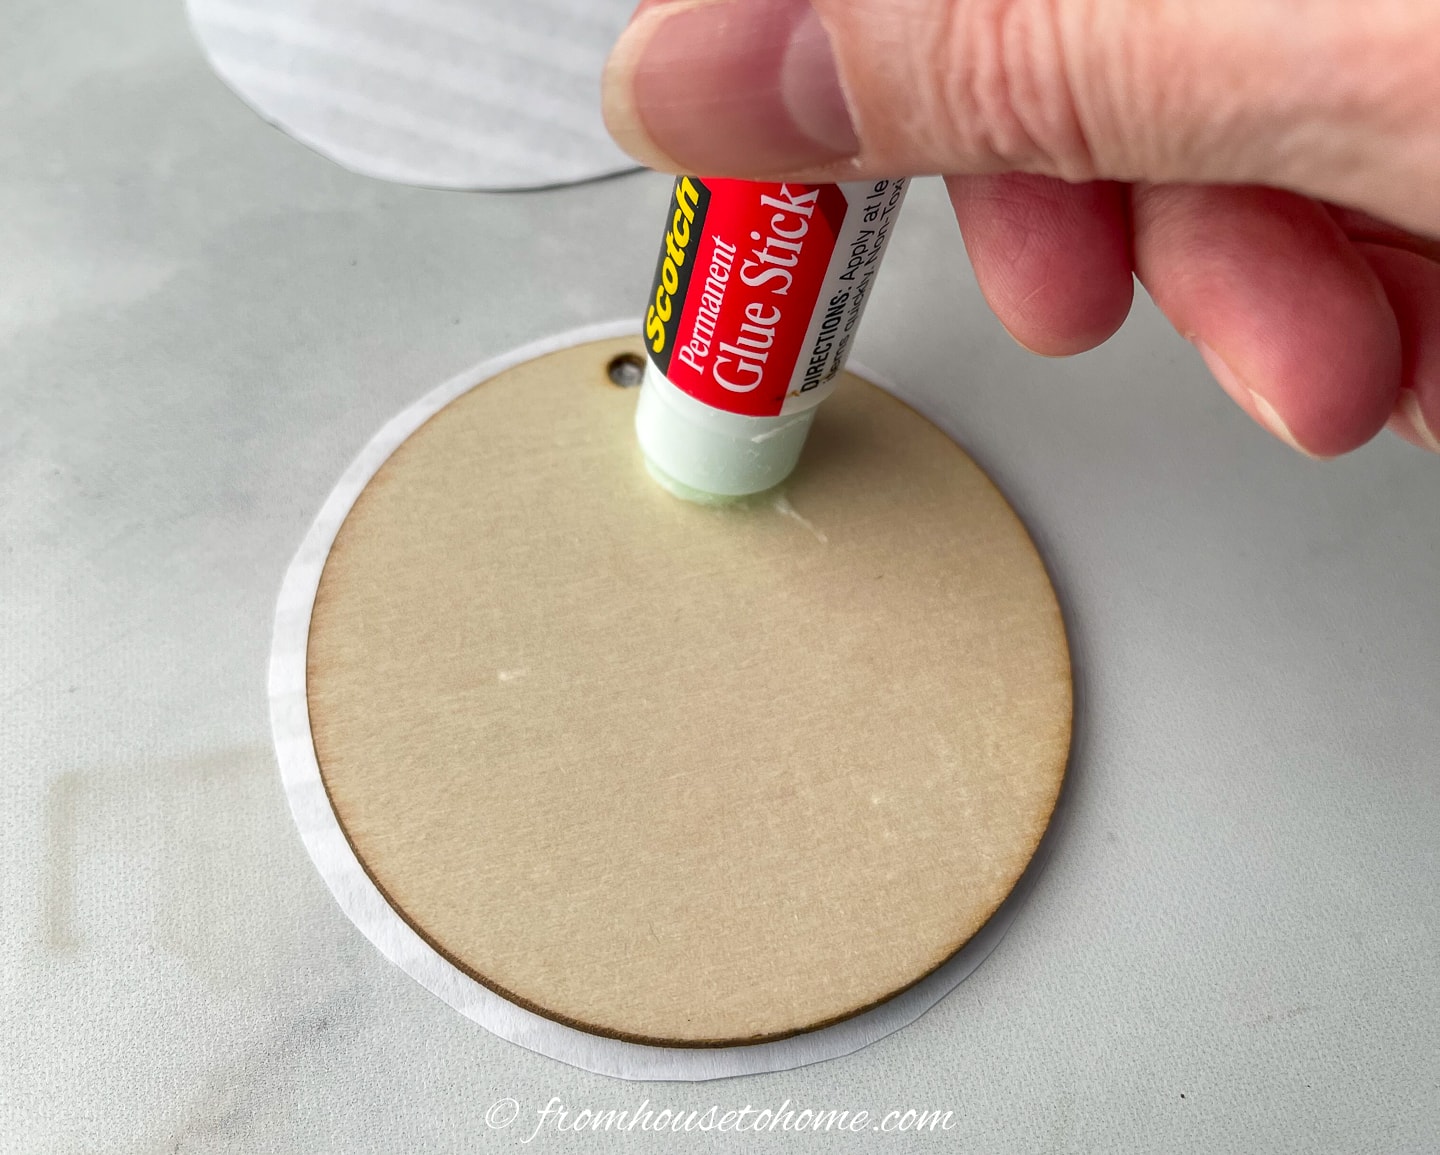
Step 5 | Glue on the hearts
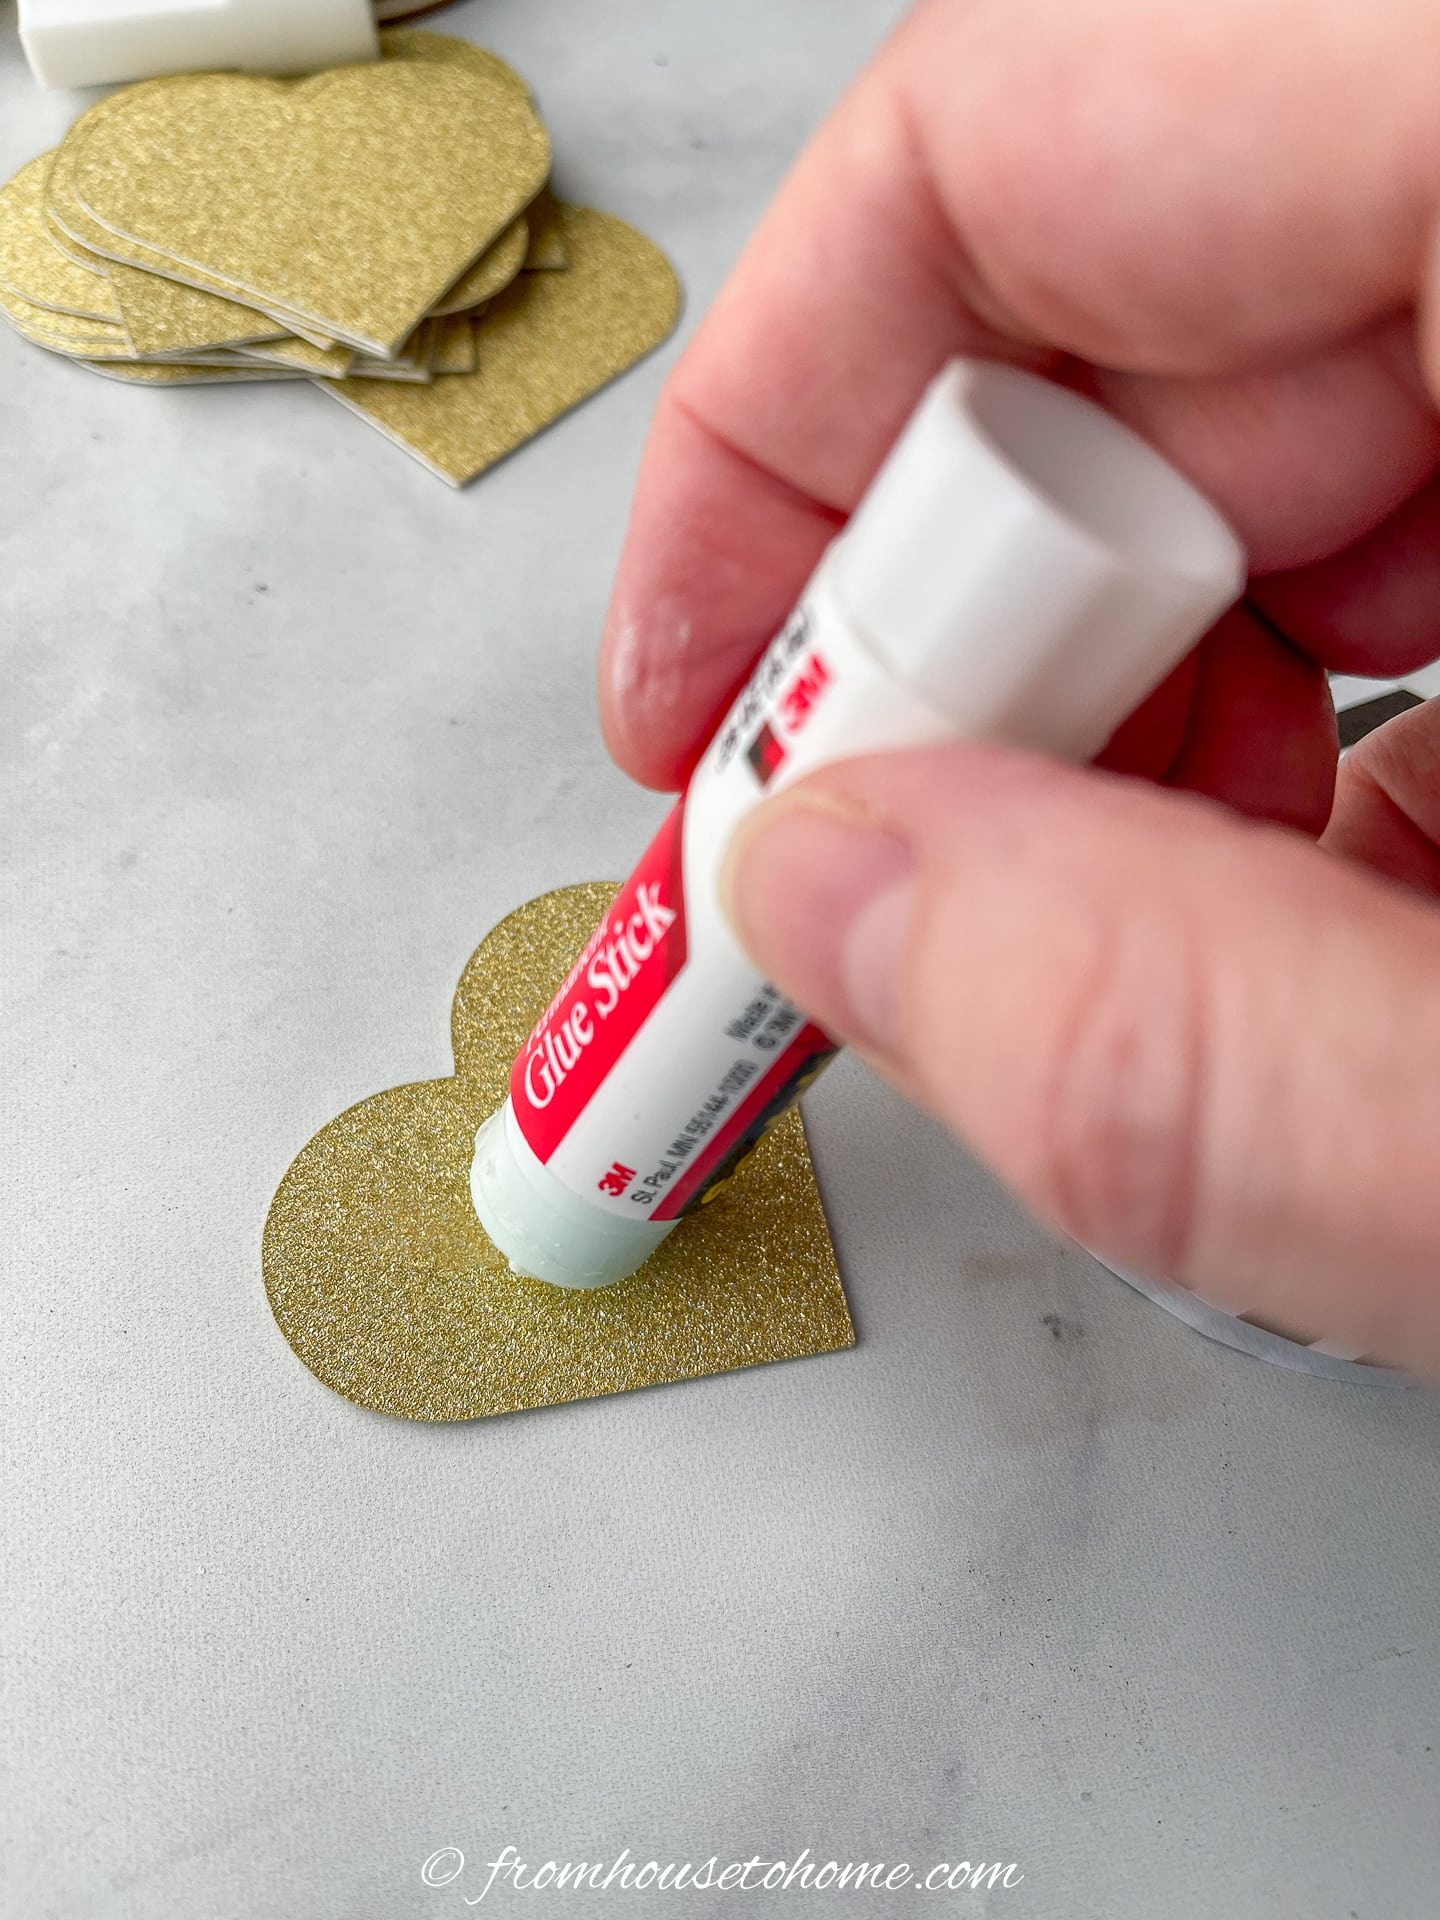
Next, add glue to one of the gold hearts.
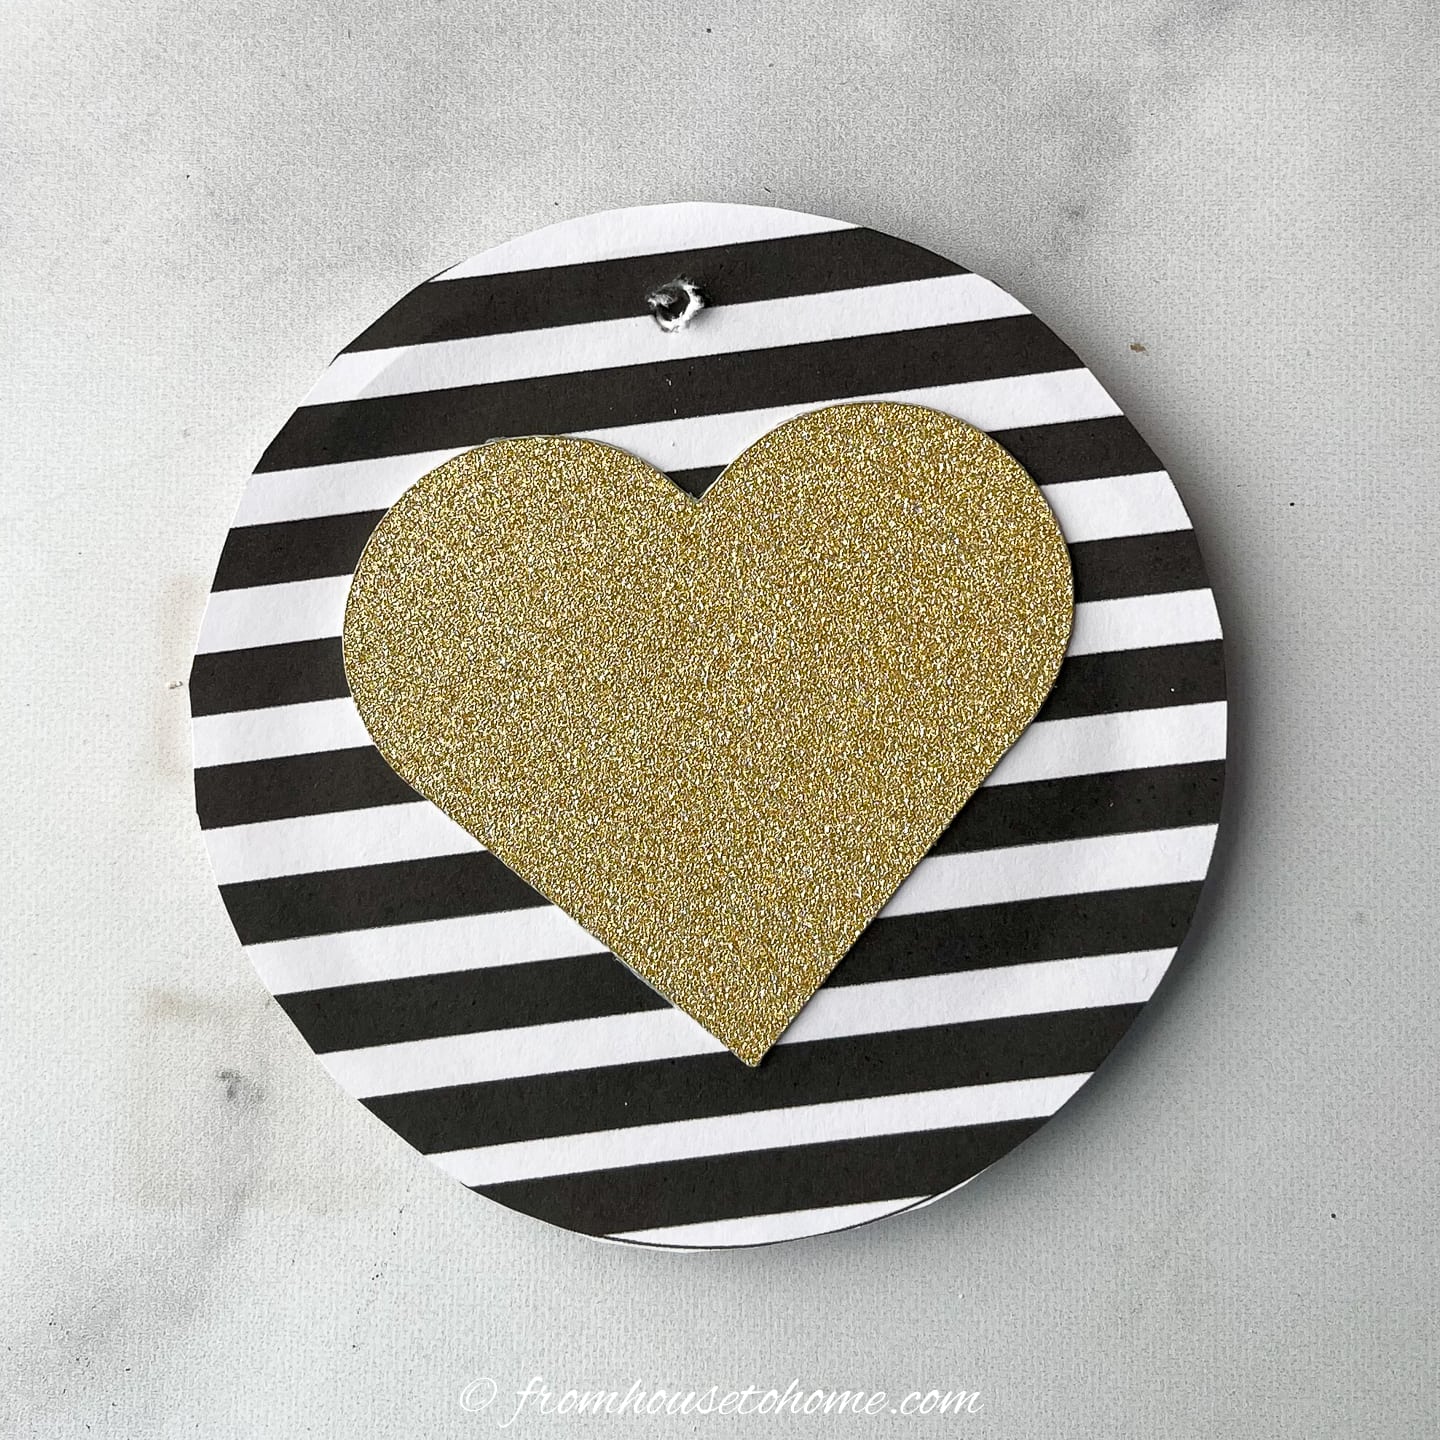
Make sure that the hole in the ornament is at the top and then stick the heart to the center of the black stripes.
For a complete look, you may also want to attach a heart to the opposite side. However, if you’re crafting a large number of ornaments and the backs won’t be visible, feel free to omit this part.
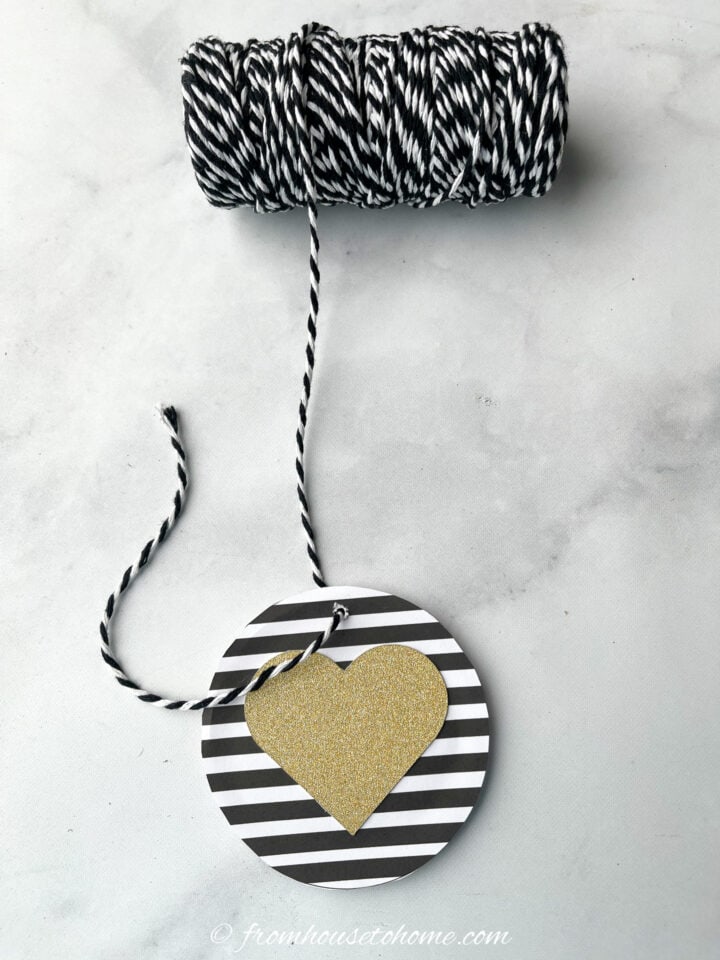
Step 6 | Attach the string
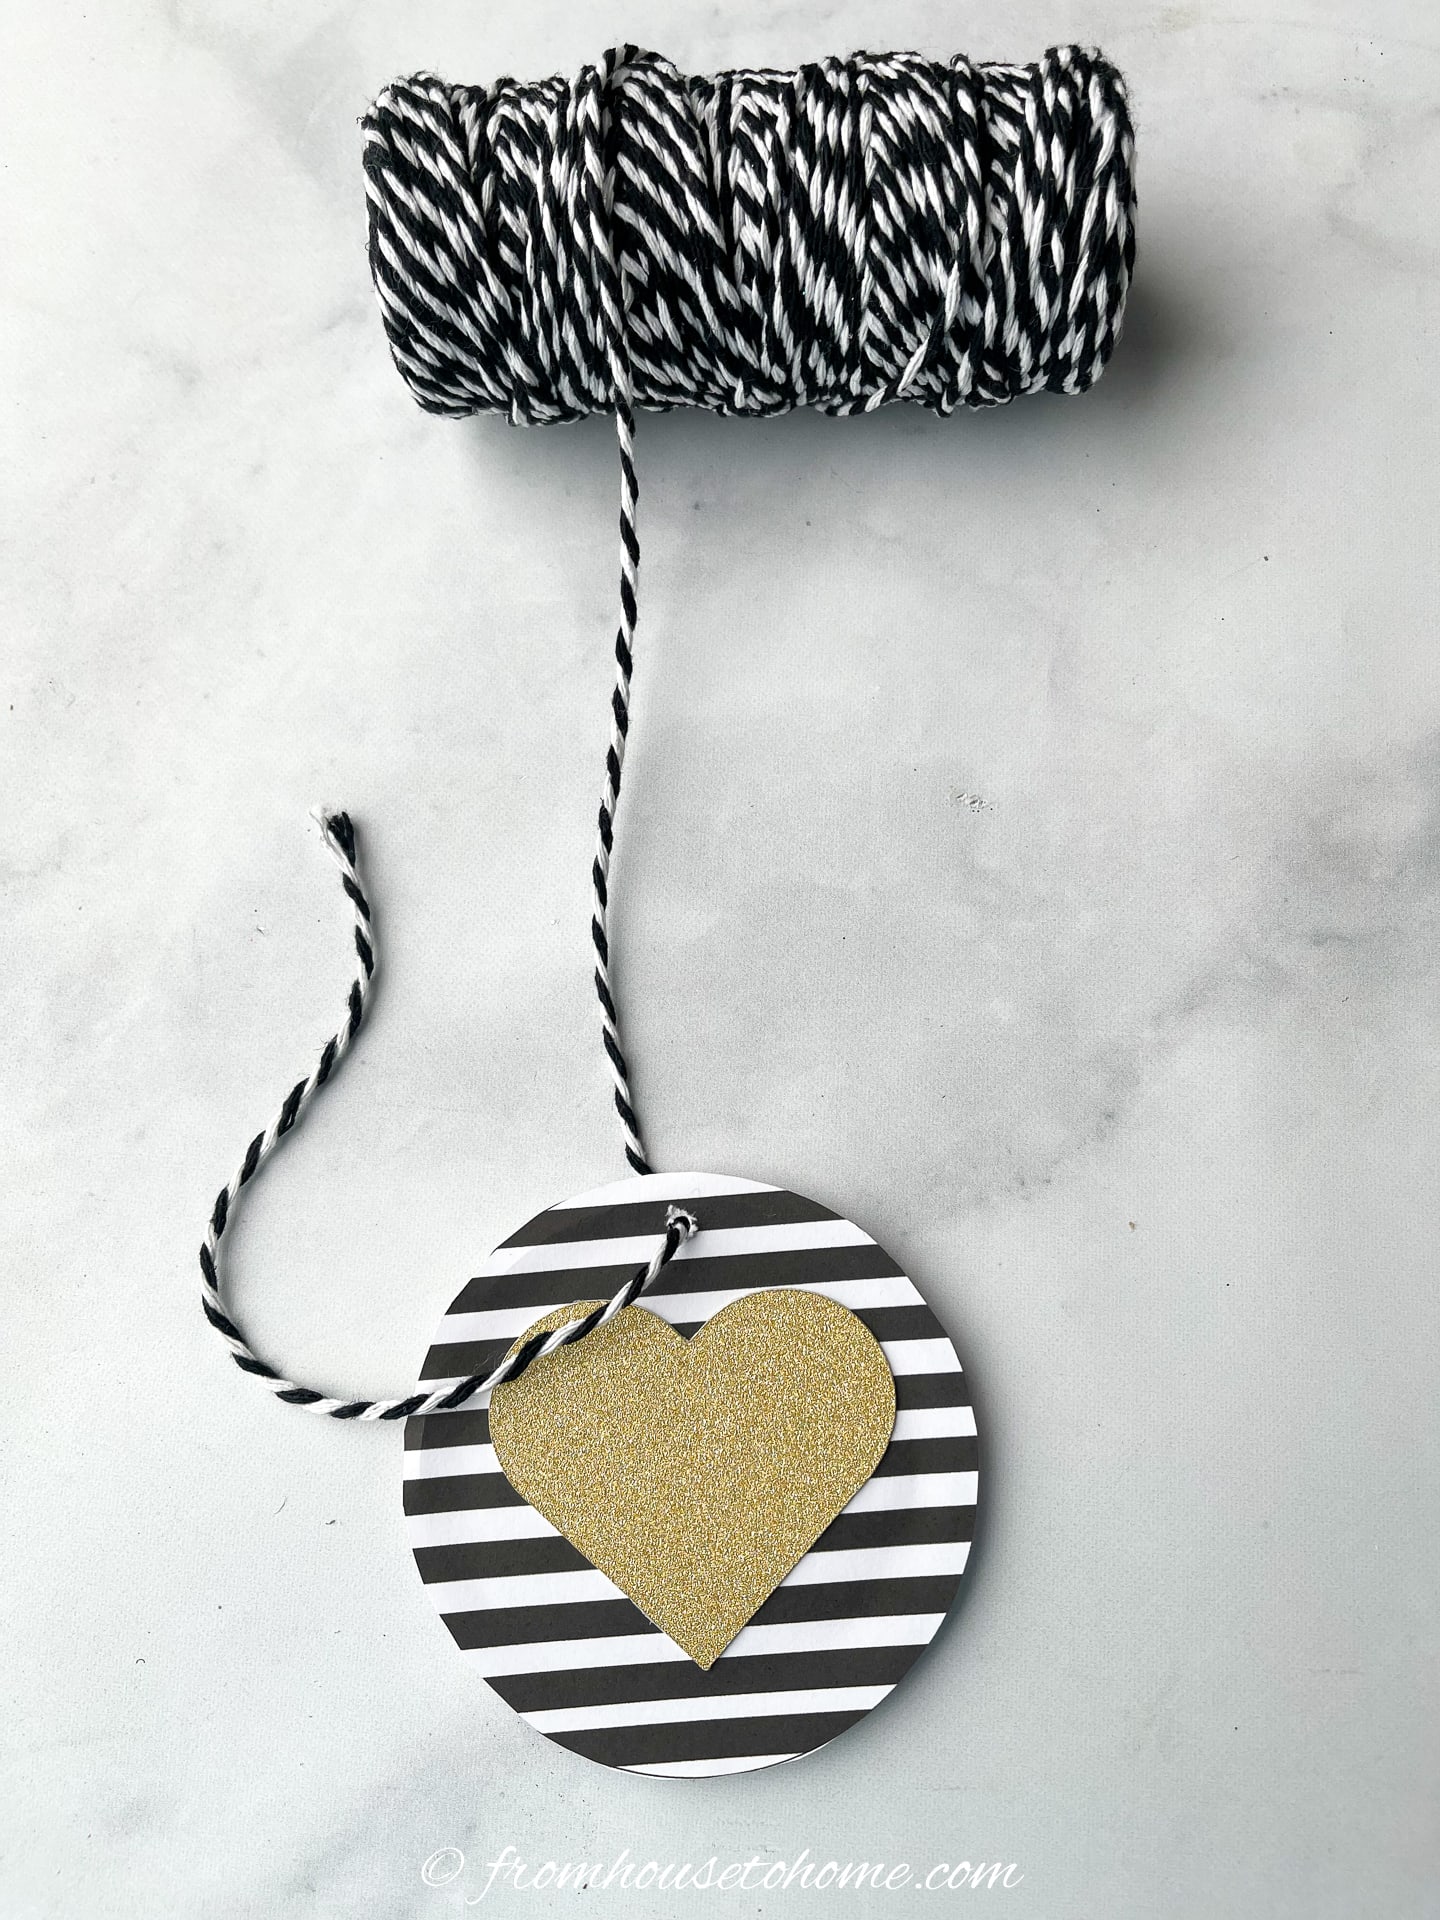
Now it’s time to attach the string for hanging your heart ornament.
While I chose a black and white string to match my color scheme, you could also use thread, fishing line, thin ribbon, or an ornament hook to hang them with.
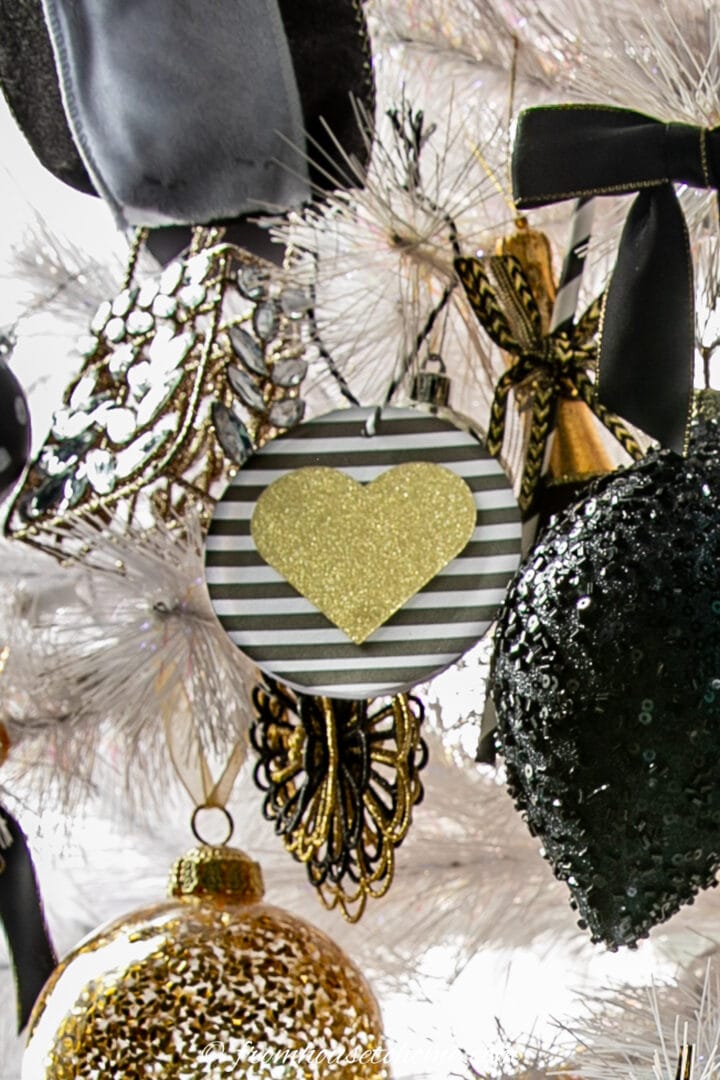
The finished ornament
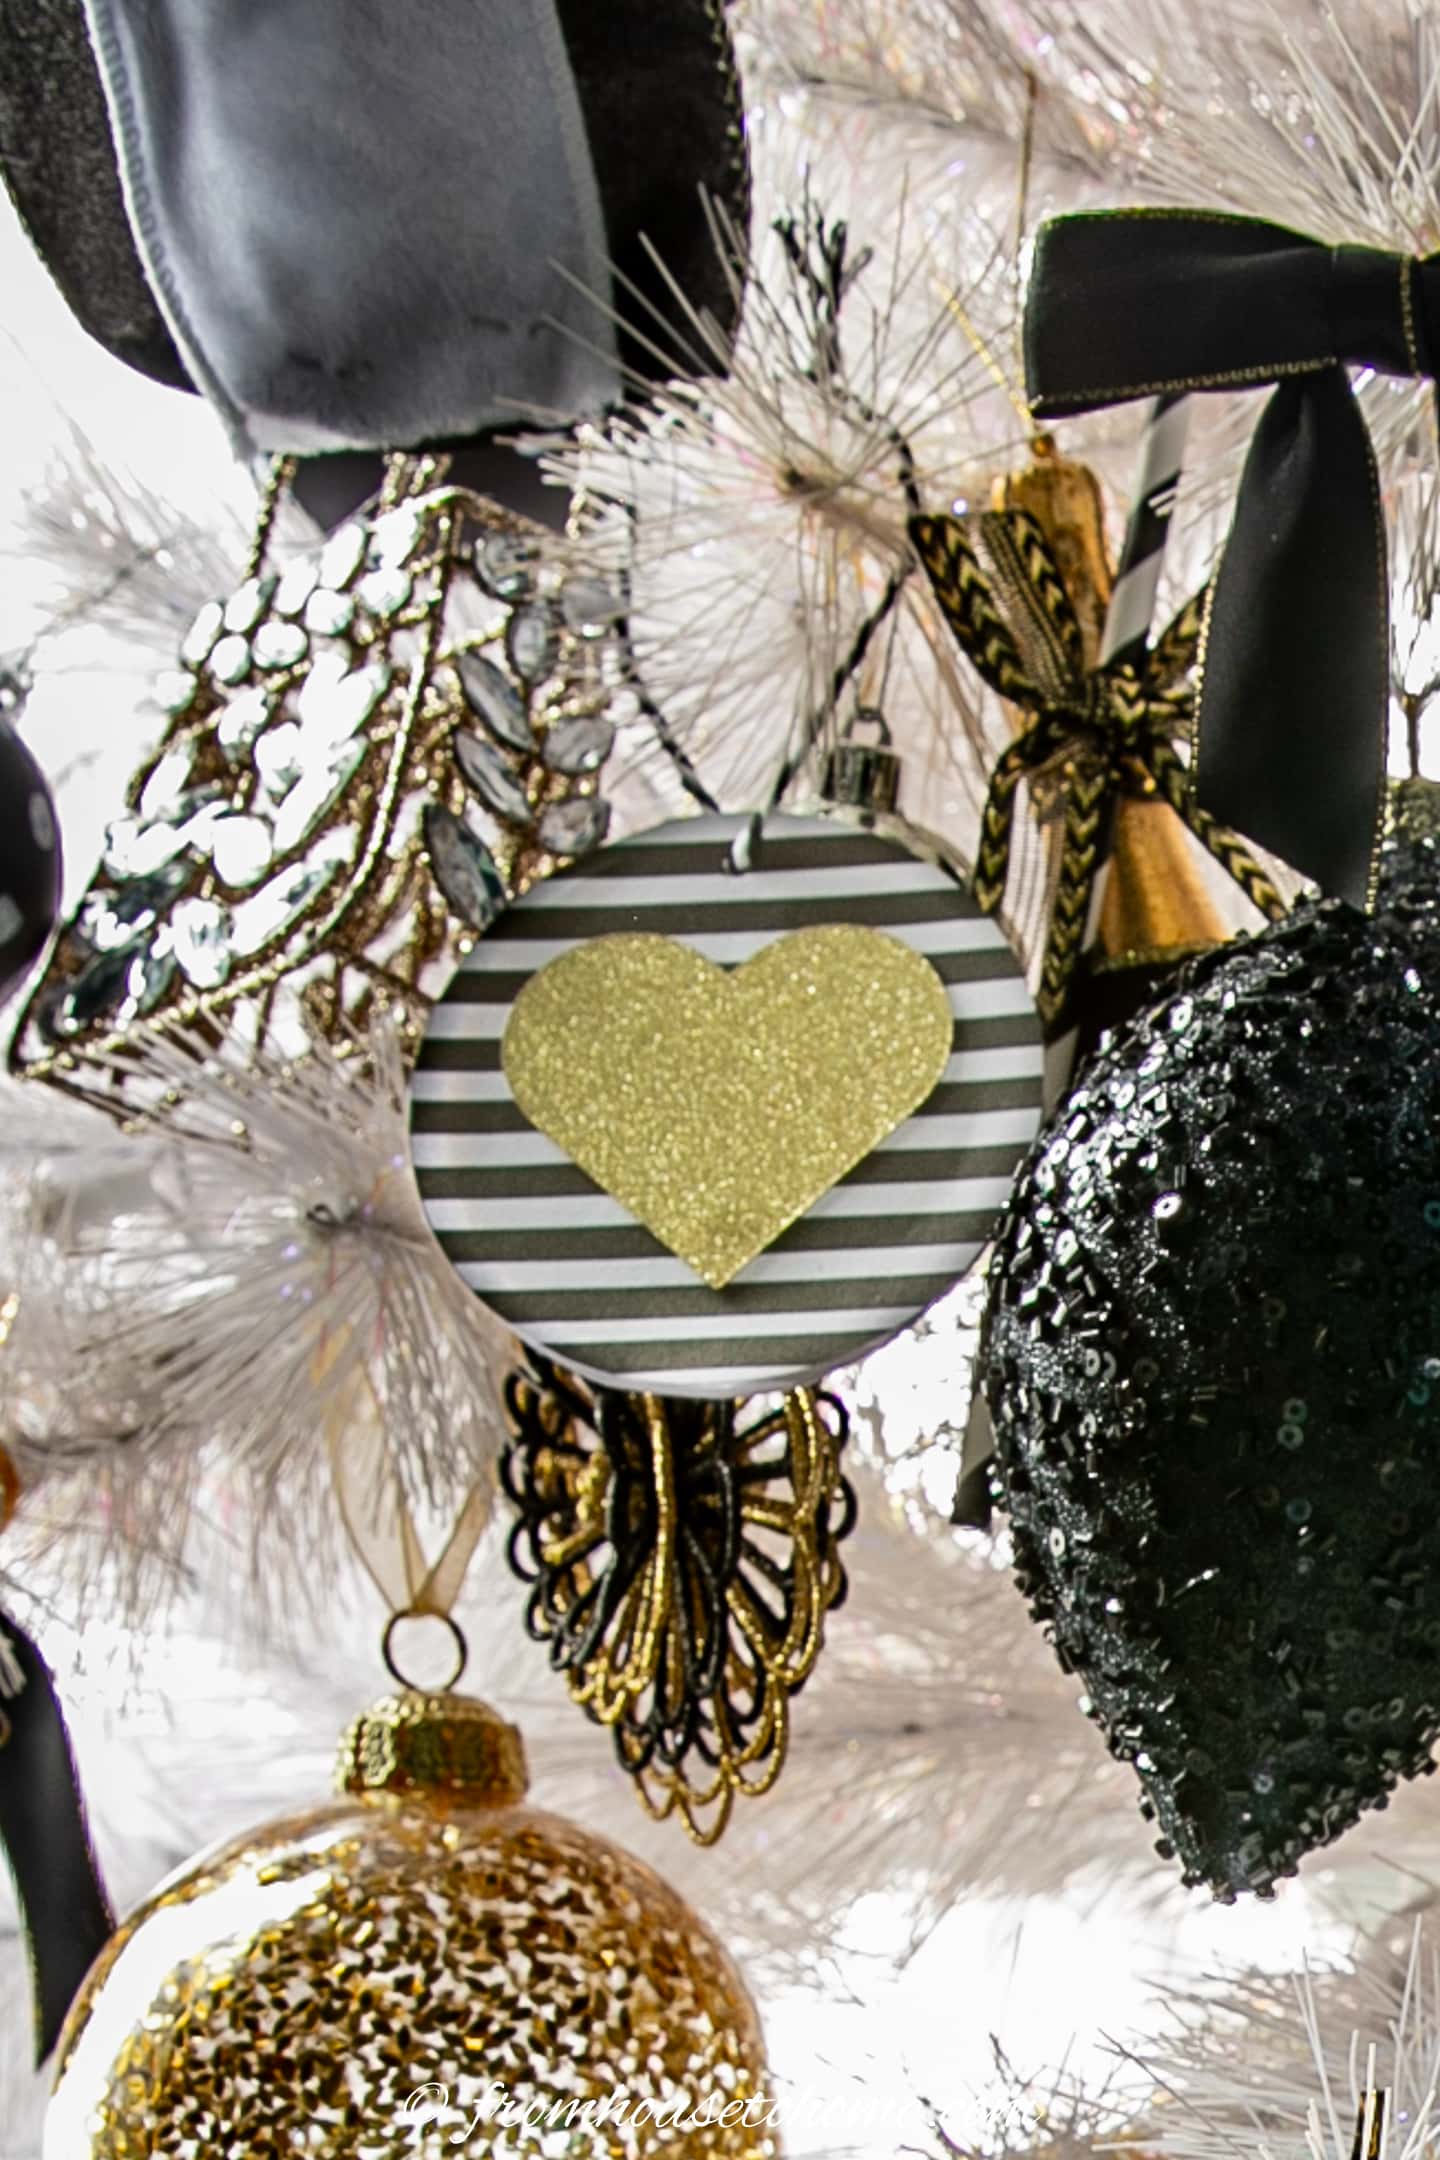
Once completed, hang the ornament on your Christmas tree.
It looks stunning on my white Christmas tree, especially when paired with other black ornaments.
Other black and white Christmas decor ideas you might like
- DIY Black And White Polka Dot Christmas Ornaments
- Black And White Plaid Christmas Tree
- Black, White And Gold Christmas Tree
Or browse all of our black and white Christmas decor ideas.
DIY heart Christmas ornaments
Equipment
- printer
- Pair of scissors
- pointy object like a screw or a pen
Materials
- 2 sheets 8½" x 11" pieces of paper
- 1 sheet gold glitter paper
- glue stick
- 6 3-inch round wood discs
- black and white string
Instructions
- Begin by signing up for our newsletter to access the free ornament design downloads.
- After downloading, print 2 copies of the black and white striped circle design on regular paper and 1 copy of the hearts design on gold glitter paper.
- Use scissors to cut out the circles featuring black and white stripes and the gold glitter hearts.
- Apply glue to one side of a wood disc.
- Stick one of the black and white circles on it, ensuring the hole in the wood disc is at the top and the stripes are running horizontally.
- Use a pen or screw to make a hole in the paper where the hole in the disc i.
- Repeat this process for the other side of the disc, ensuring the stripes match the direction of the first side.
- Apply glue to a gold heart and stick it onto the middle of one side of the ornament. Repeat this process on the other side of the ornament if desired.
- Attach a string, thread, thin ribbon or ornament hook to the ornament for hanging.
Notes
- If you have a Cricut, you can upload the heart design into Design Space and have it cut the hearts for you.