How To Hang Art On A Bookcase (And Still Have Easy Access To The Books)

Now that I finished my side project of updating my library, I am back to fixing the functionality of the craft area in my home office.
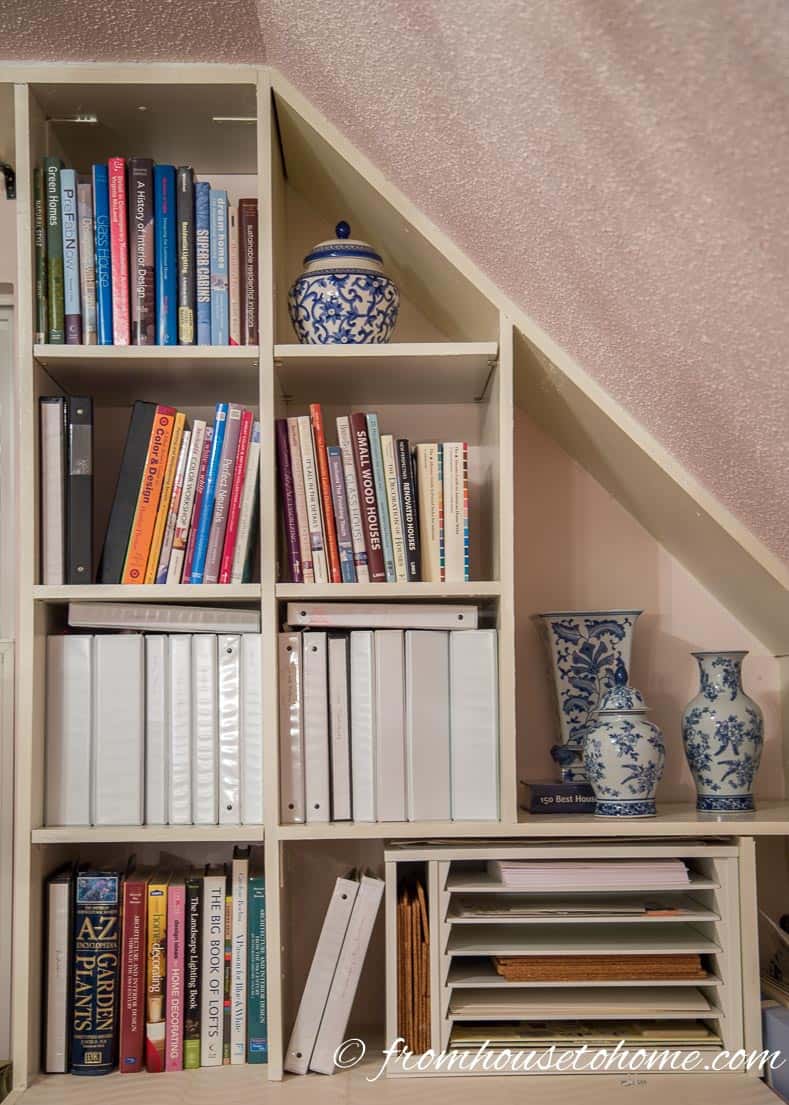
One of the big issues I have with this room is a lack of wall space. Since it’s in the bonus room over the garage, the top part of the walls are angled, so the straight part of the wall is only 5 feet high. And I have already used most of that wall space with storage solutions for my fabric rolls and fabric ladder.
That means I had to get creative in finding spaces to hang things. And since the one tall wall is covered with a bookcase, I started to think of ways that I could use the front of the shelves as vertical wall space.
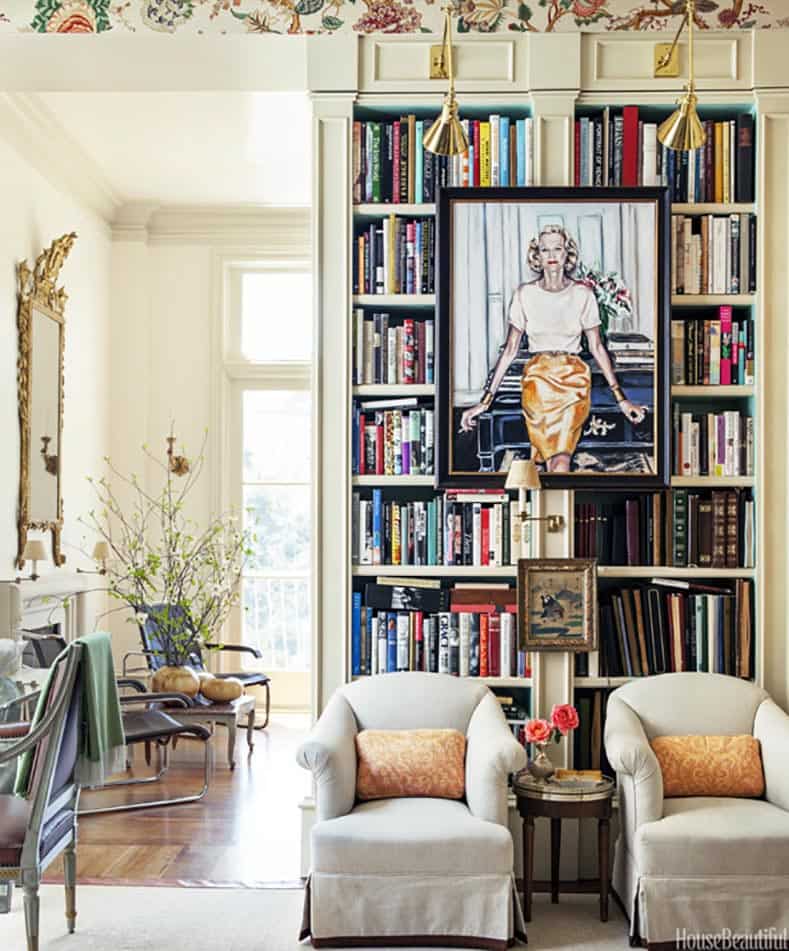
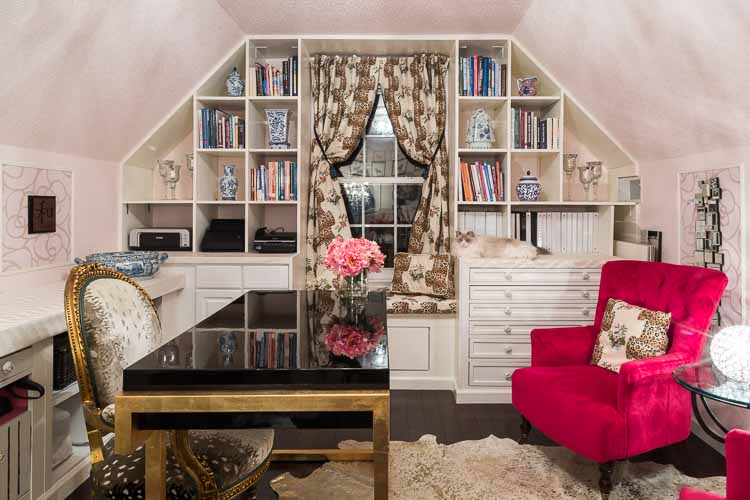
I have always loved the look of bookcases with art hung on them, like this living room I found on housebeautiful.com (design by Alex Hitz. Photography by Lisa Romerein.) But I have never done it because I thought it would be too hard to get at the books behind the picture.
And certainly in my office / craft room, I need to be able to get at the things on my shelves!
Which means? A perfect opportunity for a DIY project…to hang art on a bookcase and still have easy access to the books. Keep reading to find out how.
What You Need
To make this work, you need a wooden frame that should be at least 1″ wide and 1/2″ thick.
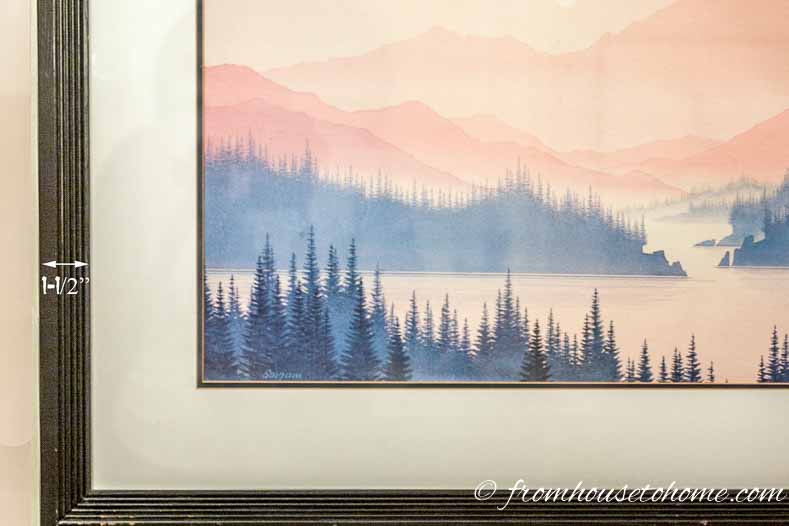
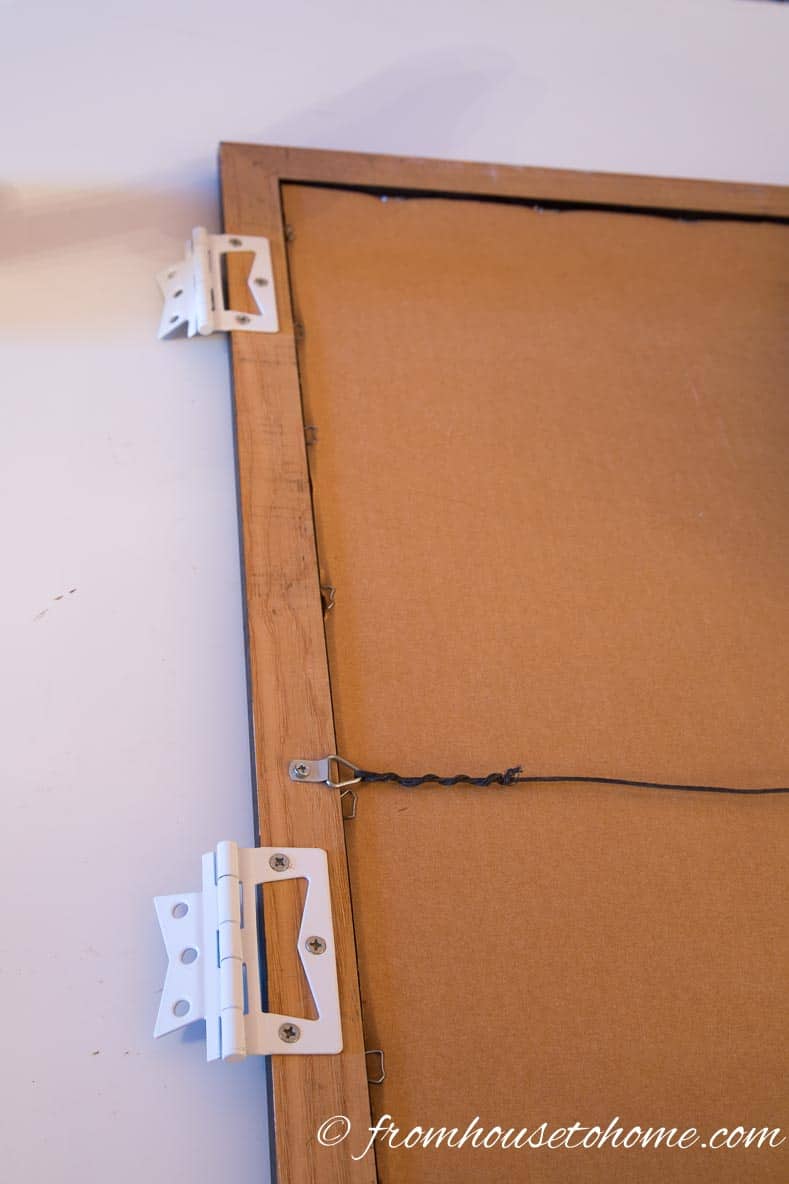
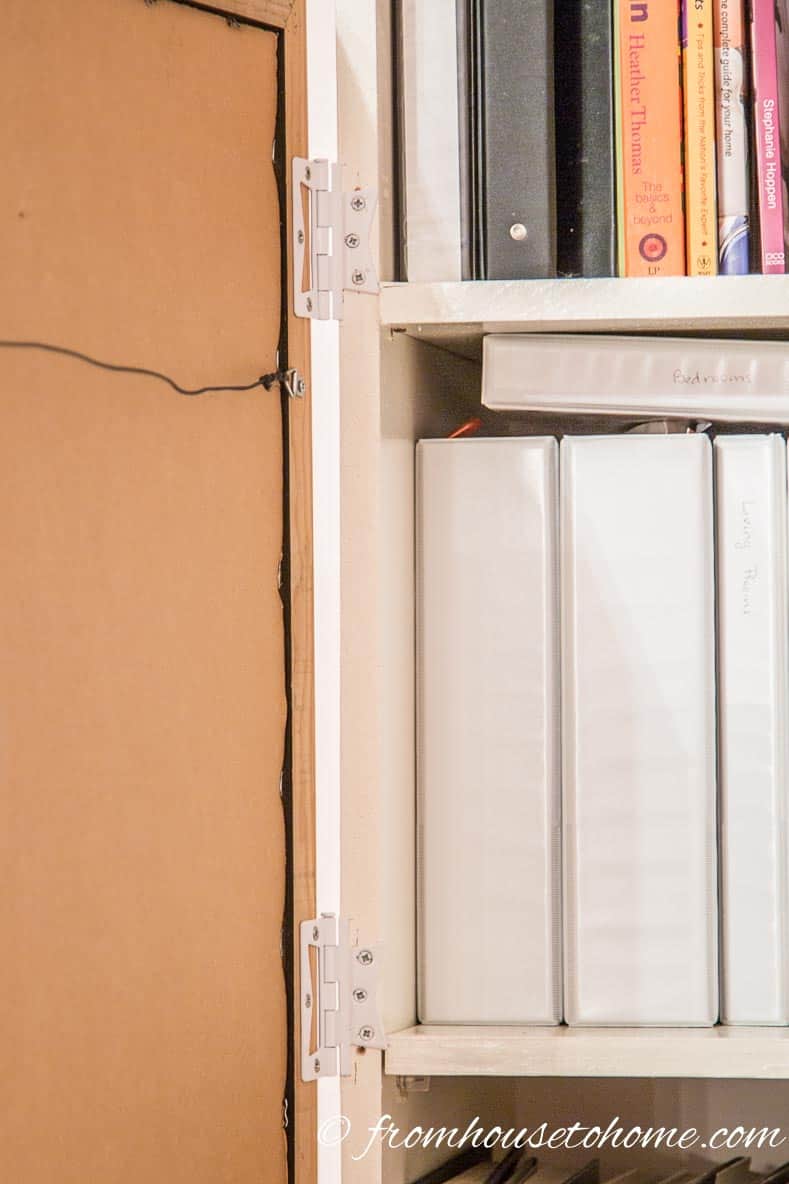
You also need to be able to hang the art so one edge of the frame is running along the edge of either an upright or a shelf. In other words, you need somewhere to attach the hinge to the shelf.
Then you need hinges that are narrow enough to be screwed into both the shelf and the frame.

Using non-mortise hinges* makes sure that you don’t have to cut into either the frame or the shelf to install them. I bought white ones so that they would blend in with the color of the shelves.
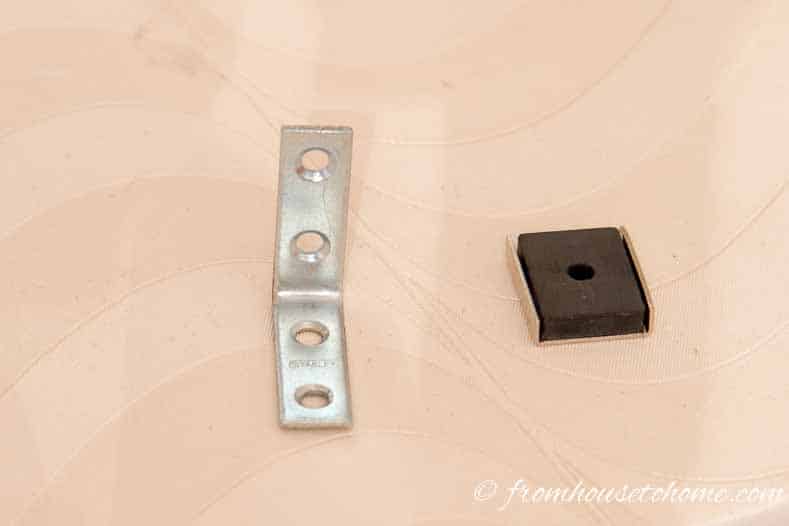
Finally, a small angle bracket* and a magnet with a hole* will keep the picture closed against the shelf.
Attach the Hinges To The Frame
1. First, check to make sure that the screws which come with the frame are the right length…you don’t want them to go all the way through the frame In my case, I had to swap them out for shorter ones (1/2″ screws).
2. Then decide where you will line up the hinge with the frame. My hinges had a bump out that made it easy to make this decision. The key is that you want to make sure the hinges are straight and both installed the same way…otherwise you will have a lot of problems getting the art to hang straight.
3. Install the screws but don’t screw them all the way in.
4. Then make sure that the hinges are straight and finish installing the screws.
Attach the Hinges To The Shelf
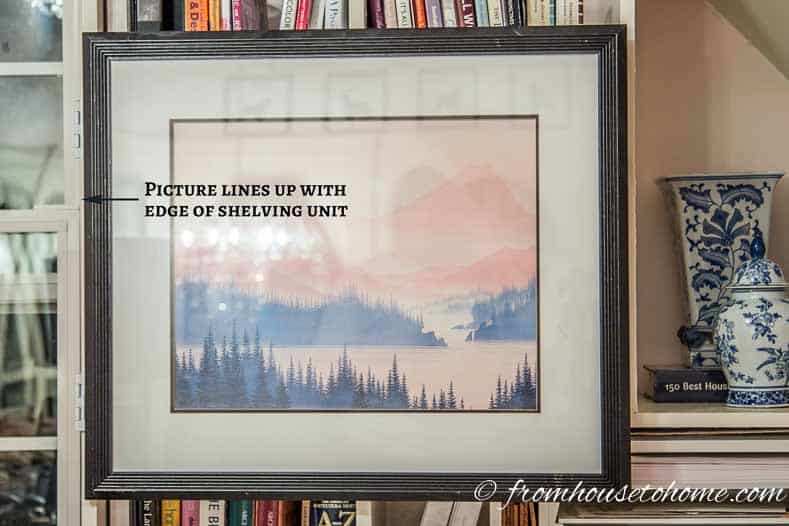
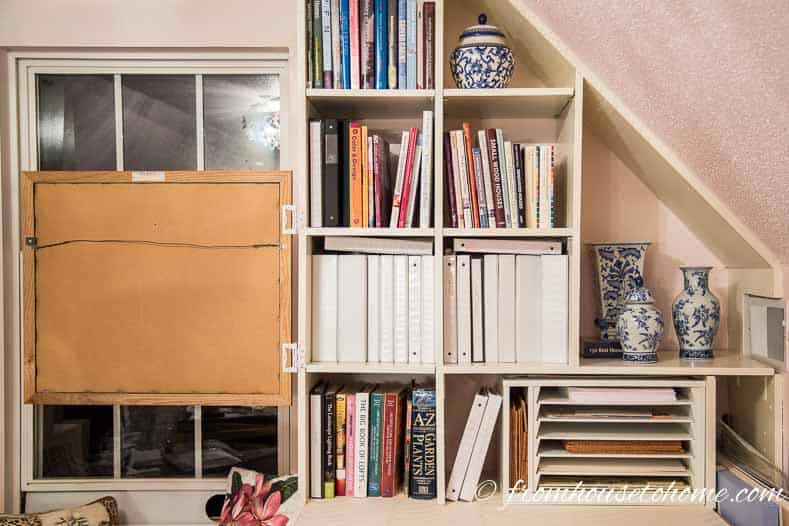
1. The first step is to decide where the picture should be positioned on the shelf.
Since I don’t usually have a helper, I put those books to work! By stacking them up and placing the picture on top, I can step back and make sure I like the position of it before I hang it.
2. Attach the hinges to the bookshelf by screwing in a couple screws on each hinge part way. Swing the picture closed to make sure it is level.
3. When you are satisfied that it is level, finish installing the rest of the screws. If the picture isn’t level, or you don’t like the height, you may have to re-position (which I did as you can tell from the extra holes).
Use a Magnet To Keep The Picture Closed
1. A small angle bracket and a magnet with a hole will help to keep the picture closed.
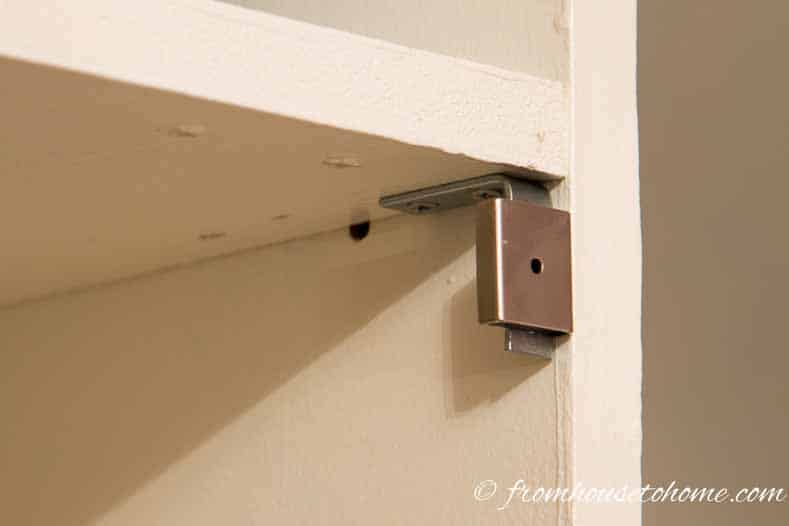
2. Install the angle bracket on the book case. It should be installed back far enough so that the magnet will not hold the picture out too far. To do this, stick the magnet to the bracket and make sure that it is lined up with the edge of the shelf.
It also needs to be close to the edge of the picture so that the magnet can be screwed into the picture frame.
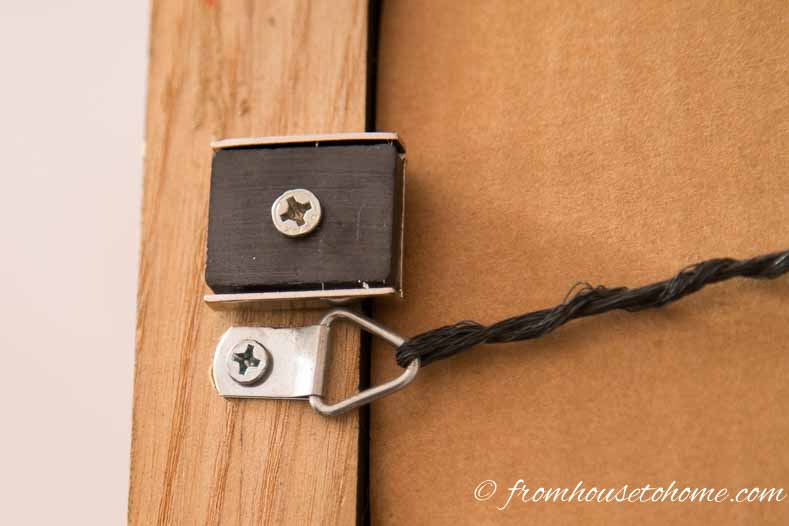
3. Attach the magnet to the frame at a height that will hit the bracket on the shelf.
Test your installation to make sure the magnet is holding the picture closed.
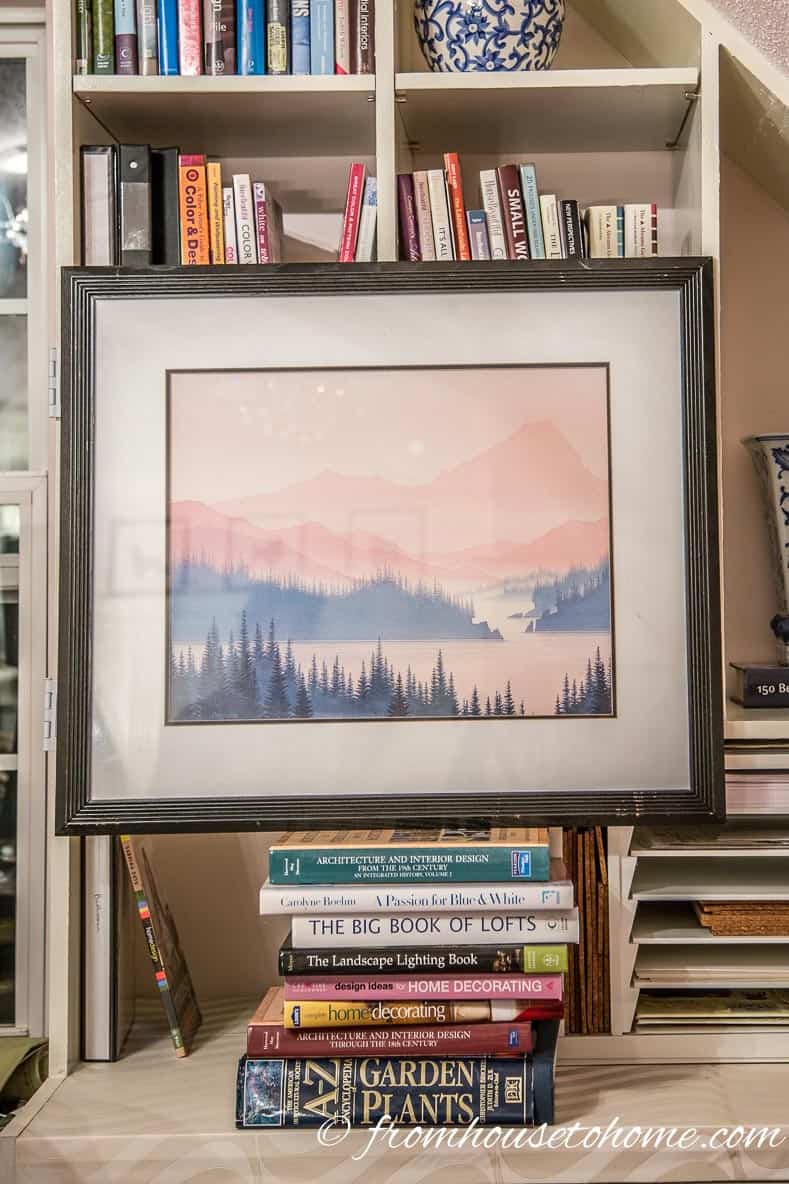
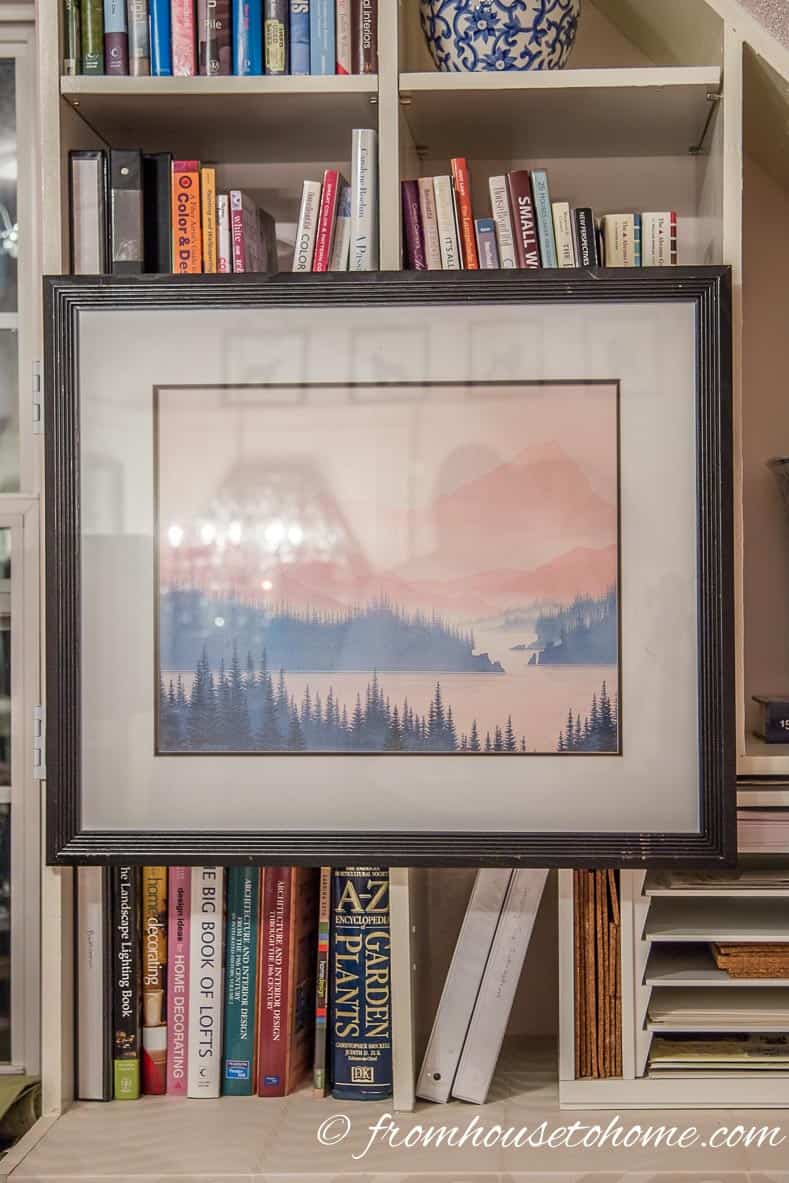
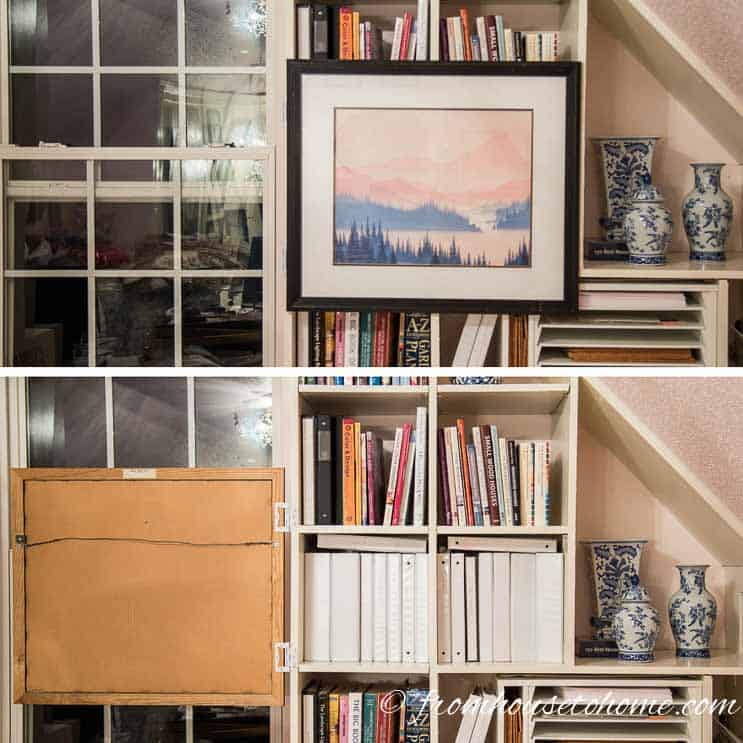
The Finished Project

Enjoy your finished project…displaying artwork while still being able to get at the shelves easily.
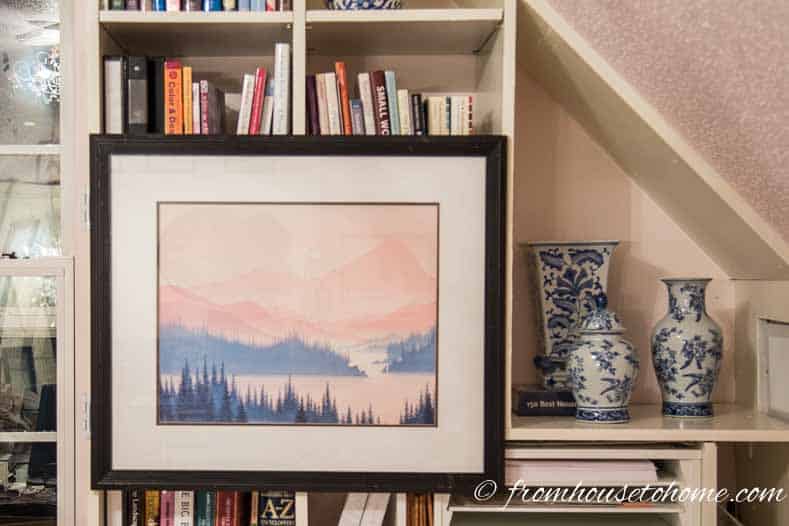
It covers up the things that you don’t want everyone to see.
But opens very easily when you want to get at the shelf contents.
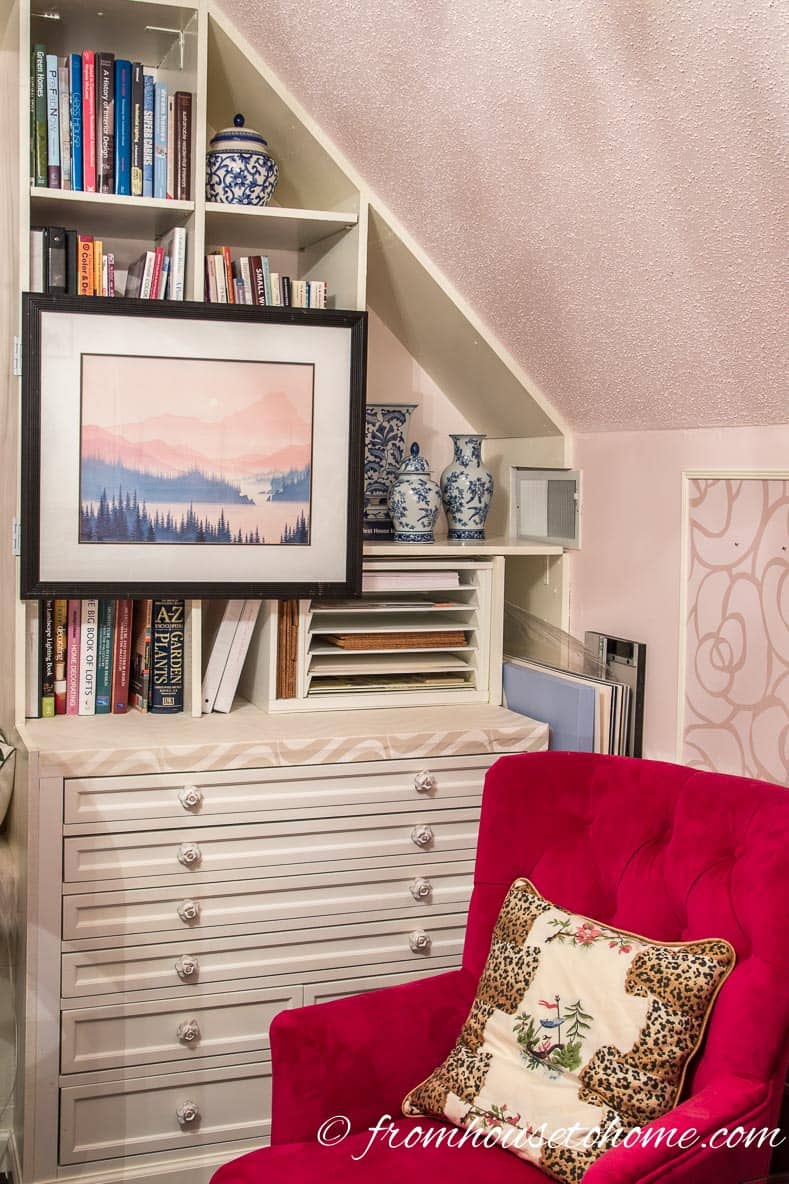
And I think it makes the shelves look so much better in my office.
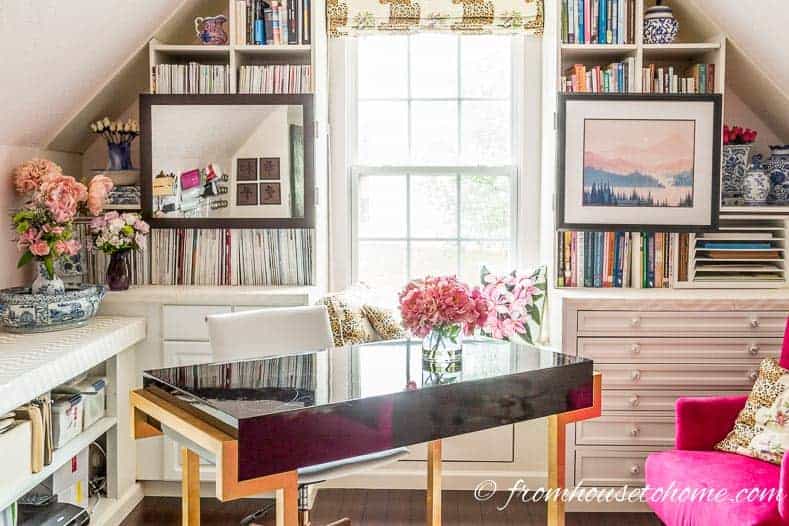
I liked it so much that I did the same thing with a mirror on the other half of the shelves.
Now that I’ve got those ugly binders covered up, I can get on with the rest of my office craft area organization projects.
Comments or questions on how to hang art on a bookcase (and still have easy access to the books)? Tell us in the section below.
This post was originally published on October 10, 2016 but was updated with new content on May 29, 2019.
This is a fantastic idea! I am doubly amazed that you did this-twice-so level and so sturdy! Still, my eyes keep drifting to the halves of the books and binders that peek out above and below the picture. Since you only describe the frame and not your choice of picture, why not start with a frame that will reach from the bottom of one shelf to the top of another? Then the whole shelf is covered and I don’t feel the urge to tell the picture its slip is hanging out.
Thanks, Nancy! I agree it would look neater if the picture covered the whole shelf. I was re-using pictures that I already had so they weren’t exactly the right size, but if I were buying new ones I would definitely try to find ones that fit the shelves exactly 🙂