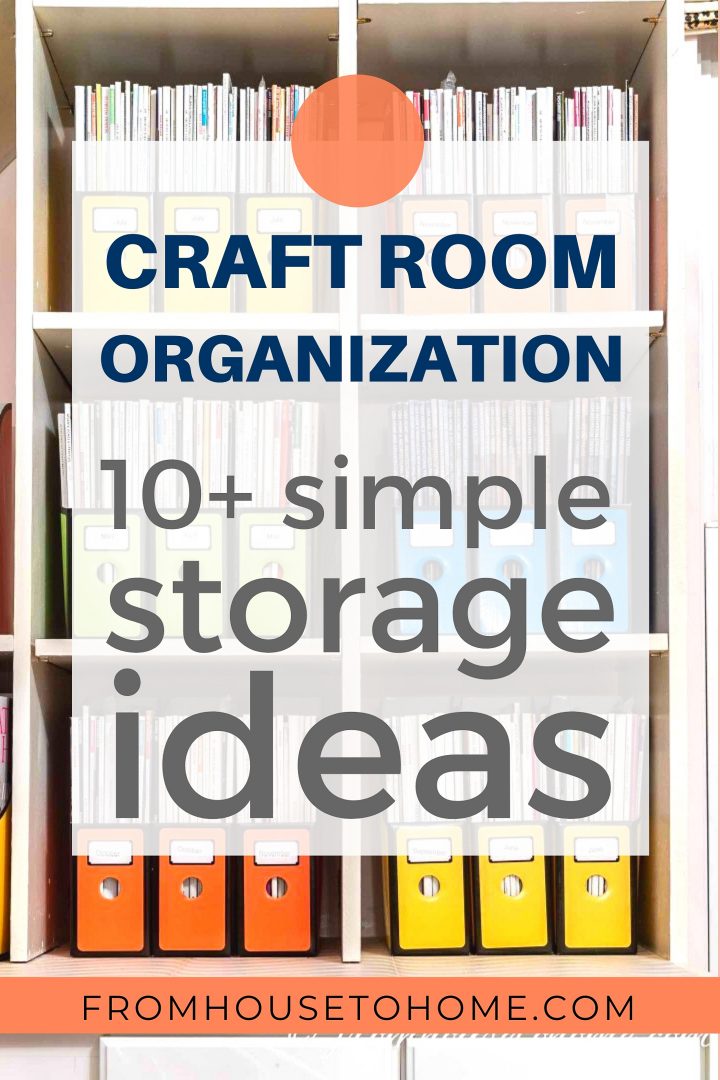
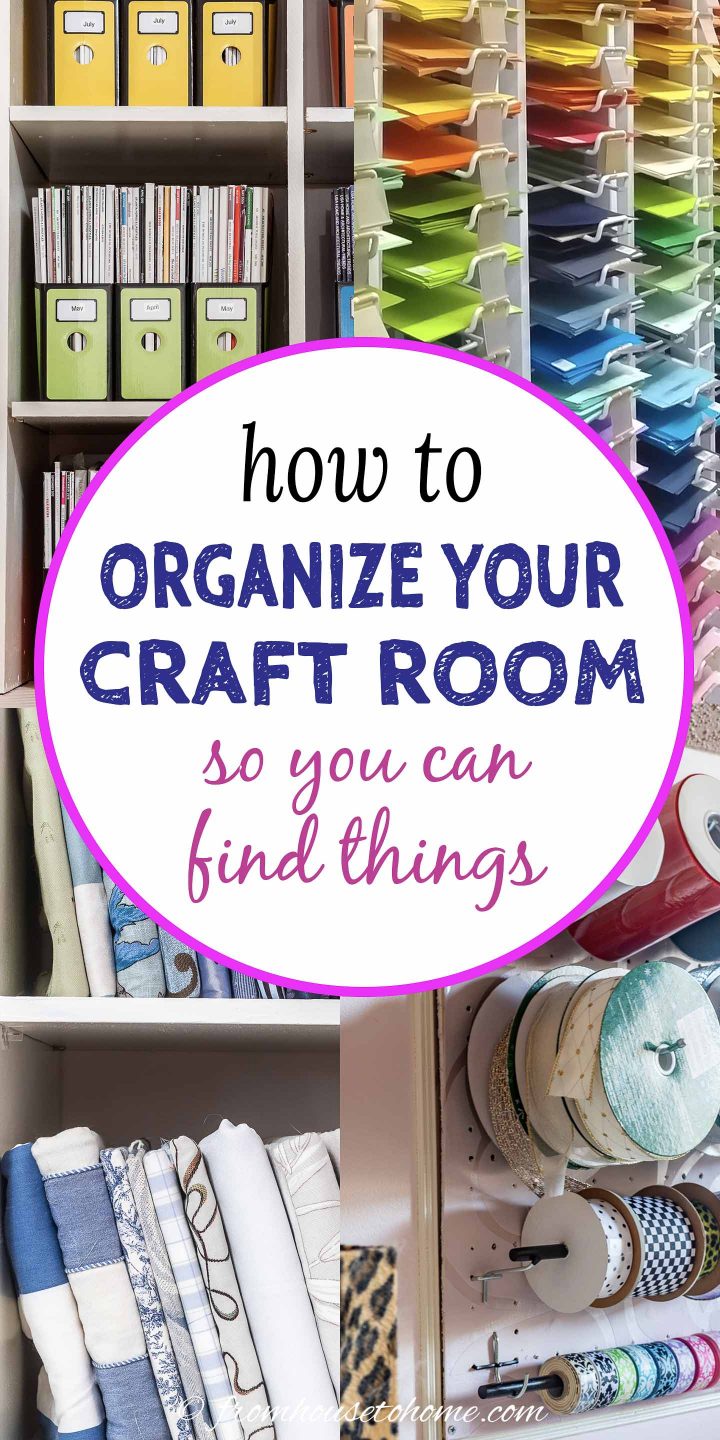
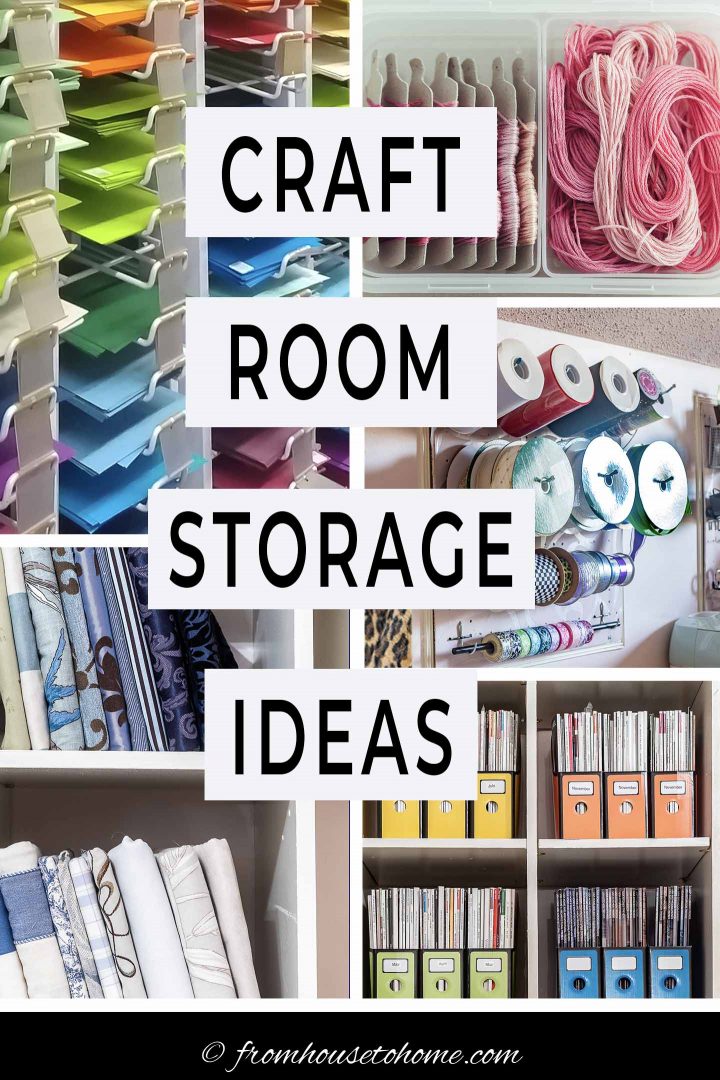
Sewing & Craft Room Organization: 10+ Amazingly Simple Storage Ideas


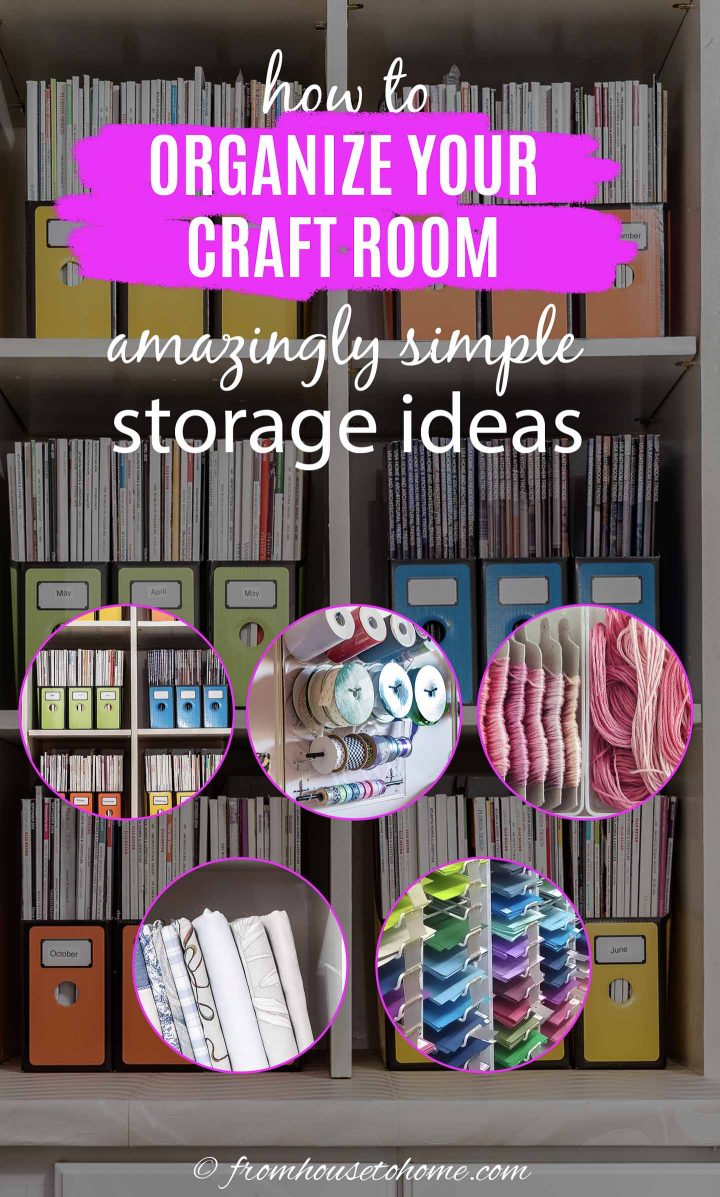
When I decided to turn the bonus room into a home office and craft room, I knew I was going to need to add some craft room organization and storage ideas to make the area functional. These creative and dual-function solutions make the most of the small space.

Craft Room Organization and Storage Ideas
I’m not sure how it happens, but despite my best efforts, there always seems to be at least one room in my house that is in serious need of organizing.
First it was my kitchen (you can see my kitchen organizing projects HERE).
Then it was the garage and my tools.
Now it’s my craft room and sewing area.
Okay, maybe I know how it happens…if you don’t have designated spots for things to go that are easy to find and get at, those things end up getting dumped on the countertop or work table. And pretty soon you end up with a pile of stuff and no space to work.
So that was the goal. Set up craft room organization and storage solutions that make things easy to access (and put away).
Since my craft room is a shared space with my office in a room that isn’t very big to begin with, these craft room organization ideas also have to fit in a small area.
As usual, I like to do these kinds of projects with the least amount of cost and effort possible, so they had to be inexpensive and easy to do, too!
Keep reading to see the simple sewing area and craft room organization and storage ideas that worked for me.
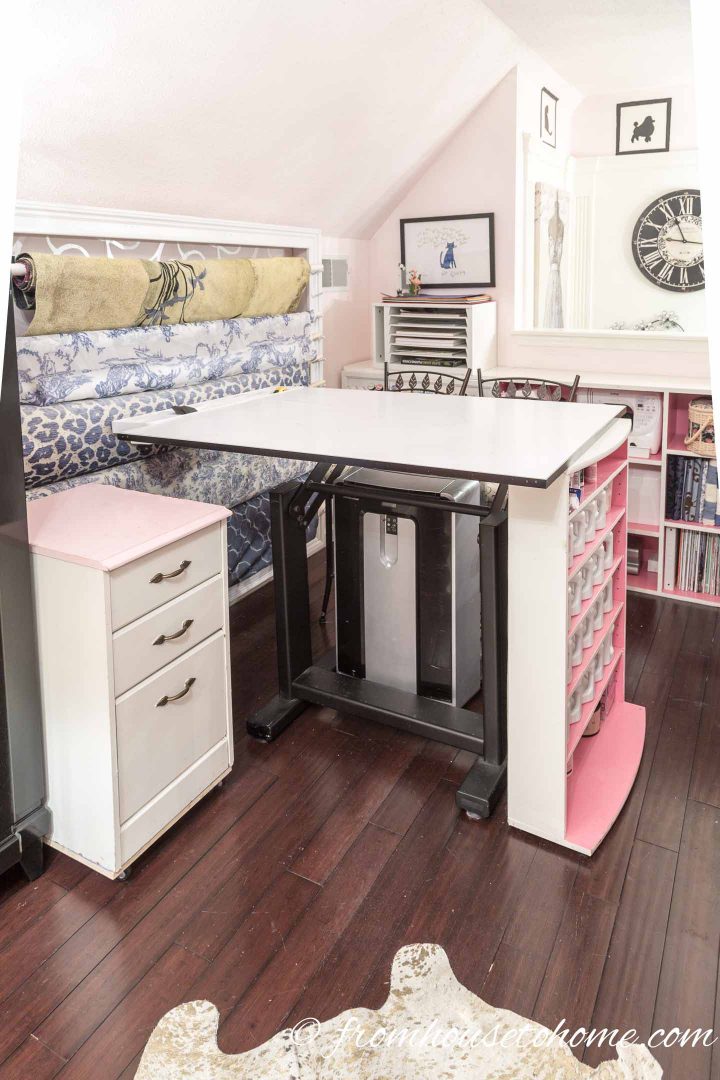
1. Get A Versatile Craft Room Table
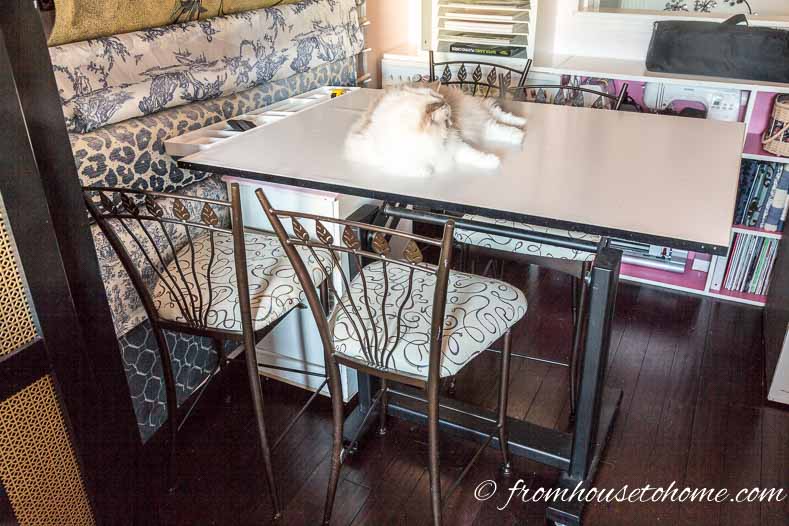
I knew when I was setting up my craft room that I wanted to have a large craft room table. And although it’s not strictly a craft room organization project, getting the right table is important for making the room functional.
The problem is that my craft room is fairly small and there are times when I need to use all of the floor space for large DIY projects. So I wasn’t sure where I would put the table.
Then I remembered the adjustable height drafting table* that I had from my interior design classes.
If you position the top so that it is flat, it is a great craft room table with lots of work area. You can even change the height depending on whether you want to sit or stand while you are working.
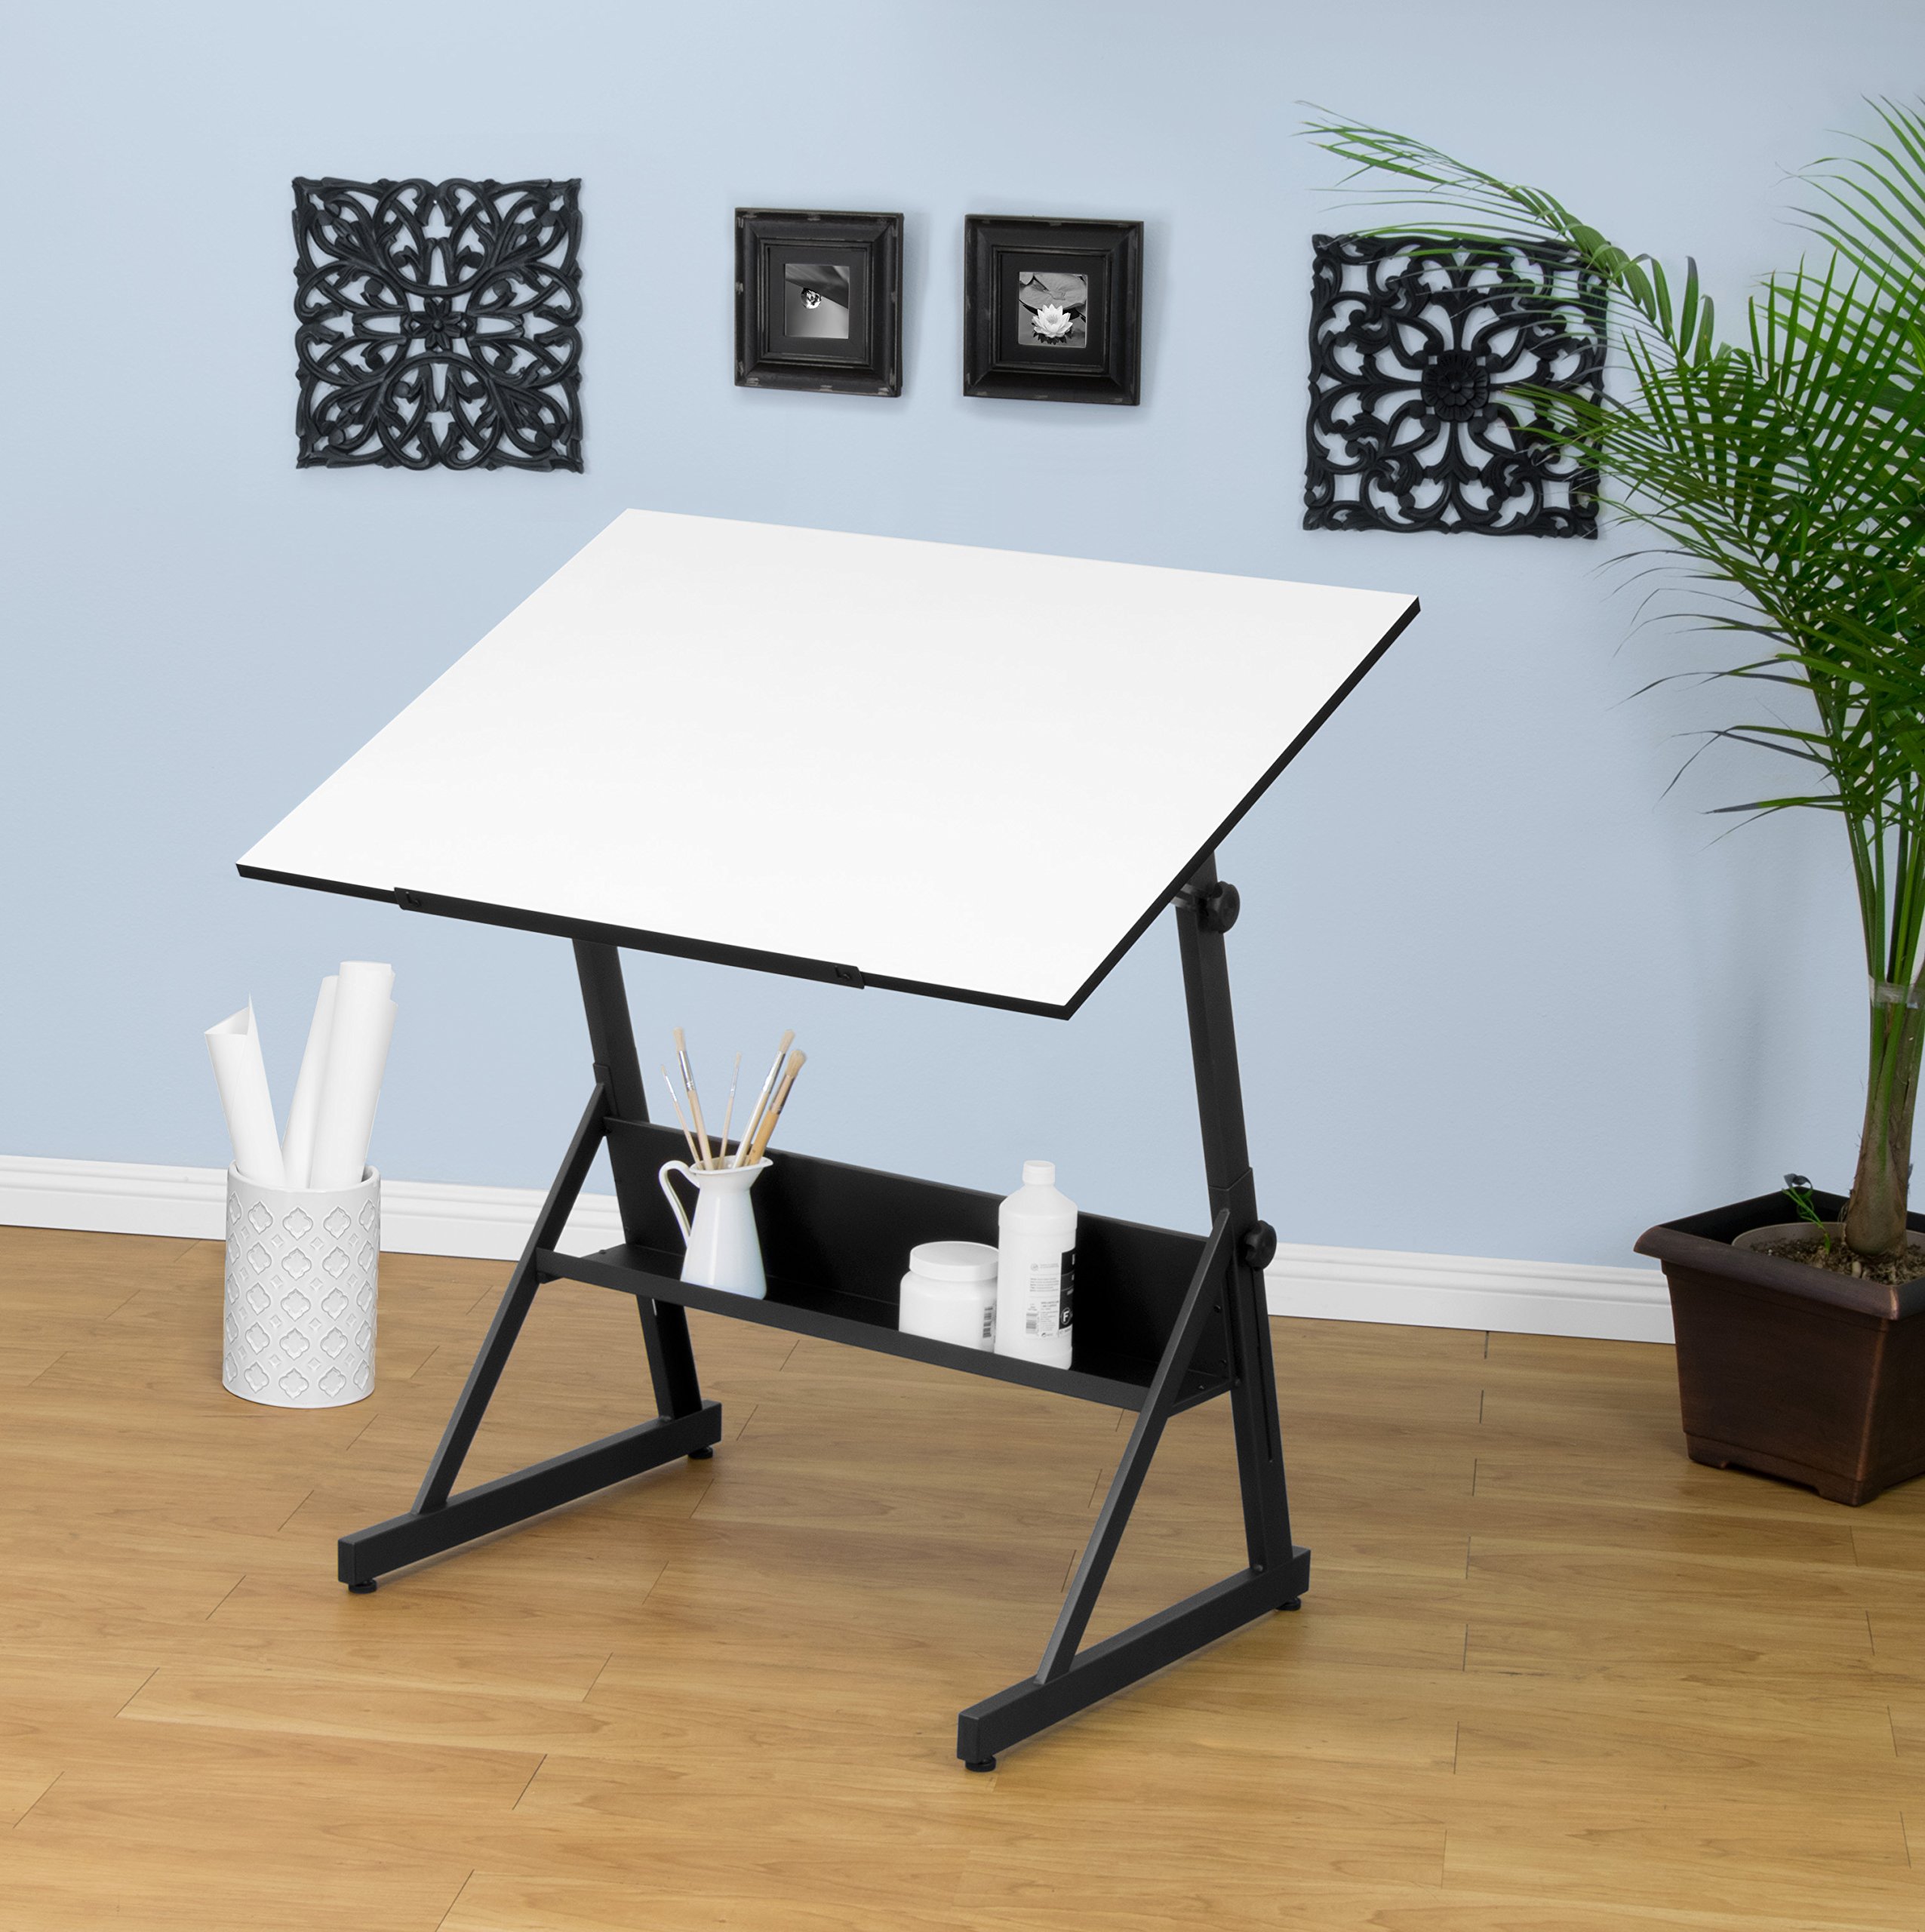
But the really great thing about it is that the surface folds straight up so you can push it right up against the wall when you want the floor space.
I knew I kept it around for a reason!
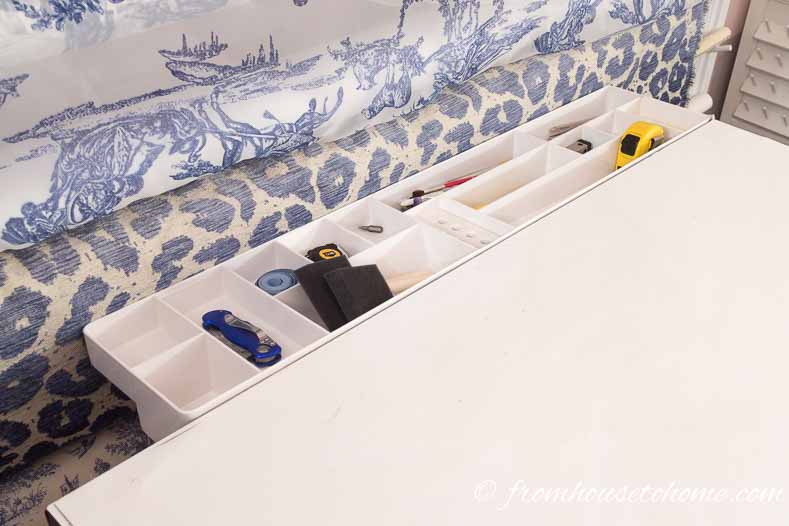
The tray* that attaches to the side of the table is also really useful for storing odds and ends.
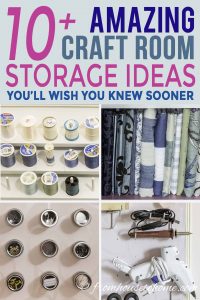
2. Sewing Storage Ideas
The next area I tackled in my craft room organization project was all of the sewing supplies.
Store Sewing Machines In Cubbies
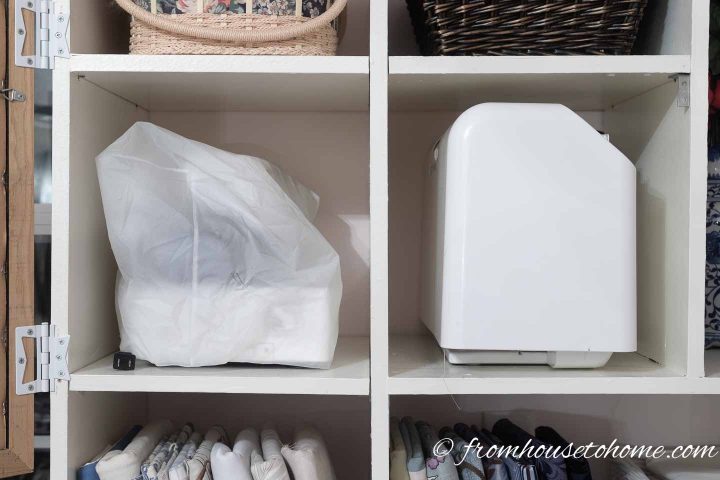
The cubby holes in my craft room shelving unit ended up being the perfect size to store my sewing machine and serger.
Putting them in their own storage space makes them really easy to get to, and easy to put away when I’m not using them.
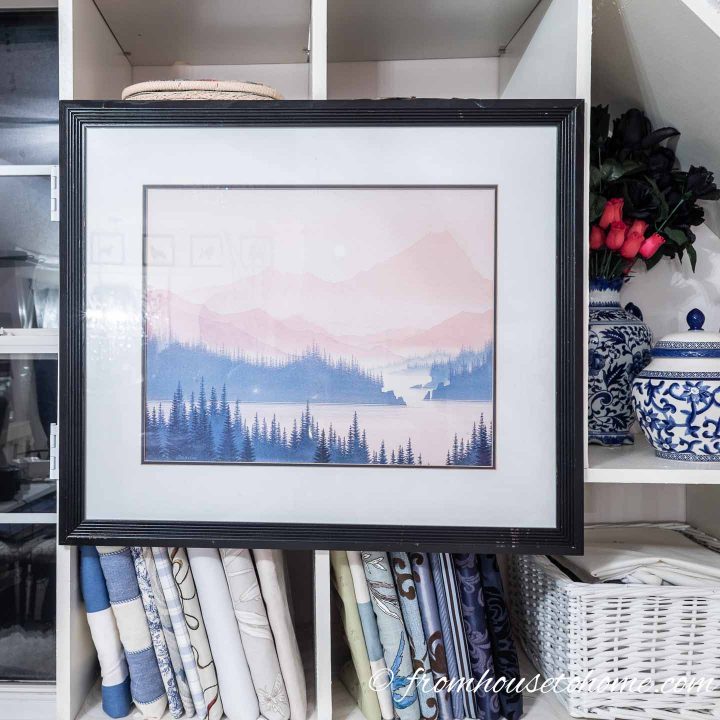
They also happen to be behind the picture I installed as a door on my bookshelves. That helps to keep the dust off and keeps the shelves look neat.
Find out how to make a picture door for your shelves HERE.
Hang a Thread Rack
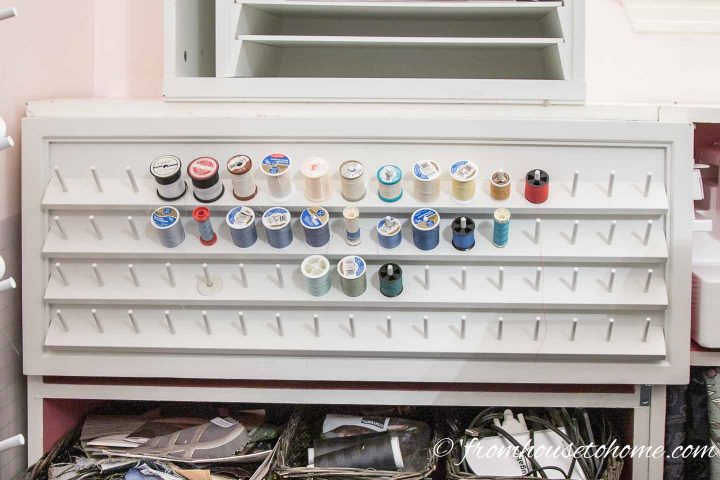
Wall-mounted thread racks (like this one*) are a great way to store your thread so you can find it easily.
As I mentioned before, my craft room is fairly small so I don’t have a lot of available wall space in my sewing area. And I needed somewhere to hang my thread rack.
So I decided to make use of the front of my shelves…and turned the thread rack into a door, similar to the picture door above. The best way to fit more function into a small space is to get your furniture to do double duty!
Store Larger Thread Rolls In Baskets
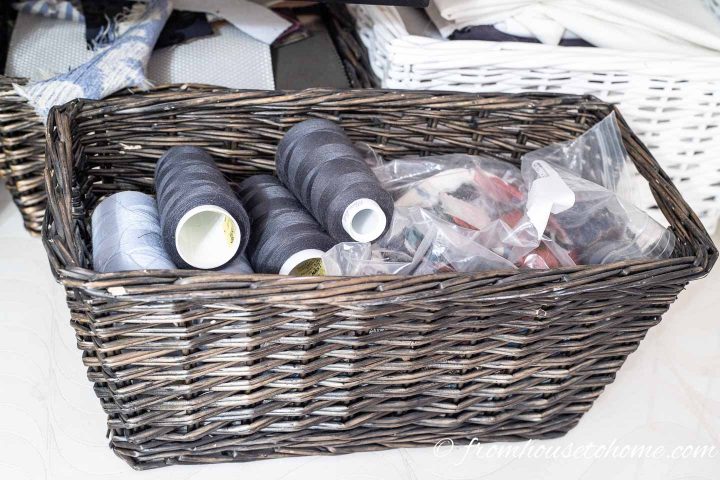
For the larger thread rolls that go on my serger, I added a basket to the shelves.
It’s just wide enough to fit those larger spools of thread.
And I even had some extra basket space left over for some fabric samples.
I keep a separate Ziploc bag for each of my rooms that contains fabric samples, paint chips and trim samples.
That way if I ever need to buy something new, I can just grab the bag for that room and I have everything I need to make sure whatever I’m getting will go.
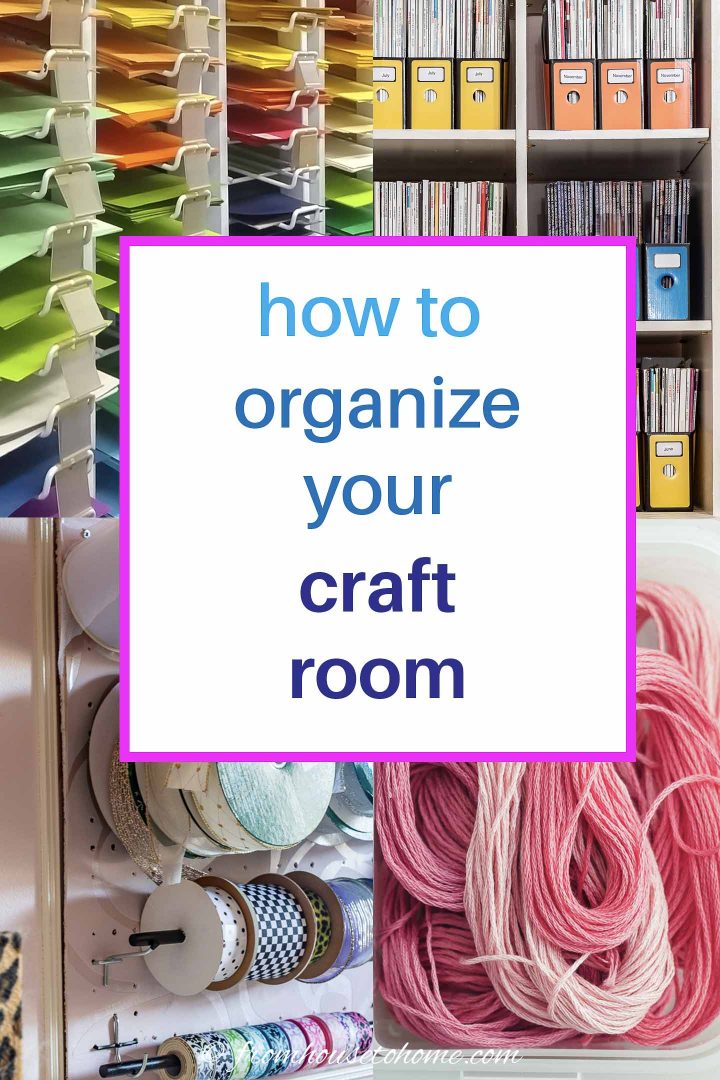
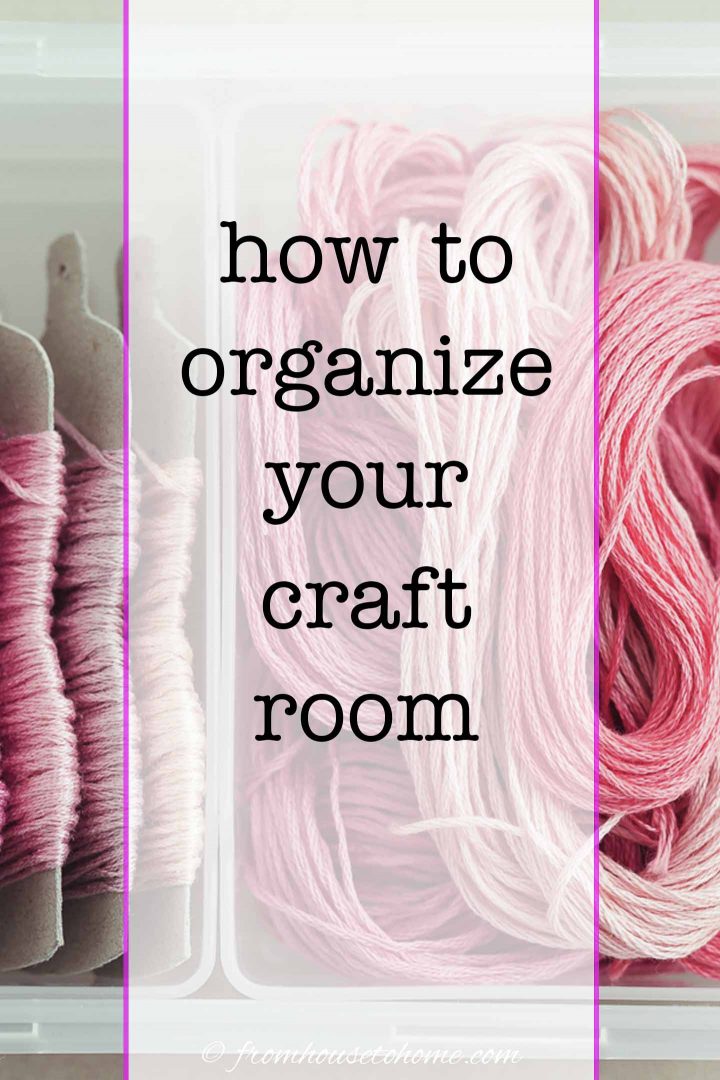
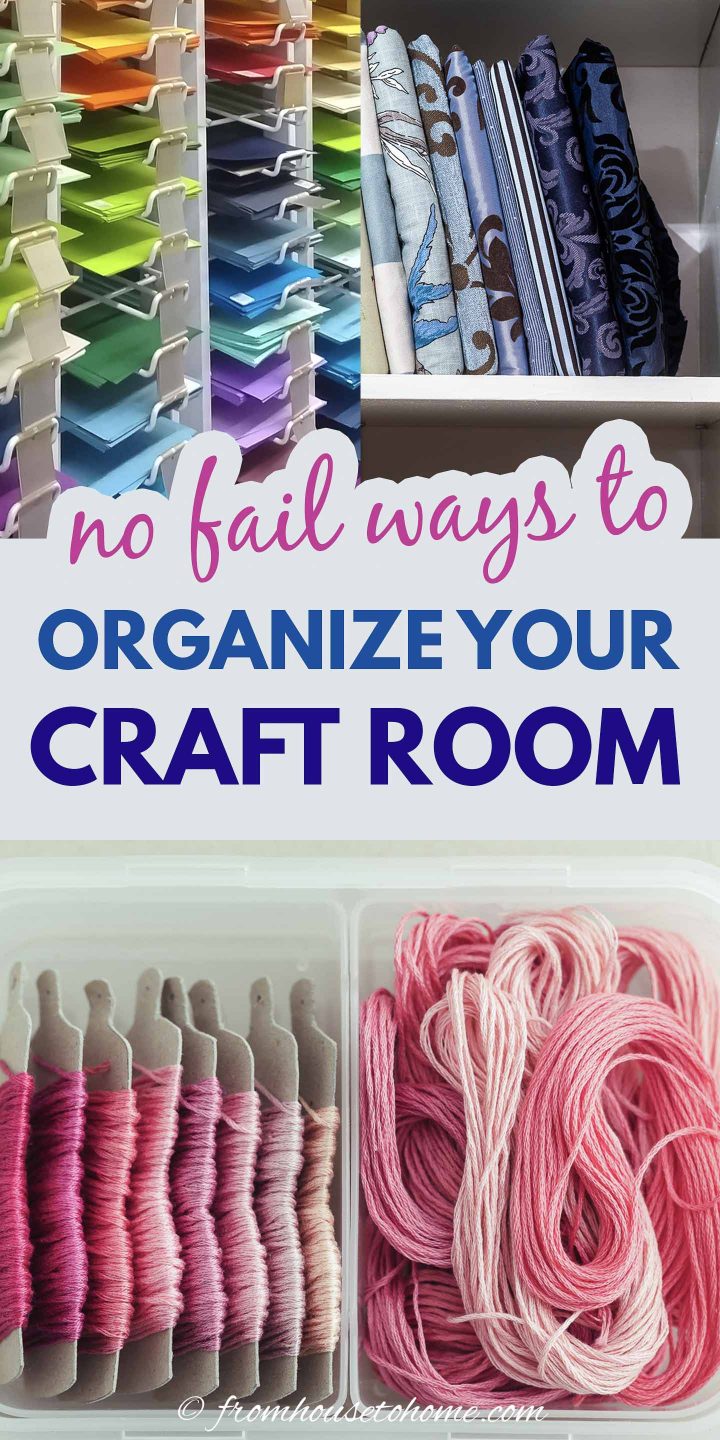
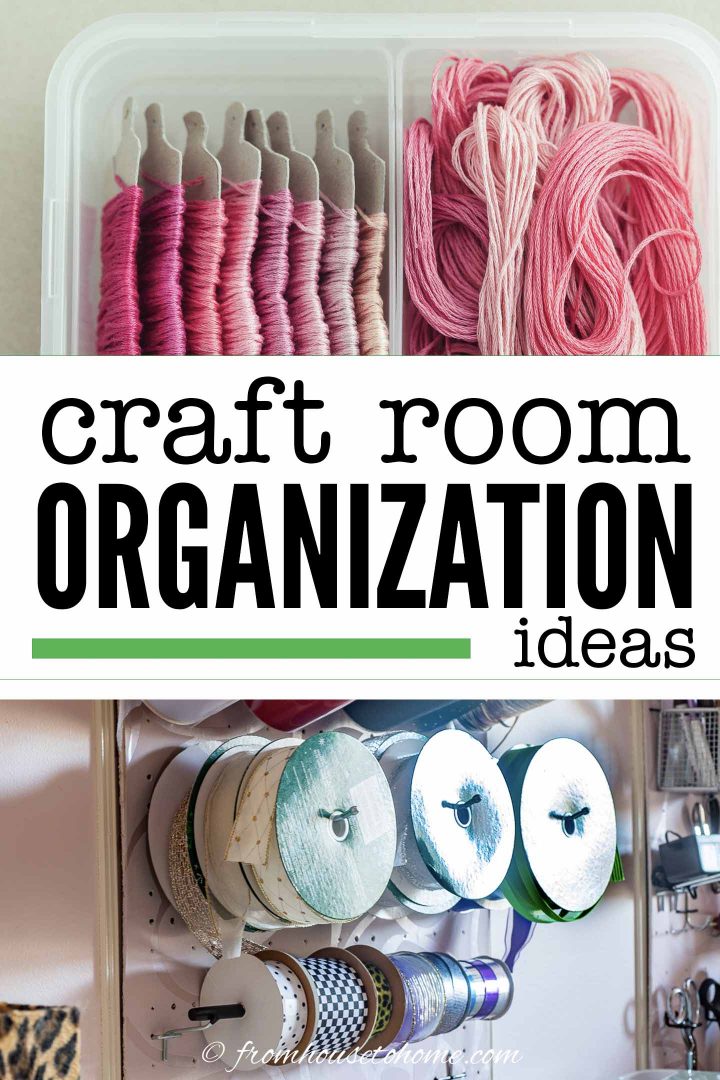
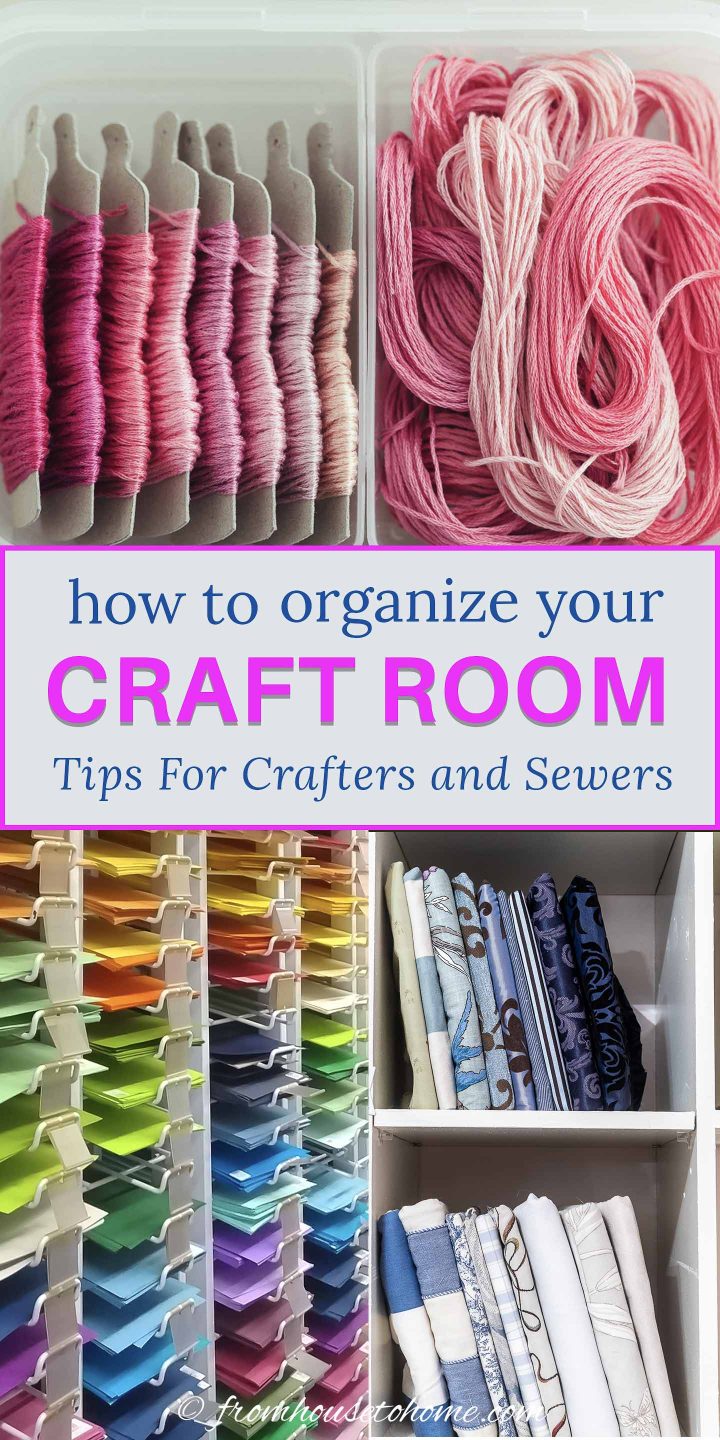
Keep Wool In Containers By Color
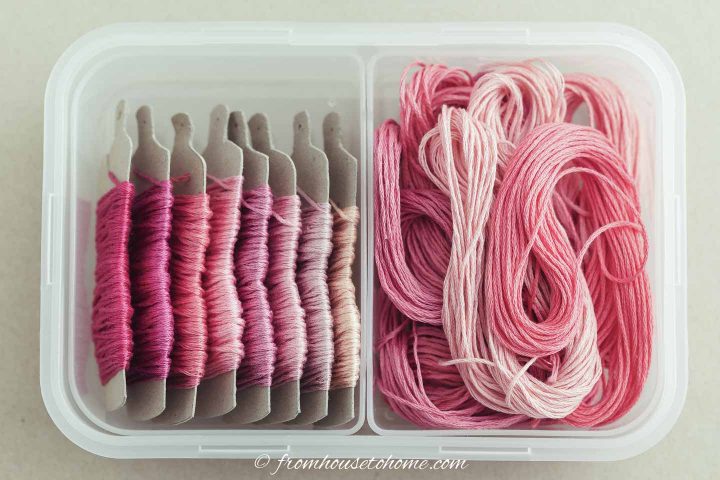
Wrap small amounts of wool around cardboard spools
Keep like colors together to make them easy to find.
Store Buttons In Pretty Jars
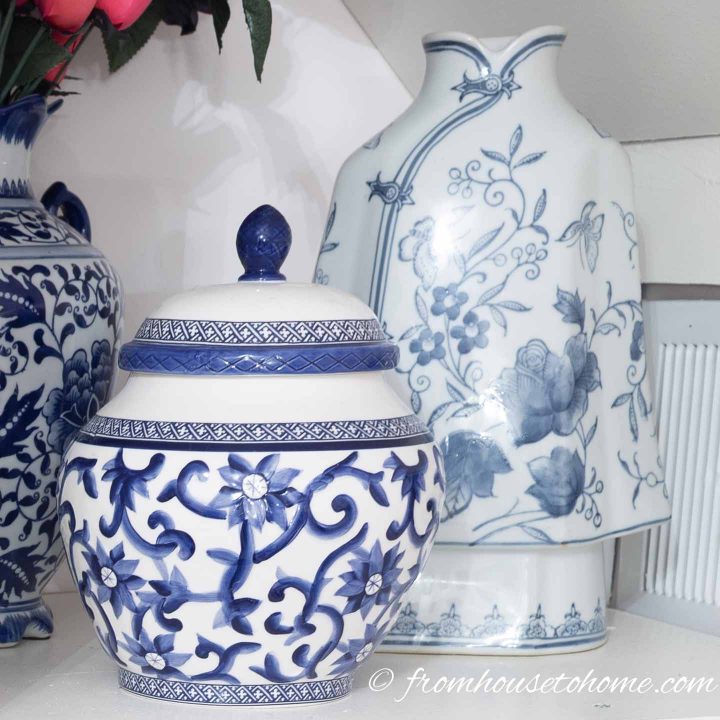
If you’ve seen any of the rooms in my house, you know I have a thing for blue and white ginger jars.
So since they’re hanging around my shelves anyhow, I decided to put them to work.
Turns out they’re perfect for storing leftover buttons.
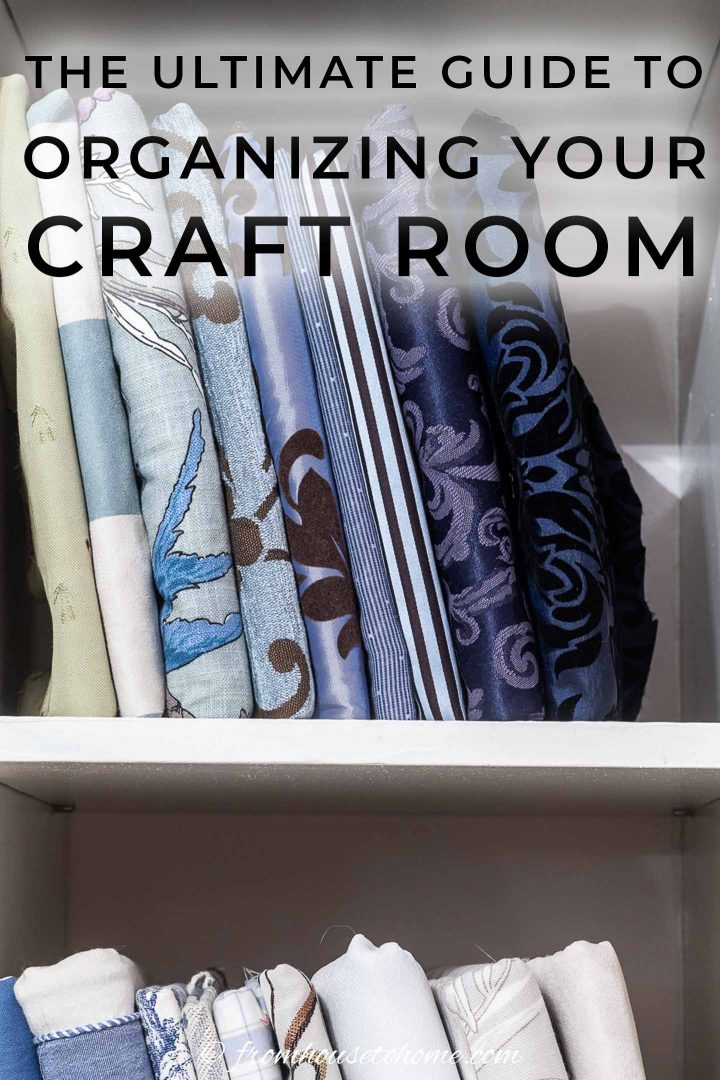
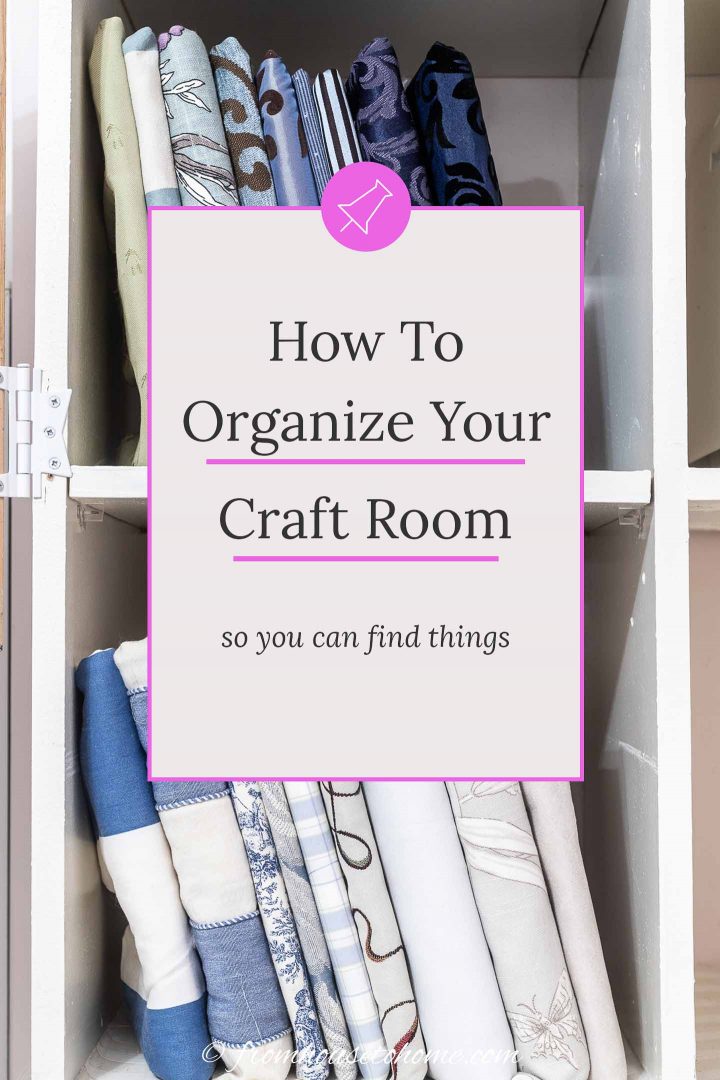
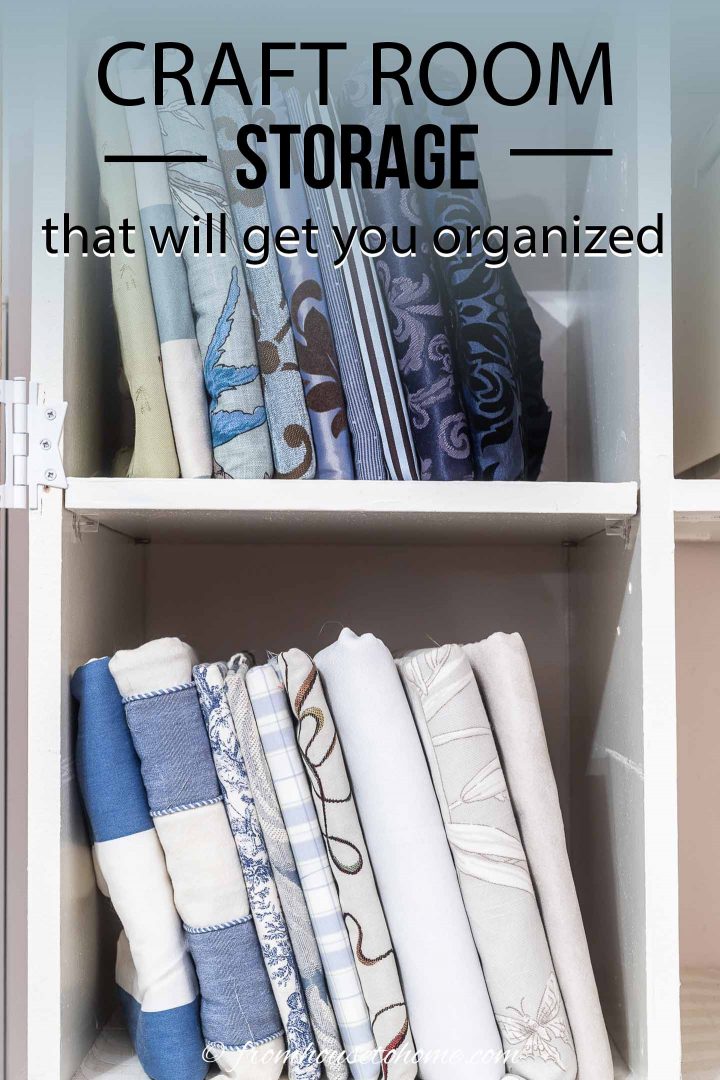
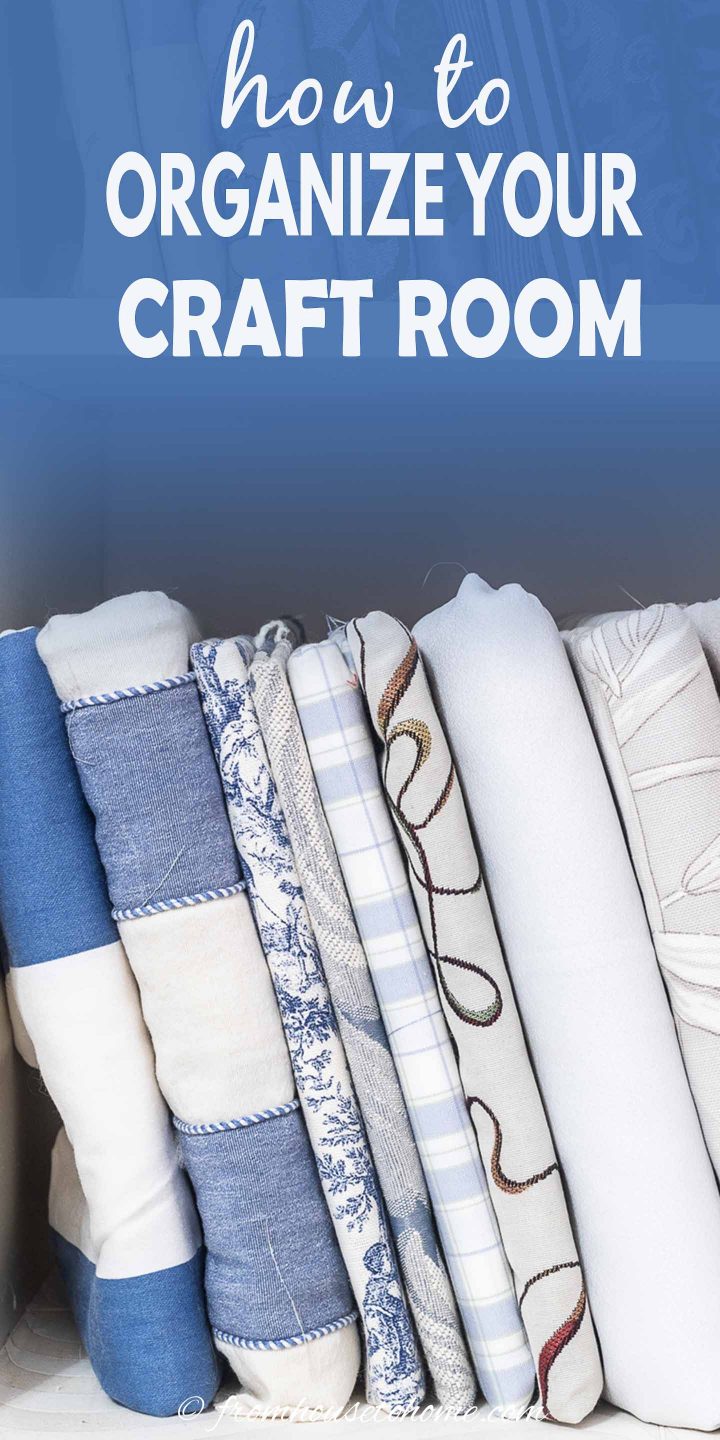
Create A Fabric Organization System
If you use your craft room for sewing, then you probably have lots of left over pieces of fabric like I do.
Since I didn’t want to just have stacks of fabric everywhere, I decided to create a simple fabric organization system that will keep the fabric stash looking good and under control.
1. Store Fabric Scraps in Baskets
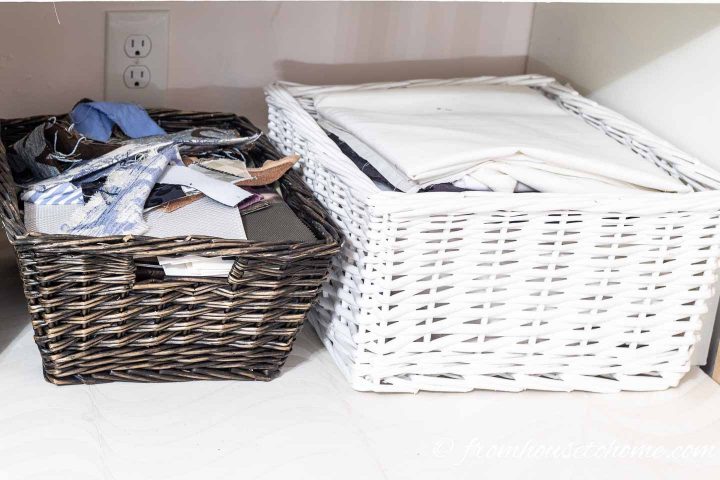
When it comes to storing small pieces of fabric, baskets are your friend.
It’s really easy to throw pieces in there and then there all in one place if you need to look for something.
If you really want to be organized, you could have a separate basket for each color.
But I haven’t got to that level of organization yet…maybe some day 🙂
I also keep a separate basket for storing left over lining and interfacing (and old sheets that I’m planning to use as lining).
That way I know where to look to see if I have enough for a project I’m about to do, or if I need to go buy some more.
2. Store Small Fabric Pieces On Shelves
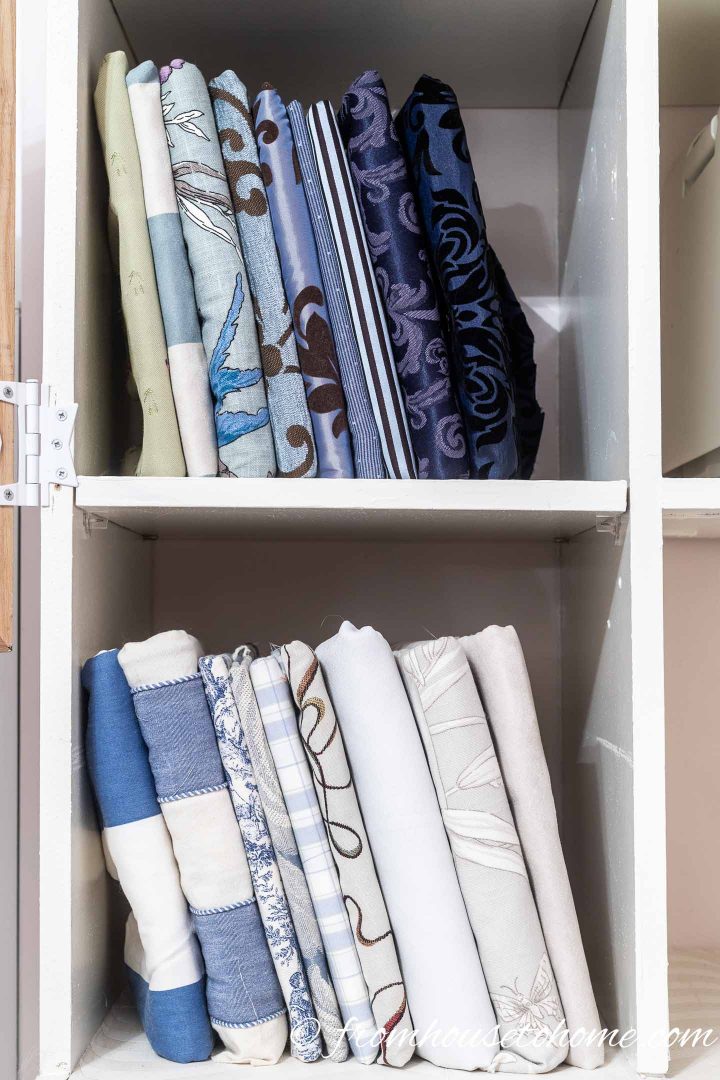
For the small pieces of fabric that are bigger than scraps, I folded them on to card stock and put them on shelves.
This way it’s really easy to see what I have available. And arranging them by color makes it easy to find what I’m looking for.
If you have a lot of light coming into your room and are worried about the fabric fading, you can also store these folded fabric pieces in a filing cabinet or drawer.
Or hang a curtain (or one of my picture doors) in front of them.
You can find out how to fold fabric on cards HERE.
3. Build a storage rack for fabric bolts
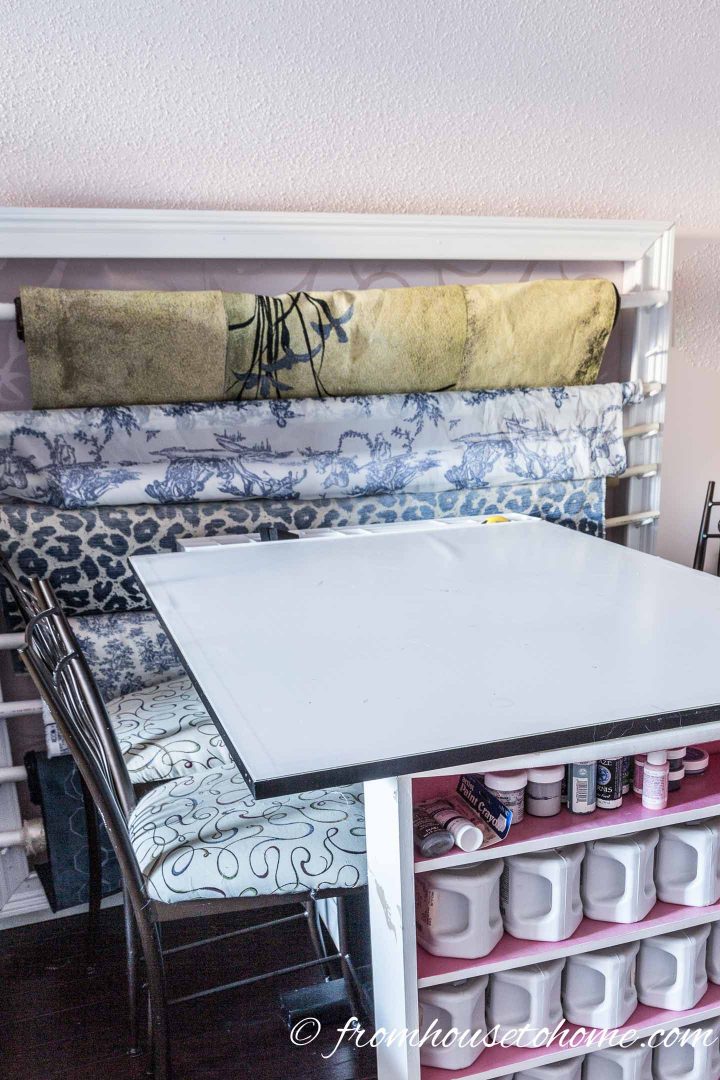
I also seem to collect fabric bolts. I buy them for a project and then don’t get around to doing it as fast as I thought I would…or ever in some cases 🙂
So I figured I would store them the way the fabric stores do…on a rack.
My DIY fabric roll storage rack didn’t end up being that hard to make, and it also acts as a backdrop for my craft table.
Since I’m not using the fabric bolts for a project right now, I might as well use them as decor 🙂
Find the instructions to make the fabric bolt rack HERE.
4. Make a blanket ladder
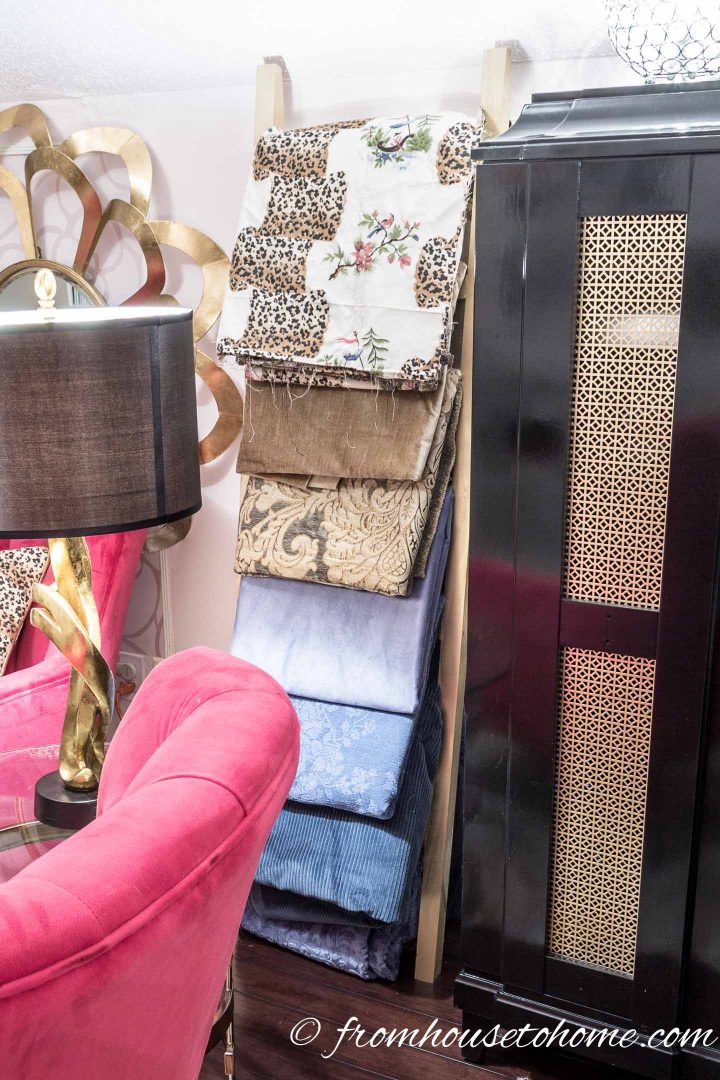
For the larger pieces of fabric that aren’t on rolls, I built a blanket ladder that I use for fabric storage.
It also adds some extra color in my office.
You can see get the tutorial for how to make it HERE.
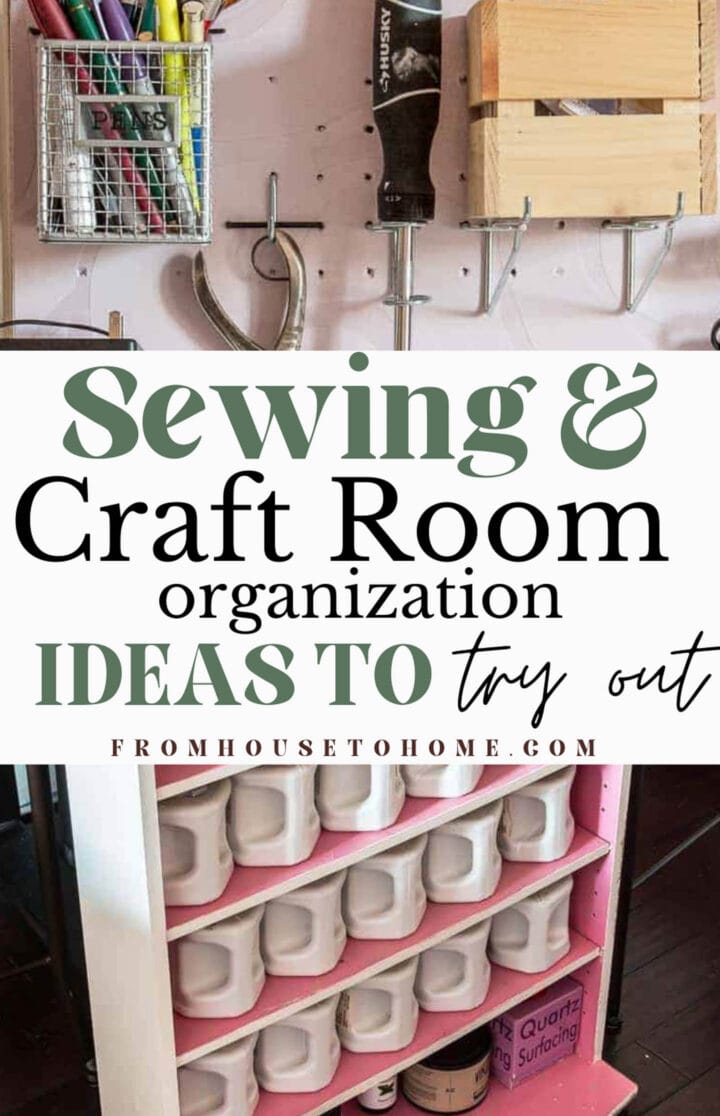
3. Store Tools On Pegboard
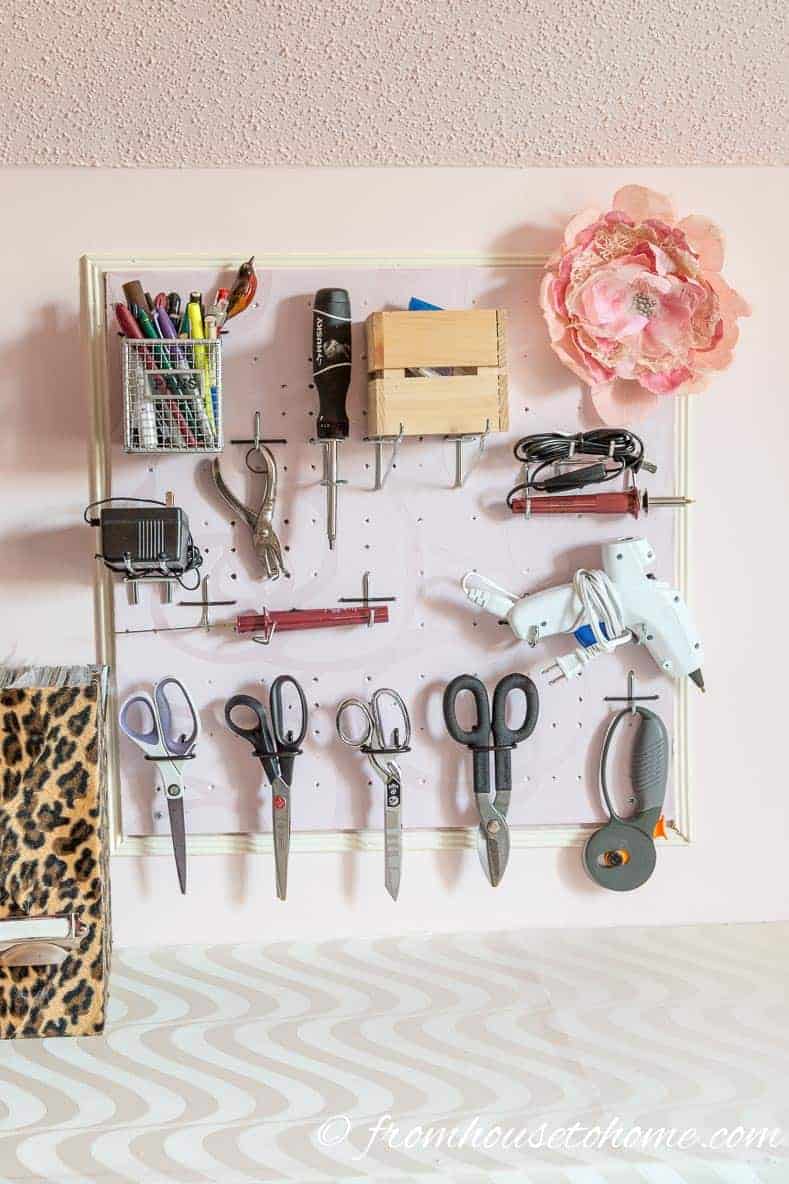
Of course I couldn’t have craft room storage without pegboard.
There are just too many things you can organize easily on pegboard! So it was the next one of my craft room organization ideas.
But saying you’re going to use pegboard and then actually making it work well are 2 different things.
Decorating The Pegboard
Fist things first. I didn’t want to have a plain piece of pegboard hanging on the wall in my craft room, so I had to come up with a way to decorate it.
Since I was already using panel molding in my office, I used that to make a frame for my pegboard. It’s a really easy project! You can find out how to install panel moldings HERE.
Then to make the plain pegboard blend in with my room decor, I covered it with wallpaper that matches the wallpaper in the rest of the panel moldings in my office. Another simple project that makes the pegboard look so much better. Find out how to decorate pegboard with wallpaper HERE.
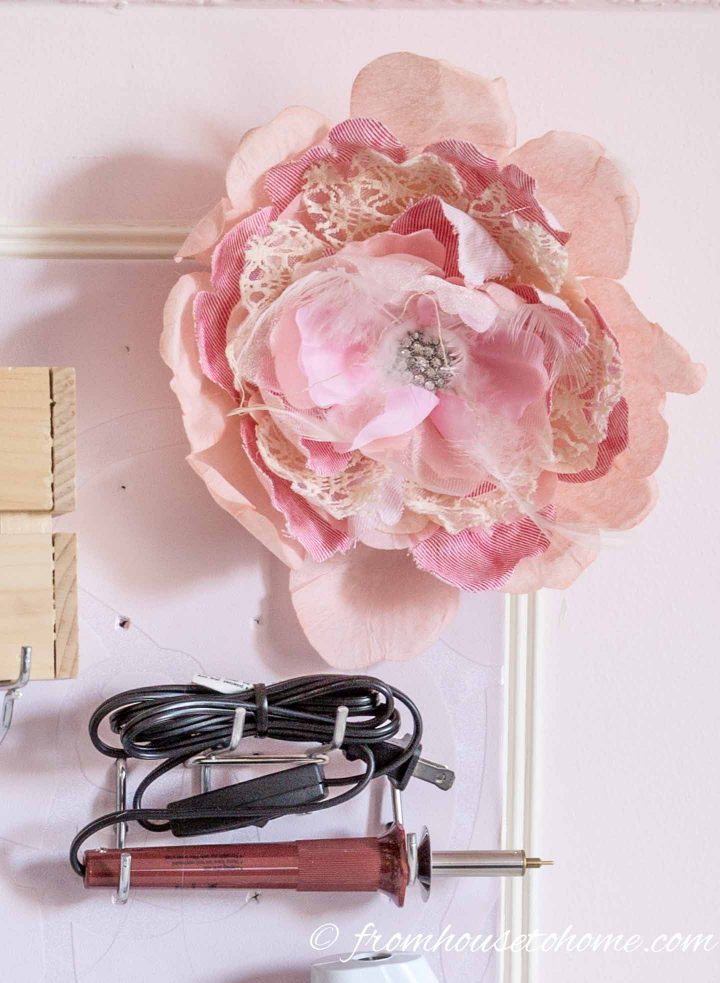
Finally, I added a short-stemmed faux flower, by sticking the stem into one of the pegboard holes. You could actually use this idea to store faux flowers if you have a bigger pegboard than I do.
Organizing The Craft And Sewing Tools On The Pegboard
The next issue I have with the pegboard was figuring out how to hang things on it to make the best use of space. And what pegboard accessories to use.
Here’s what I came up with.
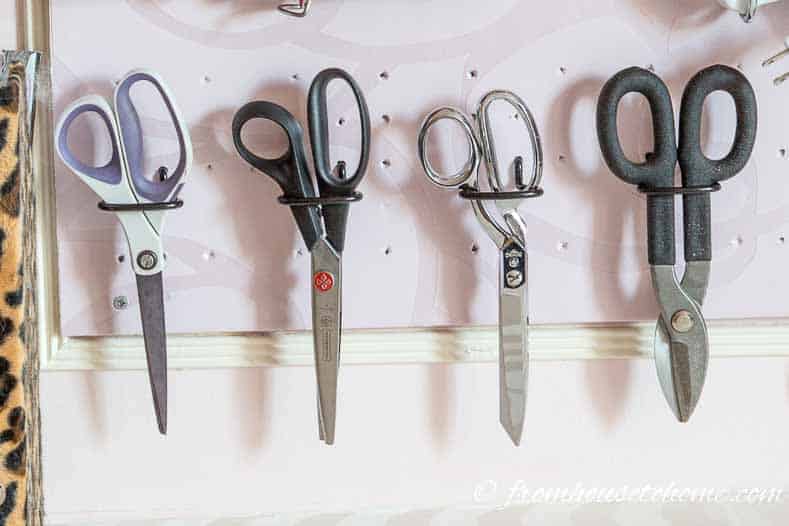
1. Put Things That Hang Down At The Bottom
Since my frame isn’t very thick, things can hang over the bottom edge of the pegboard. Which leaves more pegboard space above it for more stuff! And that’s an important consideration when you are working with a small space.
This is especially important for sharp things (like my fabric cutting wheel). When the blade is hanging down at the bottom, you are far less likely to cut yourself while trying to remove something else from the board.
My sewing scissors, crafting scissors and wire snips all got hung on the pegboard using plier hooks*.
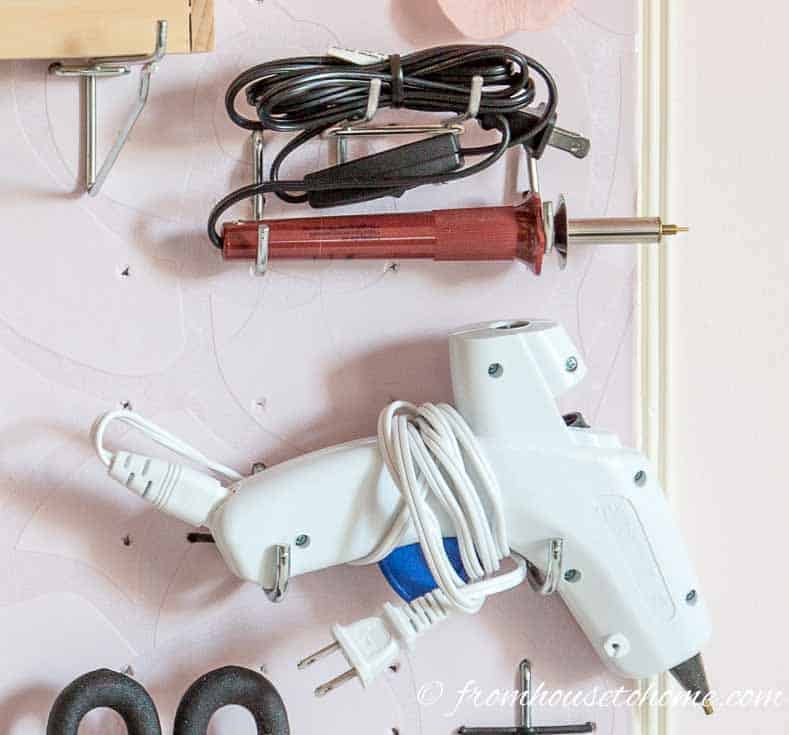
2. Hang Horizontal Tools In The Middle
In the middle section of my pegboard, I hung tools like my glue gun and my engraver.
Two large round hooks* work well for hanging up these kinds of tools. Position one hook close to each end of the tool.
If there is an electrical cord, use a two-pronged straight hook* either above or below the tool and wrap the cord around it.
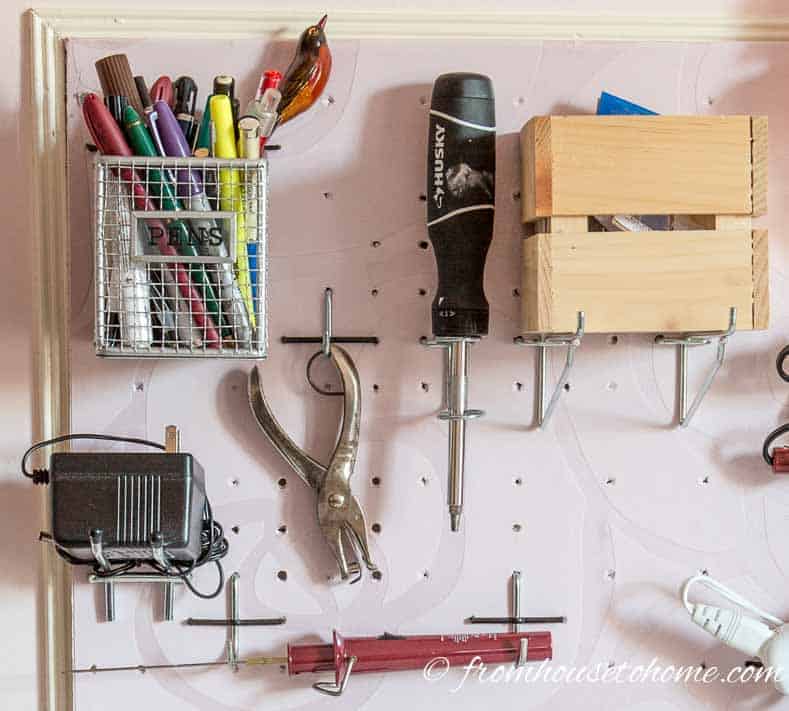
3. Hang Boxes On The Top
Some craft supplies just don’t have a good way to be hung from a pegboard. Which is why I always add some small boxes that help with my craft room organization.
Rest those small boxes on top of two shelf hooks* at the top of the pegboard. Or if you have a container (like my Pens box), you can use a regular pegboard hook to hang it on the board.
This is where I store everything that can’t be hung from a hook, like all of my pens, and my Cricut blades and tools.
Storing the Cricut supplies in a box that can be easily taken down from the board is really helpful. That way I can take the whole box down when I’m using my Cricut and have everything I need in one place.
4. Fill In The Blank Spaces
Then I filled in the blank spaces with all of the smaller tools, like my screwdriver.
Screwdriver hooks* are good for round tools with small noses (like screwdrivers).
5. Lock the Pegs
Before you finish your pegboard, make sure all of your hooks (especially the single ones) have locks so they don’t fall out of the board.
Some pegboard accessories come with the anchors already on them. But if they don’t, you can buy these pegboard locks* that install over the hooks to keep them on the board.
Trust me…the aggravation they save later on when you can take things off the wall without worrying about the hook falling out is worth the extra few dollars!
4. Make Manuals Easy To Find
Speaking of tools, they usually come with instruction manuals that I often need to refer to…and usually can’t find when I need them. So finding a good organization method for these was a must!
The solution was to get some fun magazine boxes* and place them right under the bulletin board where the tools are. That way they are easy to access and more likely to get put back in the right place!
(Yes, that’s cat hair at the top of one of those boxes…for some reason, these are a favorite scratching post for my cats. The fur is hard to get rid of!)
5. Store Small Craft And Sewing Accessories On a Magnetic Bulletin Board
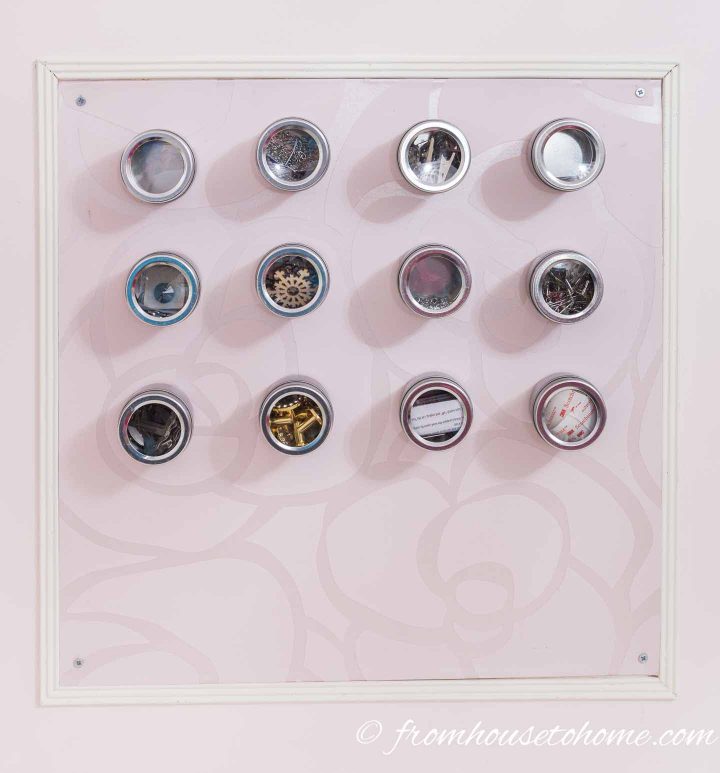
The next one of craft room organization ideas is to use a magnetic bulletin board for storing all of your small crafting and sewing accessories.
Last year when I was organizing my kitchen, I discovered that galvanized sheet metal* makes an inexpensive surface for magnets (you can see my DIY magnetic spice rack HERE).
The same principle applies for these panels in my craft area. Since the plain sheet metal doesn’t really go with the decor in my craft room, I decided to make it match by covering it with wallpaper. Then I screwed them onto the wall with a screw in each corner. And added more of that panel molding around the outside.
Add some magnetic containers* and you have great storage for small craft and sewing supplies (like pins, small knobs and screws). I like the ones with clear tops so you can see what is inside. But you could also add labels if you want to.
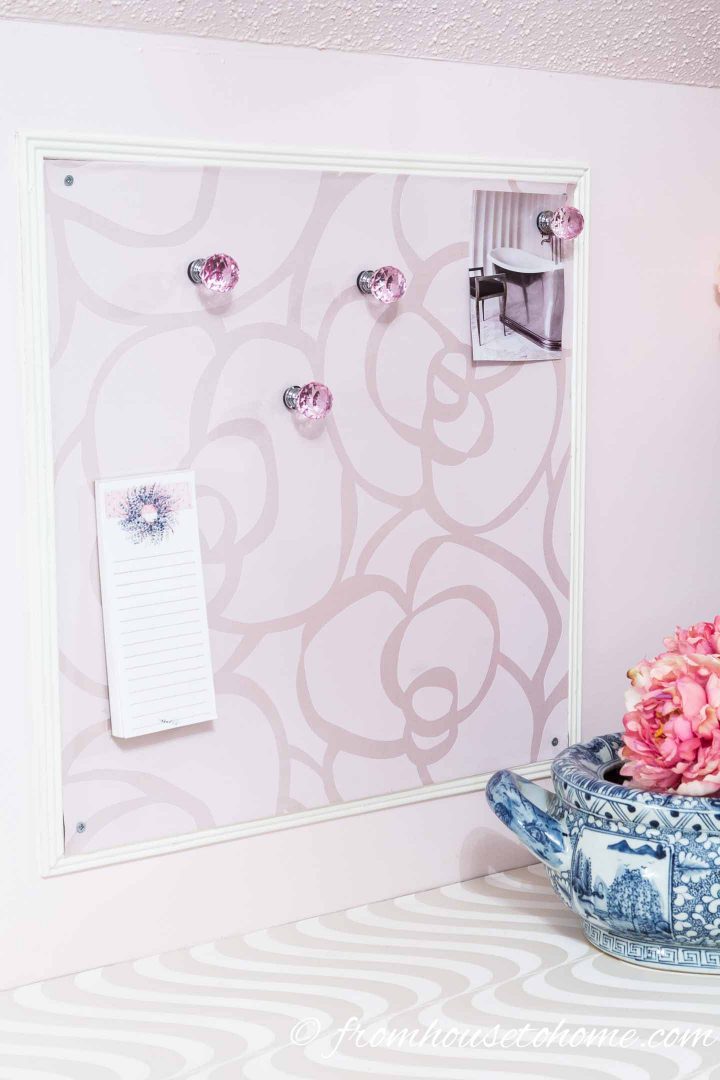
I also like to use these magnetic boards as a bulletin board, using magnets instead of tacks.
I dressed up the magnets a bit by gluing them to the bottom of glass knobs*. That way they look pretty even when they’re not holding anything to the board.
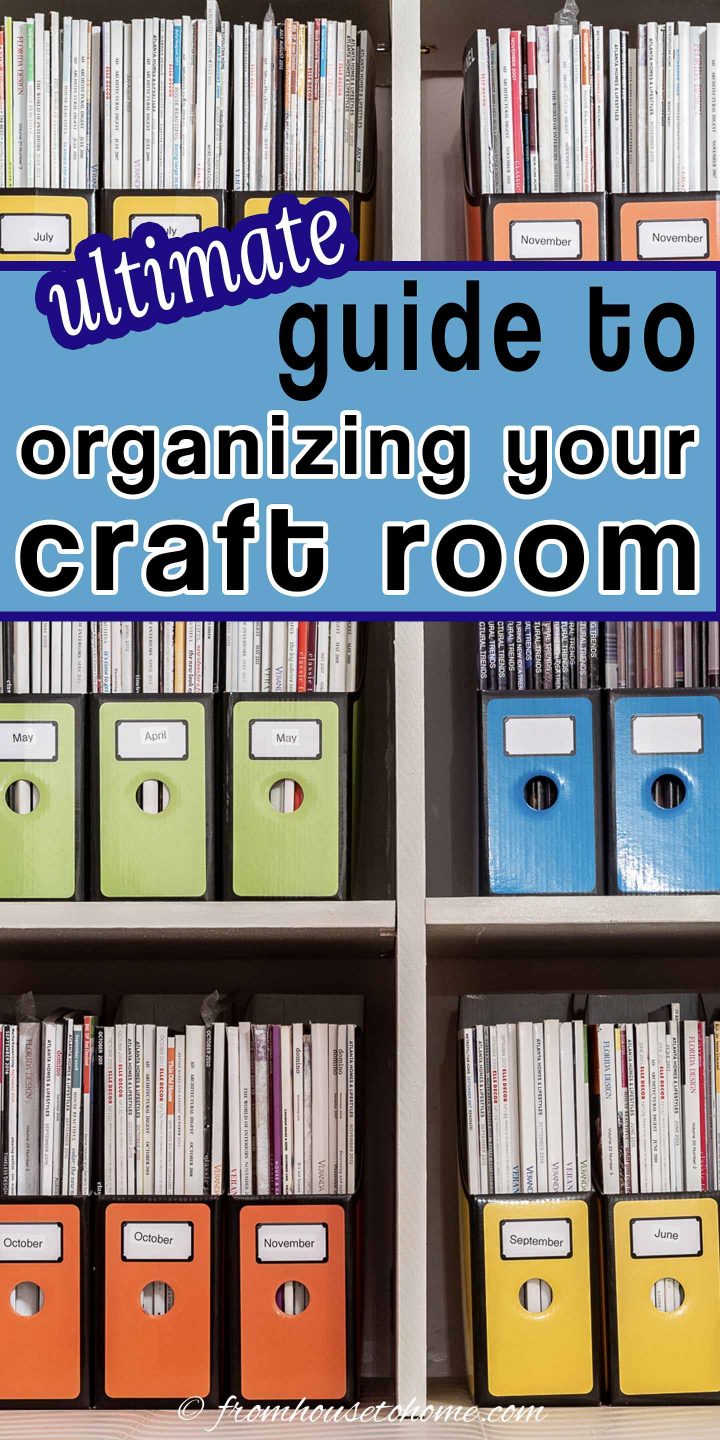
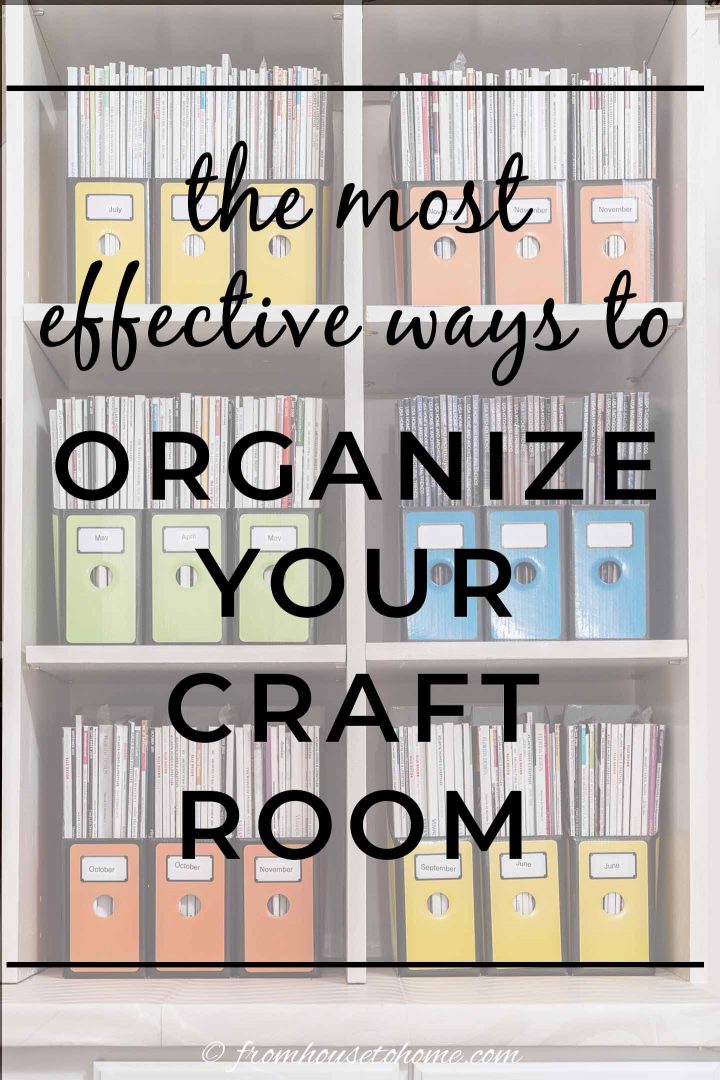
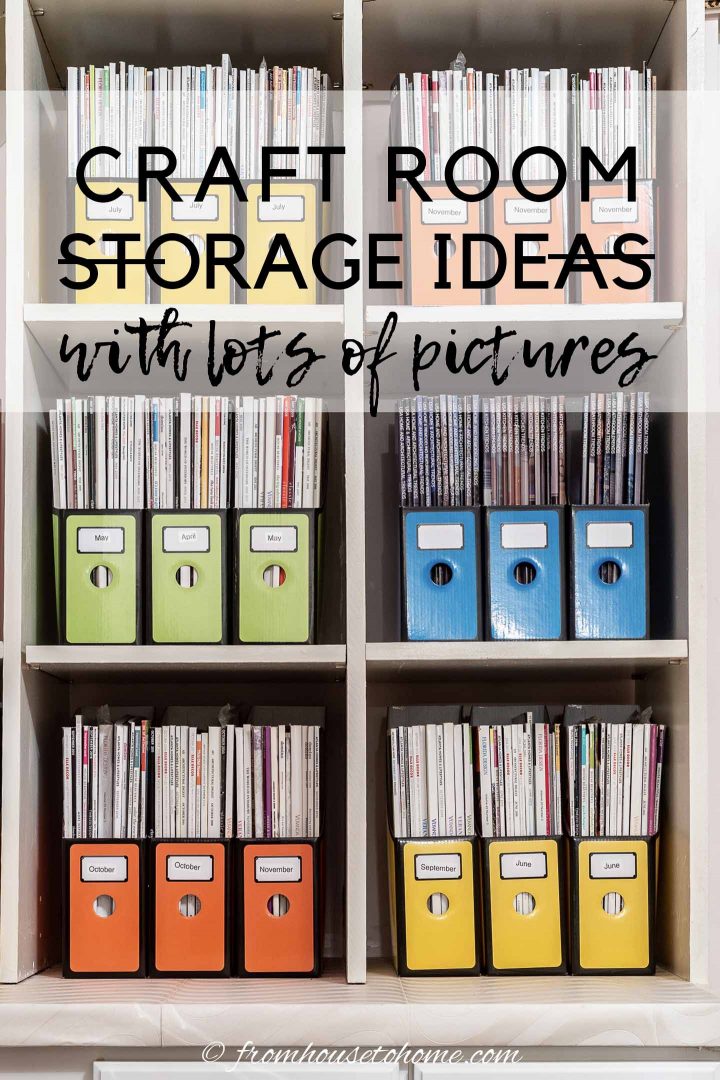
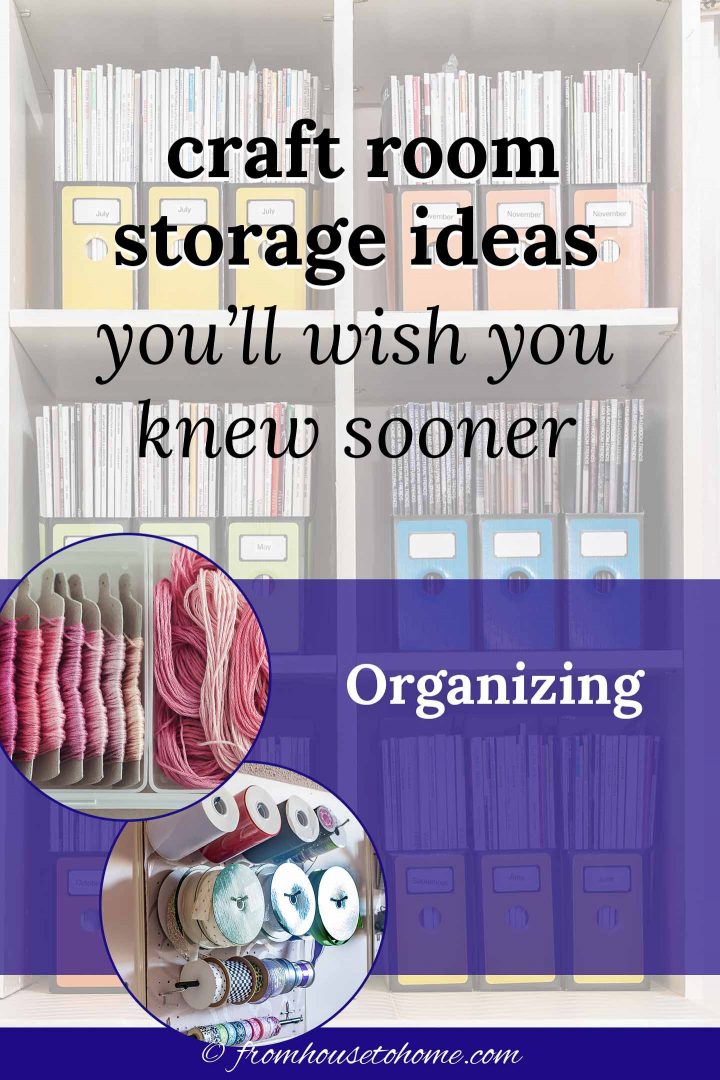
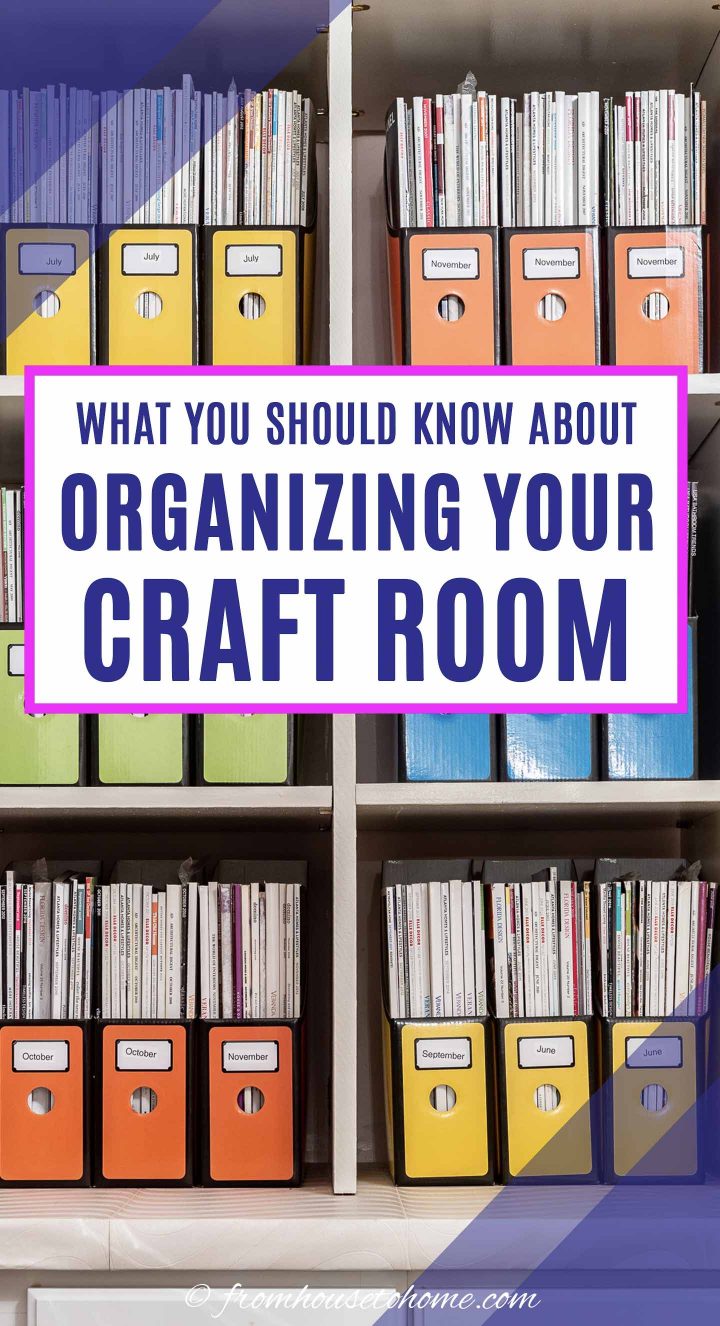
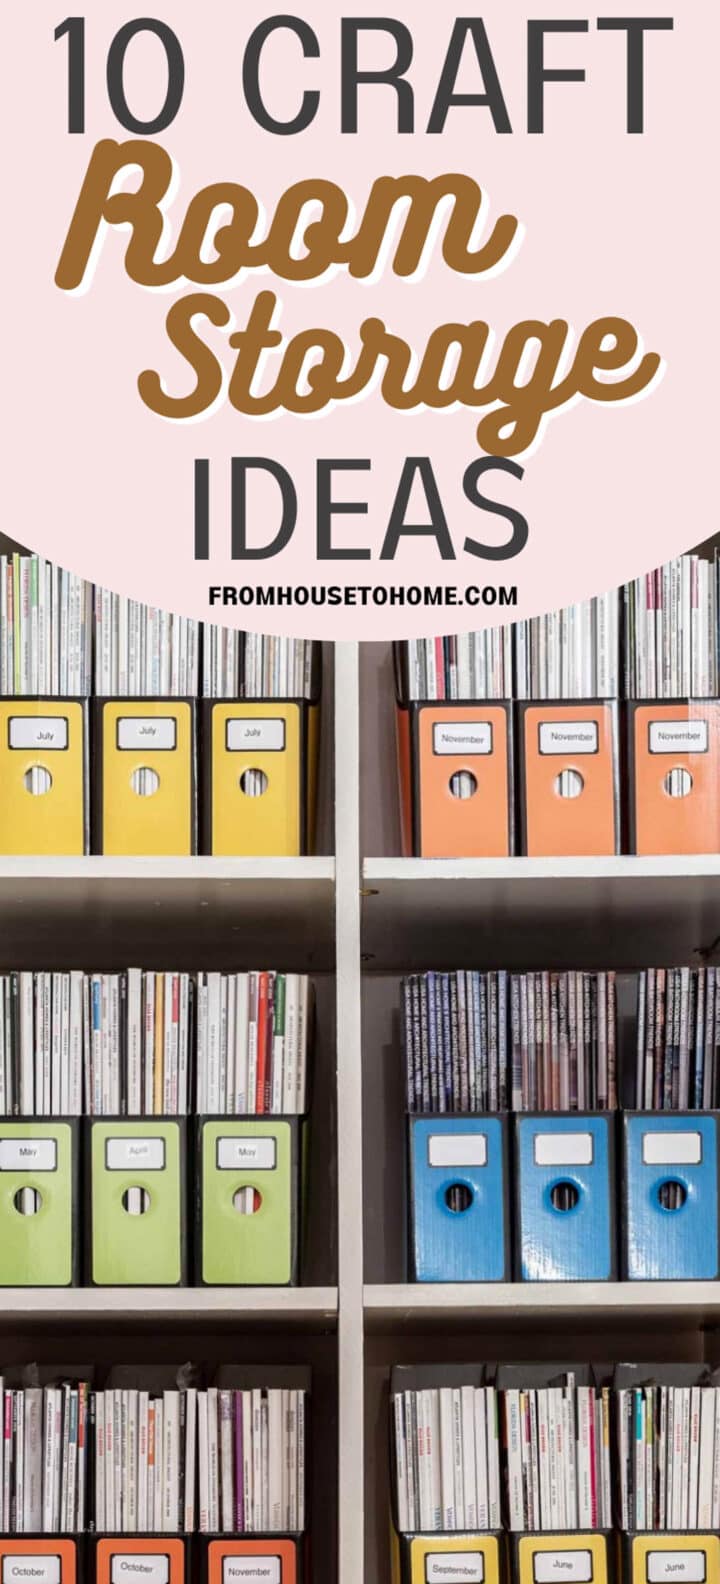
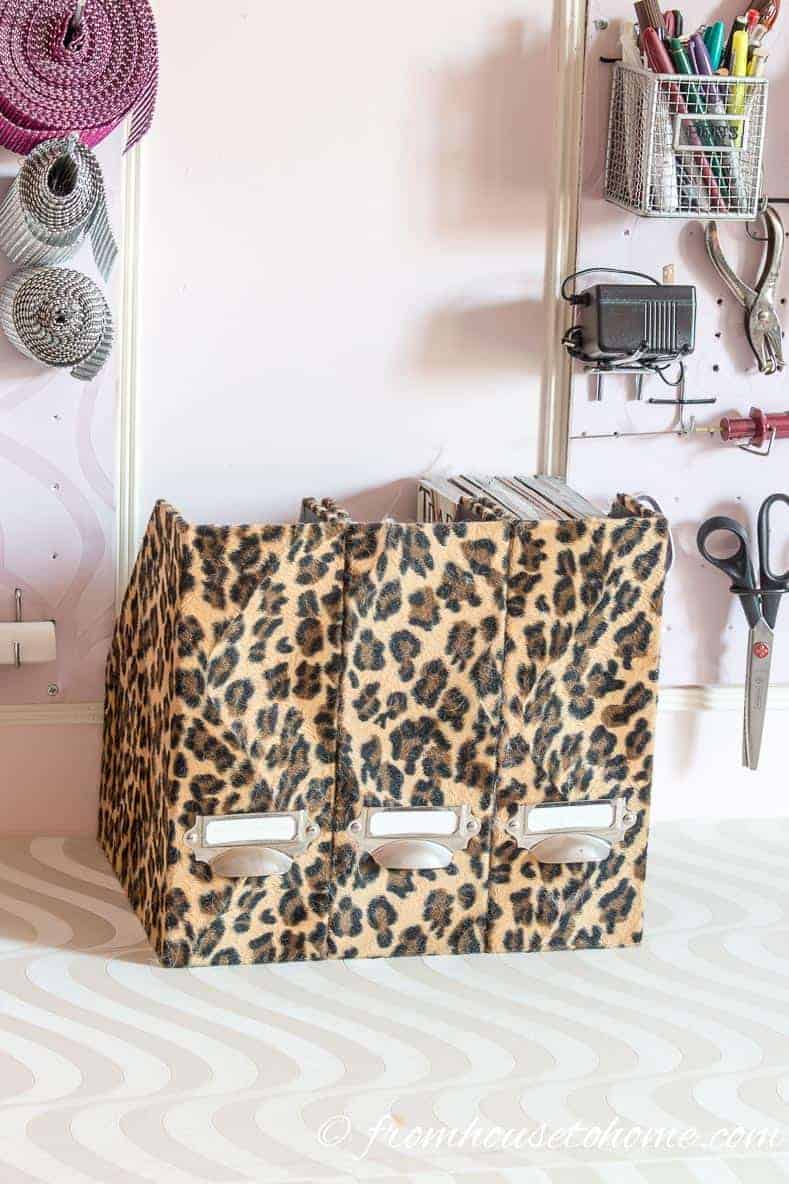
6. Organize Magazines and Sewing Patterns
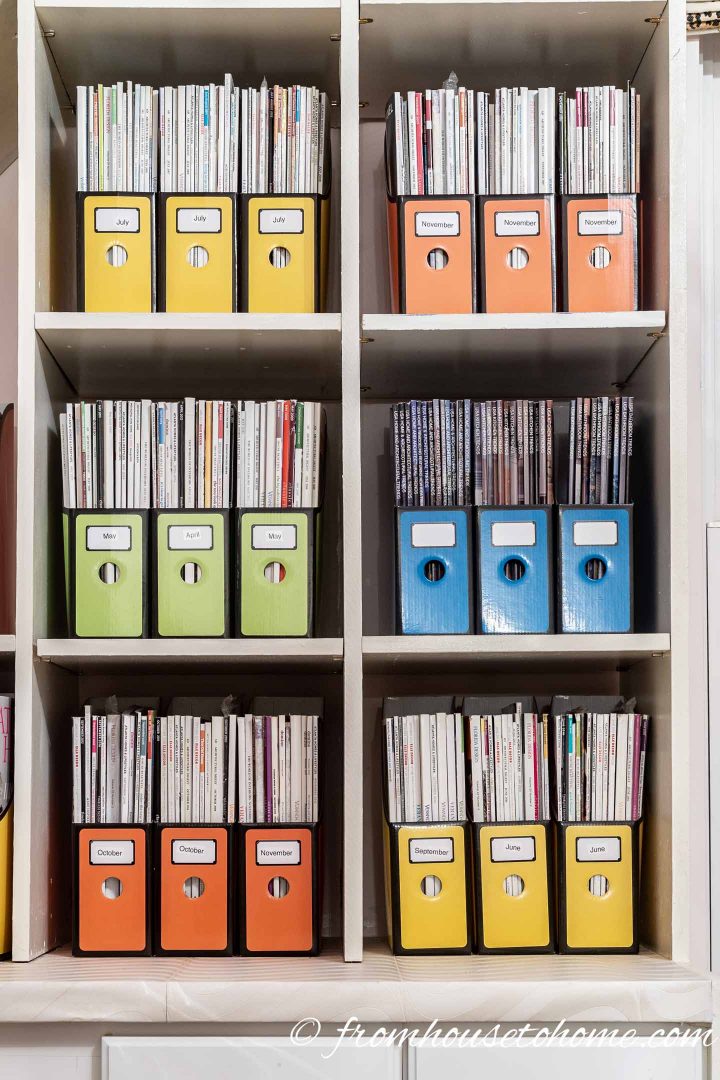
I don’t know if you have collected as many magazines as I have put I certainly needed a good craft room organization idea to keep mine in order.
Since magazine files are meant for that, I decided to use them. (I know…what a novel concept).
When I found these inexpensive ones that come in different colors*, I decided to use a different color file for different topics of magazines. That way you can tell at a glance which files to pull out when you are looking for something.
Plus they look pretty on the shelves. And they work really well for storing sewing patterns, too.
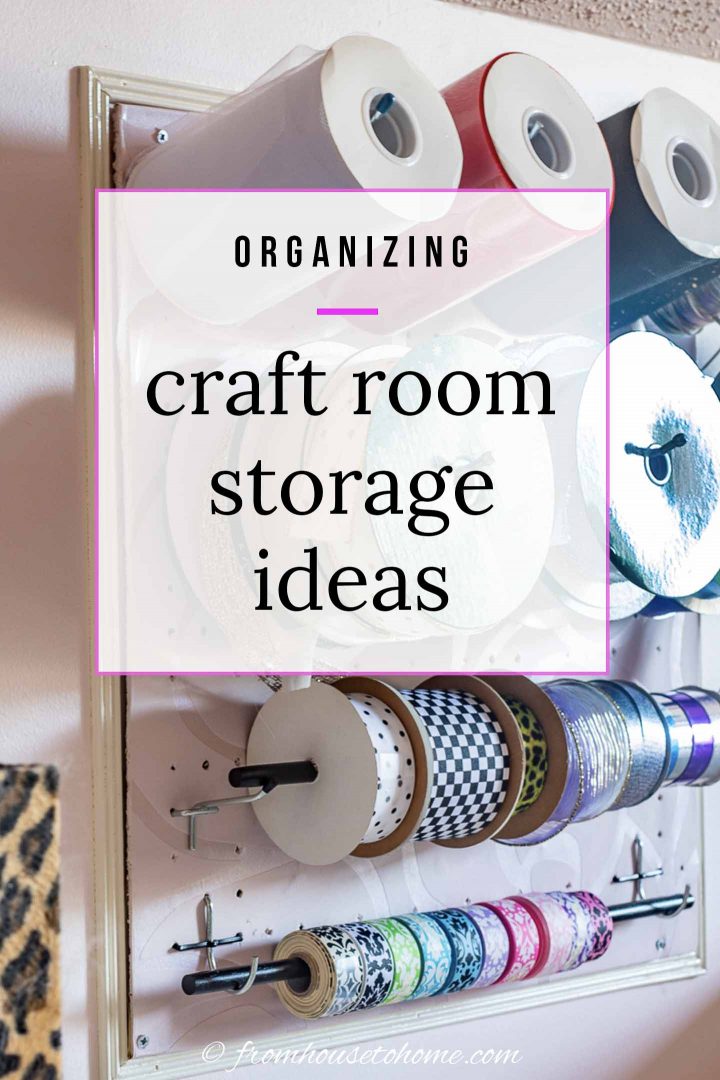
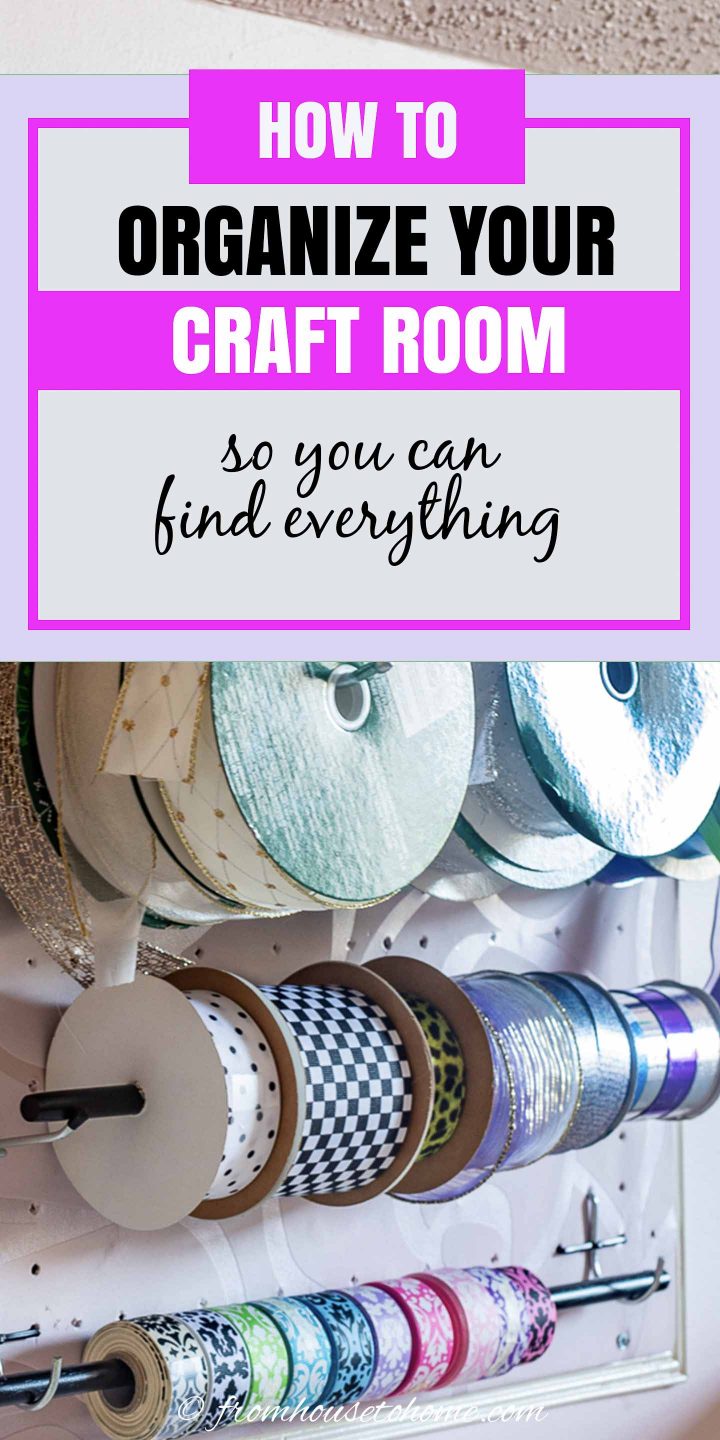
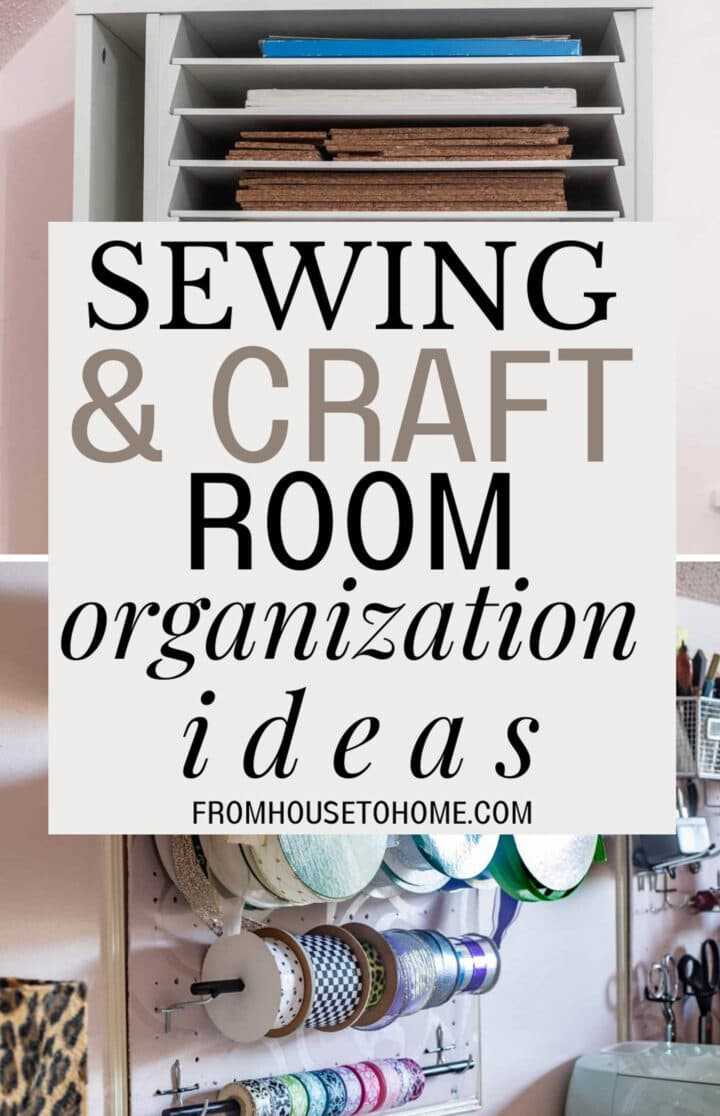
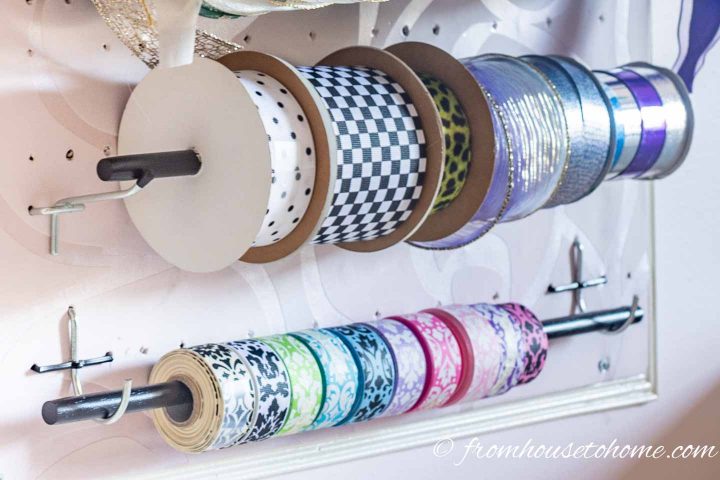
7. Hang Ribbon On Pegboard
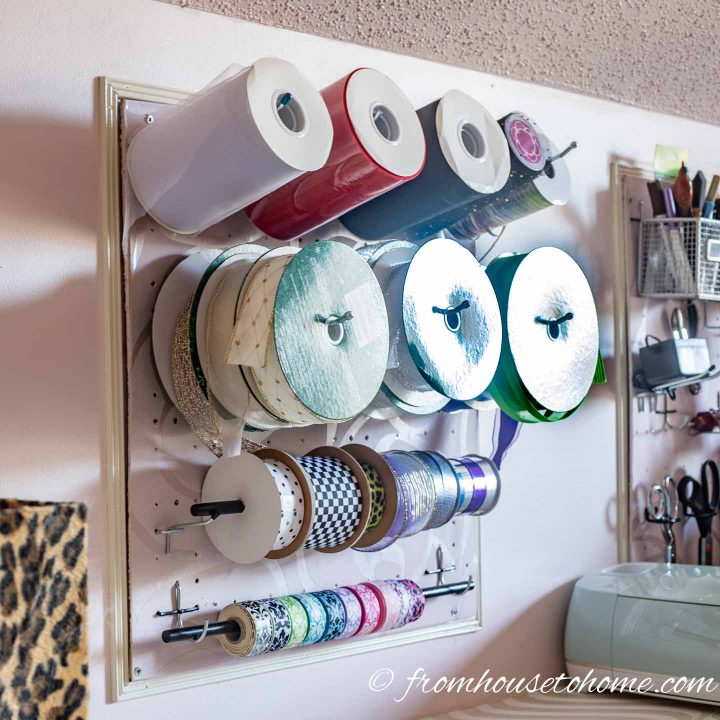
You didn’t think I was done with the pegboard, did you?
If you’re like me, then you’ve got ribbon everywhere in your craft room. So this pegboard organization challenge was to tame the ribbon overload. and make them easy to find.
1. Hang Smaller Ribbon Rolls On Dowels
I think the easiest way to store small ribbon rolls and washi tape is to put them wooden dowels*.
Then hang the dowels on large pegboard curved hooks* for the smallest rolls.
Or straight hooks that curve up on the end for somewhat larger rolls. You can usually find a few of these in your standard pegboard hook assortment.*
Position the hooks at least an inch in from either end of the dowel. Otherwise it will always be falling off the board…which gets annoying after a while. Ask me how I know 🙂
If you are looking for wrapping paper storage, you can use a similar idea to hang it on pegboard, too. Or you can take a look at these creative wrapping paper storage solutions.
2. Hang Large Ribbon Rolls On Straight Hooks
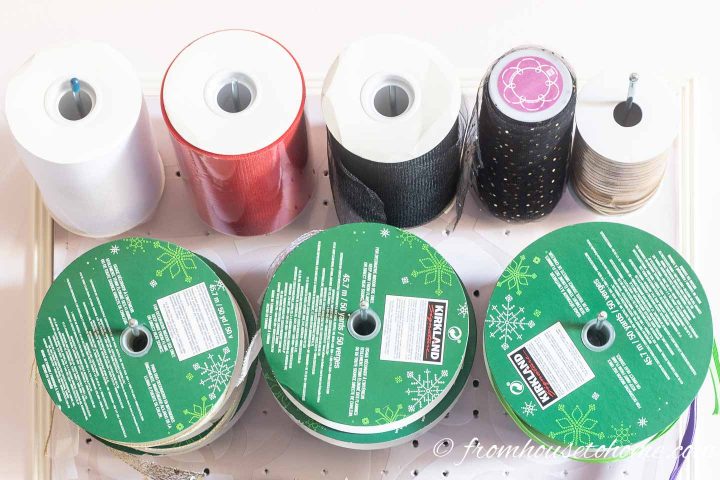
For large rolls of ribbon and tulle, I find the 6″ long straight hooks* work the best.
The rolls are easy to take off the board and you can fit quite a few in a smaller space (more than you would if you tried to use the dowel approach from above). The perfect craft room organization idea for a small pegboard!
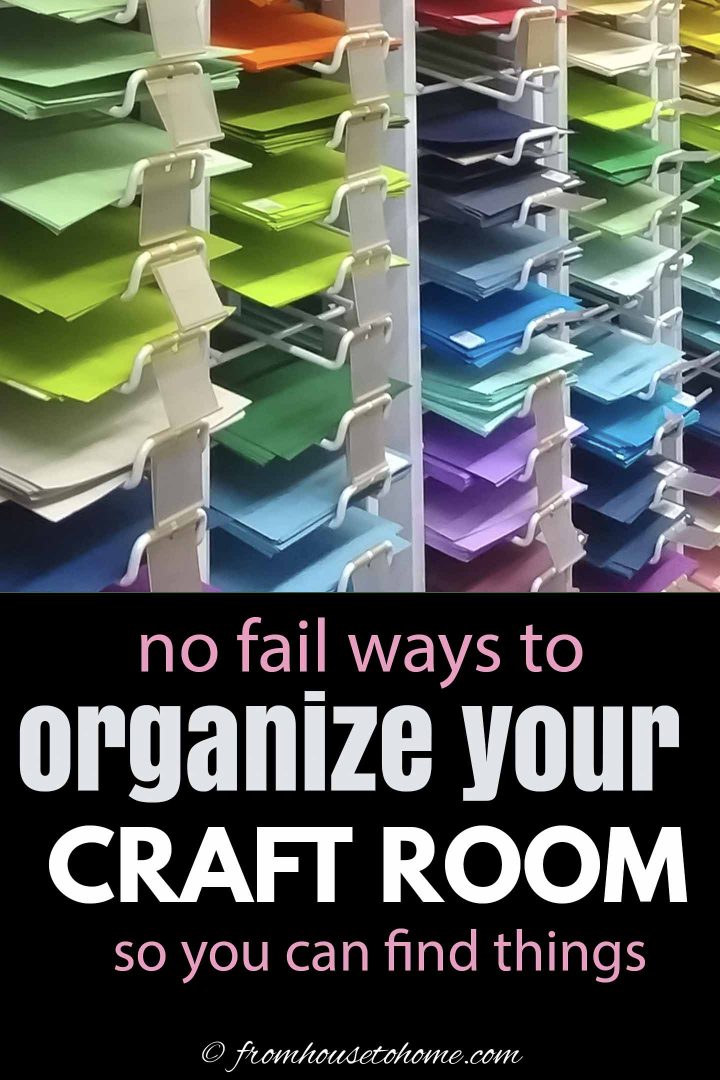
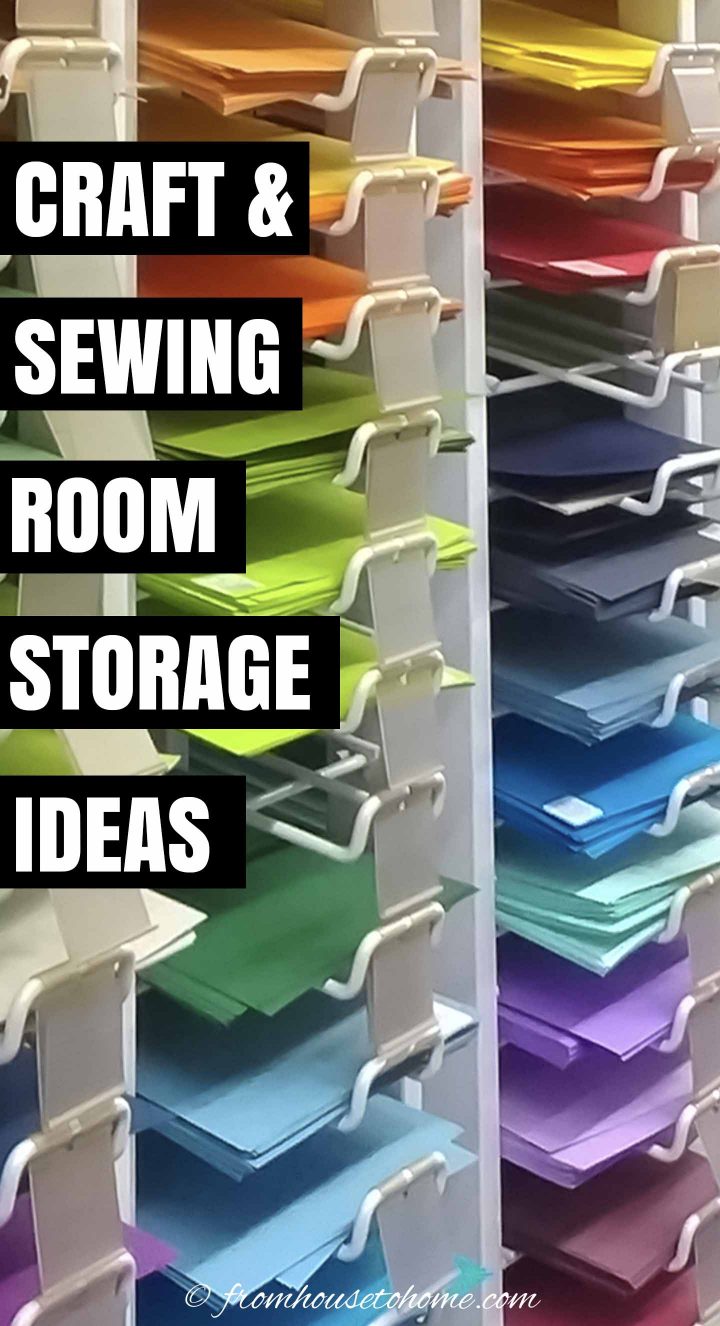
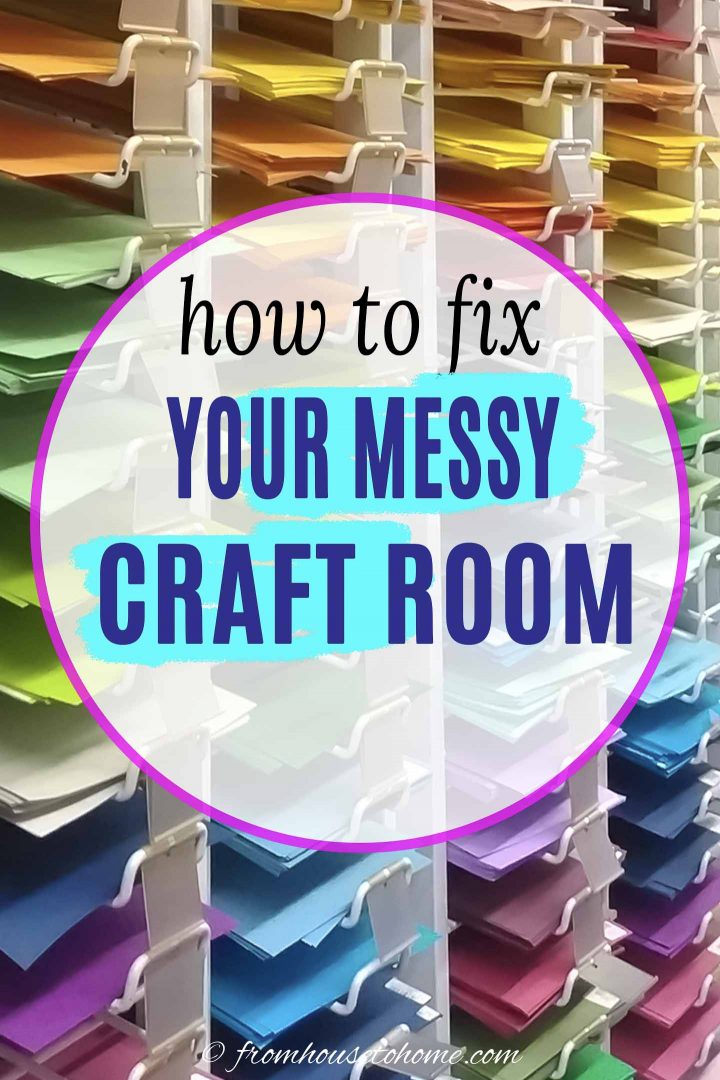
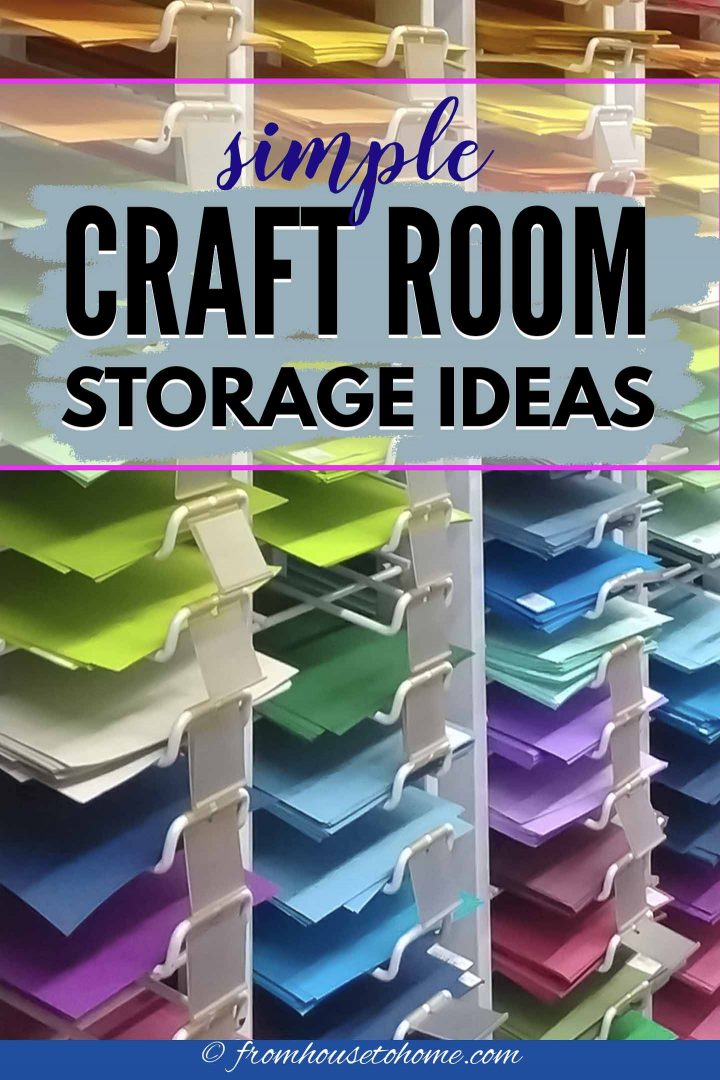
8. Sort Your Paper
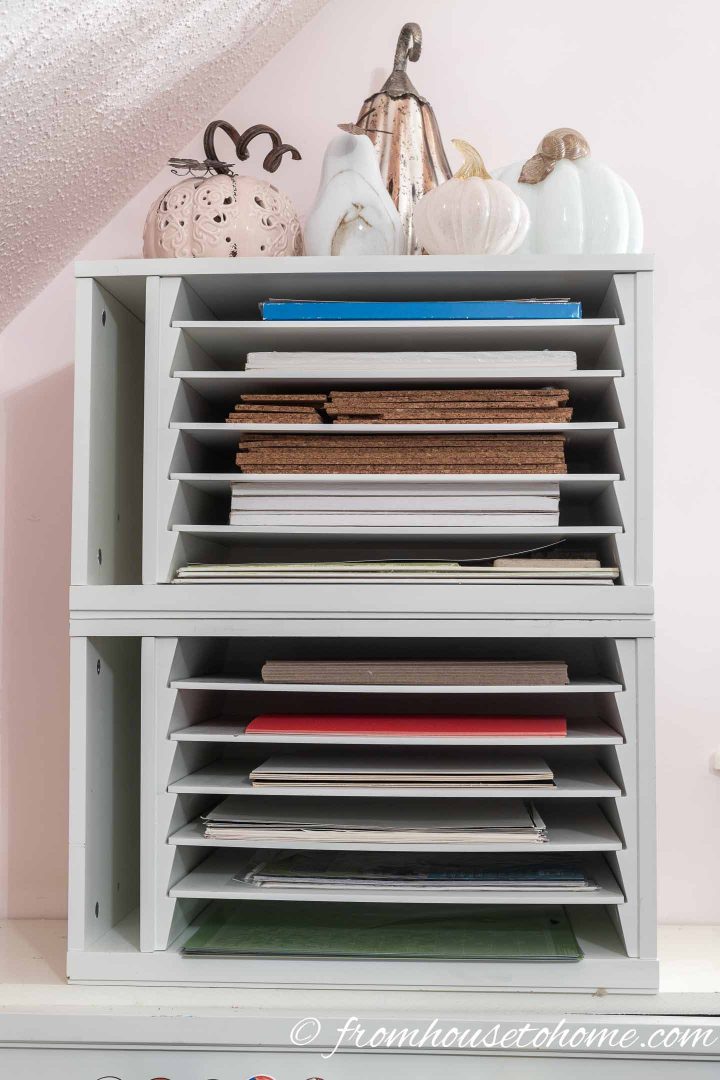
Another craft room storage issue I always have is trying to keep papers from getting wrinkled, and in a place where I can find them.
Which is where using a craft room organization solution meant to solve this exact storage problem comes in handy.
Paper organizers make it really easy to store and organize all kinds of paper, Cricut mats, adhesive vinyl and any other flat craft supplies.
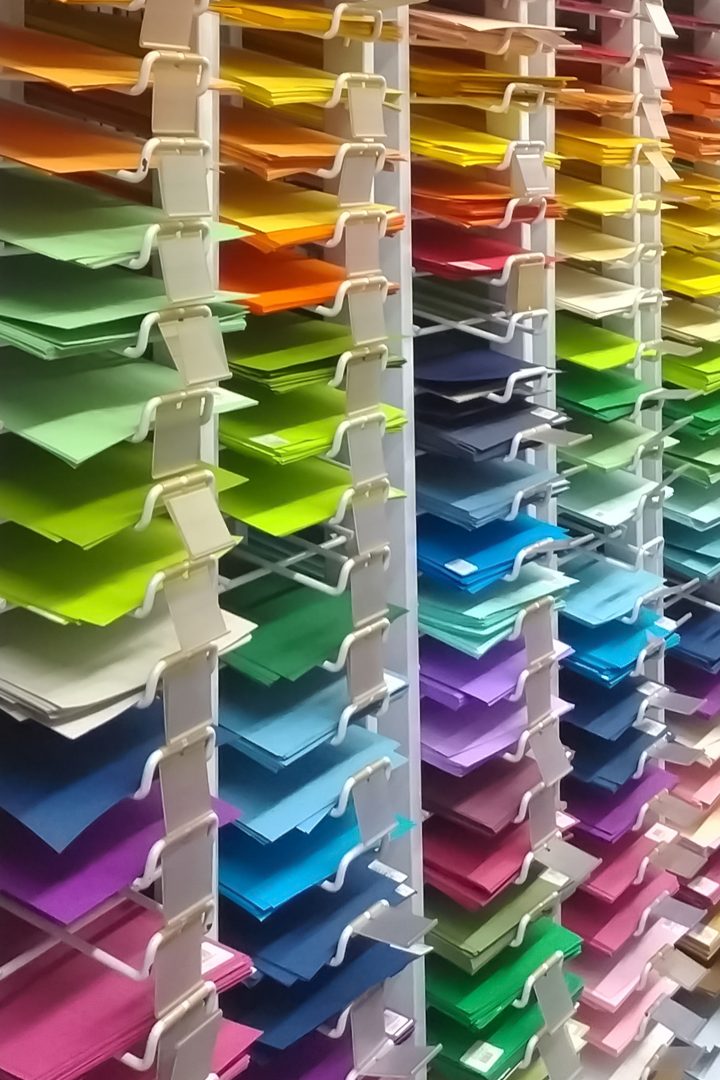
Of course, if I ever collect enough paper to warrant a whole wall of paper storage, filing it by color using these clear paper trays* would be awesome!
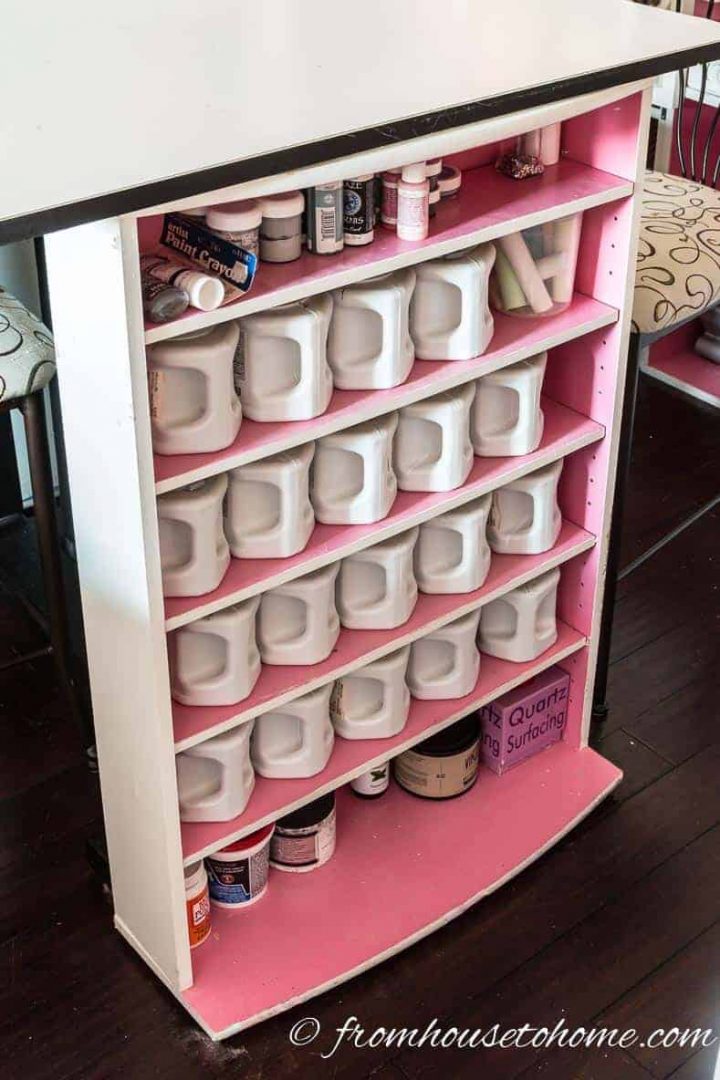
9. Store Paint In A CD Rack

The next one of my craft room organization ideas is a bit of a storage hack…but it works really well!
If you have a CD shelf left over from the days when having hundreds of CD’s was normal, you don’t have to throw it out!
Re-purposing CD shelves as a craft room storage solution works so well because they are the perfect depth for a lot of craft supplies…no more taking everything off the shelf to see what’s at the back!
I store everything that comes in small cans or jars (like paint and spackle) on this CD rack. And it’s amazing how much it holds.
I painted mine to match the office decor, and it fits perfectly under the end of my work table.
10. Add Wheels To A Filing Cabinet
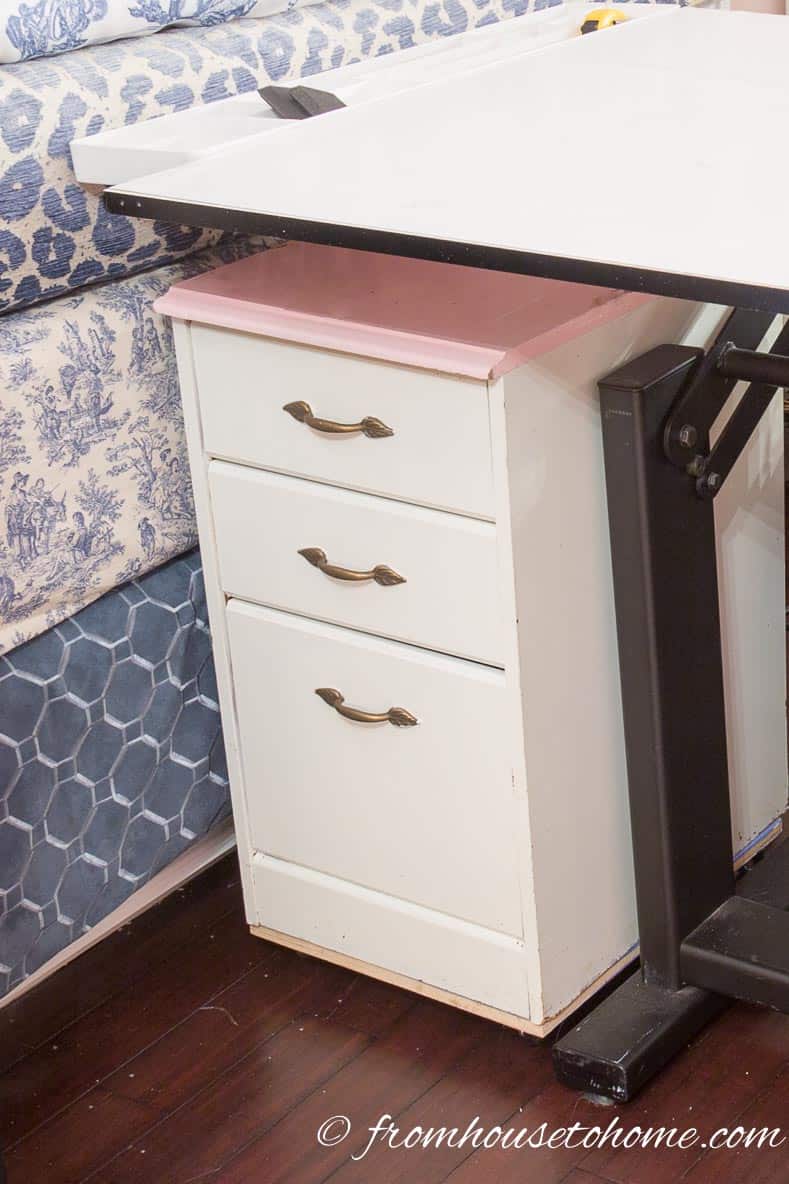
Filing cabinets are generally pretty useful as a craft room organization idea.
Of course, they are great for storing different types of paper (since that is their original purpose). But they also work well as a creative storage solution for fabric (see that HERE) or wrapping paper (find that HERE).
Adding wheels to the filing cabinet just makes it so much easier to use since you can wheel it where you need it. They make great side tables for putting things on while you’re working on a craft project. (There’s that dual-function furniture idea again!)
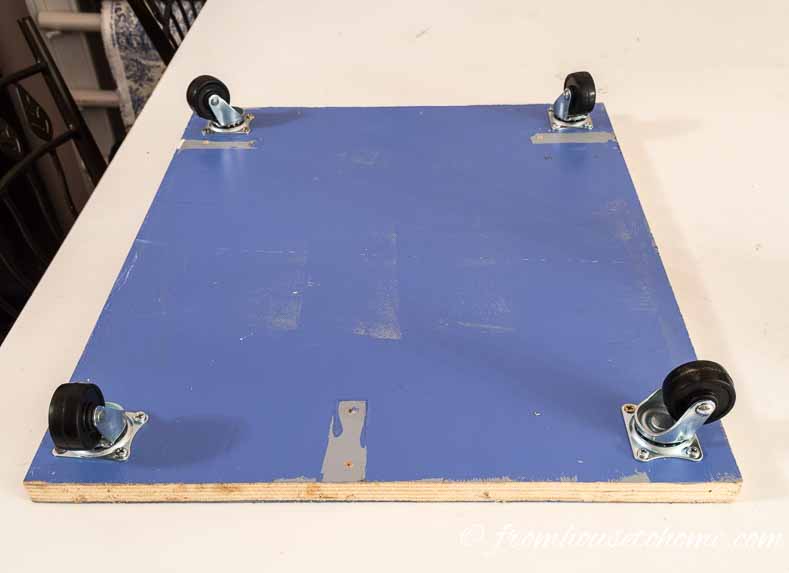
Since a lot of filing cabinets don’t have bases that are easy to attach wheels to, I like to make a dolly.
As you can see, you don’t need a fancy piece of wood for this. I used a scrap of plywood that was leftover from another project.
Cut the wood so that is slightly larger than the base of the filing cabinet.
Then screw on 1½” casters*. You can get bigger wheels than this if you need to wheel over really uneven surfaces. But to make the filing cabinet easy to move, I wouldn’t go much smaller than this.
Make sure that the wheels are far enough in that they don’t stick out past the edge of the wood. If they do, they will get in the way when you want to push the filing cabinet right up beside something.
Although I do move my filing cabinet around to the side like this when I need extra table space for a project, most of the time it slides right under my adjustable table. That way it doesn’t take up any extra floor space.
11. Store Faux Flowers In Vases
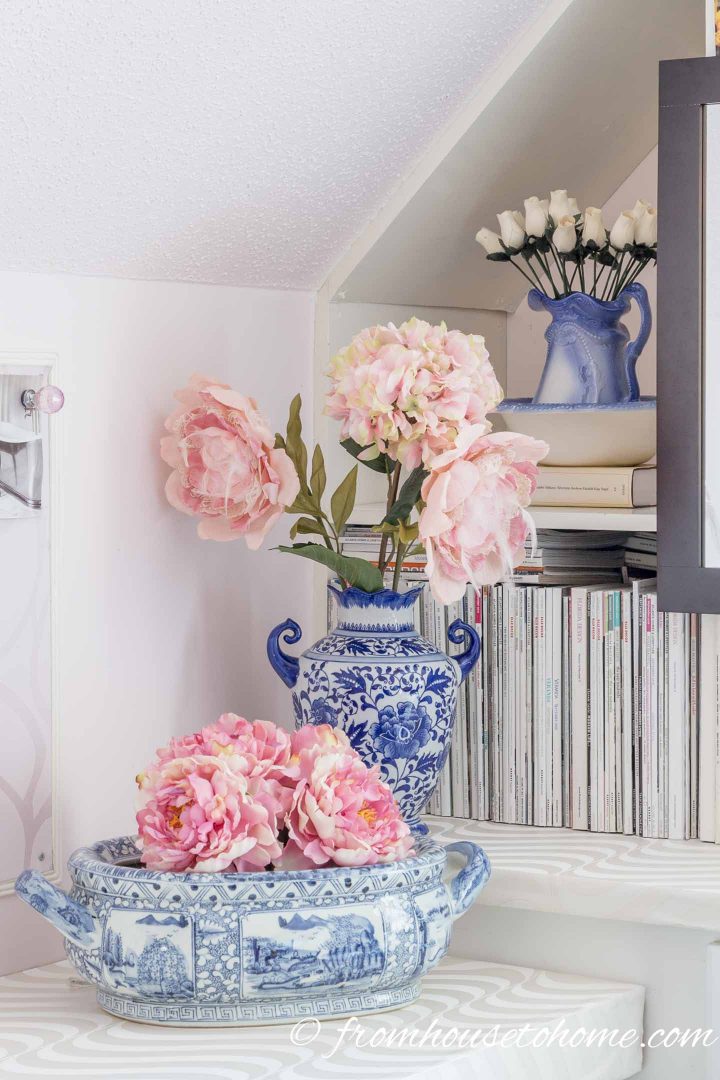
The last of my craft room organization ideas doesn’t even feel like storage to me 🙂
If you like to use faux flowers like I do sometimes, there’s always the question of what to do with them when you aren’t using them. They’re kind of an awkward shape and you don’t want to squish them by piling a bunch of stuff on top of them.
I put them in pretty vases and store them that way in my work room. That way they add to the decor and they’re easy to access when I need them.
And as you can tell, this picture was taken before I bought the magazine files from above 🙂 Don’t the files look so much better?
There you have it…all the things I did to get my craft room organized and it has definitely made recent projects easier!
Other Organizing Ideas You Might Like
Pin It So You Don't Forget It!
[columns] [span4]
[/span4][span4]

[/span4][span4]
[/span4][/columns]
Do you have any craft room organization and storage ideas to share? Tell us in the section below.
This post was originally published on February 17, 2017 but was updated with new content on February 28, 2022.
I make photo albums for family and greeting cards with scrap booking products. There is a lot of scrap paper of all sizes. My trick is a portable hanging file folder with alphabet filing of colors. I have two. If multi colors I use predominate color or divide into two different color folders. This has been a real life saver for me.
That’s a great idea, Cathey! Thanks for sharing.
This is a great post! I’m just starting out in crafting and need ideas. Where did you get your paper sorters? I love them!
Thanks, Becky! I actually got the paper sorter from a company that was going out of business so I’m not sure where you can buy them. The closest I have seen is at Ikea (https://www.ikea.com/us/en/p/kvissle-letter-tray-white-70198031/). It’s even a little bit better because the paper trays slide out 🙂
I am very glad to see a post like this one. I have taken my crafting with me all over the world being in the military. I always found ways to find storage places for my things. Now with your DIY projects I can build a cabinet to store my crafts and tools. Thank you
Thanks, Takasia! I’m happy you found it helpful 🙂 Happy crafting!
Hello and thank you so much for this post! I can’t tell you how many sites I’ve visited in the last 6+ months looking for exactly the practical content of this post. I recently decided to use half of my part-time guest room as my sewing/craft space. I have so many things to store, but couldn’t wrap my head around a organized way to get everything in one very small space, using the items I already had (I don’t want to buy more “stuff”). I can’t wait to get started on the organization and then, creating! Thank you for this graphic, clear and helpful post.
Thanks, Cindy! I’m happy you found it helpful! Good luck with your organizing 🙂