How To Update A Countertop Without Spending A Lot Of Money
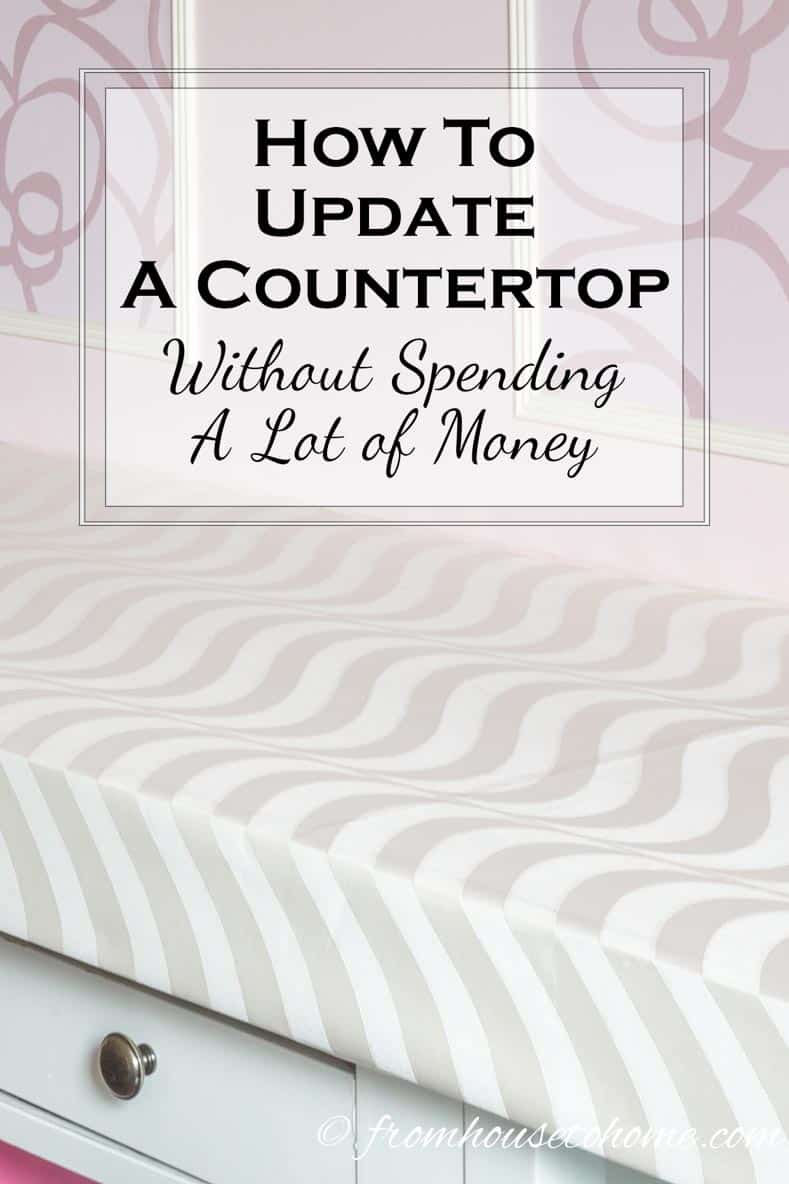
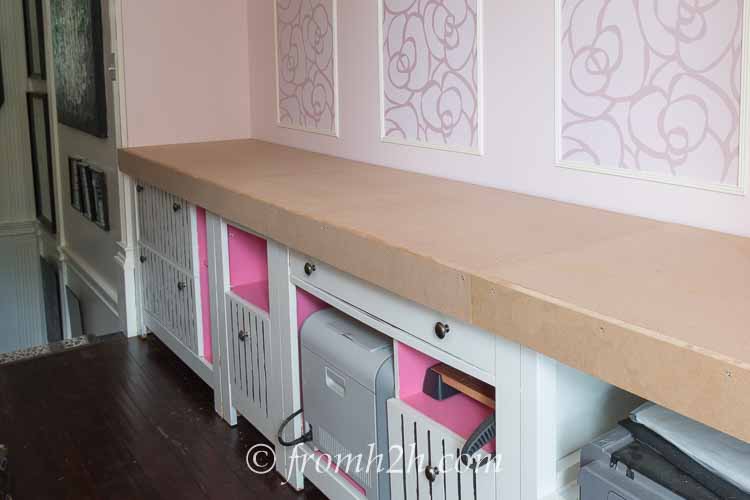
As part of my home office makeover, I built a countertop over a row of filing cabinets and wanted a way to make it more interesting without spending a lot of money.
I had originally considered doing contact paper Faux Marble (like I did on this computer table), but the color of the “marble” was a little too white.
Then I thought about painting the countertop and using traditional decoupage (where you glue images on to the surface) to add some interest to it. But that sounded like a lot of work!
But that gave me an idea. Why not use the decoupage technique of applying paper to the surface but instead of doing individual images, use one big long strip of paper? That sounded like a lot less work, but with lots of creative possibilities.
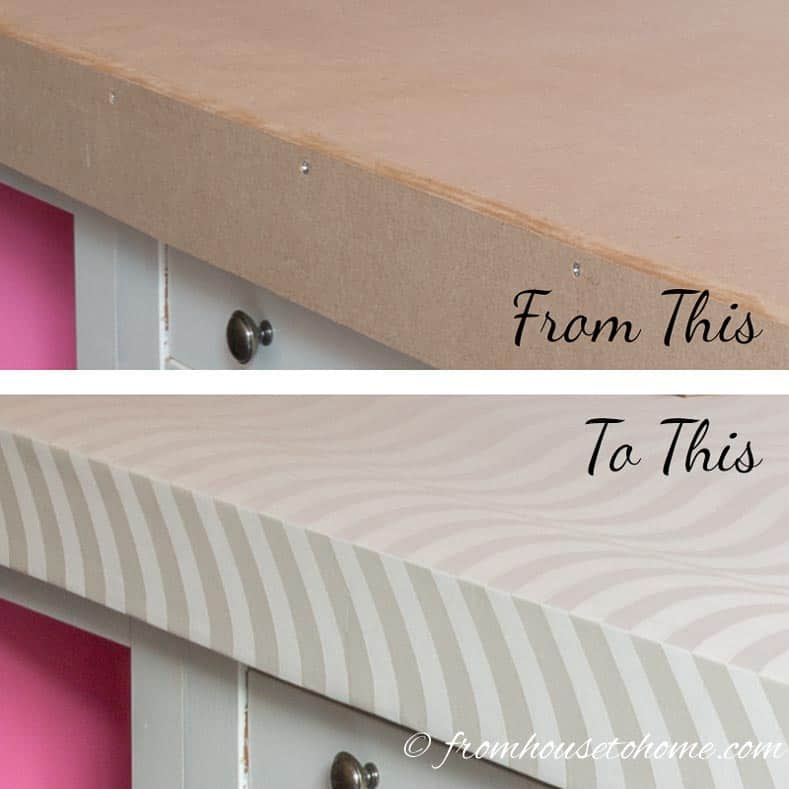
Here’s a sneak peek of the countertop before and after it was updated.
Read on to find out how to update a countertop without spending a lot of money.
Find Your Paper
The first step to creating your countertop is to find the paper that you want to use.
Ideally, the paper should be wider and longer than the countertop area that you are covering, including any overhang. That way you don’t have to worry about matching the pattern or creating a seam.
My first thought was to use wrapping paper.
It comes in a lot of different colors and patterns, and you can order it in 15′ lengths from zazzle.com. I picked out 3 different patterns and couldn’t decide which one to use so I ordered all of them.
When they arrived, I used one of my favorite techniques for narrowing down color choices…took pictures of all three options. This usually helps me to see the colors and patterns more objectively, so it is easier to make a decision on the best one.
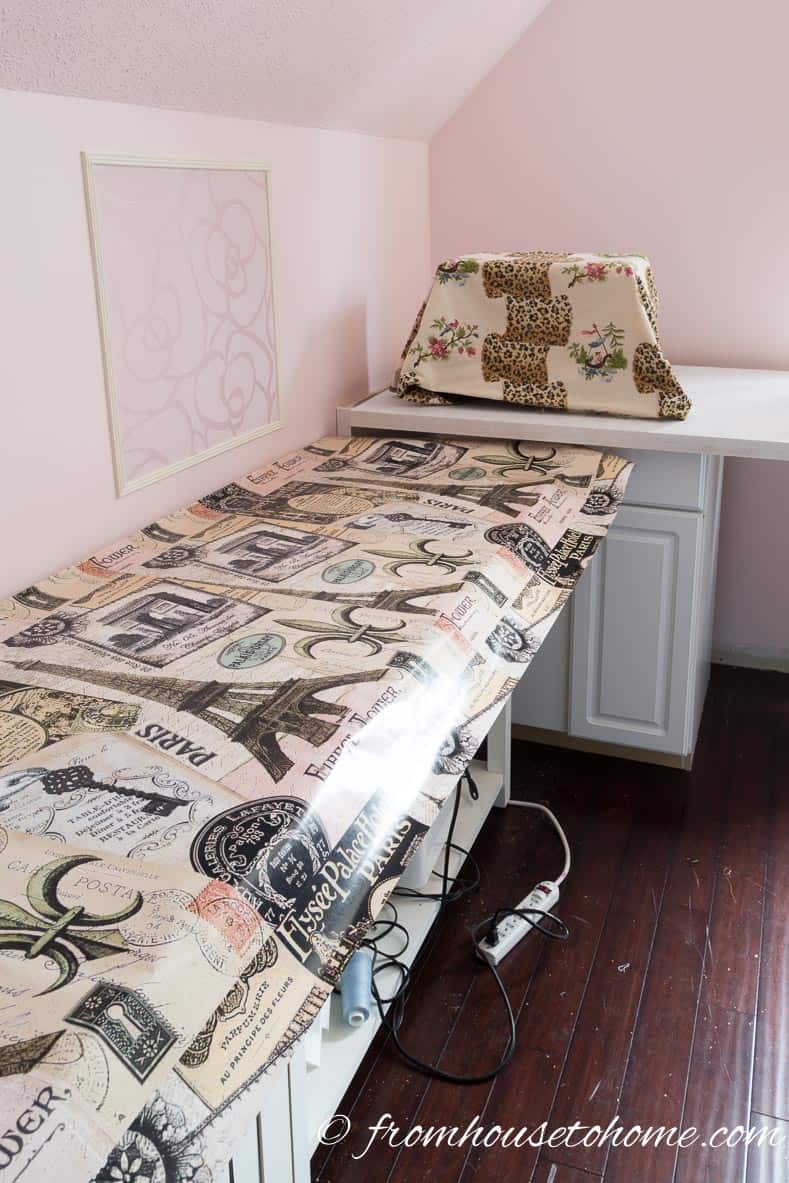
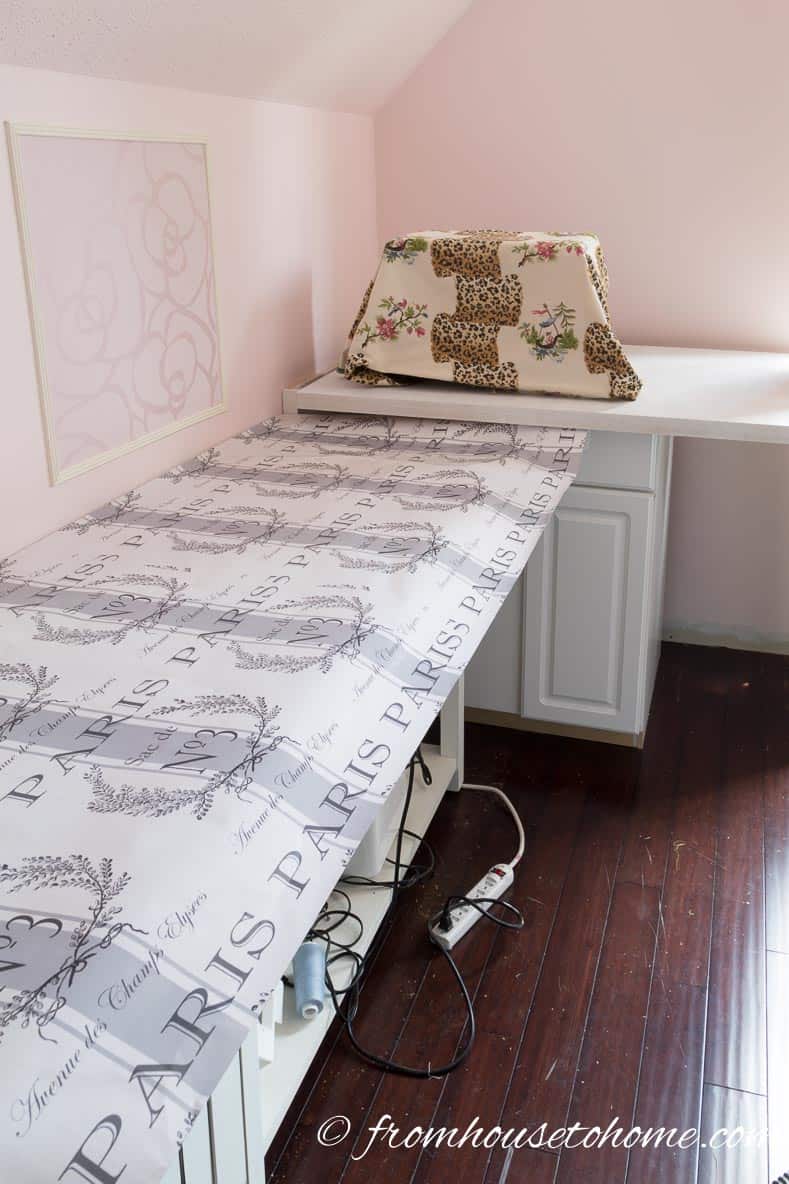
The first was a pink, cream and black collage of Paris pictures (similar to a traditional decoupage pattern). The colors were great but the picture did help me to see that the pattern was too busy…I didn’t really want the countertop to be the focal point.
The second was a black and grey linen-look Paris print which was much more subdued. But I thought the background was a little more grey than I wanted in this space.

The third pattern was a black and white leopard print that repeated the pattern from the curtain material.
After taking the pictures I was able to eliminate the first one, but still couldn’t decide which of the other two was better…I wasn’t really excited about either one of them.

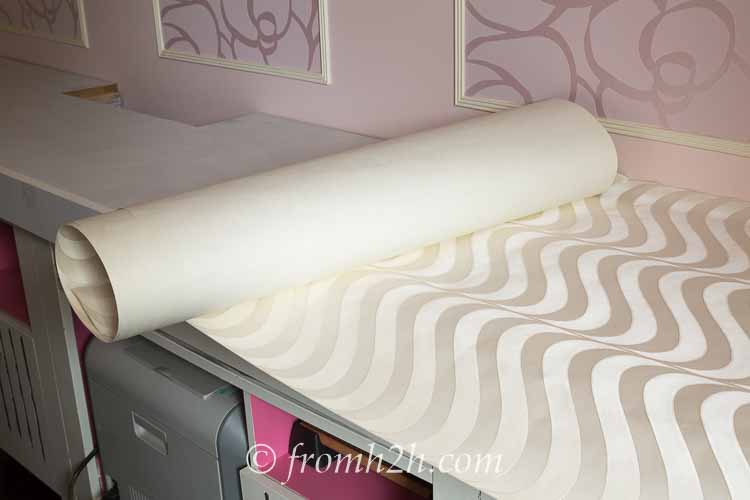
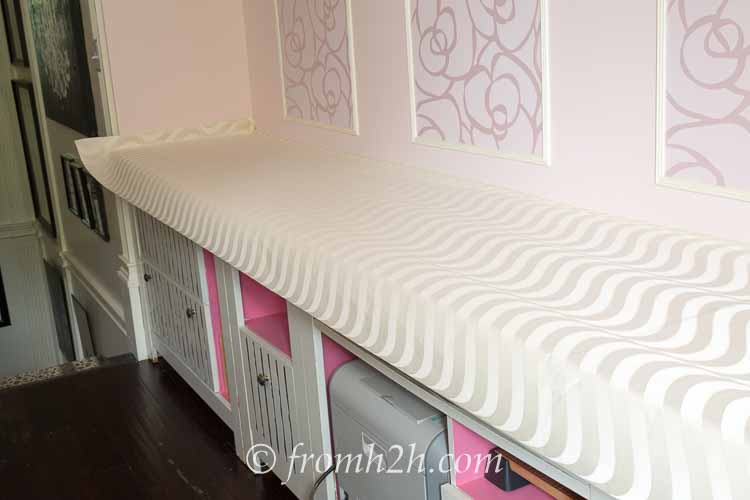
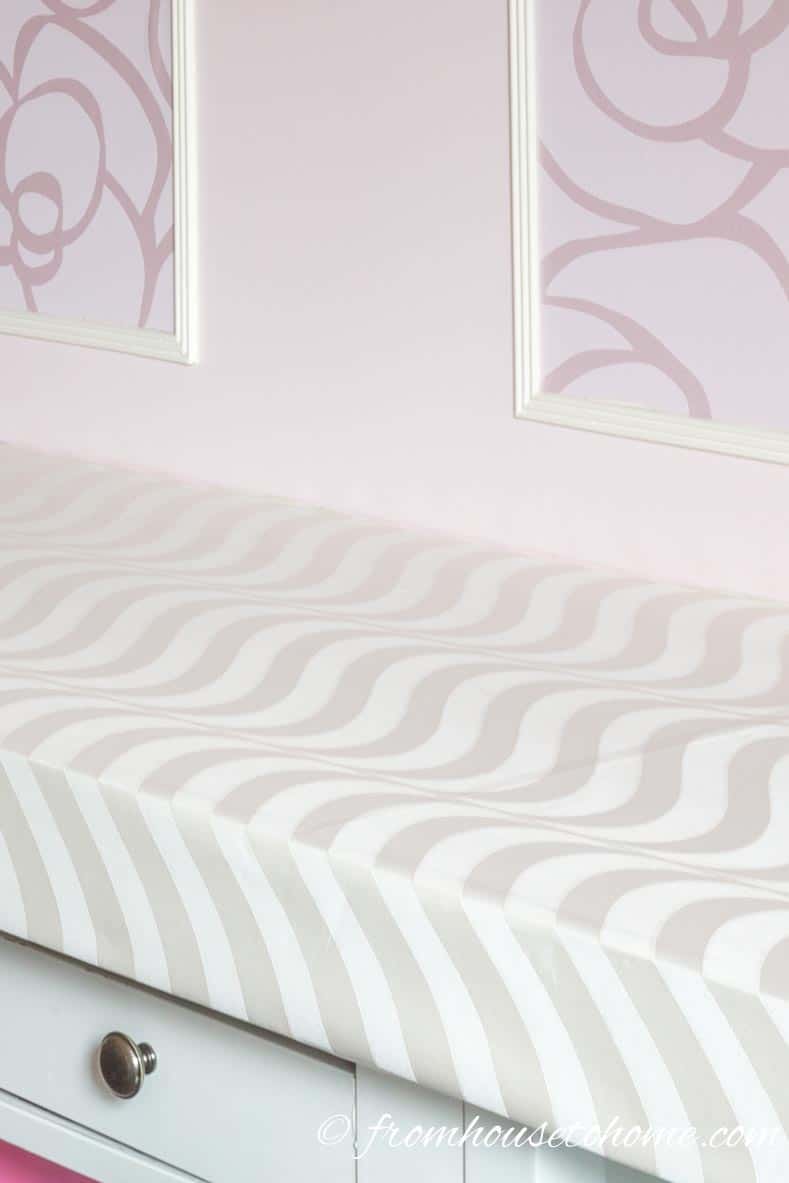
Finally, I remembered the leftover wallpaper from my bedroom makeover, which has a beautiful ivory colored wavy stripe on it. And when I laid it out, it was perfect!
The color was exactly the same as the mouldings, it had enough pattern to add some interest but not enough to overwhelm the room, and it was wide enough and long enough to cover the entire countertop…decision made!
Supplies
Materials
- Caulk or wood filler
- Sand paper
- Primer
- Wallpaper or good quality wrapping paper
- (Optional – only required for thin paper) Clear acrylic sealer*
- Mod Podge*
- (Optional) Wallpaper paste*
- (Optional) Marine varnish* – for a really hard finish.
Tools
- Putty knife
- Foam rollers
- Paint roller and tray
- Paint brush
- Wallpaper smoother*
- Carpet knife*
- Staple gun with ¼” staples
Prepare The Surface and The Paper

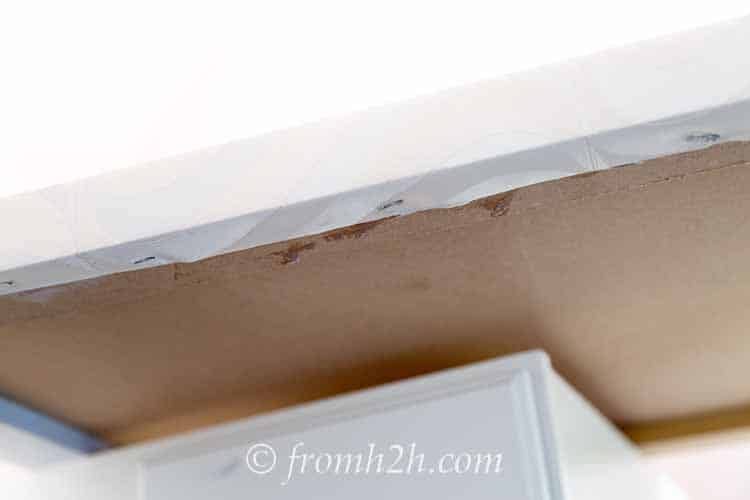
1. Use a putty knife and caulk or wood filler to fill any holes and cracks in the surface. I prefer to use caulk for this…to me it is easier to work with, but either one will do the job.
2. Sand the surface to remove any shine or loose bits on the existing countertop. Make sure there aren’t any bumps on the surface or they will show through once the paper is installed.
3. Wash and dry the surface.
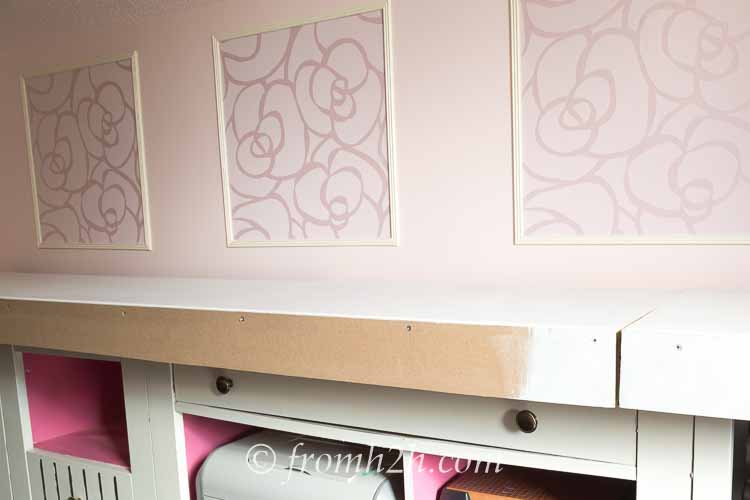
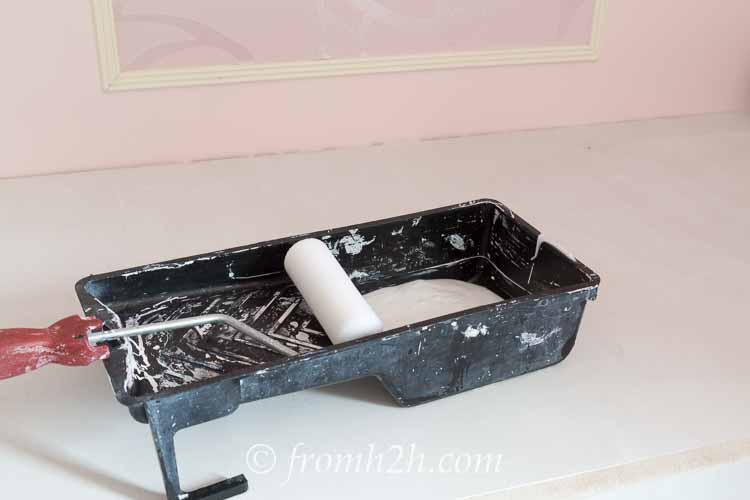
4. Prime the surface. Start at the back of the countertop and work your way forward…that way you are less likely to lean on the wet paint. I like to use foam rollers for this since they leave a really smooth surface.
5. Measure the length and width of the counter top.
6. Cut a piece of paper that is a little longer and a little wider than your counter top. It is easier to work with the paper if it is close to the size that it needs to be, but make sure you leave yourself enough extra to cover any parts that might not be straight (in my case, very wavy walls!)
7. Since I ended up using wallpaper, I didn’t need to do this step…but if you are using thin paper, you might want to spray both sides of it with Clear Acrylic Sealer. This helps protect the paper and makes it less likely to rip when it is wet.
Glue On The Paper
1. If you are doing a long countertop, you might want to roll up the paper inside out (so that the back is facing outwards). This will make it easier to unroll.
2. Start at one end of the counter. Use a foam roller to roll either wallpaper paste (if you are using wallpaper) or Mod Podge (for either wallpaper or wrapping paper) onto the top of the counter. Leave the overhang for now. Apply the paste liberally, but try not to have lumps. If you are doing a large countertop area, do sections of it at a time or the glue will dry before you get there…3′ sections worked pretty well for me.
3. Stick the paper onto the glue making sure that it is straight. If you have a pattern with stripes, you will definitely want to make sure that they line up with the edges of the countertop (it will be pretty obvious if they don’t). If you are doing a long countertop, getting this first piece right is very important…the straighter you get it, the easier it will be to do the rest of it.
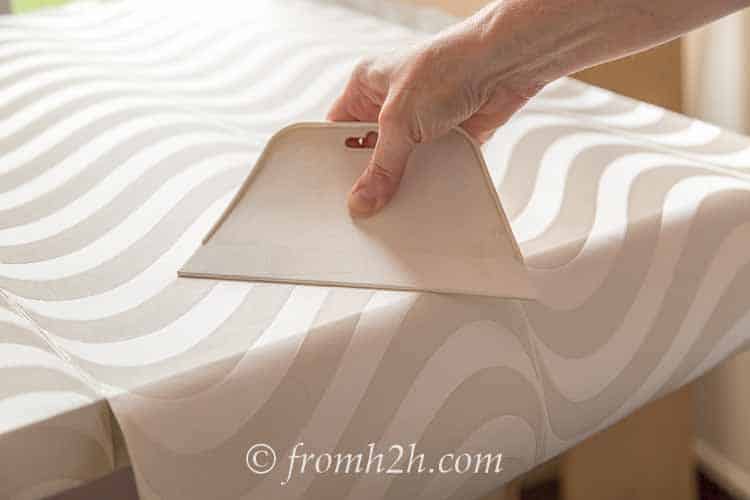
4. Use a wallpaper smoother to smooth out any bubbles by pushing gently from the middle of the paper out to the edges. If excess glue squishes out at the edge, just wipe it up with a damp cloth. Don’t push too hard or you will stretch the paper (or even worse, tear it). If you have stubborn bubbles, you can use a pin to prick a small hole to let the air out…however I usually find this means that the paper is not on straight so you might want to try re-positioning it.
5. You can also use a rollpaper roller along the edges to make sure they are stuck down.
Glue down the top before continuing to the sides
6. Repeat the glue and paste cycle until you have all of the paper stuck to the top of the countertop.
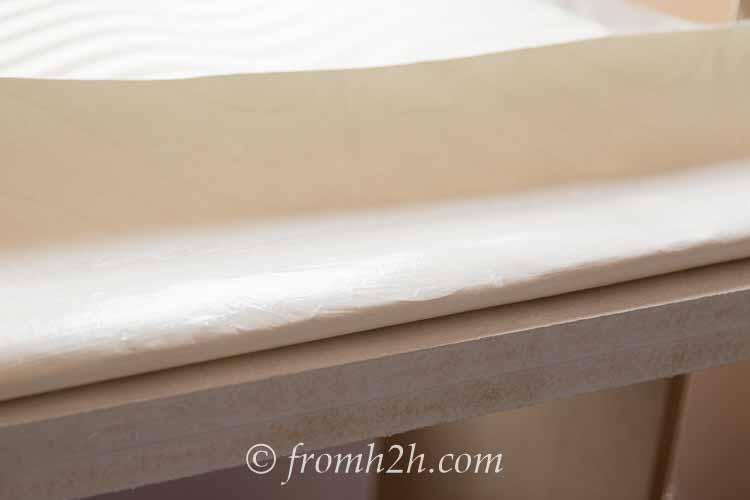
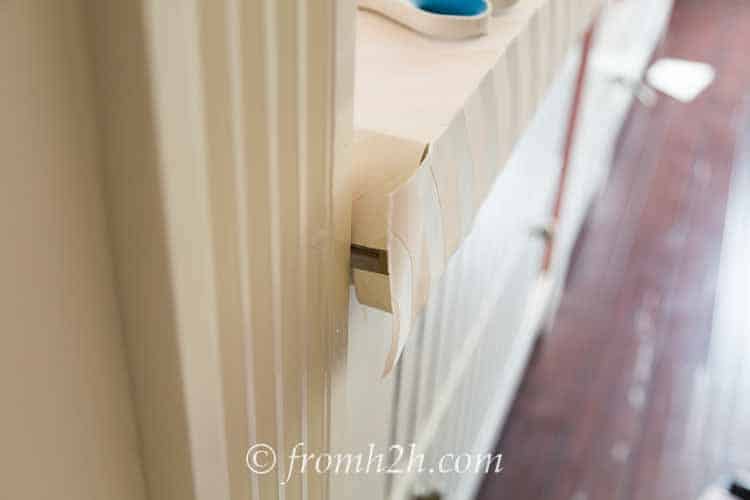
7. Now you will glue on the overhang. Roll the paste onto the overhang portion of the counter top. If you are using wallpaper, I found it worked best to use a brush to put some paste on the back of the wallpaper as well.
8. Pull down on the edge of the paper (gently) so that it is tight, and stick it onto the sides. Use the smoother to create a crease at the corner and to smooth out any bubbles.

9. If you are using wallpaper, you might want to use a staple gun to staple the paper to the underside of the overhang. This will make sure it stays in place. For wrapping paper, this step probably isn’t necessary.
If the staples don’t go all the way in, you can use a hammer to make them go in the rest of the way.
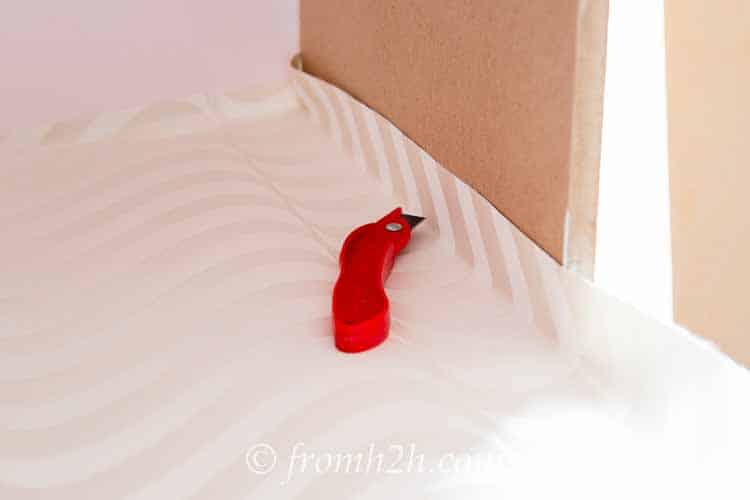
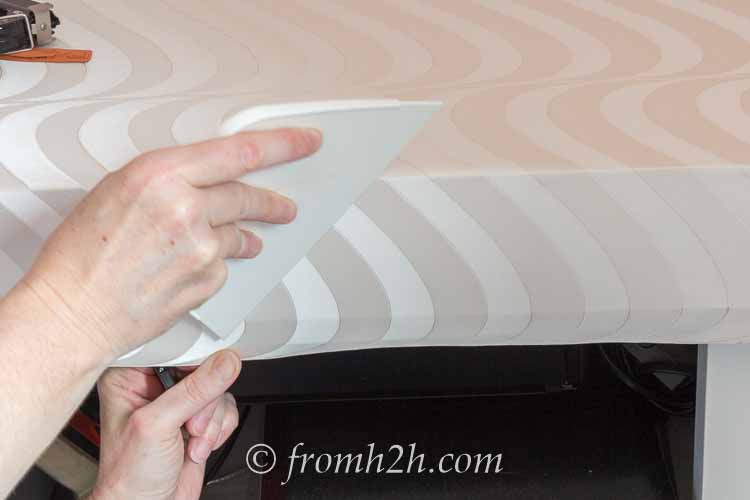
10. Use a utility or carpet knife to trim the excess paper from the edges of the counter top. I think carpet knives and blades work best…since they’re sharp enough to cut through carpet, they do a good job of making clean cuts in paper.
11. If you have any corners that show, cut slits at the top and bottom of the overhang, and fold the edges over like you are wrapping a present. You might extra glue to make sure these stay stuck.
Seal The Countertop
1. In order to protect the paper, you will want to put on several coats of sealer. Start with 2 coats of Mod Podge. I like to use a foam roller for this, too. This will seal the paper. You can apply the second coat of Mod Podge 15 to 20 minutes after the first which makes this process pretty quick.
2. If this is a relatively low-use surface (like my office countertop), add a couple of additional coats of Mod Podge to make it durable enough to use.
3. However if this countertop is in a bathroom or kitchen where it will get lots of use and could get wet, you will want to use multiple coats of an oil-based Polyurethane finish or Marine Varnish. Wait for 24 hours after the last Mod Podge coat before applying the first coat of polyrethane. Then follow the manufacturer instructions. You will need at least 4 or 5 coats in order to protect the paper properly. I have a wood countertop in my bathroom that was sealed with Marine Varnish and I can vouch for the fact that it is definitely water proof!
Enjoy Your New Countertop
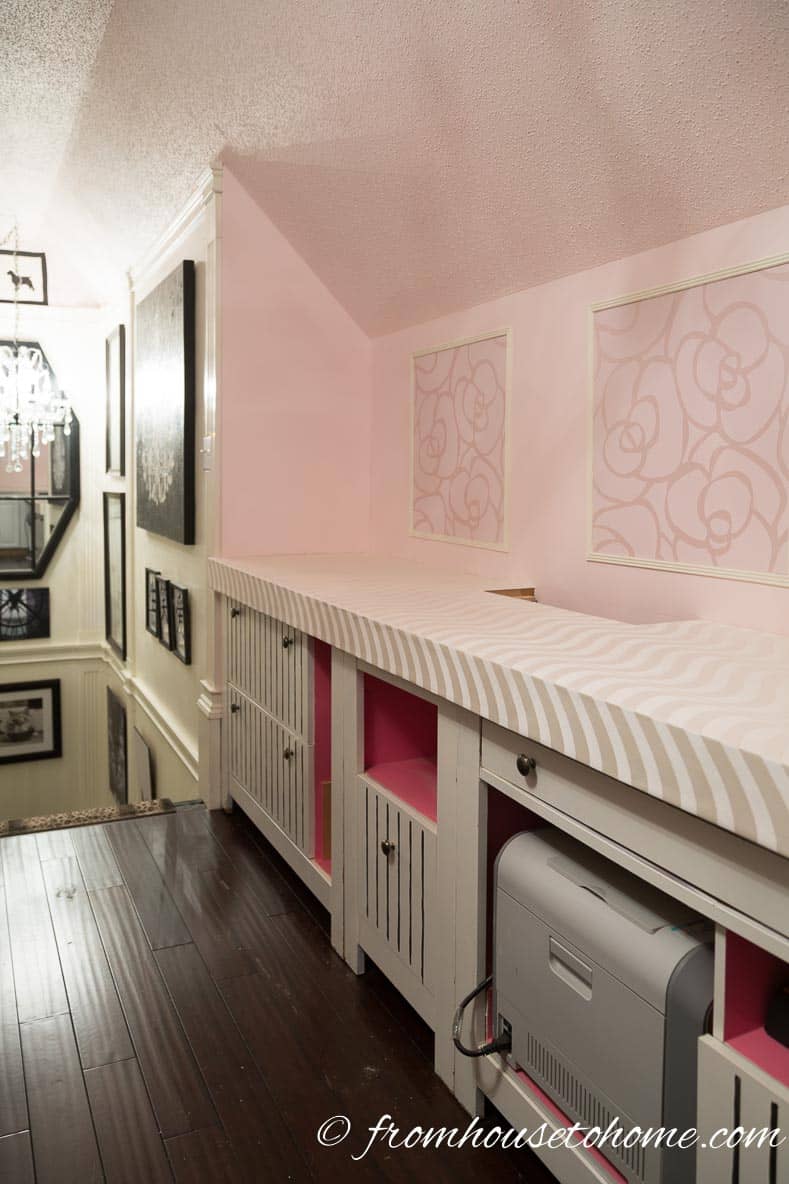
I love the way the new countertop looks…enough of a pattern to add some interest but it doesn’t distract from the rest of the room.
It definitely looks better than when it started!
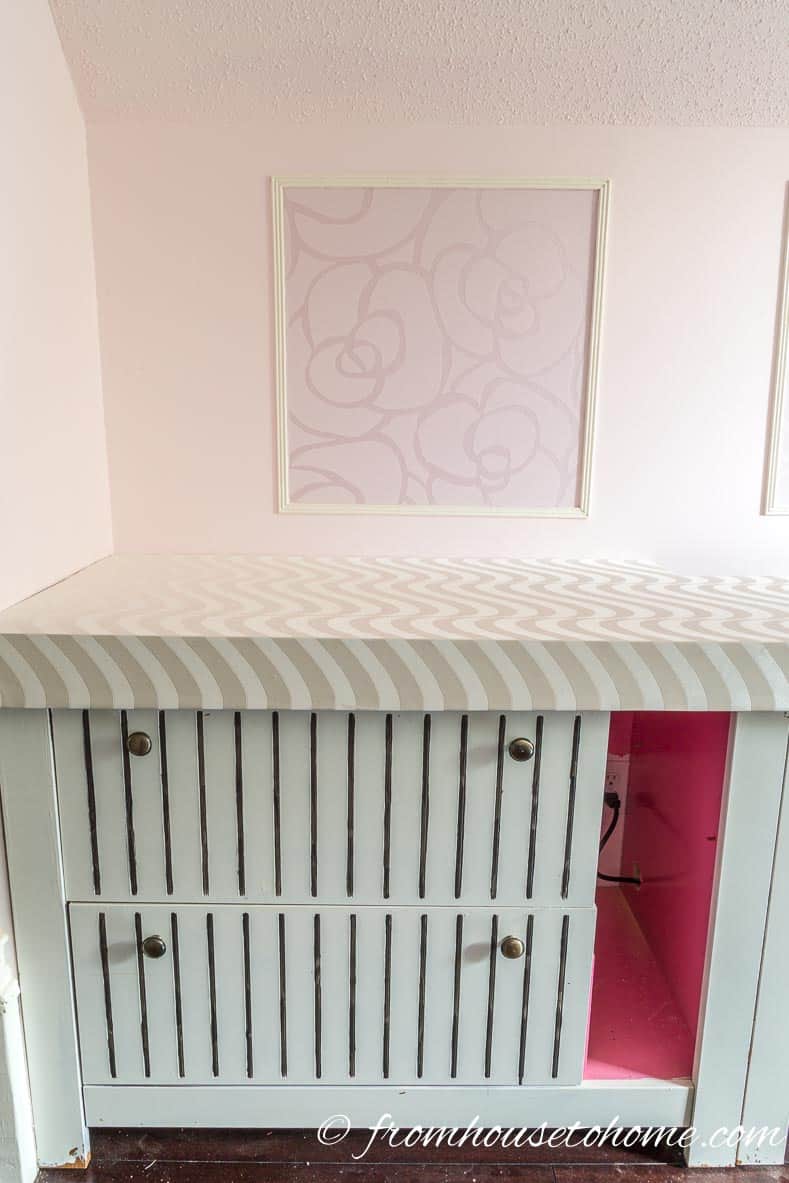
The colors go perfectly with the cabinets and the wall mouldings.
And it was a very inexpensive project! A win-win solution all around.
Have comments or questions on How To Update A Countertop Without Spending A Lot Of Money? Tell u sin the section below.
This post was originally published on May 2, 2016 but was updated with new content on April 13, 2024.