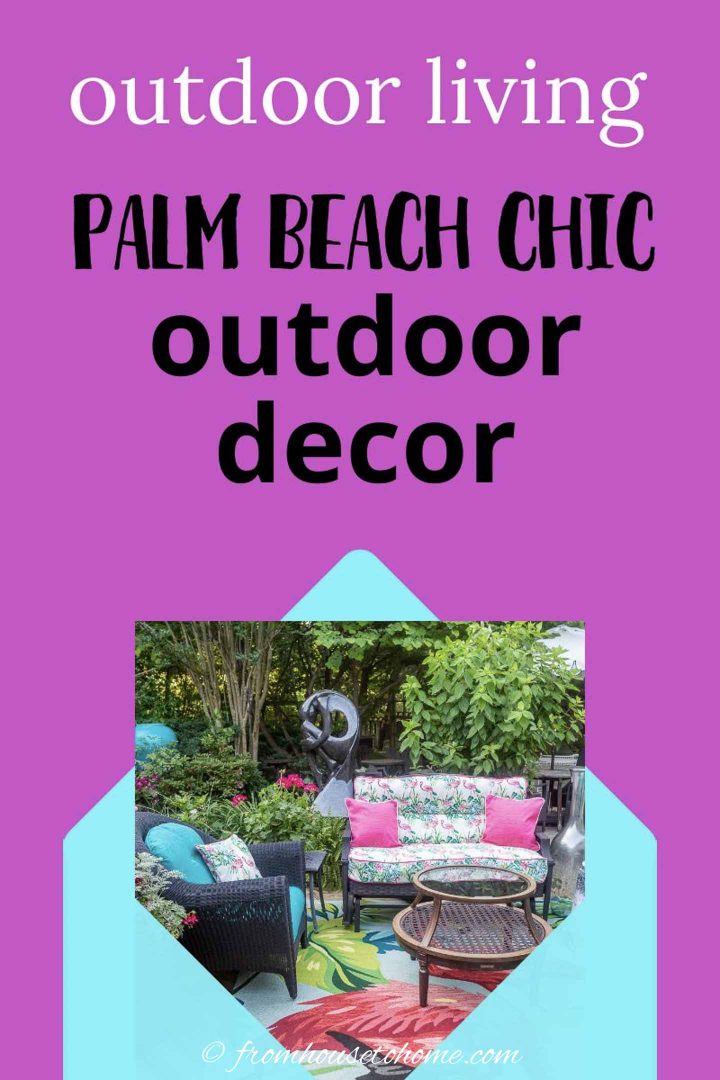
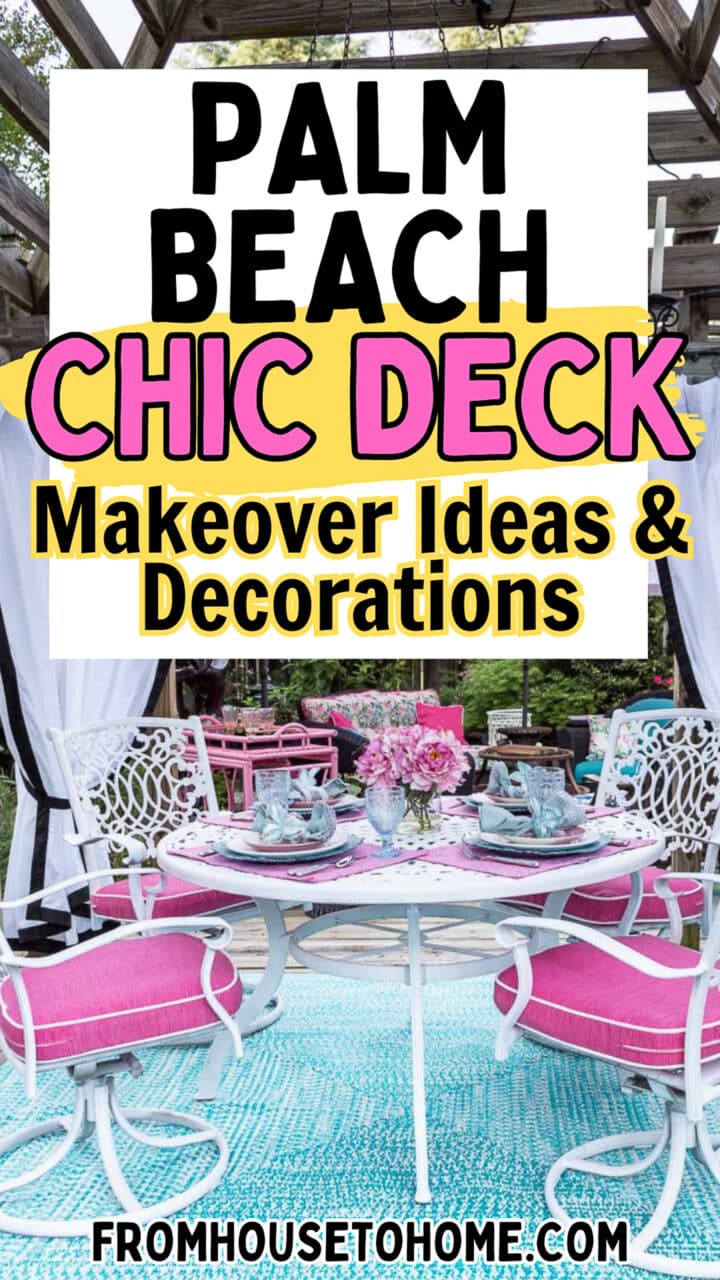
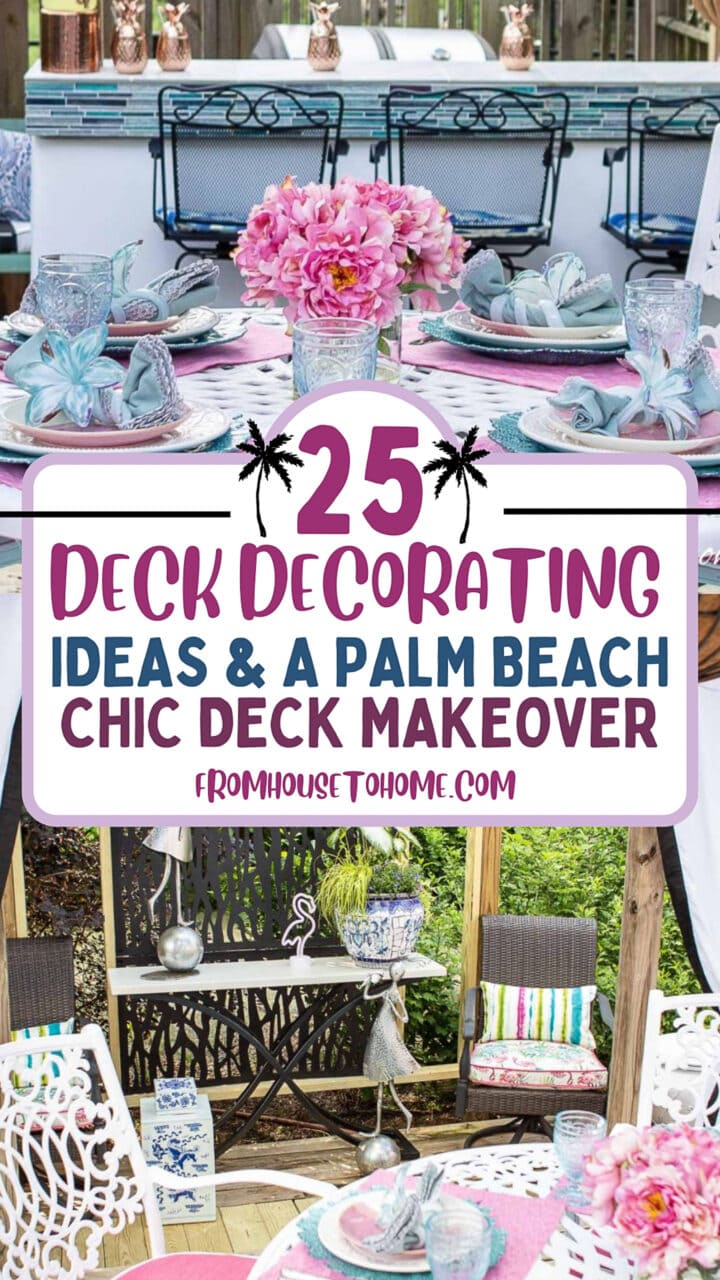
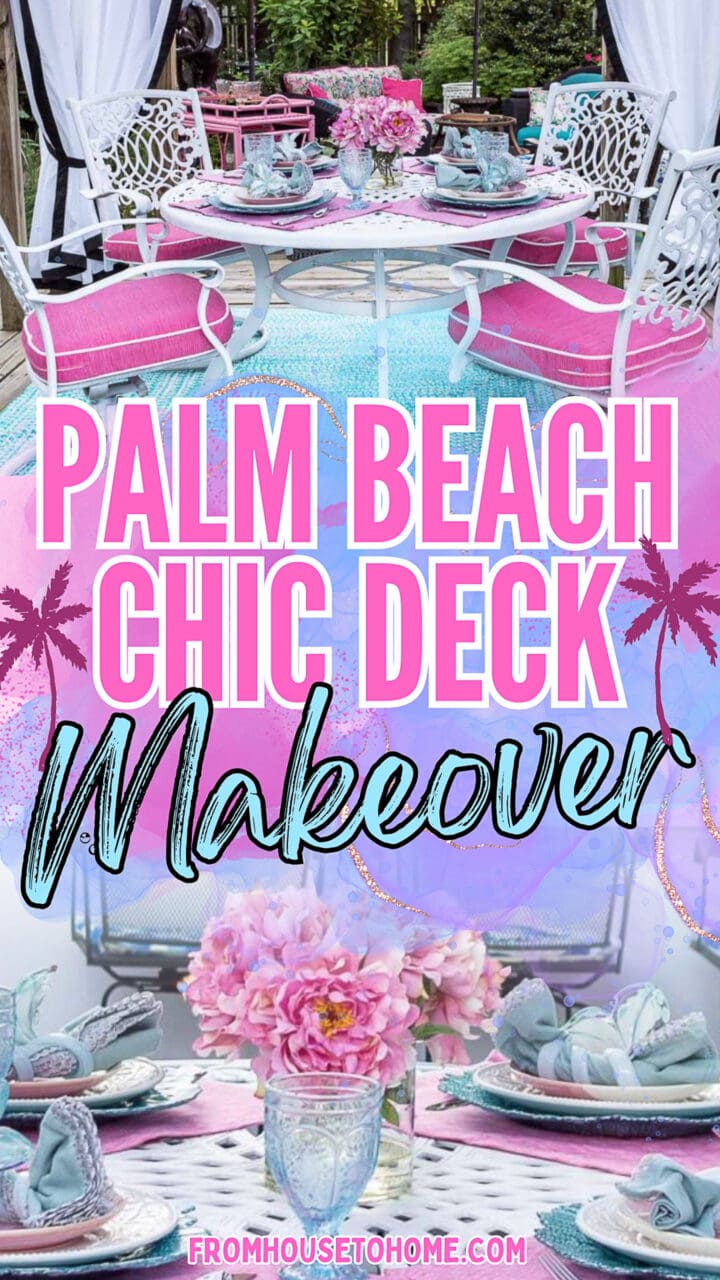
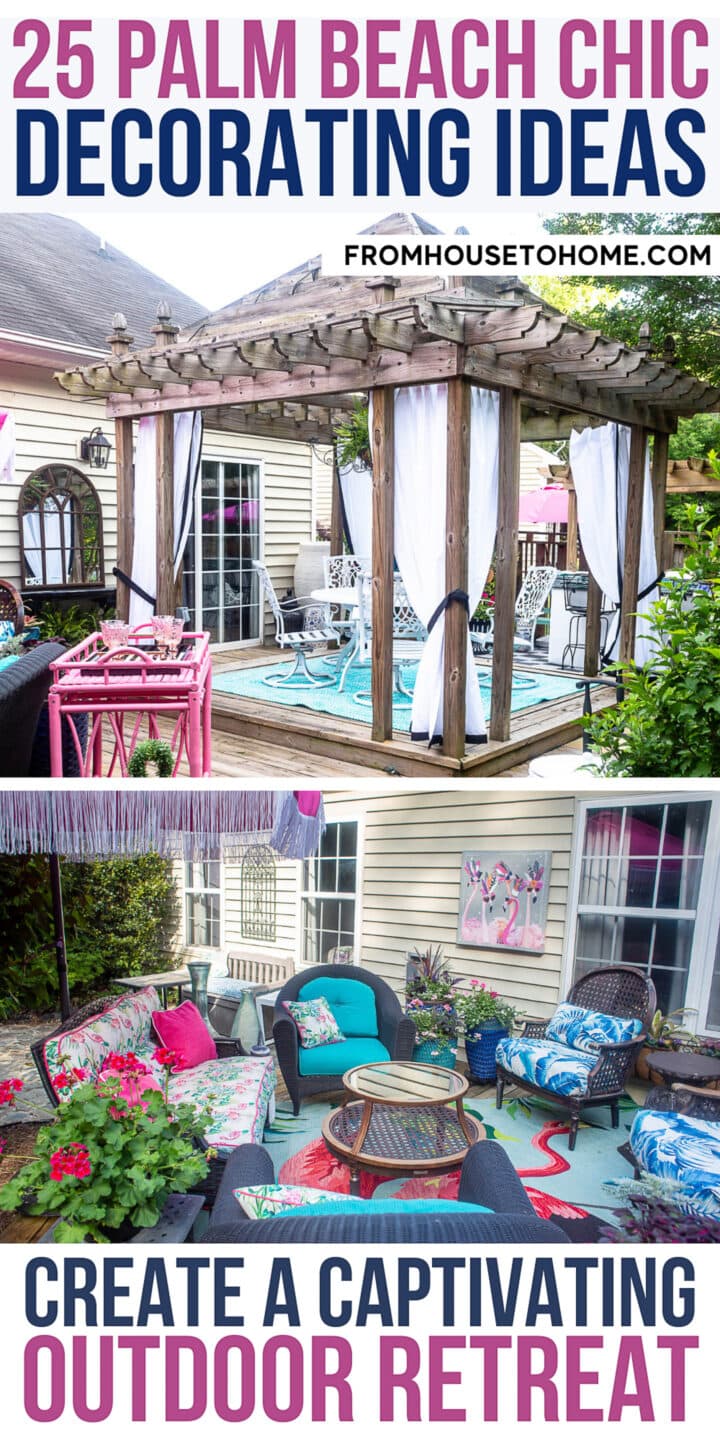
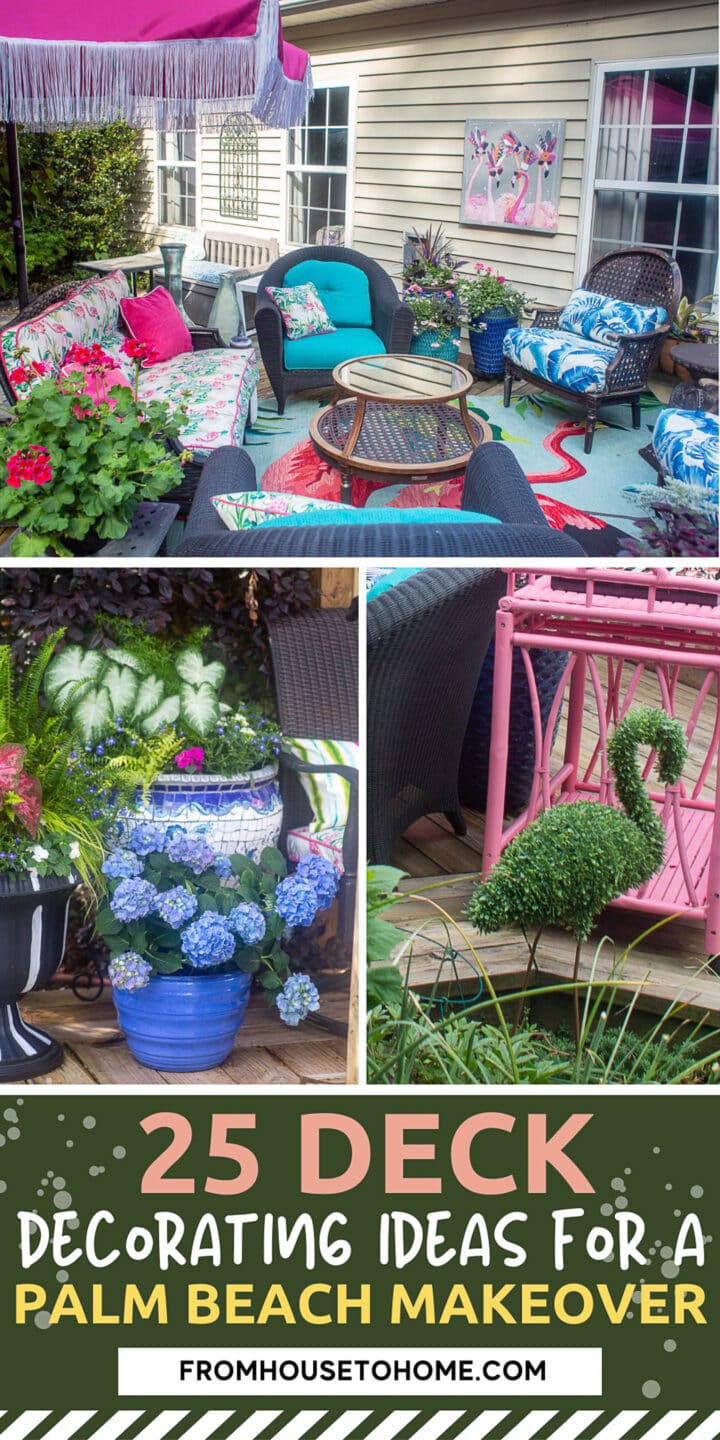
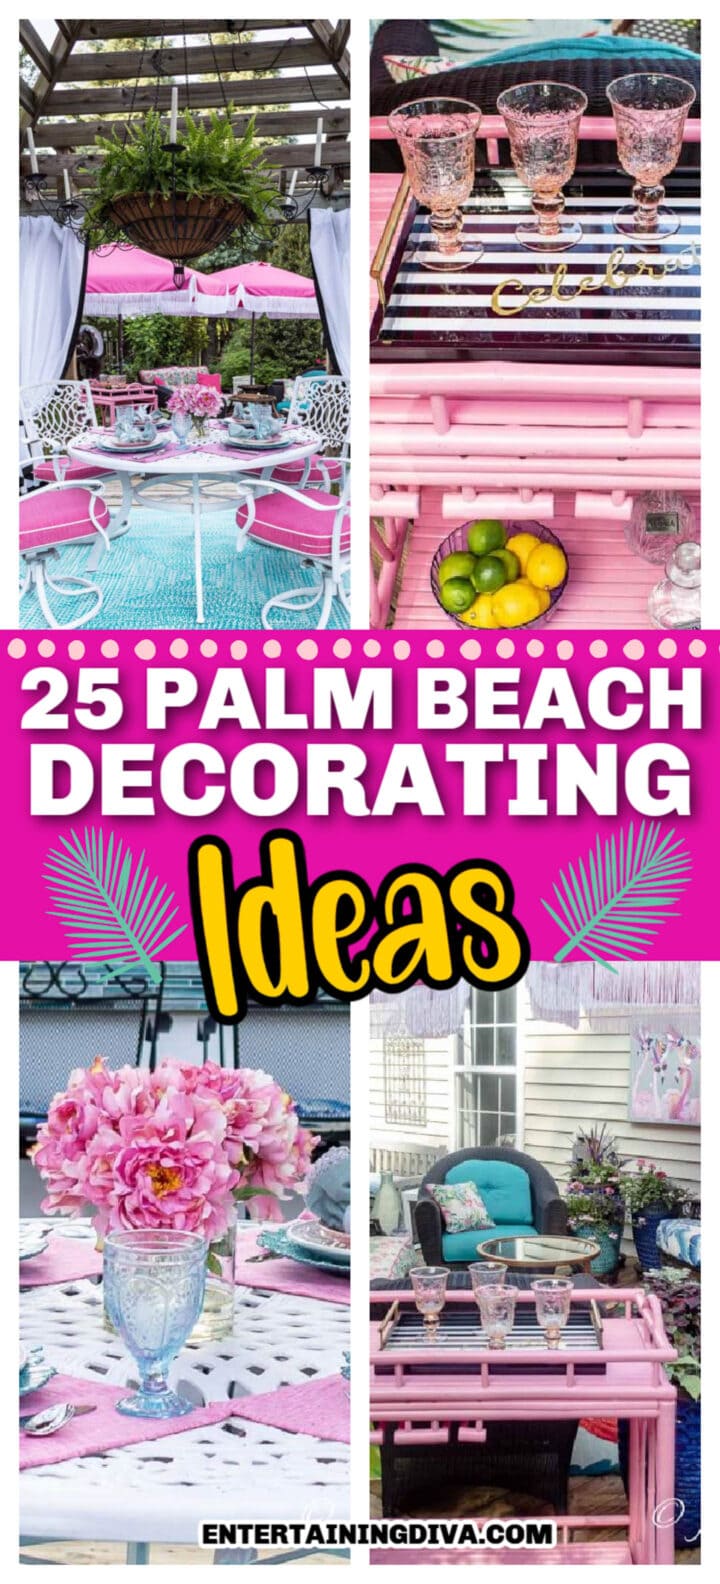
25 Deck Decorating Ideas For A Palm Beach Chic Deck Makeover
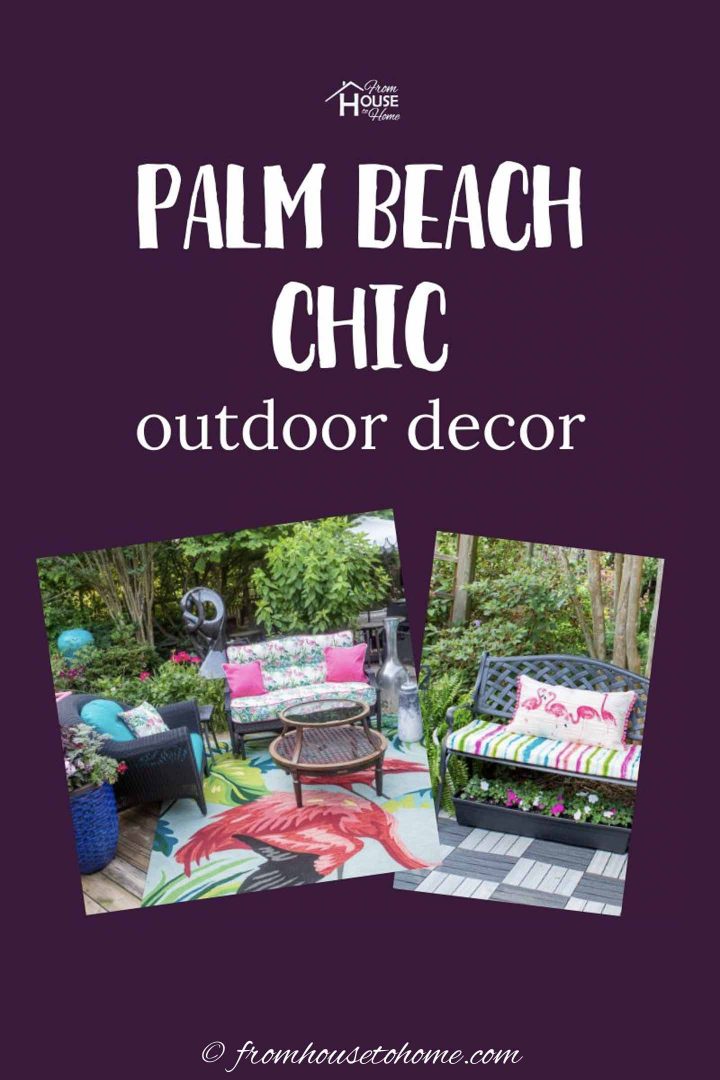
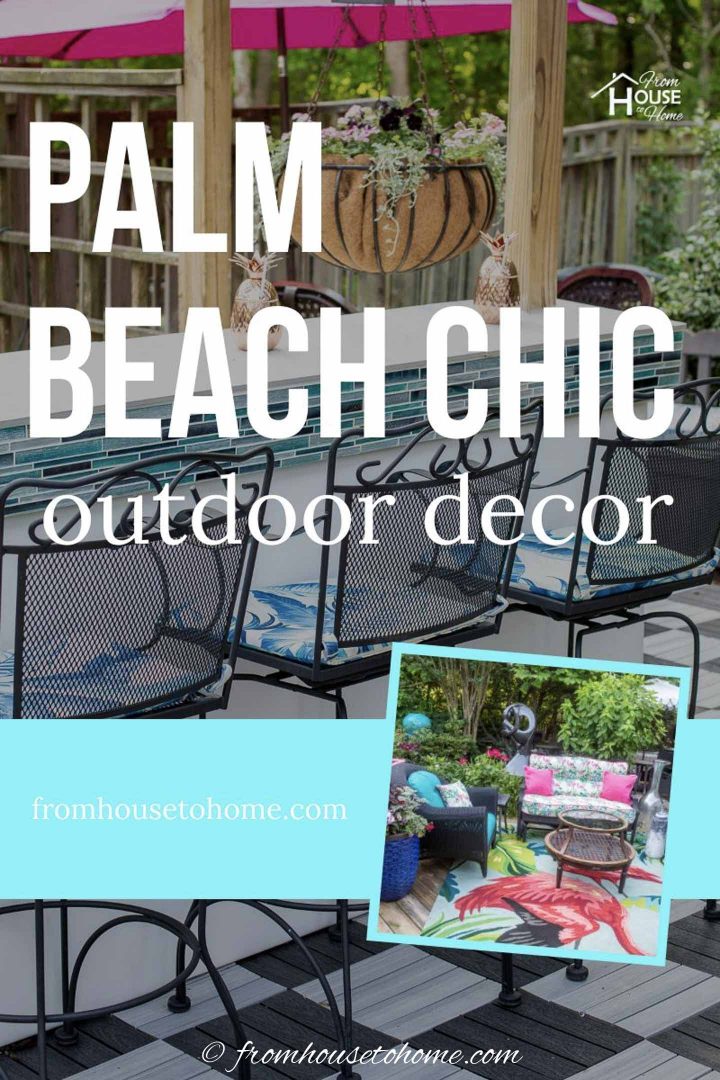
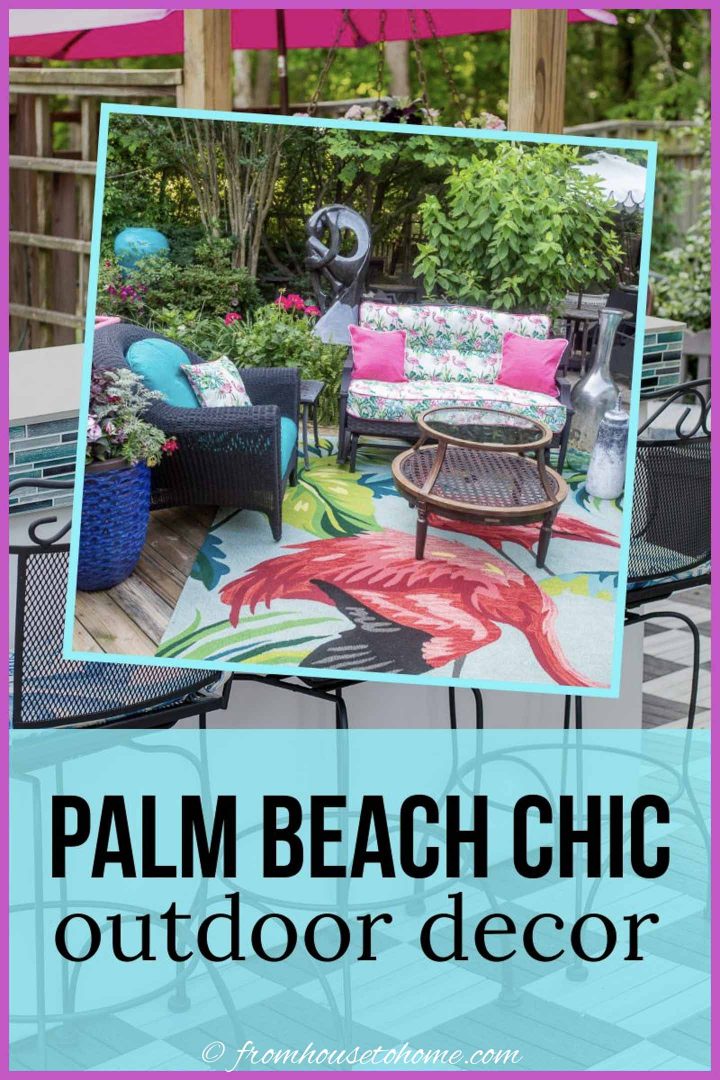
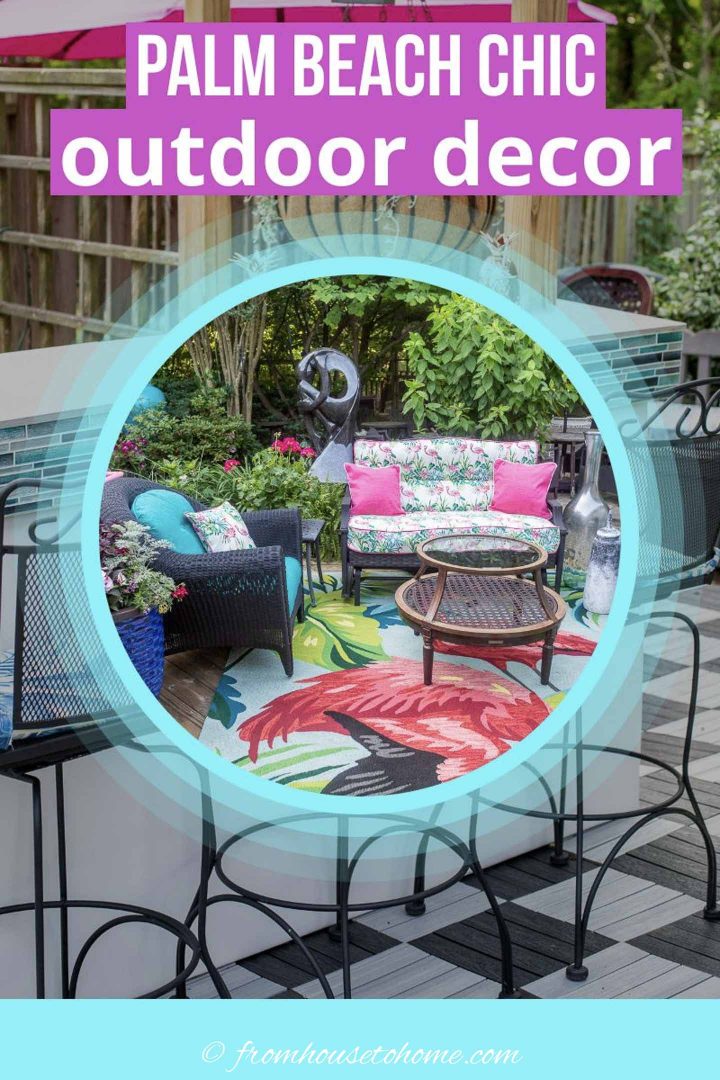
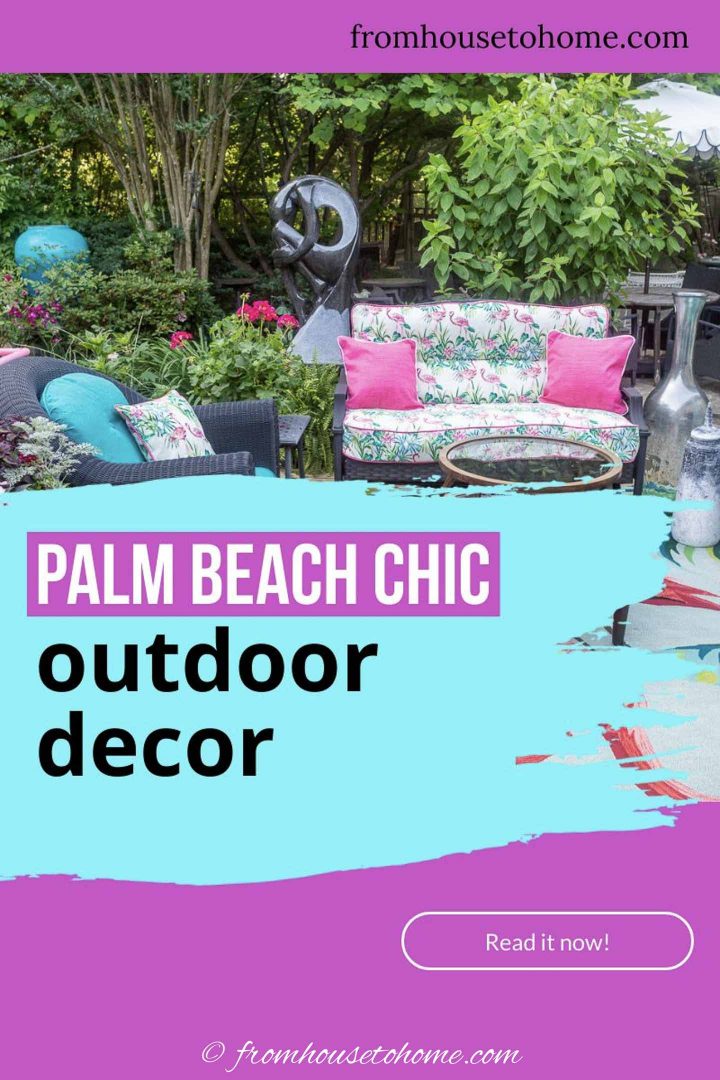


When I decided to update my outdoor living space with a Palm Beach chic deck makeover, I had no idea it would turn into such a big project. But now that it’s finished, it’s hard to believe the before and after is the same deck! Even if you don’t want to use the same colors, you’re sure to find some deck decorating ideas you can use in your own backyard.
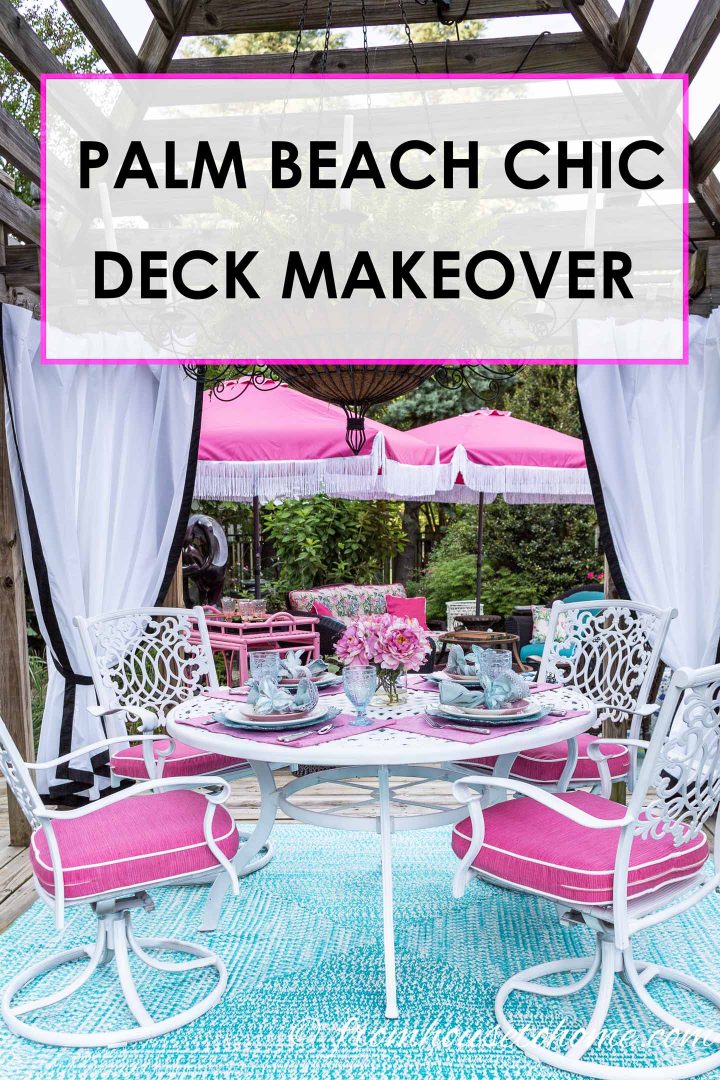
After lots of hard work, many DIY projects and some new purchases, my deck makeover is finally done.
And it really is the outdoor area I’ve always wanted for entertaining friends.
It includes a comfortable seating area, a dining area under the gazebo and an outdoor bar area with more seating, as well as space for the grill.
So there’s a lot of deck decorating ideas you can use for your own backyard.
The Deck “Before”
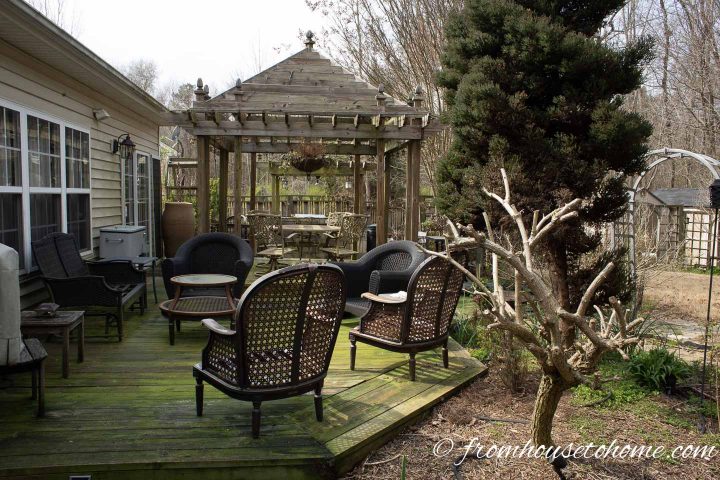
Just 6 weeks ago, my deck looked like this.
Good bones, but in serious need of a good cleaning and an update.
The layout
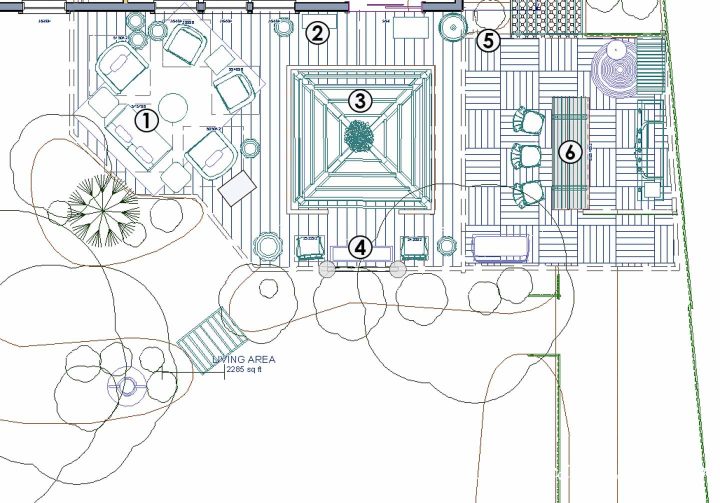
This is the layout for my deck.
The structure of the deck, gazebo and bar/grill area hasn’t changed at all, but I did do some furniture re-arranging and some DIY makeover projects that have totally changed the way it looks.
So without further ado, here’s all the updates I did for my deck makeover.
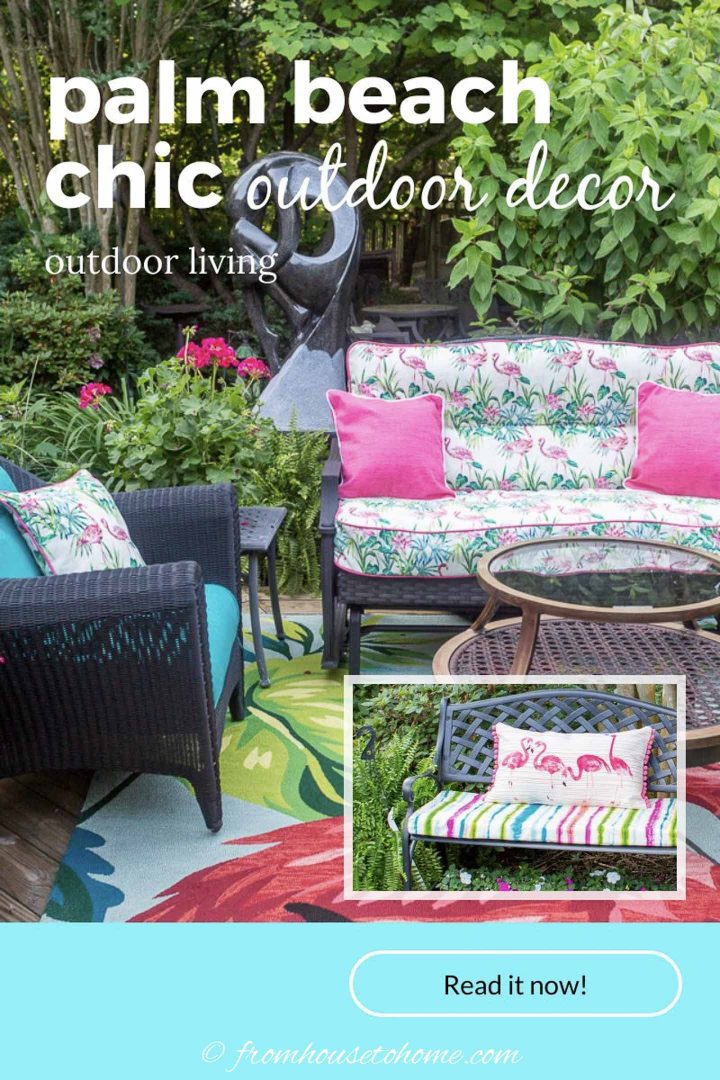
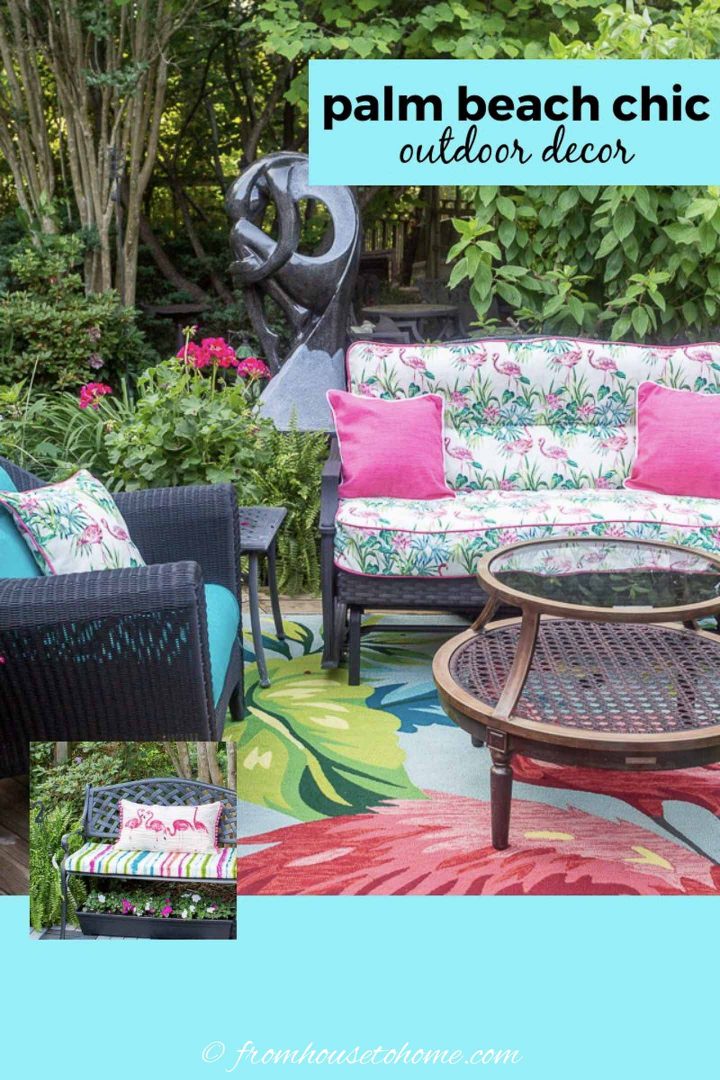
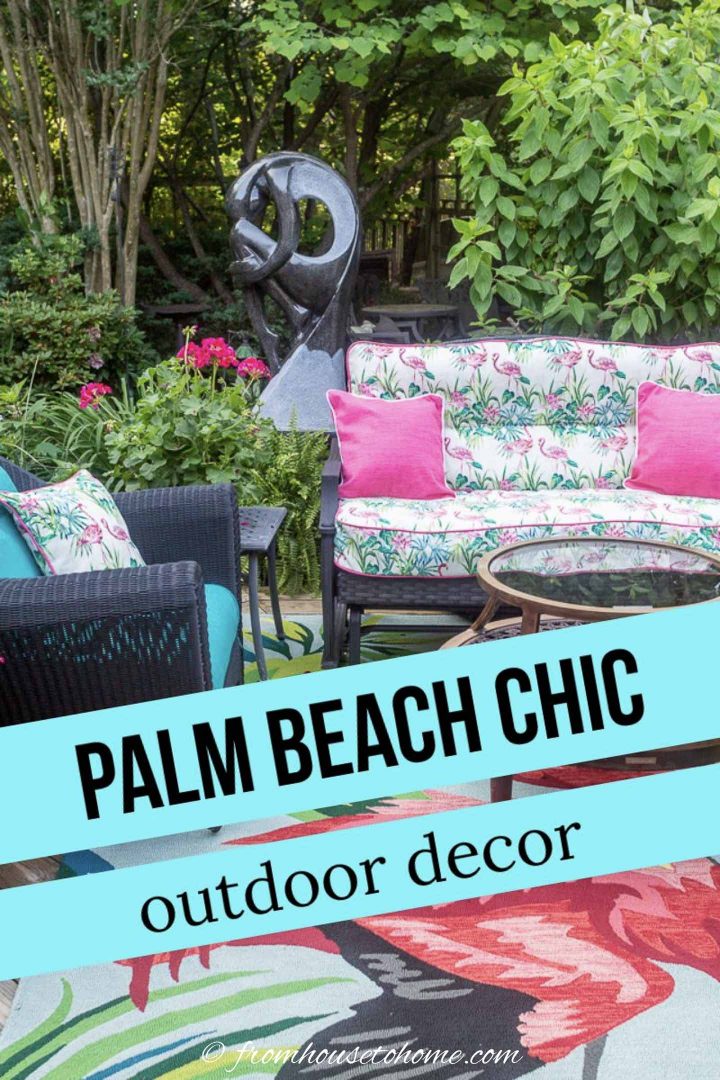
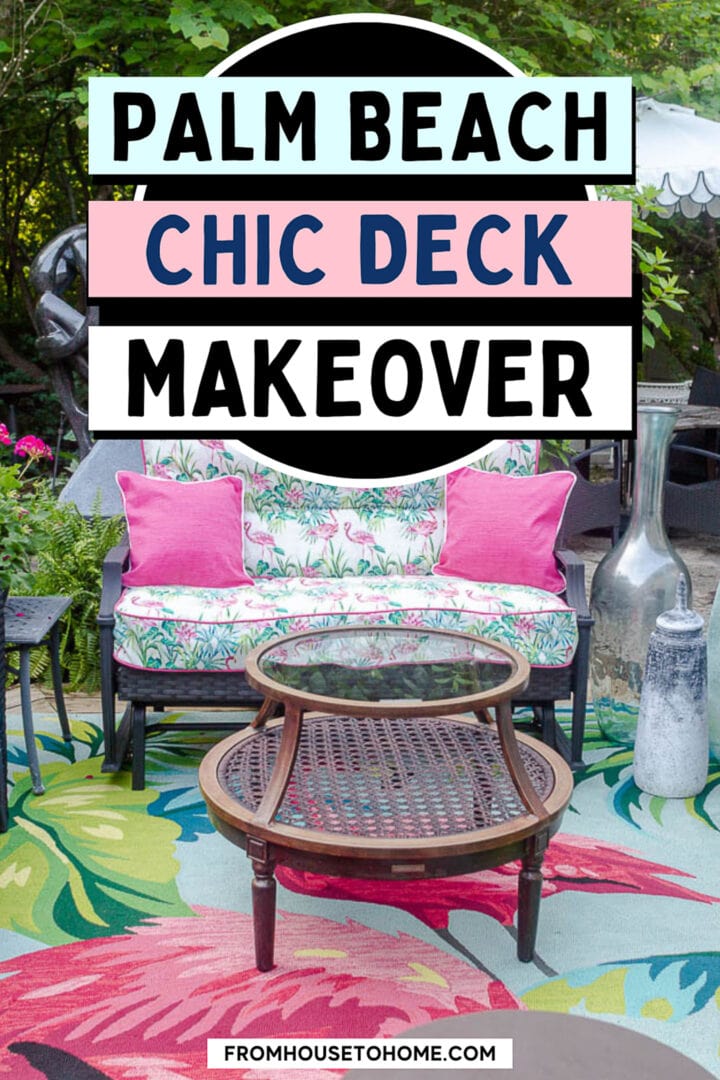
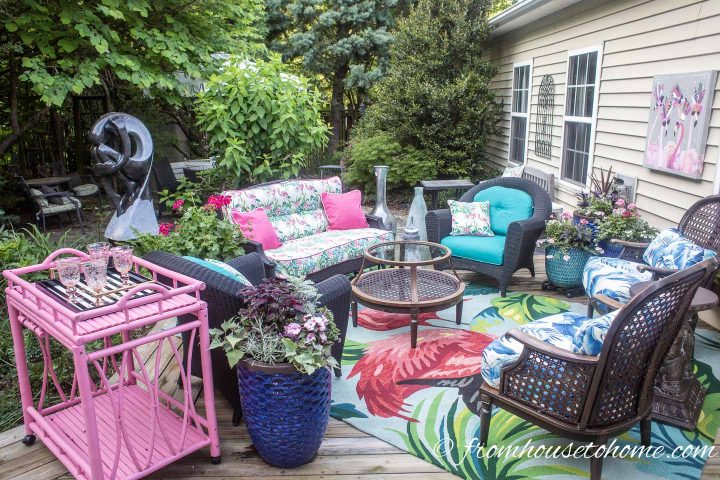
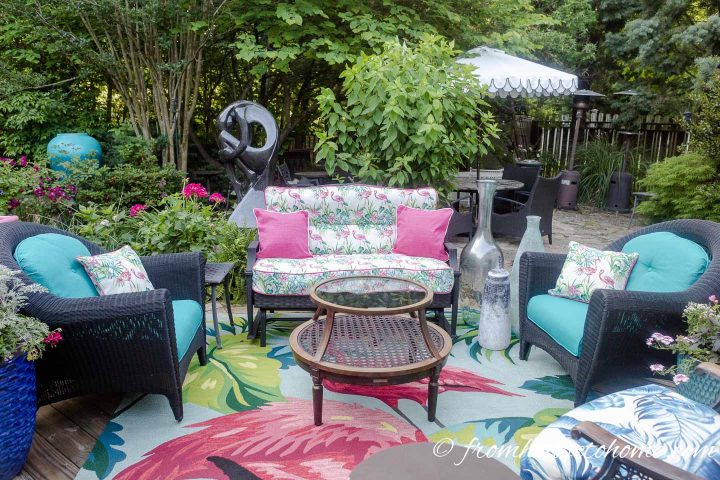
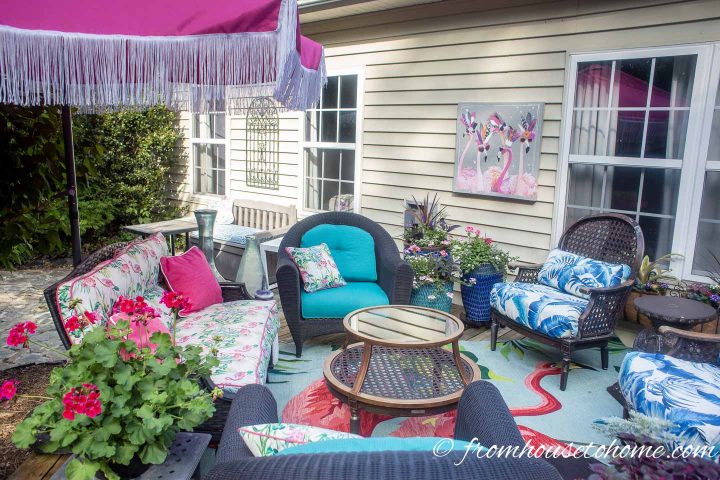
1 | Create a deck seating area
I use my deck for entertaining a lot.
So having an area where people can sit down in a comfortable spot, relax and talk is very important to me.
And many times, it’s more than just a few people sitting around talking, which means a lot of comfortable seating is required.
Plus a coffee table and some end tables to give everyone a place to put down a drink.
That’s how I ended up with so much outdoor furniture, and a section of my deck that’s designed strictly for lounging.
It was the first area of focus for my Palm Beach chic deck makeover.
2 | Sew outdoor cushion covers & throw pillows
Since Palm Beach decor is all about bright colors like pink, turquoise and lime green, updating the cushions and throw pillows on my outdoor furniture was a must.

But I have A LOT of outdoor furniture on my deck.
So buying new cushions would have been really expensive. And trying to find the right sized cushions in the colors I wanted would have been impossible.
Fortunately for me, my mother was in town and sewed all new cushion covers (in a week!).
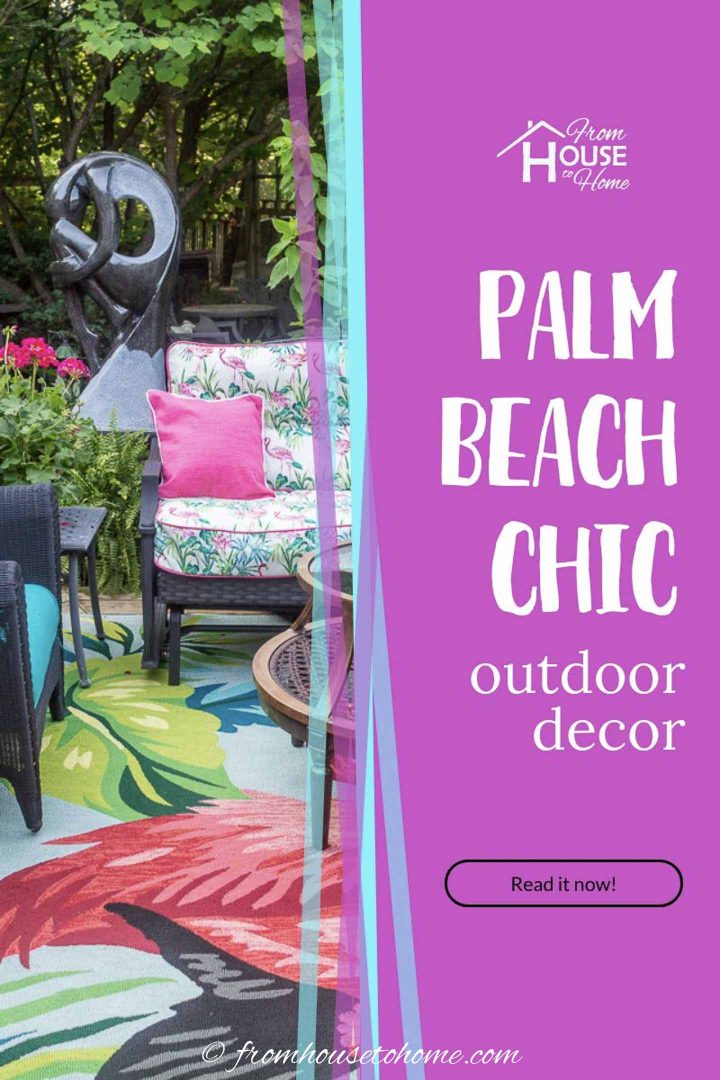
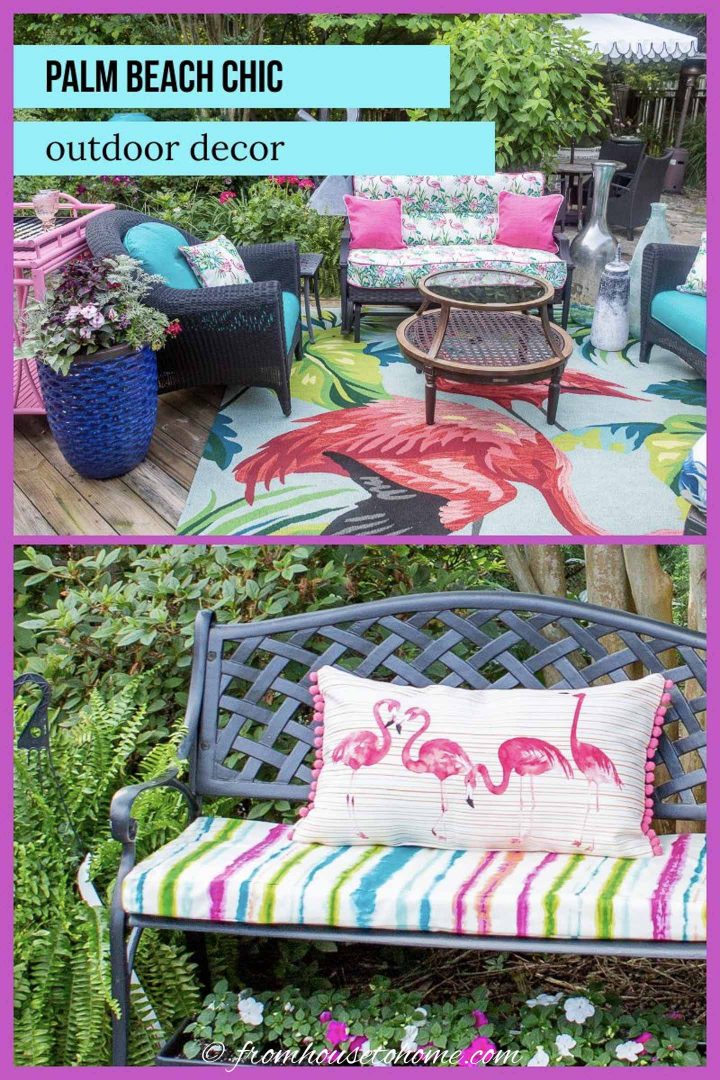
And, since the cushion covers were custom made in outdoor fabrics, I was able to pick some tropical themed prints with flamingos and palm leaves.
Which definitely started my Palm Beach chic deck makeover off in the right direction.
Read our tutorial on sewing box cushion covers if you want to learn how to make your own.
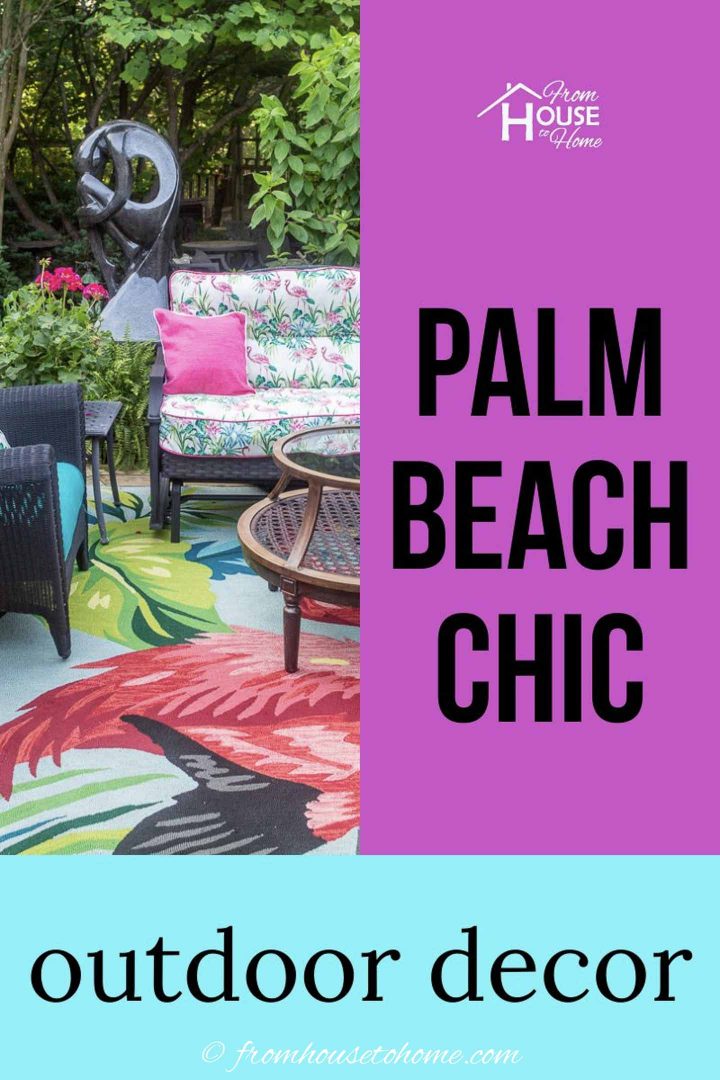
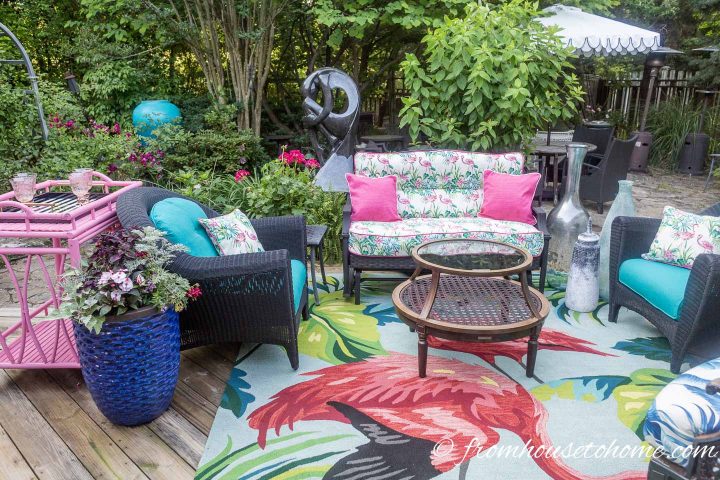
3 | Lay down an outdoor area rug
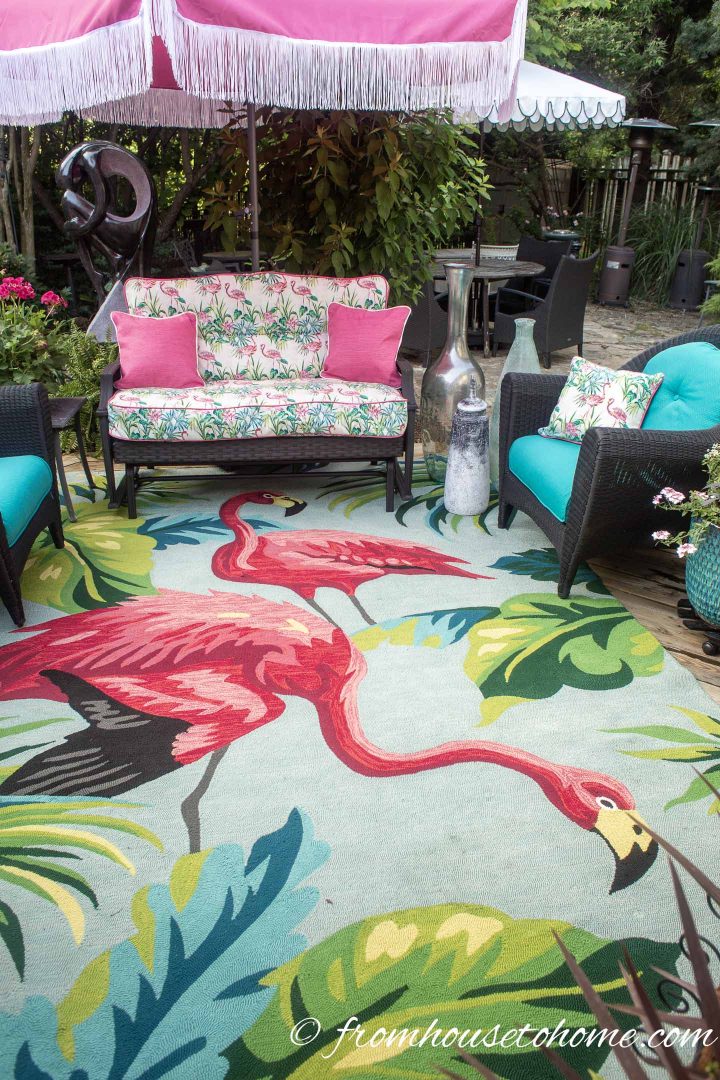
Then I saw this fabulous indoor/outdoor area rug with flamingos* on it and a turquoise background. I just couldn’t resist!
Outdoor rugs have come a long way since they first started making them.
This one is nice enough that I would use it in my living room (if I were decorating with Palm Beach chic decor inside).
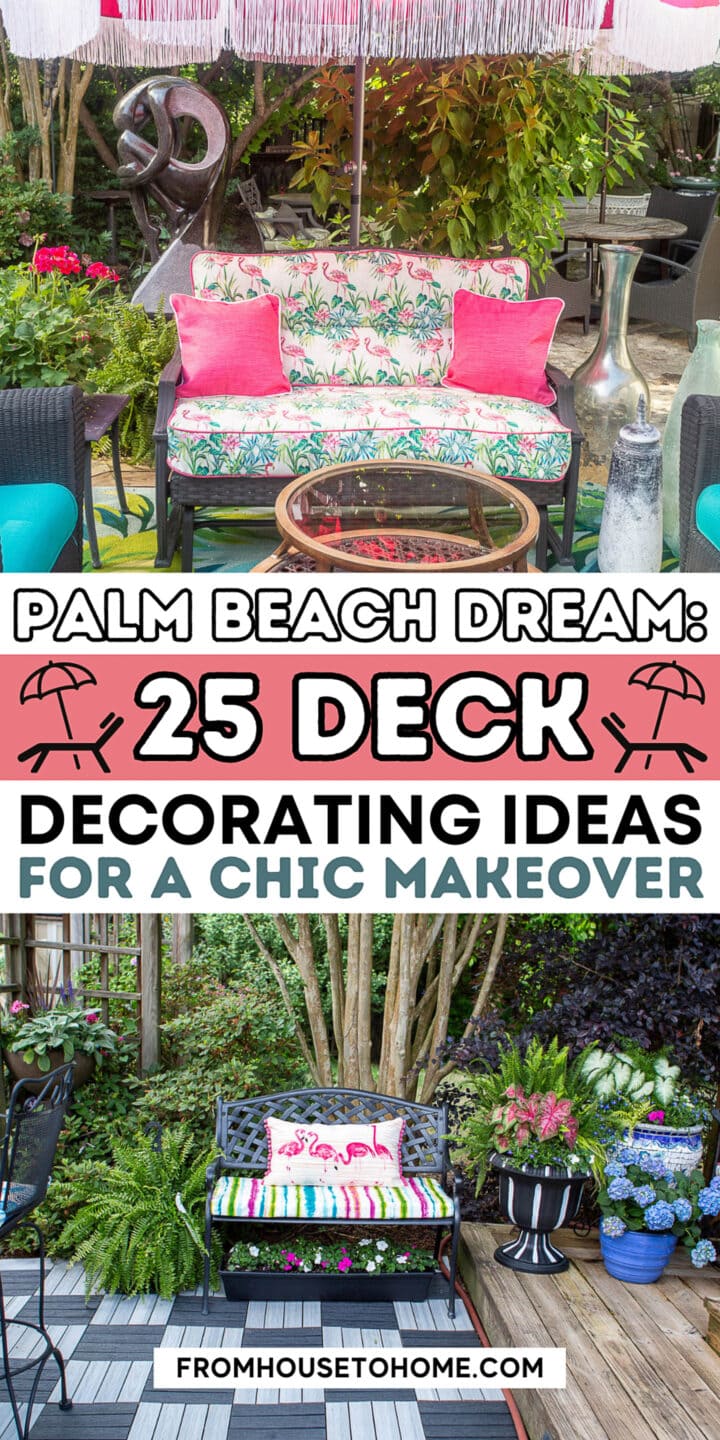
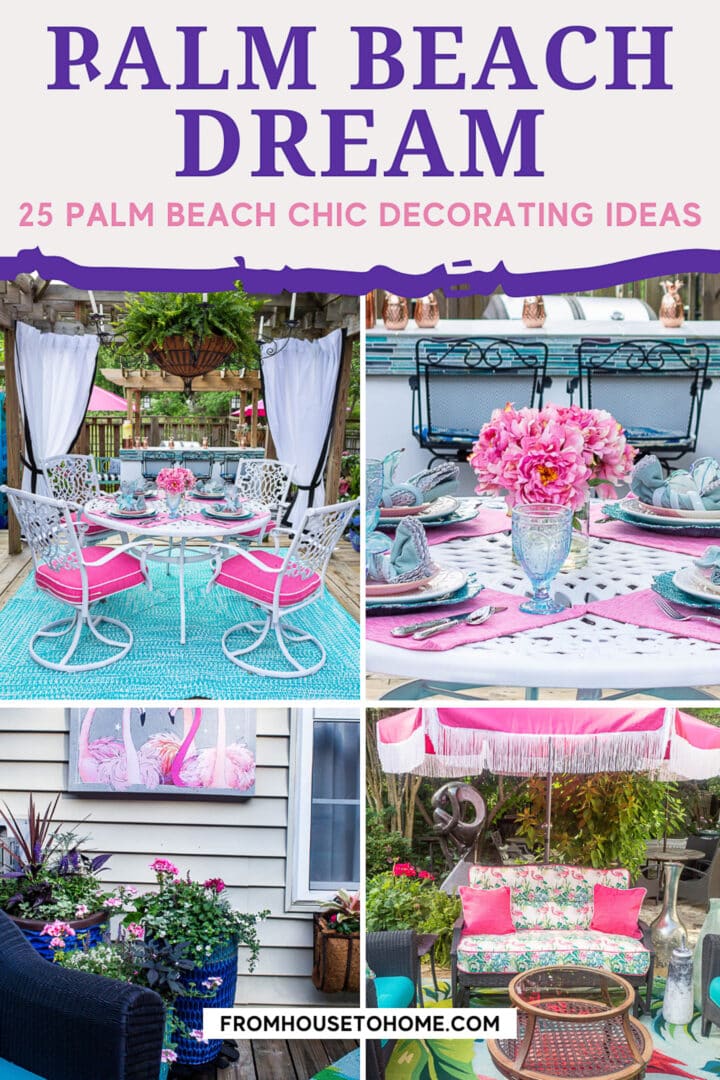
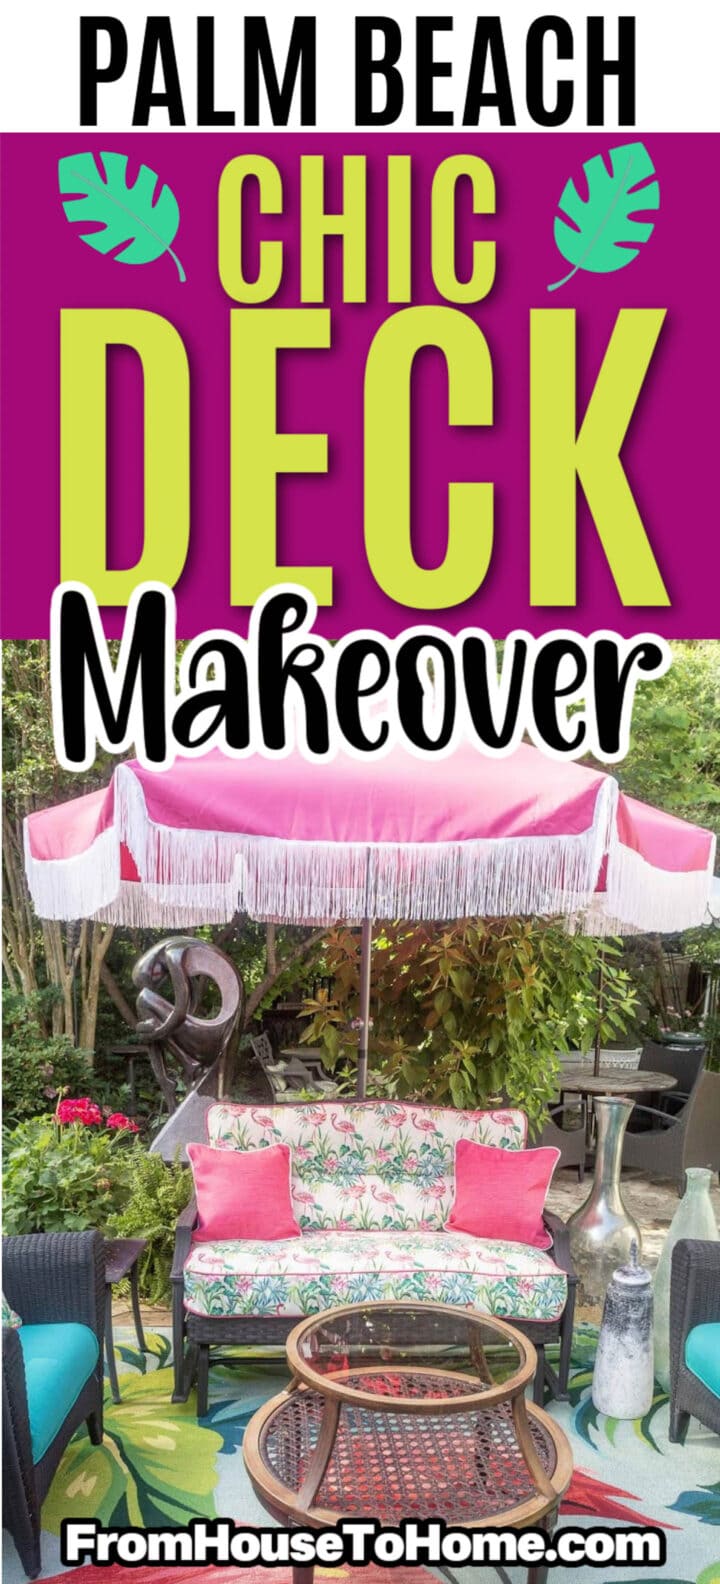
4 | Embellish some patio umbrellas
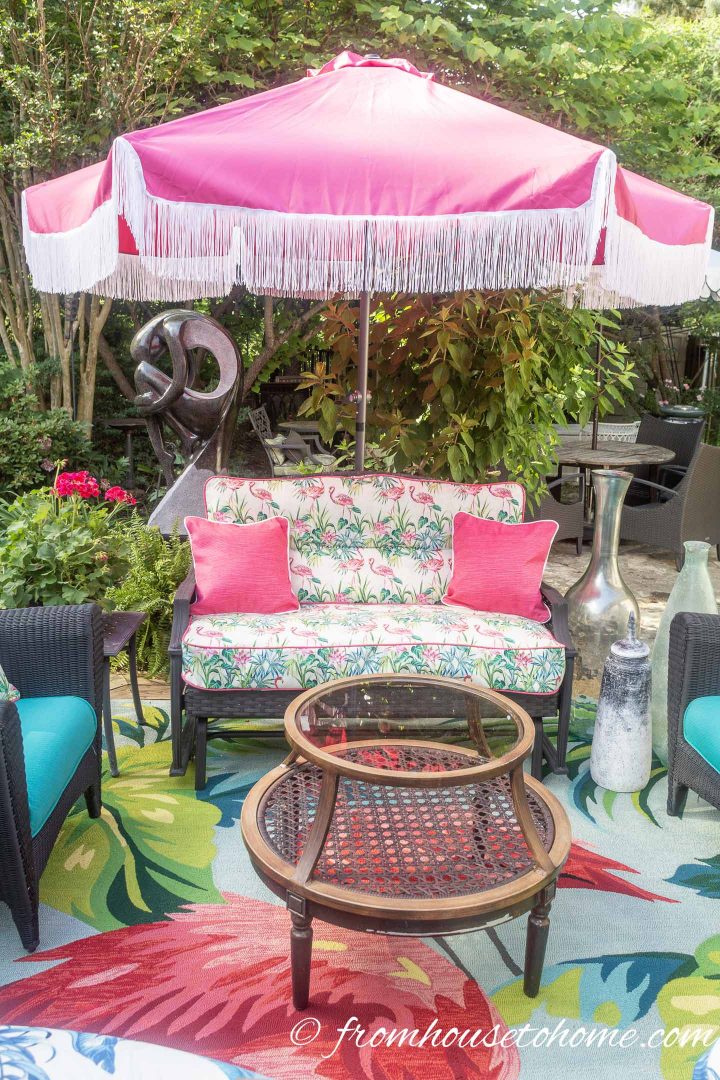
When summer rolls around here in South Carolina, it gets pretty darn hot, especially if you are sitting in the sun. Which means patio umbrellas are pretty much non-negotiable during the day.
So when I saw these pink umbrellas with white fringe*, I just had to have one. Until I saw how much they are 🙂
So I did what I usually do when this happens…a DIY version that is similar and costs a fraction of the price.
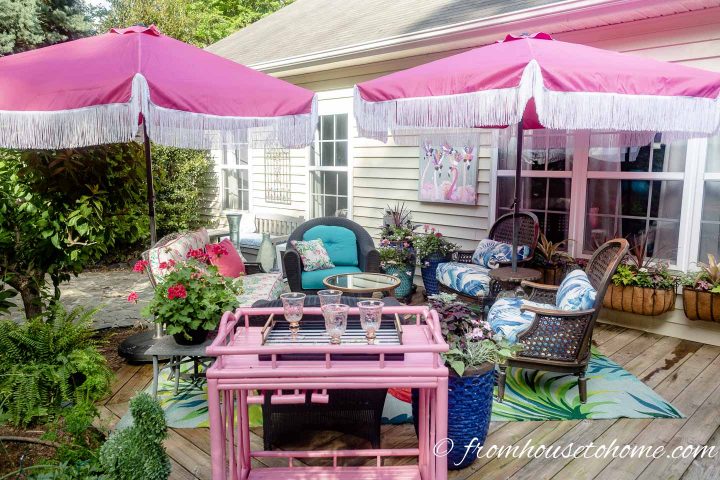
I liked it so much, I made two of them!
You can find the fringed umbrella tutorial HERE.
5 | Install a statue focal point
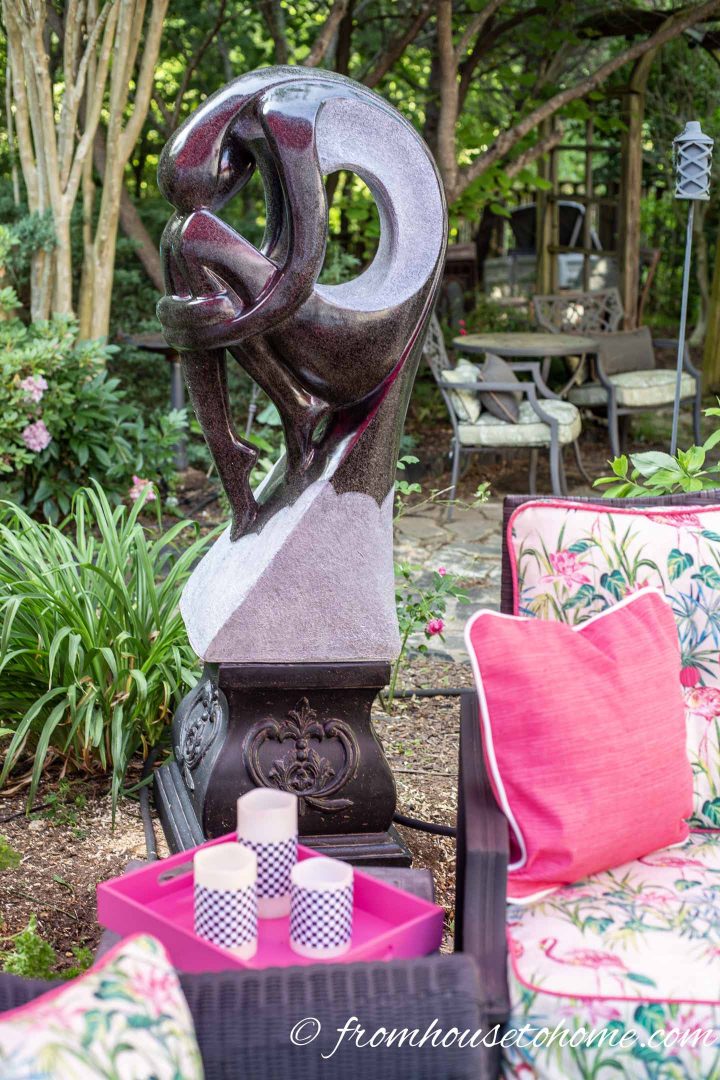
Another one of my original to-do items was to cut down the evergreen tree in the little garden area behind my deck. It had split in the middle and was partially dead, so not very attractive.
But once it was gone, I needed to replace it with something that would fill the space.
Since the standard hydrangea in that garden bed gets quite large and makes it hard for the other plants in that bed to grow, I decided to go with a statue instead of another plant.
Garden art is a great way to add a focal point to that area of my yard. Even better? This statue* also happens to be a fountain so it provides the soothing sound of running water to the deck.
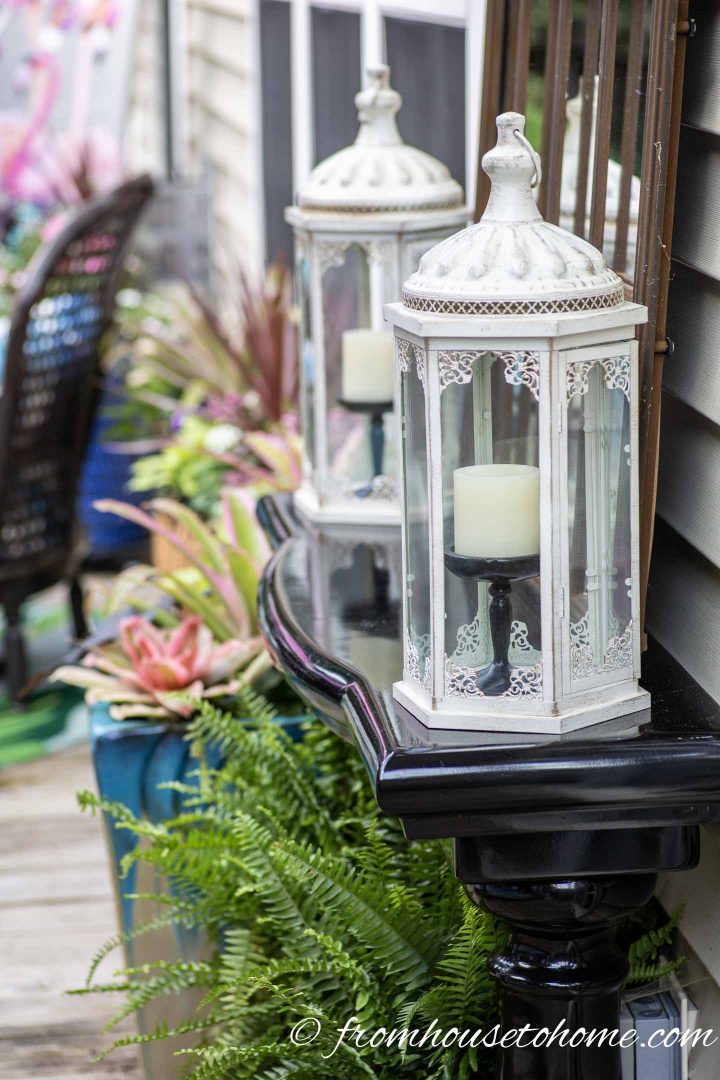
6 | Bring indoor accessories out
One of my favorite ways to make my deck feel like a real room is to bring some of my indoor accessories outside.
Glass vases are perfect for this since you don’t have to worry about them if it rains.
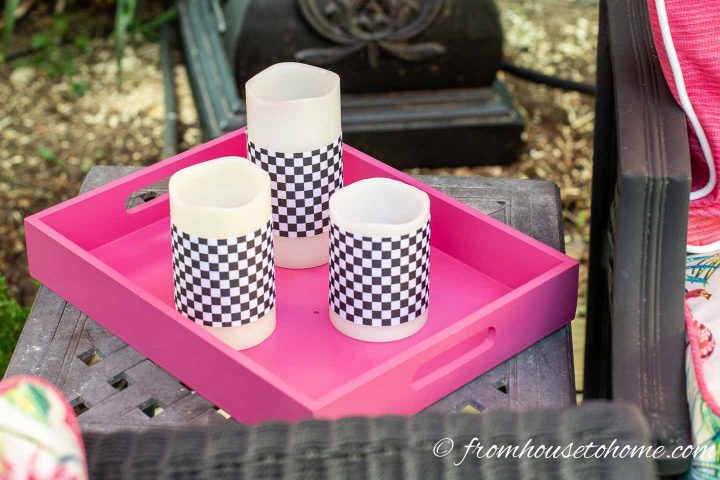
Flame-less candles are another favorite of mine. They don’t blow out if it’s too windy and they can take a little rain.
Black and white is another common theme in Palm Beach decor, so I dressed these candles up by taping some black and white checked ribbon around them.
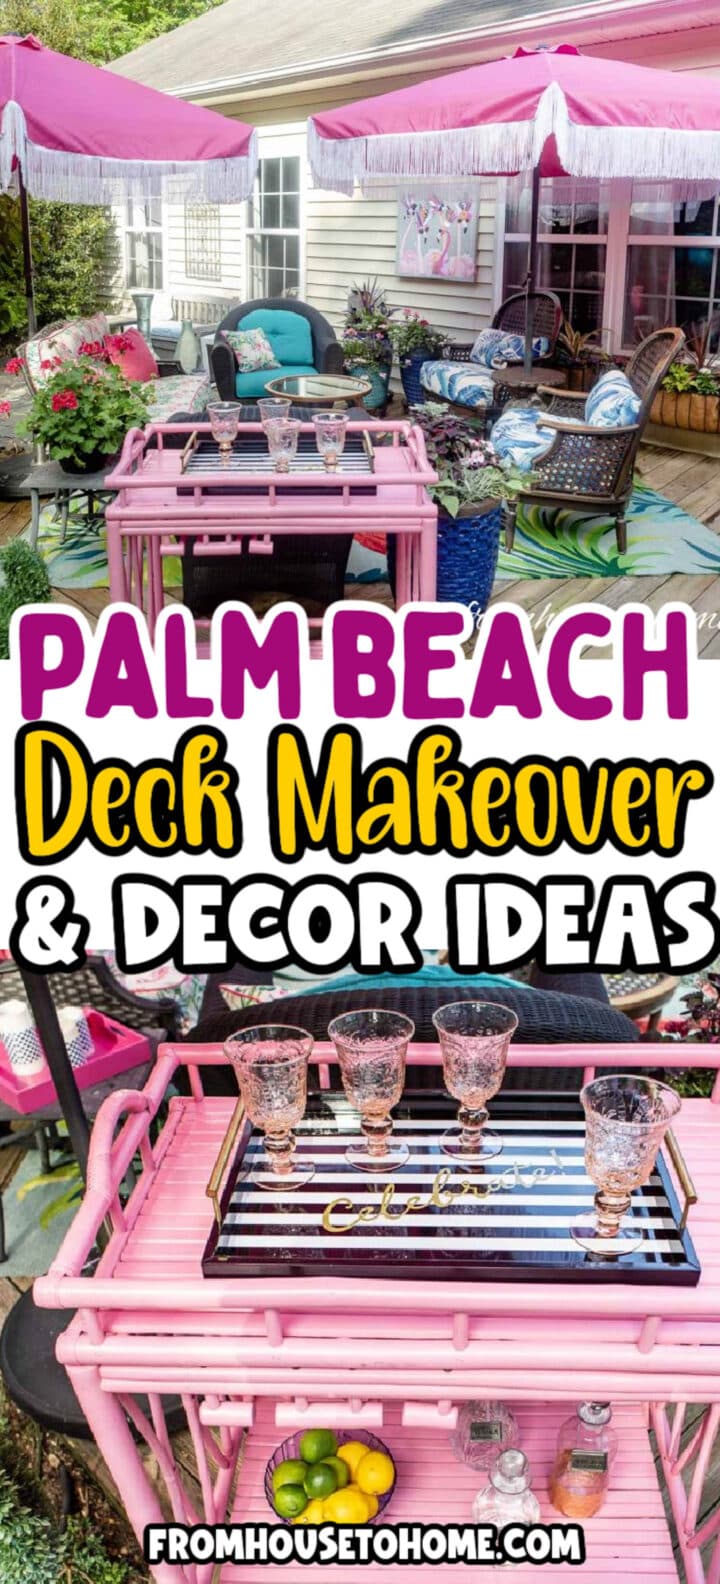
7 | Buy an outdoor bar cart
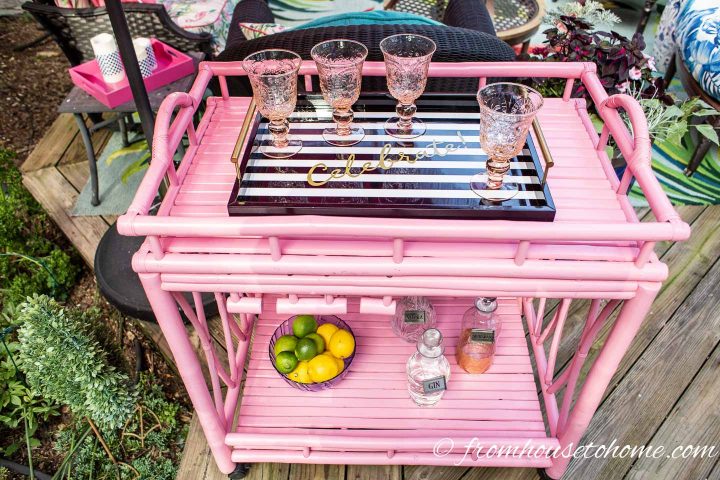
Since both pink and bamboo are characteristics of Palm Beach decor, I combined the two together with this outdoor bar cart. (Unfortunately, this one is no longer available).
In my opinion, every entertaining area needs a bar cart.
It can be used for any kind of serving (not just drinks) and the wheels make it easy to put wherever you need it.
8 | Decorate the house walls
In case you aren’t aware, I live in a builder grade house.
In my neck of the woods, that means vinyl siding in some shade of yellowy-beige.
Neither of which are very Palm Beach chic.
Hanging decorations is one way to distract your attention from the less appealing house walls.
Some pieces like this metal wall hanging are intended to go outside.
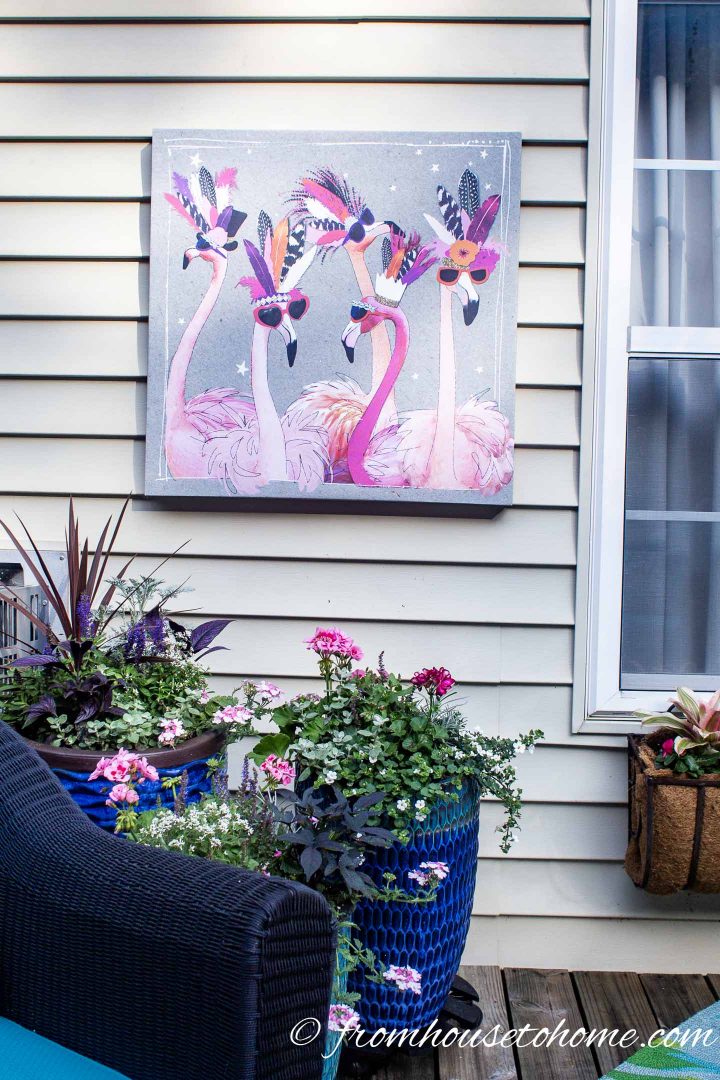
But since my walls are somewhat protected by the roof overhang, I also hang indoor prints (like these flamingos) out there, too.
They do fade and wear out eventually, so I don’t use anything that’s too expensive out there.
9 | Get an outdoor console table
One way to dress up your house walls is to get an outdoor console table that adds some dimension to the flat surface.
Just like with a buffet or console table in the house, an outdoor console table provides a surface area for decorations and candles. And also gives you a space for putting down dishes or setting out munchies.
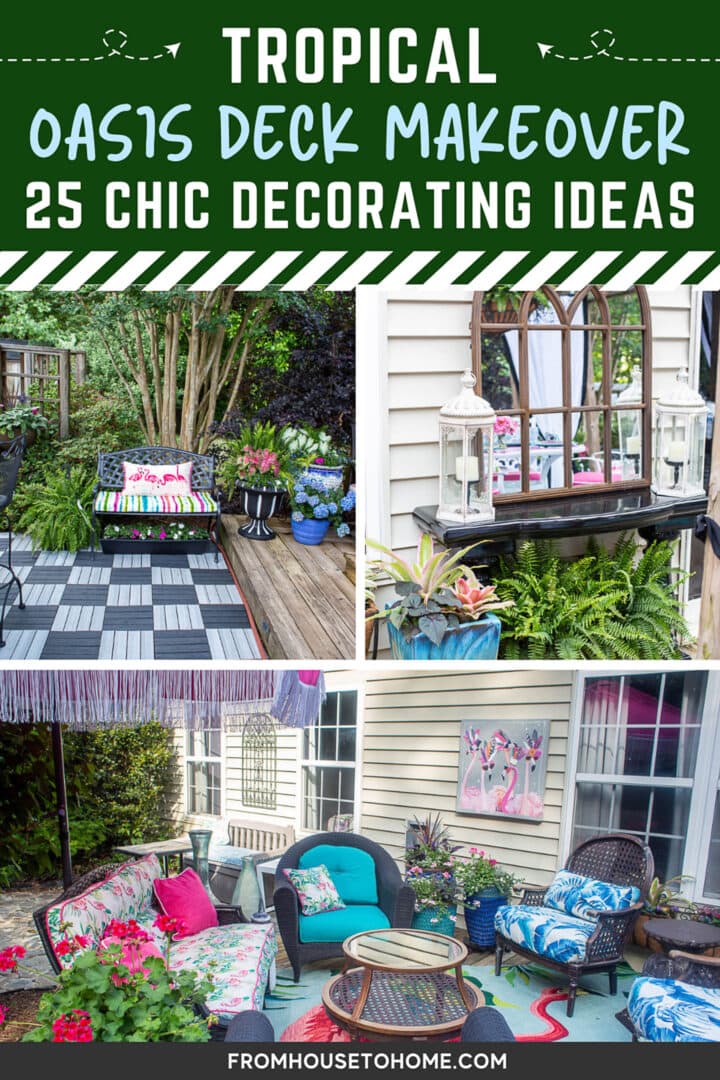
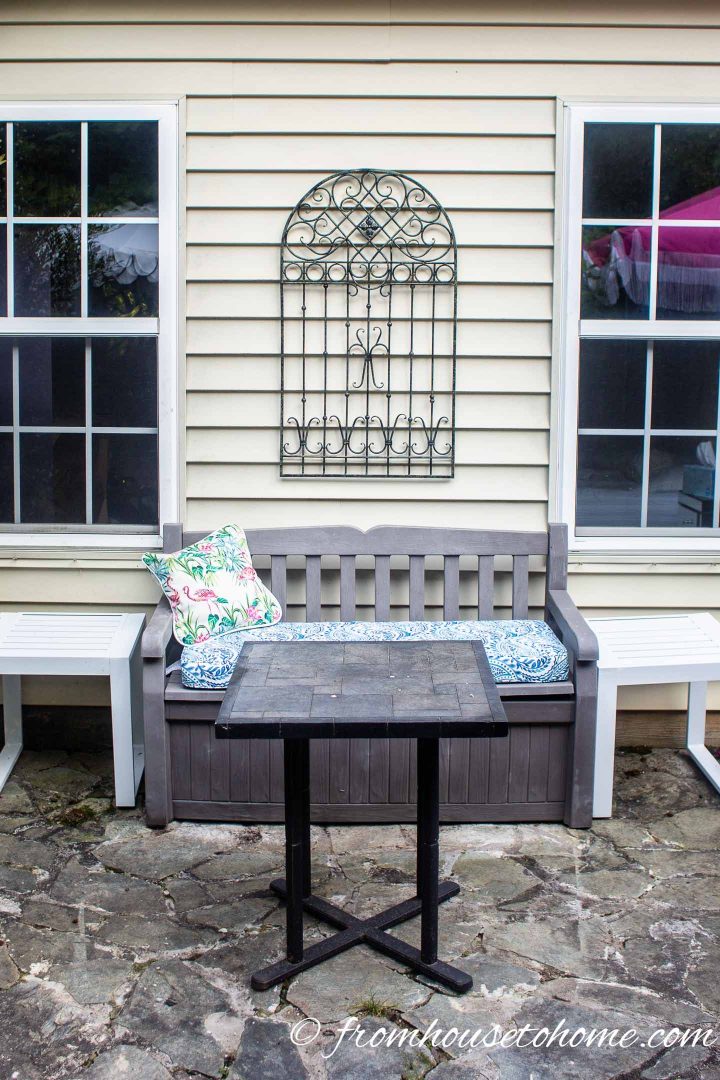
10 | Put up a garden mirror

And what’s a console table without a mirror above it?
Hanging a garden mirror on your walls definitely helps to expand the space since the mirror is reflecting back whatever is in front of it.
Put it in a location where you can see something pretty and you’re all set.
11 | Plant window boxes
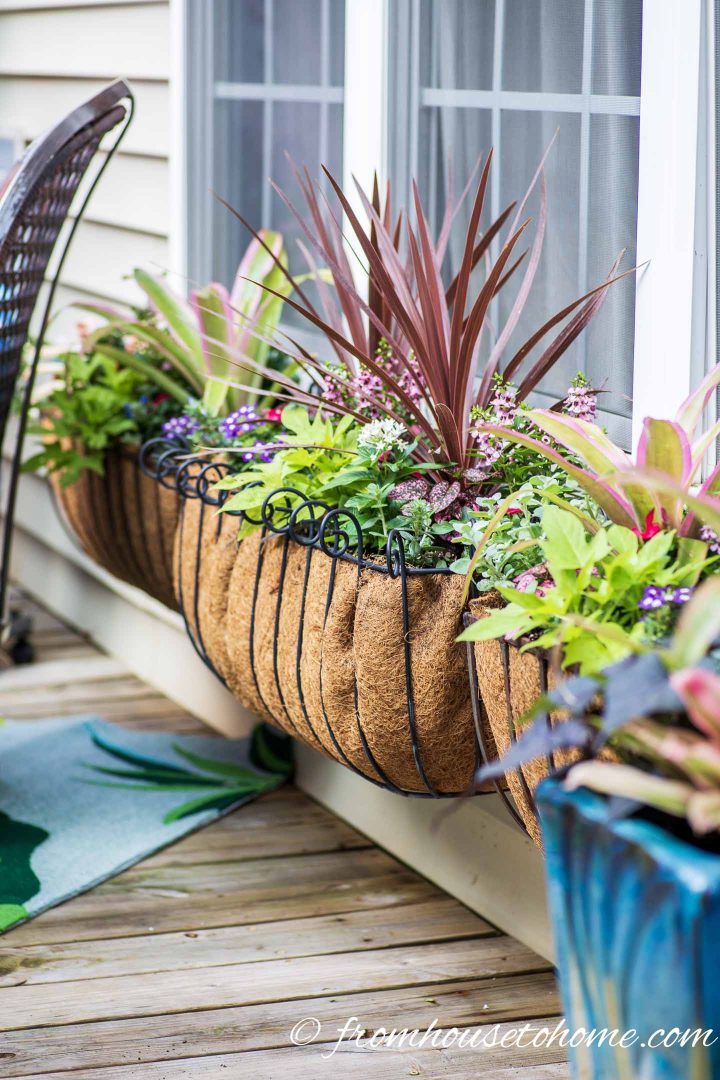
I have to admit I have a thing for window boxes. I can wander around Charleston for hours just looking at all the amazing plant combinations they use in their flower boxes.
While most people think of window boxes as a way to increase their home’s curb appeal (which they do), I really like to use them on the back of my house. (Why should the neighbors be the only ones to get a pretty view?)
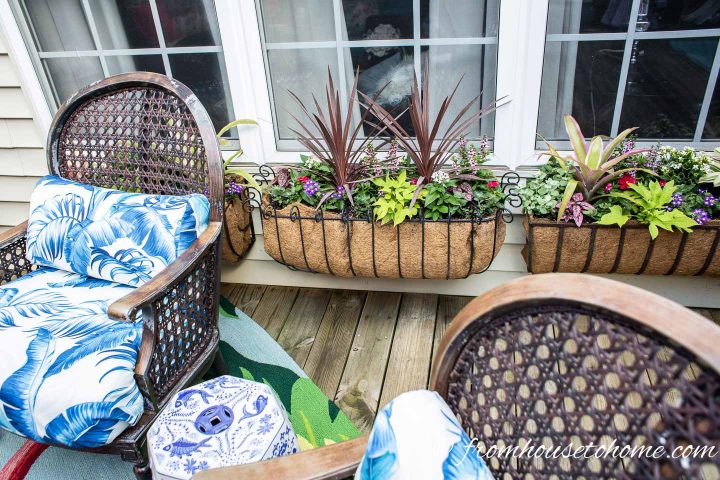
They soften up the look of the siding on the back of my house and provide a beautiful backdrop for the rest of the deck.
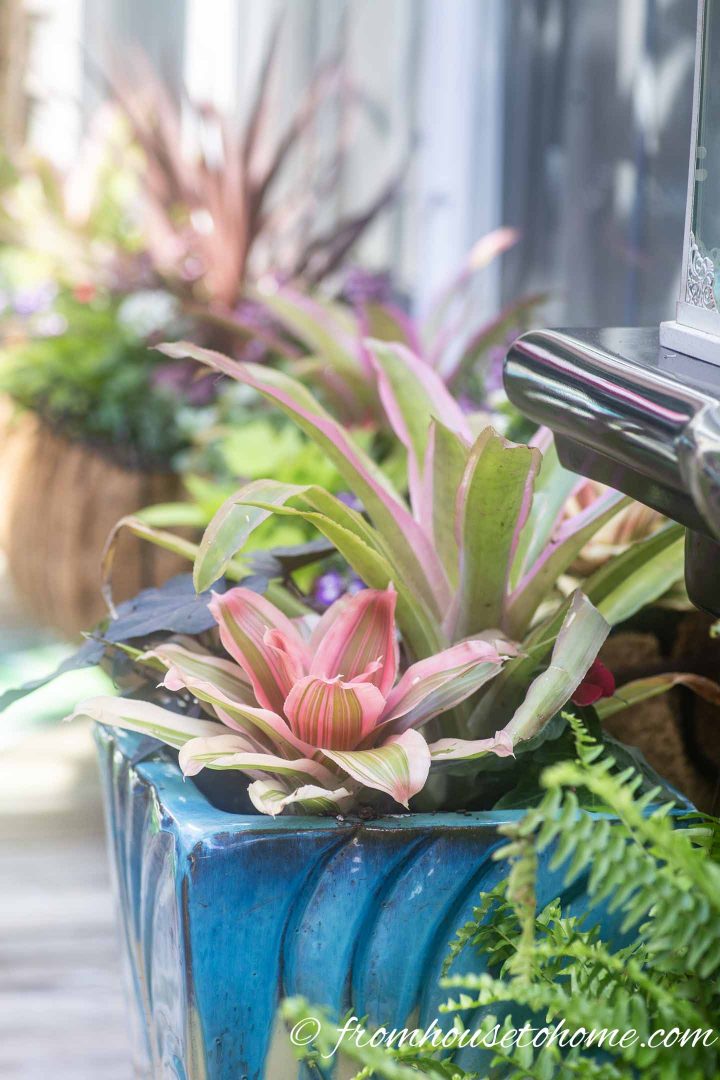
I try to pick plants that go with my colors and add at least a couple of varieties that are unexpected (like these bromeliads). That keeps the look cohesive but interesting.
Using big window boxes (at least 30″ long, 8″ wide and 8″ deep helps to keep them from drying out too fast.
Otherwise, I would have to water them twice a day in the summer!
Having said that, I did install an automatic watering system (something almost all the houses in Charleston have) so now I don’t even have to think about it.
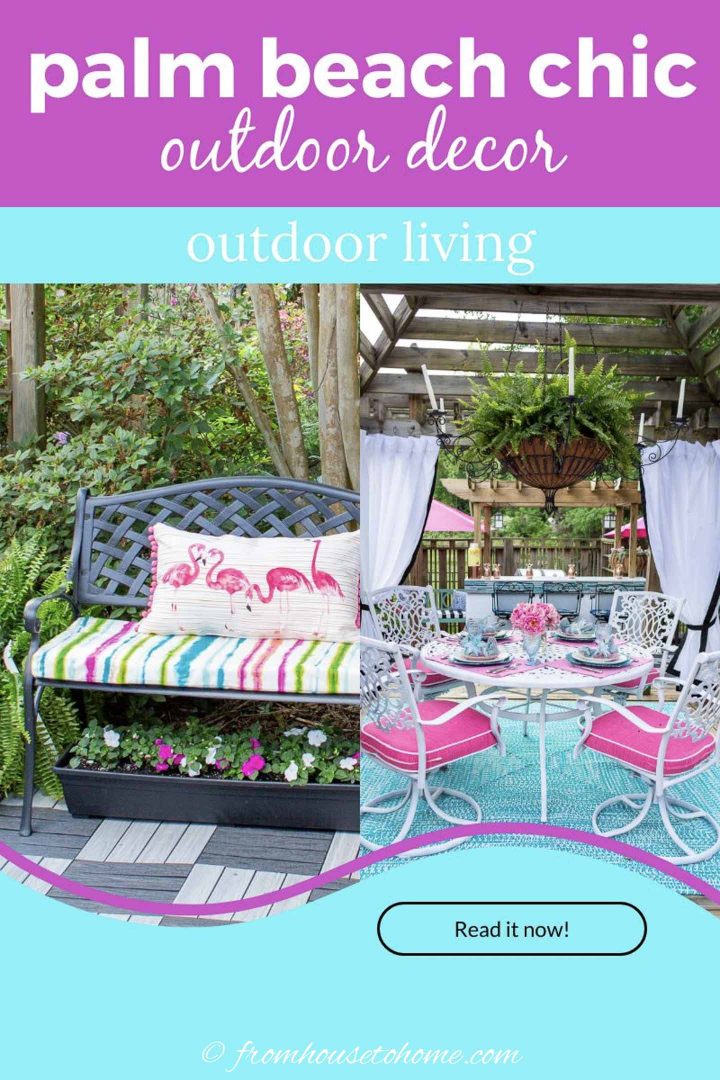
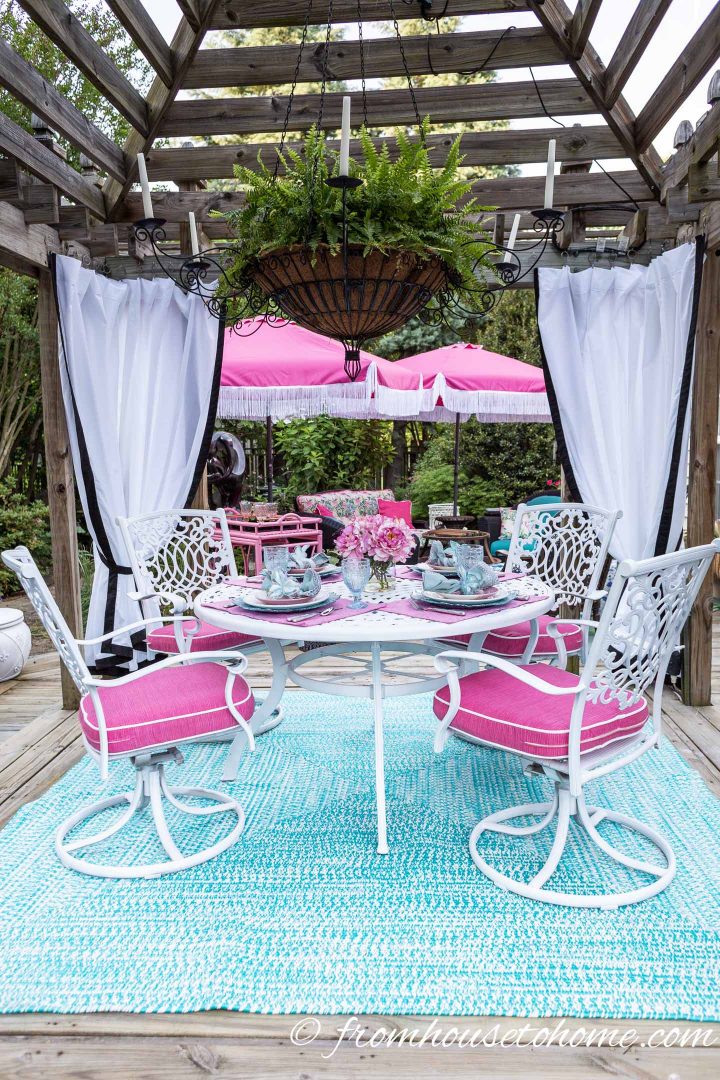
12 | Create an outdoor room
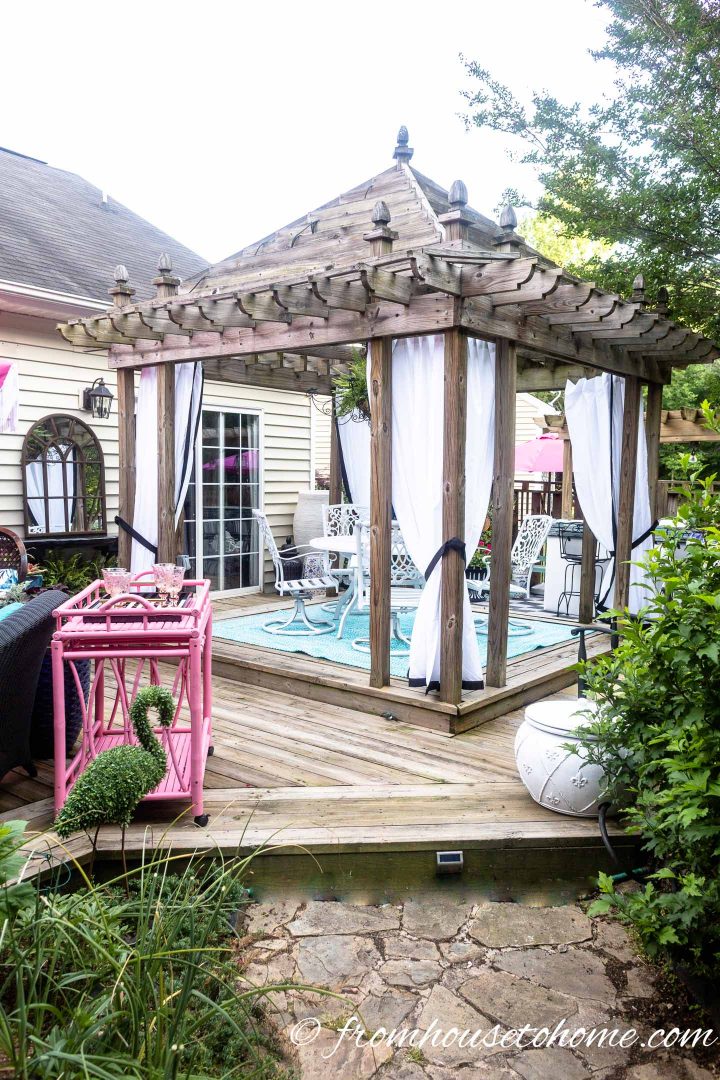
Adding a gazebo or pergola to your deck creates an instant outdoor room.
You can build it out of wood (like I did). Or buy a pre-made kit so you just have to put it together.
I use mine as an outdoor dining room.
But you could also set it up as a seating area.
13 | Hang outdoor curtains
Hanging curtains in the corners of the gazebo enhances the feeling of an outdoor room.
And adds some privacy from the neighbors.
But outdoor curtains can be quite expensive.
Especially when you need 8 of them (2 curtains per side on 4 sides of the gazebo).
Fortunately, my mother came up with a solution to make DIY outdoor curtains that cost less than $10 each! And they look amazing!
14 | Add candles
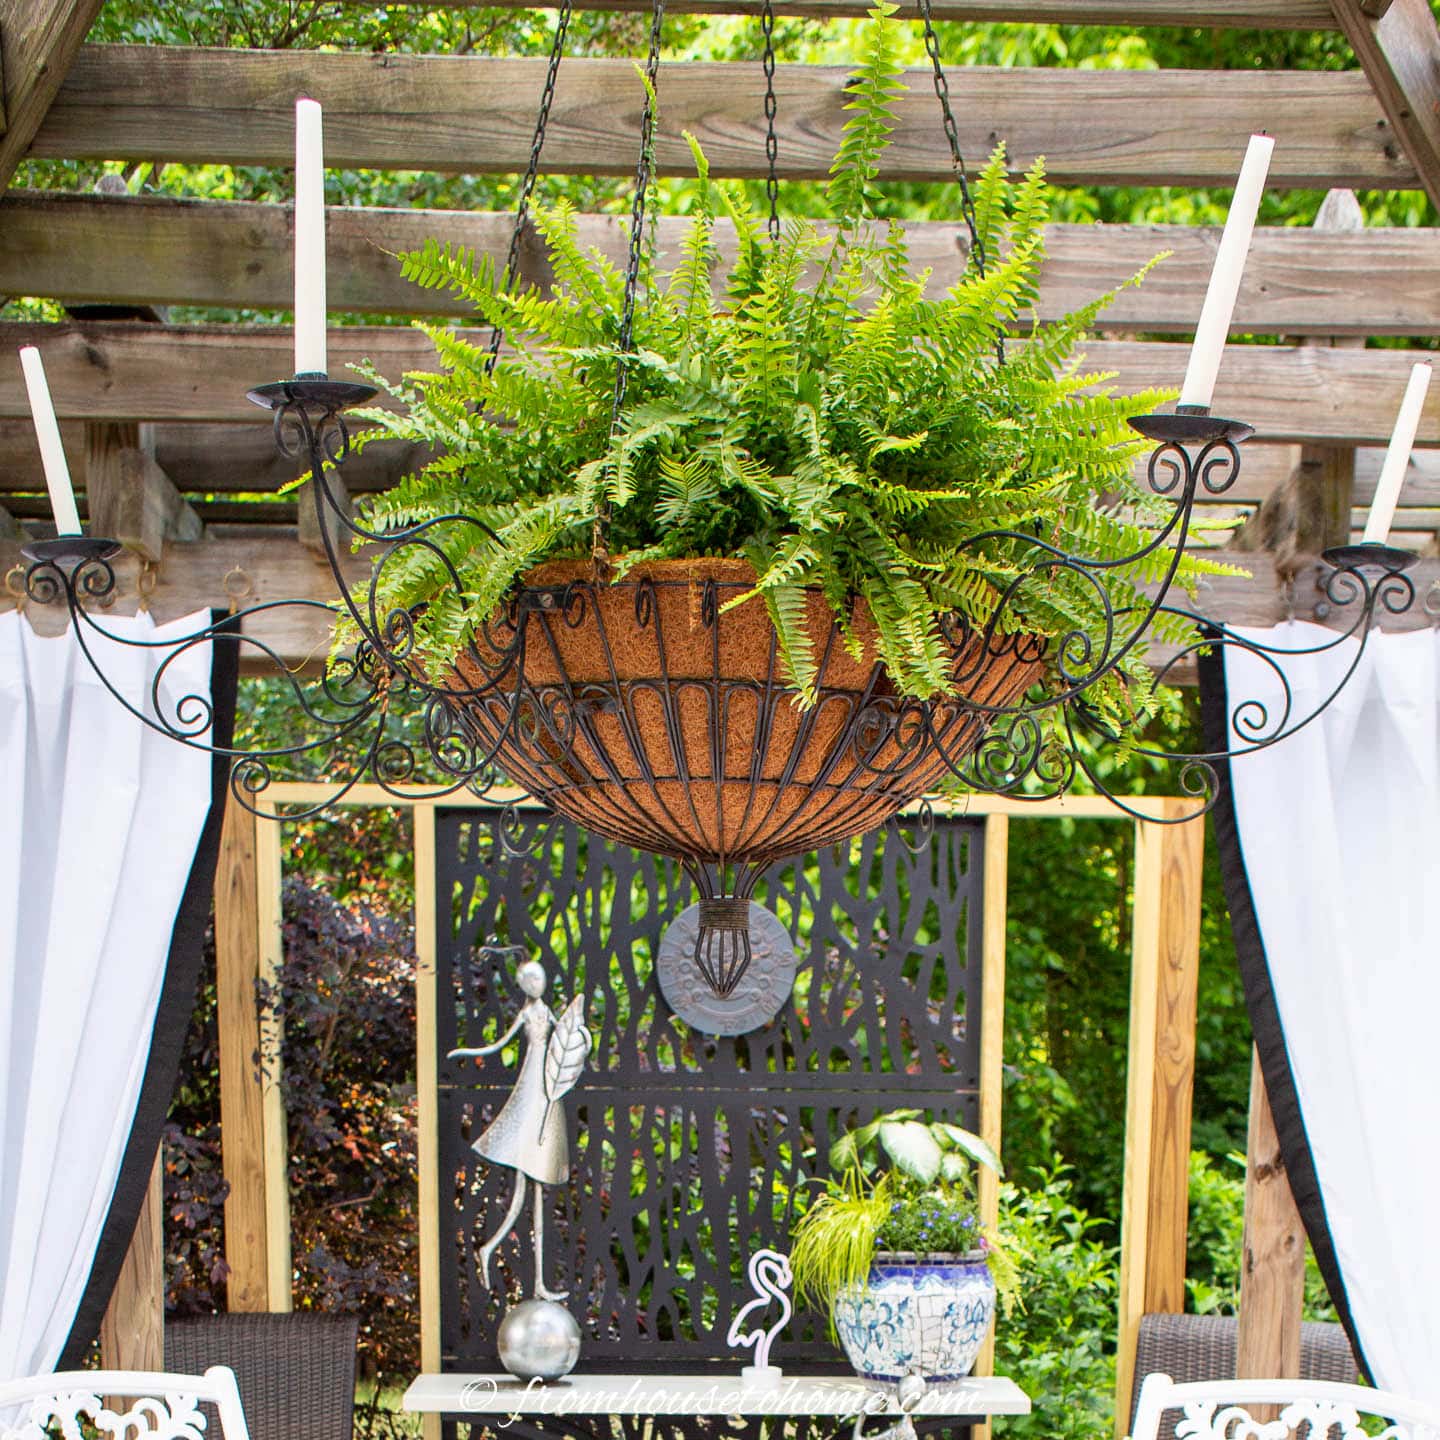
Whether you’re inside or out, there’s nothing quite like candle light to add ambience to a space.
Which is why I think all outdoor spaces should have some candles.
I bought this candle chandelier at HomeGoods many years ago and it’s still one of my all-time favorite deck decorations. (Unfortunately, I have never seen anything quite like it since).
15 | Paint your patio furniture
If you have outdoor furniture that is functional but not pretty, a few cans of spray paint may be all you need.
My metal dining table and chairs were the first pieces of outdoor furniture that I ever bought (many years ago!).
They weren’t very expensive but the chairs are very comfortable and the table is a good size. Plus, they have held up remarkably well (no rust after all these years!)
The only problem with them was they were beige.
So I painted them white and now they look like a totally different furniture set! (If you’re interested in doing this, read all my tips on painting metal patio furniture).
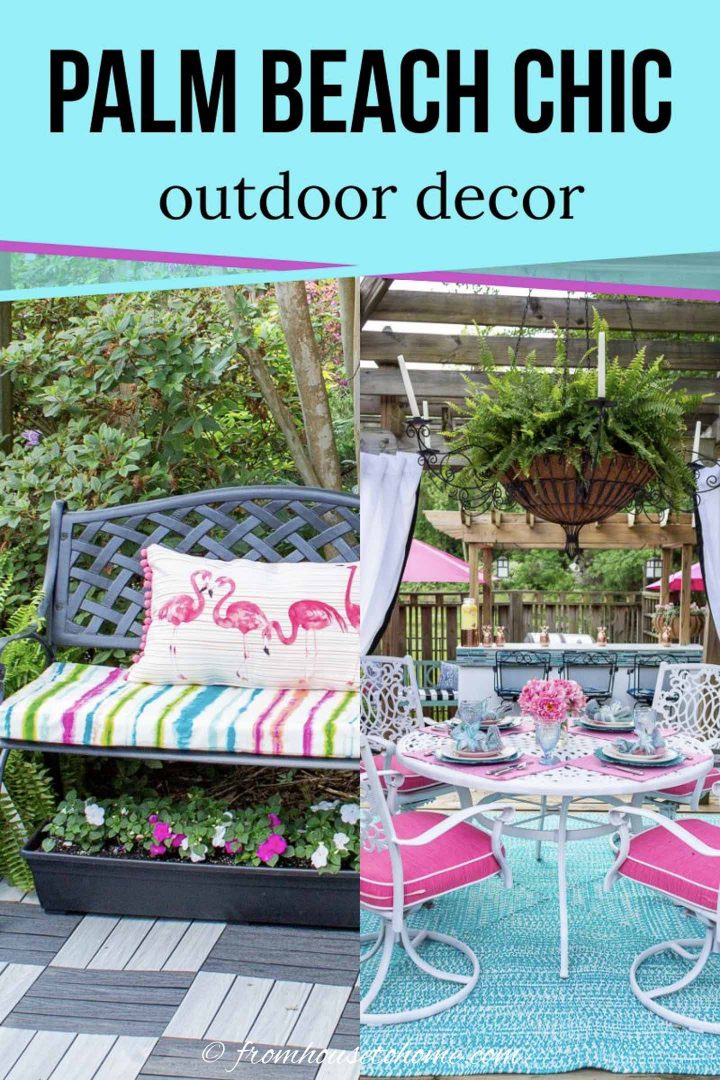
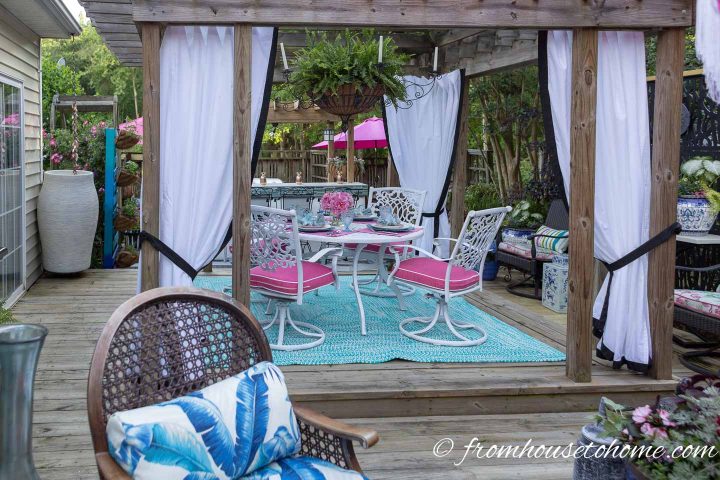
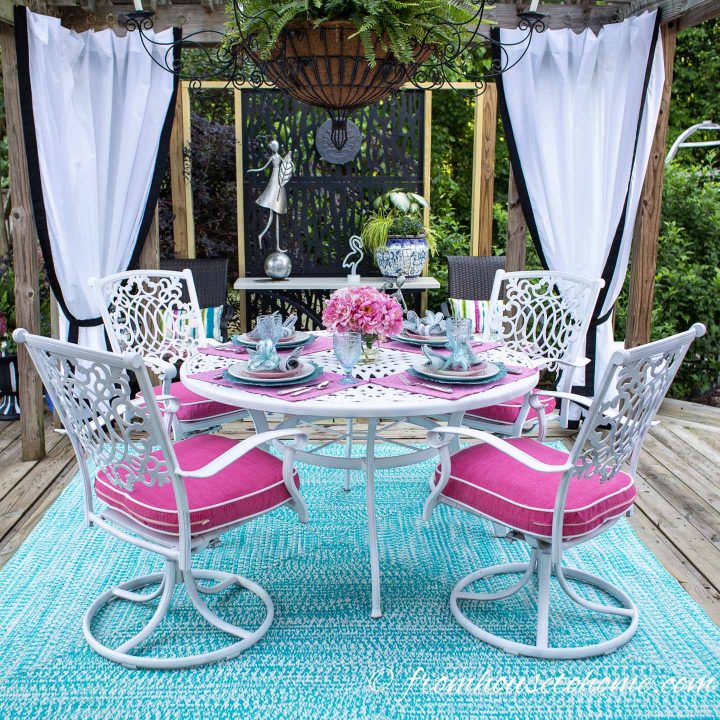
16 | Set a beautiful tablescape
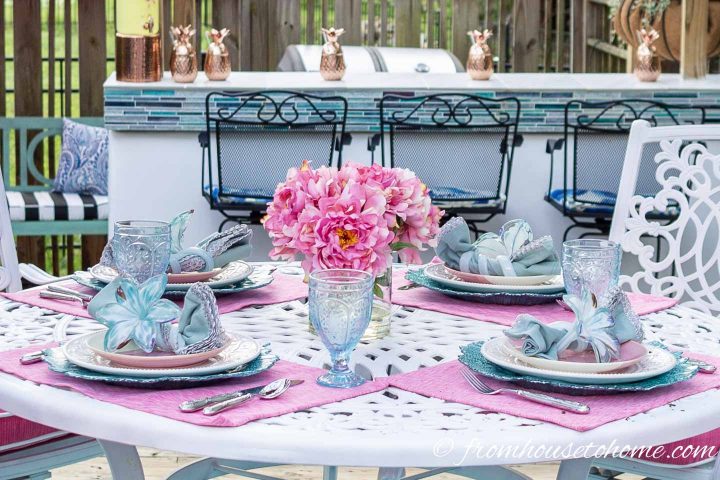
If you’ve been around here for a while, you know that I LOVE to create tablescapes.
So I wasn’t going to pass up this opportunity to set a Palm Beach chic table setting in my gazebo dining room.
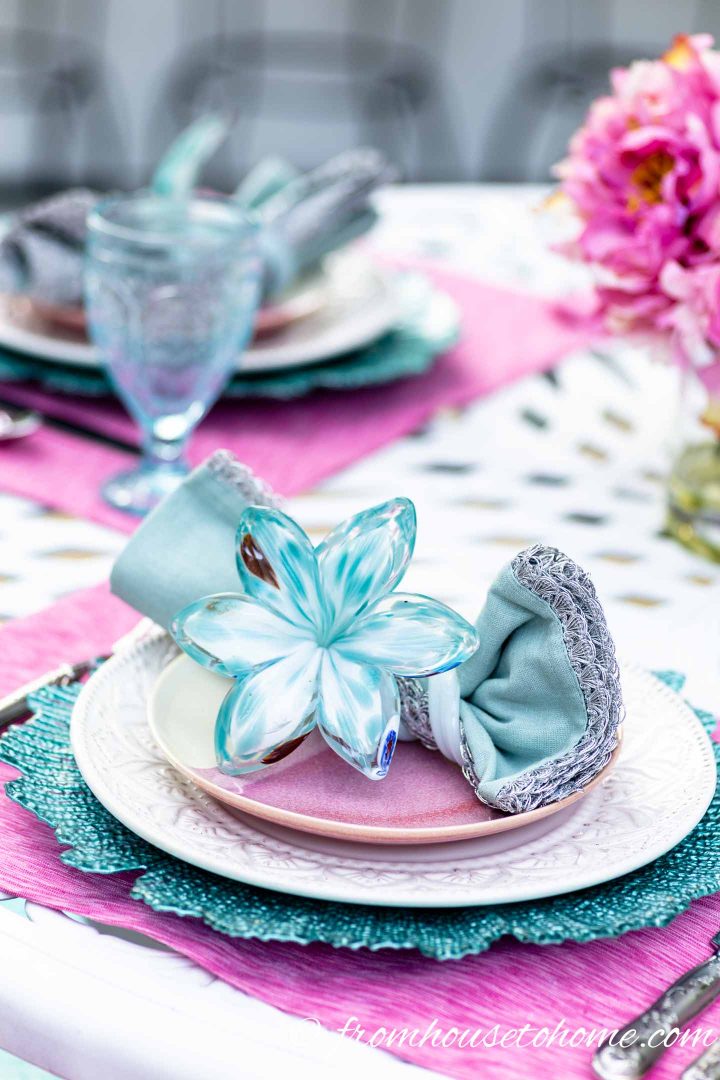
I love this turquoise and pink color scheme…I think it may be my favorite table setting yet!
17 | Build a lattice privacy screen
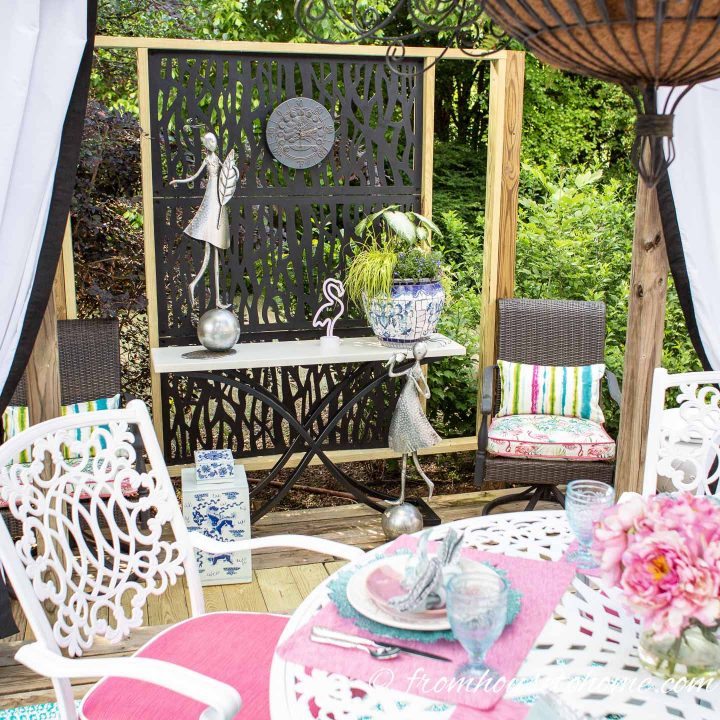
Putting up a “wall” in the form of a privacy screen helps to add a little more privacy to the deck.
And makes it feel even more like an outdoor room.
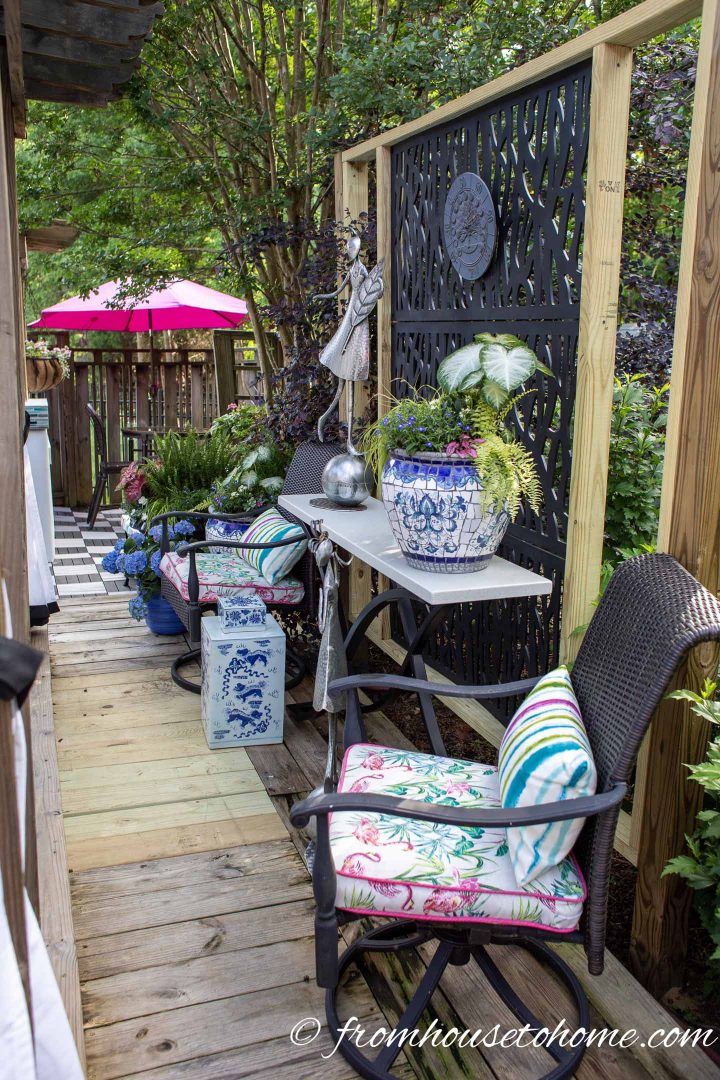
To get the wall to be exactly the right size, I built my own privacy screen using some lattice with a non-traditional pattern. (For all the details, read our tutorial on how to build this privacy screen).
It provides the perfect backdrop for another console table* and makes sure that nobody pushes their chair off the side of the deck.
18 | Add some garden art
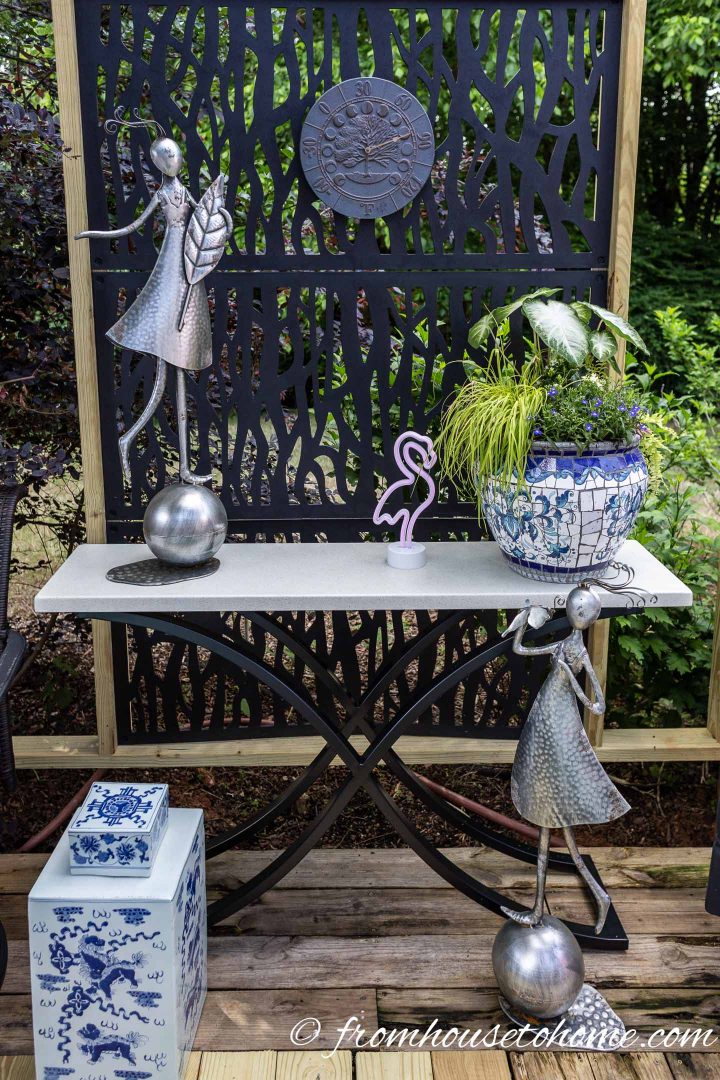
Just like in an indoor room, art adds interest to an outdoor space.
So I try to find unique pieces that are either intended to go outside (such as whimsical outdoor statues*).
Or things that can naturally withstand the elements (like the ceramic chinoiserie jar).
19 | Or topiary

Topiaries always make a statement in the garden.
But I don’t have time to maintain the living kind.
Which is why I added this faux flamingo topiary*. Same effect with much less work!
20 | Plants lots of containers
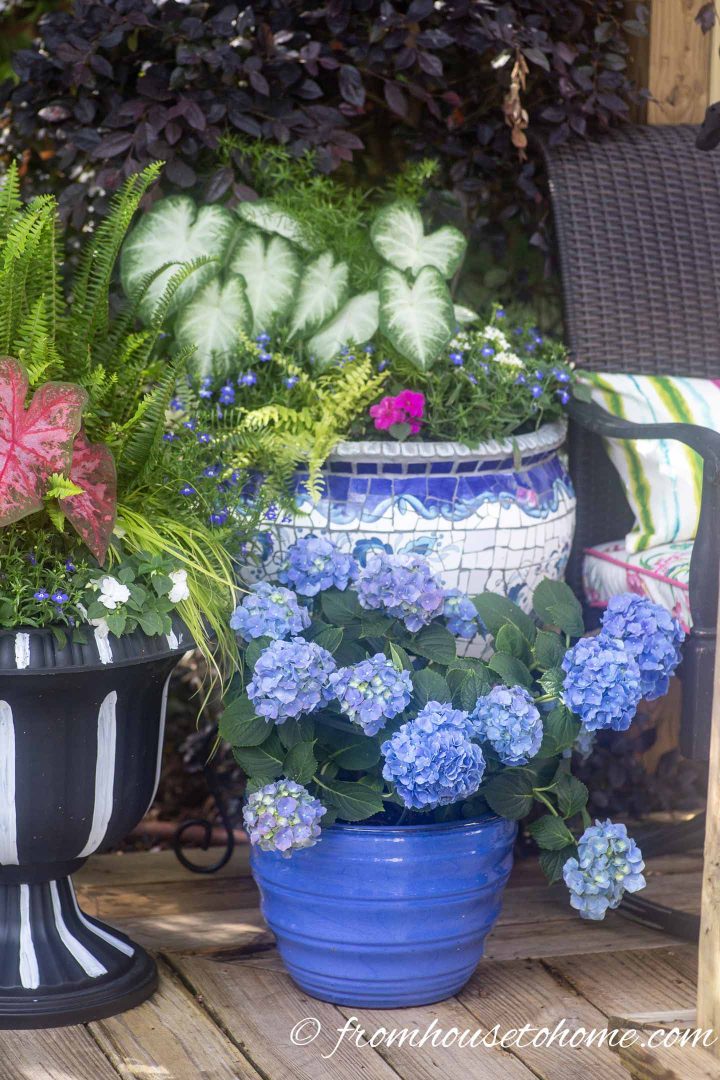
Most Palm Beach gardens are filled with lush tropical plants that survive outside in South Florida all year round.
While I already have some plants around the outside of my deck, I wanted to add more of that lush garden feeling by planting containers of flowers.
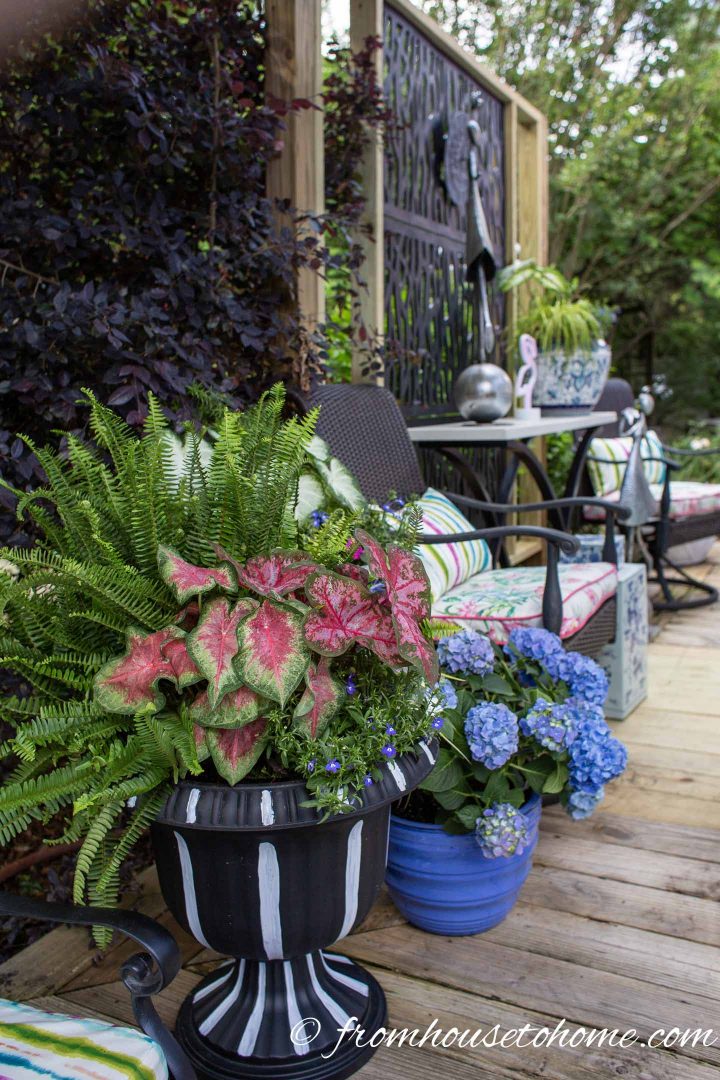
I like to use a lot of plants with interesting colored leaves (like these Caladiums). That way they look pretty even when they’re not blooming.
It also helps to use pretty containers.
That black and white one is actually a really inexpensive black plastic urn left over from Halloween. I painted white stripes on it to make it look like it fits in.
21 | Make a vertical herb garden

Growing fresh herbs is one of my favorite parts of having a garden. They make everything taste so much better.
But I don’t want to walk out into the yard to get them when I need them.
And I don’t have a lot of space by the door to plant them in the ground.
So I decided to install a vertical herb garden.
I liked the idea of this herb planter* with its configurable boxes, but it was a little out of my budget.
You know what that means…another DIY project!
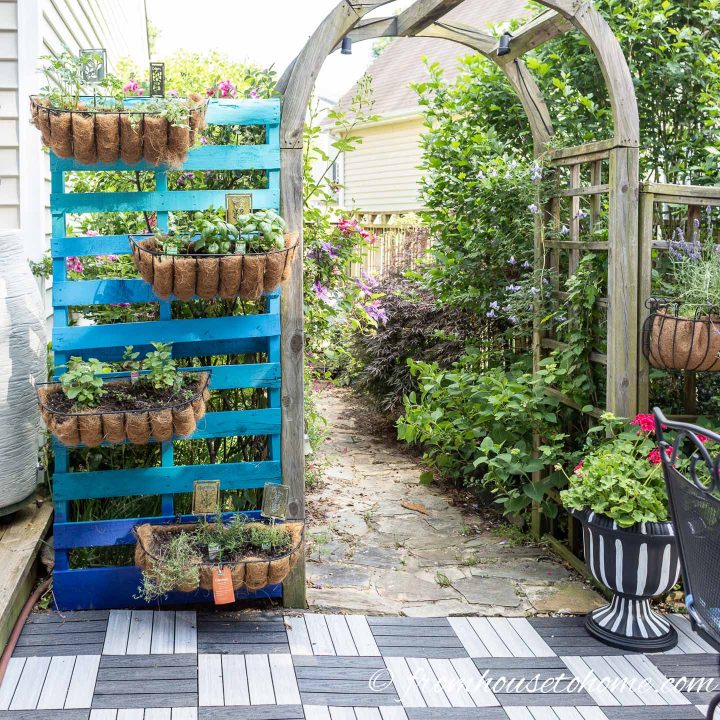
So I converted a pallet into my own configurable herb garden.
And painted it turquoise to blend in with the rest of my Palm Beach chic deck decor.
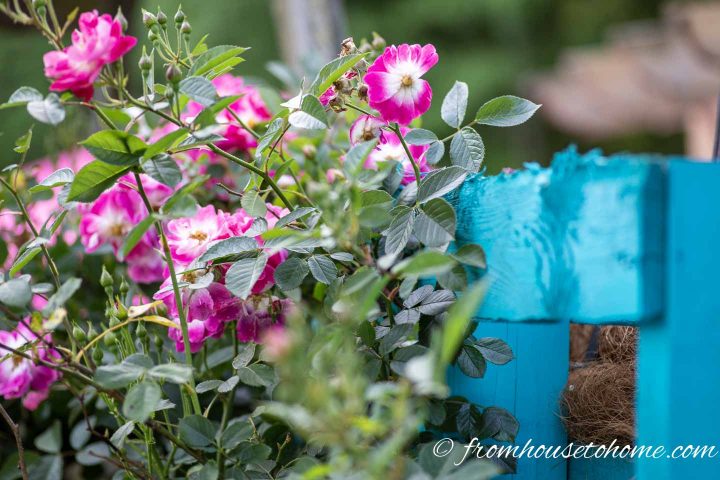
It does double-duty as a trellis to keep the rose that grows behind it in check.
To get the step-by-step instructions, read our DIY pallet herb garden tutorial.
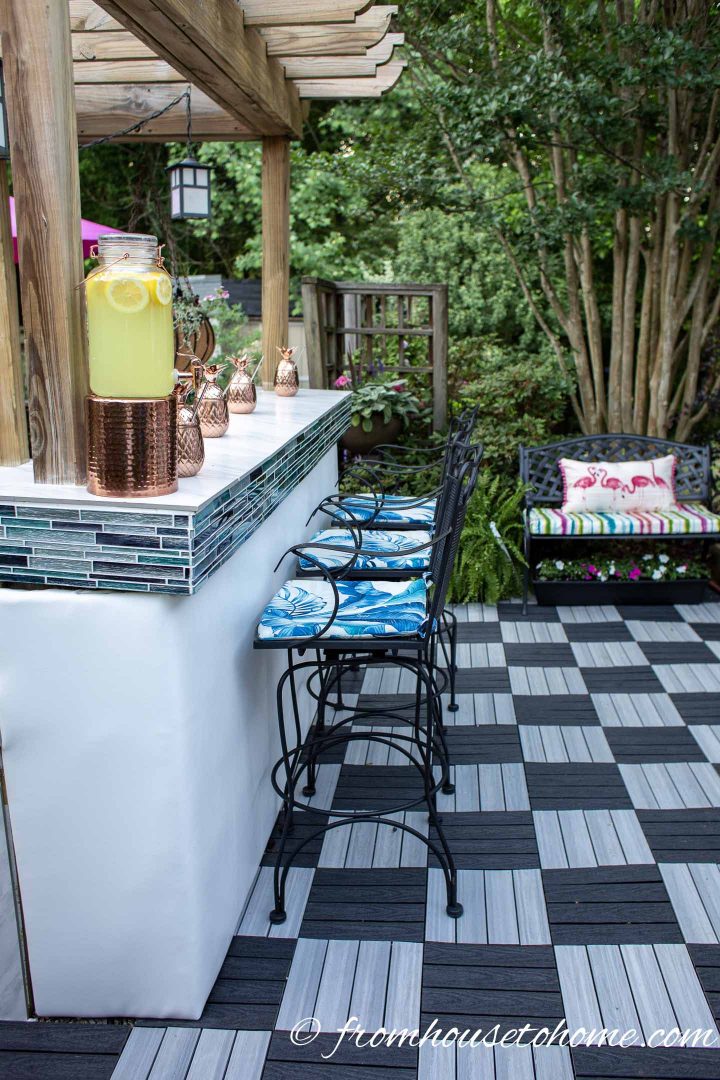
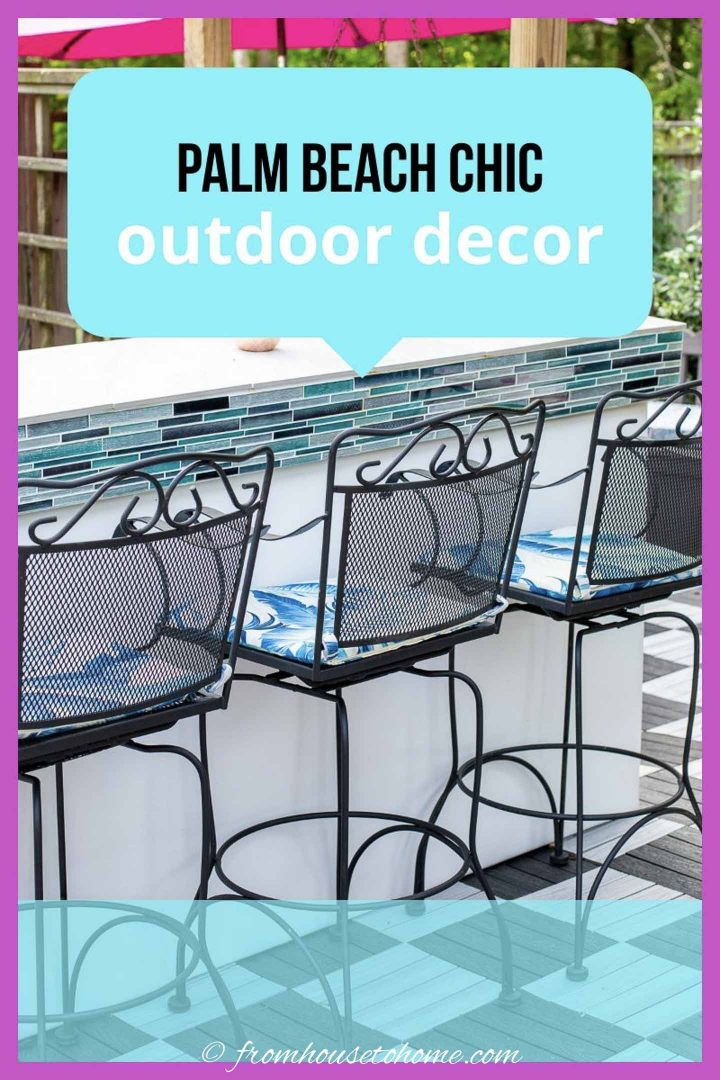
22 | Build a glam outdoor bar
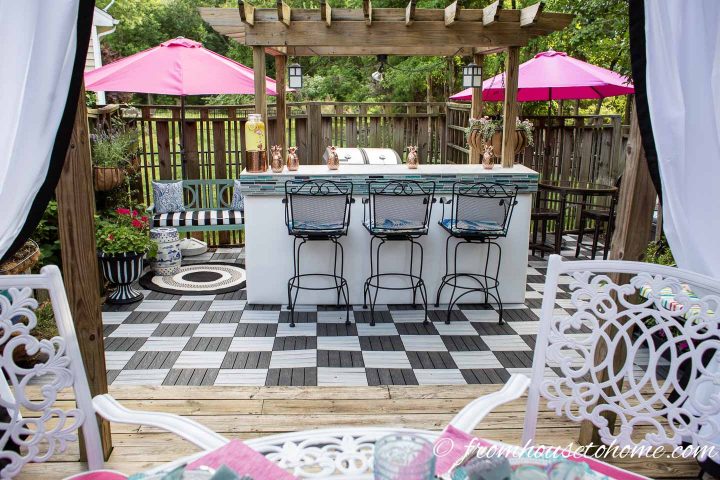
There’s nothing like an outdoor bar to take your outdoor entertaining to the next level.
This is the most popular area of my deck when I have parties.
I built this Tiki bar and grill area quite a few years ago, so the structure was already there. But it definitely needed an overhaul.
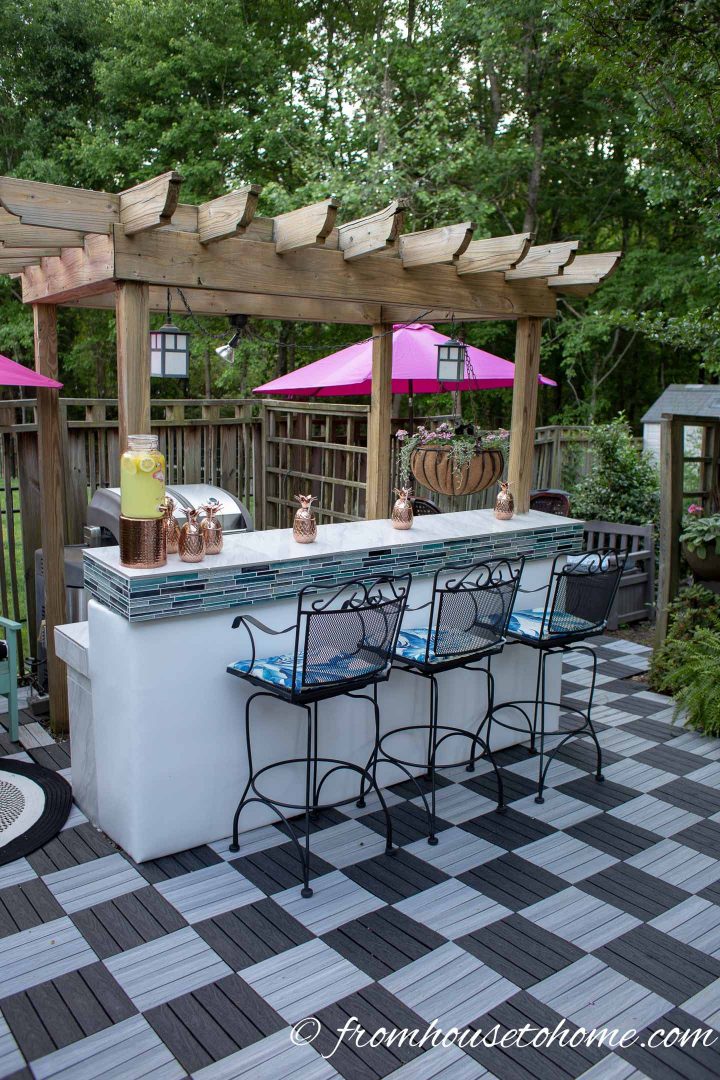
I tiled the countertop and the whole back of the bar in a marble-look porcelain tile.
Then added some decorative glass tiles around the top for a bit of glam.
Finally I made an upholstered front from white marine vinyl (so it should last a while outdoors).
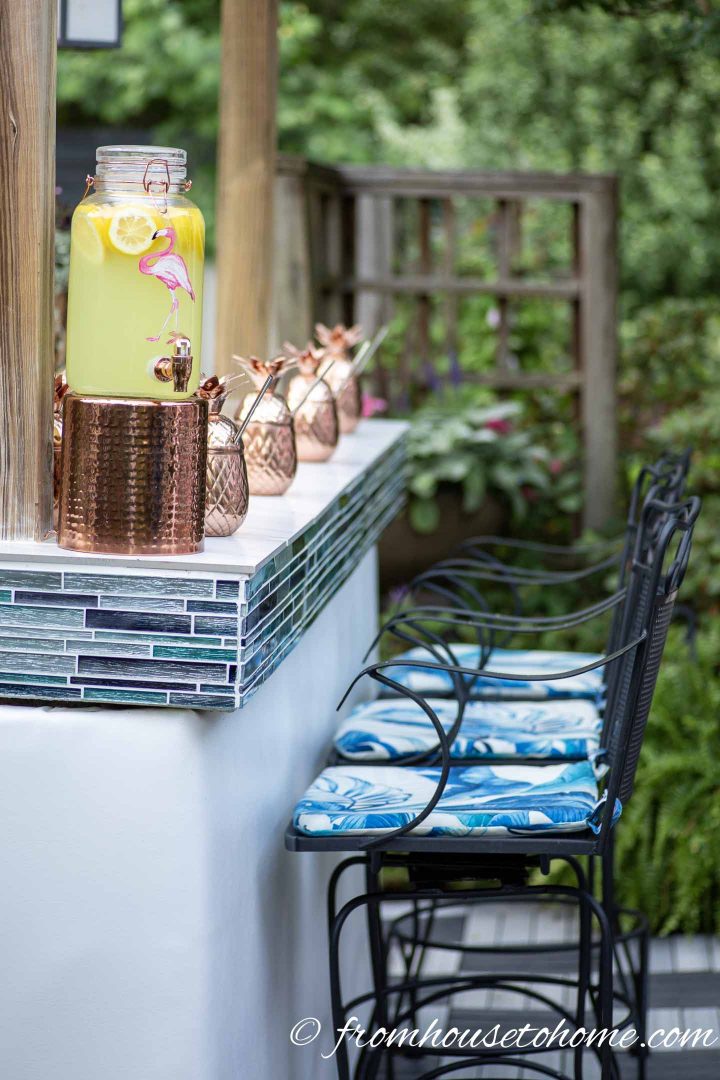
After all that work, I could have downed that whole container of lemonade in one sitting!
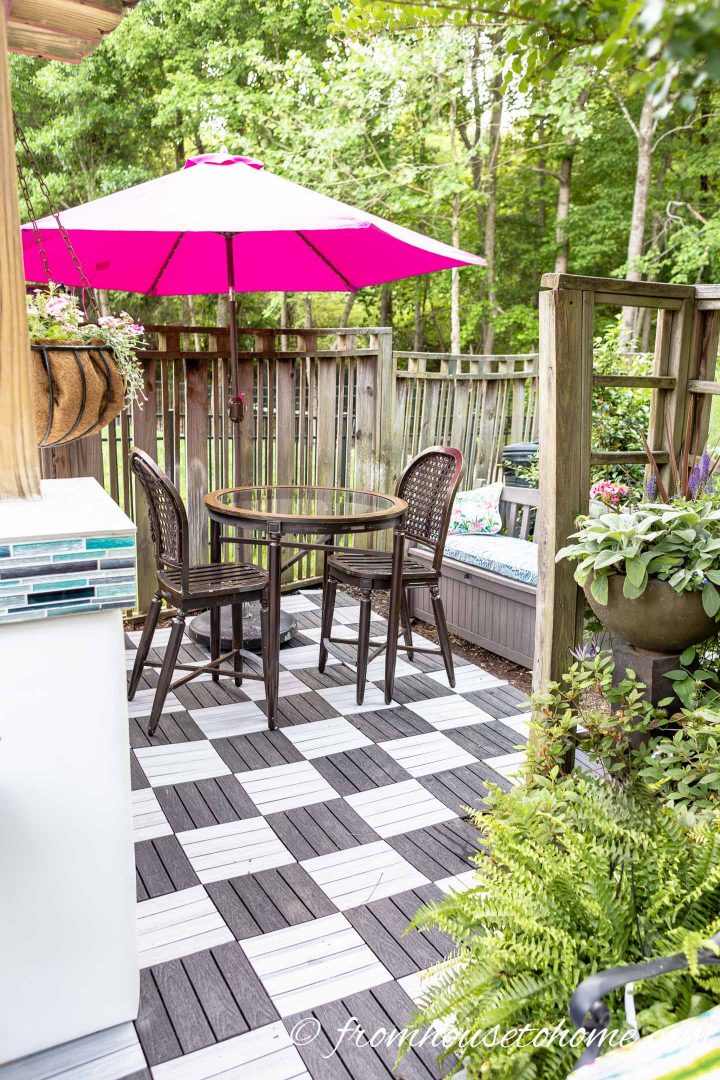
23 | Put down deck tiles
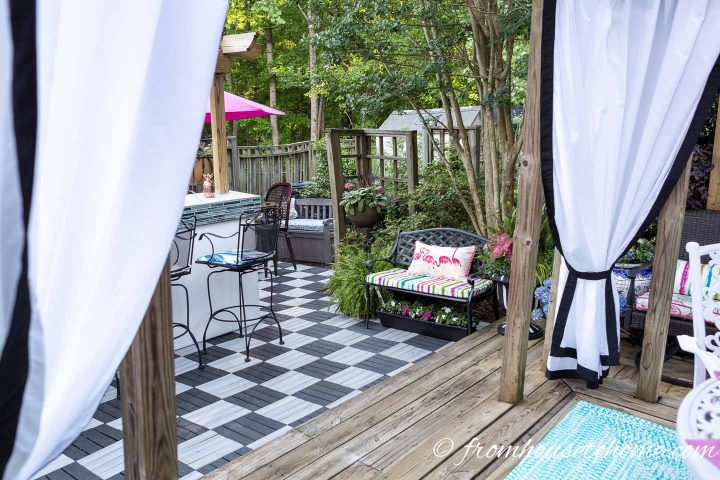
An easy way to extend the deck is to put down deck tiles.
They can go right over whatever is there (as long as it is level).
Once they’re down, they’re super easy to clean and don’t require any maintenance.
I alternated some light-grey tiles* with charcoal-colored tiles* to create a checkerboard floor pattern that fits right in with my Palm Beach chic decor.
But they are available in lots of other colors (including wood tones) so you can pick the ones that match your decor.
For more information, read our tutorial on how to install deck tiles.
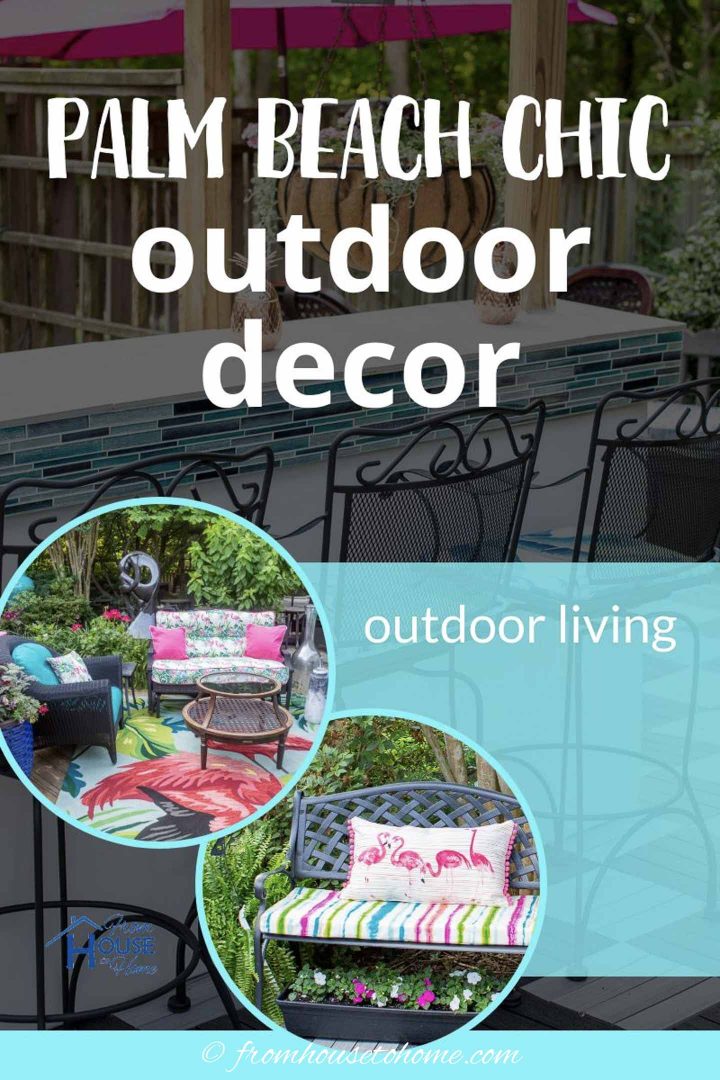
24 | Add bench seating areas
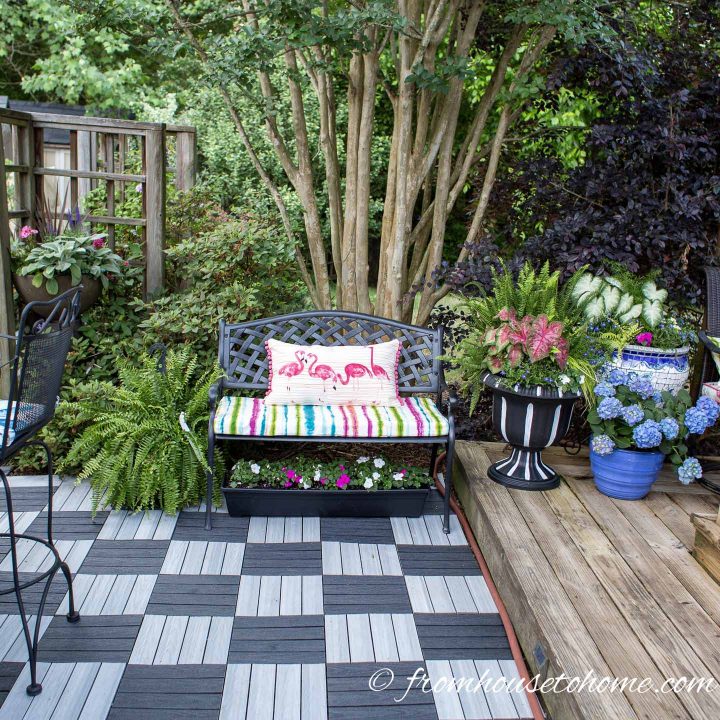
Since the bar area is such a popular hang-out spot for my friends, I wanted to add a few more seating options.
The patio area here isn’t that big, so I needed something that wouldn’t take up a lot of space.
And benches are just the thing.
I added a small black bench* at the end of the patio area.
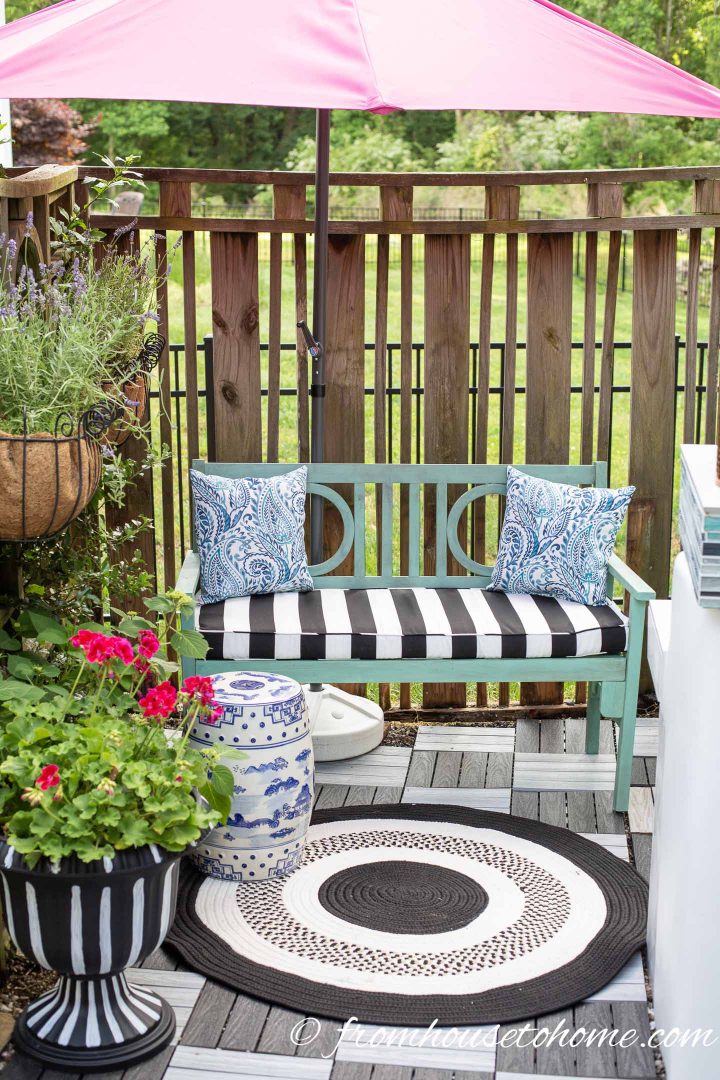
And another turquoise-colored bench* right beside the bar and grill with a small black and white rug* and a Chinoiserie garden seat*.
25 | Put up lots of umbrellas
To keep the deck from getting too hot, I like to use lots of umbrellas.
If you don’t have a lot of room, a half umbrella* is easier to open in tight spaces (like next to the house or fence).
One of my friends has already proclaimed this the best seat in the house. It’s close to the food and drinks, and in the coolest spot on the deck.
Well, that’s it for my Palm Beach chic deck decorating ideas. Hopefully you’ve found some inspiration for your own outdoor space.
If you want to see how I got to this point, here are all the previous weeks:
- Week 1: The Deck Before The Makeover
- Week 2: Palm Beach Chic Decor Ideas
- Week 3: A Thorough Cleaning and DIY Trellis
- Week 4: Painted Patio Furniture
- Week 5: Tiled Outdoor Bar
Other outdoor decor ideas you might like

Don’t forget to check out the final reveals of all the other One Room Challenge participants. There is sure to be a ton of awesome decorating inspiration!
Have comments of questions about our Palm Beach chic deck decorating ideas? Tell us in the section below.
This post was originally published on May 8, 2019 but was updated with new content on February 14, 2024.
Hi – you did a marvelous job on your deck area! Where did you find the pink umbrella that you added the fringe to? I have looked everywhere for a pink umbrella (for under $500, ha!) to no avail!
Thanks, Saint! I ordered the pink umbrella from overstock.com. You can find it here. It’s the Berry Berry color.
Hi Wanda!
I realize this post is a couple years old. You did a fabulous job! You’re patio is amazing! I was wondering if you leave your pink bar cart outside and if you do how has it held up?
Thank you, Suzie
Thanks, Suzie! I left if out the first summer, but the paint was starting to fade (our sun is really strong here). So now it stays in the shed unless I’m using it, and that has worked well.
I was reading all the way you made it happen so beautiful. I love it ..
I would like to know where did you got the fuchsia cushions for the seats /?
Thanks, Isabella! My mother made those cushions for me, so unfortunately they’re not something you can buy somewhere.
I really like if you know where u bought the exactly fabric I will be happy. if you can help me out. I would like to do something like that for my patio. I love it very much that color. I try searching for that color but I can’t find exactly anywhere 🙁
Hi Isabela…We bought the fabric at a local fabric store in Greenville, SC called West End Fabrics. I don’t think they have a website, but here’s their facebook page: https://www.facebook.com/pages/West-End-Fabric/126062524115317. I’m not sure if they will ship it to you, but you could ask.
WOW….gurl you got some energy!!!! I was exhausted just reading about everything you did in six weeks. I am moving into a second FL home in Jan. I am planning on doing a PS theme. You have certainly inspired me! I now need to go and buy a sewing machine!!! Great job! I hope you are very proud of yourself. It looks fantastic.
Thanks! It was a lot of work but it was worth it in the end 🙂
But WHERE did you get that hanging pot/ chandelier over the table in the pergola?!!! That thing is Amazing! This Perfectly done. Wow!!!!
Thanks, Megan! The hanging pot came from HomeGoods a few years ago. It definitely was a find…I’ve never seen one like it since…
I must say you did a bang up job with the Palm Beach style and an incredible amount of work!! I live just north of Palm Beach (and in South FL my whole life) so I know what this should look like and you nailed it right down to the plant choices. You’re extremely blessed to have a mom who did all those cushions…I’ve done many outdoor cushions and they are my least favorite sewing projects.
Thanks, Pamela! I am so happy with the way it turned out. It makes me feel like I’m in south FL 🙂 And I totally agree about my mother being a blessing…I would never have been able to get all that sewing done on my own 🙂
Wanda, what a beautiful space! So colorful and perfect for entertaining. Love all the things you’ve built. And kudos to your mom for her mad sewing skills. Gorgeous!
Thanks, Cyndi! I’m definitely happy with the way it turned out…and grateful for my mother’s sewing talent 🙂