Super Easy Custom Wood DIY Drawer Dividers


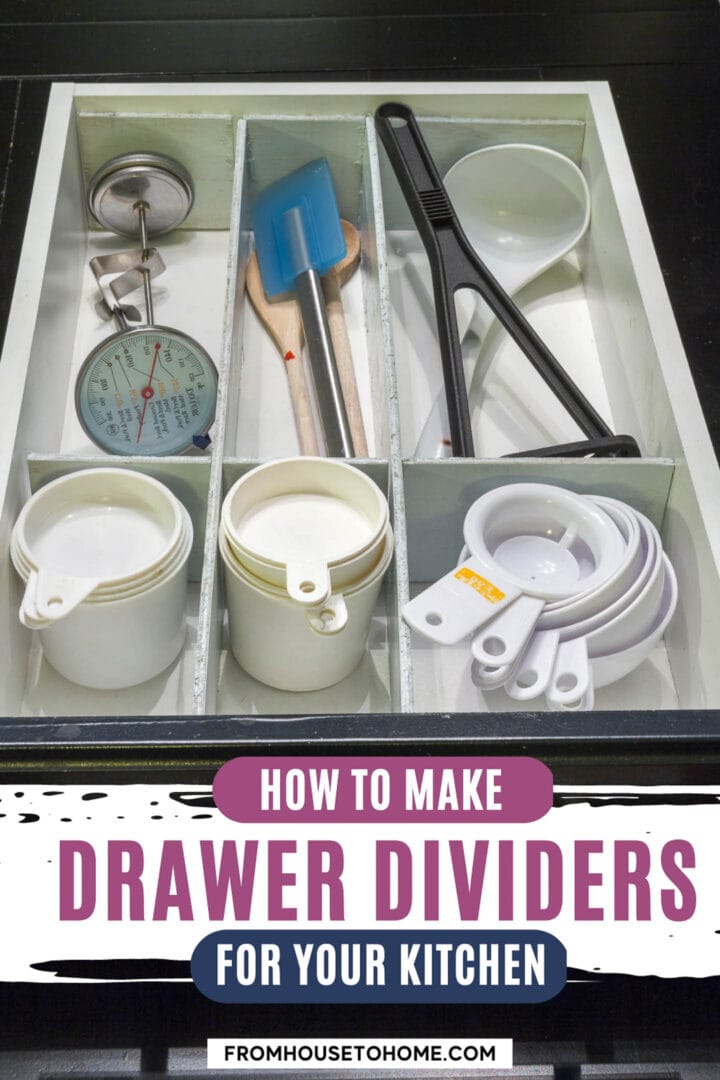
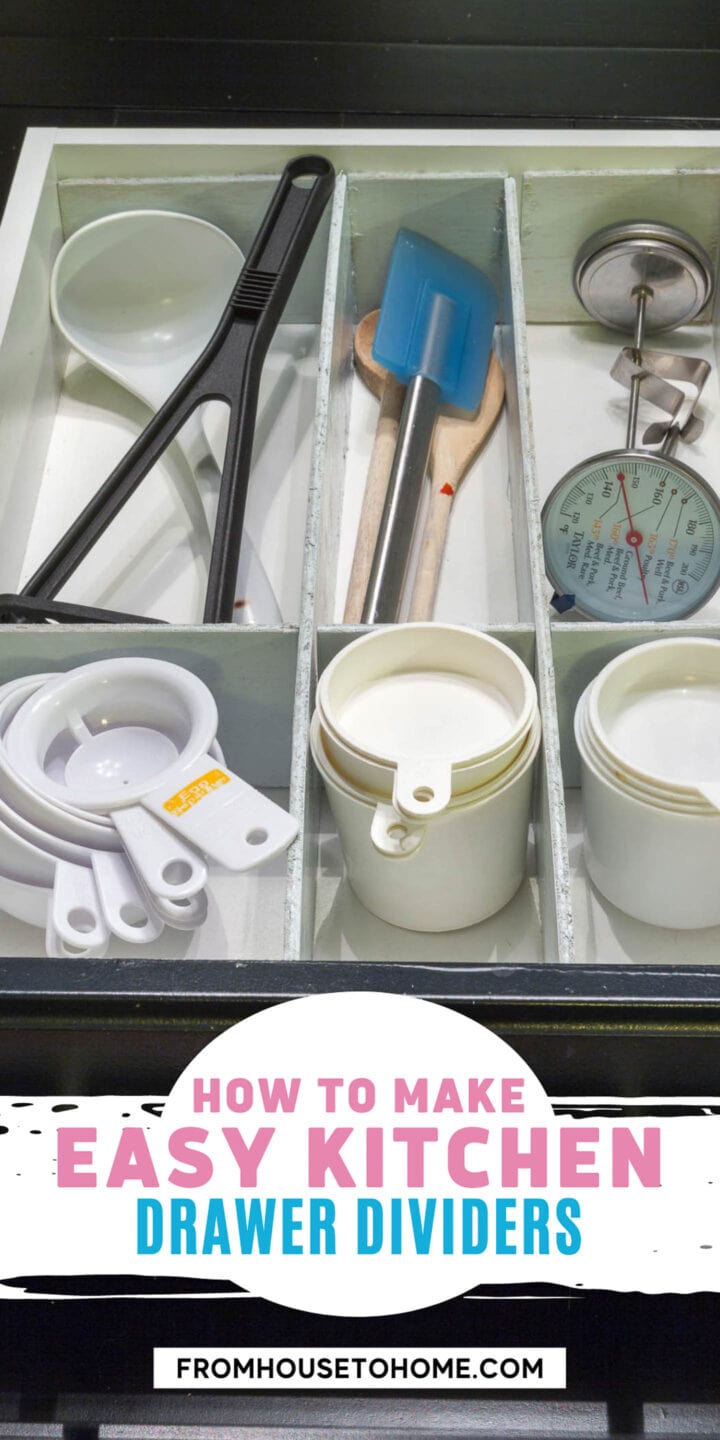
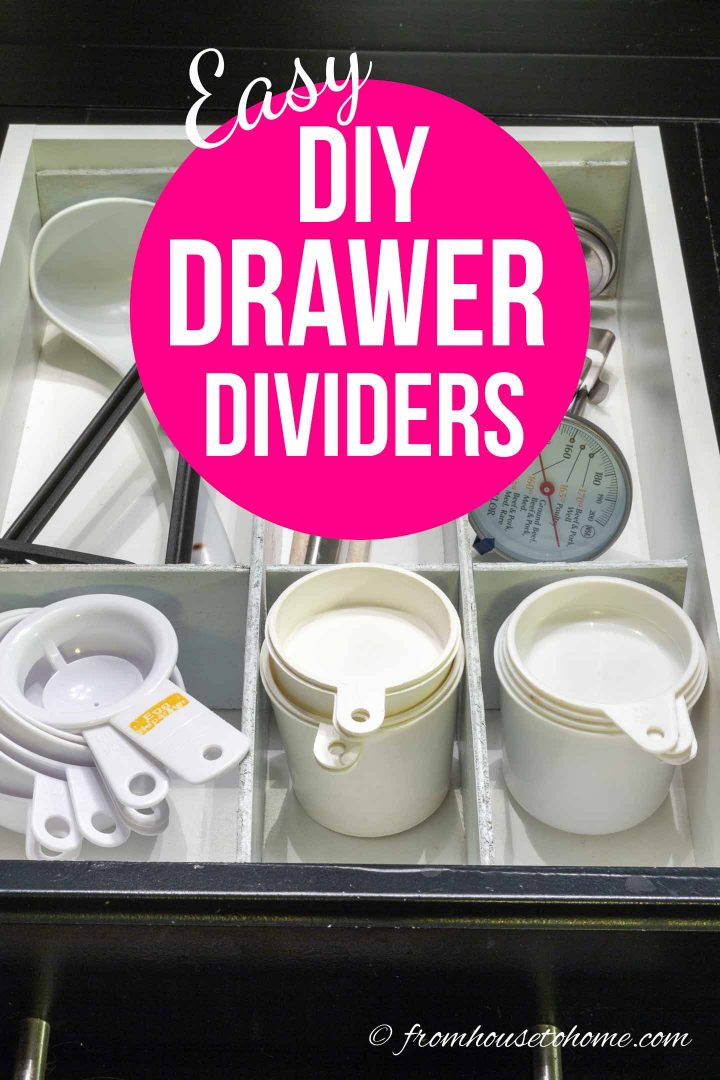
These custom wood DIY drawer dividers are a super easy way to make drawer organizers that will get your kitchen, desk or bathroom drawers in order.
I’ve been on a mission to get my kitchen organized. Between these DIY drawer dividers, my custom pegboard drawer organizers and my rotating utensil holder, I think I have the utensil clutter conquered.
I love drawer dividers…they give everything in the drawer its own place and make it all easy to find.
The problem is that the standard organizers never seem to fit the size of my drawers. I always end up having to cut them to fit and there is usually some wasted left over space. Not to mention that most of the store-bought organizers are only about an inch high, when most drawers are at least 3 inches high…I’ve never understood why they make them so low.
So I decided that making my own DIY wooden draw dividers was the way to go. They aren’t very difficult to put together and you an customize them to whatever size you need.
In my case, the spaces that I wanted were the same all the way across the drawer…so I ended up using a really easy method for creating the dividers that doesn’t require any glue or nails.
If your spaces don’t end up being the same across the drawer, this method won’t work for you. You will probably need to get out the glue and nails…you can find a great tutorial to make them HERE.
My other requirement was that I wanted to be able to remove the dividers so that I can clean the drawer easily.
Keep reading to find out how to make these easy DIY custom wood drawer dividers.
Supplies
Materials
- Sheet of 1/4″ plywood
- Sandpaper
- Paint
Tools
- Measuring Stick
- Jig Saw
Plan Your DIY Wood Drawer Dividers
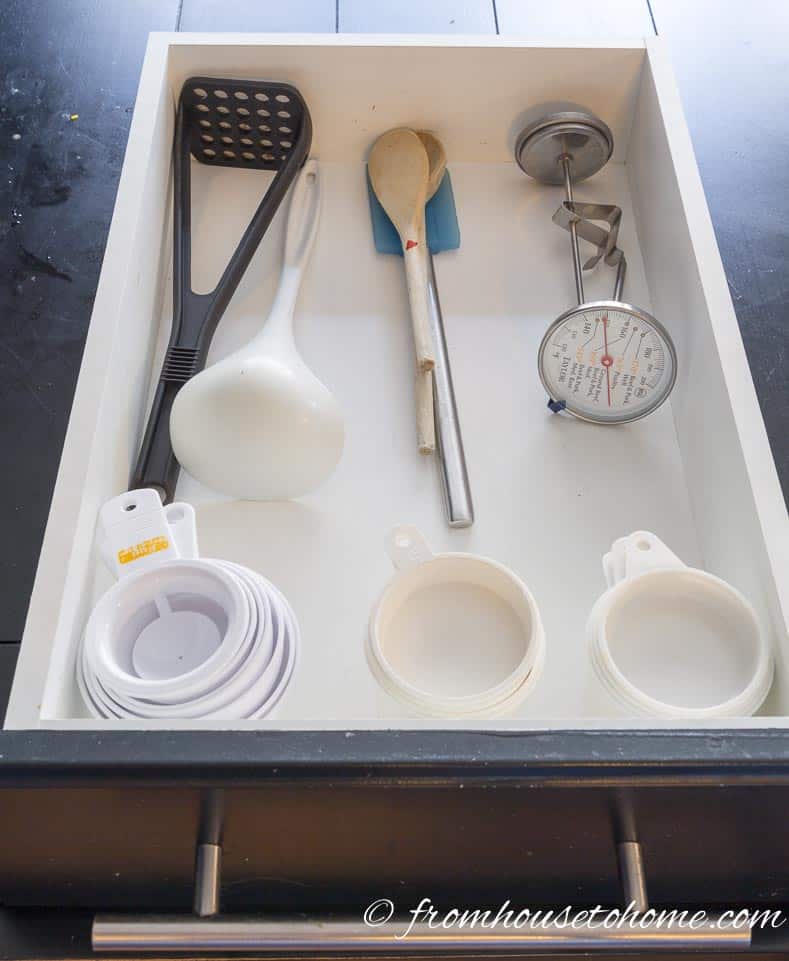
The first step to making custom drawer dividers is to figure out what you want to store in the drawer and how you want it to be organized.
Lay out your utensils in the drawer so that you can tell where the dividers should go.
I didn’t end up organizing it exactly the same way after the dividers were finished, but it was close enough to let me figure out the divider spacing.
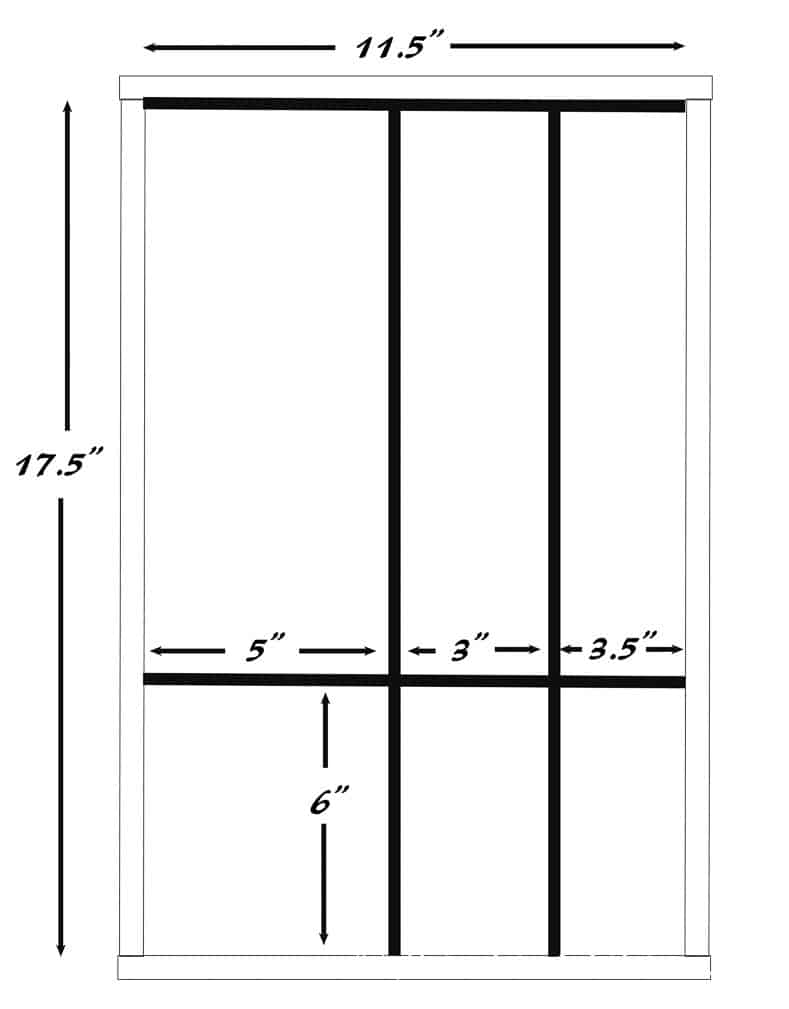
Use your decision to figure out how large the spaces need to be. Measure how wide and long each space should be. You might want to do a rough drawing so you can keep track of your measurements.
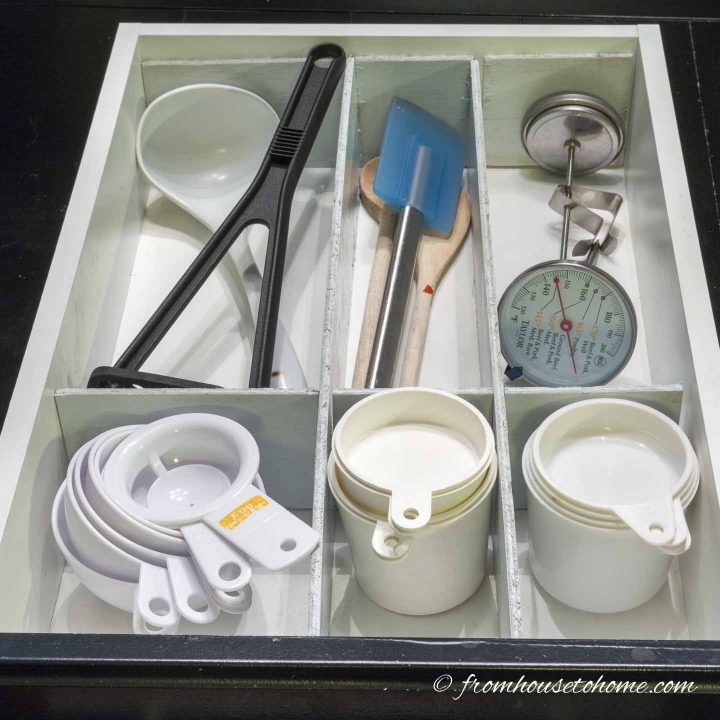
In my case, I wanted to store 3 sets of measuring cups at the front of the drawer, and longer items such as wooden spoons and spatulas in the back of the drawer.
These long items were all of the ones that didn’t have a hole in the handle so they can’t be stored on my rotating hanging utensil rack.
Cut The Custom Wood Drawer Dividers
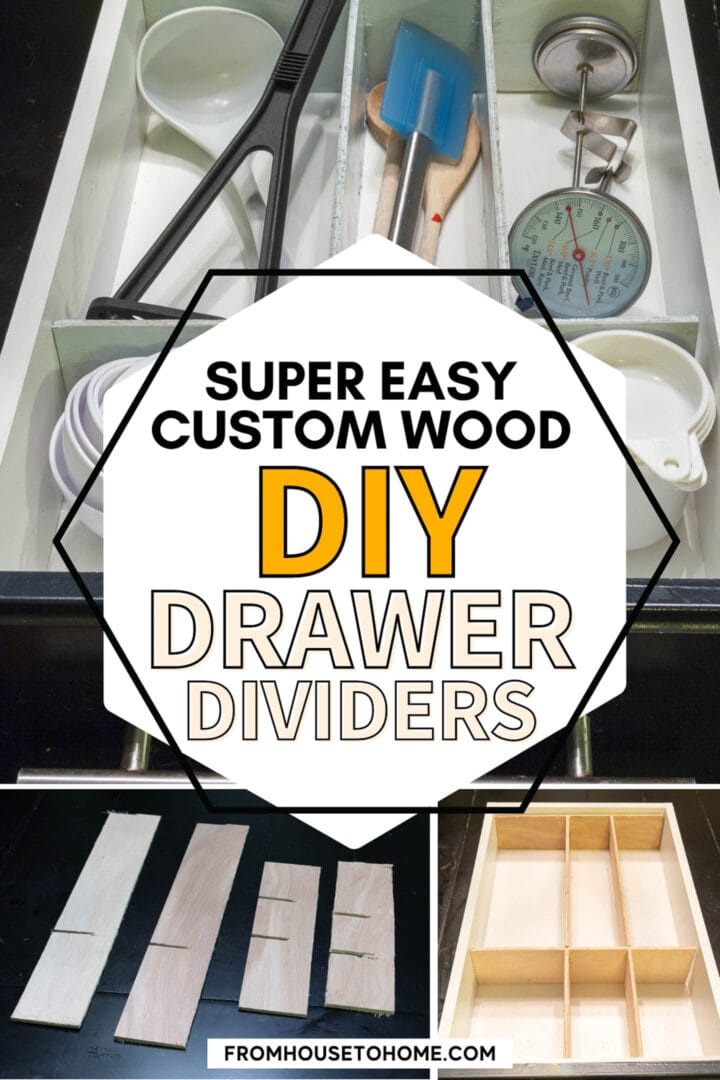
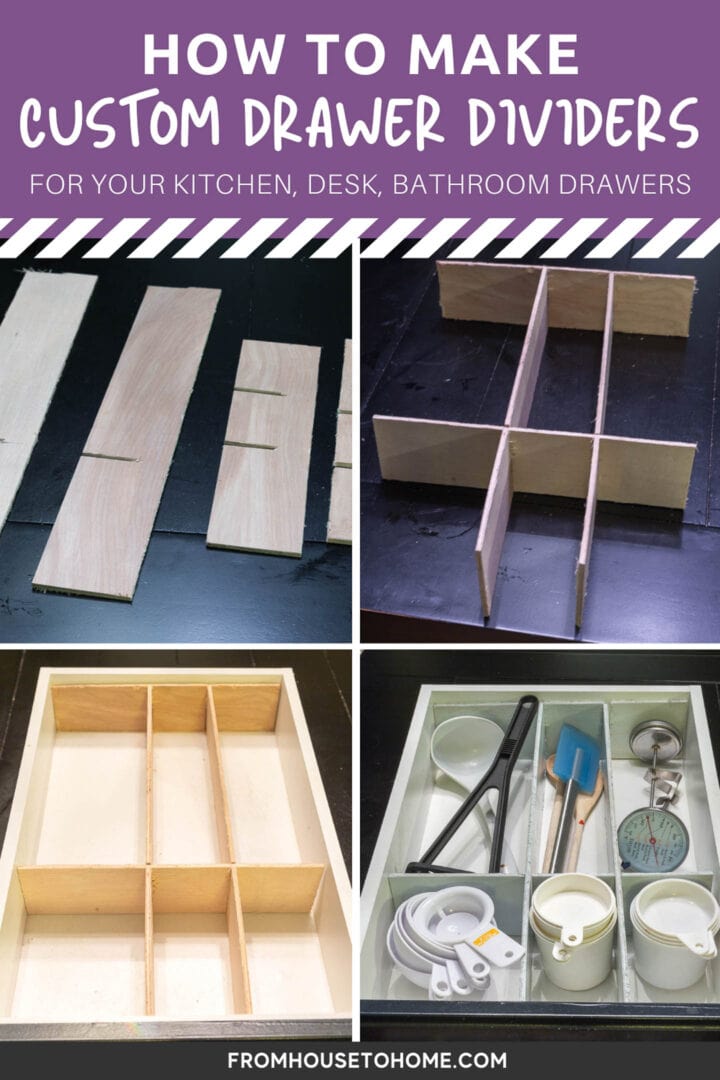
1. Cut dividers from ¼” plywood that are 3″ wide and the same length as the drawer (in my case, I needed 2 of these).
2. Cut dividers from ¼” plywood that are 3″ wide and the same length as the width of the drawer.
I only needed one width-wise divider, but since it was positioned much closer to one end of the drawer than the other, I actually cut 2.
The second will be go at the end of the drawer to make sure the lengthwise dividers maintain their spacing properly.
You could also create one of these for the front of the drawer if you need it…in my case the middle divider was close enough to the front that a third one wasn’t really necessary.
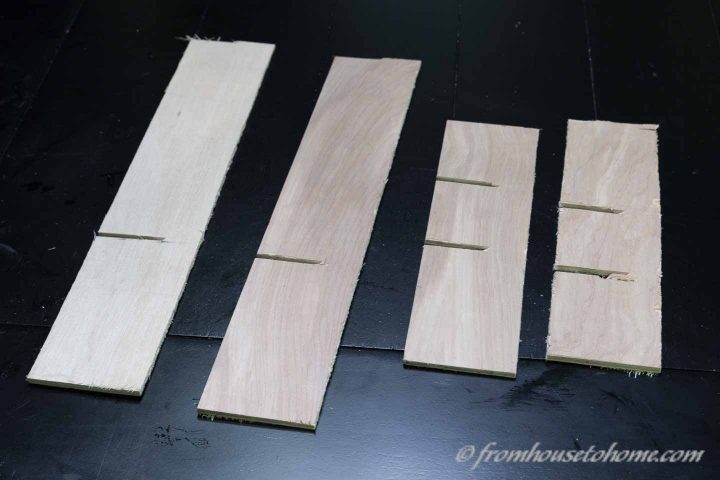
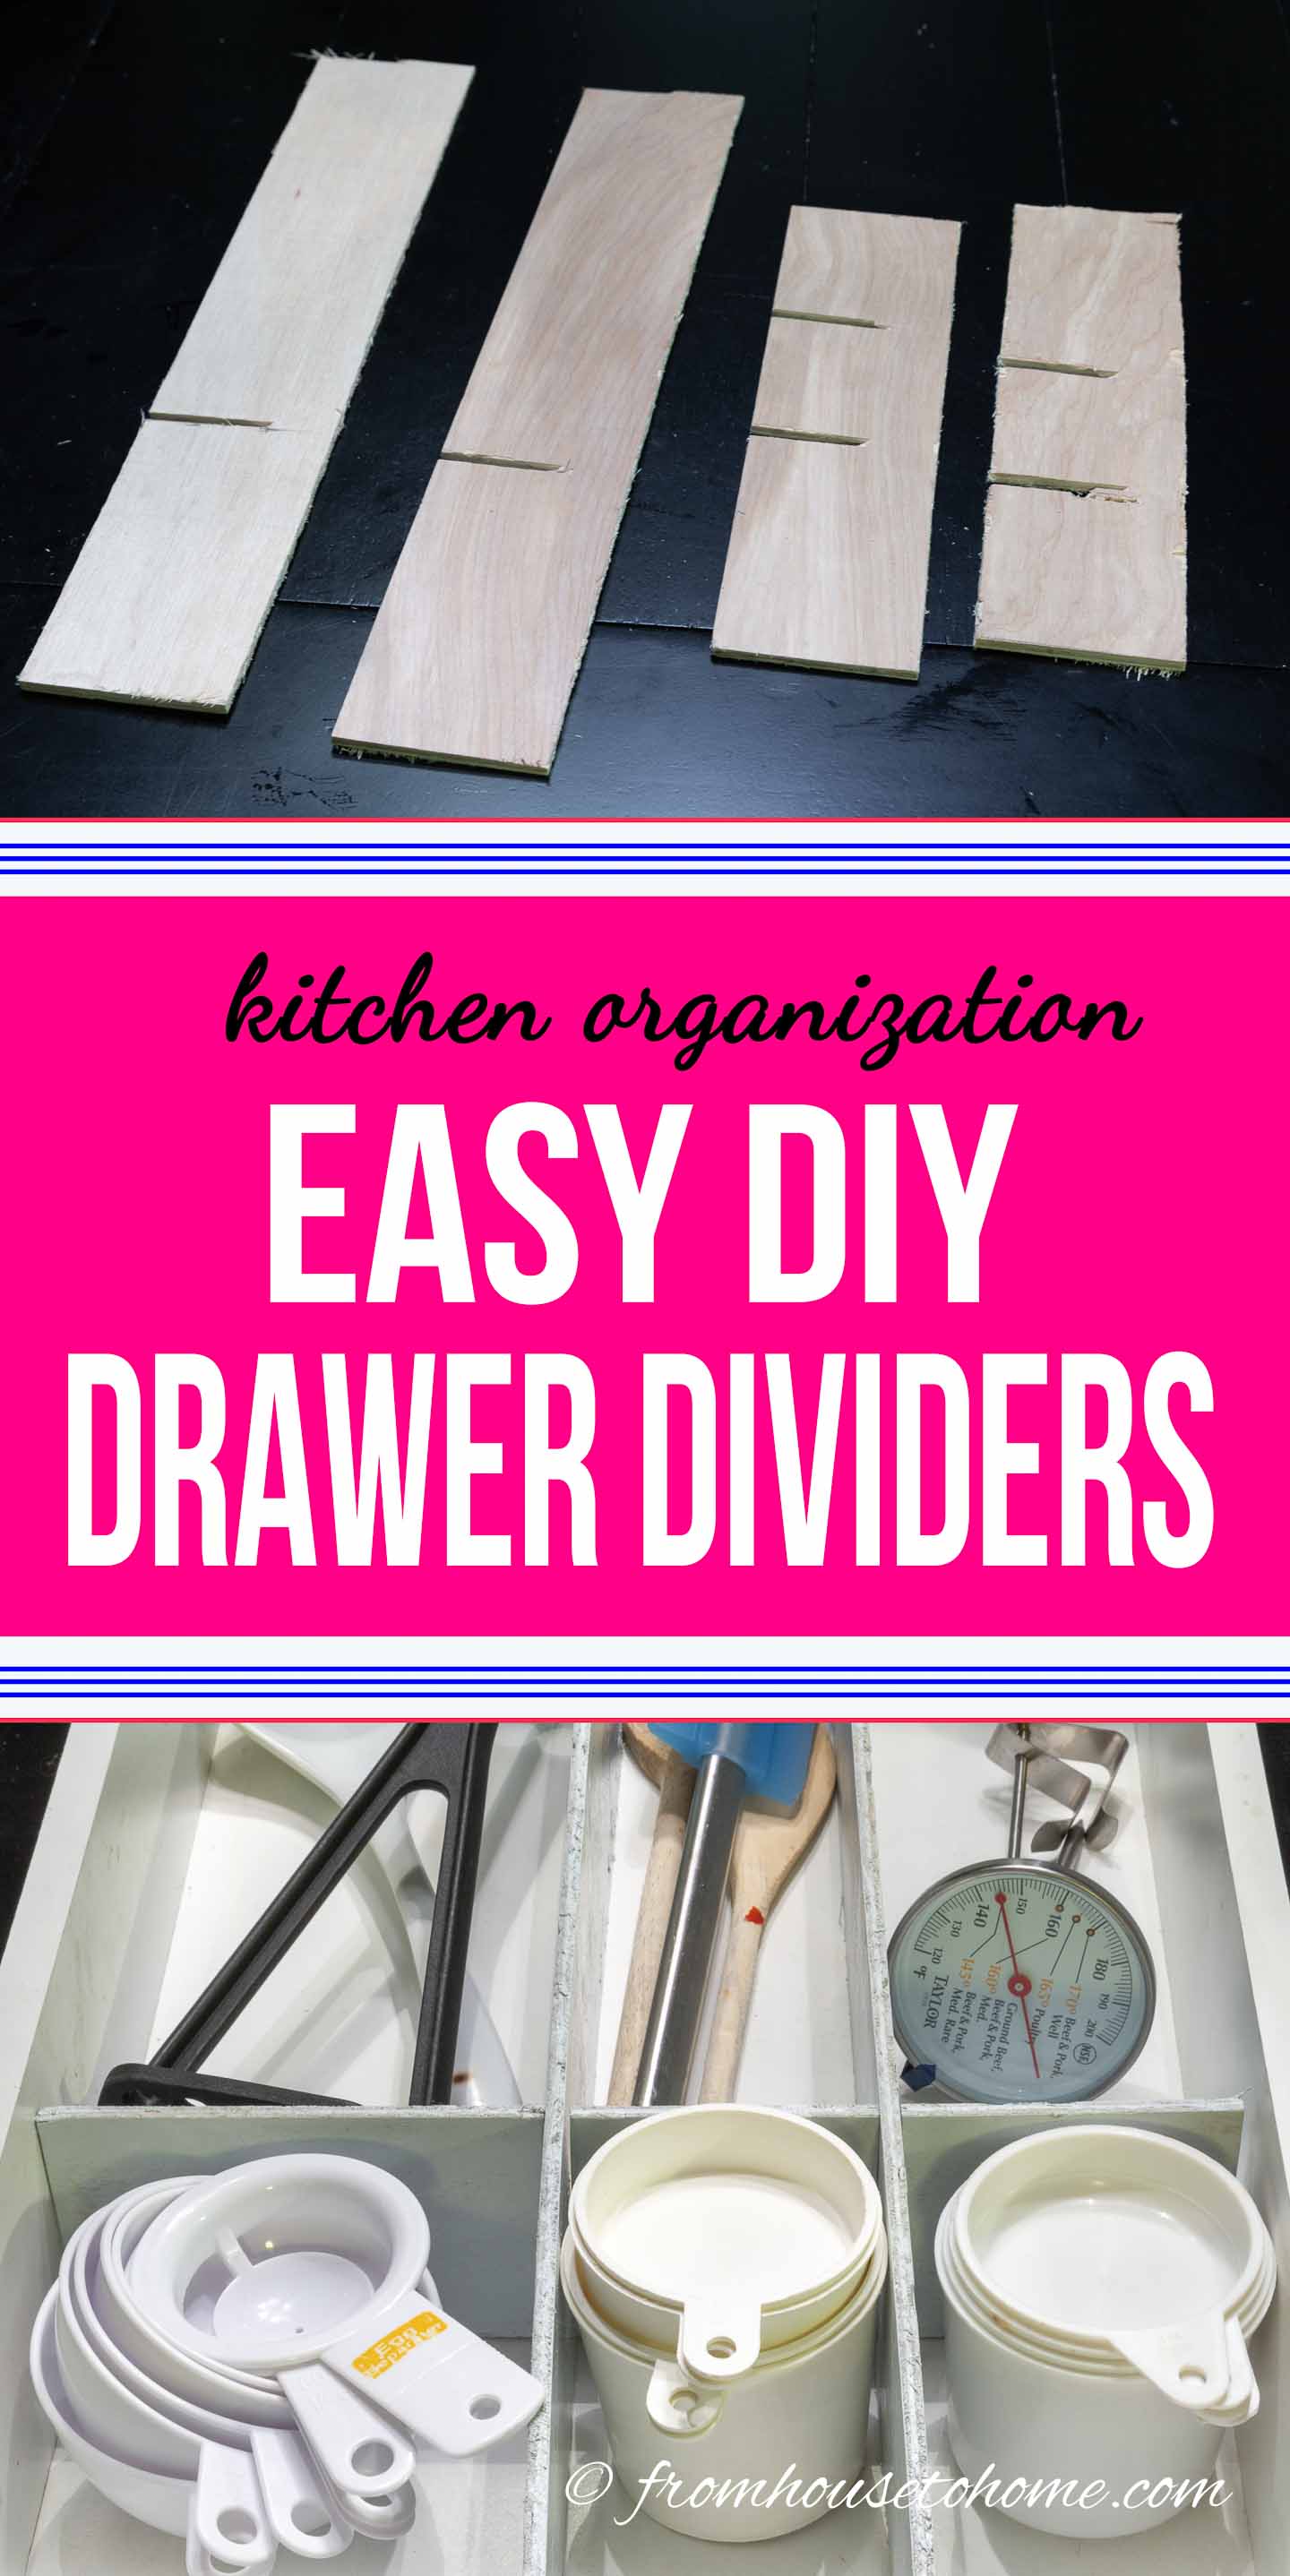
3. Use a jig saw to cut 2″ slits in the lengthwise dividers where you want the crossing dividers to go.
These should not go all the way through the wood and should be about ¼” thick (the same thickness as the plywood).
It usually takes 2 or 3 cuts made right next to each other to get the correct width.
4. (Optional) If you are using a crossing divider at the front or the end of the drawer to stabilize the long dividers, cut the same 2″ long slits at the very end of the long dividers, on the same side of the board as the previous cuts.
5. Use a jig saw to cut 2″ slits in the crossing dividers where they will cross the lengthwise dividers.
Again they will need to be about ¼” thick.
Put the Custom Drawer Organizers Together
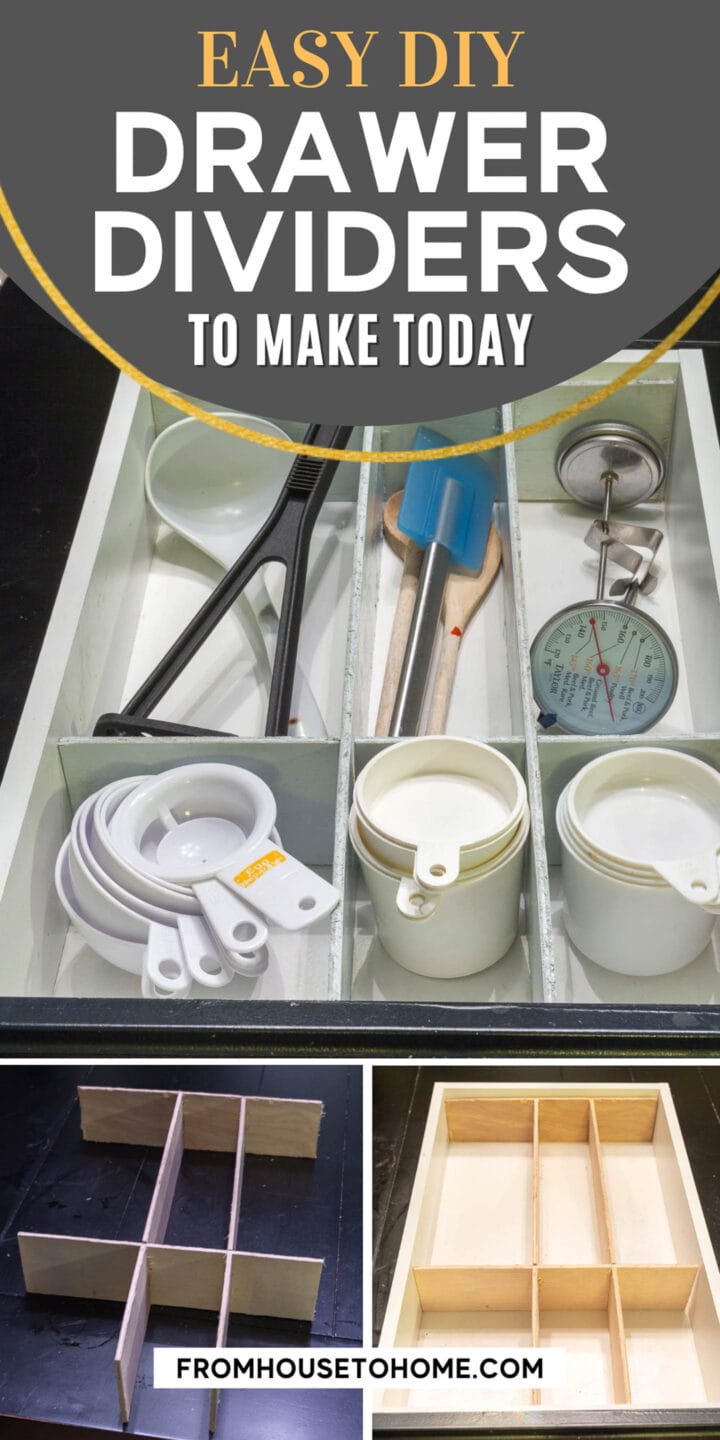
1. Cross the boards so that the slots meet and push them together. It should form the divider pattern that you want for your drawer.
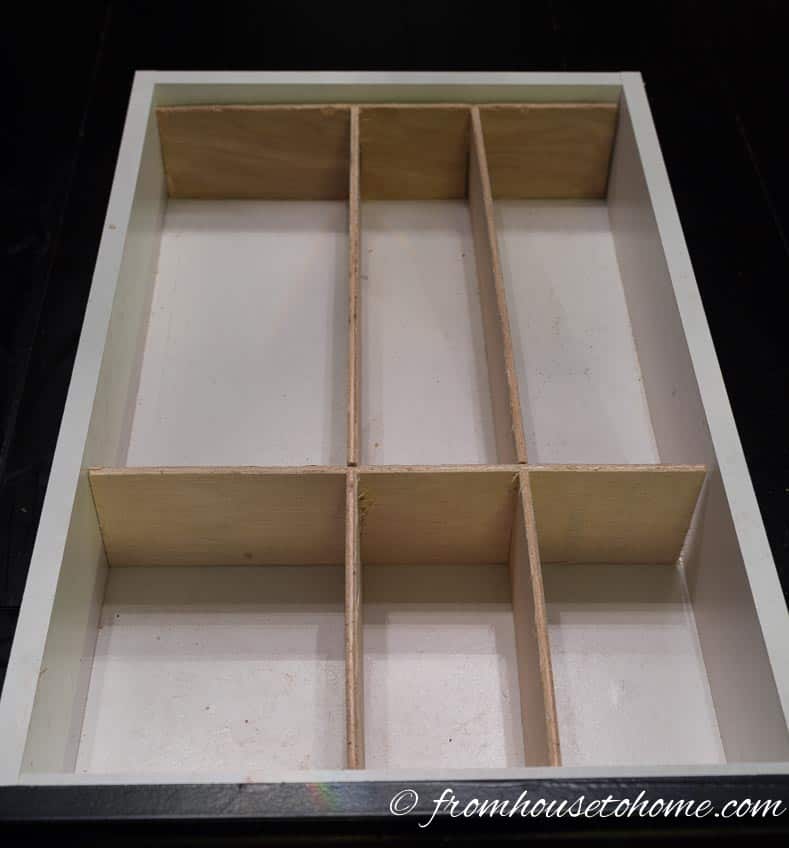
2. Fit the dividers in the drawer to make sure it fits properly.
3. Sand off the rough edges and then paint the dividers if you want them to match the drawer color.
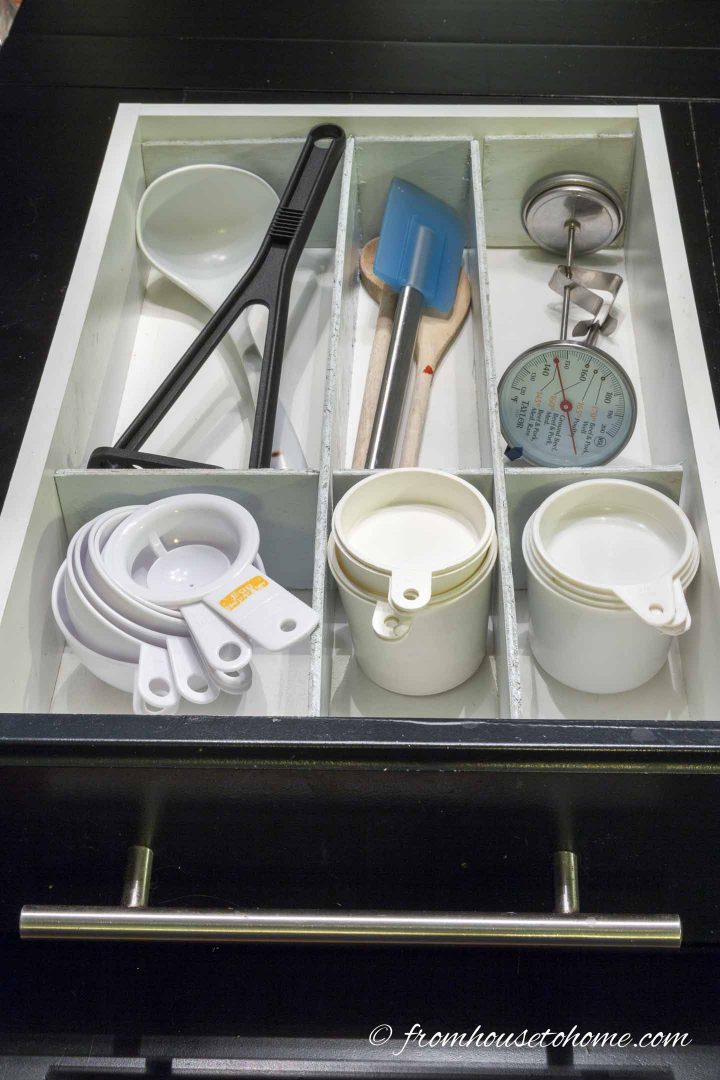
Put back all of your drawer contents and enjoy your newly organized drawer!
Pin It So You Don't Forget It!
Other kitchen organizing ideas you might like
Or browse all of our kitchen organization ideas.
Have comments or questions on our easy DIY custom wood drawer dividers? Tell us in the section below.
This post was originally published on December 23, 2018 but was updated with new content on December 10, 2023.
Thank you. That should cut my assembly time in half 🙃
Tom
I am going to try making your Drawer Dividers, but, what happened to steps 5 and 6 in the Cut the Custom Drawer Dividers section?
Sorry, Tom…it’s just a numbering issue, so #7 is actually #5 (and there aren’t any more steps than that).