
How To Make A DIY Windowpane Mirror
This DIY windowpane mirror tutorial transforms any room by adding a touch of elegance and the illusion of more space. Learn how to create this stylish piece with simple tools and steps, making it a must-try project for enhancing your home decor effortlessly.

Have you ever wanted to brighten up a dark corner in your home or add a bit of unique character to your walls?
Well, I found the perfect solution by creating a DIY windowpane mirror from an old wood window.
I decided to hang mine at the top of a tall stairwell, and it’s amazing how it almost looks like an additional window.
In case you want to do something similar, I’ll walk you through a step-by-step tutorial on how to do your own DIY mirror window project using an old window frame.
Looking for more mirror decorating ideas? You'll love Decorate With Mirrors and How To Decorate Around A Mirror.
Supplies
Materials:
- old window – I got mine from an old building that was being renovated. But you can often find them at the Re-Store or other salvage shops.
- mirror, cut to the size of the window
- paint stripper
- cleaner/degreaser – to thoroughly clean the window frame. I like Krud Kutter*.
- wood filler
- primer – I like Kilz*.
- paint – I used a semi-gloss latex paint for a smooth finish. But you could also use chalk paint for a more rustic finish.
- frame clips*
- screw eye picture hangers*
- picture wire
- long screws with wall anchors
Tools:
- bucket and wash cloth
- putty knife
- 220 grit sanding paper and sanding block
- Scotch brite scrub sponge – to apply the cleaner/degreaser.
- paint brush
- drill, drill bit and screwdriver bit – for installing the screws in the wall
How to make a DIY windowpane mirror

1 | Have mirror cut to size
Start by measuring the opening of the window frame where the glass used to be.
Use a tape measure to get the width and height of the space, measuring from edge to edge on the inside of the frame.
Then add about ½-inch to each measurement so the mirror will overlap the frame on all sides. But make sure there is enough space left on the frame for the frame clips to be installed.
2 | Remove the existing glass
Carefully take out the glass from the window frame. Wear thick gloves and safety glasses to protect your hands and eyes from sharp edges.
If there are any small nails or glazing points holding the glass in place, use a flat head screwdriver or putty knife to gently pry them out.
Work slowly and keep a firm grip on the glass as you lift it out of the frame.
If the glass is stuck, tap lightly around the edges with the handle of your tool to loosen it.
3 | Remove the existing finish
If the window has old paint or varnish, apply a paint stripper according to the instructions on the label. Wearing gloves and working in a well-ventilated area will help keep things safe and comfortable.
Use a paintbrush to spread a thick, even coat over the surface.
Let it sit for the recommended time—usually about 15 to 30 minutes—until the finish starts to bubble or lift.
Once the finish loosens, use a scraper to gently remove it.
For stubborn spots, apply a little more stripper and wait a few extra minutes before scraping again.
After removing the old finish, wipe down the surface with a damp cloth to get rid of any remaining residue.
If needed, use fine steel wool or sandpaper to smooth out any rough patches.
Make sure the window is completely clean and dry before moving to the next step.
4 | Fill any holes
Check the window frame for any small holes, dents, or scratches.
If you spot any, use wood filler to smooth them out.
Scoop a small amount of wood filler onto a putty knife and press it firmly into each hole or nick.
Spread the filler so it’s level with the surface of the frame.
Let it dry completely, following the drying time on the package before moving on.
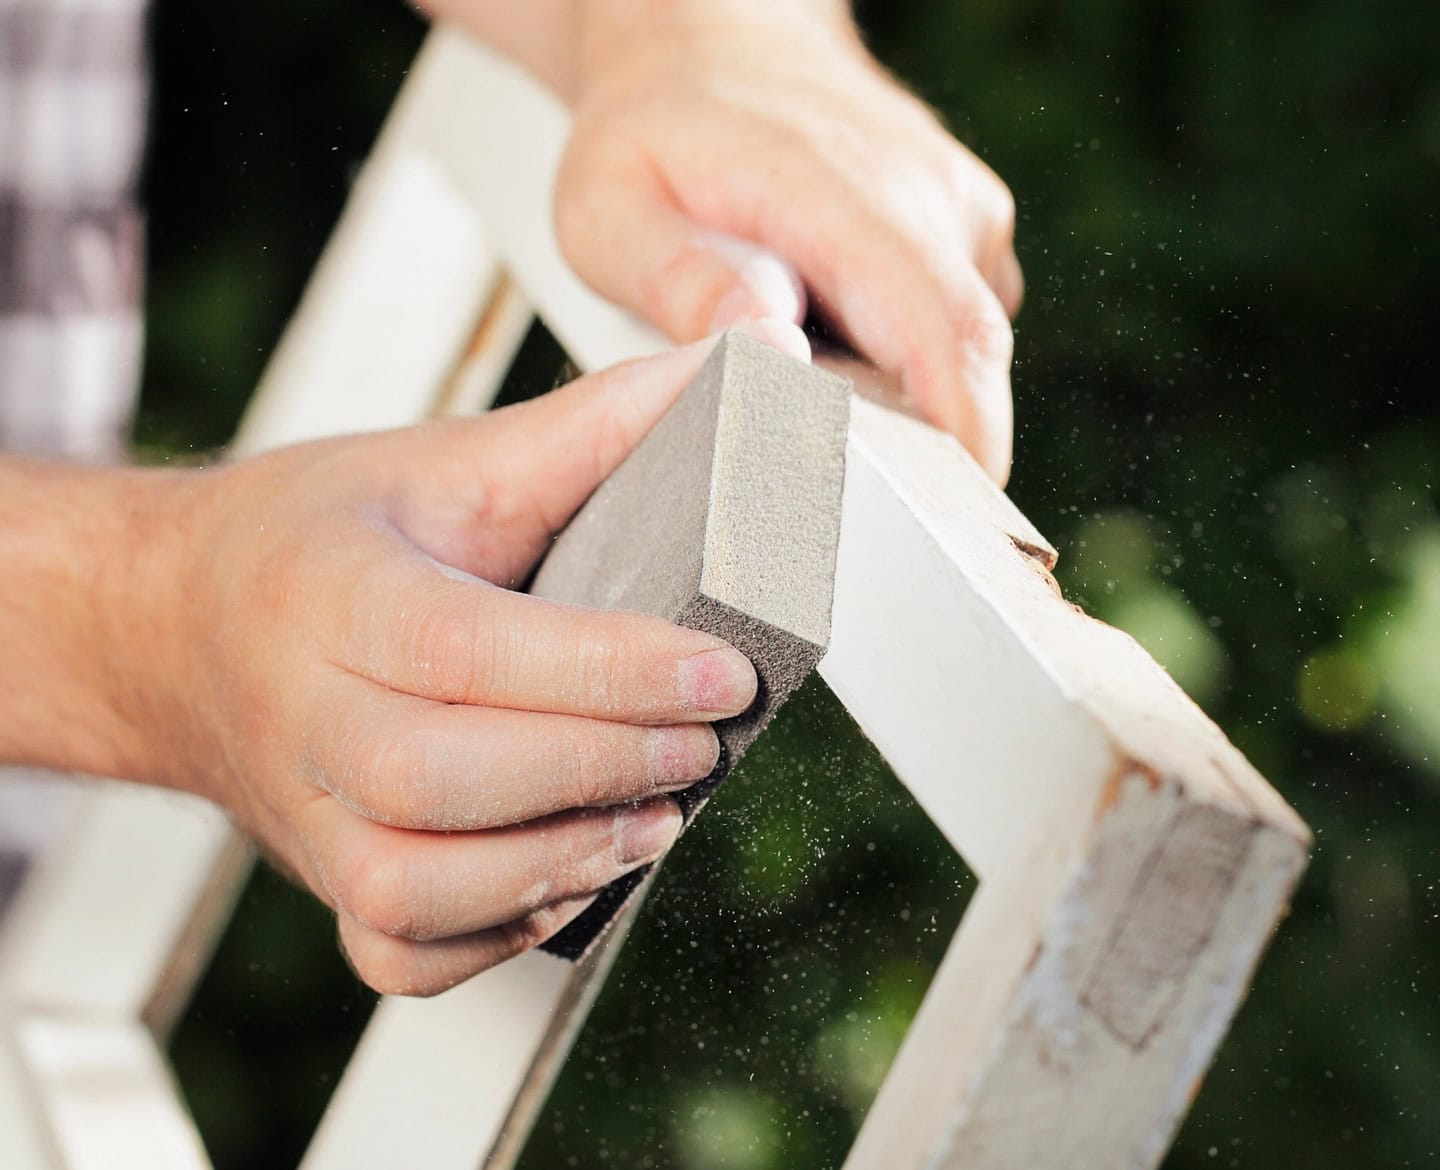
5 | Sand

Use 220 grit sandpaper and a sanding block to smooth out the wood filler and any rough spots on the frame.
Hold the sandpaper flat against the surface and move it it back and forth along the grain of the wood.
Wipe away any dust with a damp cloth or tack cloth so the surface is clean and ready for the next step.
6 | Clean
Wipe down the entire window frame with a degreaser like Krud Kutter* to remove any dirt, dust, or grease.
Spray the degreaser directly onto the frame, then use a sponge to scrub all surfaces, especially in corners and crevices where grime can collect.
Pay extra attention to any spots that feel sticky or look dirty.
After scrubbing, wipe the frame with a damp cloth to remove any leftover cleaner.
Let the frame dry completely before moving on.
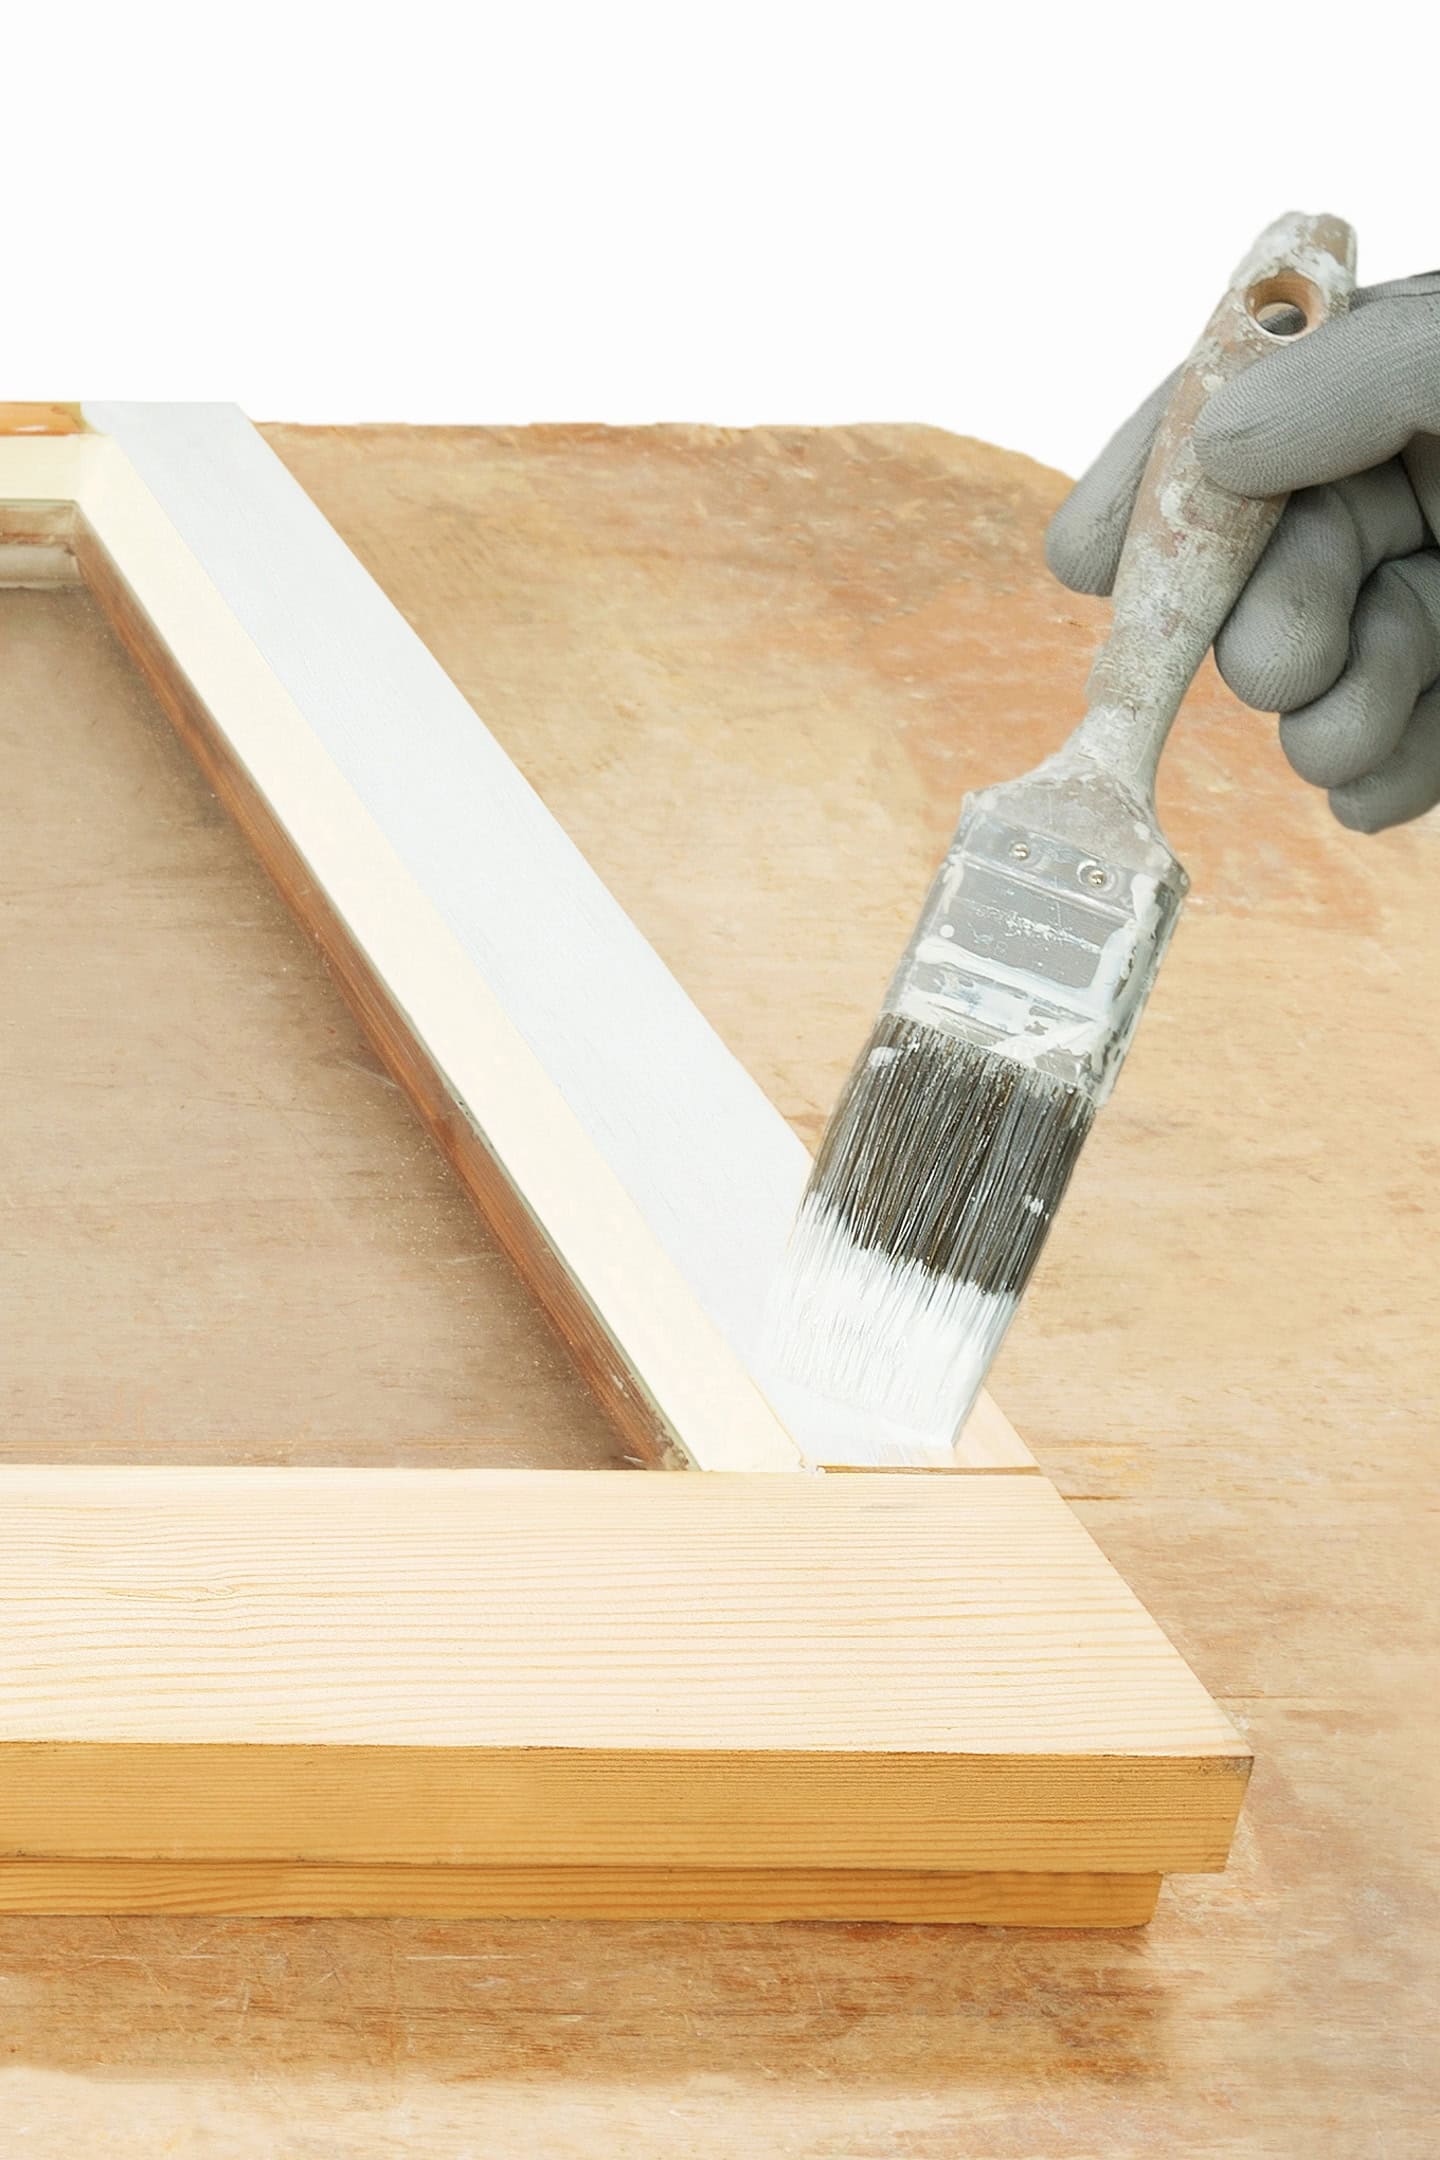
7 | Prime

Cover the entire window frame with a quality primer like Kilz*. This helps the paint stick better and gives a smoother finish.
Use a small angled brush to get into corners and along the edges, then switch to a larger brush or a small roller for the flat surfaces.
Apply the primer in thin, even coats to avoid drips and streaks. If you see any thick spots or runs, smooth them out right away with your brush.
Let the primer dry completely before moving on.
8 | Paint the window frame
Make sure your paint is stirred well so the color is even.
Use a small brush for corners and edges, and a larger brush for flat surfaces.
Apply thin, even coats rather than one thick coat. This helps prevent drips and gives a smoother finish.
Let each coat dry completely before adding another, following the directions on the paint can.
9 | Add the mirror
Lay the window frame face down on a soft surface to avoid scratches.
Place the mirror onto the back of the window frame, making sure the reflective side is facing out through the front.
Center the mirror so it lines up evenly with the edges of the frame.
Install frame clips to hold the mirror in place.
Space the clips evenly around all sides of the mirror, about every 8 to 10 inches.
Make sure each clip is snug but not so tight that it puts pressure on the glass, which could cause cracks.
Double check that the mirror feels firmly attached and doesn’t move if you gently shake the frame.
10 | Install picture hangers
Screw eye-hook picture hangers into the back of the frame, placing one on each side about a third of the way down from the top.
Make sure they are level with each other so your mirror hangs straight.
Use a small drill bit to make a pilot hole first if the wood is hard—this helps prevent the frame from splitting.
Thread picture wire through both eye-hooks.
Pull the wire tight but leave a little slack so it can catch on a wall hook easily.
For a secure hold, loop the wire through each eye-hook two or three times before twisting the ends back around themselves.
Use pliers to twist the wire tightly and tuck in any sharp ends to keep them from scratching the wall or your fingers.
Double-check that the wire feels sturdy and secure, especially since mirrors can be heavy.
11 | Hang the mirror
Install two sturdy screws into the wall, making sure they are close enough together for the picture wire on the back of the mirror to rest securely over both screws.
Use a level to check that the screws are perfectly even, so the mirror will hang straight.
For the strongest hold, try to position at least one screw so it goes into a wall stud. A stud is a vertical wooden beam behind the drywall, and you can find one using a stud finder or by tapping lightly and listening for a solid sound.
If you can’t hit a stud with both screws, use a wall anchor for the other screw to keep it from pulling out of the drywall.
Wall anchors are easy to use: just drill a small pilot hole, tap the anchor into the wall, and screw into the anchor.
Once the screws are in place, hang the mirror by draping the picture wire over both screws.
Adjust as needed so the mirror sits flat and level against the wall.


Frequently asked questions
Can I use any type of window for this DIY windowpane mirror project?
Absolutely! Any old wood window can be transformed into a beautiful mirror. Just ensure the frame is sturdy enough to hold the mirror and that it fits the aesthetic you’re going for in your space.
Is there a specific type of mirror I should use for this project?
It’s best to use a mirror that is at least 1/4 inch thick to ensure durability and stability. Also, make sure the edges are polished to avoid any sharpness that could cause injury.
Can this DIY windowpane mirror be hung outdoors?
While it’s a beautiful addition to any room, hanging it outdoors is not recommended unless all materials used are suitable for exterior use. Moisture and temperature changes can affect the wood differently outside.

How To Make A DIY Windowpane Mirror
Print PinMaterials
- Old window
- Mirror , cut to the size of the window
- paint stripper
- cleaner/degreaser – to thoroughly clean all of the parts. I like Krud Kutter*.
- primer
- paint
- frame clips
- screw eye picture hangers
- picture wire
- long screws with wall anchors
Tools
- bucket and wash cloth
- putty knife
- 220 grit sandpaper and sanding block
- Scotch brite scrub sponge – to apply the cleaner/degreaser.
- paint brush
- drill, drill bit and screwdriver bit
Instructions
- Start by measuring the window frame and have a mirror cut to fit, making sure it overlaps the inside of the frame by at least 1/2 inch on all sides while leaving space for frame clips.
- Carefully remove the glass from the window frame.
- Apply paint stripper to the window and remove the existing finish.
- Fill any nicks in the frame with wood filler.
- Remove excess wood filler and smooth out bumps using 220 grit sandpaper.
- Thoroughly clean the frame with a degreaser like Krud Kutter.
- Apply a quality primer like Kilz to cover the entire window frame.
- Paint the window frame in a color that matches your decor.
- Screw eye-hook picture hangers into the back of the frame and thread picture wire through them, looping the wire a few times for extra strength.
- Place the mirror on the back of the window frame with the reflective side facing forward. Secure the mirror to the frame using enough frame clips to hold it firmly in place.
- Install two level screws into the wall, spacing them so the picture wire can hang over both. Secure at least one screw into a stud and use a wall anchor for the other.
Have comments or questions about how to make a DIY windowpane mirror? Tell us in the section below.