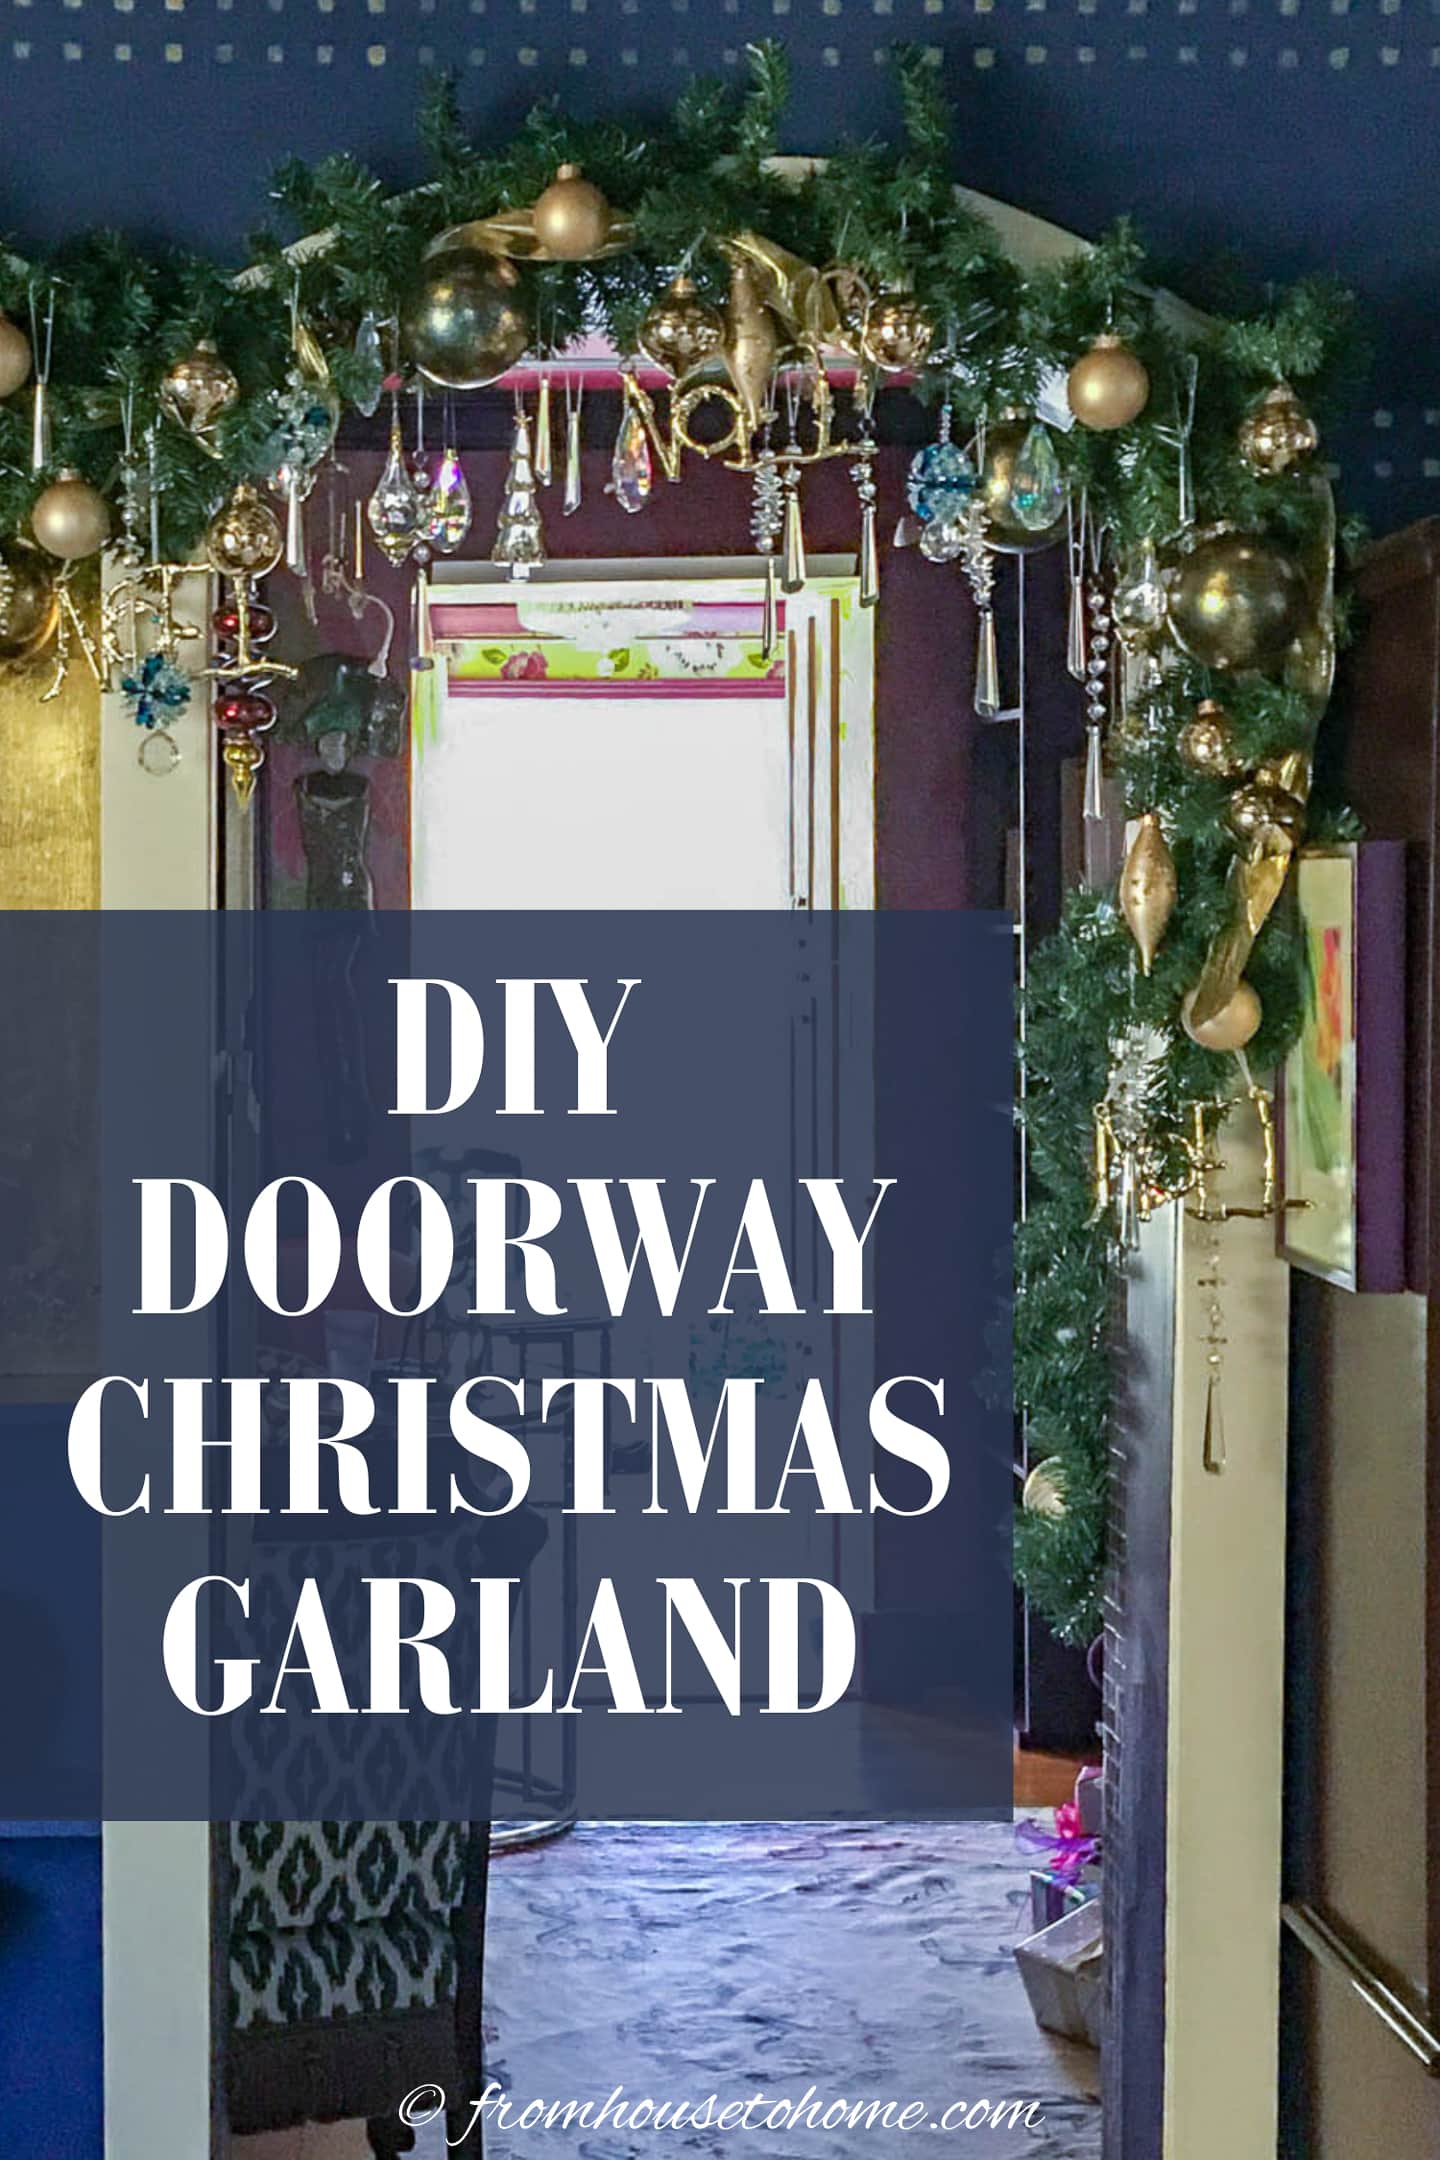
Gold And Crystal Indoor Doorway Christmas Garland
Transform your indoor doorway into a festive wonderland with our step-by-step tutorial on decorating a Christmas garland. Using gold ribbon and gold and crystal ornaments, this garland adds beautiful holiday decor to any room.
My house is very small so I’m always looking for ways to add Christmas decorations that don’t take up a lot of room.
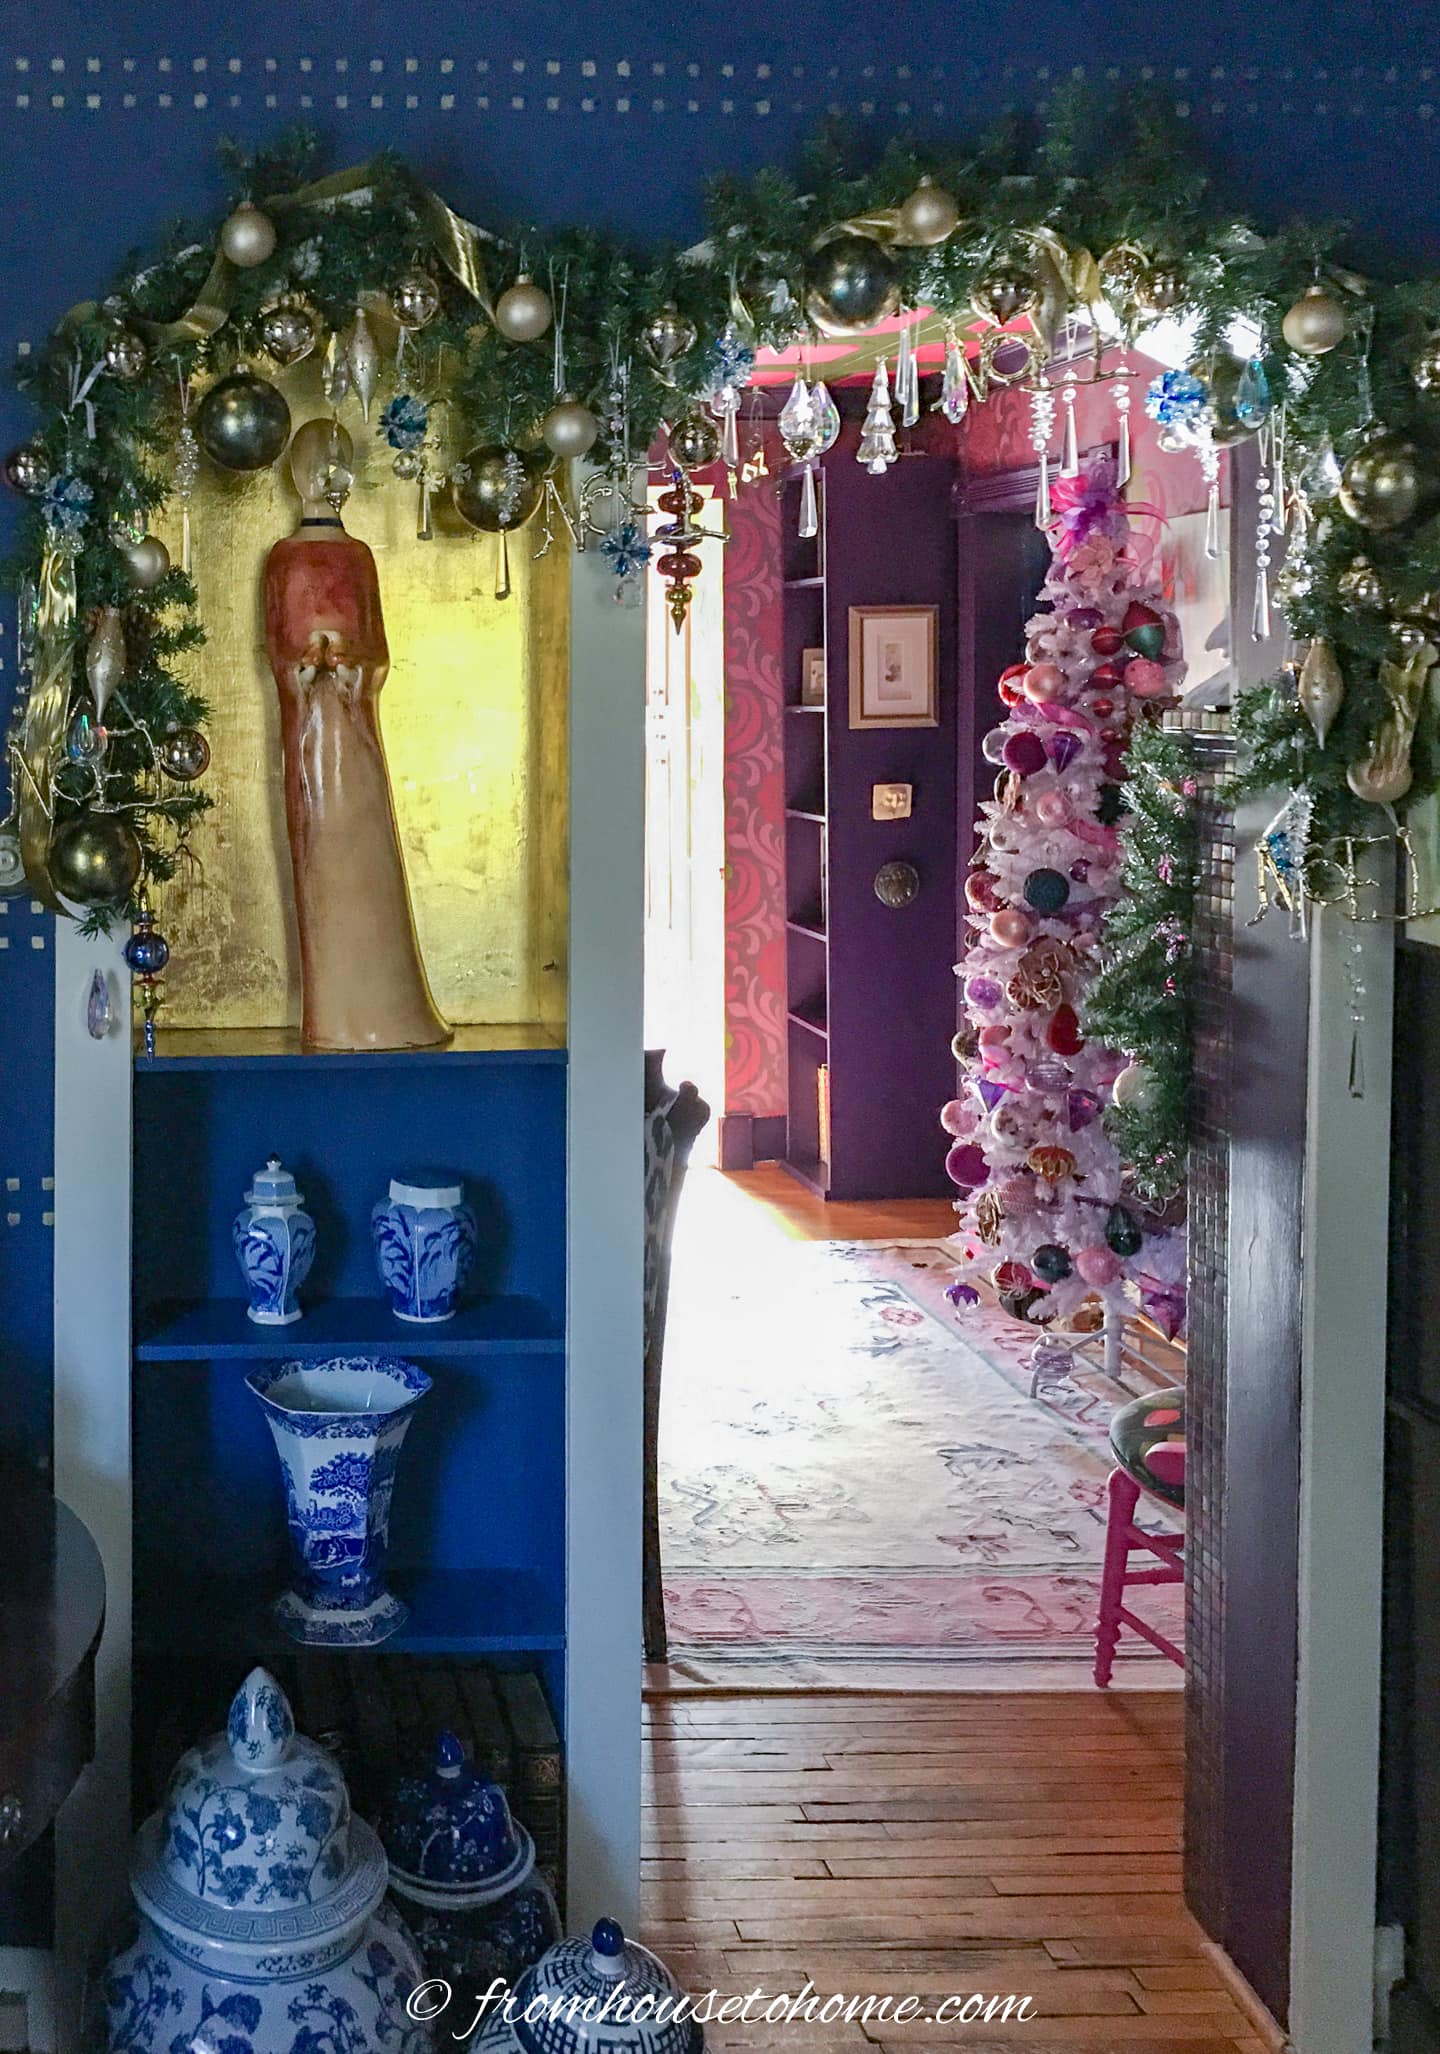
I also have an archway between my living room and home library.
So it’s the perfect place to add a festive Christmas garland.
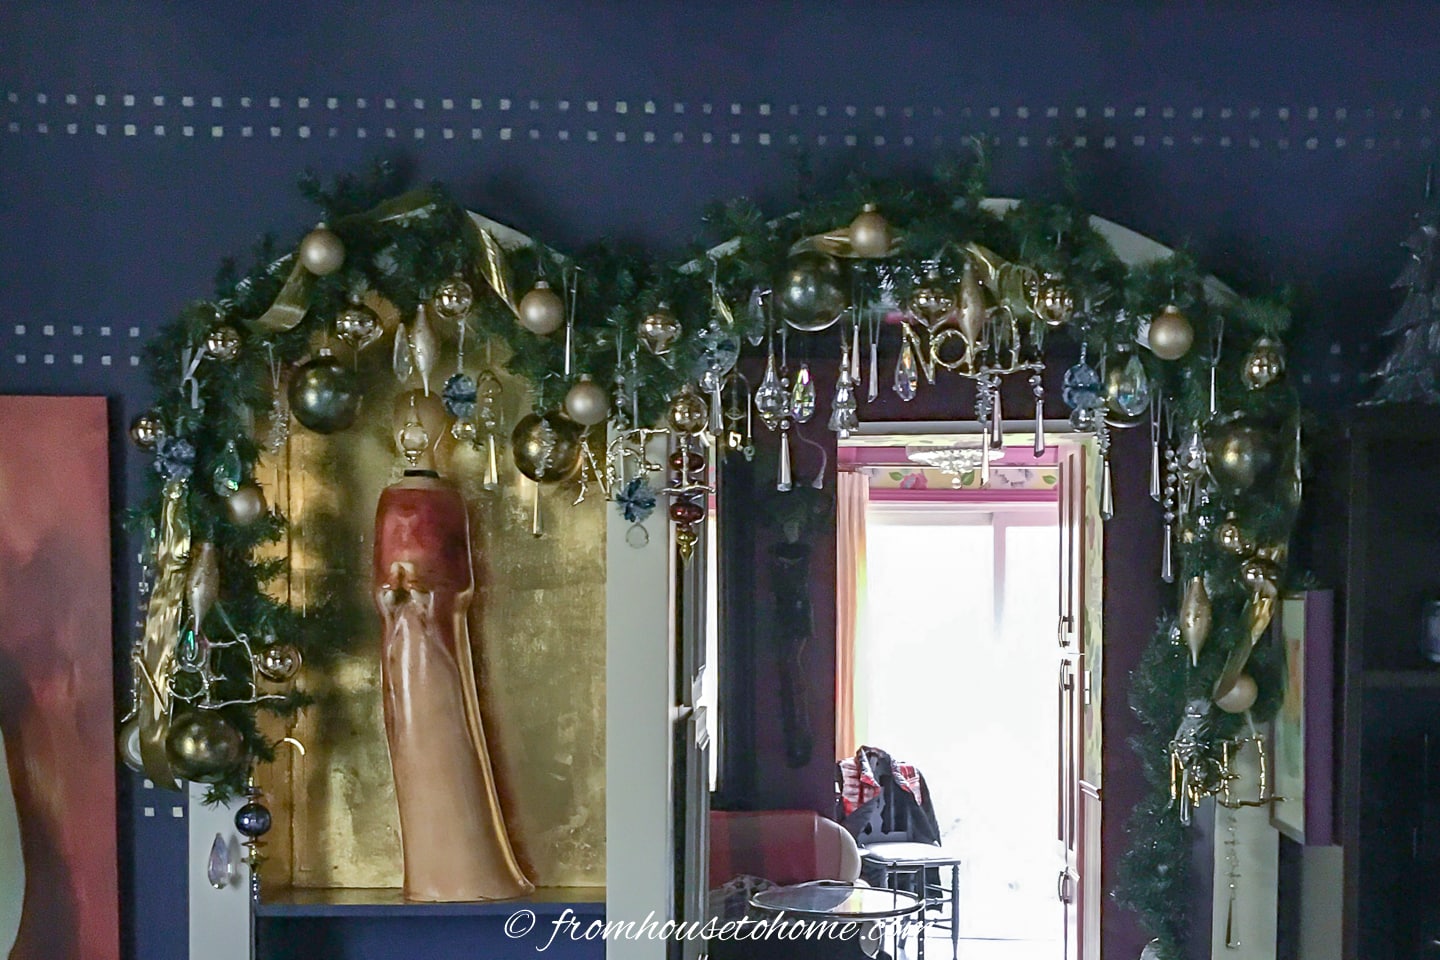
This year I decorated it with gold and crystal. Which adds a little sparkle and glam to the area.
And looks absolutely gorgeous!
Note: This garland works best for doorways or archways without a door. The ornaments hang down so they will block a door from closing.
Materials
- 10′ of faux garland — mine is green but you can choose white or flocked or use a real evergreen garland.
- 3 large and several small command hooks
- Gold ribbon – I used a 2″ ribbon because that’s what I had on hand. But a 3″ to 4″ wide ribbon is preferable since it is more noticeable and stands out more among the stems of the garland.
- Various gold ornaments – I used an assortment of balls, finials and words (such as NOEL). You can use whatever color goes with your Christmas decor.
- Clear crystal ornaments – My collection is a mix of store-bought and these DIY crystal ornaments.
How to decorate the doorway Christmas garland
1 | Hang the garland
To start the doorway garland, mount 2 large command hooks at each upper corner and 1 in the middle of the door opening.
Since my room has 2 arches, I created a dip in the middle where they meet, which is off-center.
For straight across doorways or single archways, you’ll want to put it in the middle of the opening.

Bend the garland so that it hangs down both outside edges. Hook it to the 3 command hooks.
Add several more medium sized hooks under the garland to hold it in place along the curve of the arch or top of the doorway. The crystals are heavy and need extra support along the length of the garland.
Fluff the stems of the garland so that they are nicely distributed above and below the central wire.
2 | Add ribbon
Next add the ribbon by weaving it above and below and into the garland.
Hold it in place by bending a branch over it as necessary.
Let the ends of the ribbon fall down the sides of garland.
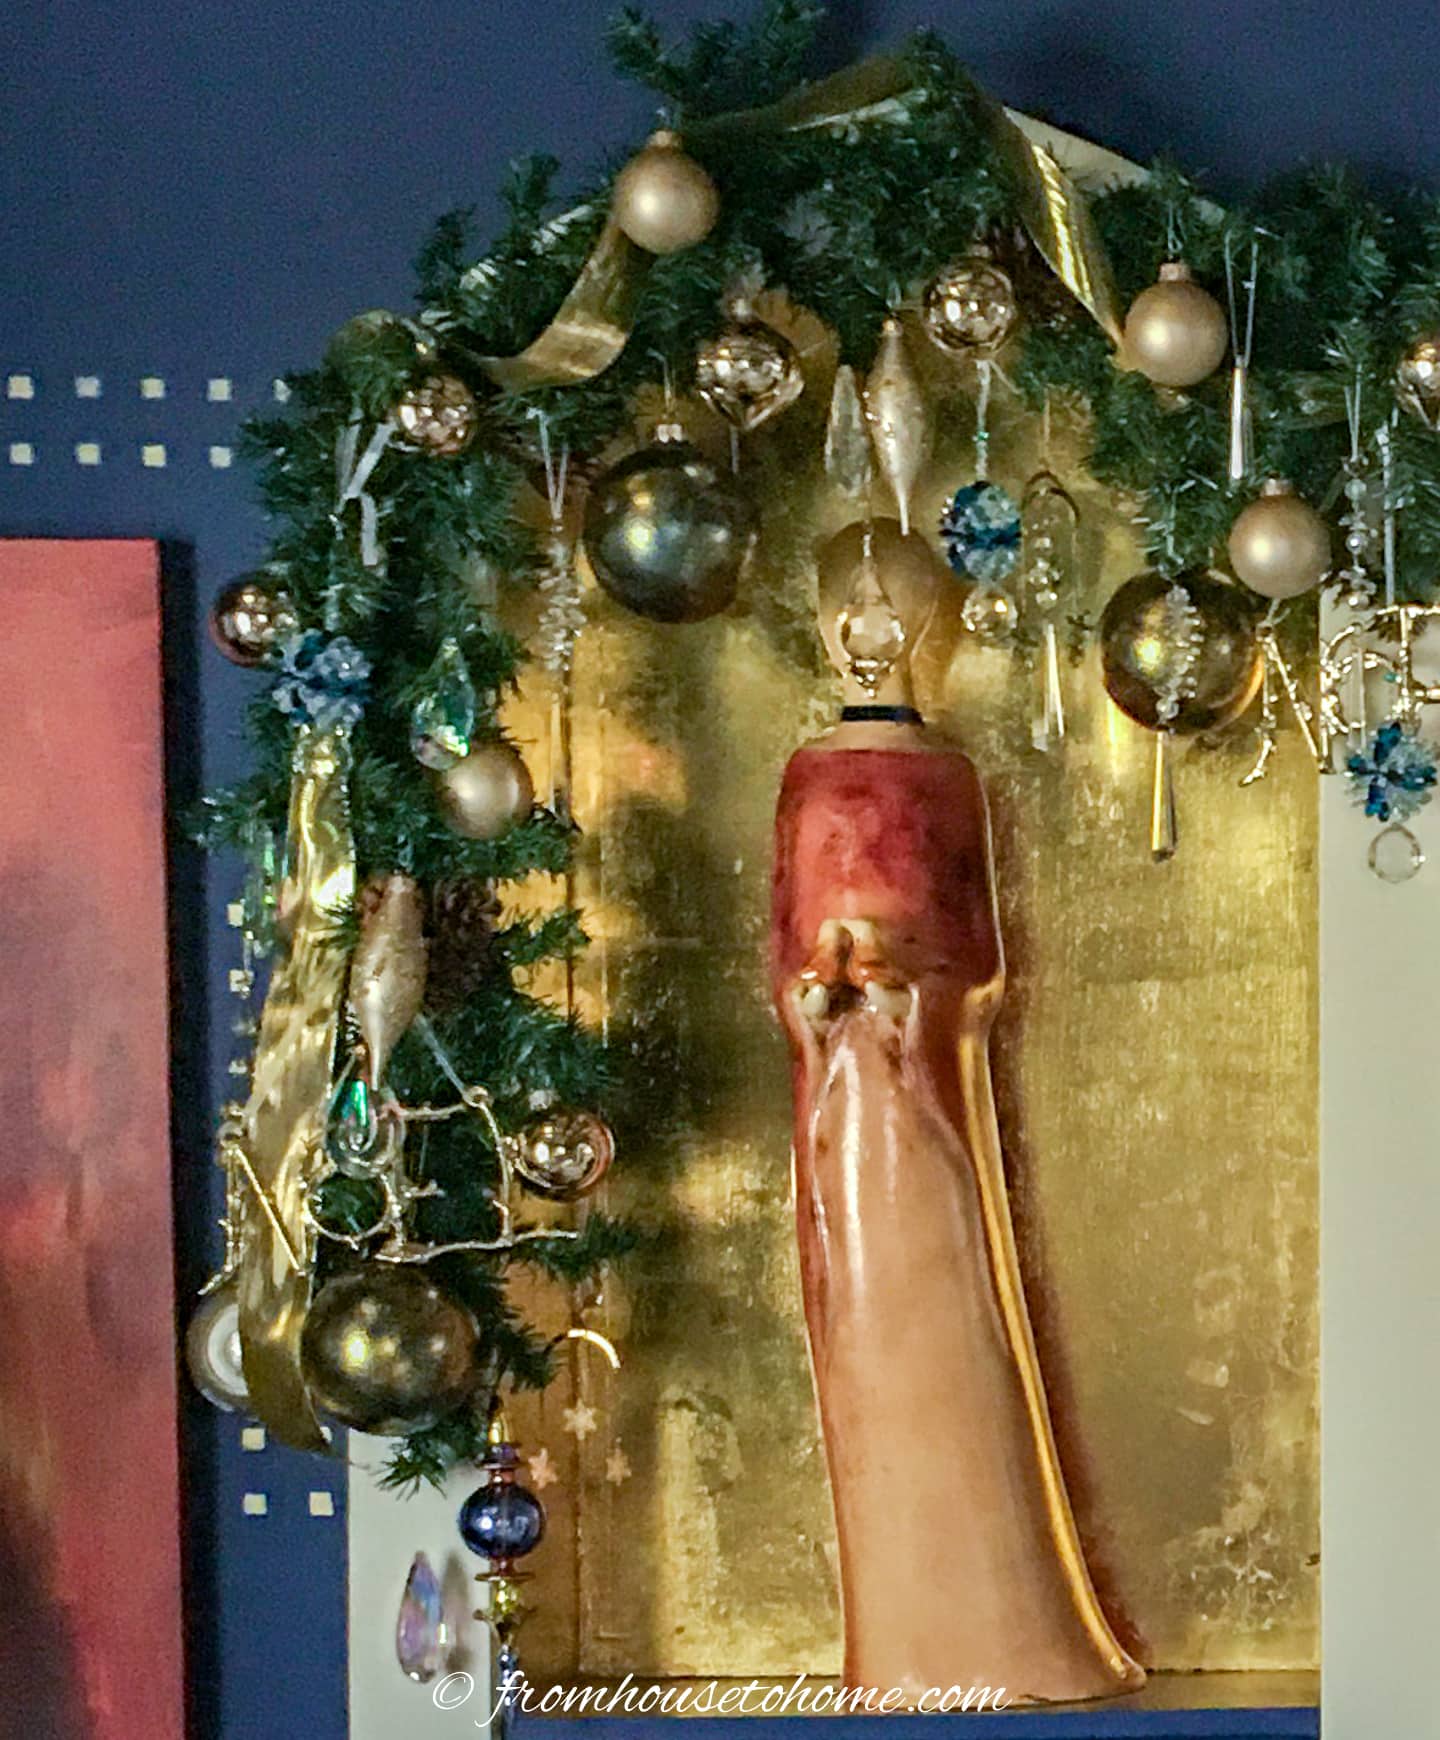
3 | Hang the gold ornaments
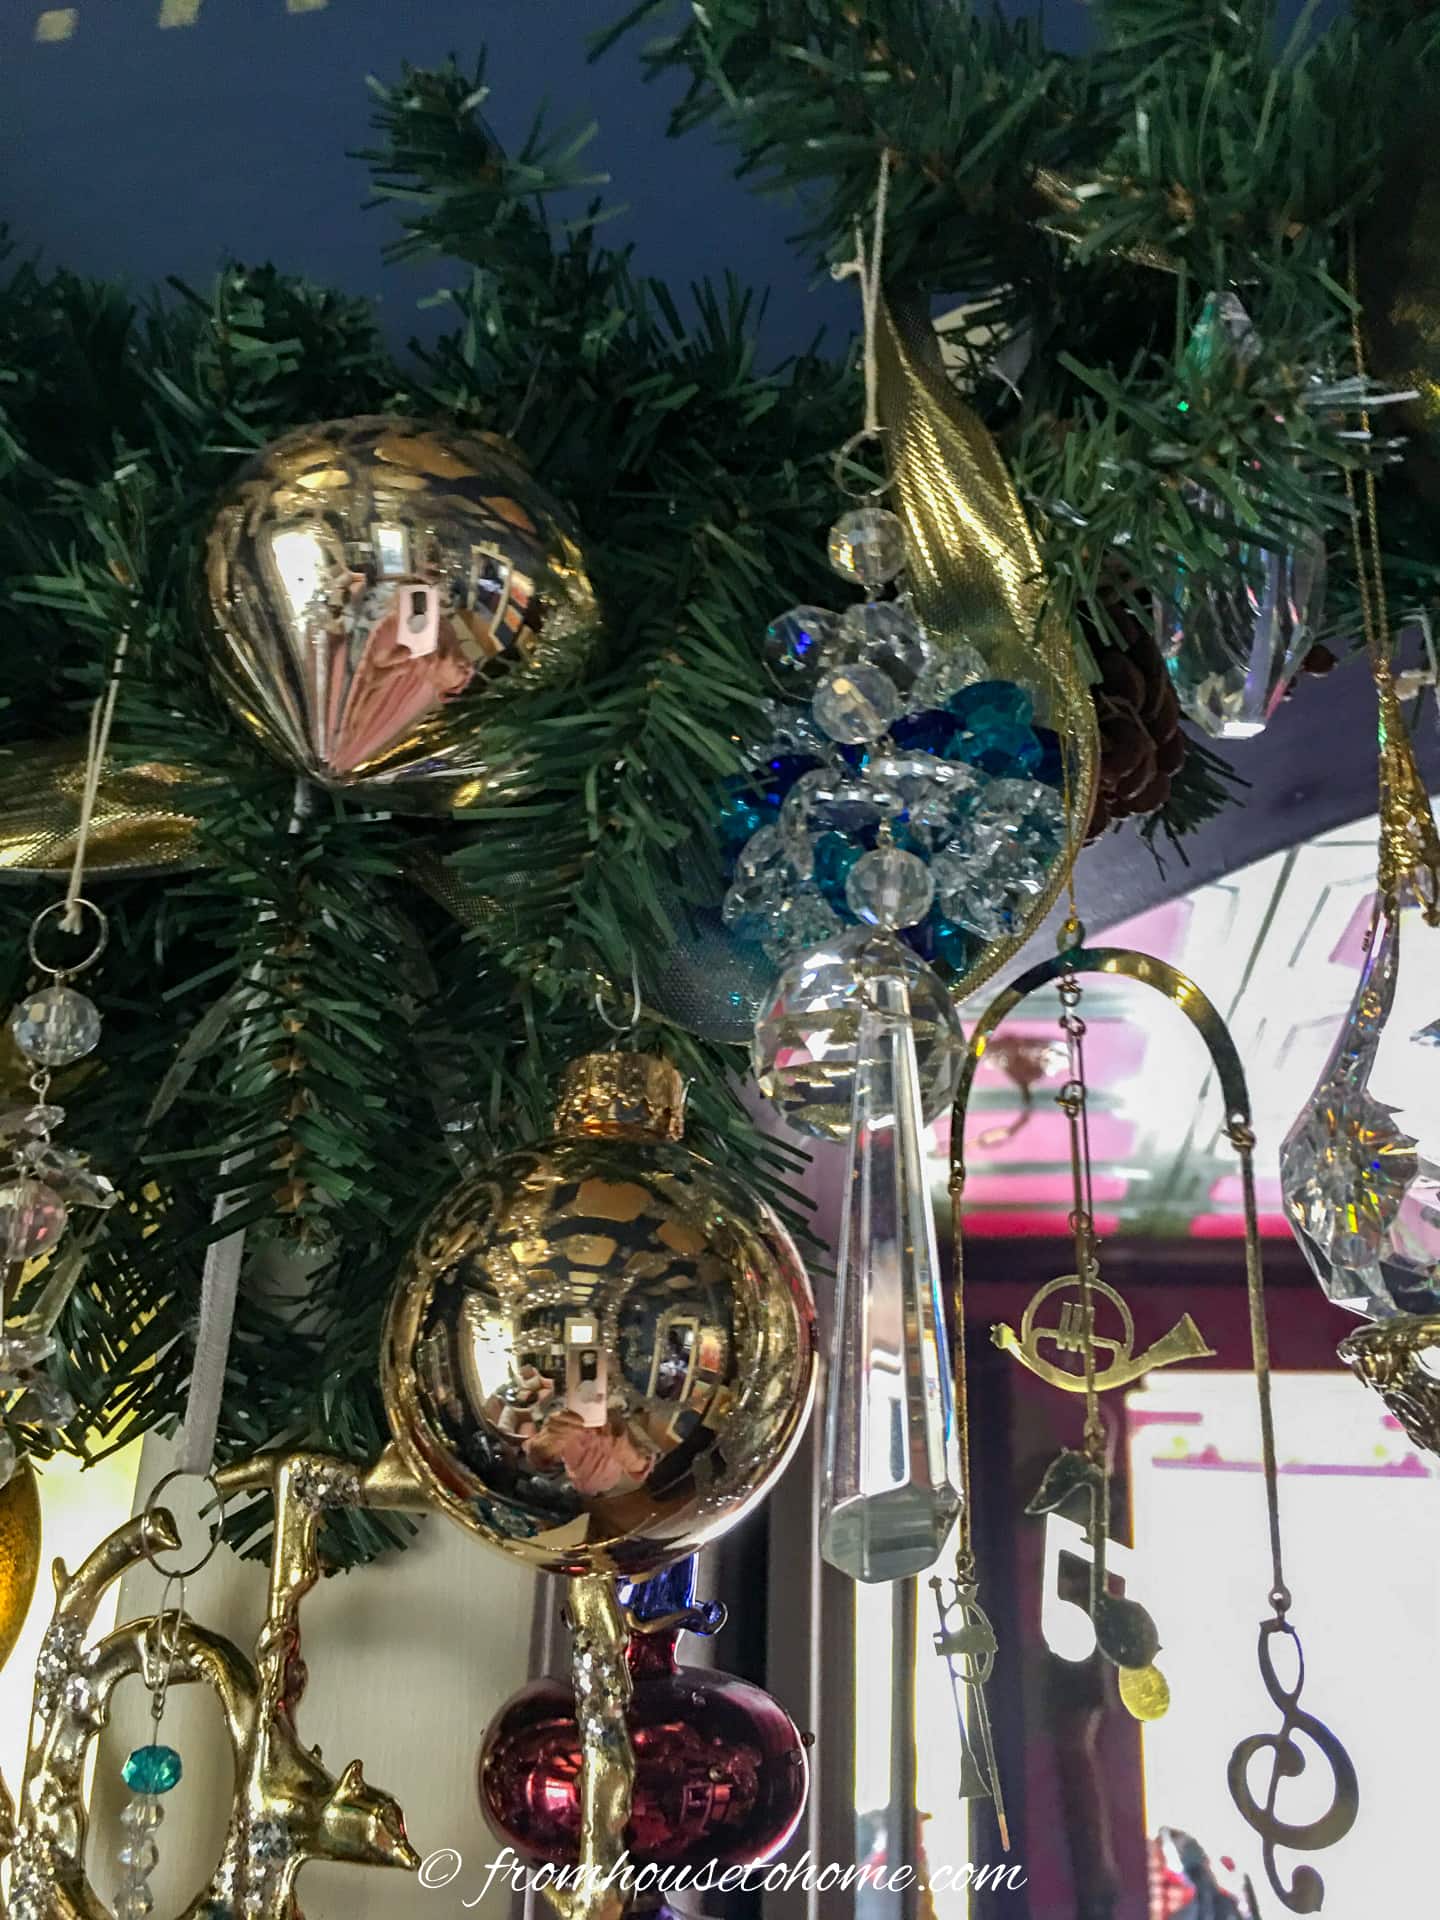
Now add the gold decorations by distributing the larger balls first and finishing with the smaller balls.
Then add the specialty ornaments, such as the “NOEL” words.
I put most of these in the garland, with only a few hanging below it.
4 | Put up the crystals
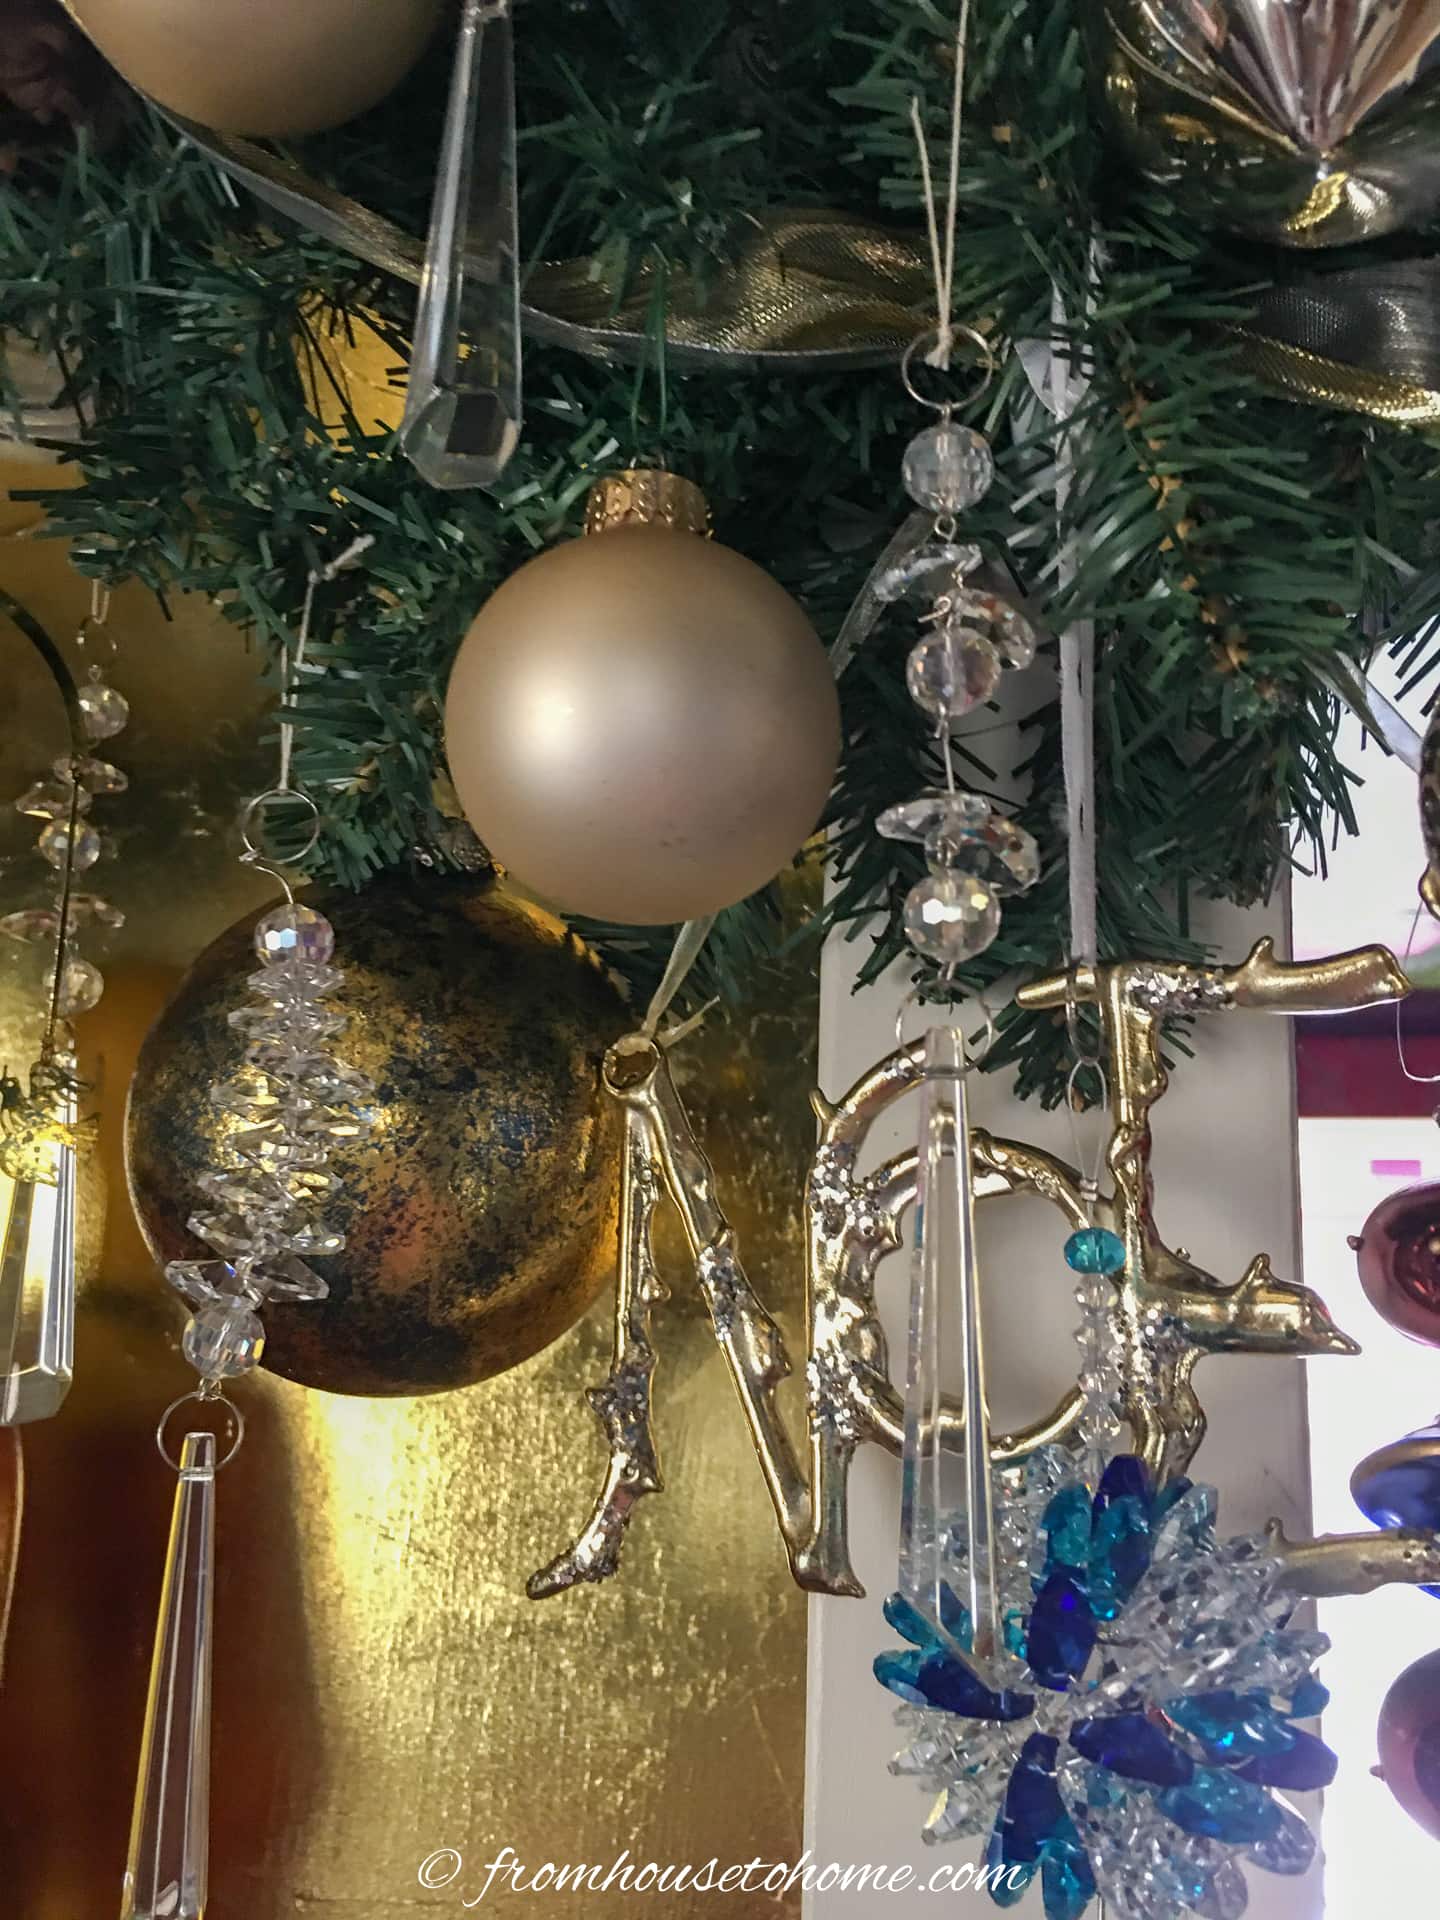
The crystals are most visible when they hang below the garland, so that’s where I put most of them.
I put the longest ones at the sides, and shorter in the center, so that tall people can walk through the doorway without hitting their heads.
The clear crystals are a good choice for this since they’ll be seen from two different rooms and they go with the decor in both.
They also don’t block the light or the view of my pink and purple Christmas tree in the other room.
The finished garland
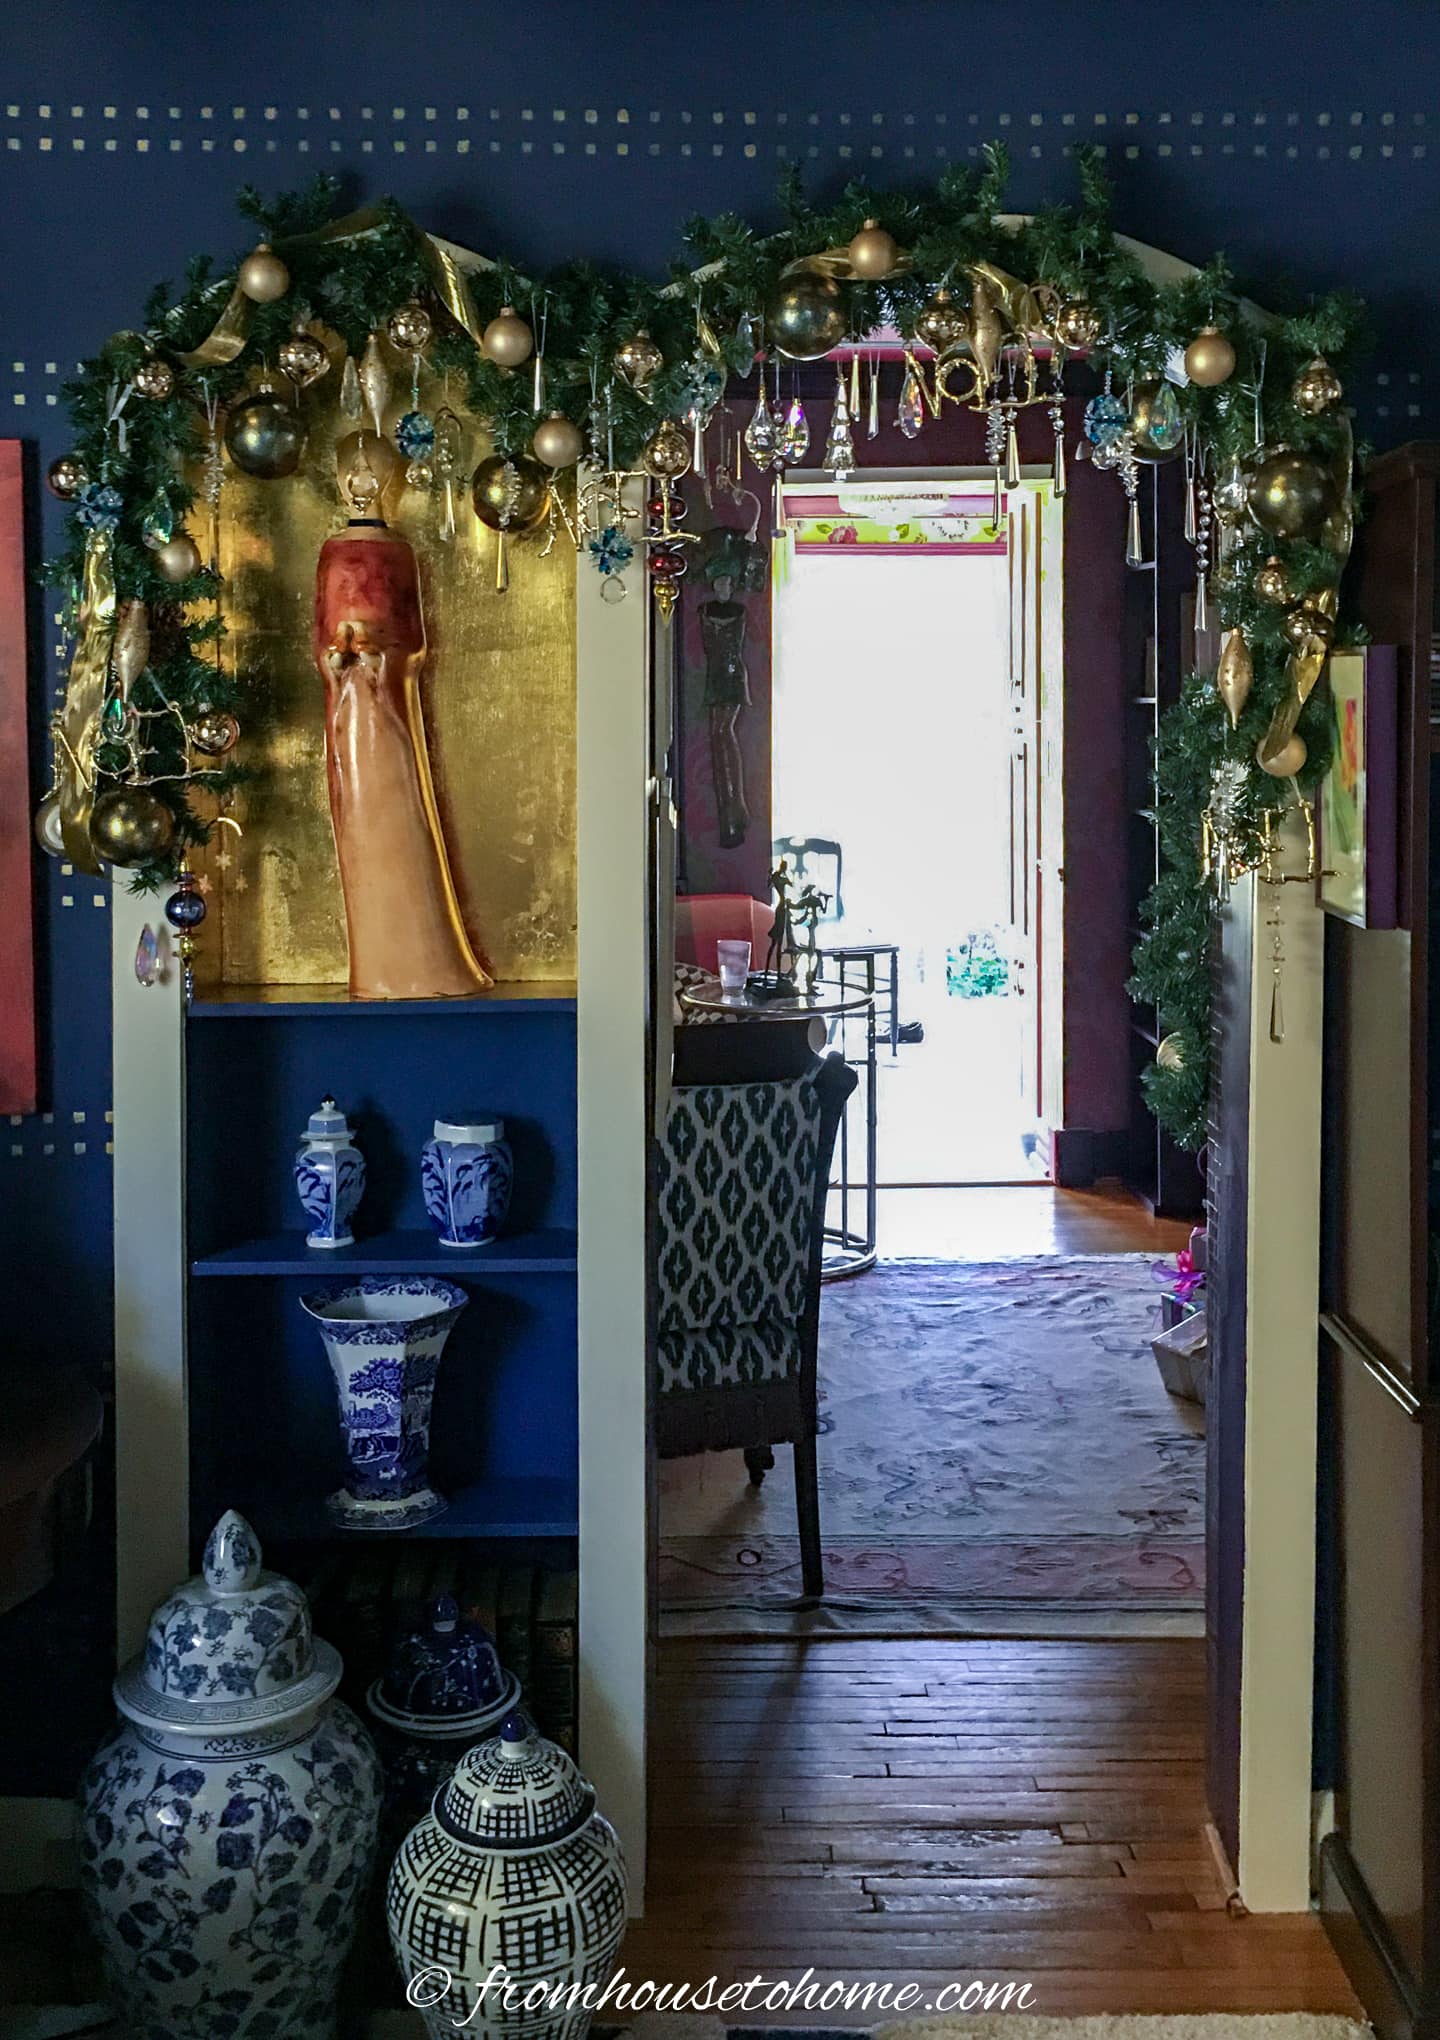
The gold and crystal combination is sophisticated and elegantly glamorous.
And I always get a ton of compliments on it.
Other Christmas decor ideas you might like
- How to decorate a blue and white garland
- DIY Grinch-themed garland
- Christmas decorating ideas for small spaces