
Small Blue And White Guest Bathroom Makeover On A Budget
This small blue and white guest bathroom makeover will show you how to transform your guest bath into a chic and inviting space with some practical tips and creative ideas. Learn how to maximize space, choose budget-friendly materials, and incorporate stylish accents for a stunning update.
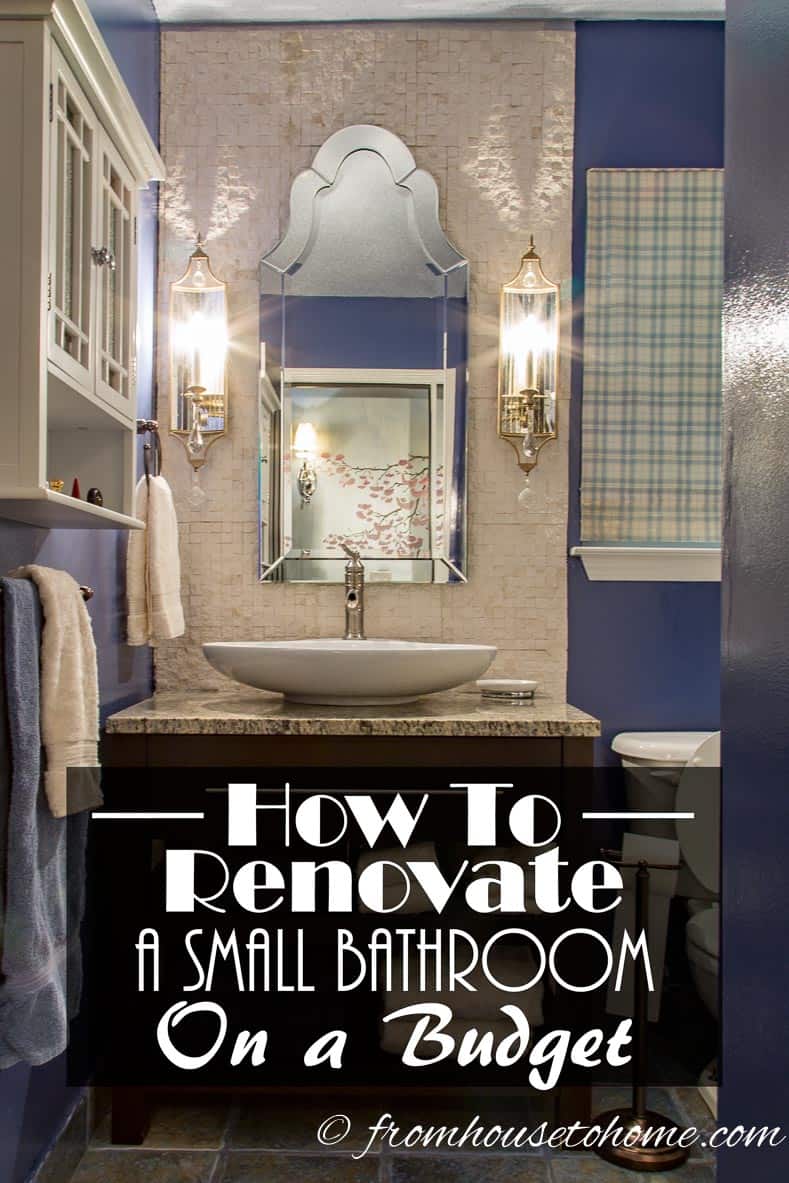
When I moved into my current house, I was thrilled because this is the first house I have ever owned with 2 full bathrooms. No sharing the shower with guests!
I was so thrilled with having a second bathroom that I didn’t really notice how small it was.
After I had lived with it for a while, I decided that I needed to do something to upgrade it, even though increasing the size wasn’t really an option.
And this small blue and white guest bathroom makeover is still one of my favorite room updates I have ever done.
Get a FREE Room Makeover Workbook by signing up for our newsletter
You’ll also get access to our members-only resource library with all of our other printables.
We won’t send you spam. Unsubscribe at any time.
The “Before” Bathroom
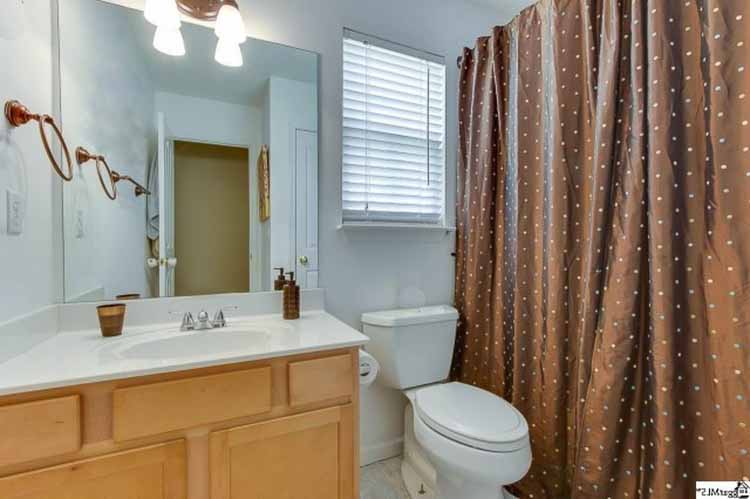
My guest bathroom is tiny!
It basically has enough space for the tub, toilet, and sink, plus a small amount of floor space for someone to stand in while they are drying off, and that’s about it!
The down side…there really isn’t anywhere to expand it out to (and I didn’t really want to spend the money to do a large-scale bathroom remodel) so the size was staying the same.
The up side…because the size is so small, I could splurge a little on the tiles and it wouldn’t break the bank.
I also decided that with the small size, it wasn’t worth trying to re-arrange the position of the sink, toilet and tub.
Plus, leaving the plumbing “as is” really cuts down on the cost of a bathroom remodel.
1 | Paint

The first step of any room re-do is a new paint job.
It is the easiest and least expensive way to change the look of a room. And if you don’t love the color you’ve chosen, you can always paint right over it!
Which is why you will never see white walls in any of my room makeovers. In my book, why make the safe choice on one of the things that has the biggest impact with the least amount of expense and risk?
For this room, I went with Farrow and Ball Pitch Blue paint in full gloss.
I usually use a semi-gloss paint in bathrooms because it stands up to the humidity and is easy to clean.
Gloss paint does both of those things, but also adds some extra light reflection. Which helps the room to not feel “cave-like” with a fairly dark color on the wall.
Although putting the paint on the wall is one of the first things you do when you are executing a makeover, picking the paint color should be one of the last things you do when you are planning a makeover.
There are so many different shades of paint, it’s much easier to match it to your tiles and other elements in the room than to do it the other way around.
2 | Tile the Floor
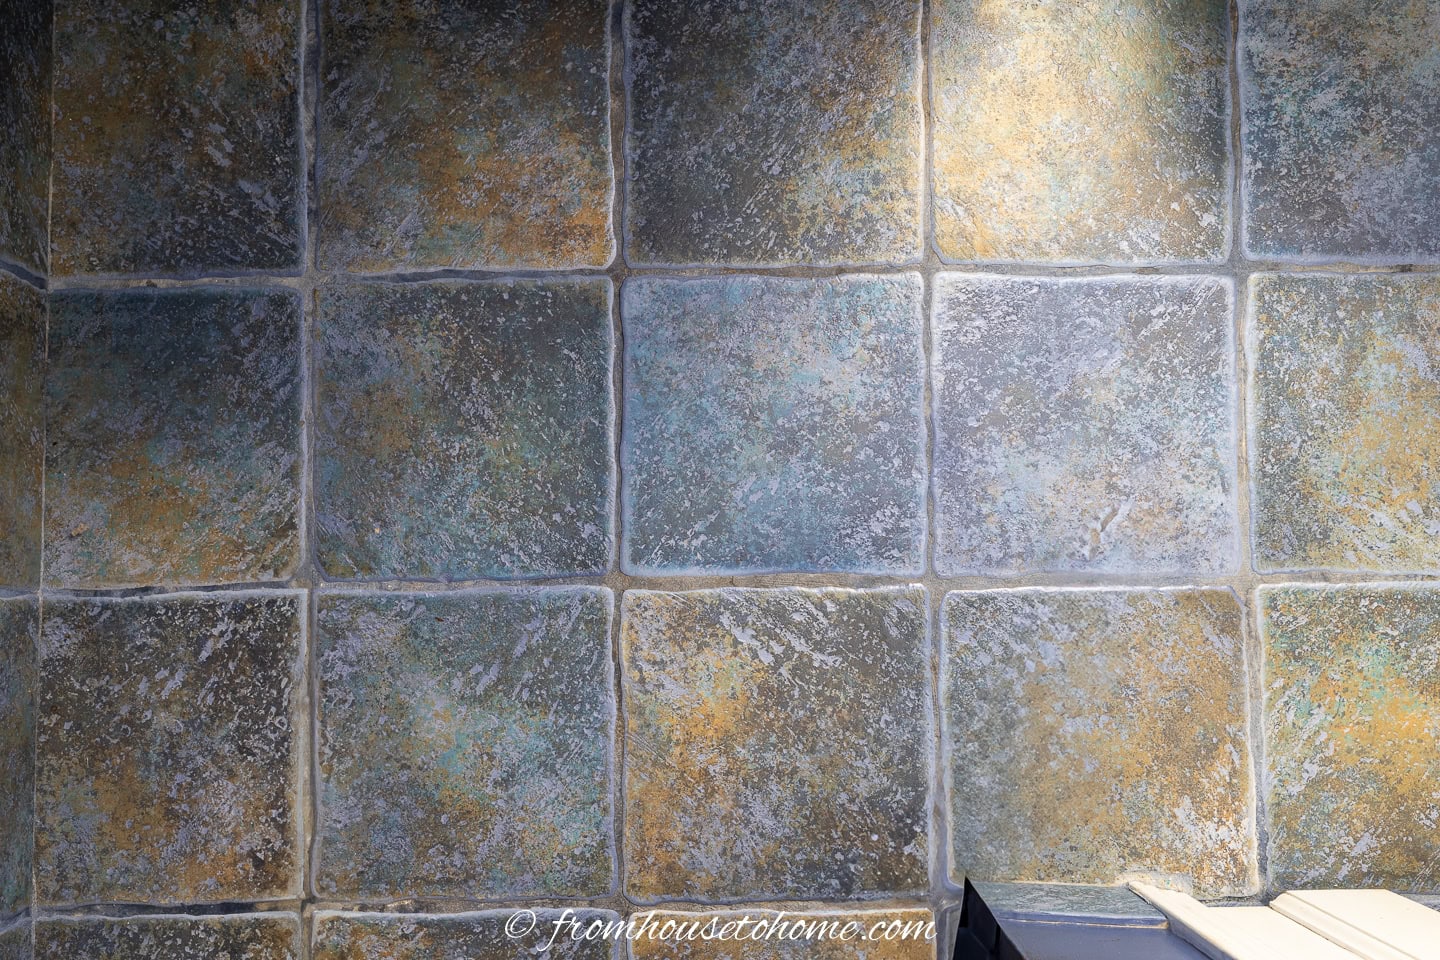
Next up is the floor.
I found these floor tiles at a tile store in Toronto. They kind of look like slate but are actually 12″ x 12″ ceramic floor tiles.
For the budget-conscious renovator, using ceramic tiles instead of real stone tiles is an easy way to save some money.
The colors in these tiles were perfect for this bathroom, and I loved the uneven edges.
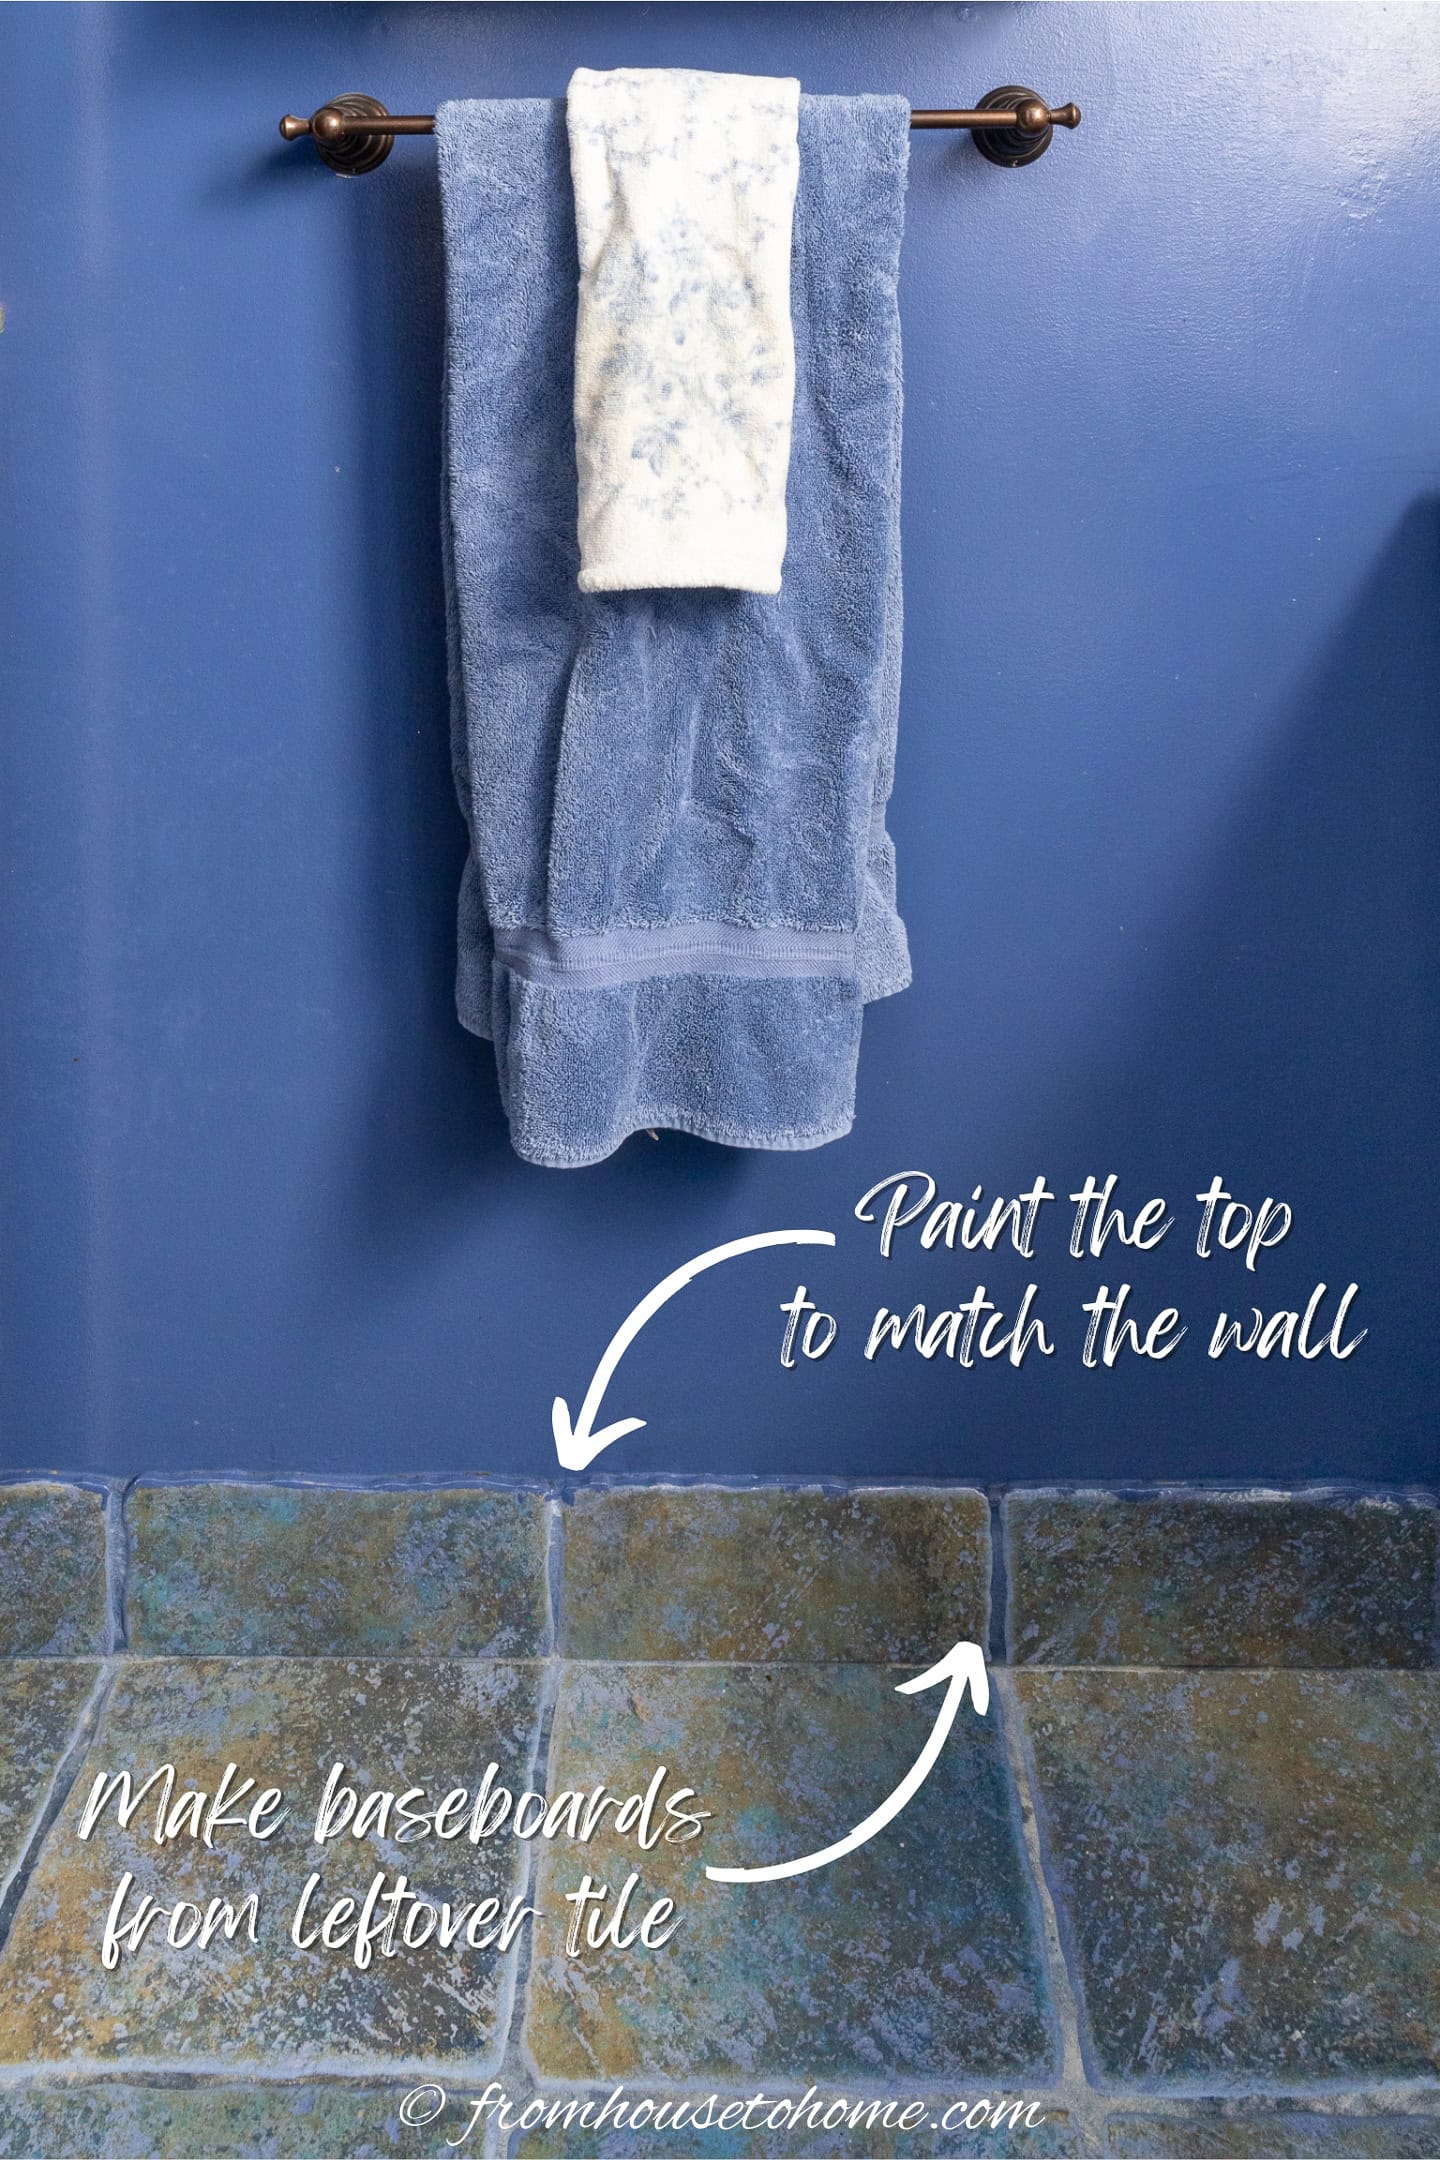
Since they went so well with the wall paint, I decided to cut them to create base boards as well.
To make sure that there was a smooth transition from the tile baseboard to the wall, I painted the top edge of the baseboard tiles the same color as the wall.
And installing them myself saved me a ton of money!
One thing to keep in mind with bathroom floor tiles:
People will be getting out of the tub with wet feet and ceramic tile can be very slippery when it’s wet.
So you need to make sure that either the tile has some grip to them or there is something on the floor (like a bathmat or rug) that will keep people from slipping.
Related: Tips and tricks for doing your own tiling
3 | Add a Tile Accent Wall
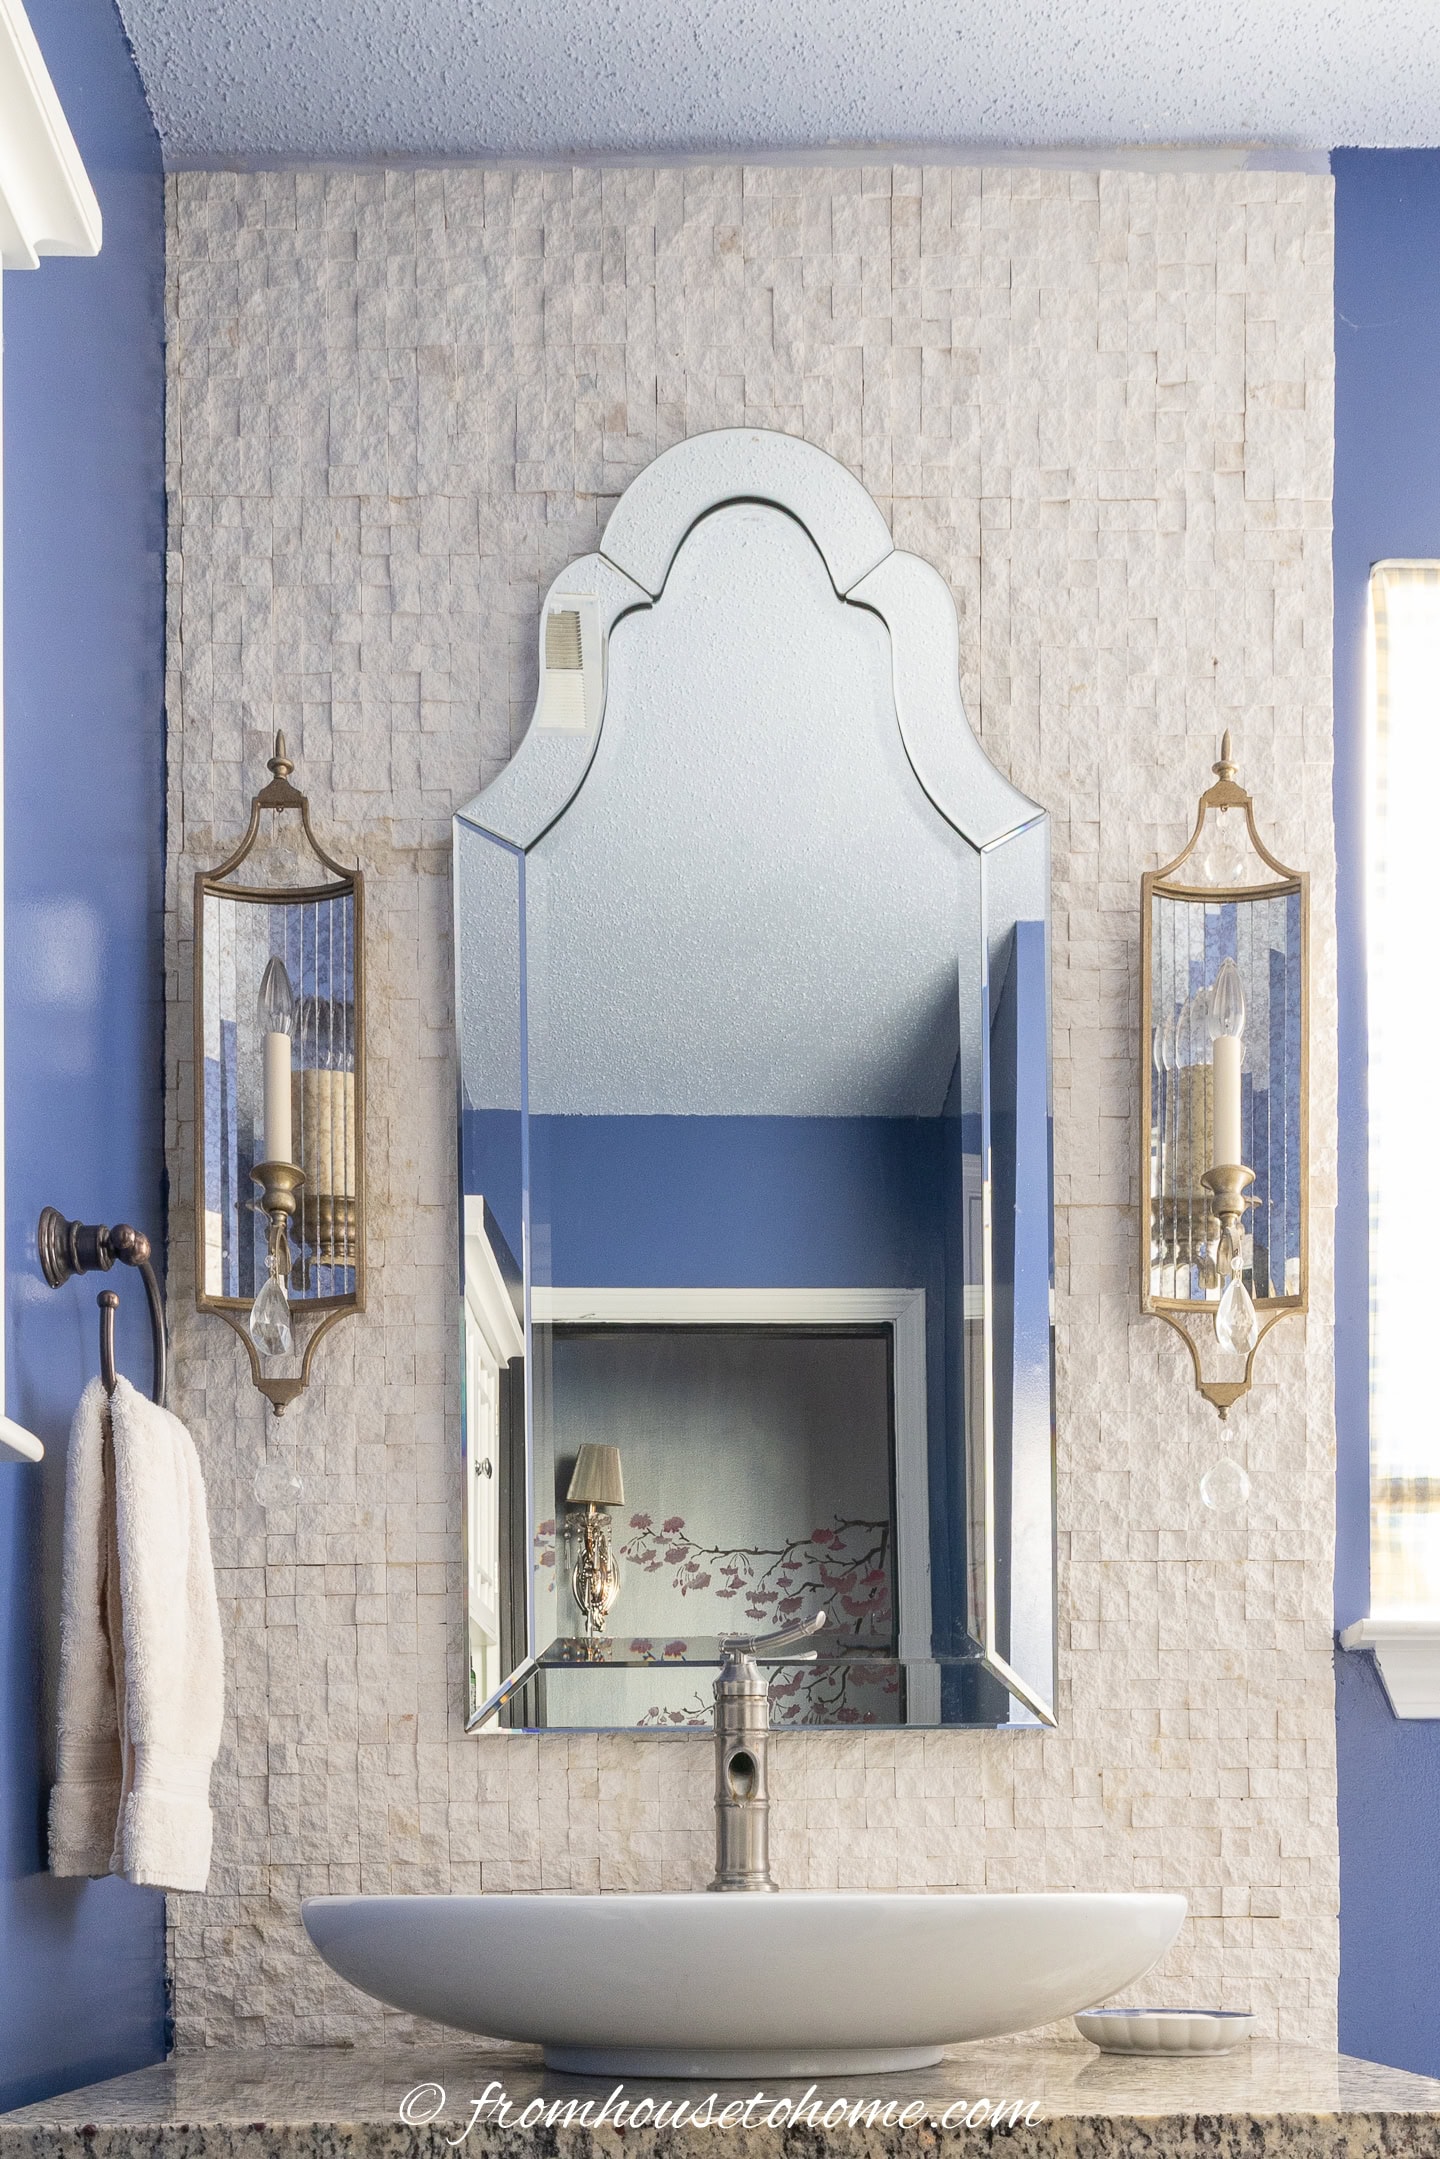
After I had painted and tiled the floor, the bathroom was looking a little too blue (I never thought I would say that since I love blue so much!)
So I was looking for something to break it up and I happened to see this split-face limestone mosaic tiles online. I ordered a sample and just loved them!
They are not really practical for a bathroom since they are difficult to clean.
But this is a guest bathroom so it doesn’t get as much use as some other rooms might.
And they are easier to install than regular tiles since they don’t have to be grouted. So I decided to go for it!
I tiled the section of the wall behind the vanity area. I think it adds some interest, breaks up all of the blue and creates a little separation between the vanity and the toilet.
It goes all the way down to the floor, although you can’t really see it behind the vanity. That way if I ever decide to replace the vanity with something smaller, the wall won’t need to be updated.
As a side note, since I was moving the lighting from an overhead bar to two sconces on either side of a mirror, I had to have the electrical work done for the sconces before I tiled the accent wall.
4 | Replace the Vanity
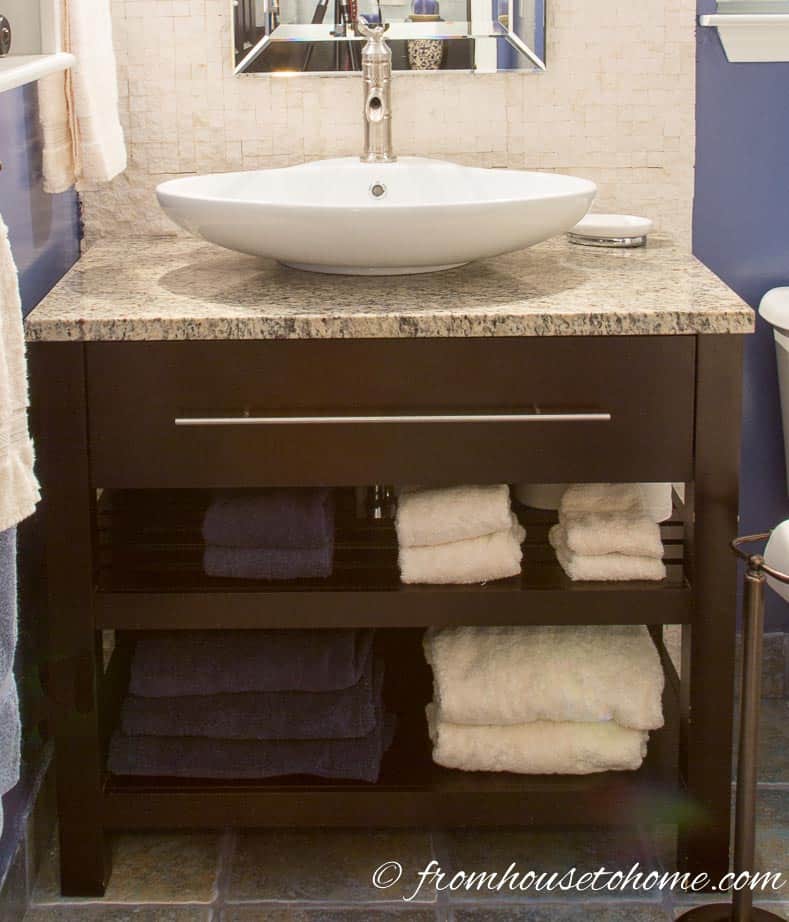
I saw this vanity at Costco and just had to have it.
It fit the bill for having open storage where I could towels that guests can find easily but still had a drawer for storing a hair dryer and curling iron.
It had a granite top that was the same base color as the accent wall, with a vessel sink and faucet.
This was the big splurge on this bathroom. But since I saved money on the rest of the bathroom by doing my own work, I decided to go for it.
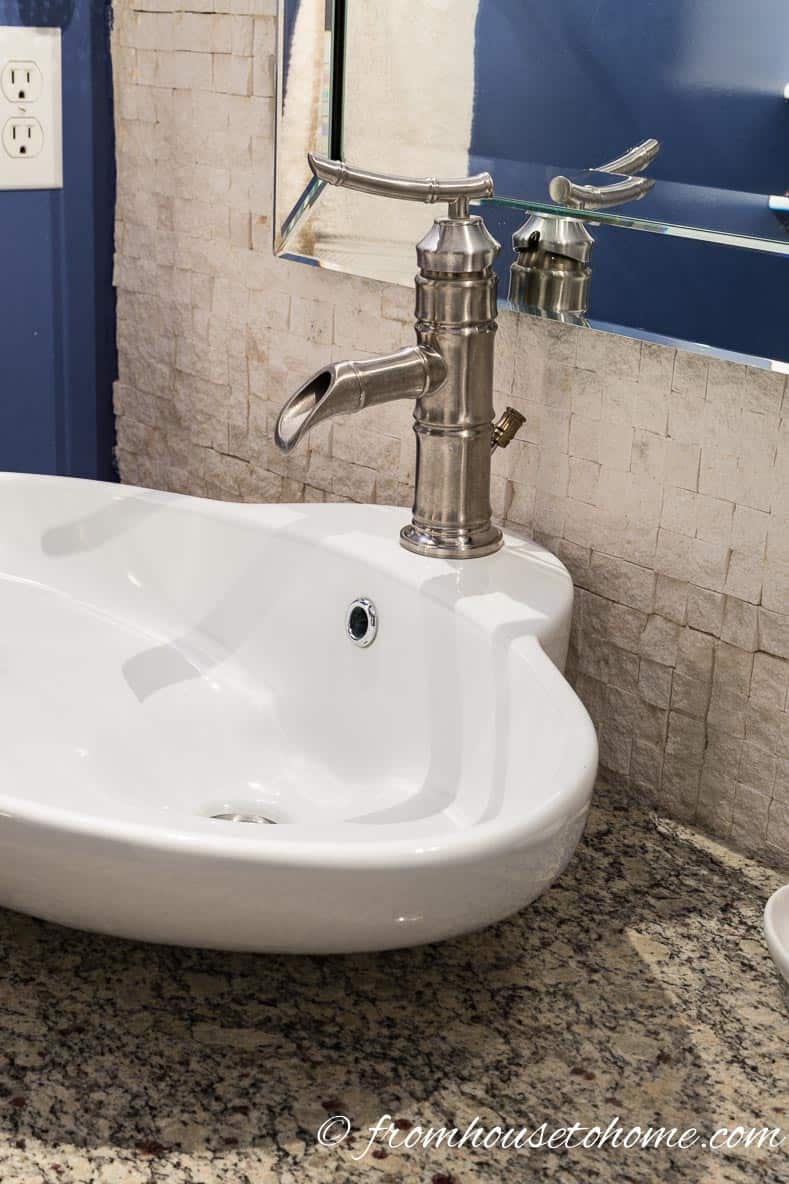
It came with the sink and a faucet.
I love the sink style, but decided to get this bamboo-look faucet* that would go with the one in the bathtub.
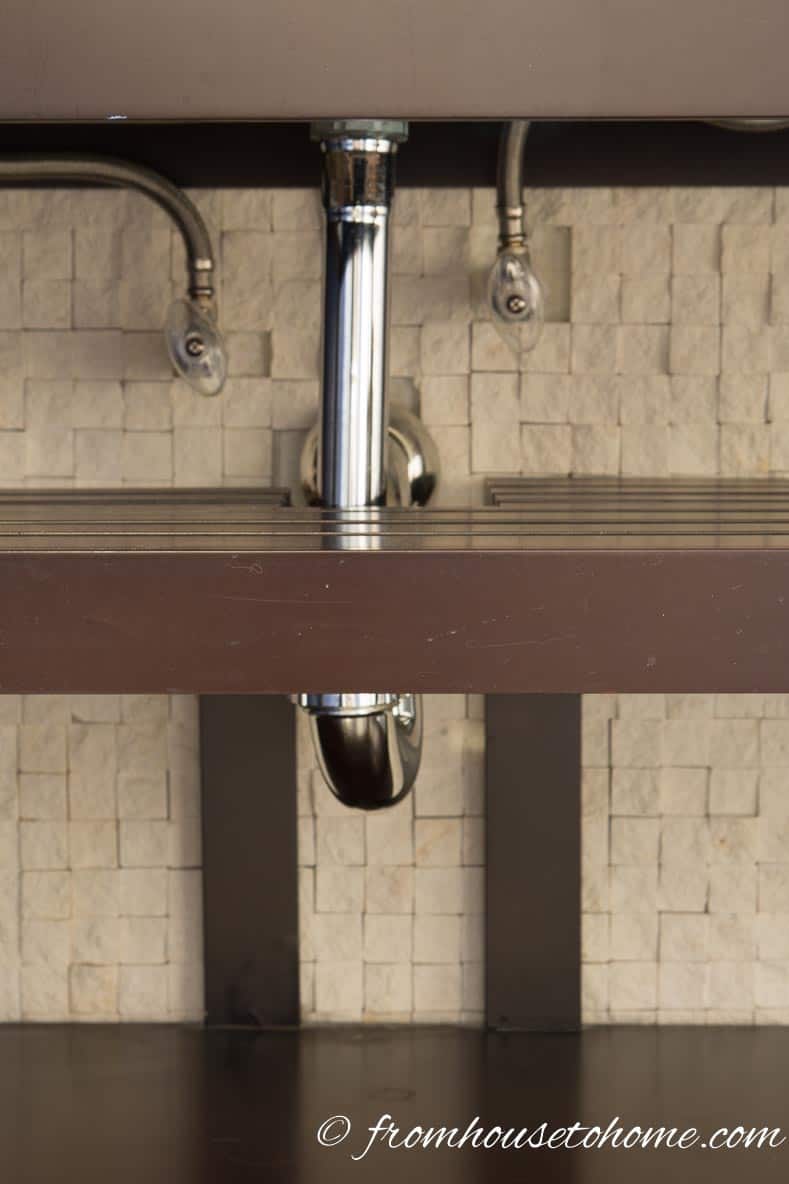
Since I didn’t have an open vanity before and do now, I replaced the plumbing under the sink with a silver-finish drain pipe* rather than the original white PVC pipe.
I think this just finishes the look.
To save money, I did the plumbing myself.
If your bathroom was installed with PVC pipes, it really is completely do-able to install a new sink and faucet yourself.
Most PVC pipes have screw on connectors that don’t even require glue.
5 | Switch to Romantic Lighting
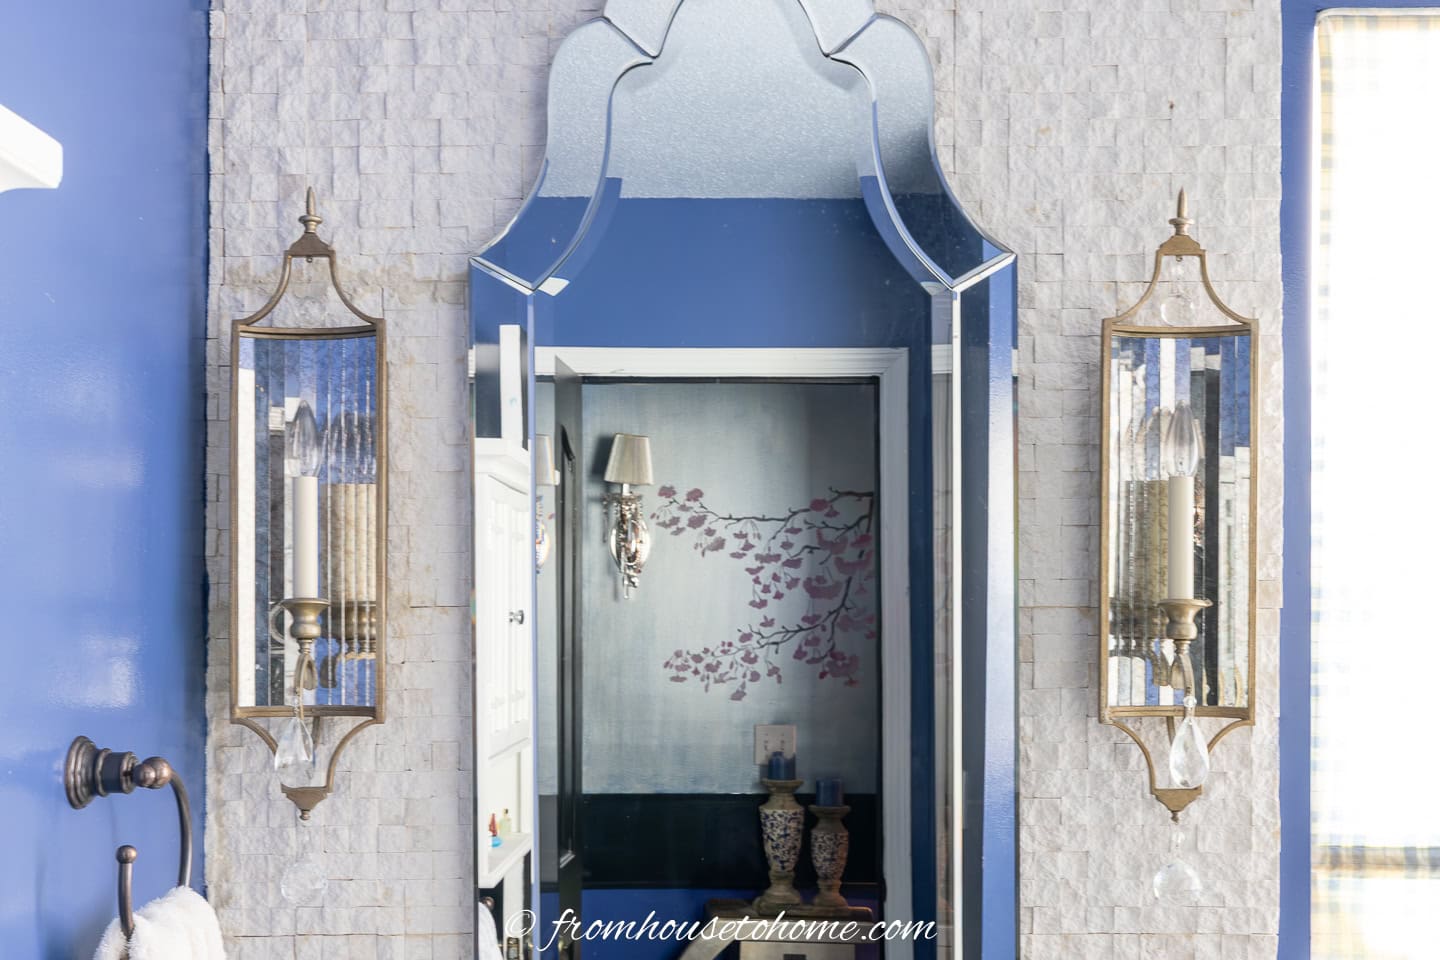
I knew that I wanted to replace the overhead bar-type lighting with sconces on the sides of the mirror.
I think people always look better with side lighting than overhead lighting, and sconces are so much prettier than an overhead light bar!
Since the space isn’t very big, I needed tall narrow sconces that would add some drama and not take up too much width over the mirror.
6 | Upgrade the Mirror
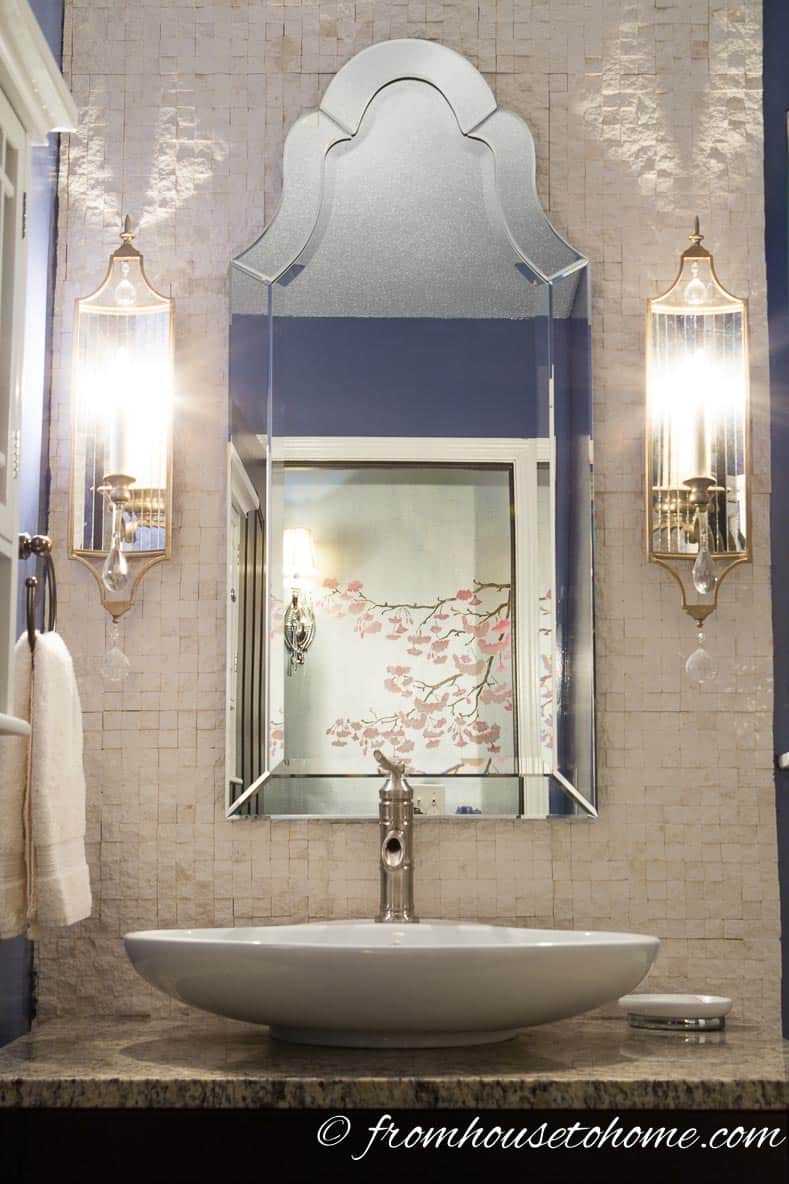
Since I now had sconces taking up some of the wall space over the vanity, I needed to look for a fairly narrow mirror.
All of the standard bathroom mirrors were either too wide for the space, or seemed to come with frames that looked too heavy.
The one that I finally ended up going with didn’t cost me anything extra since I already had it on hand.
I had bought this tall Venetian-style mirror* on sale a while back, just because it was a good deal and I loved it (and I figure you can always find a spot for a mirror).
It turned out to be the perfect width for this spot.
And the height goes well with the tile wall behind it.
7 | Replace the Faucets
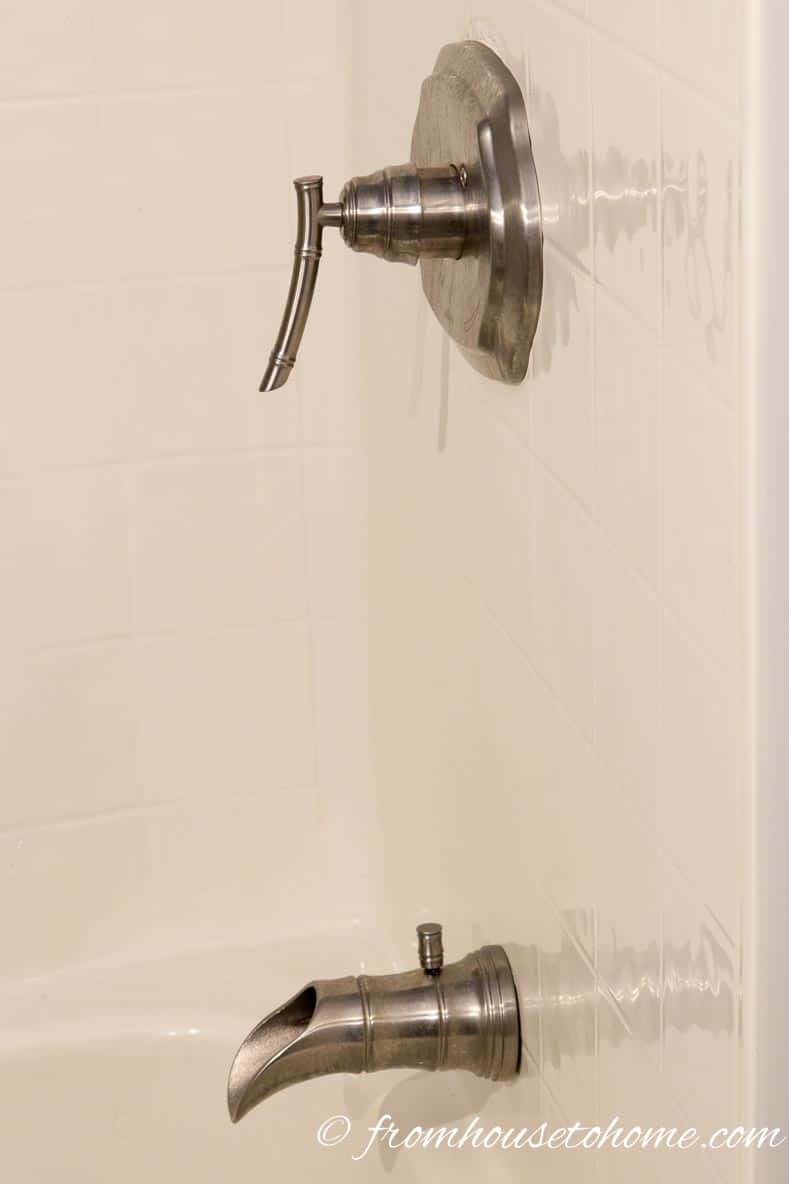
Since the builder of my house was still installing the really, really inexpensive bulb faucets, there really wasn’t any question that this needed to be done.
Going with the somewhat Asian-feel that the bathroom was taking on, I got this bamboo-look faucet for the tub*. It looks great and was on sale on their website when I bought it…even better!
8 | Add a Window Treatment
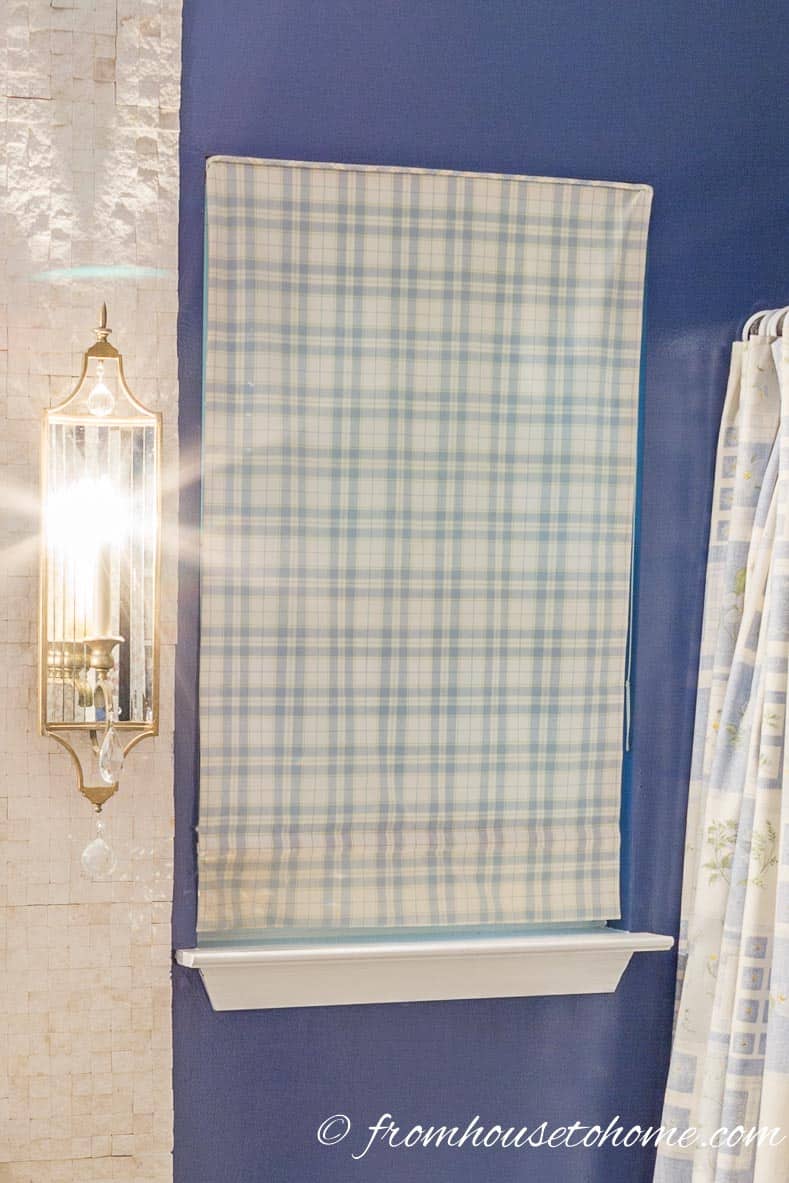
To cover the window, I wanted something that could be easily opened and closed, but wasn’t too frilly.
In this small bathroom, a big window treatment would have overwhelmed the space.
A roman shade was the perfect solution! Installed on the inside of the window, it takes up no visual space, but still adds a little color to the bathroom.
I was able to find some plaid fabric in colors that matched the bathroom color scheme, and talked my mother into doing a little more sewing for me.
Related: How to sew a roman shade
9 | Add A Shower Curtain
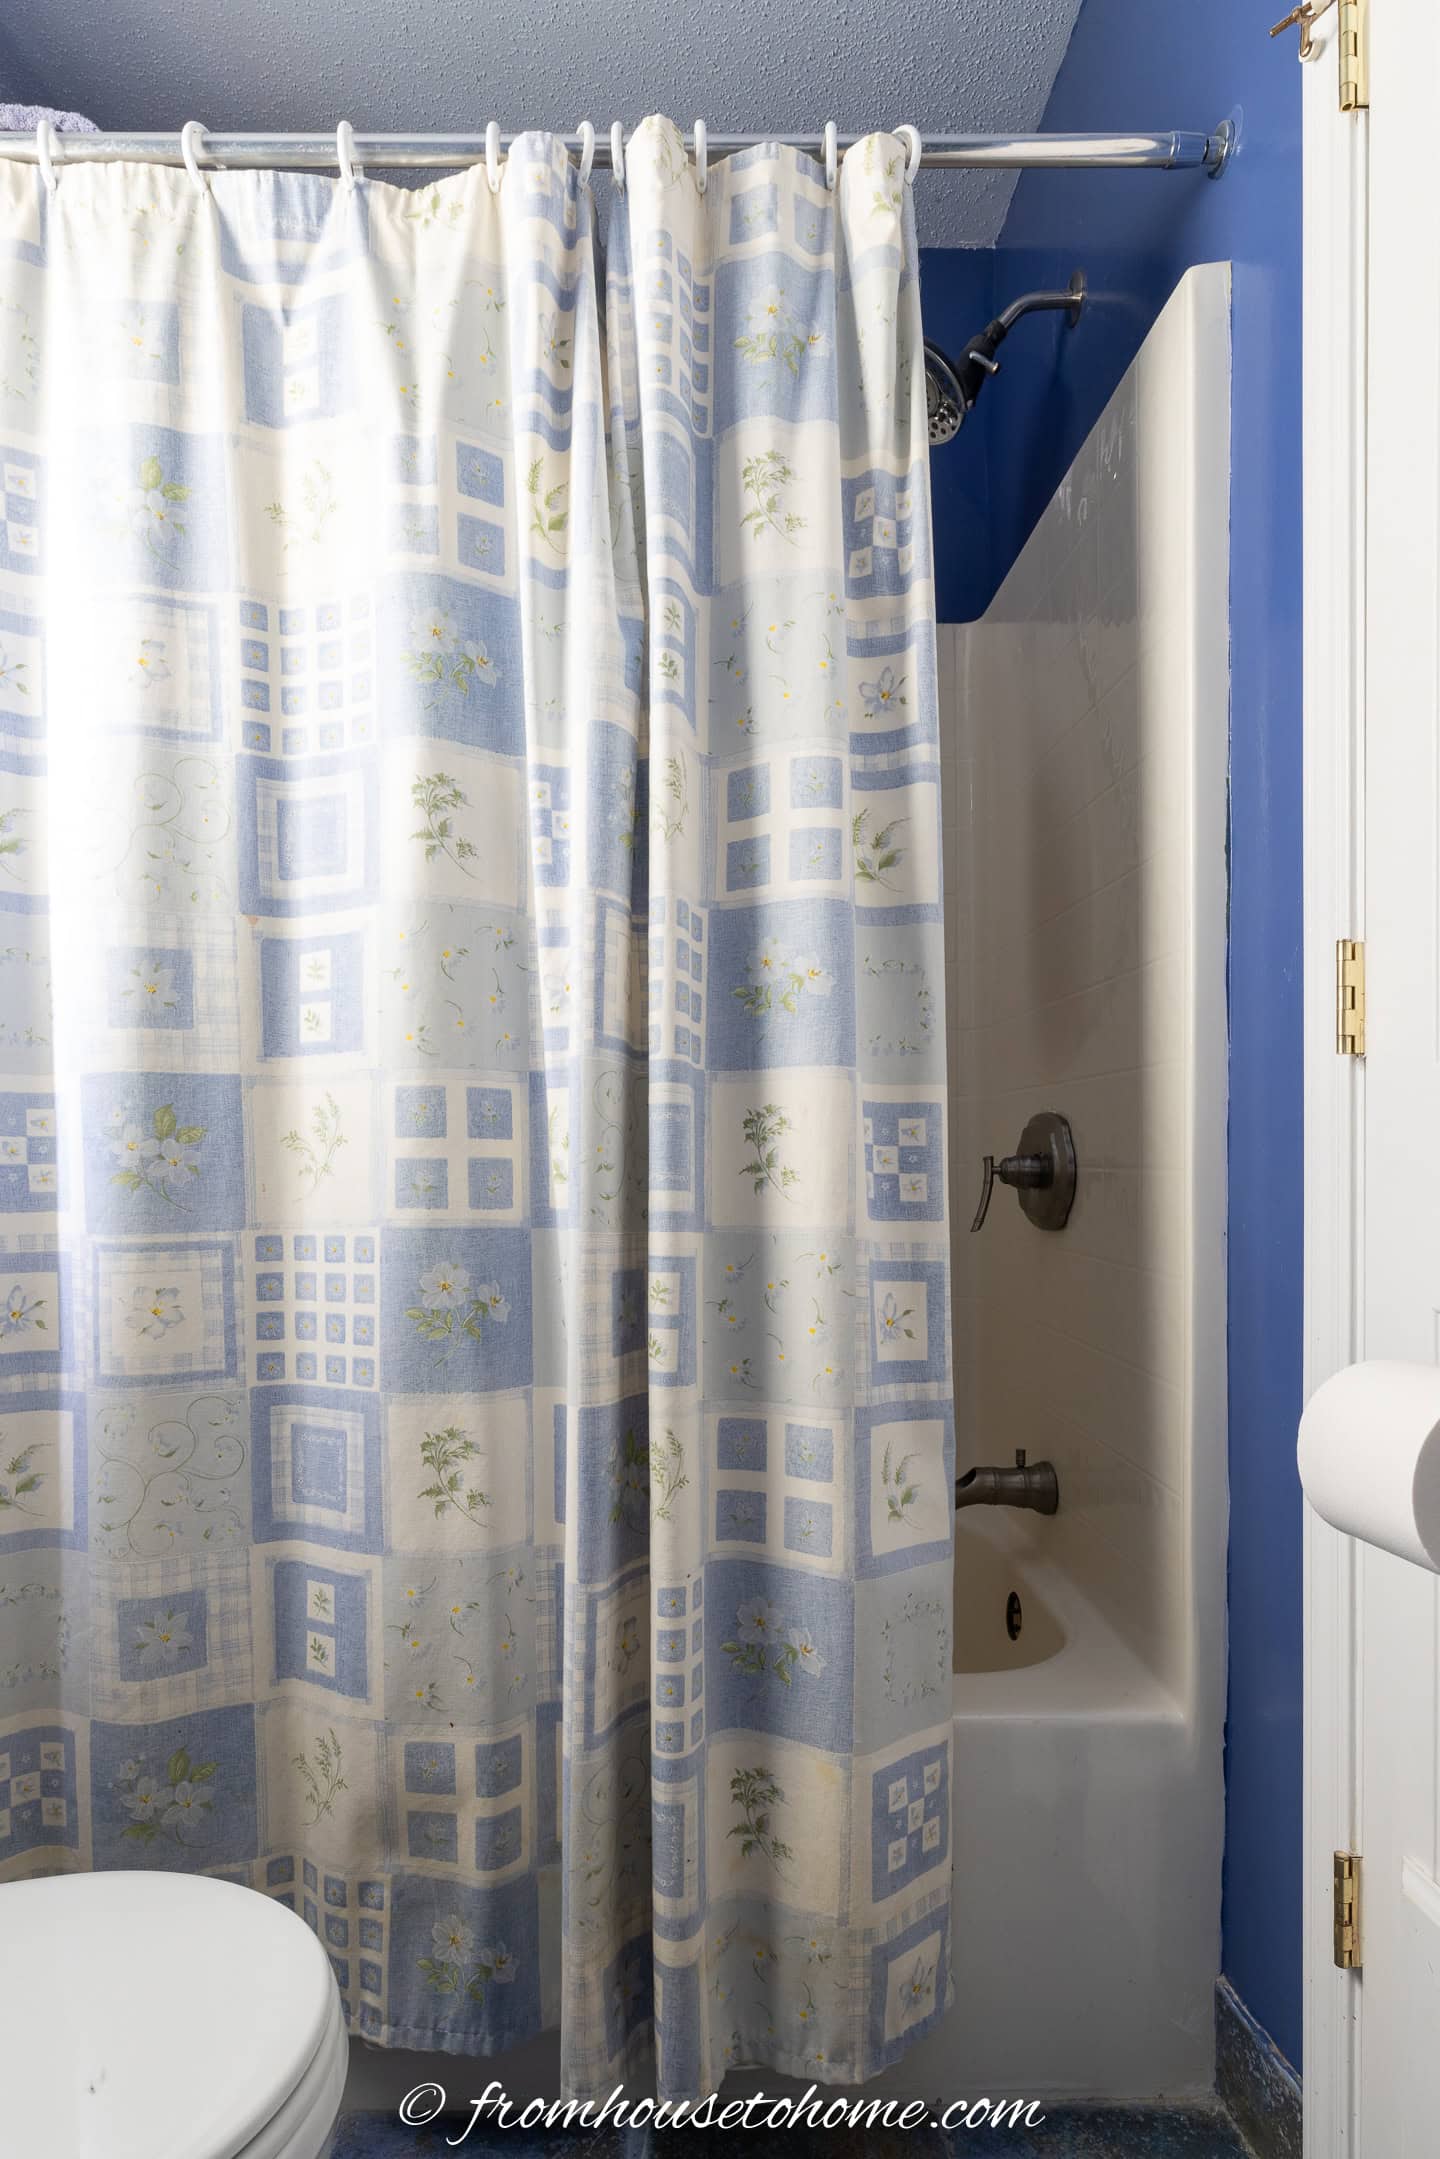
Sometimes when you are decorating, you just luck out and find the perfect thing for your room without even trying.
That’s what happened with this shower curtain.
I was out shopping (not for shower curtains) and happened to see it. And knew that it would go perfectly in my bathroom!
It has the same colors as the room, and the floral print is similar to the bedding from the guest room, so it tied everything together.
Related: Blue and cream guest bedroom makeover
10 | Add Storage and Amenities
With all the main features of the bathroom finished, I just needed to add the finishing touches.
I have to admit I stole most of these ideas from my favorite hotels. I figure if these little touches make hotels feel comfortable, they would work in my guest bathroom, too.
A hair dryer and curling iron are in the drawers of the vanity. And lots of comfortable towels are on the open shelving below.
A hand towel ring right by the sink makes sure there is a towel for drying your hands right near the sink.
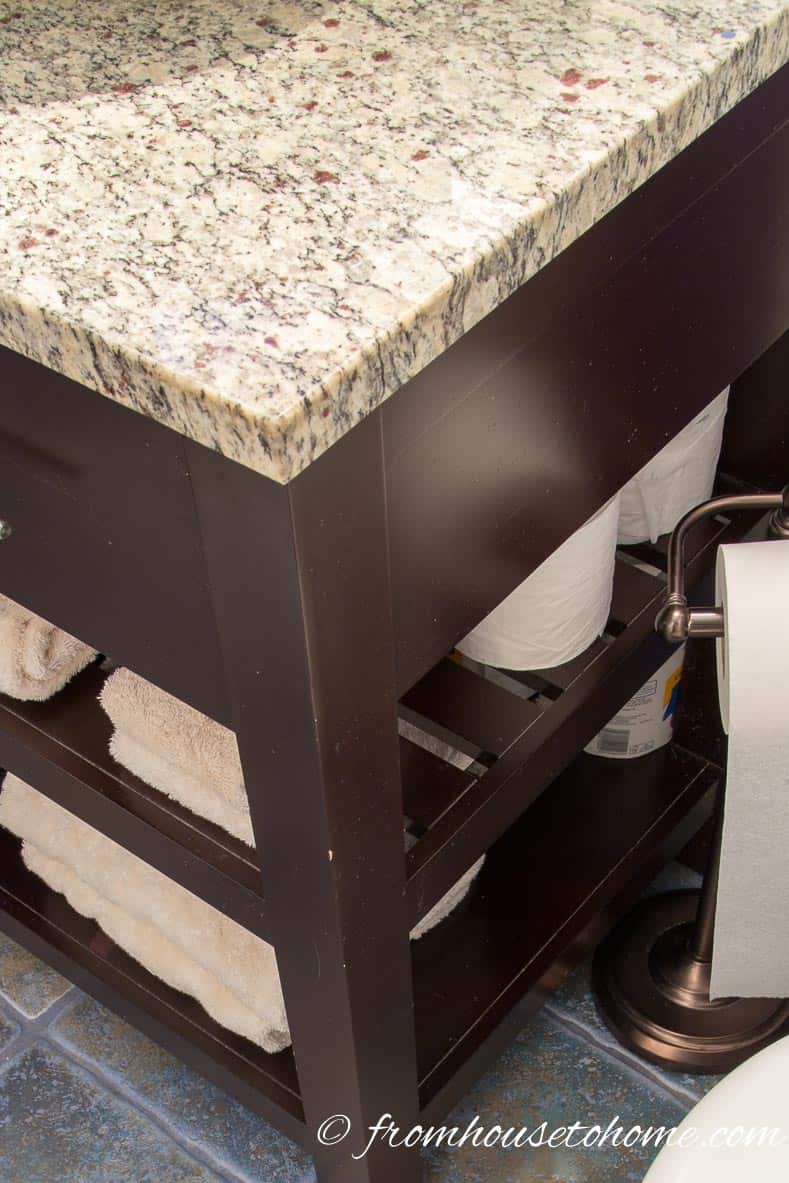
Extra roles of toilet paper, positioned so you can see them from the toilet but not from the rest of the room.
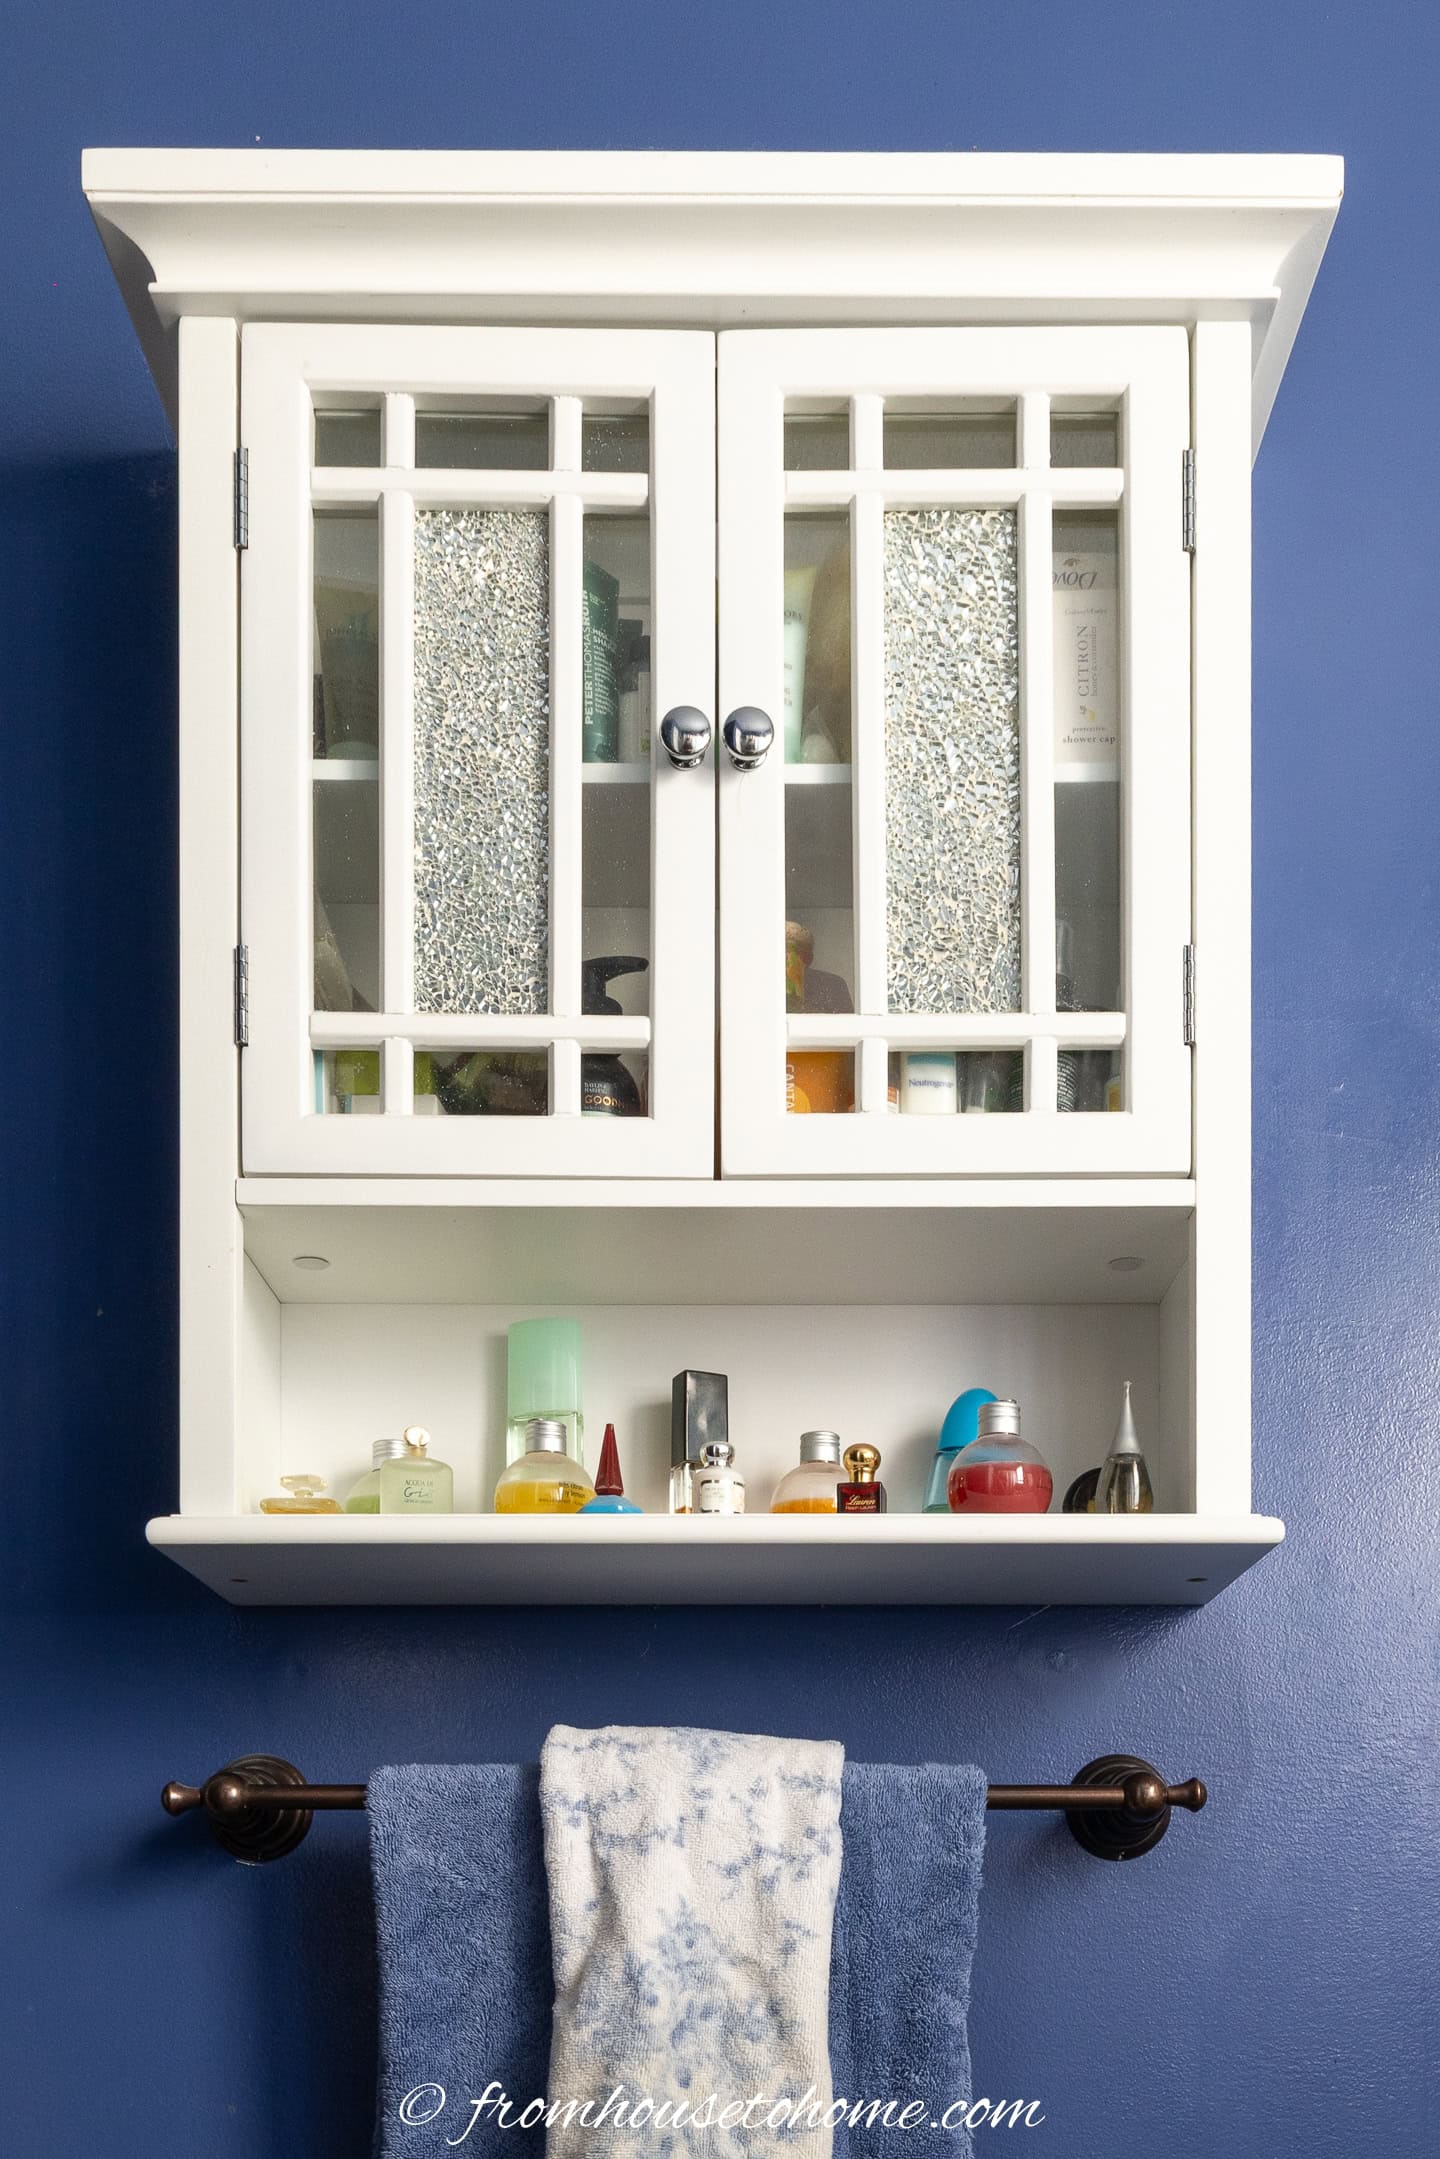
A small cabinet contains soap, shampoo, conditioner, lotions, bath bubbles and oils, a shower cap, a sewing kit, nail polish, a nail file, a new toothbrush, a small tube of toothpaste, small bottles of perfume, and anything else I can think of that someone might need while traveling.
Since I’ve done a fair amount of traveling with my day job, this is pretty much my wish list of things that makes me happy in a hotel!
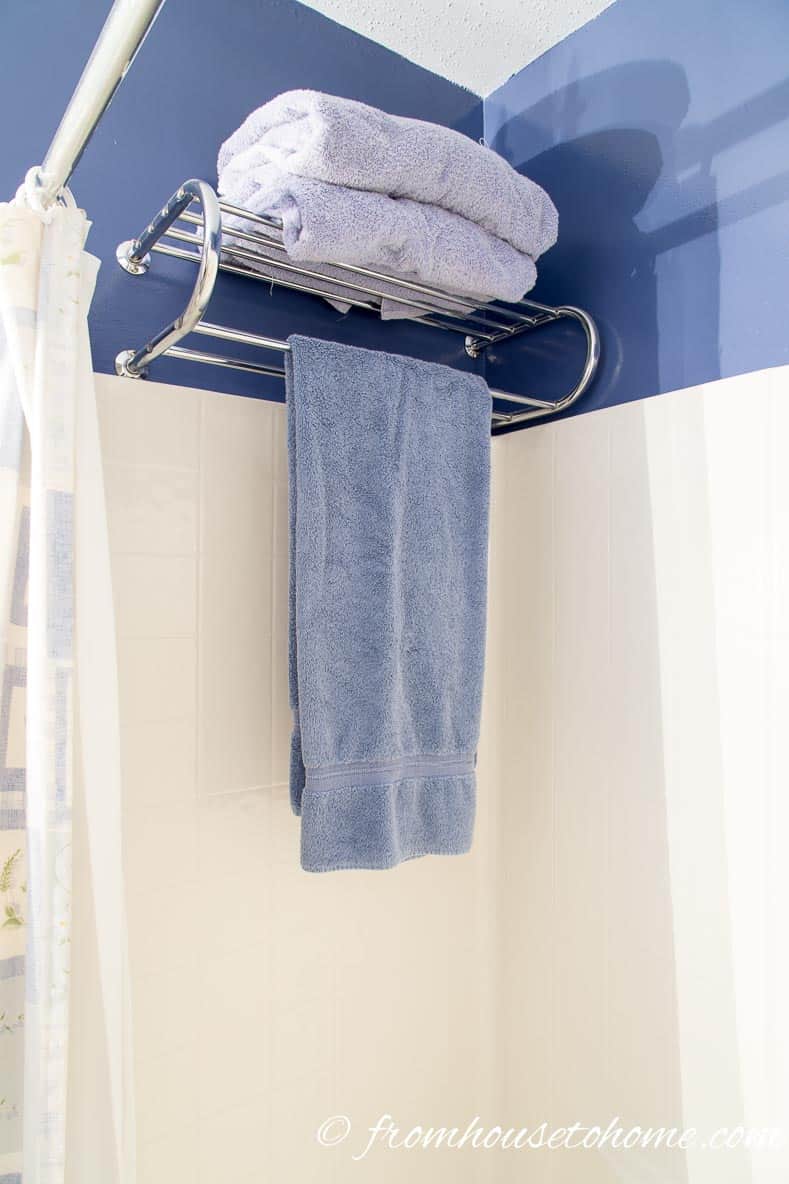
I added a towel rack at the back of the tub, so people can easily get to the towels after they have finished taking a shower.
A hook on the back of the door gives a place for hanging clothes or a bath robe.
11 | Add a cat door
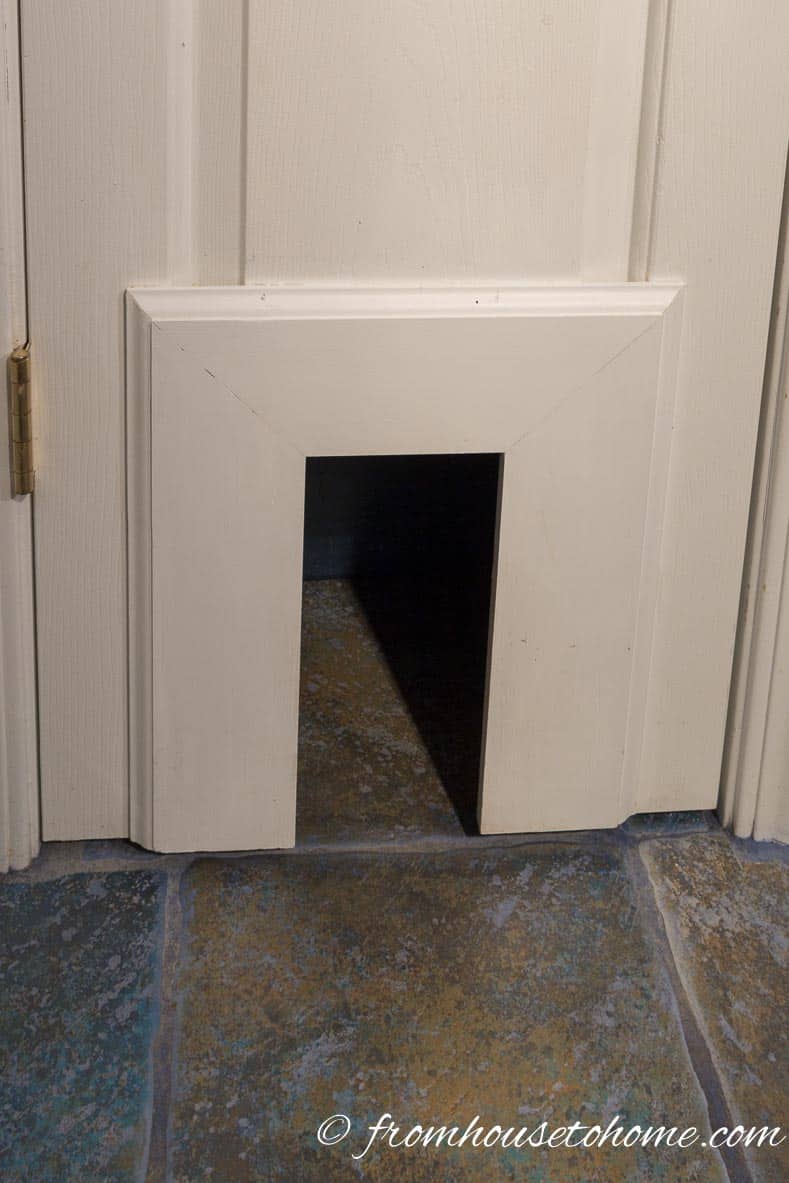
The last step of my bathroom doesn’t have much to do with having guests :).
I have cats and a dog, and need to have a kitty litter box in a location that the cats can get to but the dog can’t.
My solution? Use the bottom of the closet in the guest bathroom as the kitty litter location. (I only store cleaning and pet supplies in this location so I wasn’t worried about putting it here).
This was an easy to do by cutting a hole in the door that is big enough for the cats to fit through but too small for the dog. Then trimming the outside of the hole with baseboard moldings to finish the edges.
The Finished Bathroom

The finished bathroom looks like a jewel box.
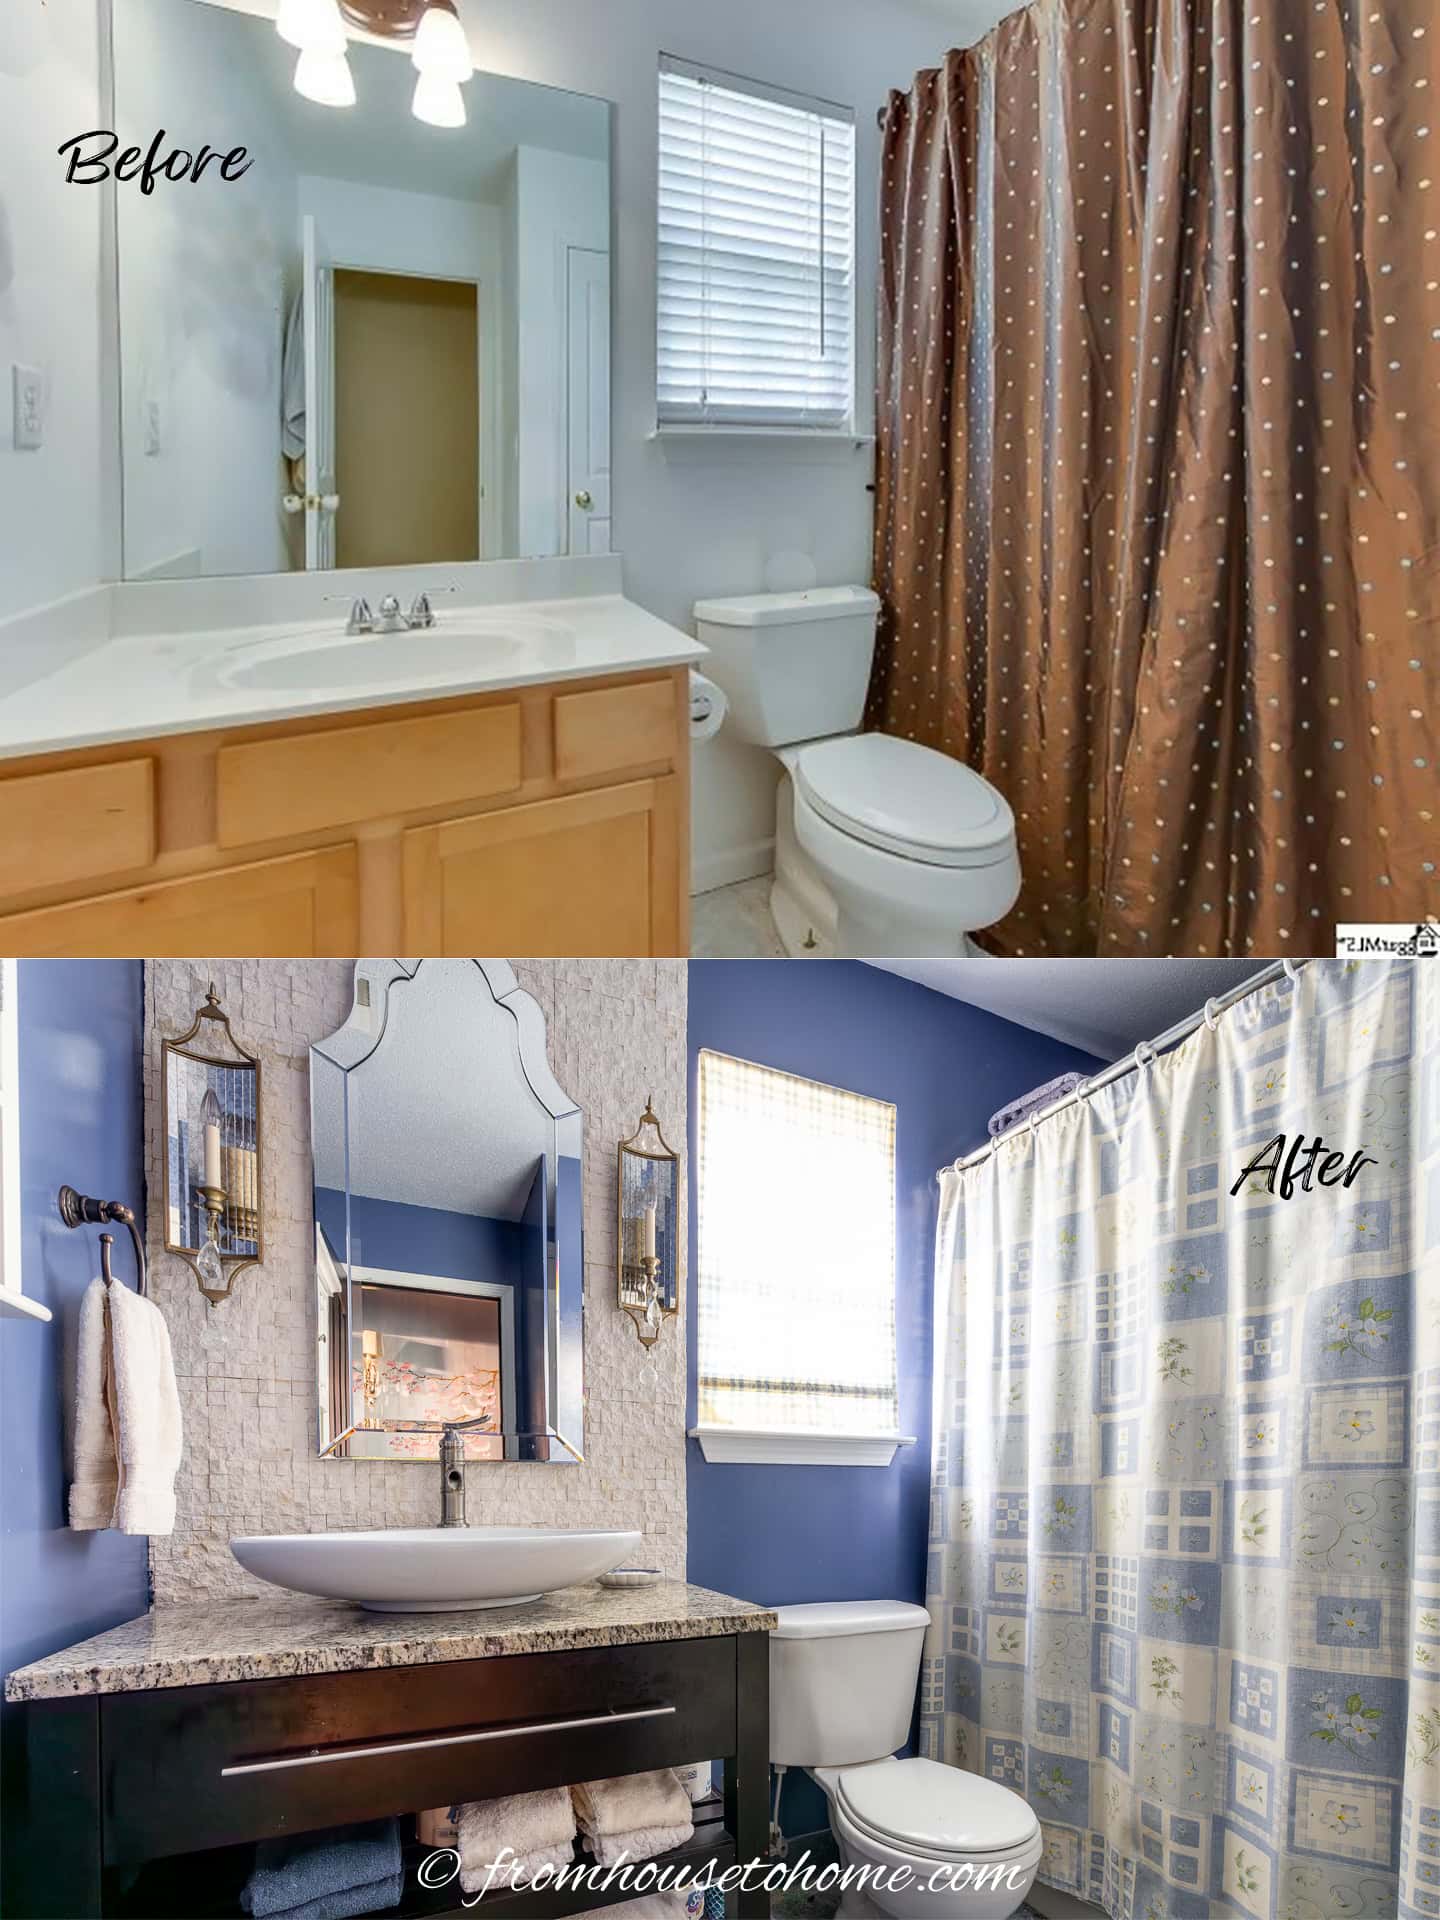
There’s no getting around the fact that it is small, but at least it’s no longer builder beige.
And I have had lots of compliments on how functional it is. (My out of town guests really appreciate the perfume!)
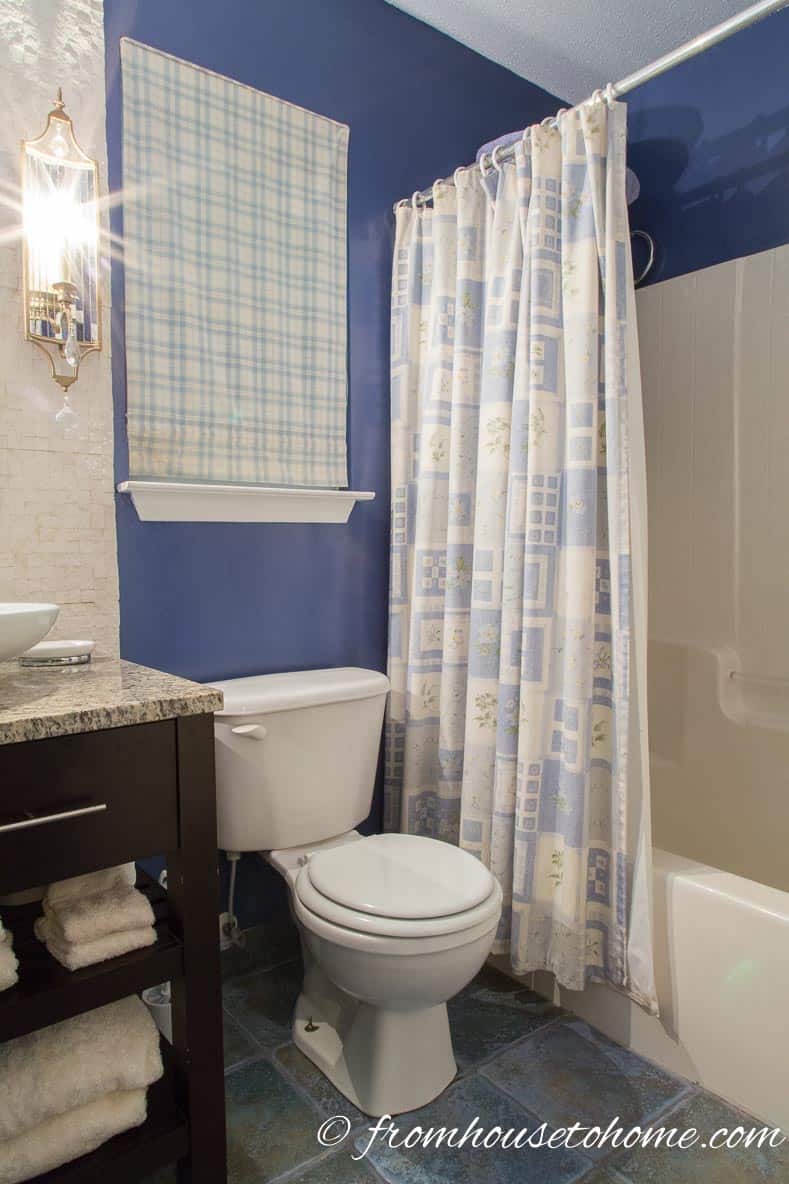
The window treatment and shower curtain and some softness to the room without being too fussy.
By doing the work myself (with help from my mother) and buying fixtures on sale, I was able to come in a few dollars under budget!
My biggest take-aways for maximizing my budget? Don’t move the plumbing, don’t be afraid to install your own sink and faucet, and learn how to tile.
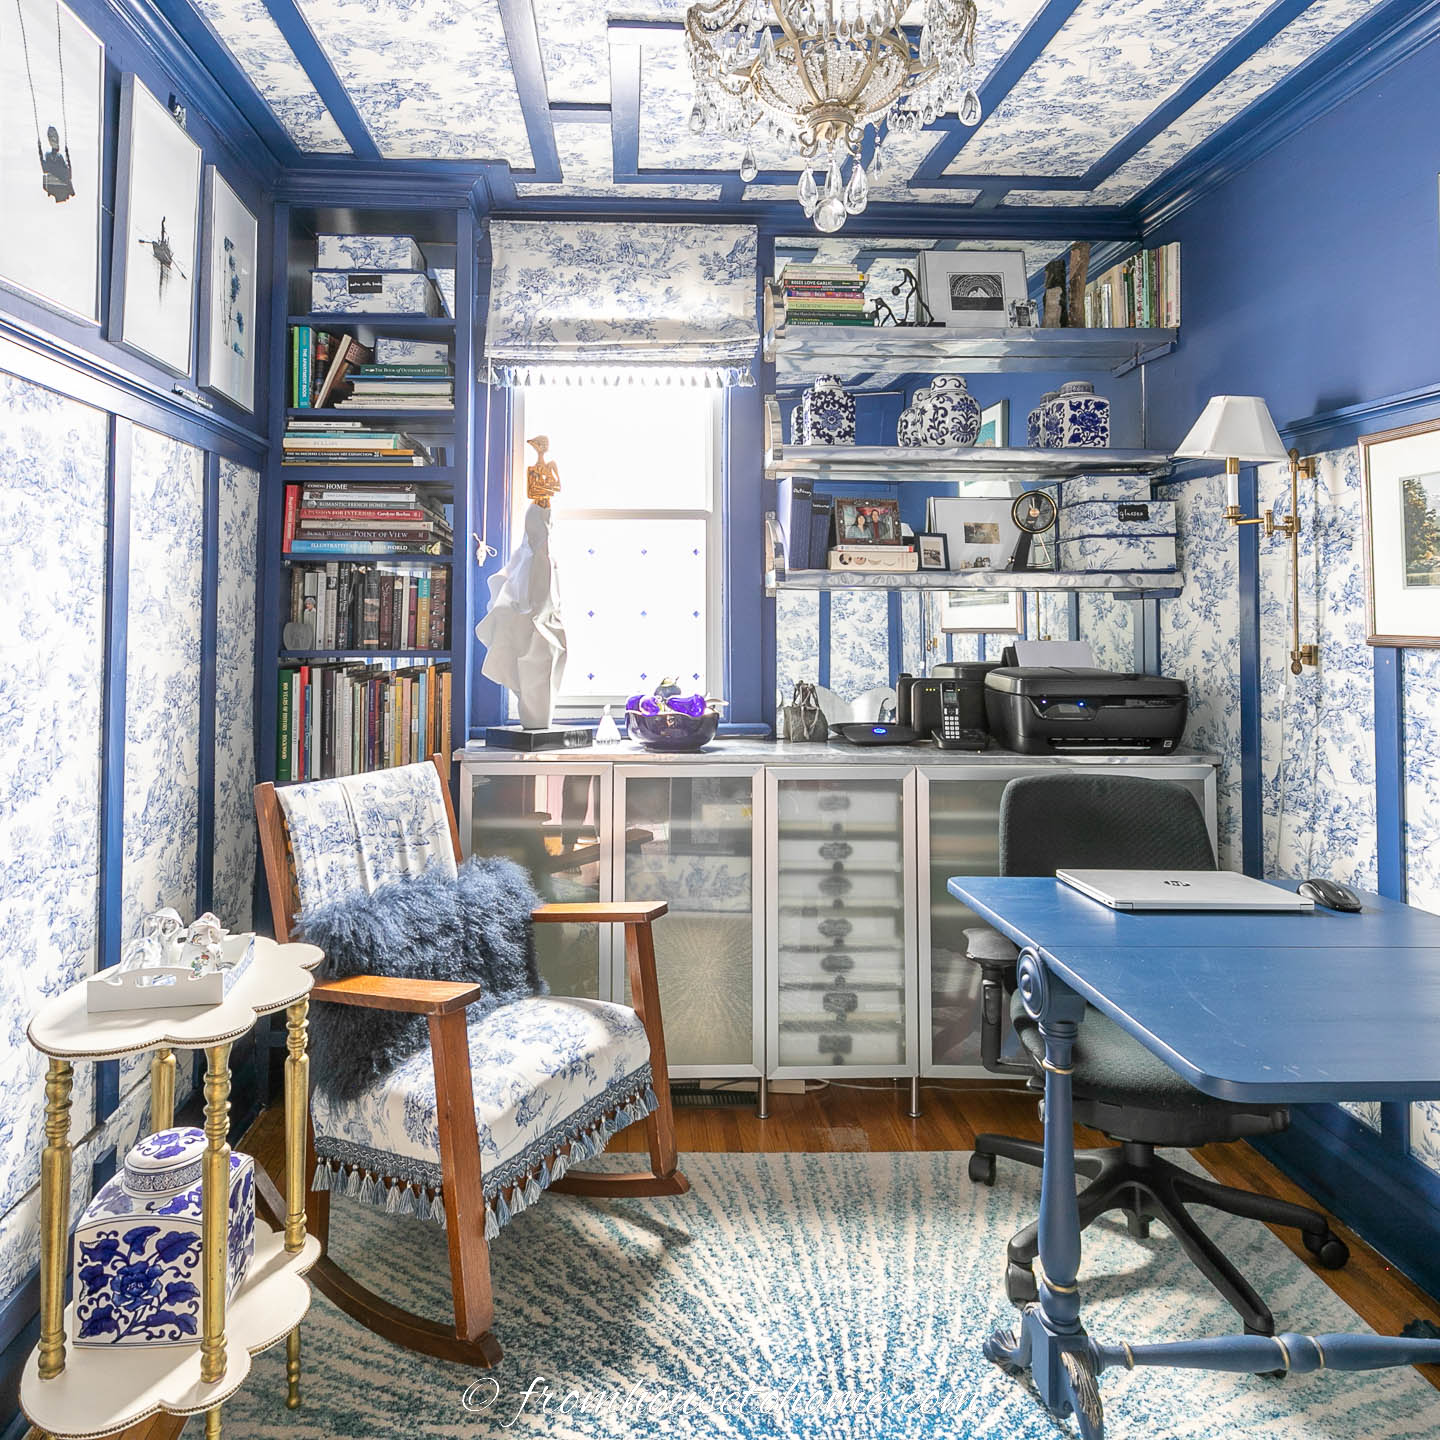
Have comments or questions about our small blue and white guest bathroom makeover? Tell us in the section below.
This post was originally published on October 26, 2015 but was updated with new content on August 5, 2025.
Great innovation. Thanks for the useful presentation.
What an excellent idea for the cat! I also leave an automatic spray set to 15 minutes in my closet and it always makes bathroom smell wonderful! Love the hole in door with moulding around it.
Thanks, Linda! The automatic spray sounds like a great idea…I’ll have to look into that! The bathroom cat door works really well…keeps the dog out of the litter box and I don’t have to see it all the time 🙂