From Dull to Dramatic: Staircase Makeover
Do you have a tall, dark, very uninteresting staircase that is calling out for some attention? I did…and I found a way to do a staircase makeover that has completely transformed the space from tall, dark and cave-like to bright and airy. Scroll through the pages to see the before and afters, as well as the steps I took to get there.
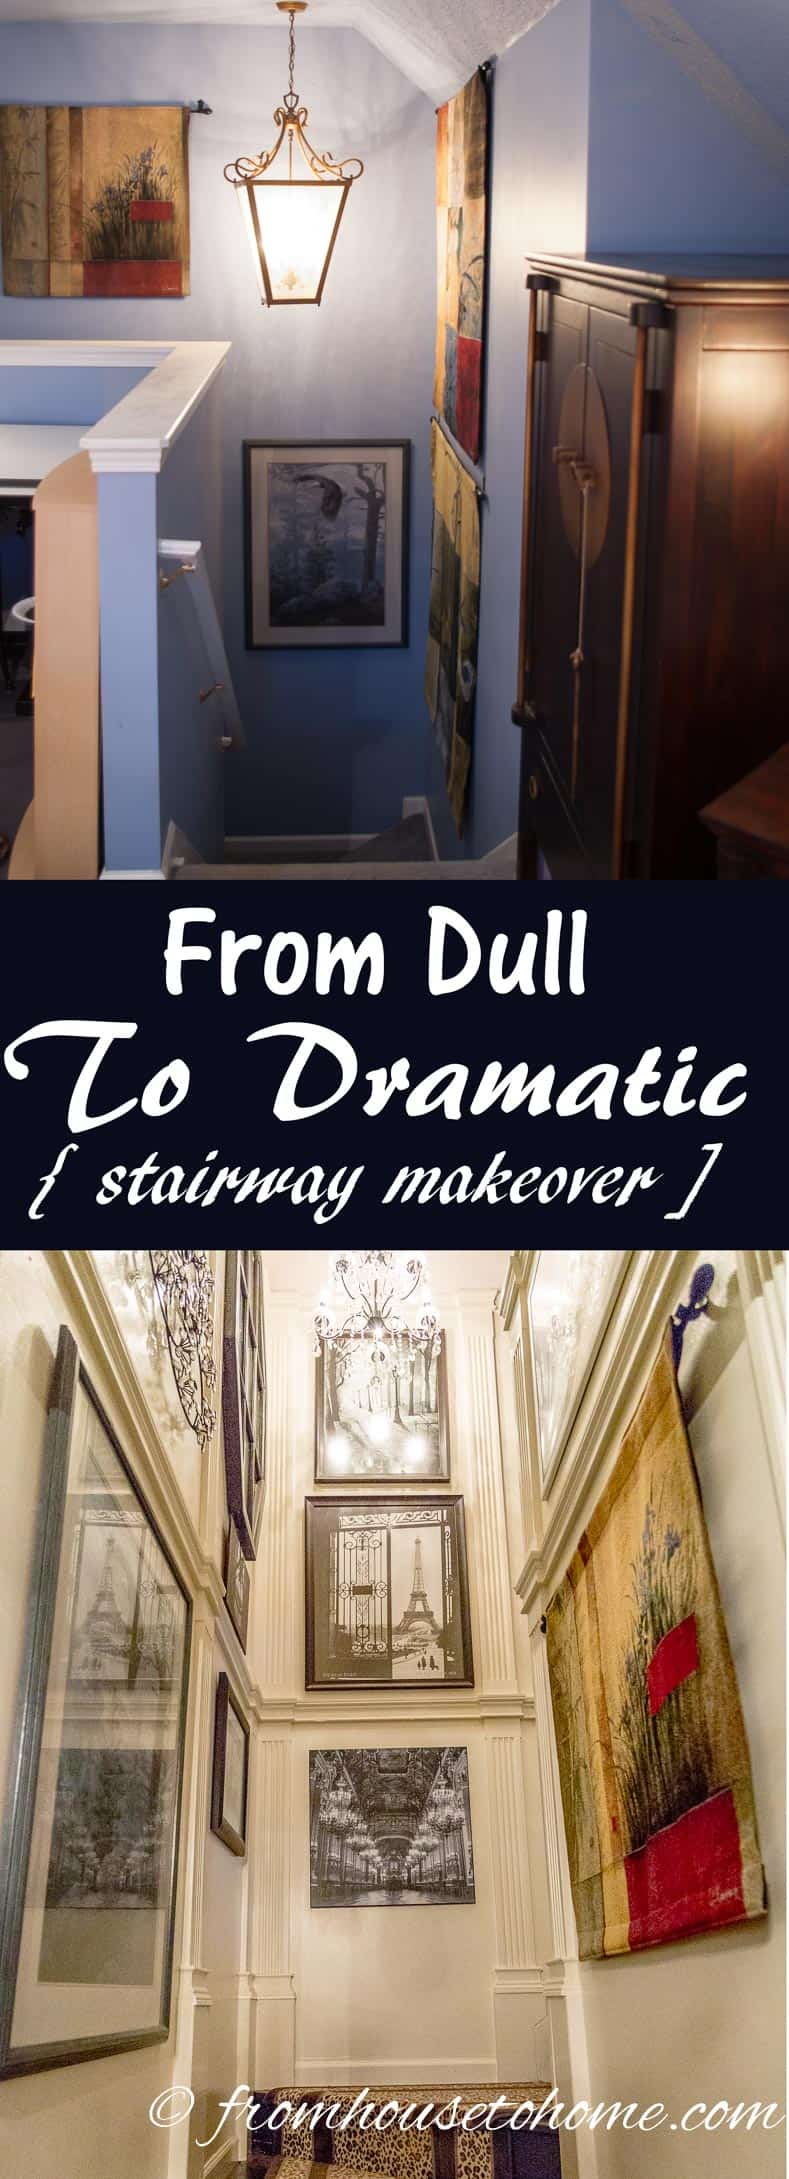
Staircase Makeover: Before
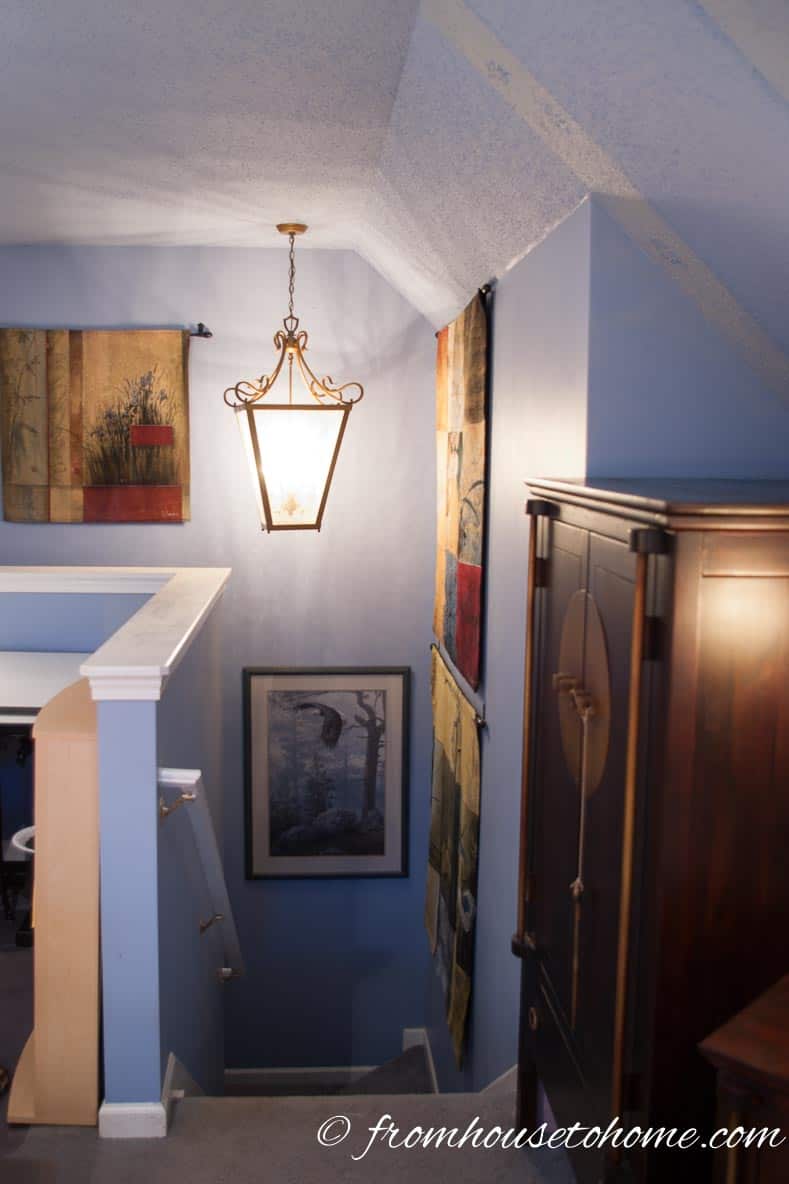
First the background…I have a bonus room over the garage that I use as my office. It is the only room that is not on the ground floor. The stairwell walls are almost 2 stories high, meaning there is A LOT of wall space, some of which is very hard to get to. It is quite narrow and dry walled on both sides making the stairwell dark and somewhat claustrophobic. My bonus room also happens to have a half wall at the stairwell end of the room, so you can see the tops of those very high walls from my office space. Even though the stairwell was painted and I hung pictures and art on those walls, it never felt inviting to me.

Staircase Makeover: After
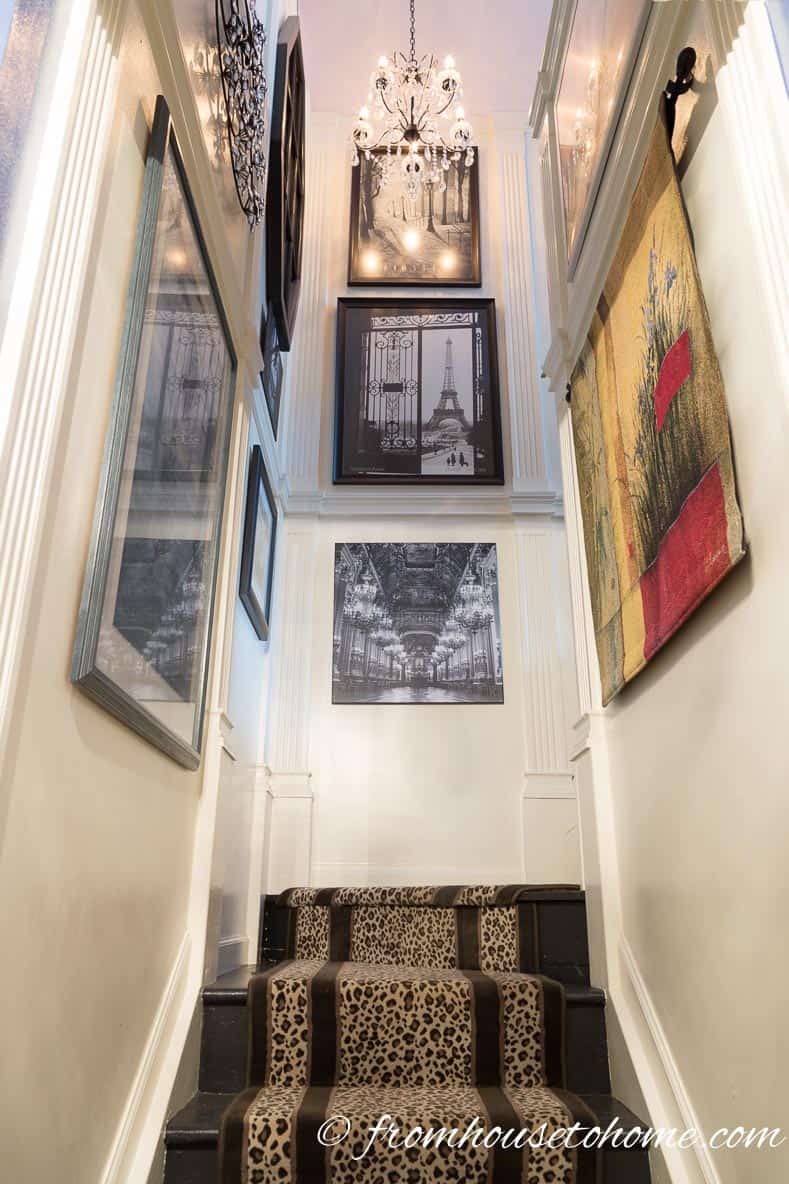
This is what my new, (normal-sized house) dramatic staircase makeover looks like now. Read on to see my inspiration for the makeover and the steps I took to make it happen.
Staircase Makeover: Inspiration

One day as I was flipping through a decorating book by Alexa Hampton called The Language of Interior Design*, I saw a picture of an absolutely gorgeous entry way and staircase.
This stair case and entry way is in a grand old home in New Orleans, with a size and scale that is far bigger than mine…obviously darkness is not as much of an issue.
But they did have the same dilemma with a large expanse of wall space that could have been very boring.
They solved it with moldings, a warm shade of white paint, a beautiful runner, a stunning wrought iron railing, a large scale chandelier and of course, art.
Because of the narrow width and drywall on both sides, I gave up on the wrought iron railing idea (next house!).
However I decided to do variations of the rest of those ideas to help my space.
Step 1: Install Moldings and Paint the Walls
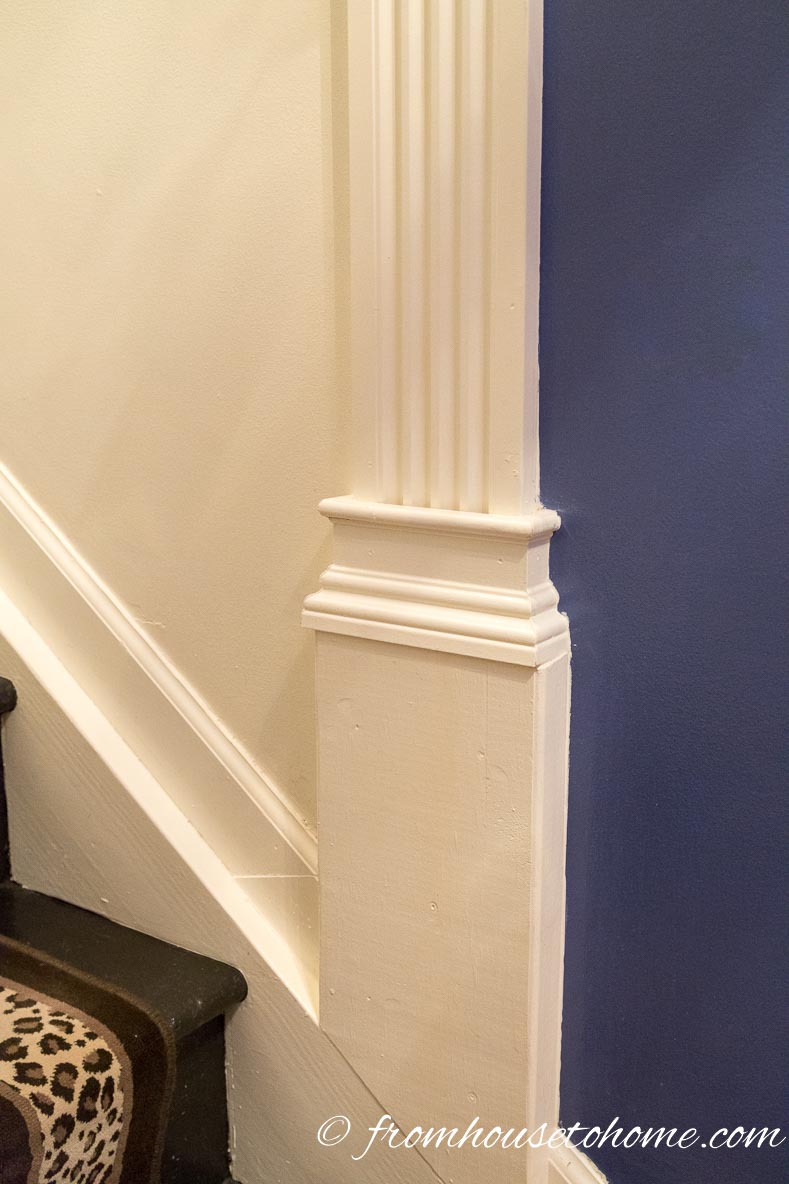
The first step was to install moldings.
These are all standard moldings that you can buy at a big box store.
The straight pieces at the bottom of each column are straight 2 x 8’s.
The tall part of the column is made from fluted door casing.
Then I installed chair rail molding upside down around the bottom of the fluted column where it met the 2 x 8.
About half way up the wall, I installed chair rail all the way around the stairwell.
It also served a practical purpose in that it hides the join where one fluted column meets the next (door casings aren’t usually that tall so you will need more than one stacked on top of each other to reach the top of the wall).
I used 2 x 8’s between the door casings to add some extra interest.

The top of the columns is the reverse of the bottom with the 2 x 8 on top of the fluted door casing column.
The upside down chair rail runs all the way around the top of the wall.
If my house had square corners, I probably would have used crown molding. Since it has weird angles, I used the chair rail to mark the top of the wall.
Then I painted the moldings and all of the wall in between with Benjamin Moore Ivory White in a semi-gloss finish.
Since I always seem to be carrying supplies up and down the stairs, I needed to make sure the paint could hold up to some bumps and scrapes. Semi-gloss does the trick.
Step 2: Paint and Carpet on the Stairs
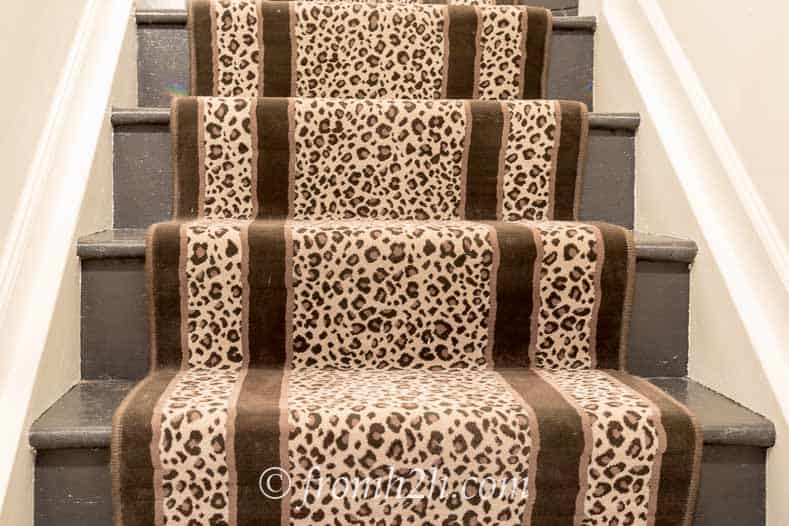
Next I tackled the stairs.
I removed the old blue carpet.
At first I was going to install hard wood floors, but stairs are quite expensive to finish properly with wood. So instead I decided to paint them Benjamin Moore Onyx, also a semi-gloss finish (stands up to the wear and tear of foot traffic).
Since there was only a sub floor, a lot of sanding was necessary to get it smooth enough to paint. The painting part went fairly smoothly (other than trying to keep the dog and cats from walking on it when it was wet).
Installing the runner was probably the trickiest part of this project (especially since it was my first time doing carpet).
I followed these instructions from This Old House and got along pretty well.
The only thing I would do differently next time? Don’t install an obvious pattern when you have stairs that make a 90° turn. Trying to match the pattern on that one riser took a lot of patience piecing bits together.
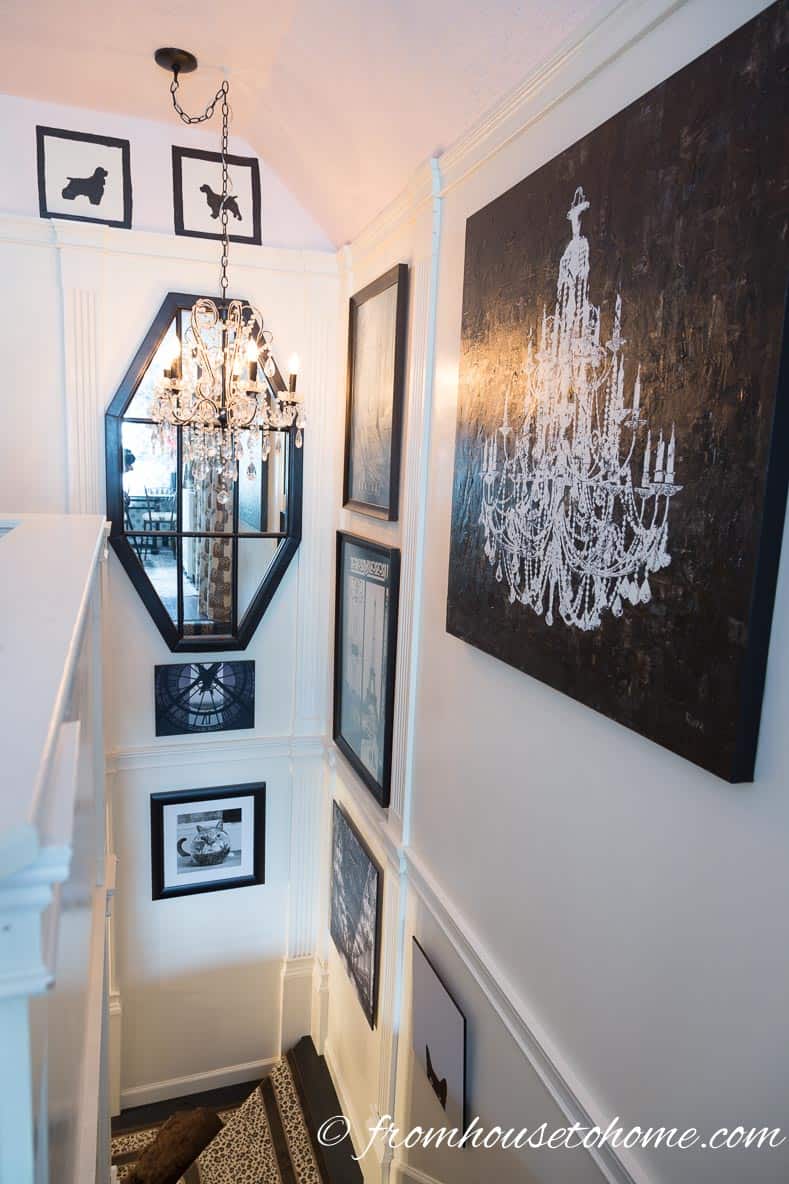
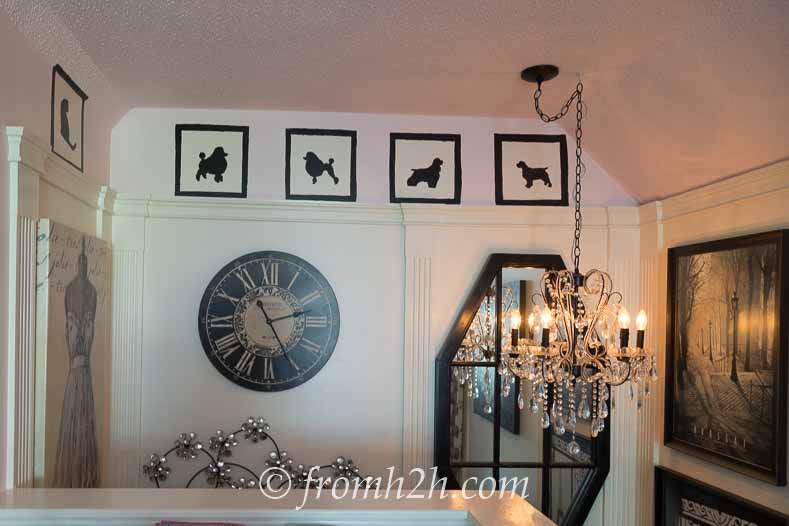
Step 3: The Chandelier
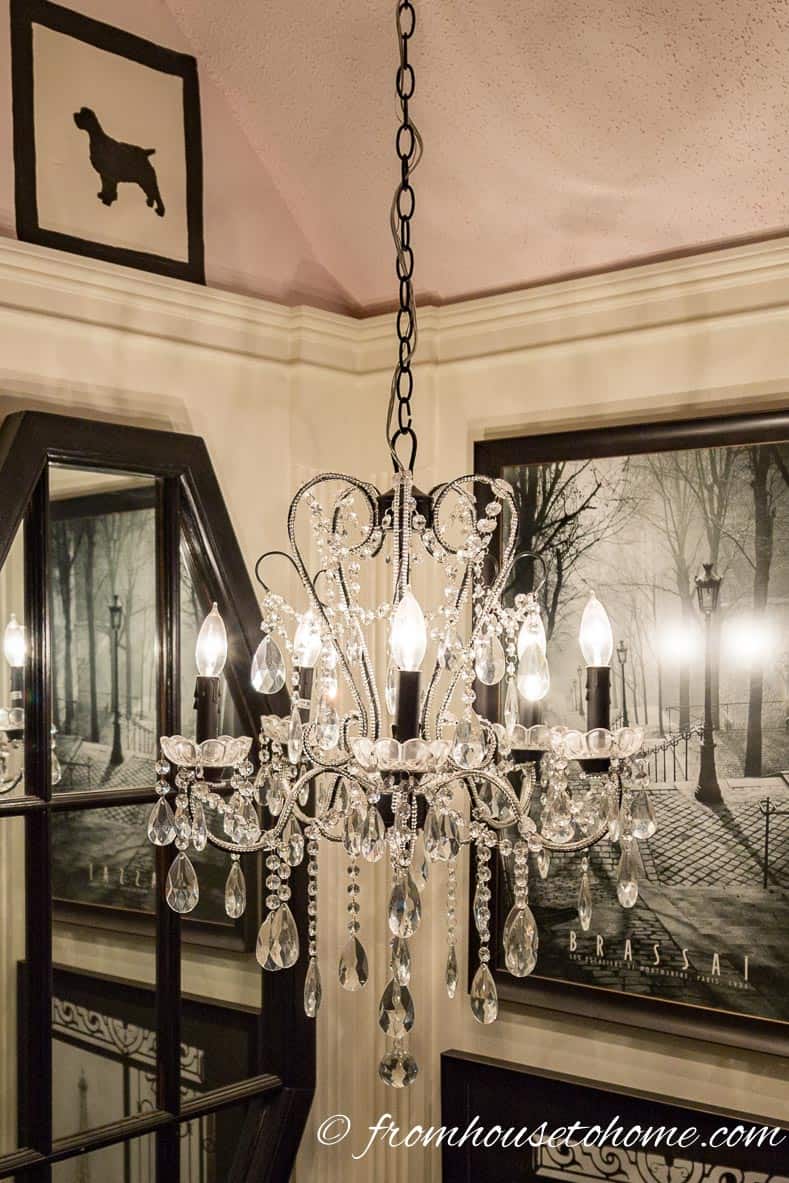
Adding the chandelier created some light and drama in the space.
Obviously, it isn’t quite the size of the one in my inspiration picture, but it fits the size of my room.
Since this room tends to be dark (there is only one small window at the other end of the room), hanging the chandelier in front of a mirror helps create more light.
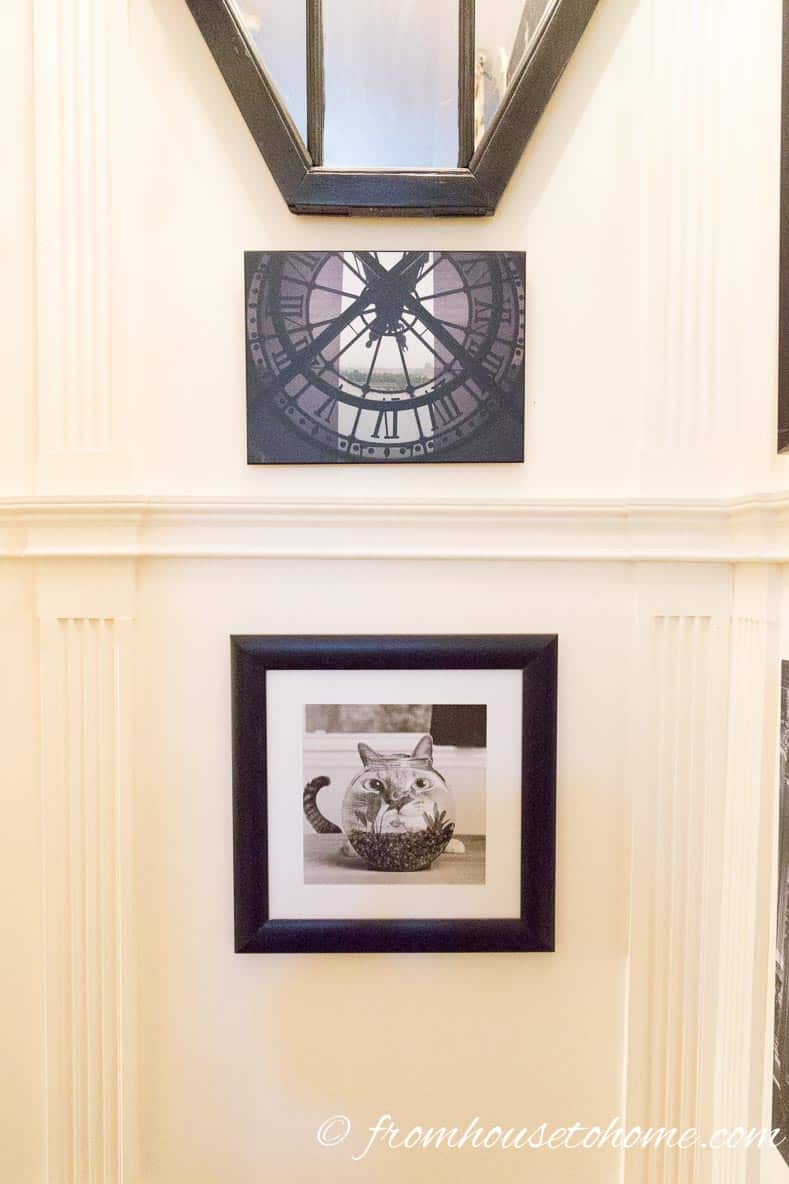
Step 4: Art on the Walls

Finally, I hung pictures that I love in the boxes created by the moldings.
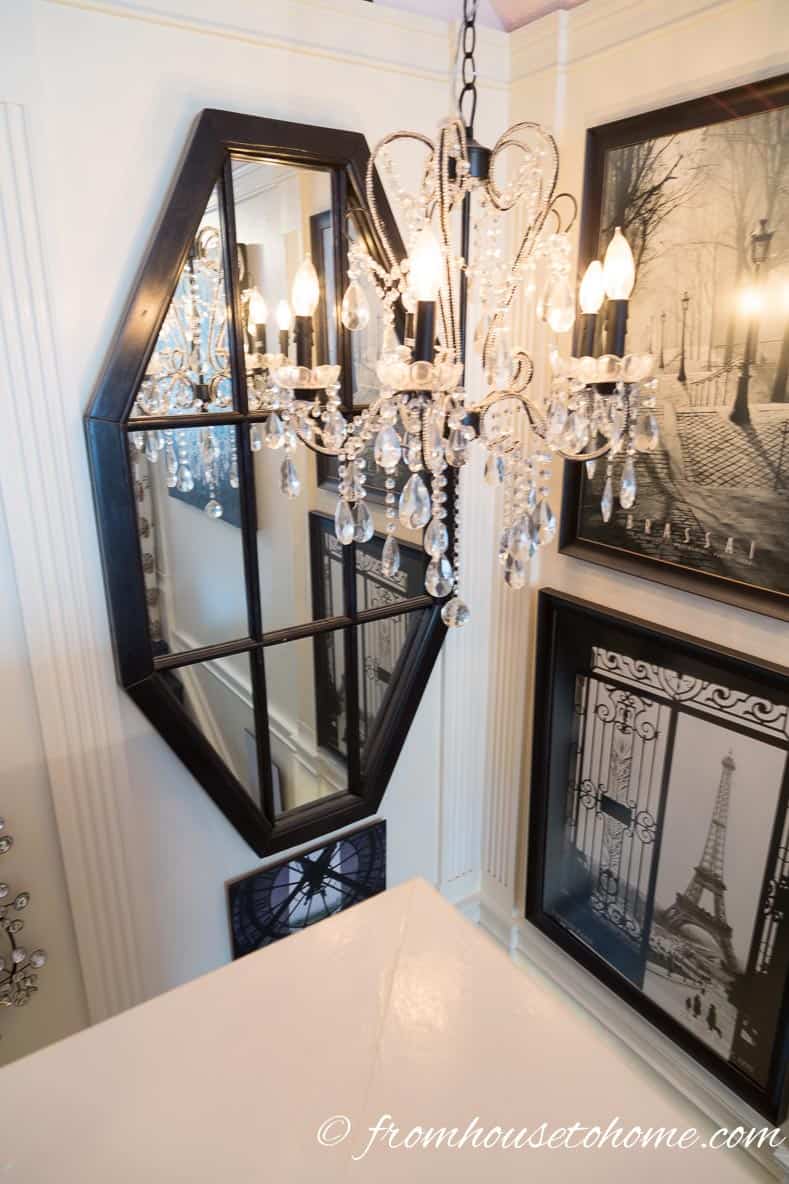
The mirror is an old window that was converted into a mirror by replacing the window panes.
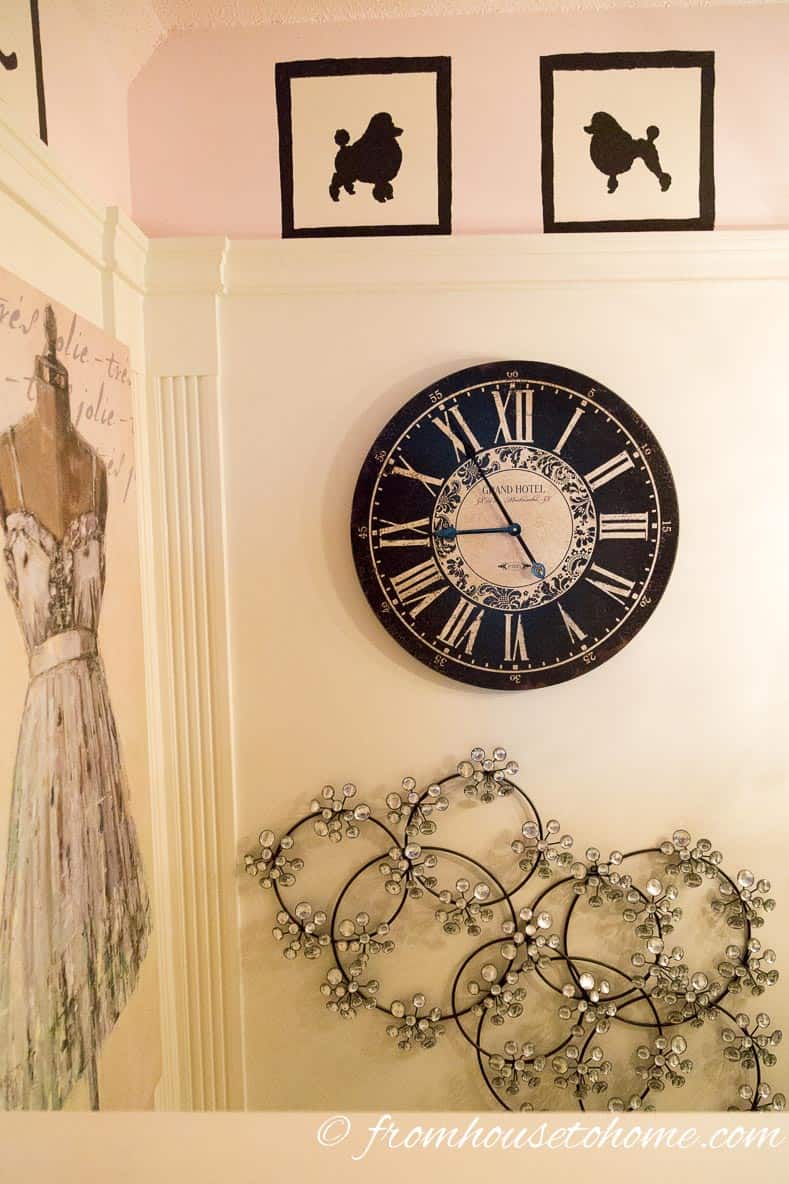
The dogs above the top of the molding were created with stencils. Want to know how to create this hand-made art? Click here to see our post on how to create silhouette art.
Clocks and wall sculptures add more interest.
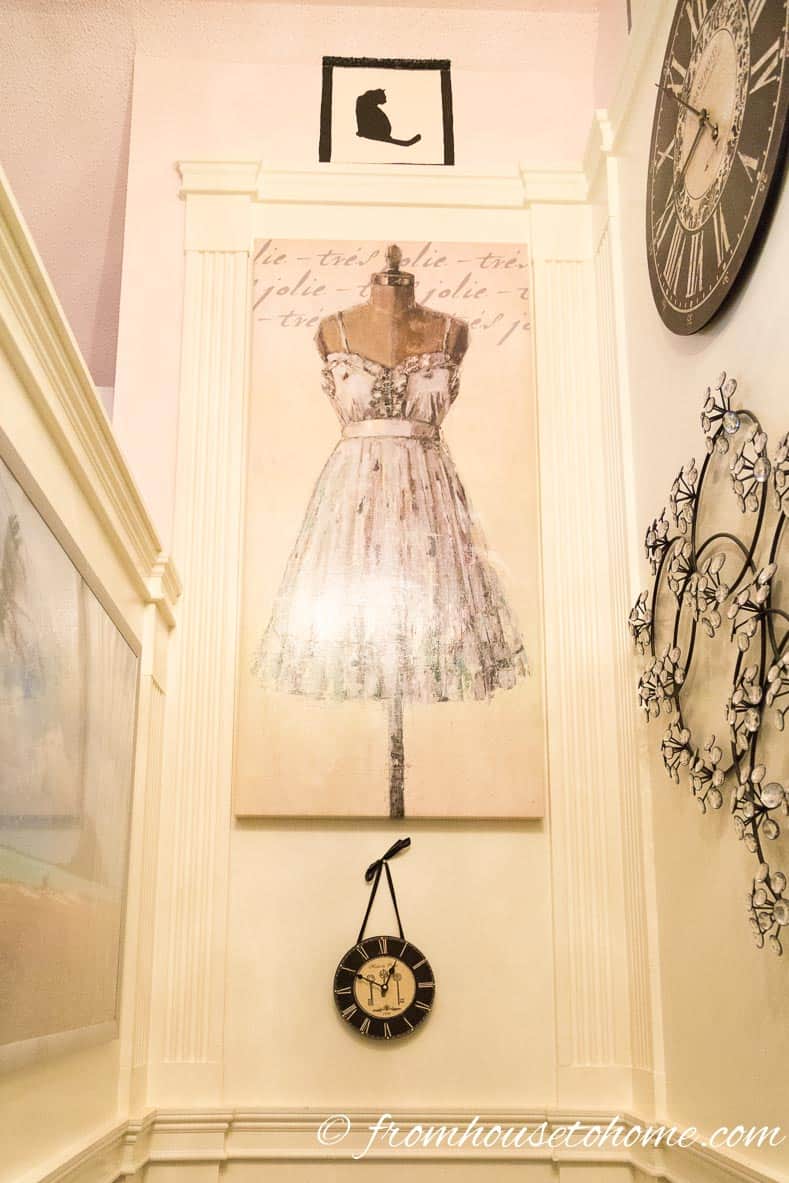
This painting fits perfectly between the moldings, as if it were made for that space.
Staircase Makeover: Finished Product
With my new staircase makeover, I can’t help but enjoy the trip up the stairs to my office!
The view down the stairs from my office is pretty good, too.
And yes, there are still a few spots that are waiting for pictures. They’ll be filled when I find the right ones.
The view over the half wall behind my desk.
As you may have noticed, I also painted my office pink where it used to be blue. Click here if you want to see the rest of the office makeover.
Comments or questions about From Dull to Dramatic: A Staircase Makeover? Tell us in the section below.
This post was originally published on June 26, 2015 but was updated with new content on June 29, 2023.
what you have done is absolutely stunning. However; I cannot follow what all you did with the molding, fluted pieces, chair rail upside down right side up??? I would love to do this in my victorian stairwell that could use some sprucing up. Maybe if I go over it enough times I can get it, lol.
Thanks, Kathryn! I did have to play around with how to use the molding to get it to look right 🙂 But it went up pretty fast after I figured out the pattern.
What kind of ladder did you use? This is a really “tricky” space to position a ladder…I have a similar space and have been mulling this around for months! It looks incredible, so lovely.
Thanks Kathy! You’re right, it is a tricky space for a ladder! I used one of those multi-positional ladders that you can position like scaffolding (Here’s an example at Home Depot: http://www.homedepot.com/p/Werner-16-ft-Aluminum-Folding-Multi-Position-Ladder-with-300-lb-Load-Capacity-M1A-8-16B/100658412). For most of the stairway, I was able to have one end of the ladder on the floor at the bottom of the stairs, and the other end going straight across to the landing so that it was like scaffolding. For the very top of the wall, I had to put the ladder on the landing and lean it up against the wall at the other end of the stairway, which was a little scary. But it got the job done (no accidents, thank goodness!)