DIY Glossy Black and Blue Bookshelf Makeover
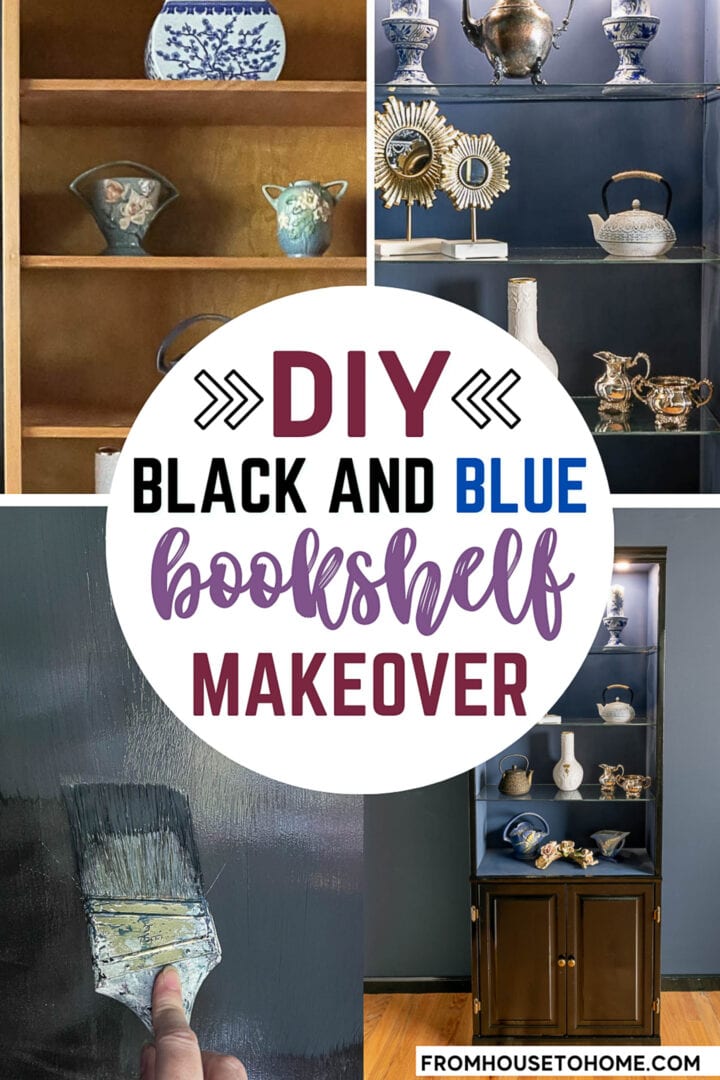


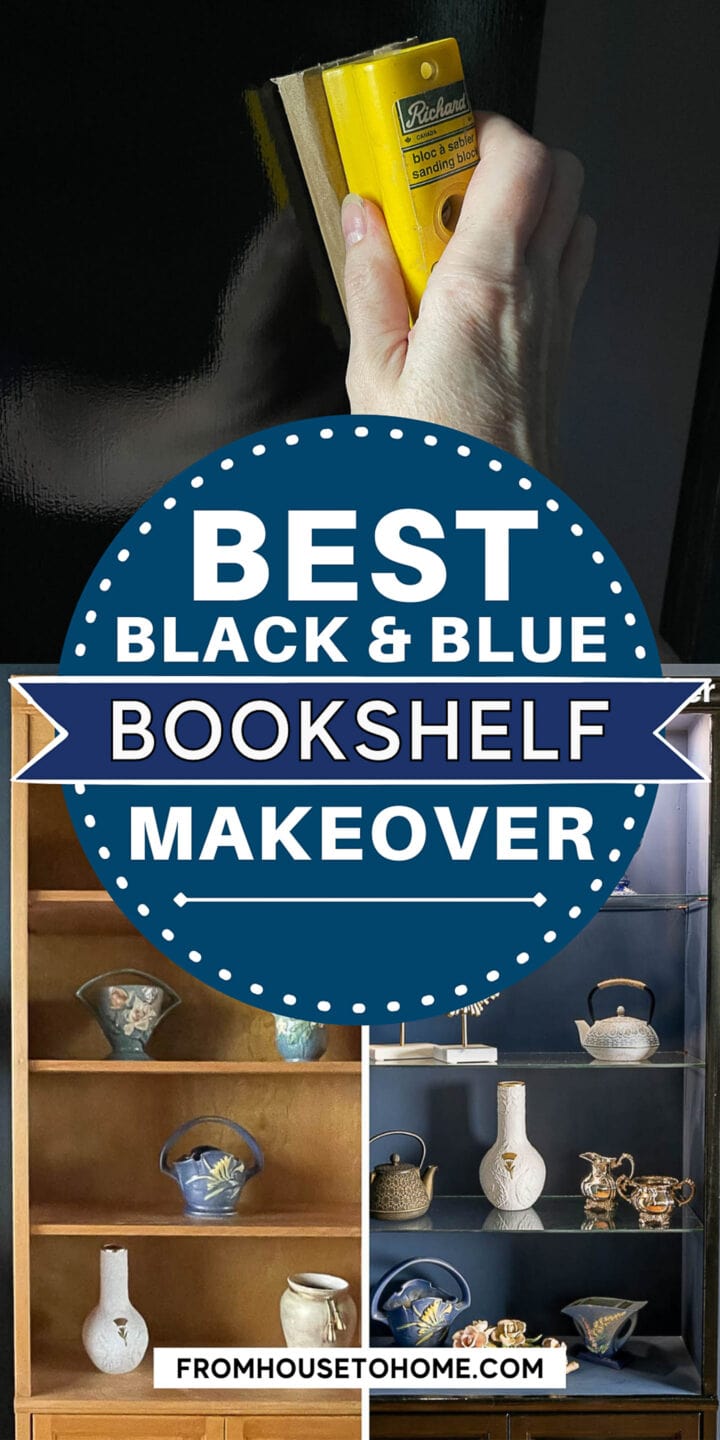
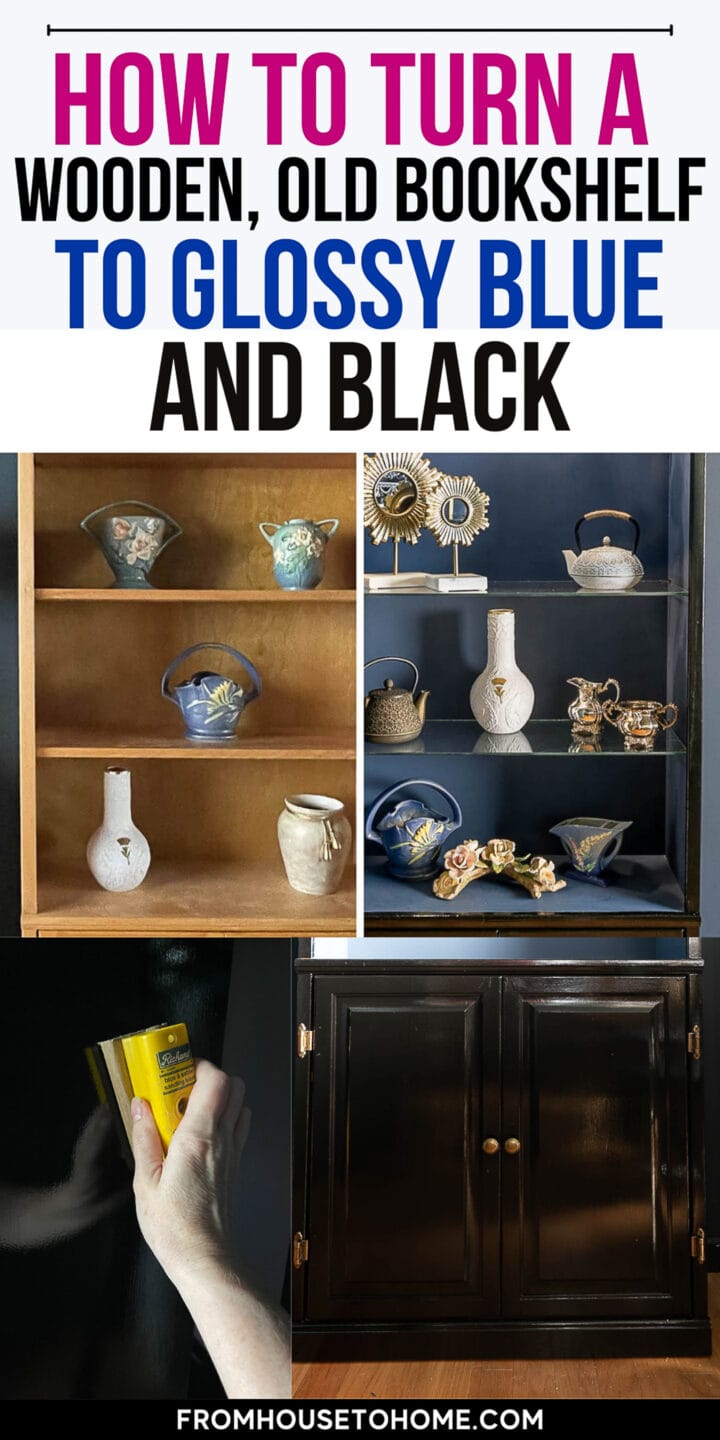

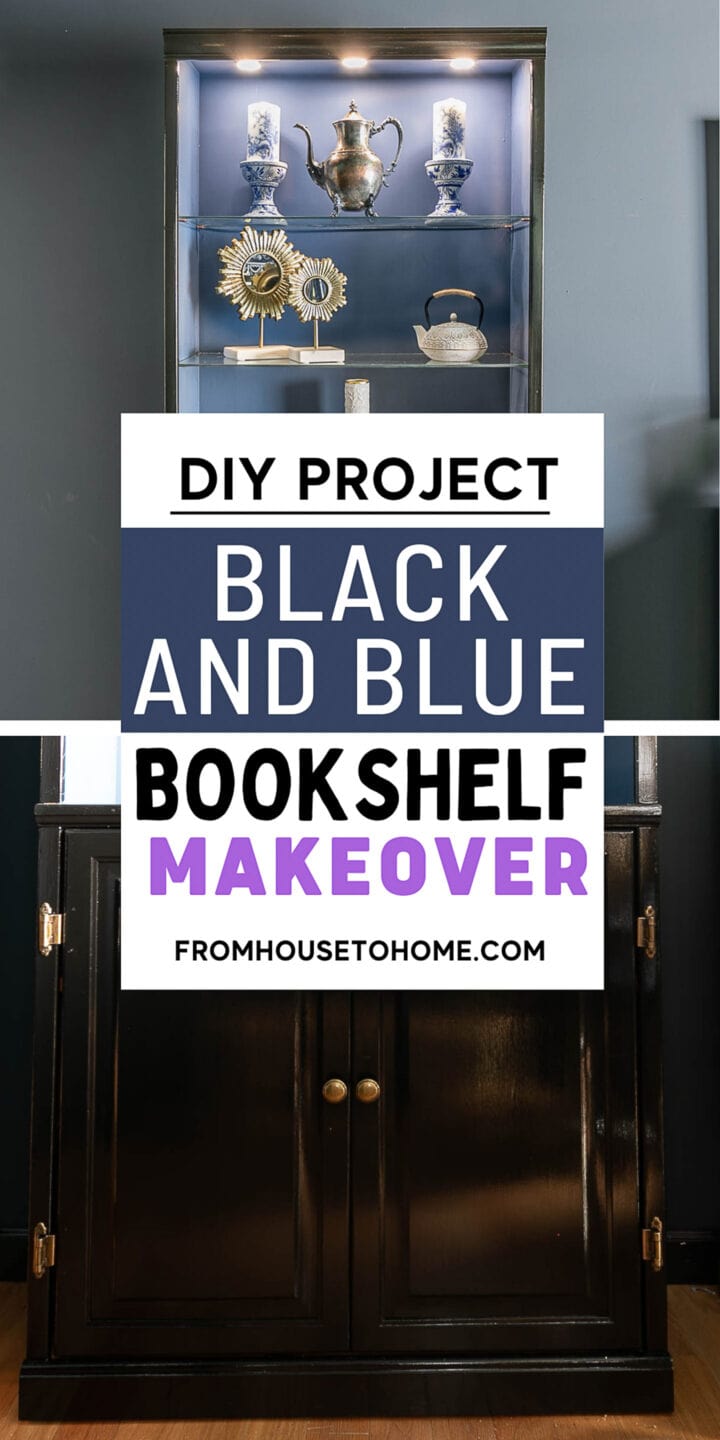
This glam and glossy DIY black bookshelf makeover shows you how to give new life to an old, wooden bookshelf. With just a few simple steps, you can give your old bookcase a stylish new look that will be the focal point of your room.

Can you believe it’s already week 5 of my One Room Challenge home office makeover?
Only 3 weeks to go for the final reveal!
Which means I better get going on finishing up this room.
This week I continued on with my DIY projects by giving my old bookshelves a brand new look.
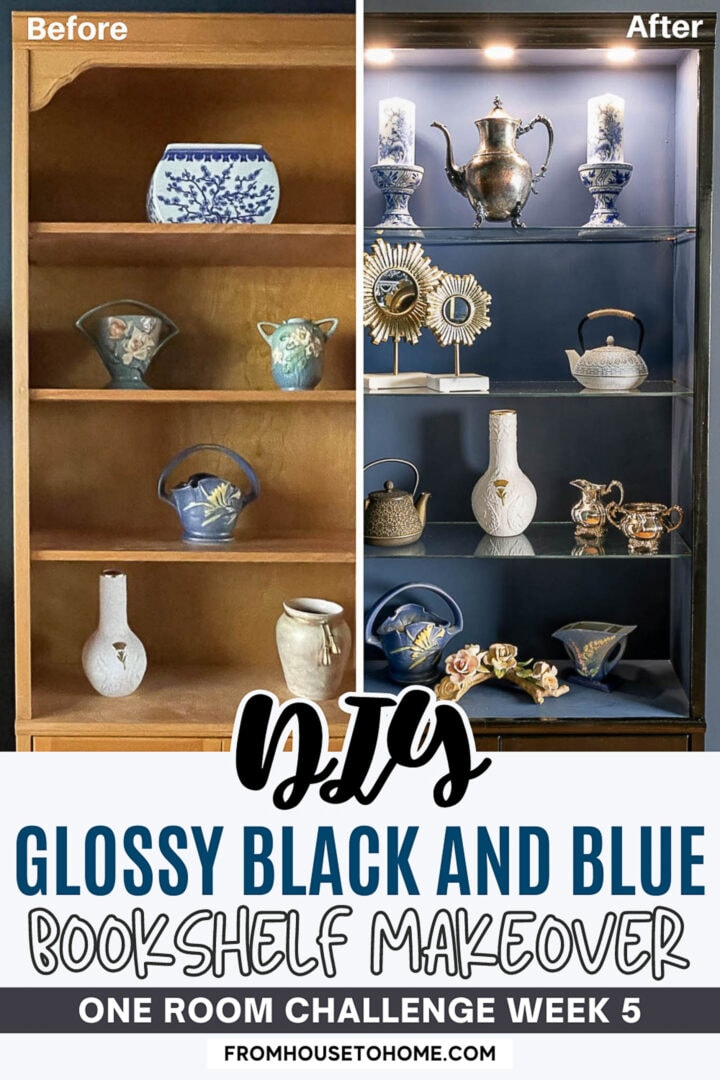
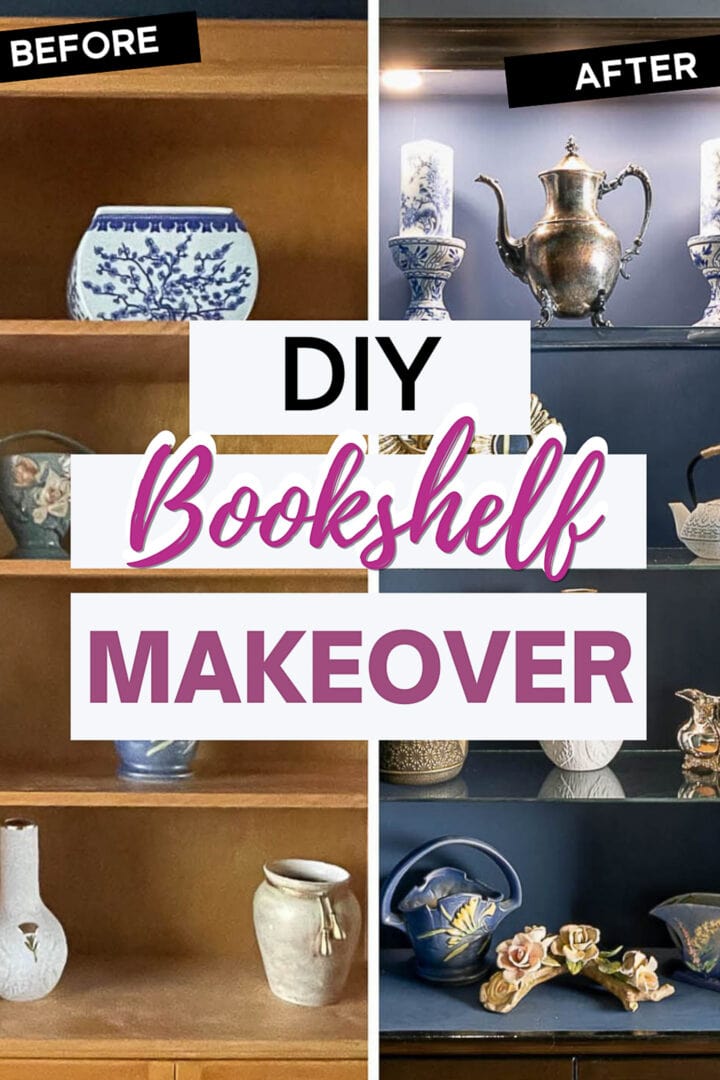
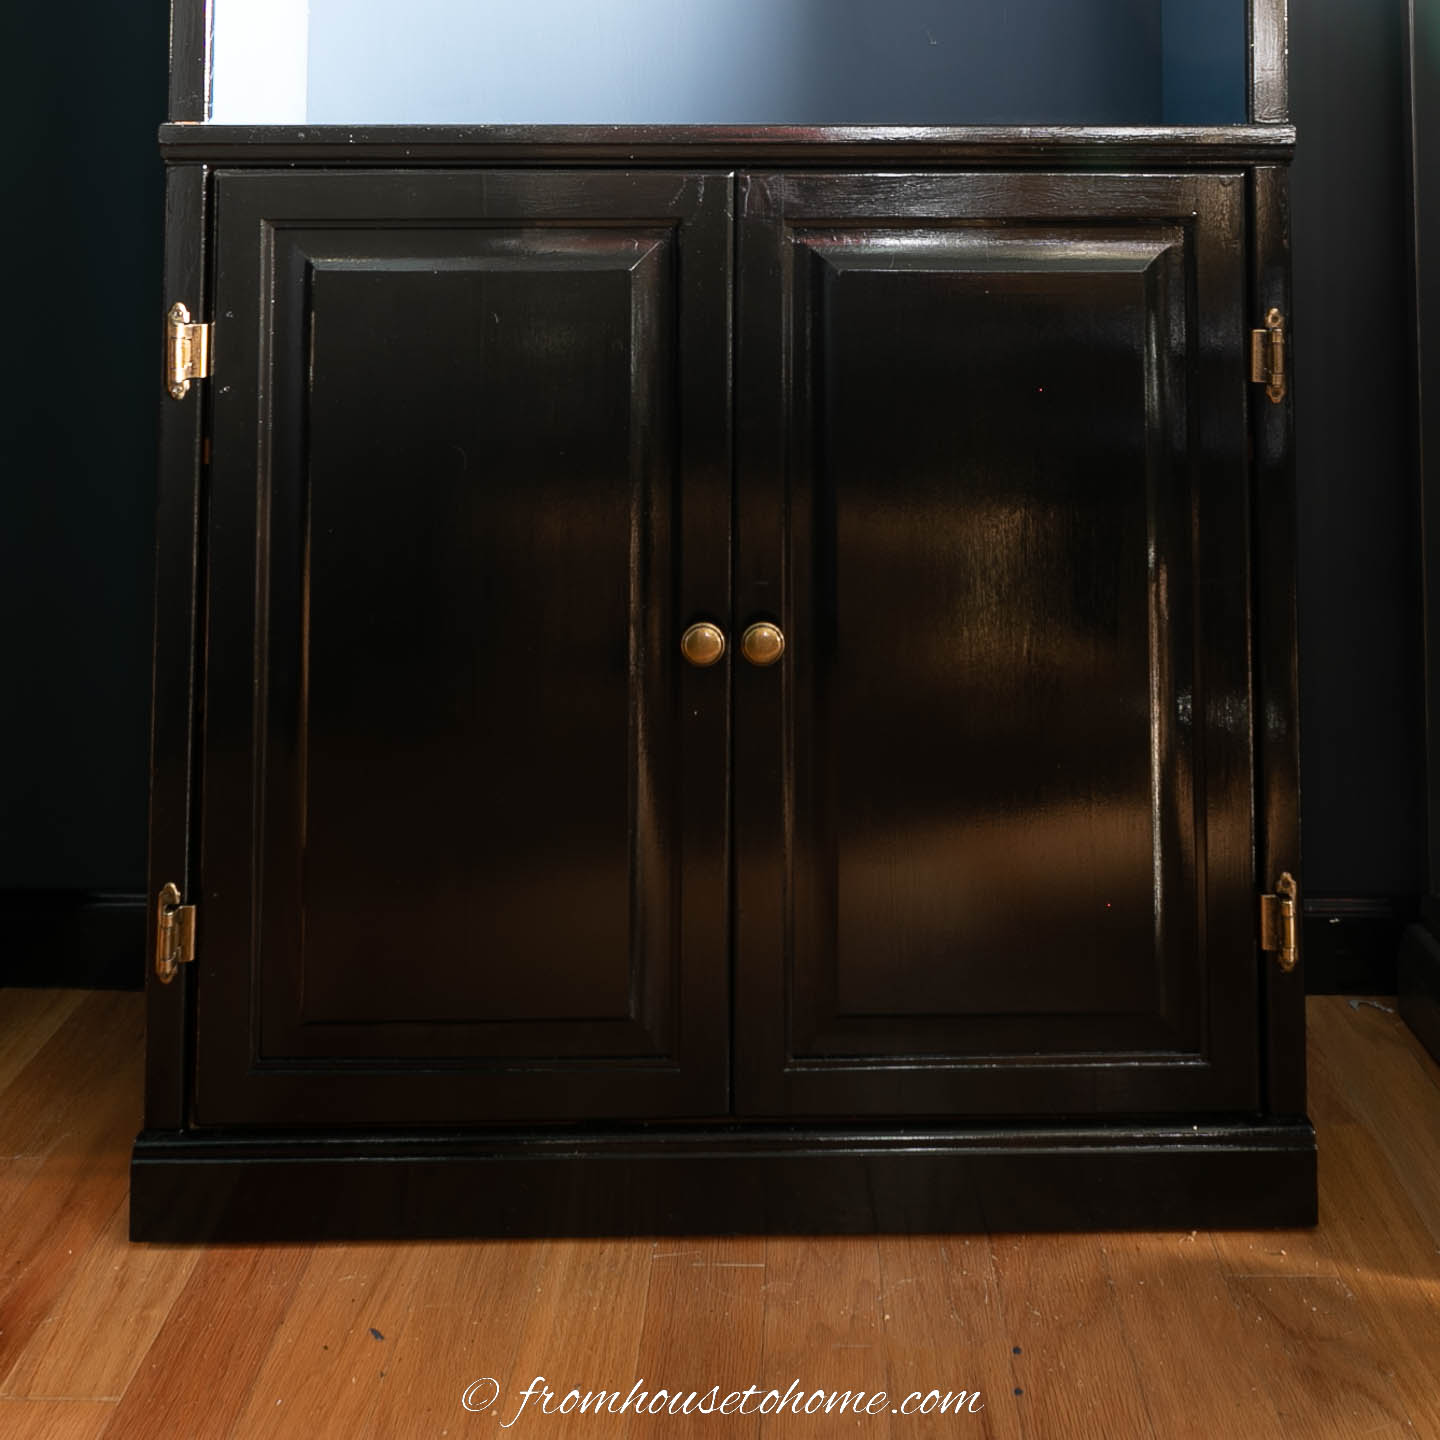
The “before” bookcase

The original bookcases were not horrible.
But I’ve had them for a long time and the natural pine finish is a little too rustic for the more elegant look I’m going for in my new office.
Now, before anyone gets upset that I’m going to be painting over wood…
It’s laminated plywood and it wasn’t very expensive when I bought it (I think about $75).
So I’m not destroying an antique or anything like that.
And even I was surprised at how amazing these shelves look now that the makeover is done.
So here’s what I did.
Materials
- black gloss paint – I used Farrow and Ball Black in a full gloss finish. And it almost look like black lacquer when it dries.
- blue paint – I used Farrow and Ball Stiffkey Blue in Estate Emulsion. I didn’t want to use gloss here because it will create too much reflection with the lights. However, the matte paint does scratch easier than a shinier paint finish would, so you might want to use semi-gloss or eggshell.
- glass shelves – I ordered ¼” thick tempered glass shelves online from onedayglass.com. Tempered glass is stronger and won’t shatter like regular glass so it is the best option for this type of installation. You can find a calculator on the One Day Glass website to figure out what thickness you’ll need based on the size of your shelf.
- glass shelf supports – (optional) I like these padded glass shelf supports* because they prevent the shelves from moving around. But regular shelf supports will work, too. If you are ordering new ones, make sure to get the right size for the pin. Mine are 5 mm, but ¼-inch is another common size.
- under cabinet lights – I ordered these electric puck lights* from Amazon. But you could also use these battery operated ones* if you don’t want to drill holes in your cabinet for the cords.
Tools
- Electric sander with 120 grit sandpaper – You can use a hand sander for this stage, but it will take a lot longer to get the job done.
- dust collector – (optional) If you want to be able to sand indoors without getting sawdust everywhere, this dust collector* that attaches to the back of your sander does an excellent job.
- paint brush, roller and paint tray
- hand sander
- 220 grit sand paper
- drill with a 1/16″ drill bit
- 3/8″ drill bit – This is to install the puck lights. So if you’re using the battery operated ones, you won’t need it.
- Screwdriver
Refinish the shelves
1 | Take the doors off
If your bookcase has doors on the bottom (like mine), taking the doors off before you begin makes sanding and painting easier.
Just make sure to mark which doors belong where. Otherwise, they may not line up exactly when you put them back on.
2 | Sand

Next you’ll need to sand them to remove any bumps or loose bits and rough up the surface so the primer and paint will stick.
While you can do this with a hand sander, using an electric one will make the job go much faster.
I used a 120 grit sand paper. If your furniture has a really uneven surface, you may want to go with something coarser than that (such as 80 grit).
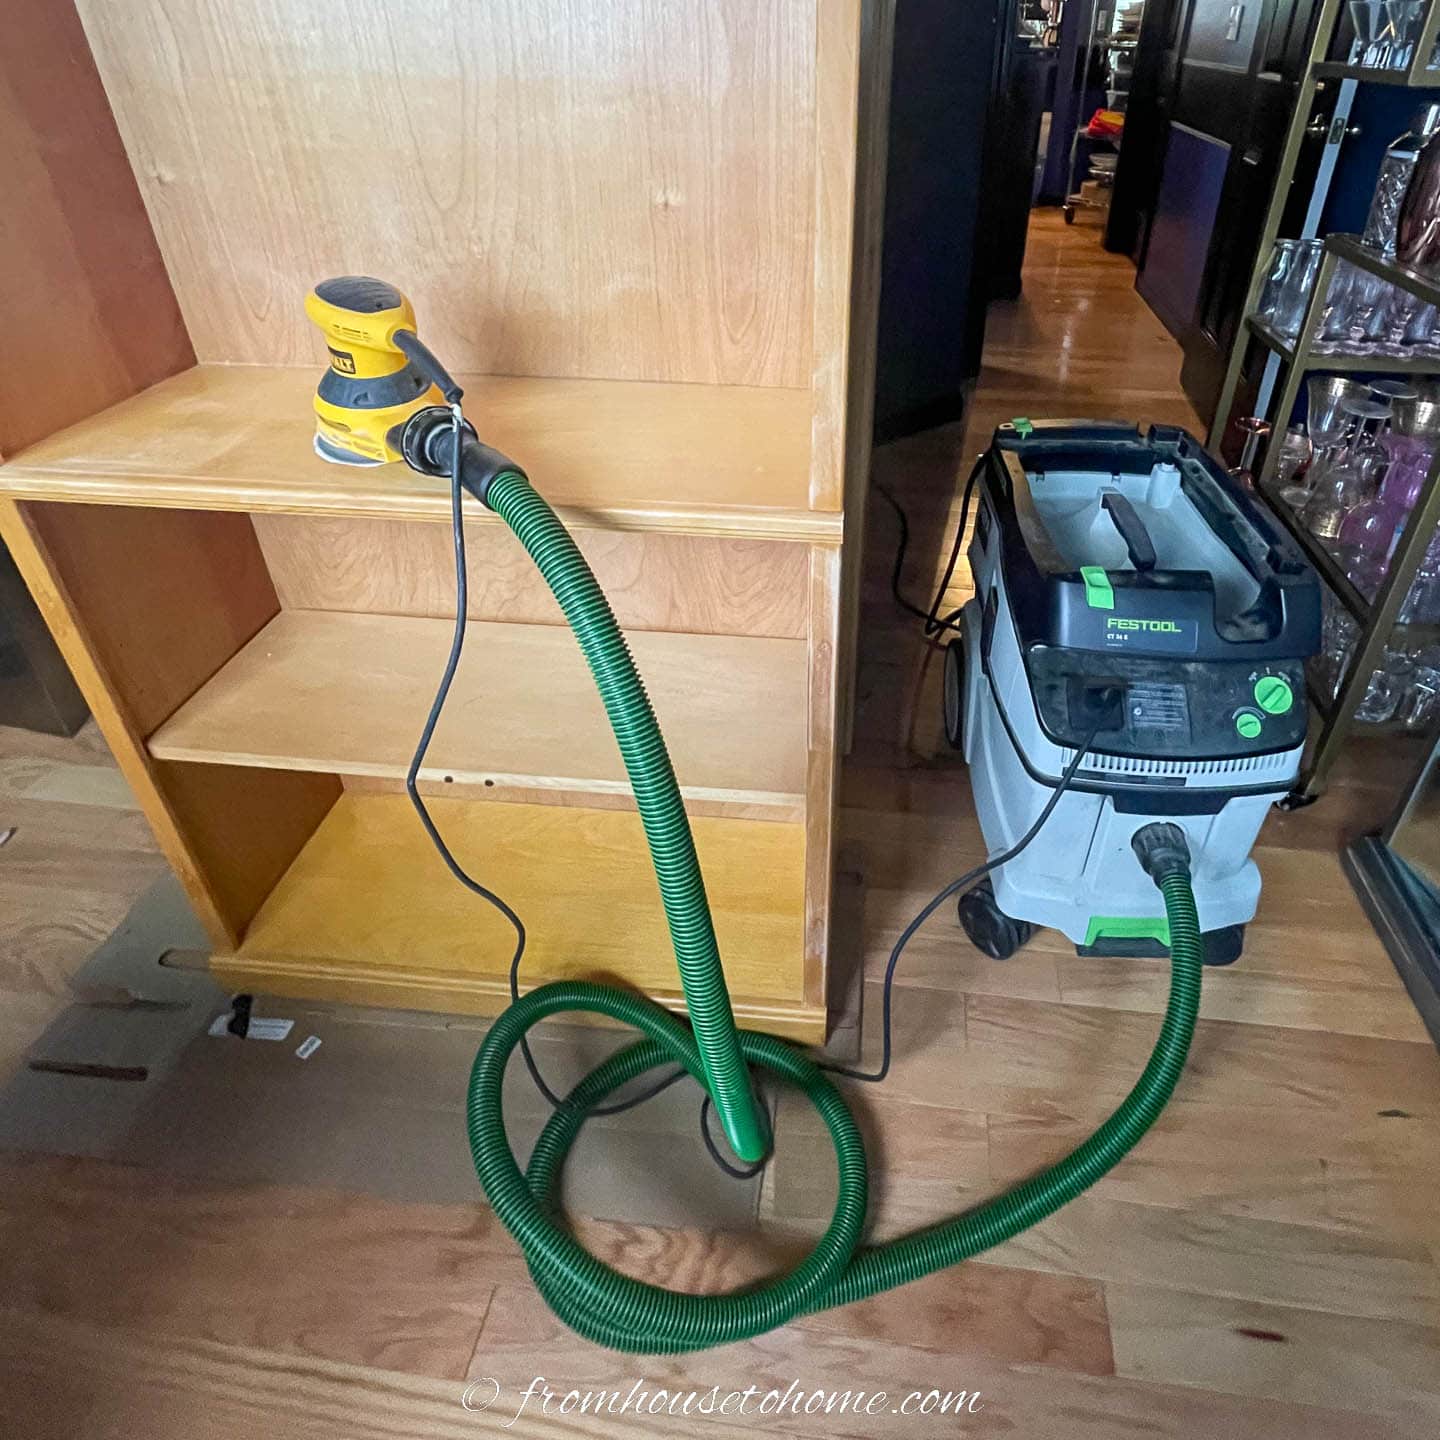
This will create a fair amount of sawdust.
To keep it from going everywhere, I attach it to a dust collector*. The one I use is a little more expensive than a standard shop vac. But there is literally no dust left on or around the shelves when I’m done.
Before painting, make sure to wipe the whole piece off with a damp cloth to remove any remaining dust or loose bits.
3 | Prime
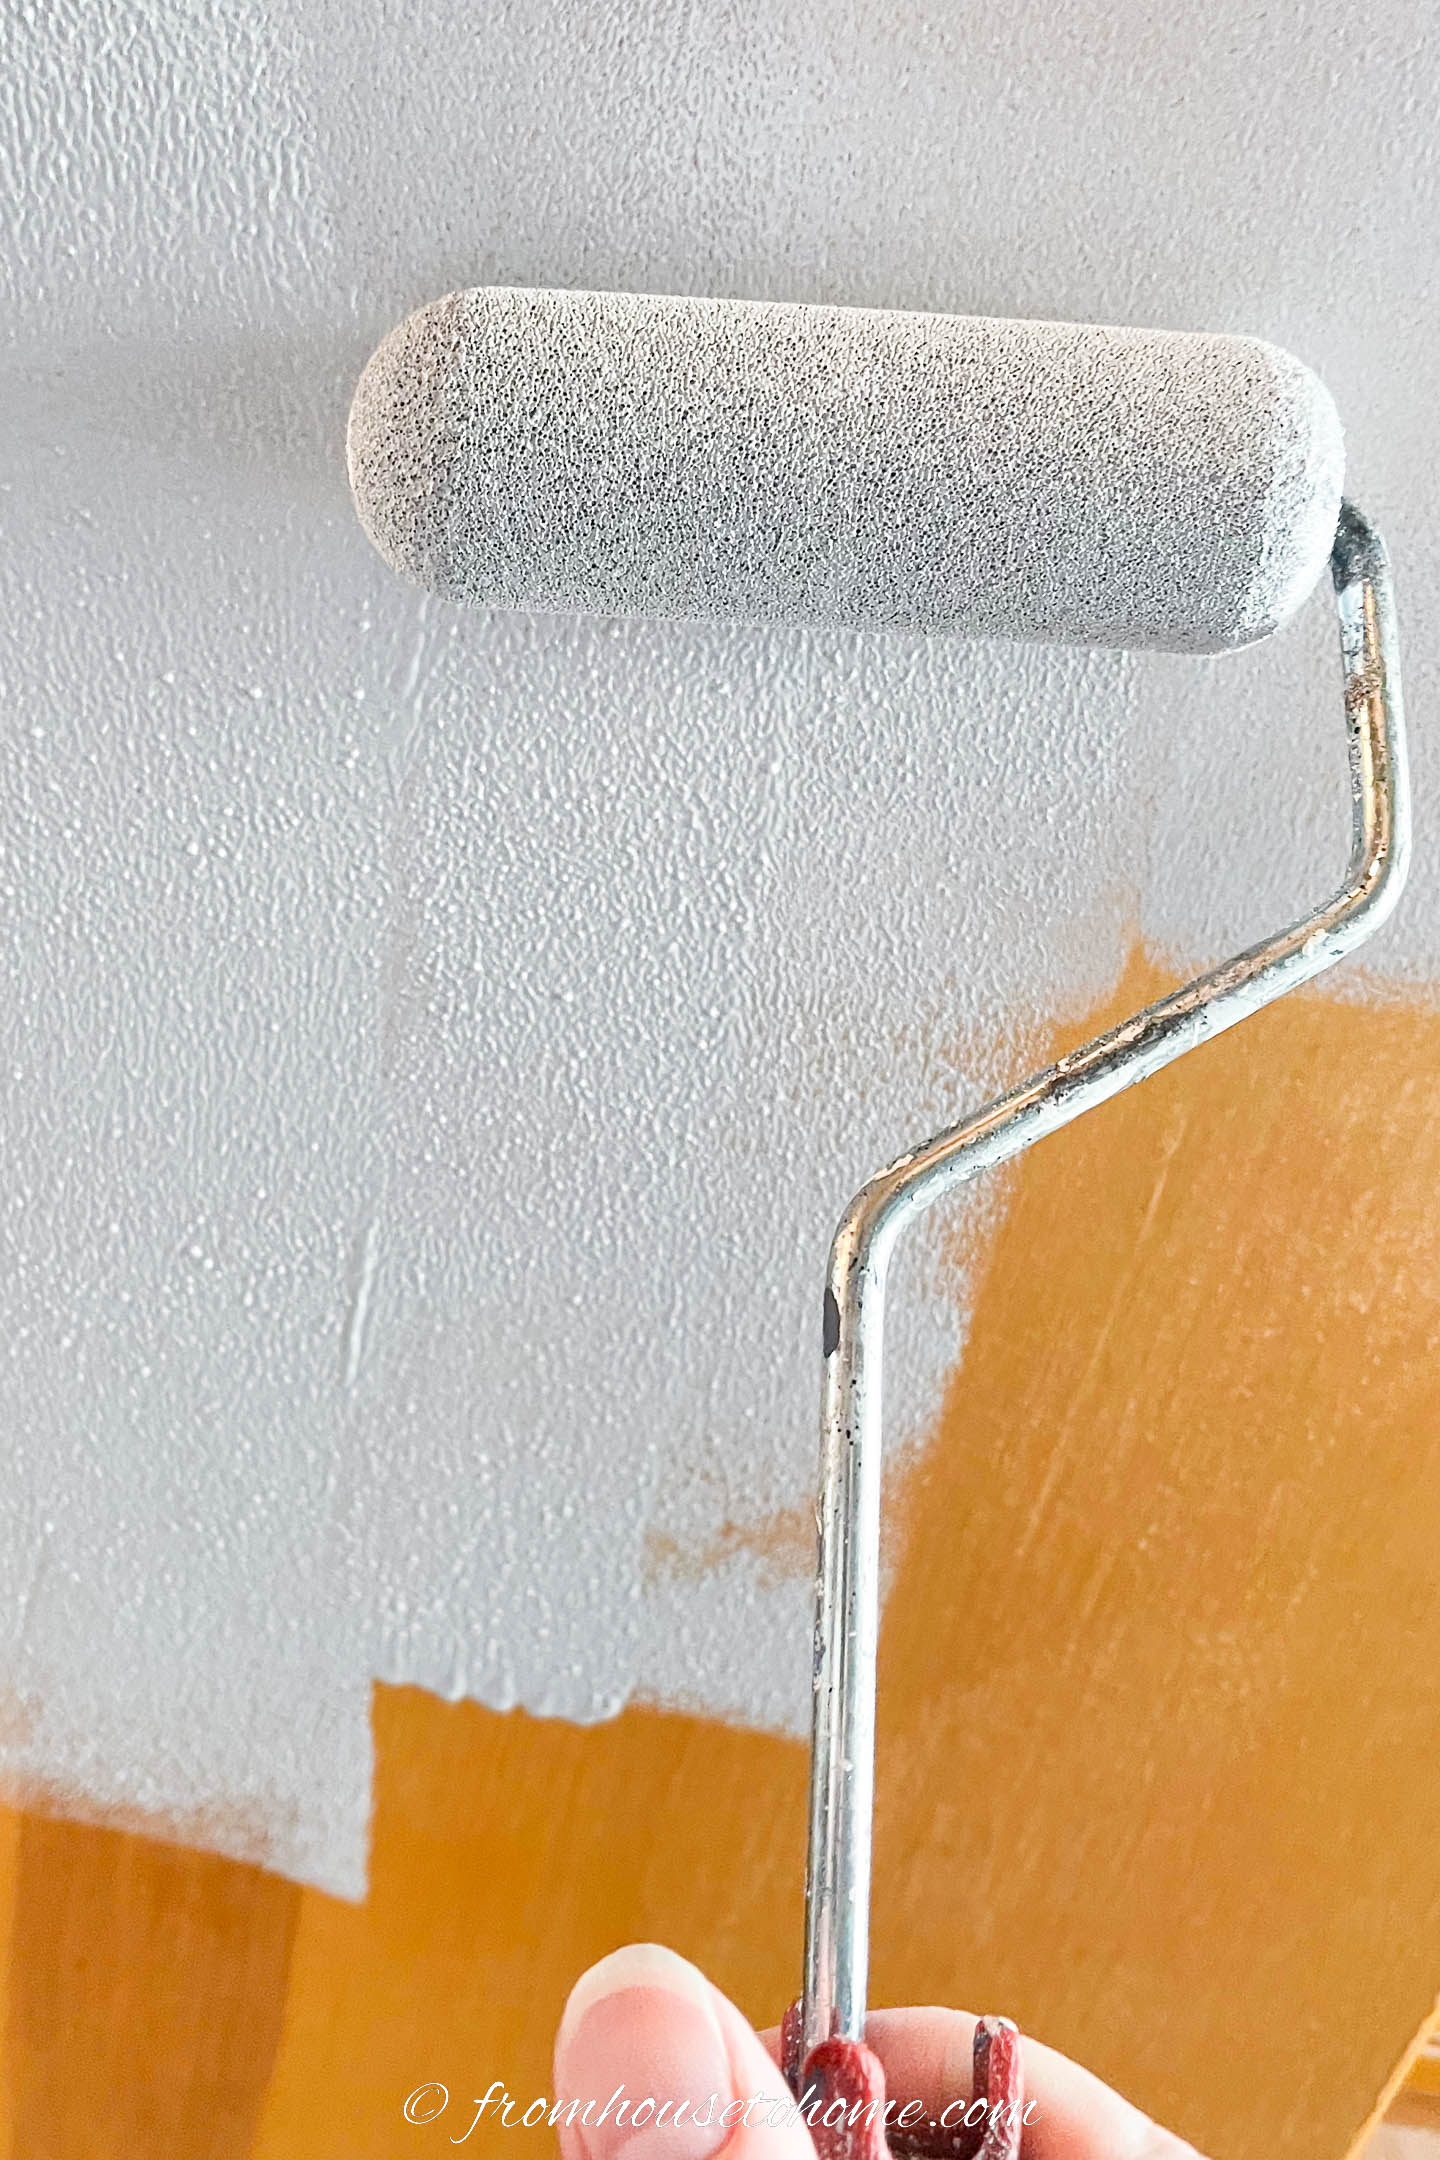
To make sure the paint sticks, you’ll need to prime the book case with a good quality primer, such as Zinsser.
I like to use a small foam roller for this because it’s faster. But a brush will work, too.
After it has dried, lightly sand with 220 grit sand paper to remove any bumps.
I do this manually with a sanding block rather than the sander (which can take off too much of the primer if you’re not careful).
Wipe off any dust with a damp cloth before continuing.
4 | Paint the outside of the shelves and the doors black
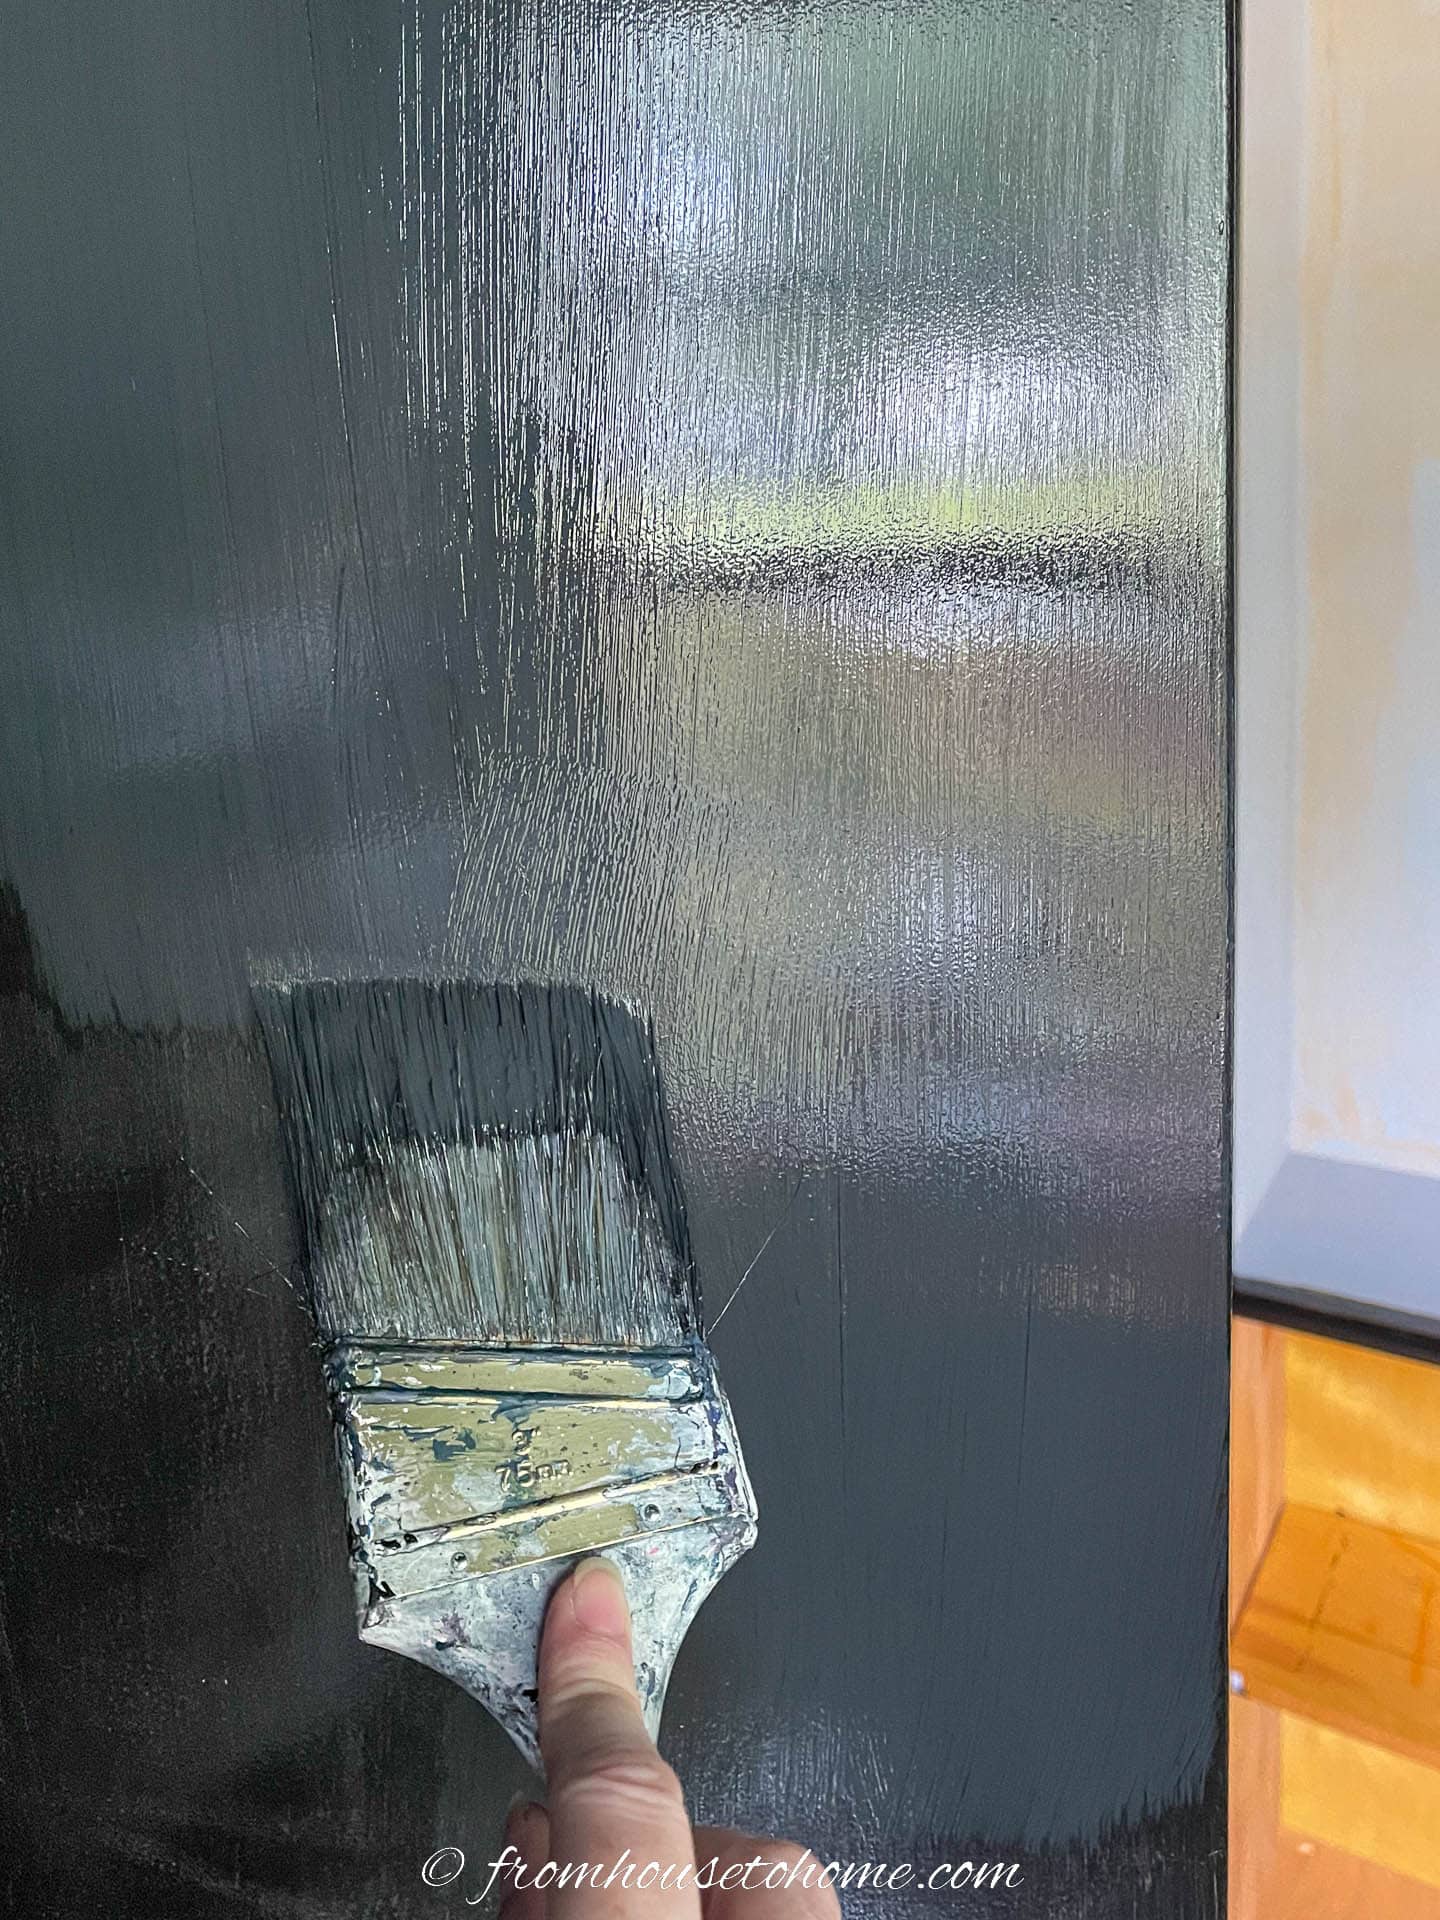
Since I was using full gloss paint for the outside of the shelves and the doors, I wanted to get a smooth finish that didn’t have any brush or roller marks.
The best way to get a smooth paint finish on furniture is to use a paint sprayer.
However, I don’t have a large enough space to do this inside and the weather wasn’t co-operating so I couldn’t do it outside.
Which means I ended up painting them by hand.
I think it is easier to get gloss paint on correctly with a brush rather than a roller, so that’s what I did.
To prevent brush strokes:
- Use long brush strokes.
- Always finish the stroke going in the same direction (I usually finish by pulling down).
- Paint the whole piece at one time so that the paint can level all the way across.
- Resist the urge to “fix up” partly-dried paint. It’s better to wait until it’s dry and do another coat.
- Do multiple thin coats of paint rather than a few thicker coats.
- Lightly sand between each coat to remove any bumps, mistakes or brush strokes.
Gloss paint generally takes longer to dry than regular paint.
And you need to wait until it is completely dry before putting on the next coat.
Otherwise, you may end up with a sticky finish that feels like it never dries.
I usually double the amount of time recommended on the can (so at least 48 hours in this case). If you’re working in high humidity or low temperatures, it may take even longer than this.

Once it is dry, sand lightly with 220 grit sand paper and a sanding block before wiping off the dust and putting on another coat of paint.
In my case, it only took two coats to completely cover the shelves (that’s one of the benefits of using a good primer).
But it can take more than that. So repeat the sand and paint process as many times as you need to get a glossy, mirror-like finish.
(And in case it’s not obvious, don’t sand after the last coat.)
5 | Paint the inside of the shelves blue
To add a little contrast, I painted the inside of the shelves blue.
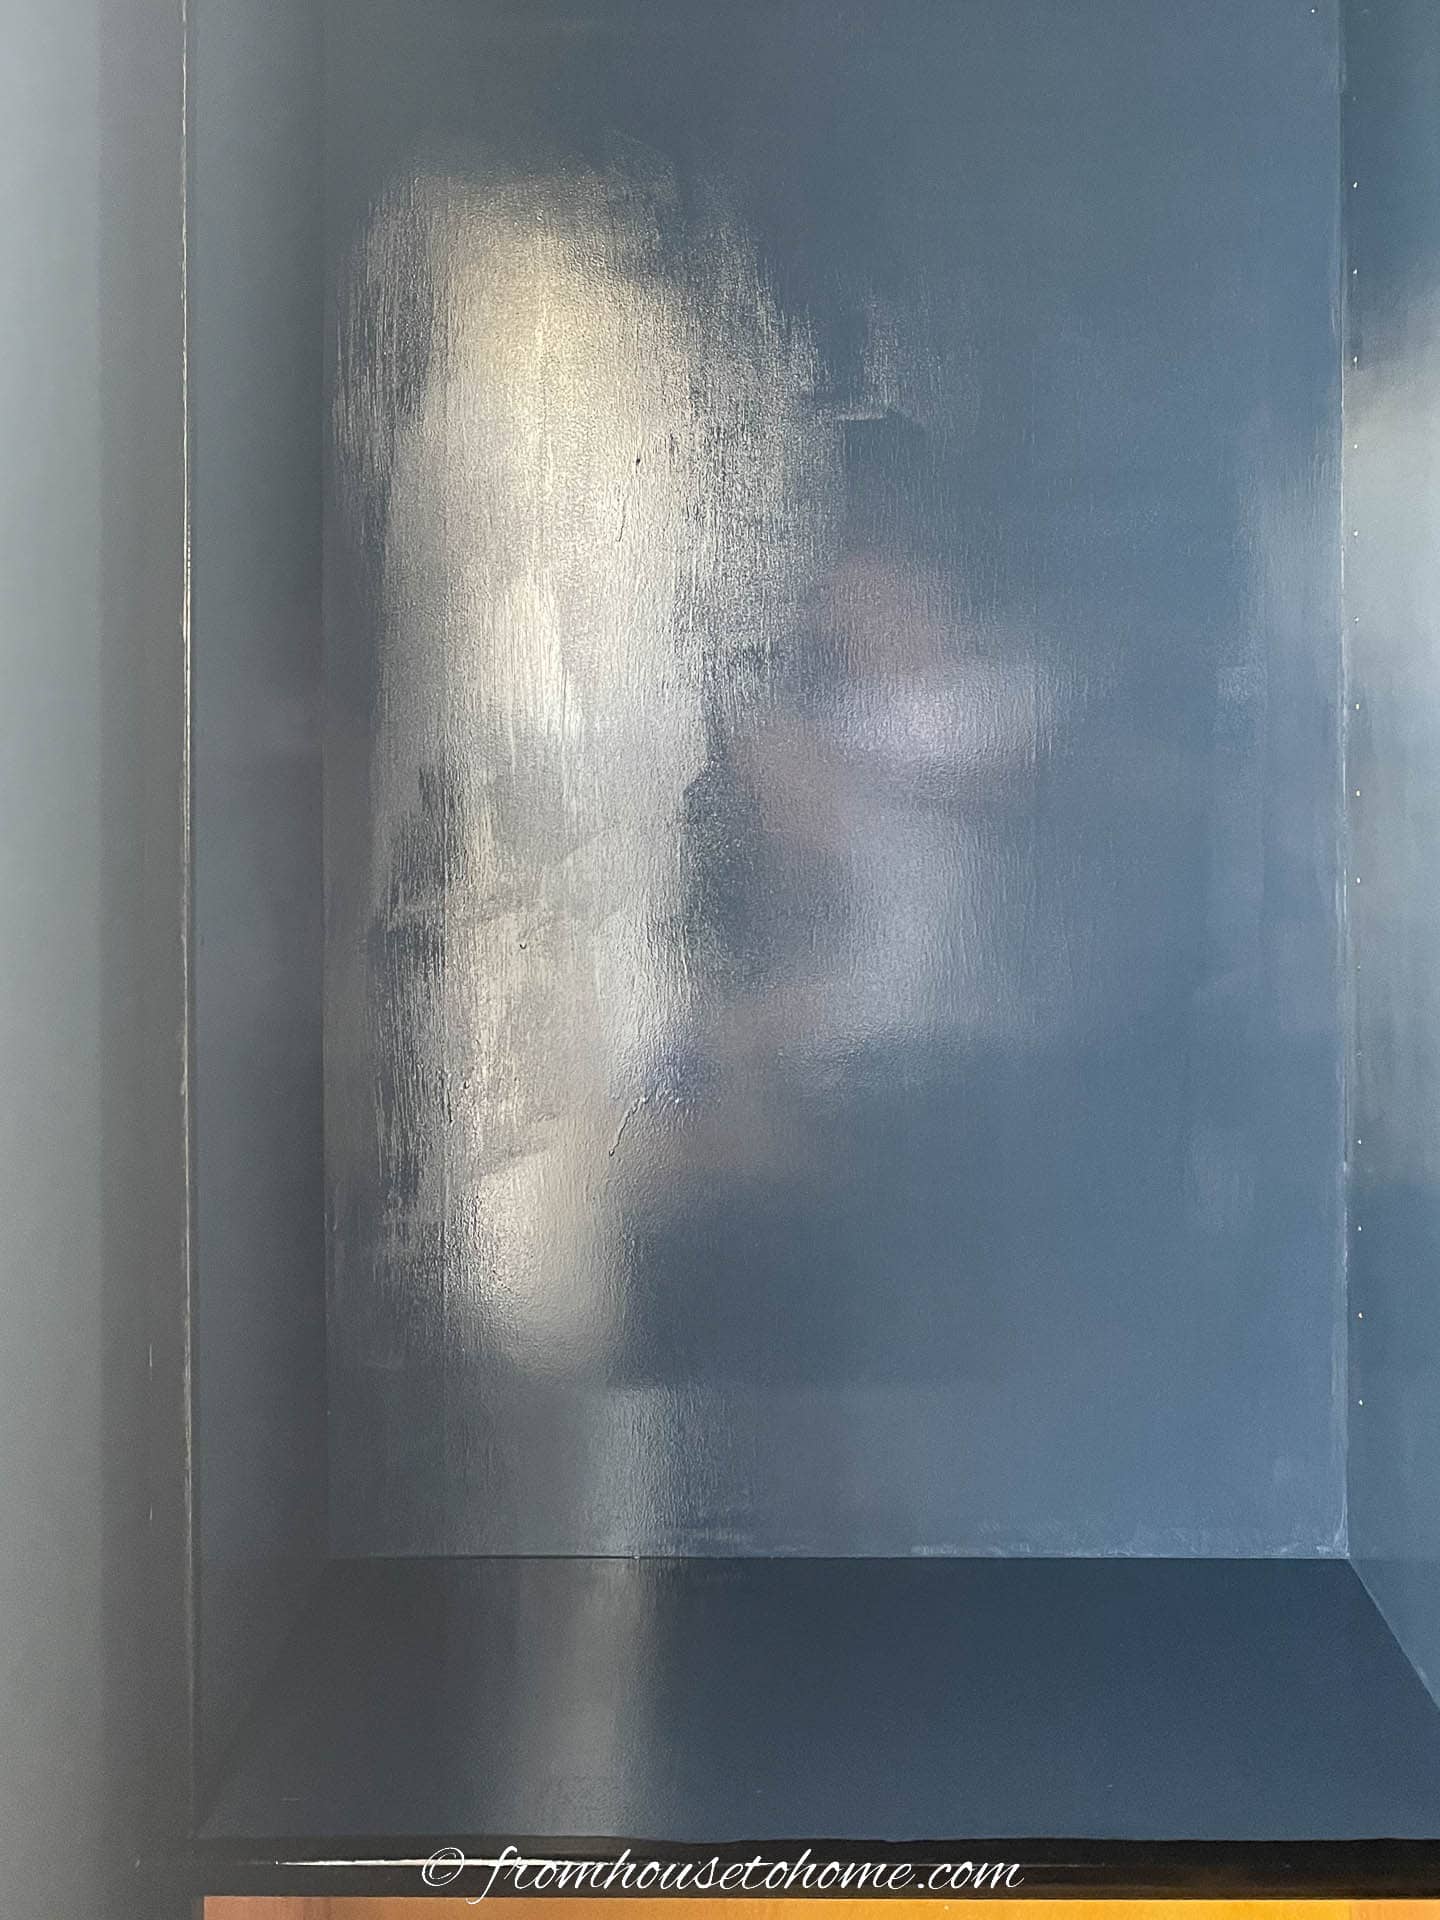
I originally tried to use gloss paint for this, too.
But after a couple of coats, I decided it caused too much glare from the light bouncing off it. Which would detract from the decorations I put on the shelves.
And it looked like this gloss paint was going to take 4 or 5 coats to completely cover.
So I painted it over with a matte finish instead.
The matte paint does scratch more easily, but I love the soft, velvety look it creates. (And it’s easy to touch up so I can fix any scuff marks that occur).
As a side note, I did not bother priming or painting inside the shelves at the bottom. Since it is covered by doors, you won’t see the inside and this saves some time. However, if that kind of thing bothers you, go ahead and paint it the same way.
6 | Put the doors back on
When the paint is completely dry, you can put the doors back on.
To prevent rub marks around the edges, you may want to wait a few days (or weeks) to give the paint more time to cure.
While it may feel dry, gloss paint can take up to 4 weeks to completely harden.
I put them on but kept them open so they wouldn’t get scratched.
Also, I liked the original brass knobs that were on my doors so I didn’t bother changing them. But if you don’t like yours, installing new ones is an inexpensive way to make the doors look better.
Replace the shelves
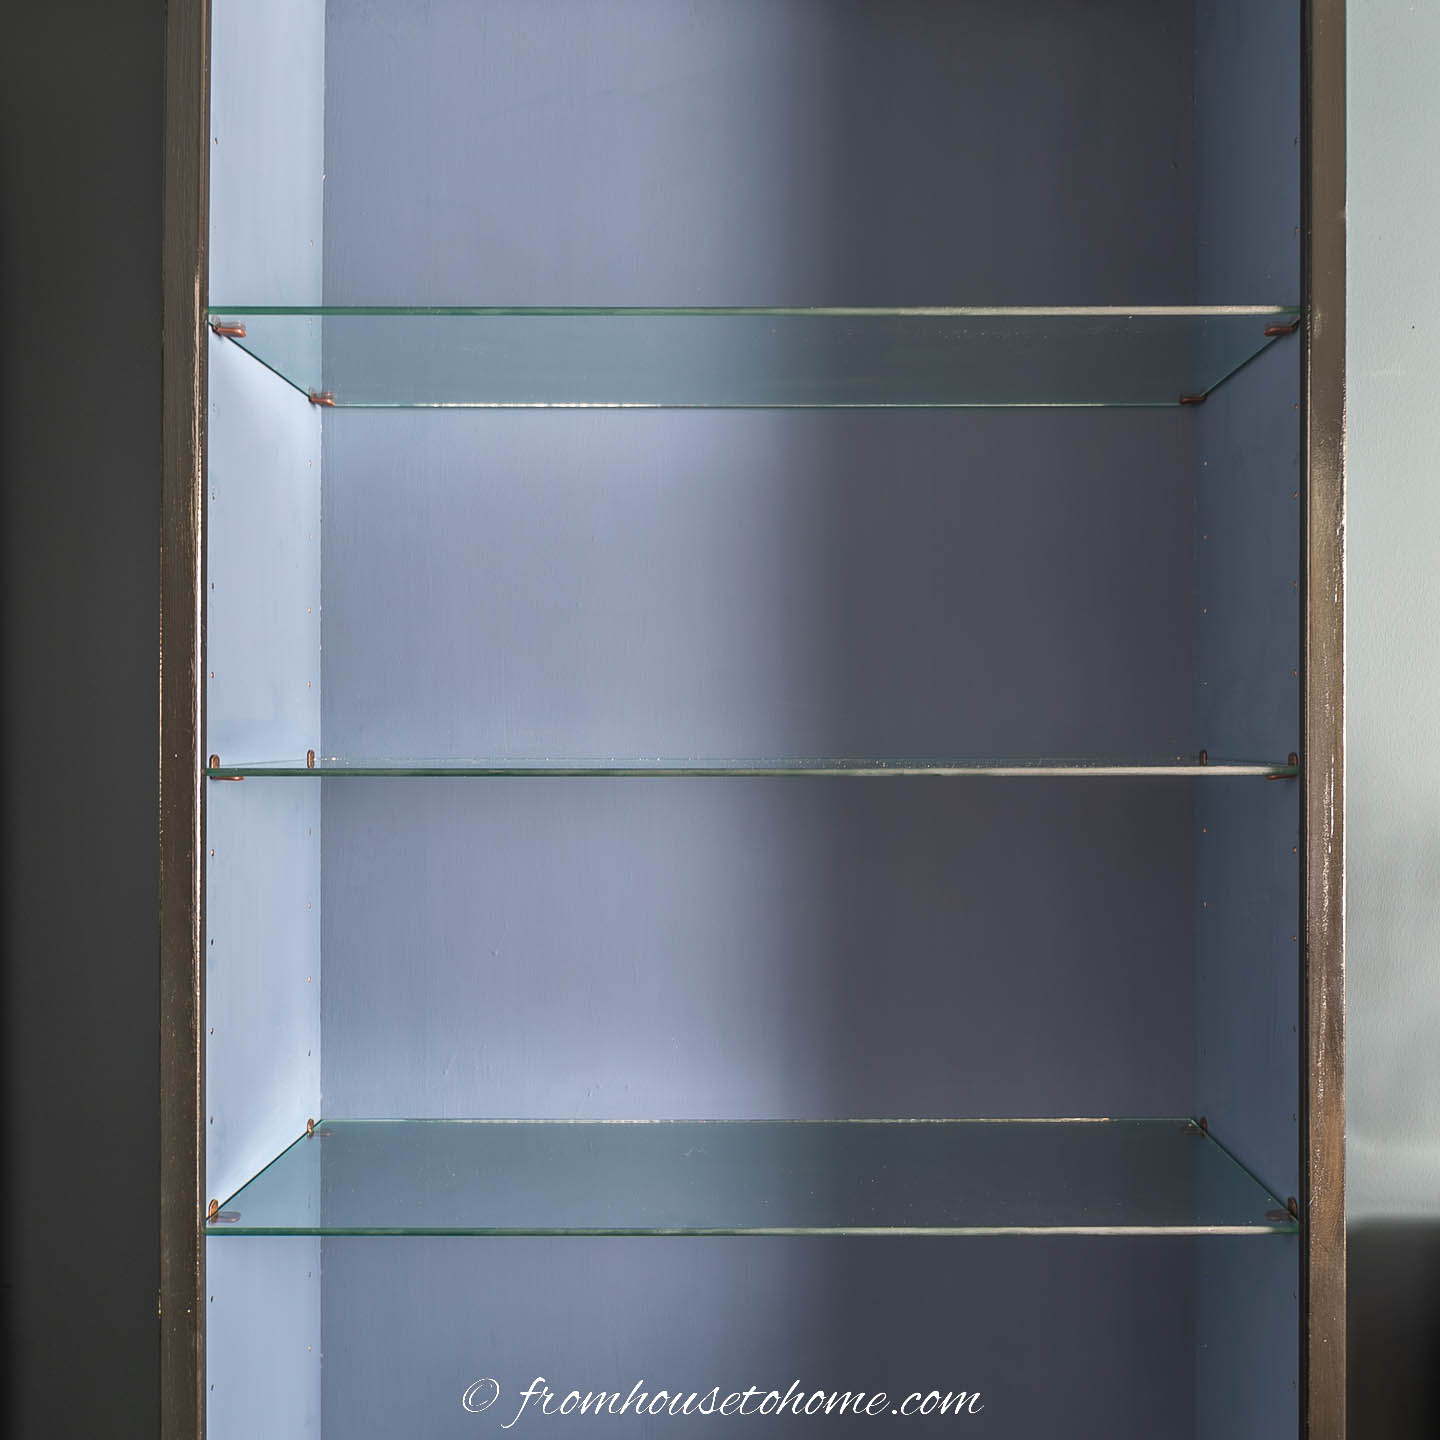
To really give my bookcases an upgraded look, I replaced the wood shelves with glass ones.
It isn’t the cheapest option but it immediately made my bookshelves look more expensive.
To do this, measure the length and width of one of the existing shelves. And then measure it again. You don’t want to make a mistake with this or your glass shelves won’t fit.
Then have a glass manufacturer cut shelves to match.
You’ll want to use tempered glass, which is stronger than regular glass and won’t shatter if you accidentally drop something on it.
Having the front edge beveled looks nicer and gets rid of any sharp corners.
And they should be at least ¼ inch thick.
The exact thickness you need depends on the size of the shelf and how much weight you want it to be able to hold.
You can find a handy calculator at onedayglass.com.
That is where I ordered my shelves. They were the least expensive option I could find and they arrived at my house (very well packed) in about 2 weeks.
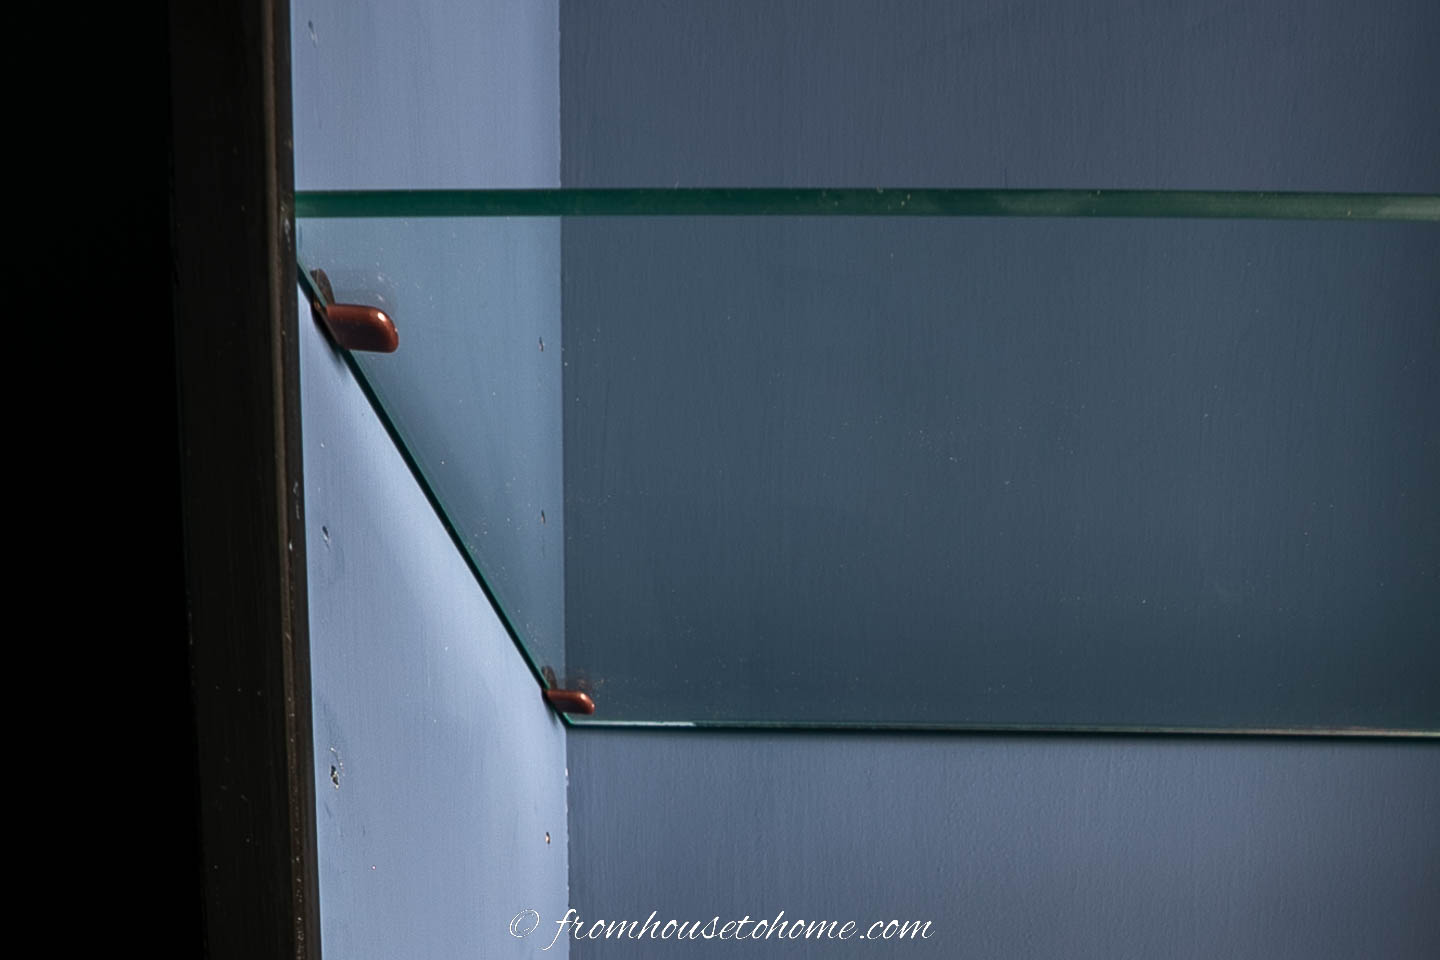
To put them up, I used these glass shelf supports* which are padded and keep the shelves from sliding around.
Just make sure to get the size that will fit the holes in your shelf. (Mine were 5 mm, but ¼-inch is another common size).
If you don’t want to spend the money on glass, you can paint your shelves the same blue as the inside of the bookcase (like I did in my master bedroom) which also looks quite good.
Install the lighting
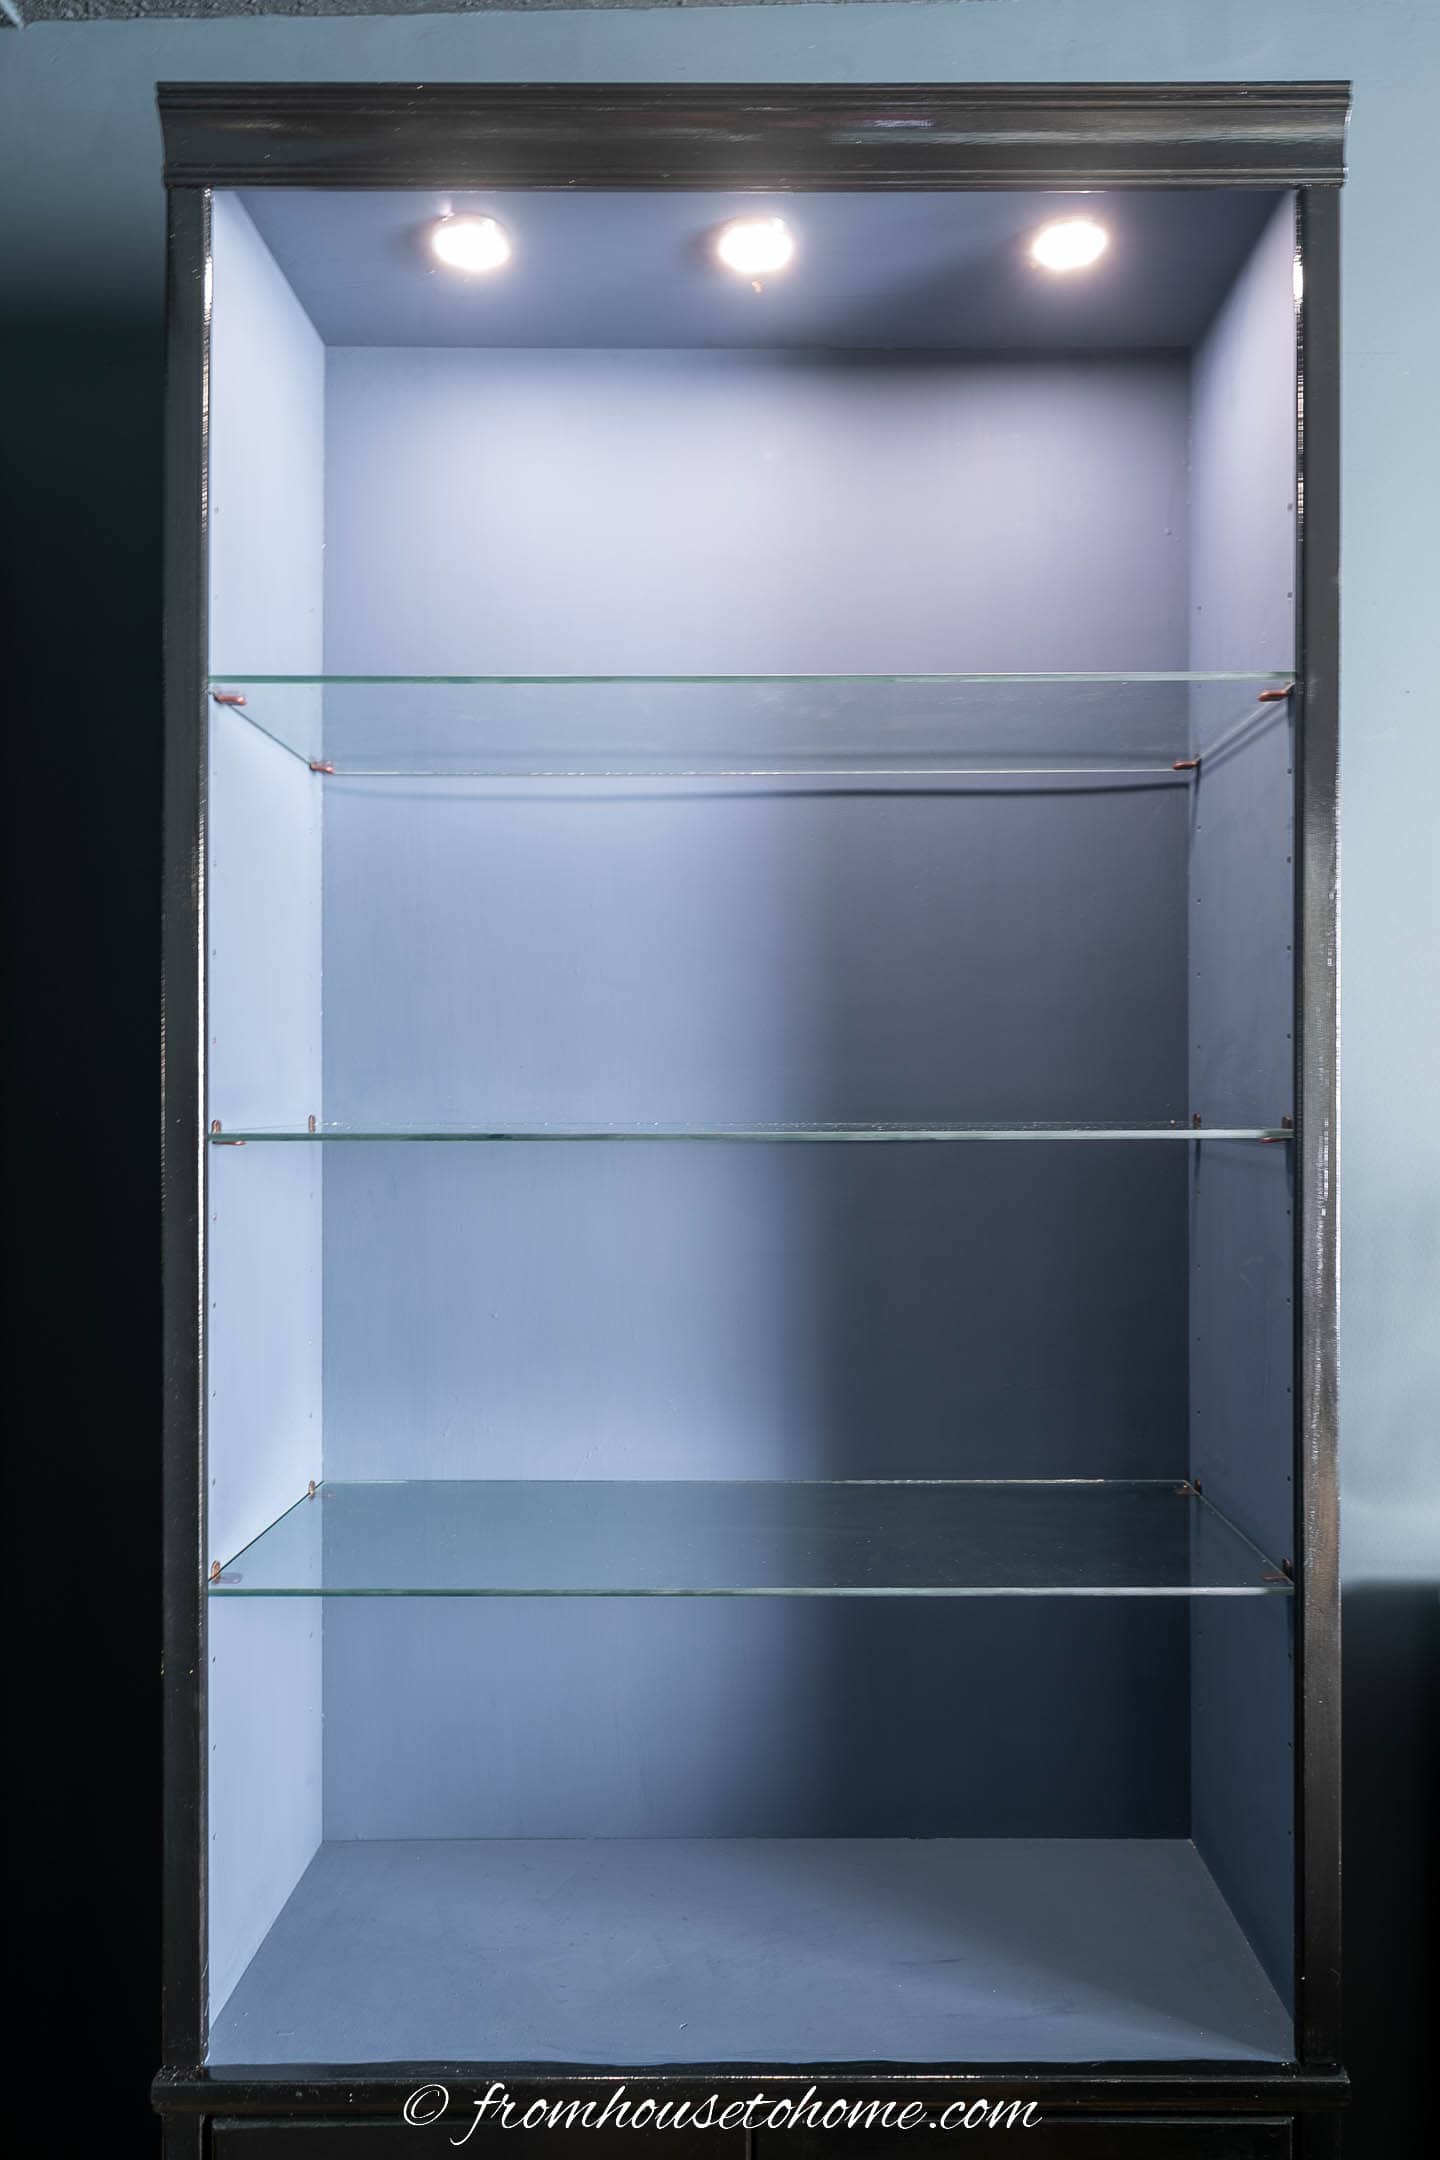
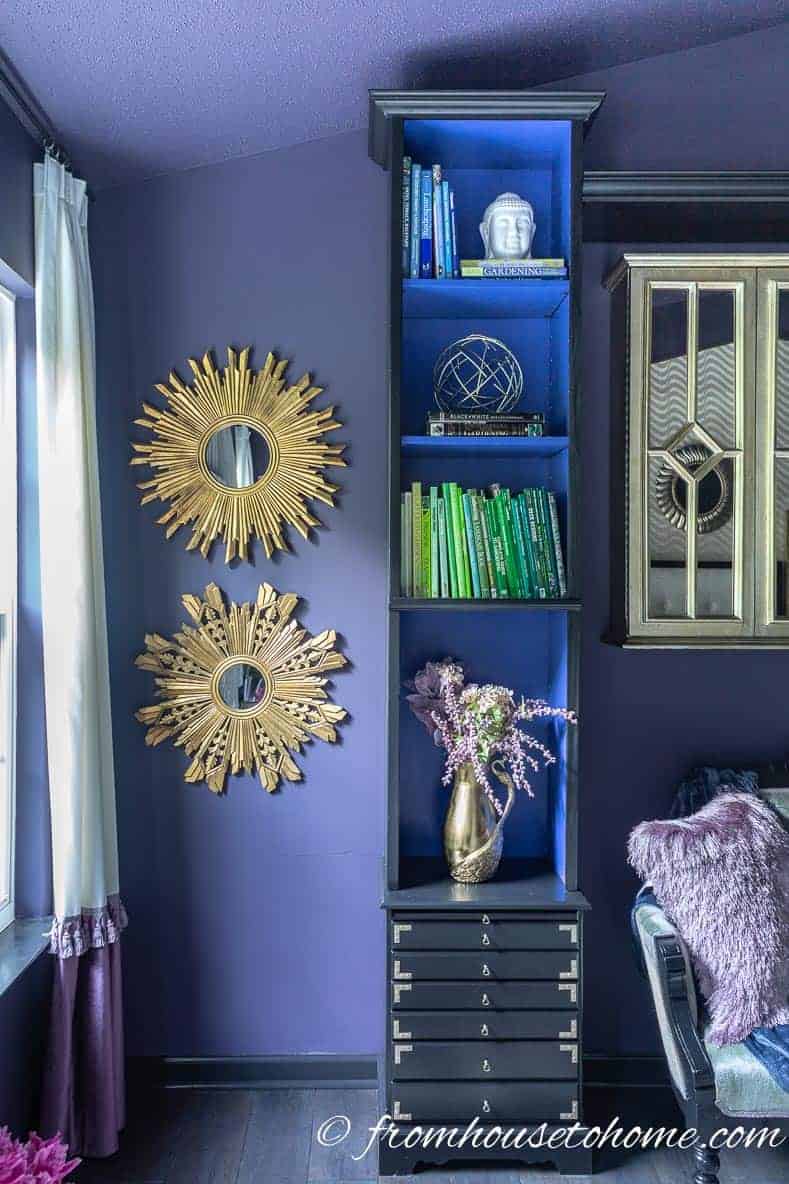
The last step was to install these under cabinet lights* at the top of the shelves, which will illuminate all of the decorations below them.
The lights came with a remote control so you can turn them on and off, and dim them without having to reach the switch.
Which is great since I can keep the cords hidden behind the shelves.
For more information, read our step-by-step instructions on how to install shelf lighting.
Note: If you don’t want to make holes in your shelf, you could also use battery operated lights (like these ones*) that are stuck on with double-sided tape.
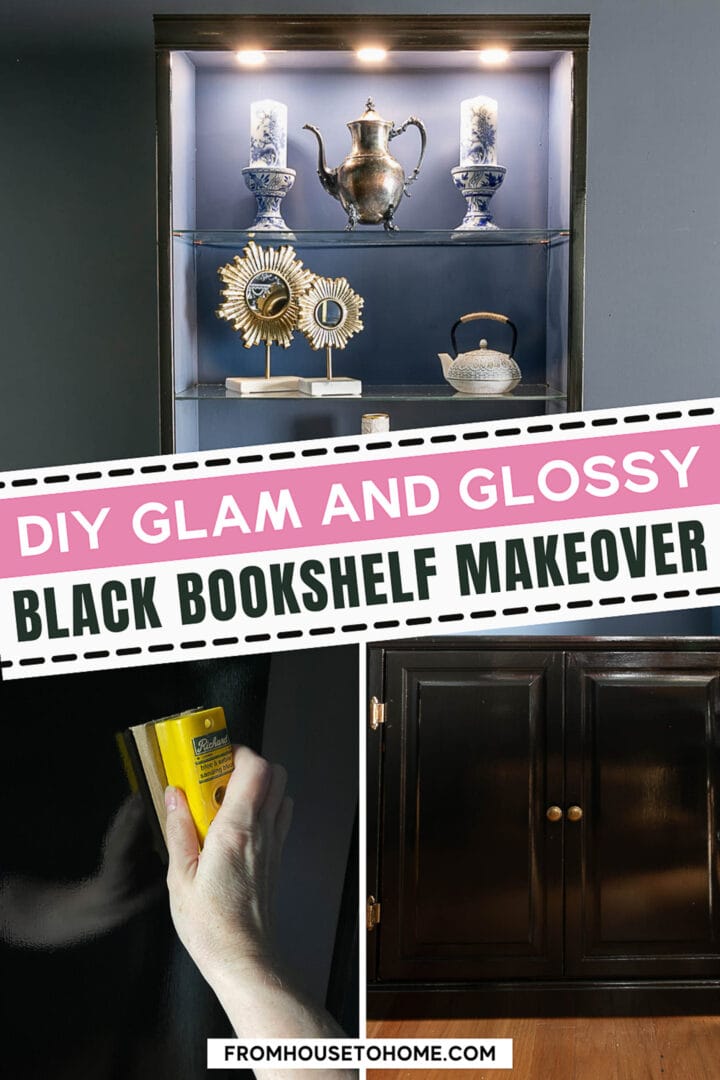
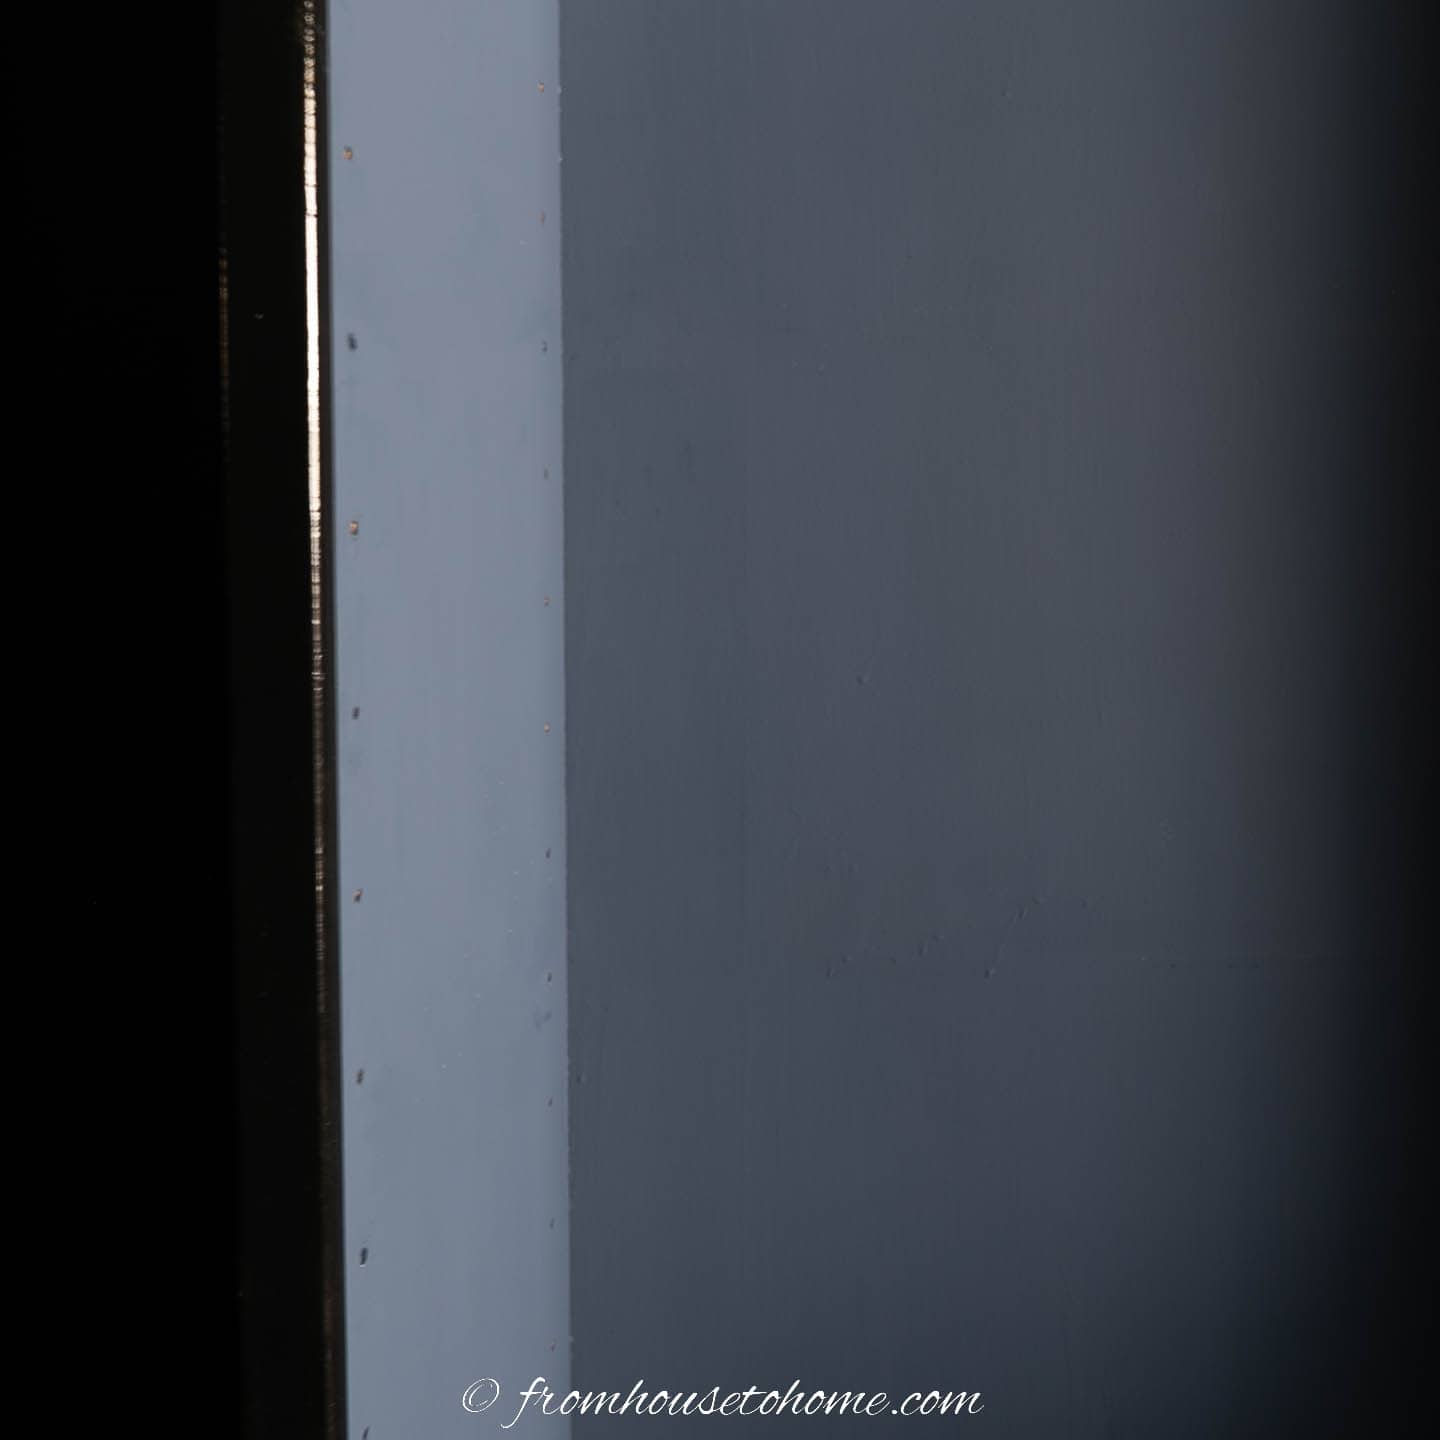
The “after” bookshelves
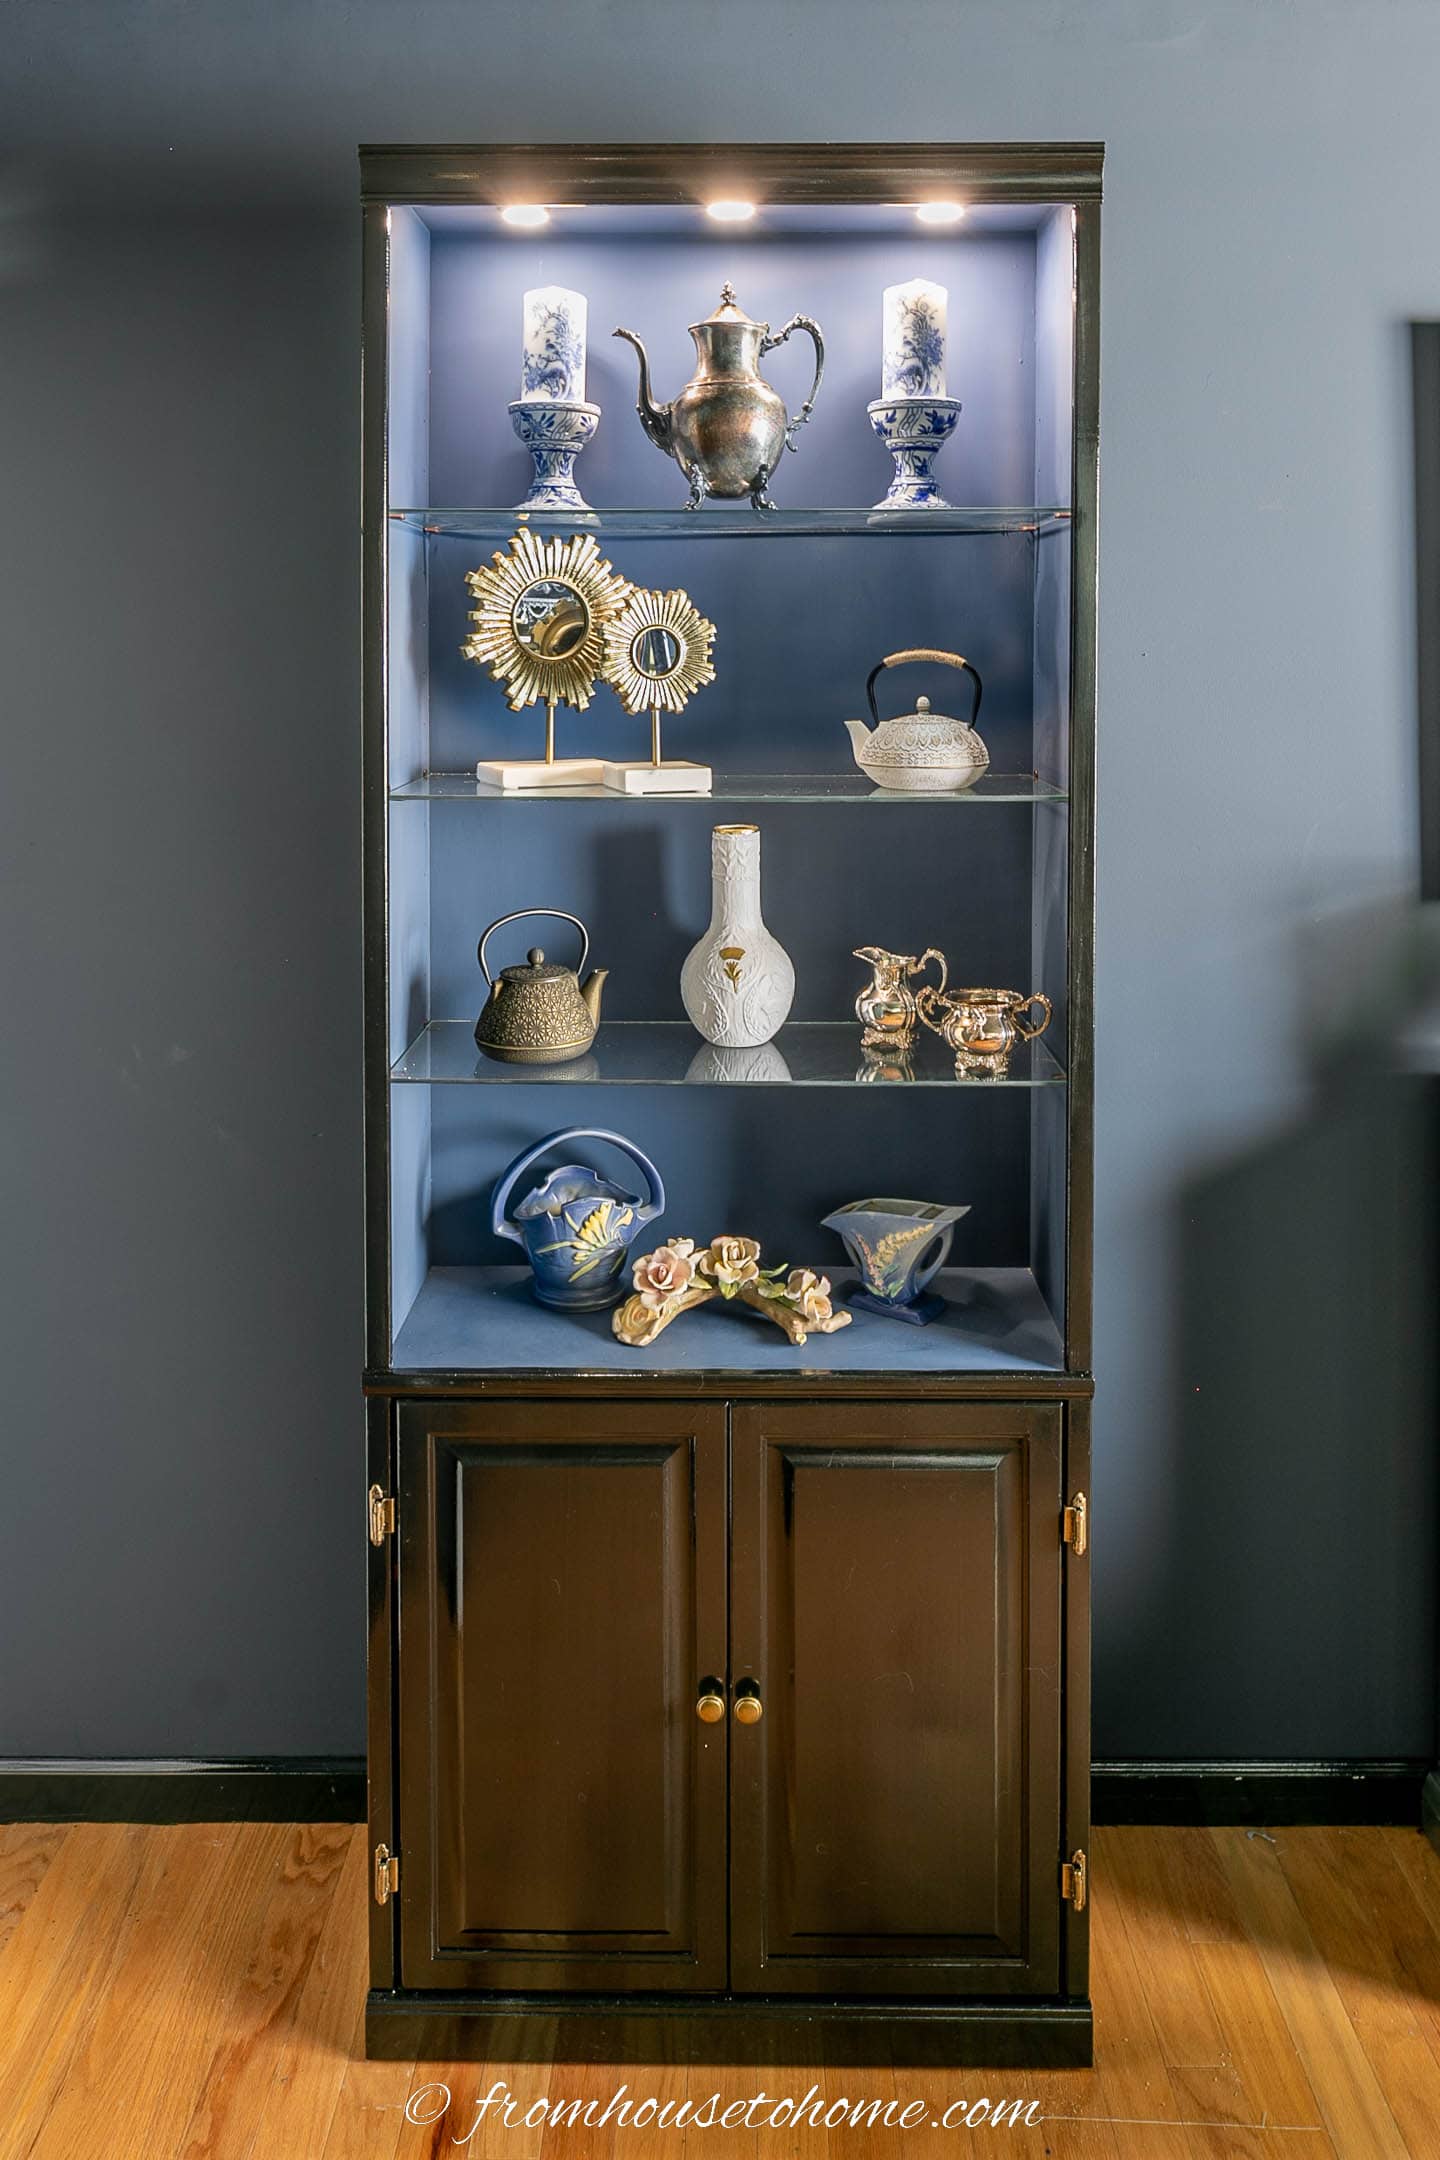
The finished black shelves definitely have that elegant but glam vibe I was going for.
The black gloss paint looks almost lacquer, and the blue interior goes well with the rest of the room.
And the glass shelves and lights make the decor really stand out.
Read the rest of our blue home office makeover posts:
- Week 1: Blue home office ideas
- Week 2a: Blue home office mood board
- Week 2b: Home office layouts
- Week 3: Blue home office paint colors
- Week 4: DIY large wall art
- Week 5: Glam black and blue bookshelf makeover
- Week 6: DIY electric sit stand desk
- Week 7: How to hide wires on a desk
- Week 8: Hague blue and white home office makeover

Don’t forget to checkout this week’s makeovers from all the other guest participants on oneroomchallenge.com.
Other furniture makeovers you might like
- 20+ DIY bookshelf makeovers
- Gold and white side table makeover
- Gold and black bar cabinet makeover
- Black armoire makeover
Have comments or questions on our DIY black and blue bookshelf makeover? Tell us in the section below.
This post was originally published on October 25, 2022 but was updated with new content on April 13, 2024.
Great job on the bookshelf. The new look is very nice. That is a lot of items to dust, however, lol!
That is true, Gayle. Fortunately, I have some help in that department (dusting isn’t one of my strong points)